Operating Manual & Recipe Book - Ilve
Operating Manual & Recipe Book - Ilve
Operating Manual & Recipe Book - Ilve

Create successful ePaper yourself
Turn your PDF publications into a flip-book with our unique Google optimized e-Paper software.
Grilling Systems<br />
Electric<br />
There are two ways to grill food in an ILVE electric oven;<br />
by using radiant heat to cook the food or by using thermal<br />
grilling, a combination of radiant heat with thermal air flow.<br />
The full roof area conventional grill system uses<br />
automatically controlled direct infra-red heat radiated<br />
from above for traditional grilling applications. ILVE ovens<br />
combine the advantages of infra-red heat with fan forced<br />
air assistance, allowing grilling on three levels at the<br />
same time.<br />
Both cooking techniques give exceptional results for a<br />
wide range of meat cuts such as chicken breasts, beef<br />
steaks, lamb and pork. It is also ideal for grilling fish and<br />
fish fillets.<br />
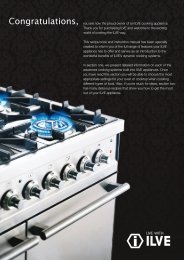
Traditional grill<br />
1. Select the grill mode (Mode 5) on the<br />
function control knob.<br />
2. Turn the temperature control knob to<br />
250º C.<br />
The oven heating indicator light at the<br />
front control panel comes on when<br />
the thermostat is energised and turns<br />
off once it has reached the selected<br />
temperature setting.<br />
ILVE Tip<br />
• When conventional grilling<br />
the oven door should always<br />
be closed<br />
• The best settings for conventional<br />
grilling is between 175 – 190º C.<br />
• Care must be taken to make sure<br />
that there is at least 8cm between<br />
the top of items being grilled<br />
and the grill element to allow for<br />
unimpeded circulation of hot air<br />
(shelf 5).<br />
be placed on grill grid inside a grill tray<br />
alternatively; meat can be placed on a<br />
wire oven rack positioned over an oven<br />
pan to make sure any drips are caught.<br />
ILVE Tip<br />
• The oven door should always be<br />
closed during hot air grilling.<br />
• The temperature should be set<br />
from 175 – 180º, this range in<br />
temperature helps prevent food<br />
from burning and avoids splatter,<br />
minimising the need for cleaning.<br />
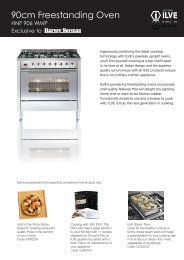
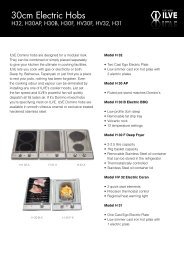
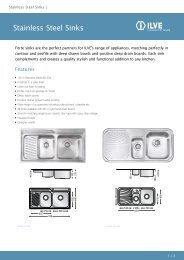
• The shelves are numbered 5 to<br />
1 from top to bottom<br />
(See diagram above right).<br />
• ILVE’s fan grill system can be<br />
used to cook on multiple shelves,<br />
for example grilling meat on top<br />
shelf, lasagna on middle shelf,<br />
garlic bread on bottom shelf, while<br />
warming plates on the bottom of<br />
the oven.<br />
Shelf positions<br />
Grilling guide<br />
FOOD TO BE<br />
GRILLED<br />
THIN CUTS<br />
RECOM-<br />
MENDED<br />
SHELF<br />
POSITION<br />
OVEN<br />
TEMP<br />
– 5<br />
– 4<br />
– 3<br />
– 2<br />
– 1<br />
TRADITIONAL<br />
GRILLING<br />
GRILLING<br />
TIME 2<br />
OVEN<br />
TEMP<br />
FAN GRILLING<br />
GRILLING<br />
TIME 2<br />
Steaks 3 - 4 180ºC 10 - 16 mins 180ºC 10 - 16 mins<br />
Kebabs 3 180ºC 25 - 30 mins 180ºC 25 - 30 mins<br />
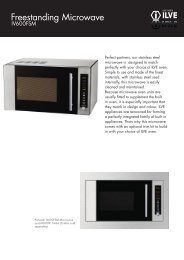
MODE 5 Full roof area conventional<br />
grilling mode<br />
In this mode the inner roof element<br />
heats up creating direct infra-red heat.<br />
This mode allows you to grill with the door<br />
closed. Grilling with the door open ajar may<br />
lead to the control knob heating up slightly.<br />
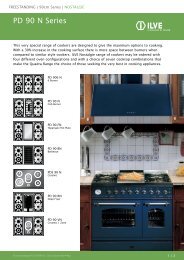
MODE 6 Hot air grilling system<br />
This mode utilises the fan combined with the<br />
infra-red grill to ensure hot air is circulated<br />
evenly around the oven. This is the ideal<br />
mode to use when multitasking, grilling chops<br />
and sausages on the top level whilst baking<br />
a potato bake on the lower level. The door<br />
must be closed during this grilling mode.<br />
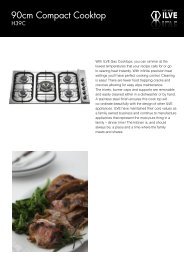
Fan grilling<br />
1. Position racks at heights according<br />
to food types and thickness (See hot<br />
air grill cooking guide)<br />
2. Select the fan grill mode (Mode 5) on<br />
the function control knob.<br />
3. Turn the temperature control knob to<br />
175º C.<br />
4. Allow oven to preheat for a minimum<br />
of four minutes depending on food<br />
types (See hot air grill cooking<br />
guide).<br />
When fan grilling on multiple shelves<br />
the oven door must be closed. The<br />
grill element at the top of the oven<br />
produces intense heat to sear the<br />
surface of the meat while the fan<br />
moves this heat around the oven.<br />
Fan grilling eliminates the need to turn<br />
food over during the grilling process;<br />
however, turning is optional depending<br />
on the degree of browning desired.<br />
When using this function make sure<br />
that food is elevated to allow the hot air<br />
to circulate around the food. Food can<br />
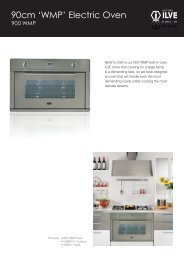
Controlling smoke<br />
and splatter while<br />
grilling<br />
When grilling items such as sausages<br />
or fatty meats it is advisable to add<br />
1 cup of water to the grill pan to<br />
control, drips, splatter and smoke.<br />
Rotisserie mode<br />
1. Insert rotisserie skewer into small<br />
opening on right side of oven wall<br />
cavity.<br />
2. Leave oven door closed.<br />
3. Turn grill function knob to<br />
temperature variance of your choice<br />
(1 – 12).<br />
• Refer to page 28 for cooking<br />
methods in your gas oven.<br />
Chicken Kebabs 3 180ºC 20 - 25 mins 170ºC-180ºC 20 - 25 mins<br />
Cutlets / Schnitzel 3 - 4 180ºC 12 - 18 mins 180ºC 18 - 20 mins<br />
Liver 3 - 4 180ºC 8 - 12 mins 180ºC 10 - 14 mins<br />
Burgers 3 - 4 180ºC 14 - 20 mins 180ºC 16 - 20 mins<br />
Sausages 3 - 4 180ºC 10 - 15 mins 180ºC 8 - 12 mins<br />
Fish Fillets 3 - 4 180ºC 12 - 16 mins 180ºC 12 - 16 mins<br />
Trout 3 - 4 180ºC 16 - 20 mins 180ºC 20 - 25 mins<br />
Toast 3 - 4 180ºC 2 - 4 mins 180ºC 3 - 5 mins<br />
Cheese Toast 3 - 4 180ºC 7 - 9 mins 180ºC 4 - 6 mins<br />
Tomatoes 3 - 4 180ºC 6 - 8 mins 180ºC 6 - 8 mins<br />
Peaches 3 180ºC 6 - 8 mins 180ºC 7 - 10 mins<br />
THICKER CUTS<br />
Chicken (1kg) 2 – – 170ºC-180ºC 50 - 60 mins<br />
Rolled Meat (1kg) 1 – – 180ºC 75 - 85 mins<br />
Pork (1kg) 1 – – 180ºC 100 - 120 mins<br />
Sirloin (1kg) 1 – – 200ºC 25 - 35 mins<br />
1) Select the appropriate shelf level for the thickness of the food.<br />
2) Turn food over half way through the grilling time.<br />
Note: The information given in this chart is intended as a guide only.<br />
12 ILVE <strong>Operating</strong> <strong>Manual</strong> ILVE <strong>Operating</strong> <strong>Manual</strong> 13