Here - TwoMorrows
Here - TwoMorrows
Here - TwoMorrows

Create successful ePaper yourself
Turn your PDF publications into a flip-book with our unique Google optimized e-Paper software.
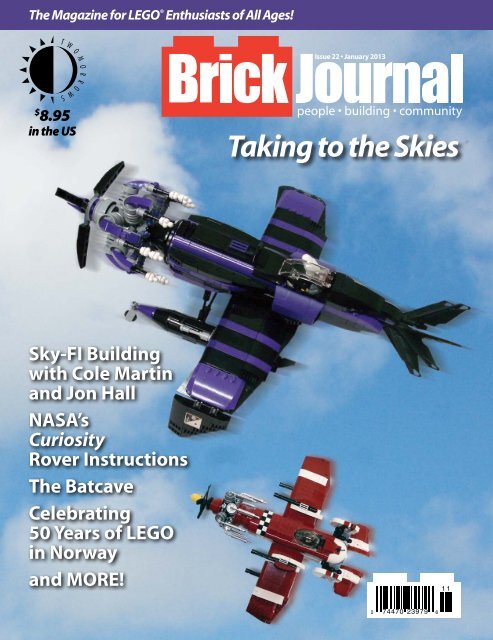
The Magazine for LEGO ® Enthusiasts of All Ages!<br />
Issue 22 • January 2013<br />
$<br />
8.95<br />
in the US<br />
Taking to the Skies<br />
Sky-FI Building<br />
with Cole Martin<br />
and Jon Hall<br />
NASA’s<br />
Curiosity<br />
Rover Instructions<br />
The Batcave<br />
Celebrating<br />
50 Years of LEGO<br />
in Norway<br />
and MORE!<br />
1 1<br />
0 74470 23979 6
Issue 22 • January 2013<br />
Contents<br />
From the Editor...................................................2<br />
People<br />
Are J. Heiseldal......................................................3<br />
To the Batcave!.....................................................8<br />
BrickStix®: A Timeline..................................18<br />
Celebrating 50 Years of LEGO®<br />
in Norway...........................................................20<br />
Building The Norwegian<br />
Royal Palace......................................................22<br />
Building Snowy Mountain......................24<br />
NASA AFOL!........................................................26<br />
You Can Build It:<br />
Curiosity Rover...............................................28<br />
Building<br />
You Can Build It:<br />
T-16 Skyhopper..............................................37<br />
Minifigure Customization 101:<br />
Fun With a Vacuum!..................................40<br />
Century Fighters..............................................44<br />
Community<br />
Sky-Fi: Building in the Aerial<br />
Universe of Crimson Skies® and<br />
Dieselpunk.......................................................49<br />
Cole Martin: Sky-Flyer!.................................56<br />
You Can Build It:<br />
Modular Pirate Interceptor..................60<br />
Jon Hall: LEGO Aviator!................................67<br />
The LEGO Group Takes to the Air!......73<br />
From the Designer’s Desk........................76<br />
Community Ads..............................................78<br />
Last Word..............................................................79<br />
AFOLs......................................................................80<br />
1
People<br />
Are J. Heiseldal:<br />
the LEGO Builder<br />
Behind the Brick!<br />
Article by: Megan Rothrock<br />
Photography by: Are J. Heiseldal<br />
You might have seen his cool car MOCs on flickr, where he is known as L@go; and though<br />
he may be new on the AFOL LEGO Event scene, this talented builder is full of surprises.<br />
BrickJournal: Can you tell us a bit about yourself and<br />
where you come from?<br />
Are J. Heiseldal: I’m 35 years old and come from the<br />
southernmost part of Norway. Currently I live in Bergen<br />
on the Western coast, where I work as a sports reporter for<br />
Norwegian TV 2. My main interests, apart from building,<br />
are music and cars, particularly Italian ones. I currently<br />
own my fifth one, a typically unreliable but utterly gorgeous<br />
Alfa Romeo.<br />
BrickJournal: What MOCs or themes do you like to build?<br />
Are: I’m a town builder, and my main focus is cars, which<br />
comes quite natural to me since I’ve been a huge car nut since<br />
I was a kid. At the moment I’m very much into hot rods and<br />
vintage cars. My main rule is that the cars I build must fit<br />
in, scale-wise, with LEGO’s current offerings, and that they<br />
must be able to seat a minifig. A special pet project of mine<br />
is updating old sets that I grew up with, to modern LEGO<br />
standard, and some of those have turned out very well.<br />
In addition to that I’ve built a few modulars, and I enjoy<br />
that, but they’re so parts exhaustive – especially because I<br />
just can’t seem to be able to build buildings without interiors.<br />
It’s an expensive mental block… but the interiors are<br />
also my favorite parts of my modular buildings.<br />
Are describes his car: “My lovely ‘00 Alfa 156 2.5 V6. Not the most reliable<br />
of cars, but it’s beautiful and sounds like nothing else.”<br />
BrickJournal: How often do you build?<br />
Are: It depends on how much spare time I’ve got on my<br />
hands. Lately I’ve been building more than usual. But as<br />
I don’t have a huge collection of bricks I design all my<br />
MOCs digitally first, using MLCad, before ordering the<br />
bricks I need. That’s another expensive habit that I need to<br />
get rid of sooner or later – I’m working on expanding my<br />
parts collection!<br />
Are says, “My minifig-scale version of<br />
the classic Model Team set #5541. The<br />
proportions are a bit off, because I wanted it<br />
to have eight cylinders, and that meant the<br />
engine needed to be four studs long. But I<br />
think it works as an interpretation.”<br />
3
Mail Truck (1982)<br />
BrickJournal: When did you come out of your ‘Dark<br />
Ages?’ Was there a particular LEGO set that inspired<br />
you to get building as an adult?<br />
Are: Yes. In 2008 I discovered the Café Corner and<br />
instantly fell in love. The timing was perfect, because<br />
it hadn’t yet been discontinued, so I was able to get it<br />
at close to retail price – and got hooked. Next I got the<br />
Market Street and the Green Grocer… and after that it<br />
all went a bit crazy. I’m much more focused now. I’ll<br />
keep collecting the modulars, because they’re like the<br />
ultimate evolution of the classic Town sets that I grew<br />
up with – although the Statue of Liberty is probably the<br />
set I’m most happy with owning. It sits proudly on a<br />
pedestal in my living room.<br />
Stock Car (1986)<br />
Are’s pet project: updating the old classic sets to the modern LEGO City<br />
style. He strives to keep as many of the details as possible. All are decorated<br />
with original LEGO stickers, some of them 30 years old.<br />
Highway<br />
Maintenance Truck<br />
(1982)<br />
4
Building<br />
To the Batcave!<br />
Article and Photography<br />
by Carlyle Livingston II<br />
Hi! I’m Carlyle Livingston.<br />
LEGO building can be, and often is, a solitary endeavor.<br />
Building the Batcave with Wayne Hussey has shown both of<br />
us what can be achieved if you work together towards one<br />
goal. We discovered that by combining our knowledge and<br />
talents we were able to create a Batcave that is far better than<br />
either of us would have accomplished on our own.<br />
Design<br />
We had been kicking around the idea of starting a project<br />
together for some time, so when we found out that SEALUG<br />
had the opportunity of putting a LEGO display at Emerald<br />
City Comicon (ECCC), we began discussing what we would<br />
like to build. Wayne suggested a Batcave and I quickly agreed.<br />
The first thing we did was discuss what would be in this<br />
Batcave. Well, you must have the Batmobile, of course, and<br />
a Control Room is certainly needed, and a Batplane seemed<br />
like a good idea. So Wayne built a mock-up of our<br />
Batcave with LEGO in a microscale size.<br />
8<br />
Above: Carlyle (left) and Wayne Hussey (right), the creators of the Batcave.<br />
Below: Wayne’s scale maquette of the Batcave.<br />
When you look at that quick and simple maquette that Wayne<br />
threw together, it’s interesting to see how close we stayed to<br />
the original vision overall, yet how the additions we made<br />
along the way added so much to the final result. We wanted<br />
to create our own interpretation of the Batcave, so we drew<br />
our inspiration from elements of the different movie and TV<br />
versions we both liked best.
Building a Cave<br />
Now that the vehicles were ready, we commenced the actual<br />
construction of the cave itself. Our first concern was the overall<br />
dimensions of the cave and how it related to the size and<br />
placement of the vehicles. We came up with a size by setting<br />
up the vehicles in their rough relationship to each other on<br />
a table. It was important to make sure the vehicles wouldn’t<br />
be too close to each other, and conversely there couldn’t be<br />
any ‘dead spaces’ where you would say to yourself “Hey!<br />
Shouldn’t there be something right there?!”<br />
Building in progress. Note the cave section edges.<br />
Rock!<br />
Now we get to two things that had to be worked out jointly<br />
from the start, and continually manipulated as we went,<br />
and that is the rock surface of the cave and the structure that<br />
supports it.<br />
LEGO is a great thing for easily making shapes like houses,<br />
but when you try to make shapes found in nature, it takes<br />
a little more thought about how to pull that off so it looks<br />
convincingly like what you see in real life . In our case it was<br />
rock. My challenge, which I was excited to try, was to make the<br />
rock look like rock, not just a bunch of LEGO slapped down in<br />
an attempt at randomness. And that’s the key, in my opinion:<br />
randomness. When you look at rock, with few exceptions,<br />
there are not repeating patterns. It’s very easy to have patterns<br />
with LEGO. Randomness requires special effort. As I placed<br />
each piece, I made sure that the area surrounding it had no<br />
parts moving in the same direction in a way that would cause<br />
a pattern to emerge. Patterns were my enemy!<br />
As I was doing that task I also had to consider how to keep<br />
it all structurally sound. This is where Wayne comes in.<br />
His many years of experience helped me see ways to make<br />
structure that was strong, lightweight and used as few bricks<br />
as possible to achieve both of those goals. He designed how<br />
the exterior walls of our cave attached to the interior rock<br />
walls. He also created simple ways to have openings in the<br />
exterior walls which would allow for access after they enclosed<br />
the rock.<br />
An early phase of building.<br />
The next major consideration was transportation. Not only<br />
did we ask ourselves, “Can we carry it easily,” but will it even<br />
fit through the door? Carlyle slaps forehead! This is easy to<br />
overlook when starting a large project. We decided that it<br />
would be best to split the cave into three major sections that<br />
would slide apart for disassembly. Wayne did his usual magic<br />
and came up with a way to have registration pins made from<br />
axles where the sections meet, so they would stay together<br />
when on display.<br />
A closer look at the rock detail work done for the cave.<br />
10
People<br />
Celebrating<br />
50 years of LEGO®<br />
in Norway:<br />
“Bli med å bygge<br />
landet”<br />
(Build a Piece<br />
of Norway!)<br />
Article by: Megan Rothrock<br />
and Are J. Heiseldal<br />
Photography by: Are J. Heiseldal<br />
and Bjørn Håvar Falck-Andersen<br />
Strong enough to hold a train; this mountain bridge was built by Bård Nome.<br />
A completed map of Norway in LEGO bricks!<br />
Photo provided by Matija Pužar.<br />
This past November Megan Rothrock had the<br />
opportunity to travel to Oslo, Norway to attend<br />
a special LEGO event: “Bli med å bygge landet”-<br />
in English, “build a piece of Norway.” LEGO<br />
celebrated 50 years in Norway inviting visitors to<br />
come to the Telenor Arena, which they filled with<br />
five million LEGO bricks! For this journalist and<br />
LEGO event veteran, this was a very different style<br />
of LEGO event to attend. Never before had there<br />
been so many loose LEGO bricks to build with,<br />
encouraging the visitors to build up a model and<br />
place it into a massive map or Norway!<br />
Strong enough to hold a train; this mountain bridge was built by: Bård Nome<br />
20
TV 2 Norway interviews Morten Dalermoen<br />
with their own custom built LEGO microphone.<br />
Members of Brikkelauget eagerly awaiting the<br />
National News broadcast of the event on TV.<br />
A giant rendition of the Øresund Bridge (which connects Denmark and Sweden) by LEGO Certified Professional<br />
Matija Pužar. Train on bridge built by Bjørn-Erik Gunnerød.<br />
Train station built by Bjørn Einar Storsveen.<br />
Morten dives into a ‘pool’ of LEGO bricks!<br />
25
People<br />
NASA<br />
AFOL!<br />
Article and Photography<br />
by Stephen Pakbaz<br />
2012 will be known to<br />
space fans as the year<br />
that Curiosity landed on<br />
Mars. One of those fans<br />
is Stephen Pakbaz, who<br />
lives in Virginia and is a<br />
member of WAMALUG<br />
(the Washington and<br />
Metro Area LEGO<br />
Users Group, based in<br />
Washington, DC). Not<br />
only has he built spacethemed<br />
models, he also is<br />
a designer for a NASA<br />
contractor!<br />
<strong>Here</strong>, Stephen talks about<br />
the models he has built and<br />
the work he does with his<br />
LEGO building.<br />
26<br />
Curiosity and its skycrane,<br />
built by Stephen and<br />
displayed at Brickfair 2012.<br />
The first NASA models I built were not my own design, but from the LEGO<br />
Discovery theme. It was released in 2003 and consisted of six sets: a Space<br />
Shuttle (7470), Apollo spacecraft (7468, 10029), Mars rovers (7471, 7469), and the<br />
International Space Station (7467). Before then, the space models I made were from<br />
the realm of science fiction, my own research into interplanetary space travel, and<br />
my imagination. The first NASA LEGO creation that I designed myself was the<br />
Curiosity rover, early in 2011. At the same time, I was a Mechanical Engineer at the<br />
Jet Propulsion Laboratory (JPL), where I helped perform tests and design parts for<br />
the real Curiosity rover. I used my firsthand experience with the real rover to make<br />
the model as accurate as possible. The Jet Propulsion Laboratory, birthplace of robotic<br />
space exploration, was a treasure trove of useful information. Models and displays<br />
fill the hallways and entrances to most buildings. Also on the laboratory premises is<br />
a fantastic museum and library, which I visited often. I made use of these resources<br />
to create other models such as minifig scale versions of the previous Mars rovers<br />
and the Voyager 2 spacecraft, with inspiration left over for many more models<br />
in the future. I am currently a Senior Mechanical Designer at the Orbital Sciences<br />
Corporation, which specializes in developing commercial and exploration spacecraft,<br />
launch vehicles, and other projects in cooperation with NASA. My recent Pegasus<br />
rocket and Cygnus spacecraft LEGO models have reflected this change and the recent<br />
overall increase in commercial space development.<br />
The Curiosity rover was the first spacecraft I ever worked on, and I was very<br />
enthusiastic about discussing it with friends and family. While I was very familiar<br />
with this robotic vehicle, most others were not, considering it hadn’t even launched<br />
yet. It was sometimes difficult to describe the rover and how it worked without<br />
images or models, especially parts like the mechanically marvelous rocker-bogie<br />
suspension system that the rover uses to navigate over obstacles and uneven terrain.
You Can Build It<br />
MINI Model<br />
Curiosity Rover<br />
Design and Instructions<br />
by Stephen Pakbaz<br />
With the landing of Curiosity, it only seemed fitting to have a<br />
model of the rover in BrickJournal. We are fortunate to have the<br />
model designed by the same person that designed the LEGO<br />
CUUSOO version.<br />
This version is a minifigure scale model of the rover, and has<br />
many of the details of the larger CUUSOO version. The model<br />
has an accurate rendition of the suspension and instrument<br />
arms, and can be rolled around to show its suspension.<br />
Many thanks to Stephen Pakbaz for the model design and<br />
digital model!<br />
Parts List (Parts can be ordered through Bricklink.com by<br />
searching by part number and color)<br />
Qty Color Part Description<br />
1 White 30374.dat Bar 4L Light Sabre Blade<br />
1 White 4070.dat Brick 1 x 1 with Headlight<br />
2 Light Bluish Gray 4070.dat Brick 1 x 1 with Headlight<br />
1 Light Bluish Gray 3023.dat Plate 1 x 2<br />
2 Light Bluish Gray 60470.dat Plate 1 x 2<br />
with 2 Clips Horizontal<br />
2 Light Bluish Gray 48336.dat Plate 1 x 2<br />
with Handle Type 2<br />
4 Light Bluish Gray 3710.dat Plate 1 x 4<br />
1 Light Bluish Gray 2420.dat Plate 2 x 2 Corner<br />
2 Trans-Clear 50746.dat Slope Brick 31 1 x 1 x 2/3<br />
2 Light Bluish Gray 50746.dat Slope Brick 31 1 x 1 x 2/3<br />
1 White 32123a.dat Technic Bush 1/2 Smooth<br />
with Axle Hole Reduced<br />
2 Red 3069b.dat Tile 1 x 2 with Groove<br />
2 Light Bluish Gray 3068b.dat Tile 2 x 2 with Groove<br />
1 Light Bluish Gray 41770.dat Wing 2 x 4 Left<br />
1 Light Bluish Gray 41769.dat Wing 2 x 4 Right<br />
1 Light Bluish Gray 54384.dat Wing 3 x 6 Left<br />
1 Light Bluish Gray 54383.dat Wing 3 x 6 Right<br />
28
1<br />
1x<br />
2<br />
2x<br />
1x<br />
3<br />
1x<br />
4<br />
1x<br />
1x<br />
5<br />
1x<br />
6<br />
1x<br />
7<br />
1x<br />
8<br />
1x<br />
9<br />
1x<br />
10<br />
1x<br />
11 12<br />
1x<br />
1x<br />
1x<br />
13 14<br />
1x<br />
1x<br />
29
You Can Build It<br />
MINI Model<br />
T-16 Skyhopper<br />
Design and Instructions<br />
by Christopher Deck<br />
Hello everybody and welcome back to our ongoing series<br />
of mini model building in BrickJournal! This issue is about<br />
sky-fighting, which is why we want to build an air vehicle.<br />
This time, it’s the popular T-16 Skyhopper as seen in Star<br />
Wars Episode 4: A New Hope, a small and maneuverable<br />
vehicle of tri-winged design. The mini model’s<br />
construction is more complex than it seems, however.<br />
The main difficulty was to realize the windscreen on each<br />
side of the huge top fin, which divides it into two sections.<br />
A way to achieve this is to use two wedge plates in SNOTalignment<br />
which allows us to attach two 1x1 slopes as<br />
a separate cockpit on each side. The next challenge was<br />
to keep those two wedge plates together as one wing.<br />
Another SNOT-trick with two headlight bricks helps here,<br />
which becomes clear when you will have a closer look at<br />
the instructions. A nice side-effect by using this second<br />
trick is that we have one stud on the underside as well for<br />
the attachment for the laser cannon. The attachment of a<br />
pair of side wings then completes the skyhopper and our<br />
model is finished!<br />
Happy building and see you next time!<br />
Parts List (Parts can be ordered through Bricklink.com by<br />
searching by part number and color)<br />
Qty Color Part Description<br />
1 White 30374.dat Bar 4L Light Sabre Blade<br />
1 White 4070.dat Brick 1 x 1 with Headlight<br />
2 Light Bluish Gray 4070.dat Brick 1 x 1 with Headlight<br />
1 Light Bluish Gray 3023.dat Plate 1 x 2<br />
2 Light Bluish Gray 60470.dat Plate 1 x 2<br />
with 2 Clips Horizontal<br />
2 Light Bluish Gray 48336.dat Plate 1 x 2<br />
with Handle Type 2<br />
4 Light Bluish Gray 3710.dat Plate 1 x 4<br />
1 Light Bluish Gray 2420.dat Plate 2 x 2 Corner<br />
2 Trans-Clear 50746.dat Slope Brick 31 1 x 1 x 2/3<br />
2 Light Bluish Gray 50746.dat Slope Brick 31 1 x 1 x 2/3<br />
1 White 32123a.dat Technic Bush 1/2 Smooth<br />
with Axle Hole Reduced<br />
2 Red 3069b.dat Tile 1 x 2 with Groove<br />
2 Light Bluish Gray 3068b.dat Tile 2 x 2 with Groove<br />
1 Light Bluish Gray 41770.dat Wing 2 x 4 Left<br />
1 Light Bluish Gray 41769.dat Wing 2 x 4 Right<br />
1 Light Bluish Gray 54384.dat Wing 3 x 6 Left<br />
1 Light Bluish Gray 54383.dat Wing 3 x 6 Right<br />
Yours, Christopher Deck<br />
37
Building<br />
Minifig<br />
Customization 101:<br />
Fun With a<br />
Vacuum!<br />
by Jared K. Burks<br />
Figure 2. Plastic Forming Diagram.<br />
Figure 1. Mattel Vac-U-Form.<br />
The kids of the 1960s had it good! Yes, that<br />
statement sounds odd, but think about it for<br />
a second. In the early sixties LEGO came to<br />
America, which is cause enough to celebrate,<br />
but this isn’t the only reason to think these kids<br />
had it good. The Mattel Corporation had a toy<br />
ahead of its time for this hobby: the Mattel Vac-<br />
U-Form. This was a simple vacuum former<br />
that allowed someone to head up a plastic<br />
sheet and then swivel it over on top of a mold<br />
and vacuum out the air with a simple hand<br />
pump, forming a new toy.<br />
Using a vacuum former in the hobby of<br />
LEGO minifigure customizing has long been<br />
something I have wanted to try, but I was<br />
concerned about the level of vacuum pressure<br />
required. But I am getting ahead of myself.<br />
Before we stroll through the uses in minifigure<br />
customizing, let’s roll through the basics of<br />
vacuum forming. Vacuum forming remains a<br />
popular deforming process where the vacuum<br />
removes the air underneath a soft and flexible thermoplastic sheet, creating pressure<br />
to pull the plastic onto a mold. The vacuum forming process starts by raising the<br />
plastic sheet towards a heater to soften the plastic before being pulled down onto the<br />
mold to create a draping form. The aim is always to create a high definition outcome<br />
without any excessive thinning of the plastic taking place. Vacuum forming is used to<br />
make many toy containers as well as several other commercial products.<br />
To be honest with everyone, I am very excited about the content in this article and<br />
I must share the fact that I have not yet tried this technique, but can’t wait to do so.<br />
Because I haven’t tried it, I have reached out to an expert in vacuum forming, Jimmy<br />
“THE BOXMAN” Chavez. Jimmy is relatively new to LEGO customizing, but has<br />
been customizing in Hot Wheels for some time. For info on Jimmy please see his<br />
profile following this article.<br />
For the remainder of the article, I have asked Jimmy to walk us through one of the<br />
cool uses of a vacuum former, beyond the use to create packaging. Clearly packaging<br />
would likely require a larger former than what would be used for creating small<br />
parts.<br />
40
Building<br />
Century Fighters<br />
Article and Photography by Ralph Savelsberg<br />
The F-105 (left) and F-106 (right) showing their swept wings and their area-ruled<br />
fuselages.<br />
44<br />
The LEGO Group has a long-standing policy of not wanting to<br />
make war seem like child’s play. I can completely understand<br />
their point of view, but it has not stopped me from building a<br />
large collection of military aircraft and helicopters using their<br />
products. I am fascinated by the technology that goes into<br />
military aircraft and they are exciting and challenging objects<br />
to build. In this article, I hope to give you some idea what<br />
makes building models of fighter jets interesting and fun, by<br />
explaining how I built two of them: the F-105 Thunderchief<br />
and the F-106 Delta Dart.<br />
Most of my models represent aircraft from the end of the<br />
cold war, but the F-105 and F-106 are of a slightly older<br />
vintage. They entered service with the US Air Force in the<br />
late ‘50s and are part of a range of famous fighter aircraft<br />
known as the Century Fighters, named such because their<br />
numerical designations are in the 100-109 range. Aeronautical<br />
engineering progressed rapidly in the ‘40s and ‘50s. In 1947,<br />
the experimental rocket-powered Bell X-1 was the first aircraft<br />
to fly faster than the speed of sound. Only ten years later,<br />
Century Fighters were routinely flying supersonically, some<br />
even reaching more than twice the speed of sound. These<br />
high speeds required a range of innovations, such as large jet<br />
engines with afterburners and both the F-105 and F-106 were<br />
powered by the J-75 engine, one of the biggest jet engines<br />
available at the time. The high speeds also had an impact<br />
on the shape of the aircraft. Swept wings reduce supersonic<br />
drag, as does making the nose of the aircraft pointy. For low<br />
drag close to speed of sound, the cross-sectional area of the<br />
aircraft ought to change only gradually along its length. A<br />
consequence of this, the so-called area rule, is that the fuselage<br />
has to be narrower where the wings are attached to it, giving it<br />
a shape reminiscent of a Coca-Cola bottle, or perhaps fitting for<br />
the time, of Marilyn Monroe. These external features obviously<br />
have an impact on building the aircraft using LEGO elements.
Building the Thunderchief<br />
F-105s were originally designed to deliver a nuclear weapon,<br />
but instead they went into combat over the jungles of<br />
Southeast Asia, carrying conventional bombs. During the<br />
first few years of the war, they performed the majority of the<br />
USAF’s dangerous bombing missions over North Vietnam,<br />
sustaining heavy losses in the process. Almost half the total<br />
production run was lost, mostly to anti-aircraft artillery.<br />
Enemy MiG-fighters also took their toll, but even though<br />
Thunderchiefs were ill-suited for air-to-air combat, they still<br />
managed to shoot down more than 20 MiGs. The aircraft I<br />
modelled represents one of the ‘MiG-killers’, which survived<br />
the war and in the late Seventies ended up flying with the<br />
Virginia Air National Guard.<br />
I wanted to build an F-105 for years, but for a long time I could<br />
not work out how, for two reasons: the camouflage colors<br />
and the shape of the wings. The easiest way to build a sweptback<br />
wing is by building it perpendicular to the fuselage,<br />
with wedge plates (plates with a diagonal side) used for the<br />
leading and trailing edges. On the F-105 this was not really a<br />
viable option. The sweepback angle for the leading edges of<br />
the wings is almost 45 degrees, which may seem convenient as<br />
there are wedge plates with 45 degree corners. However, the<br />
angle of trailing edge does not match any LEGO wedge plates.<br />
Furthermore, the main legs of the undercarriage fold into the<br />
wings and they are not perpendicular to the fuselage when<br />
retracted. I solved all of this using a bit of mathematics called<br />
a Pythagorean triple. If you make a right-angled triangle with<br />
sides whose lengths are three and four studs long, the diagonal<br />
will be exactly five studs long. The wings on my model<br />
slot into a gap between the upper and lower sections of the<br />
fuselage, and by placing the studs that hold them in place so<br />
that they formed such triangles, I ended up with just about the<br />
45
Community<br />
Sky-Fi:<br />
Building in the<br />
Aerial Universe<br />
of Crimson<br />
Skies ® and<br />
Dieselpunk<br />
Article by Fradel Gonzales<br />
Photography provided by<br />
Fradel Gonzales, Jon Hall,<br />
Theodore Sammis II, Chris<br />
Paton, Chris Giddens, Mark<br />
Sandlin, Gil Shaw, Nick<br />
Kappatos, Adrian Drake,<br />
sydag, Leigh Holcombe,<br />
tbone_tbl, and Fredoichi.<br />
Above: A sky-fi model by Fradel Gonzales.<br />
Beginning a Theme: Influences<br />
Manned flight has captivated the dreams and imaginations of young minds for<br />
countless generations. As children, we watched air shows and were awed by the<br />
aerial stunts, the planes, and the possibilities. It was only natural that the creative<br />
talents of many an AFOL would harness this fascination and combine them to make<br />
exceptional aerial MOCs, especially from the Spacer group of the AFOL community.<br />
By late 2003, builders started creating MOCs inspired from a resurrected board<br />
game from the late ’90s called Crimson Skies. The game was the creation of Jordan<br />
Weisman, the game maker from FASA Corporation that had also brought the<br />
franchise Battletech ® to the gaming world in the mid ’80s. In 2003, the game garnered<br />
a resurgence and following when Microsoft put out an action flight game version of<br />
Crimson Skies for the Xbox and PC gaming systems.<br />
Crimson Skies is an alternate history setting in the 1930s where air pirates, militias,<br />
and corporations vie for control of the skies over a fractured political landscape of the<br />
shattered United Stations in the post-Depression 1937. This game was made famous<br />
not just for the amazing backstory, but also because of the radical aircraft designs.<br />
Examples of these unorthodox designs were flying wings, pusher propeller-driven<br />
aircraft, gyrocopters, and Zeppelin aircraft carriers. Just imagine if the experimental<br />
planes that the United States and Germany had been working on in the ’40s like<br />
the Vought V-173 (Flying Pancake) and the flying wing seen in Raiders of the Lost<br />
Ark had made it into widespread production. The weaponry was also comprised of<br />
experimental technology considered advanced in that era like Tesla cannons, aerial<br />
torpedoes and homing rockets.<br />
Left: Renders of Crimson Skies aircraft.<br />
Top: Devastator.<br />
Bottom:: Kestrel.<br />
49
Tbone_tbl’s rendition of the DuckTales planes,<br />
the Sea Duck (left) and Don Carnage’s plane<br />
(right).<br />
Even before Crimson Skies, there was a<br />
Disney animated series called Tailspin.<br />
This show took characters from the<br />
movie Jungle Book and placed the<br />
characters in a fictional setting in the<br />
South Pacific. It took its cues from yet<br />
another television show, Tales of the Gold<br />
Monkey, about a bush pilot and ex-<br />
Flying Tiger (coincidentally a plot point<br />
shared by Jude Law’s character in Sky<br />
Captain). The plots were very film noir<br />
and incorporated elements like a pilot’s<br />
love for his aircraft, romance, dealing<br />
with bandits and sky pirates, and just<br />
trying to keep their air services afloat.<br />
Both shows also showcased a seaplane<br />
as the protagonist’s sky chariot.<br />
Sydag’s version of the Sea Duck.<br />
Other influences to the genre lay in<br />
Japanese animation. Several anime<br />
movies and television shows gave<br />
examples and inspiration for diesel<br />
punk. Studio Ghibli movies like Kiki’s<br />
Delivery Service and Porco Rosso each<br />
gave examples of interesting flying<br />
designs. Other anime like Last Exile<br />
broke with traditional winged diesel<br />
punk by having wingless flight craft, yet<br />
still maintained the grungy industrial<br />
retro-future look. More examples of<br />
pusher-prop war birds and alternate<br />
history development were from movies<br />
like Sky Crawlers and Royal Wings of<br />
Honneamise.<br />
Sydag’s version of the Savoia S21 plane.<br />
Jon Hall’s model of the Savoia S21 plane<br />
from the film Porco Rosso (above) and<br />
Nausicaä’s “Mehve” Glider (left) from<br />
Nausicaä of the Valley of Wind.<br />
50
Community<br />
Cole Martin:<br />
Sky-Flyer!<br />
Article by Joe Meno<br />
Photography provided by the LEGO Group<br />
Sometimes builders have to be found. This was the case<br />
with Cole Martin, an AFOL who lives in California. I first<br />
met him a couple of years ago at a San Diego LEGO Users<br />
Group (SANDLUG) meeting while I was in town attending<br />
Comic-Con International: San Diego. At that time, Cole was<br />
just starting to build MOCs and already had an eye toward<br />
building hot-rodded vehicles.<br />
I saw him again at a meeting in 2012, and not only had his<br />
building skills jumped, he had found a theme he wanted<br />
to build in. After seeing two of his models, it was apparent<br />
that he had some great MOCs, and so I talked to him about<br />
building Sky-Fi models. Some of those models are highlighted<br />
in this article.<br />
BrickJournal: What do you do now?<br />
Cole Martin: I am currently working in the aerospace industry<br />
as a welder.<br />
BrickJournal: When did you start LEGO building, and when<br />
did you begin building sky-fi models?<br />
Cole: I started building LEGO when I was about 4 years old,<br />
and began sky-fi in 2008.<br />
BrickJournal: What inspires you to build? Who inspires you<br />
to build?<br />
Cole: My first inspiration originally came from a video game<br />
from the X-box game system called Crimson Skies. If I had to<br />
point to one person who has influenced me the most in skyfi<br />
aircraft, it would be Jon Hall18 on Flickr, from<br />
London, England.<br />
56<br />
BrickJournal: How do you build a model? Do you sketch it<br />
out beforehand or just build it?<br />
Cole: When I get an idea for a model, I will usually sketch it<br />
first to get all the details down on paper. Then I like to take<br />
those shapes I have and apply them to the LEGO system.<br />
BrickJournal: How long does it take to build a model?<br />
Cole: Well, it takes me a long time I think compared to most<br />
adult builders because in-between models I take long breaks<br />
of not building anything. This attributes to forgetting things to<br />
where I have this constant re-learning curve going on. It varies<br />
from one week, to two months being the longest.<br />
BrickJournal: What’s the best part of building? What’s the<br />
hardest part of building?<br />
Cole: The best part of building is to me the finished product.<br />
We’re able to transfer our ideas from our minds to the LEGO<br />
medium, and in turn the finished model displays that original<br />
idea. So you can actually see visually what I was thinking.<br />
The hardest part of building to me is the brainstorming and<br />
figuring out the techniques to use to achieve the angles I want.<br />
And this is very difficult at times because of the LEGO itself.<br />
Sometimes they just don’t make the part you want or need, so<br />
you have to compromise.<br />
BrickJournal: What is your favorite model you have built,<br />
and what is your favorite LEGO set?<br />
Cole: My personal favorite is a plane I did that I called Strato<br />
Magnetto. It’s the dark red aircraft shown in this article. My<br />
favorite LEGO set was the recent Space Police set called Smash<br />
’n’ Grab. It made me laugh in the store when I saw it! Real<br />
space criminals, stealing an ATM. Yes! Epic!<br />
BrickJournal: What are you planning to build in the future?<br />
Cole: I am planning on continuing a theme I started a while<br />
back I call Sky Skulls. It consists of dark red, black, and white<br />
aircraft. I am working on and sketching an interceptor aircraft<br />
at the time of this issue. I may do some mercenary planes in<br />
the future as well. We’ll see.
Cole Martin’s Aircraft Brief:<br />
Purple Pirahna<br />
The next four aircraft are example of Cole’s work. He was<br />
gracious enough to take some time to describe each plane for<br />
BrickJournal:<br />
The Purple Piranha is an aircraft fitted with pontoons, or<br />
floats, often referred to as a floatplane, for being specifically<br />
aquatic or water-based. This plane also has what is<br />
considered to be a runway kit which allows it to make<br />
landings on land as well as water. This plane has more to<br />
it than meets the eye, as it has a secret cargo compartment<br />
located in the center of the fuselage (or body) and has a<br />
small compartment located just behind the pilot’s chair as<br />
well. I built this plane using purple because there aren’t as<br />
many parts or elements in LEGO’s color palette molded<br />
in purple. In other words there aren’t as many elements<br />
in purple as red or yellow that most people might have. I<br />
wanted a challenge, and also wanted a color that could be<br />
identified with a female pilot. A female smuggler has to<br />
have a super hot-looking plane! She needed to have a big,<br />
hot-rodded, exposed radial engine too. I think she’ll get<br />
plenty of unwanted attention at the air shows! She is, after<br />
all, a smuggler.<br />
57
You Can Build It<br />
Sky-Fi MINI Model<br />
Modular Pirate<br />
Interceptor<br />
Design by Cole Martin<br />
Instructions by Joe Meno<br />
Parts List (Parts can be ordered through Bricklink.com by<br />
searching by part number and color)<br />
Qty Color Part Description<br />
2 White 2335p30.dat Flag 2 x 2 with Jolly Roger<br />
Pattern<br />
2 White 2420.dat Plate 2 x 2 Corner<br />
4 Black 2420.dat Plate 2 x 2 Corner<br />
2 Black 2444.dat Plate 2 x 2 with Hole<br />
1 Black 2496.dat Wheel Trolley<br />
2 Black 2540.dat Plate 1 x 2 with Handle<br />
2 Dark Red 3021.dat Plate 2 x 3<br />
1 Black 3021.dat Plate 2 x 3<br />
2 Dark Red 3023.dat Plate 1 x 2<br />
1 Black 3023.dat Plate 1 x 2<br />
4 Black 3024.dat Plate 1 x 1<br />
2 Black 3069b.dat Tile 1 x 2 with Groove<br />
2 Black 3139.dat Tyre 4/80 x 8 Single<br />
Smooth Type 1<br />
2 Light Bluish Gray 3464.dat Wheel Centre with Stub<br />
Axles<br />
2 Dark Red 3623.dat Plate 1 x 3<br />
2 Black 3623.dat Plate 1 x 3<br />
1 Dark Red 3665.dat Slope Brick 45 2 x 1<br />
Inverted<br />
2 White 3665.dat Slope Brick 45 2 x 1<br />
Inverted<br />
1 Black 3666.dat Plate 1 x 6<br />
1 Light Bluish Gray 3673.dat Technic Pin<br />
2 Dark Red 3710.dat Plate 1 x 4<br />
1 Black 3710.dat Plate 1 x 4<br />
3 Black 4081b.dat Plate 1 x 1 with Clip Light<br />
Type 2<br />
2 Black 4150.dat Tile 2 x 2 Round<br />
2 Light Bluish Gray 4274.dat Technic Pin 1/2<br />
1 Black 4617b.dat Propeller 3 Blade 5.5<br />
Diameter with Technic<br />
Peghole<br />
Cole Martin designed this micro sky-fi model and talks<br />
about it: “I wanted to do something small and cool that<br />
kids mostly and adults could have a lot of fun with. I<br />
build mostly minifig scale, and consider myself to be<br />
not as good at building the really small stuff. I leave the<br />
small stuff to folks like my friend Matt Armstrong, a.k.a.<br />
Monsterbrick on Flikr (last seen in BrickJournal #21), and<br />
Fradel Gonsales, a.k.a. slice151 (seen in this issue). But this<br />
particular plane was lots of fun to do and included my signature<br />
design cues you’d find in my bigger models – split<br />
tail, big engine, and reeking of speed and havoc!”<br />
Qty Color Part Description<br />
2 Light Bluish Gray 4697b.dat Technic Pneumatic<br />
T-Piece - Type 2<br />
5 Metallic Silver 6141.dat Plate 1 x 1 Round<br />
2 White 6141.dat Plate 1 x 1 Round<br />
5 Black 6141.dat Plate 1 x 1 Round<br />
1 Black 6541.dat Technic Brick 1 x 1<br />
with Hole<br />
1 Black 30039.dat Tile 1 x 1 with Groove<br />
1 Dark Red 30071.dat Brick 1 x 1<br />
1 Black 30071.dat Brick 1 x 1<br />
1 Metallic Silver 30244.dat Tile 1 x 2 Grille<br />
with Groove<br />
1 Black 30377.dat Minifig Mechanical Arm<br />
2 White 43722.dat Wing 2 x 3 Right<br />
2 White 43723.dat Wing 2 x 3 Left<br />
2 Black 44676.dat Flag 2 x 2 Trapezoid<br />
2 Dark Red 45677.dat Wedge 4 x 4 x 0.667<br />
Curved<br />
1 Black 47905.dat Brick 1 x 1 with Studs<br />
on Two Opposite Sides<br />
1 Black 52107.dat Brick 1 x 2 with Studs<br />
on Sides<br />
9 Black 54200.dat Slope Brick 31 1 x 1 x 2/3<br />
6 Metallic Silver 59900.dat Cone 1 x 1 with Stop<br />
1 Black 60478.dat Plate 1 x 2 with Handle<br />
on End<br />
1 Black 61409.dat Slope Brick 18 2 x 1<br />
x 2/3 Grille<br />
1 Black 63864.dat Tile 1 x 3 with Groove<br />
2 White 64288.dat Cone 1 x 1 with Stop<br />
2 Black 64644.dat Minifig Telescope<br />
1 Light Bluish Gray 76263.dat Technic Flex-System<br />
Hose 2L (40LDU)<br />
1 Dark Red 85975.dat Minifig Hat Fez<br />
4 Black 85984.dat Slope Brick 31 1 x 2<br />
x 0.667<br />
60
Community<br />
Jon’s newest model, the Blue Angel.<br />
Jon Hall:<br />
LEGO Aviator!<br />
Article by Joe Meno<br />
Photography provided by Jon Hall<br />
One of the most distinctive builders in the LEGO<br />
community is Jon Hall. Primarily a plane builder,<br />
he made a name for himself with his reimagining<br />
of prop-driven airplanes in the style of sky-fi and<br />
dieselpunk. <strong>Here</strong>, Jon talks to BrickJournal about<br />
how he started building, what inspires him, and<br />
what his building method is. You’ll also find he has<br />
another tie to the LEGO community, so read on!<br />
BrickJournal: How long have you been building?<br />
Jon Hall: I started building when I was a child. I had some of<br />
the classic sets like the Yellow Castle and the early Space sets,<br />
but I only really rediscovered just how much fun it was to build<br />
things once I had my first son and he started playing with my<br />
old LEGO in my parent’s loft. That would be about 6 or 7<br />
years ago.<br />
BrickJournal: Did you have a Dark Age?<br />
Jon: Yes, I probably stopped playing with LEGO when I was<br />
about 13 or 14 and didn’t start again until I was about (ahem) 33.<br />
So quite a long Dark Age.<br />
BrickJournal: What got you into building planes and later<br />
Sky-Fi?<br />
Jon: Two things really. I’ve been a big fan of Hayao Miyazaki’s<br />
work for many years and one of the visual themes that run<br />
though his work is flight. He has imagined many crazy and<br />
beautifully realized flying vehicles. The other reason was a lot<br />
of builders build spaceships (as I soon realized from trawling<br />
the internet for cool models). I thought, wouldn’t it be fun to do<br />
something similarly imaginative, but with planes rather than<br />
spacecraft? Sometimes I even start to design a plane like I would<br />
a spaceship and then tweak it at the last minute so it resembles a<br />
plane more. I find that frees the mind wonderfully!<br />
BrickJournal: How did you come up with the name Sky-Fi?<br />
Jon: I didn’t actually, I wish I had, as it neatly encapsulates this<br />
little sub-genre perfectly! I don’t know who came up with the<br />
name but by the time I started posting on flickr, the word was<br />
already being bandied about.<br />
BrickJournal: You have a lot of models, but which is your<br />
first model?<br />
Jon: My LEGO rendition of the insect-like ornithopters from<br />
Laputa – Castle in the Sky. Well, that’s the first model that I felt<br />
was good enough to share with the world! (http://<br />
www.flickr.com/photos/25163007@N07/2374824789/in/<br />
photostream)<br />
67
Long-Distance Fighter/Interceptor<br />
IF YOU ENJOYED THIS PREVIEW,<br />
CLICK THE LINK TO ORDER THIS<br />
ISSUE IN PRINT OR DIGITAL FORMAT!<br />
The <br />
<br />
sorties and stay in the air longer before refuelling than<br />
<br />
defence of the Meneres Straits where they earned their<br />
<br />
BRICKJOURNAL #22<br />
LEGO PLANE BUILDING! Top builder RALPH SAVELSBERG takes<br />
off with his custom LEGO fighter models, there’s a squadron of<br />
articles on Sky-Fi planes by FRADEL GONZALES and COLE<br />
MARTIN, find instructions to build a Sky-Fi plane, plus our regular<br />
feature on minifigure customization by JARED BURKS, AFOLs<br />
by GREG HYLAND, other step-by-step “You Can Build It” instructions,<br />
and more!<br />
(84-page FULL-COLOR magazine) $8.95<br />
(Digital Edition) $3.95<br />
http://twomorrows.com/index.php?main_page=product_info&products_id=1072