Break-Through Usage Instructions
Break-Through Usage Instructions
Break-Through Usage Instructions

Create successful ePaper yourself
Turn your PDF publications into a flip-book with our unique Google optimized e-Paper software.
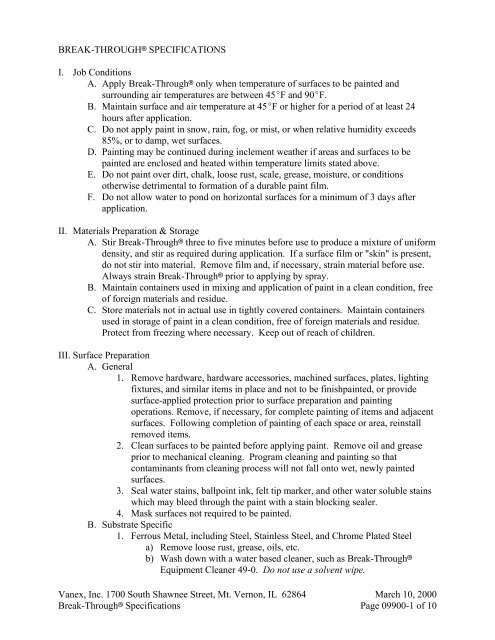
BREAK-THROUGH7 SPECIFICATIONS<br />
I. Job Conditions<br />
A. Apply <strong>Break</strong>-<strong>Through</strong>7 only when temperature of surfaces to be painted and<br />
surrounding air temperatures are between 45EF and 90EF.<br />
B. Maintain surface and air temperature at 45EF or higher for a period of at least 24<br />
hours after application.<br />
C. Do not apply paint in snow, rain, fog, or mist, or when relative humidity exceeds<br />
85%, or to damp, wet surfaces.<br />
D. Painting may be continued during inclement weather if areas and surfaces to be<br />
painted are enclosed and heated within temperature limits stated above.<br />
E. Do not paint over dirt, chalk, loose rust, scale, grease, moisture, or conditions<br />
otherwise detrimental to formation of a durable paint film.<br />
F. Do not allow water to pond on horizontal surfaces for a minimum of 3 days after<br />
application.<br />
II. Materials Preparation & Storage<br />
A. Stir <strong>Break</strong>-<strong>Through</strong>7 three to five minutes before use to produce a mixture of uniform<br />
density, and stir as required during application. If a surface film or "skin" is present,<br />
do not stir into material. Remove film and, if necessary, strain material before use.<br />
Always strain <strong>Break</strong>-<strong>Through</strong>7 prior to applying by spray.<br />
B. Maintain containers used in mixing and application of paint in a clean condition, free<br />
of foreign materials and residue.<br />
C. Store materials not in actual use in tightly covered containers. Maintain containers<br />
used in storage of paint in a clean condition, free of foreign materials and residue.<br />
Protect from freezing where necessary. Keep out of reach of children.<br />
III. Surface Preparation<br />
A. General<br />
1. Remove hardware, hardware accessories, machined surfaces, plates, lighting<br />
fixtures, and similar items in place and not to be finishpainted, or provide<br />
surface-applied protection prior to surface preparation and painting<br />
operations. Remove, if necessary, for complete painting of items and adjacent<br />
surfaces. Following completion of painting of each space or area, reinstall<br />
removed items.<br />
2. Clean surfaces to be painted before applying paint. Remove oil and grease<br />
prior to mechanical cleaning. Program cleaning and painting so that<br />
contaminants from cleaning process will not fall onto wet, newly painted<br />
surfaces.<br />
3. Seal water stains, ballpoint ink, felt tip marker, and other water soluble stains<br />
which may bleed through the paint with a stain blocking sealer.<br />
4. Mask surfaces not required to be painted.<br />
B. Substrate Specific<br />
1. Ferrous Metal, including Steel, Stainless Steel, and Chrome Plated Steel<br />
a) Remove loose rust, grease, oils, etc.<br />
b) Wash down with a water based cleaner, such as <strong>Break</strong>-<strong>Through</strong>7<br />
Equipment Cleaner 49-0. Do not use a solvent wipe.<br />
Vanex, Inc. 1700 South Shawnee Street, Mt. Vernon, IL 62864 March 10, 2000<br />
<strong>Break</strong>-<strong>Through</strong>7 Specifications Page 09900-1 of 10
c) Rinse well with water.<br />
d) Blow dry with clean air or wipe dry with a clean towel to prevent flash<br />
rust.<br />
2. Galvanized Metal<br />
a) Remove grease, oils, etc.<br />
b) Wash down with a water based cleaner, such as <strong>Break</strong>-<strong>Through</strong>7<br />
Equipment Cleaner 49-0. Do not use a solvent wipe.<br />
c) Rinse well with water.<br />
d) Allow to dry before painting.<br />
3. Aluminum<br />
a) Remove grease, oils, etc.<br />
b) Wash down with a water based cleaner, such as <strong>Break</strong>-<strong>Through</strong>7<br />
Equipment Cleaner 49-0. Do not use a solvent wipe.<br />
c) Rinse well with water.<br />
d) Allow to dry before painting.<br />
4. Glazed Ceramic Tile<br />
a) Sand lightly - 400 grit or finer<br />
b) Remove any foreign matter and film buildup with a basic cleaning<br />
solution of 1 gallon of water, 1 cup of bleach, and 2 tablespoons<br />
trisodium phosphate.<br />
c) Rinse well with water.<br />
d) Allow to dry before painting.<br />
e) <strong>Break</strong>-<strong>Through</strong>7 will adhere to most glazed ceramic tiles. Test<br />
adhesion to ceramic tile by painting a small test patch. Allow <strong>Break</strong>-<br />
<strong>Through</strong>7 to dry for three days. Apply tape to painted surface and<br />
remove. If the painted film is not removed, <strong>Break</strong>-<strong>Through</strong>7 will<br />
adhere to the ceramic tile that is to be painted.<br />
5. Unglazed Ceramic Tile<br />
a) Remove any foreign matter and film buildup with a basic cleaning<br />
solution of 1 gallon of water, 1 cup of bleach, and 2 tablespoons<br />
trisodium phosphate.<br />
b) Rinse well with water.<br />
c) Allow to dry before painting.<br />
6. Cementitious Surfaces of Concrete, Concrete Block, and Cement Plaster<br />
a) Floors<br />
(1) Remove efflorescence, chalk, dust, dirt, grease, oils, and<br />
roughen as required to remove glaze.<br />
(2) Concrete must age a minimum of 60 days prior to painting.<br />
Determine alkalinity of surfaces to be painted by performing<br />
appropriate tests. If the ph of the surface is 9 or above, it will<br />
cause blistering and burning of the finish. Correct this<br />
condition before application of paint.<br />
(3) Inspect for oil or grease absorption. If present, thoroughly<br />
clean with a penetrating cleaner/degreaser.<br />
(4) Etch concrete with a commercial solution of muriatic acid, or<br />
other etching cleaner.<br />
(5) Flush floor with a basic cleaning solution of 1 gallon of water,<br />
Vanex, Inc. 1700 South Shawnee Street, Mt. Vernon, IL 62864 March 10, 2000<br />
<strong>Break</strong>-<strong>Through</strong>7 Specifications Page 09900-2 of 10
1 tablespoon of baking soda (or sodium bicarbonate), and 2<br />
tablespoons trisodium phosphate to neutralize acid.<br />
(6) Rinse well with water.<br />
(7) Allow to dry before painting.<br />
b) Walls<br />
(1) Remove efflorescence, chalk, dust, dirt, and other foreign<br />
residue.<br />
(2) Concrete must age a minimum of 60 days prior to painting.<br />
Determine alkalinity of surfaces to be painted by performing<br />
appropriate tests. If the ph of the surface is 9 or above, it will<br />
cause blistering and burning of the finish. Correct this<br />
condition before application of paint.<br />
(3) If needed, clean with a basic cleaning solution of 1 gallon of<br />
water, 1 tablespoon of baking sodium (or sodium bicarbonate),<br />
and 2 tablespoons trisodium phosphate..<br />
7. High Pressure Laminate and Formica7<br />
a) Sand lightly using 400 grit or finer. Wet sanding achieves best<br />
appearance.<br />
b) Remove any foreign matter and film buildup with a basic cleaning<br />
solution of 1 gallon of water, 1 cup of bleach, and 2 tablespoons<br />
trisodium phosphate.<br />
c) Rinse well with water.<br />
d) Allow to dry before painting.<br />
8. Plexiglas7<br />
a) Sand lightly using 400 grit or finer. If painting previously painted<br />
Plexiglas7, wet sanding achieves best appearance.<br />
b) Remove any foreign matter and film buildup with a basic cleaning<br />
solution of 1 gallon of water, 1 cup of bleach, and 2 tablespoons<br />
trisodium phosphate.<br />
c) Rinse well with water.<br />
d) Allow to dry before painting.<br />
9. Fiberglas7<br />
a) Sand lightly using 400 grit or finer. Do not sand too strongly or fibers<br />
will be exposed. Wet sanding achieves best appearance.<br />
b) Remove any foreign matter and film buildup with a basic cleaning<br />
solution of 1 gallon of water, 1 cup of bleach, and 2 tablespoons<br />
trisodium phosphate.<br />
c) Rinse well with water.<br />
d) Allow to dry before painting.<br />
10. Sintra7<br />
a) Sand lightly using 400 grit or finer.<br />
b) Remove any foreign matter and film buildup with a basic cleaning<br />
solution of 1 gallon of water, 1 cup of bleach, and 2 tablespoons<br />
trisodium phosphate.<br />
c) Rinse well with water.<br />
d) Allow to dry before painting.<br />
11. Plastic<br />
Vanex, Inc. 1700 South Shawnee Street, Mt. Vernon, IL 62864 March 10, 2000<br />
<strong>Break</strong>-<strong>Through</strong>7 Specifications Page 09900-3 of 10
a) <strong>Break</strong>-<strong>Through</strong>7 will not adhere to untreated polyethylene or<br />
polypropylene.<br />
b) Sand lightly using 400 grit or finer. Wet sanding achieves best<br />
appearance.<br />
c) Remove any foreign matter and film buildup with a basic cleaning<br />
solution of 1 gallon of water, 1 cup of bleach, and 2 tablespoons<br />
trisodium phosphate.<br />
d) Rinse well with water.<br />
e) Allow to dry before painting.<br />
f) <strong>Break</strong>-<strong>Through</strong>7 will adhere to most plastics. Test adhesion to plastic<br />
by painting a small test patch. Allow <strong>Break</strong>-<strong>Through</strong>7 to dry for three<br />
days. Apply tape to painted surface and remove. If the painted film is<br />
not removed, <strong>Break</strong>-<strong>Through</strong>7 will adhere to the plastic that is to be<br />
painted.<br />
12. Naugahyde7 & Vinyl<br />
a) Remove any foreign matter and film buildup with a basic cleaning<br />
solution of 1 gallon of water, 1 cup of bleach, and 2 tablespoons<br />
trisodium phosphate.<br />
b) Rinse well with water.<br />
c) Allow to dry before painting. <strong>Break</strong>-<strong>Through</strong>7 will adhere to most<br />
Naugahyde7 and vinyl. Test<br />
adhesion to Naugahyde7 or vinyl by painting a small test patch. Allow<br />
<strong>Break</strong>-<strong>Through</strong>7 to dry for three days. Apply tape to painted surface<br />
and remove. If the painted film is not removed, <strong>Break</strong>-<strong>Through</strong>7 will<br />
adhere to the Naugahyde7 or vinyl that is to be painted.<br />
13. Vinyl Flooring<br />
a) Remove all floor wax with a commercial wax remover.<br />
b) Sand lightly using 400 grit or finer. Wet sanding achieves best<br />
appearance.<br />
c) Remove any foreign matter and film buildup with a basic cleaning<br />
solution of 1 gallon of water, 1 cup of bleach, and 2 tablespoons<br />
trisodium phosphate.<br />
d) Rinse well with water.<br />
e) Allow to dry before painting.<br />
f) <strong>Break</strong>-<strong>Through</strong>7 will adhere to most vinyl floors. Test adhesion to<br />
vinyl flooring by painting a small test patch. Allow <strong>Break</strong>-<strong>Through</strong>7<br />
to dry for three days. Apply tape to painted surface and remove. If the<br />
painted film is not removed, <strong>Break</strong>-<strong>Through</strong>7 will adhere to the vinyl<br />
flooring that is to be painted.<br />
14. Vinyl Wallcovering<br />
a) Glue down all seams and loose material.<br />
b) Assure wallcovering is free of paste or glue.<br />
c) Remove any foreign matter or film buildup with a basic cleaning<br />
solution of 1 gallon of water, 1 cup of bleach, and 2 tablespoons<br />
trisodium phosphate.<br />
d) Rinse well with water.<br />
e) Allow to dry before painting.<br />
Vanex, Inc. 1700 South Shawnee Street, Mt. Vernon, IL 62864 March 10, 2000<br />
<strong>Break</strong>-<strong>Through</strong>7 Specifications Page 09900-4 of 10
15. Wood<br />
a) Pigmented Finish<br />
(1) Clean wood surfaces to be painted of dirt, oil, or other foreign<br />
substances with scrapers and sandpaper as required.<br />
(2) If painting a tannin bleeding wood, such as redwood or cedar, a<br />
tannin block primer must be applied. Also protect small, dry,<br />
seasoned knots from tannin bleed by applying a tannin block<br />
primer.<br />
(3) Fill holes and imperfections in finish surfaces with putty or<br />
wood filler.<br />
(4) Remove any soils and mildew with a basic cleaning solution of<br />
1 gallon of water, 1 cup of bleach, and 2 tablespoons trisodium<br />
phosphate.<br />
(5) Sandpaper smooth when dried.<br />
b) Clear Finish<br />
(1) Remove any soils and mildew with a basic cleaning solution of<br />
1 gallon of water, 1 cup of bleach, and 2 tablespoons trisodium<br />
phosphate.<br />
(2) Sandpaper smooth when dried.<br />
(3) Remove sanding dust with clean compressed air, vacuum<br />
cleaner, or clean dry cloth. Do not use a tack cloth.<br />
IV. Application<br />
A. General<br />
1. Do not thin <strong>Break</strong>-<strong>Through</strong>7 more than 10% (12 ounces per gallon). Thin<br />
using distilled or deionized water.<br />
2. Apply multiple thin coats instead of one heavy coat for better adhesion.<br />
Thicker films will take longer to fully cure.<br />
3. At 70EF and 50% relative humidity, allow a dry time of two hours between<br />
each coat of primer or paint.<br />
4. Deep colors will take longer to fully cure than lighter colors.<br />
5. Allow paint to dry to touch before touching up any missed areas.<br />
6. Clean up tools immediately after use with soap and water. If coating has<br />
cured to the extent it cannot be cleaned with soap and water, use <strong>Break</strong>-<br />
<strong>Through</strong>7 Equipment Cleaner 49-0.<br />
7. Cure Time, 70EF, 50% relative humidity<br />
a) To touch - 30 minutes<br />
b) To handle - 45 minutes<br />
c) Back in service<br />
(1) Most surfaces - 2 hours; areas with heavier use, such as<br />
countertops - overnight<br />
(2) Floors - light traffic - overnight; heavy traffic, such as forklifts<br />
- 48 hours<br />
d) Full cure - 5-7 days<br />
B. Method Specific:<br />
1. Airless Spray<br />
a) Spray at package viscosity unless excessive tailing or fingering<br />
Vanex, Inc. 1700 South Shawnee Street, Mt. Vernon, IL 62864 March 10, 2000<br />
<strong>Break</strong>-<strong>Through</strong>7 Specifications Page 09900-5 of 10
equires thinning.<br />
b) Adjust pump pressure and tip size to achieve proper atomization and<br />
appearance. Recommended pump pressure - 1800 psi; recommended<br />
tip size - .013 - .019.<br />
c) Overlap the spray pattern a minimum of 50%.<br />
2. Conventional<br />
a) Reduce 5-10% with distilled or deionized water.<br />
b) Adjust pot pressure, air pressure, and air cap to achieve proper<br />
atomization and appearance. Recommended pot pressure - 15-20 psi;<br />
recommended air pressure - 40-60 psi; recommended aircap - 63pb in<br />
areas of high humidity; 66sd in areas of low humidity.<br />
c) Overlap the spray pattern a minimum of 50%.<br />
3. High Volume Low Pressure<br />
a) Reduce 5-10% with distilled or deionized water.<br />
b) Adjust head pressure and atomization pressure to achieve proper<br />
atomization and appearance. Recommended head pressure - 5-10 psi;<br />
recommended air flow rate - 85cfm.<br />
c) Overlap the spray pattern a minimum of 50%.<br />
4. Pad Applicator<br />
a) Reduce 5-10% with distilled or deionized water. It may not be<br />
necessary to thin darker colors.<br />
b) Use a premium quality synthetic pad applicator.<br />
c) <strong>Break</strong>-<strong>Through</strong>7 has a small window of open time. Pad apply a small<br />
area maintaining a wet edge. <strong>Break</strong>-<strong>Through</strong>7 dries very rapidly. Do<br />
not overwork.<br />
d) If wet edge is lost, allow coating to dry to touch before attempting to<br />
work back into coating.<br />
5. Brush<br />
a) Reduce 5-10% with distilled or deionized water. It may not be<br />
necessary to thin darker colors.<br />
b) Use a premium quality synthetic bristle brush, such as nylon or<br />
polyester. Natural bristle brushes are not recommended.<br />
c) <strong>Break</strong>-<strong>Through</strong>7 has a small window of open time. Brush a small area<br />
maintaining a wet edge. <strong>Break</strong>-<strong>Through</strong>7 dries very rapidly. Do not<br />
overwork.<br />
d) If wet edge is lost, allow coating to dry to touch before attempting to<br />
lap or brush back into coating.<br />
e) Use <strong>Break</strong>-<strong>Through</strong>7 Additive 48-0 to increase the open time. Do not<br />
add more than 10 ounces per gallon of <strong>Break</strong>-<strong>Through</strong>7 Additive.<br />
6. Roller<br />
a) Roller application is good for textured surfaces such as rough concrete<br />
walls & floors or textured walls.<br />
b) Do not apply <strong>Break</strong>-<strong>Through</strong>7 with a roller where a smooth surface is<br />
required.<br />
c) Do not apply <strong>Break</strong>-<strong>Through</strong>7 or Clear Advantage7 clears with a roller<br />
cover.<br />
d) For highly textured looks, no thinning is required. For lightly textured<br />
Vanex, Inc. 1700 South Shawnee Street, Mt. Vernon, IL 62864 March 10, 2000<br />
<strong>Break</strong>-<strong>Through</strong>7 Specifications Page 09900-6 of 10
looks, thin 5-10% with distilled or deionized water.<br />
e) Use a sponge roller cover or a high quality latex roller cover with a<br />
nap<br />
length of 1/4" or less.<br />
C. Substrate Specific<br />
1. Ferrous Metal, including Steel, Stainless Steel, and Chrome Plated Steel<br />
a) Interior Metal<br />
(1) No primer necessary. As a direct to metal finish, <strong>Break</strong><br />
<strong>Through</strong>7 can achieve over 200 hours of salt spray.<br />
(2) For maximum durability, apply two finish coats of <strong>Break</strong><br />
<strong>Through</strong>7 Satin (50 Series) or Gloss (70 Series) Topcoat.<br />
b) Exterior Unpainted Metal, Steel<br />
(a) Normal Environments<br />
(i) For maximum durability, prime with two coats<br />
of <strong>Break</strong>-<strong>Through</strong>7 MetaLast Primer 91-62.<br />
MetaLast can achieve over 400 hours of salt<br />
spray.<br />
(ii) For maximum durability, apply two finish coats<br />
of <strong>Break</strong>-<strong>Through</strong>7 Satin (50 Series) or Gloss<br />
(70 Series) Topcoat.<br />
(b) Demanding Environments<br />
(i) For maximum durability, prime with two coats<br />
of <strong>Break</strong>-<strong>Through</strong>7 1000 Hour Primer 91-9300.<br />
Applied to thoroughly clean surfaces, 1000<br />
Hour Primer can achieve over 1000 hours of salt<br />
spray. The best salt spray resistance is achieved<br />
when applied over iron phosphatized steel, zinc<br />
phosphatized steel, white or near-white metal<br />
blasted steel.<br />
(ii) For maximum durability, apply two finish coats<br />
of <strong>Break</strong>-<strong>Through</strong>7 Satin (50 Series) or Gloss<br />
(70 Series) Topcoat.<br />
c) Exterior Unpainted Stainless Steel and Chrome Plated Steel<br />
(1) No primer necessary.<br />
(2) For maximum durability, two finish coats of <strong>Break</strong>-<strong>Through</strong>7<br />
Satin (50 Series) or Gloss (70 Series) Topcoat.<br />
2. Galvanized Metal<br />
a) Paint Grade Galvanized or Weathered Unpainted Galvanized<br />
(1) No primer necessary.<br />
(2) For maximum durability, apply two finish coats of <strong>Break</strong><br />
<strong>Through</strong>7 Satin (50 Series) or Gloss (70 Series) Topcoat.<br />
b) New Unpainted Galvanized<br />
(1) For maximum adhesion and durability, prime with two coats of<br />
<strong>Break</strong>-<strong>Through</strong>7 MetaLast Primer 91-62.<br />
(2) For maximum durability, apply two finish coats of <strong>Break</strong><br />
<strong>Through</strong>7 Satin (50 Series) or Gloss (70 Series) Topcoat.<br />
3. Aluminum<br />
Vanex, Inc. 1700 South Shawnee Street, Mt. Vernon, IL 62864 March 10, 2000<br />
<strong>Break</strong>-<strong>Through</strong>7 Specifications Page 09900-7 of 10
a) For maximum adhesion and durability, prime with two coats of <strong>Break</strong><br />
<strong>Through</strong>7 MetaLast Primer 91-62.<br />
b) For maximum durability, apply two finish coats of <strong>Break</strong>-<strong>Through</strong>7<br />
Satin (50 Series) or Gloss (70 Series) Topcoat.<br />
4. Glazed Ceramic Tile<br />
a) No primer necessary.<br />
b) For maximum durability, apply two finish coats of <strong>Break</strong>-<strong>Through</strong>7<br />
Satin (50 Series) or Gloss (70 Series) Topcoat.<br />
5. Unglazed Ceramic Tile<br />
a) No primer necessary.<br />
b) For maximum durability, apply two finish coats of <strong>Break</strong>-<strong>Through</strong>7<br />
Satin (50 Series) or Gloss (70 Series) Topcoat.<br />
6. Cementitious Surfaces of Concrete, Concrete, Block, and Cement Plaster<br />
a) No primer necessary.<br />
b) For better first coat penetration and flow, thin first coat of <strong>Break</strong><br />
<strong>Through</strong>7 5-10% with distilled or deionized water.<br />
c) Apply a finish coat of <strong>Break</strong>-<strong>Through</strong>7 Satin (50 Series) or Gloss (70<br />
Series) Topcoat.<br />
7. High Pressure Laminate and Formica7<br />
a) No primer necessary.<br />
b) For maximum durability, apply two finish coats of <strong>Break</strong>-<strong>Through</strong>7<br />
Satin (50 Series) or Gloss (70 Series) Topcoat.<br />
8. Plexiglas7<br />
a) No primer necessary.<br />
b) For maximum durability, apply two finish coats of <strong>Break</strong>-<strong>Through</strong>7<br />
Satin (50 Series) or Gloss (70 Series) Topcoat.<br />
9. Fiberglas7<br />
a) No primer necessary.<br />
b) For maximum durability, apply two finish coats of <strong>Break</strong>-<strong>Through</strong>7<br />
Satin (50 Series) or Gloss (70 Series) Topcoat.<br />
10. Sintra7<br />
a) No primer necessary.<br />
b) For maximum durability, apply two finish coats of <strong>Break</strong>-<strong>Through</strong>7<br />
Satin (50 Series) or Gloss (70 Series) Topcoat.<br />
11. Plastic<br />
a) No primer necessary.<br />
b) For maximum durability, apply two finish coats of <strong>Break</strong>-<strong>Through</strong>7<br />
Satin (50 Series) or Gloss (70 Series) Topcoat.<br />
12. Naugahyde7 & Vinyl<br />
a) No primer necessary.<br />
b) For maximum durability, apply two finish coats of <strong>Break</strong>-<strong>Through</strong>7<br />
Satin (50 Series) or Gloss (70 Series) Topcoat.<br />
13. Vinyl Flooring<br />
a) No primer necessary.<br />
b) For maximum durability, apply two finish coats of <strong>Break</strong>-<strong>Through</strong>7<br />
Satin (50 Series) or Gloss (70 Series) Topcoat.<br />
14. Vinyl Wallcovering<br />
Vanex, Inc. 1700 South Shawnee Street, Mt. Vernon, IL 62864 March 10, 2000<br />
<strong>Break</strong>-<strong>Through</strong>7 Specifications Page 09900-8 of 10
a) No primer necessary.<br />
b) For maximum durability, apply two finish coats of <strong>Break</strong>-<strong>Through</strong>7<br />
Satin (50 Series) or Gloss (70 Series) Topcoat.<br />
15. Wood<br />
a) Exterior Wood - Pigmented<br />
(1) Prime with two coats of <strong>Break</strong>-<strong>Through</strong>7 New Wood Primer<br />
91-11.<br />
(2) Apply two finish coats of <strong>Break</strong>-<strong>Through</strong>7 Satin (50 Series) or<br />
Gloss (70 Series) Topcoat.<br />
(3) Protect horizontal surfaces from rain for three days.<br />
b) Interior Wood Composites, such as MDF and particle board, or other<br />
interior wood surfaces requiring a completely smooth finish<br />
(1) Apply one coat of <strong>Break</strong>-<strong>Through</strong>7 Interior Sanding Primer<br />
79-1 to all porous cut edges.<br />
(2) Apply a liberal coat of <strong>Break</strong>-<strong>Through</strong>7 Interior Sanding<br />
Primer 79-1 to all surfaces, including porous cut edges.<br />
(3) Allow to dry for two hours.<br />
(4) Sand smooth.<br />
(5) Acceptable smoothness and appearance can often be achieved<br />
with one edge coat and one full coat as outlined above.<br />
However, multiple coats of <strong>Break</strong>-<strong>Through</strong>7 Interior Sanding<br />
Primer 79-1 may be applied to achieve desired film build and<br />
smoothness. Sand between each coat.<br />
(6) Sand final coat of <strong>Break</strong>-<strong>Through</strong>7 Interior Sanding Primer<br />
79-1 with 400 grit or finer.<br />
(7) For maximum durability, apply two finish coats of <strong>Break</strong><br />
<strong>Through</strong>7 Satin (50 Series) or Gloss (70 Series) Topcoat.<br />
c) Interior Wood Requiring Chemical Resistance<br />
(1) <strong>Break</strong>-<strong>Through</strong>7 Clears have a slight amber cast and are not<br />
recommended for use over whites or light pastel colors.<br />
(2) Build desired depth with Clear Advantage7 Sanding Sealer<br />
51-0, sanding between coats. Apply two to three coats of<br />
Sanding Sealer.<br />
(3) Apply final finish coats of <strong>Break</strong>-<strong>Through</strong>7 Satin (50 Series) or<br />
Gloss (70 Series) Topcoat .<br />
d) Interior Wood Requiring Best Clarity, Mar, and Scuff Resistance<br />
(1) Clear Advantage7 Clear has no amber cast and is<br />
recommended for use over white or light pastel colors.<br />
(2) Build desired depth with Clear Advantage7 Sanding Sealer<br />
51-0, sanding between coats. Apply two to three coats of<br />
Sanding Sealer.<br />
(3) Apply final finish coats using Clear Advantage7 Satin 55-0 or<br />
Gloss 75-0.<br />
V. Technical Data<br />
A. Chemically resistant to a variety of chemicals including Formula 4097, gasoline,<br />
xylene, alcohol, mineral spirits, Clorox Bleach7.<br />
Vanex, Inc. 1700 South Shawnee Street, Mt. Vernon, IL 62864 March 10, 2000<br />
<strong>Break</strong>-<strong>Through</strong>7 Specifications Page 09900-9 of 10
B. Pencil Hardness (depending on the thickness of the film and cure time)<br />
1. Air Dry: HB-H<br />
2. Bake: 2H<br />
C. Gloss<br />
1. 50 Series (Satin) - 20-25 on 60E Gloss Meter<br />
2. 70 Series (Gloss) - 70+ on 60E Gloss Meter; Clears and most deep colors<br />
achieve 80+<br />
D. Exterior Weathering - 700 hours with only 50% loss of gloss.<br />
E. Flexible - withstands 160 in/lbs impact and 1/8" mandrel bend.<br />
F. USDA approved for intermittent food contact.<br />
G. Class A Flame Spread Rating - will not contribute to the burning of wood.<br />
H. Service Temperature (slight color change may occur at higher temperatures<br />
depending<br />
upon the color used)<br />
1. Intermittent: - 50E to 300EF<br />
2. Continuous: -50E to 180EF<br />
I. Recommended Dry Film Thickness - 1.0-2.0 mils<br />
J. Tinting - Use no more than 8 ounces of glycol containing universal colorants when<br />
tinting <strong>Break</strong>-<strong>Through</strong>7. Tinting in excess of 8 ounces will soften the final film.<br />
K. <strong>Break</strong>-<strong>Through</strong>7 is not recommended for the following applications:<br />
1. Bathtubs, sinks, shower basins, pools, or other continuous water immersion<br />
environments.<br />
2. Garage floors.<br />
3. Roofs.<br />
4. New or old unpainted exterior wood without <strong>Break</strong>-<strong>Through</strong>7 New Wood<br />
Primer, 91-11.<br />
5. Exterior wood surfaces requiring a clear coating.<br />
6. Very flexible substrates subject to abuse such as canvas, nylon rope, rubbers<br />
and elastomers.<br />
Vanex, Inc. 1700 South Shawnee Street, Mt. Vernon, IL 62864 March 10, 2000<br />
<strong>Break</strong>-<strong>Through</strong>7 Specifications Page 09900-10 of 10