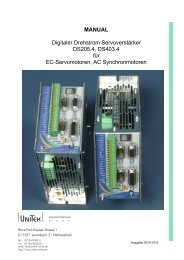
MANUAL Digital Servo Controller DS-205.3, DS403.4 - UNITEK ...
MANUAL Digital Servo Controller DS-205.3, DS403.4 - UNITEK ...
MANUAL Digital Servo Controller DS-205.3, DS403.4 - UNITEK ...
You also want an ePaper? Increase the reach of your titles
YUMPU automatically turns print PDFs into web optimized ePapers that Google loves.
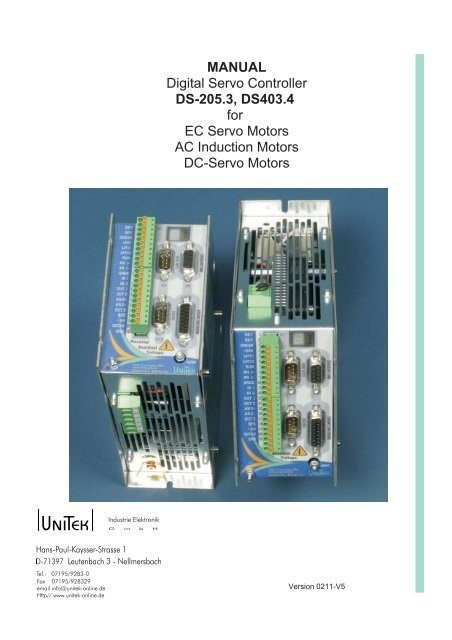
<strong>MANUAL</strong><br />
<strong>Digital</strong> <strong>Servo</strong> <strong>Controller</strong><br />
<strong>DS</strong>-<strong>205.3</strong>, <strong>DS</strong>403.4<br />
for<br />
EC <strong>Servo</strong> Motors<br />
AC Induction Motors<br />
DC-<strong>Servo</strong> Motors<br />
Industrie Elektronik<br />
Tel.: 07195/9283-0<br />
Fax 07195/928329<br />
email info@unitek-online.de<br />
Http// www.unitek-online.de<br />
Version 0211-V5
<strong>DS</strong> <strong>205.3</strong> ; <strong>DS</strong>403.4<br />
Contents<br />
Contents<br />
Part 1 Hardware-Manual<br />
Contents<br />
Page<br />
1 Basis-Information<br />
Safety instractions 3,4<br />
General 5<br />
Application 6<br />
Contruction 74<br />
Technical data 8,9,10<br />
2 Mechanical Installation<br />
Important instructions 11<br />
Dimension <strong>DS</strong> 400 12<br />
Dimension Frontpanel 13<br />
Dimension Accessories 14<br />
Assembly 15<br />
3 Electrical Installation<br />
Important instructions 16<br />
Block diagram 17,18<br />
Connection diagram 19,20<br />
EMC 21<br />
Connectors 22<br />
Mains connecting 23 -- 26<br />
Power supply 26<br />
Motor connection 27<br />
Regen resistor 28<br />
Control signals 29 -- 32<br />
RS232 33<br />
CAN-BUS 34<br />
Resolver 35<br />
Encoder 36<br />
SIN-COS 37<br />
BL 38<br />
X8 Encoder OUT-IN 39,40<br />
LED-Display 41<br />
Error list 42<br />
Warning list 43<br />
Options 44<br />
4 Guarantee 45<br />
Part2 Software -Manual NDrive<br />
Part3 Commissioning- Manual<br />
Part4 CAN-BUS Reference<br />
Document created with<br />
and<br />
COREL VENTURA 8 TM<br />
Adobe Acrobat 5.0 TM<br />
1
Basic - Information<br />
Blank page<br />
2
<strong>DS</strong> <strong>205.3</strong> ; <strong>DS</strong>403.4<br />
Safety instractions<br />
Electronic devices are never fail-safe.<br />
Caution: High voltage DC 900V=.<br />
Electric shock hazard!<br />
Danger to personnel!<br />
DC-BUS discharge - time >4min<br />
This manual must be carefully read and understood by the professional prior to installation<br />
or start-up.<br />
Consult the manufacturer or the dealer if anything is unclear.<br />
Faulty installation can lead to destruction of the devices.<br />
The <strong>DS</strong> xx series devices are electrical resources (EB) for power electronics regulating<br />
electric currents.<br />
They are designed to control EC synchronous motors (brushless dc motors, BLDC) in<br />
industrial applications.<br />
IP20 protection standard for cabinet-mounting.<br />
Only connect to earthed mains or an earthed three-phase network.<br />
Regulations and guidelines:<br />
Mount and connect the devices and their appropriate components in compliance with<br />
technical regulations locally applicable and required by law:<br />
- EG-guidelines 2004/108/EG, 2006/95/EG, 2006/42/EG<br />
- EN60204-1, EN292, EN 50178, EN60439-1, EN61800-3, ECE-R100<br />
ISO 6469, ISO 26262, ISO 16750, ISO 20653, ISO 12100<br />
- IEC/UL IEC 61508, IEC364, IEC 664, UL508C, UL840<br />
- VDE-regulations VDE 100, VDE 110, VDE 160 und<br />
- TÜV-regulations<br />
- Trade association regulations, VGB4<br />
Do not operate unless the control cabinet is closed or secured.<br />
Control and power connections can be live even though the drive<br />
is inoperative.<br />
The DC-BUS discharge time is more than 4 minutes.<br />
Measure the voltage prior to dismounting!<br />
3
Basic - Information<br />
The user must ensure:<br />
- that when the unit fails<br />
- when an operator error occurs,<br />
- when the controlling and control units fail, etc..<br />
the drive homes to a safe operating state.<br />
Apart from that machines and installations must be provided<br />
with monitoring and safety systems independent from the unit.<br />
Danger to man and property must be impossible to incur!<br />
Assembly work<br />
- only if all power is cut<br />
- only by qualified professionals<br />
Safety instractions<br />
Installation work<br />
- only if all power is cut<br />
- only by qualified electrical professionals<br />
- Comply with safety regulations<br />
Setting and programming work<br />
- only by qualified professionally specialised in electronic drives and software<br />
- observe programming notes<br />
- Comply with safety regulations<br />
CE:<br />
When it is mounted in machines and installations the proper operation of the unit is not<br />
permitted until the machine or installation has been approved according to the regulations<br />
of the EC machine directive 2006/42/EG, and the EMC directive 2004/108/EG .<br />
Die EC directive 2004/108/EG plus the EMC standards EN61000-2 and EN61000-4<br />
are complied with in the EMC Notes chapter specified installation and test conditions.<br />
A manufacturer’s certificate is available.<br />
The manufacturer of the machine or the installation is responsible for the observance of the<br />
threshold values prescribed in the EMC regulations..<br />
QS:<br />
Based on their serial number and test data the units are archived by the manufacturer for 5<br />
years.<br />
The test certificates are available on request.<br />
Safety symbols<br />
Attention danger<br />
High voltage<br />
Attention<br />
Warning<br />
Important<br />
4
<strong>DS</strong> <strong>205.3</strong> ; <strong>DS</strong>403.4<br />
General<br />
A feature of the digital three-phase servo amplifier <strong>DS</strong> xxx and the brushless d.c. motor<br />
(synchro servomotor, EC motor) drive unit is that it is maintenance-free and has high<br />
control dynamics.<br />
The drive exhibits the known good control characteristics of d.c. drives without the<br />
disadvantages of carbon brush service times and the commutation limit.<br />
The moment of inertia of the rotor is considerably smaller and the maximum power is higher<br />
than for d.c. motors of an identical construction. This results in acceleration values that are<br />
higher up to a factor of 5.<br />
Compared to asynchronous motors with frequency converters the stability, the control<br />
range and the efficiency of the drive are considerably improved.<br />
Since the temperature increase of the motor is only in the stator, the EC motors are always<br />
designed to protection degree IP 65.<br />
The brushless d.c. motor is electrically designed as a synchronous motor with a permanent<br />
magnet rotor and a three-phase stator.<br />
The physical properties correspond to those of the d.c. Motor, i.e. the current is proportional<br />
to the torque and the voltage is proportional to the speed. The speed is controlled stably up<br />
to the maximum current (max. torque). When an overload occurs the speed drops and the<br />
current remains constant.<br />
Rectangular speed/torque characteristic.<br />
The current, the speed and the position are measured exactly. The rotary field frequency is<br />
not a controlled variable, it sets itself automatically.<br />
The motor voltages and currents are sinusoidal. Maximum motor efficiency by<br />
compensating current control.<br />
<strong>DS</strong> 400 can be used as a torque amplifier, a speed amplifier or a single axis position<br />
amplifier.<br />
The position and speed actual values are generated from the sensor unit (resolver or<br />
incremental encoder). The encoder pulses are emitted from the amplifier for a superposed<br />
SPC/CNC control.<br />
The current, speed and position control loops are easily programmable digital PID<br />
controllers. Programming is at a PC or a programming box.<br />
Communication with superposed controls through BUS systems (standard CAN-BUS,<br />
RS232) or through an analog interface.<br />
Caution:<br />
For DC-BUS fed DC, AC or bl servo amplifiers in the braking mode it is necessary to take<br />
into account the power reverse feed in the DC-BUS. (lifting drives, unwinders, great<br />
flywheel masses)<br />
External regenerative circuit discharge resistor.<br />
Information:<br />
Other products<br />
Classic Thyristor-Drive 200W up to 800kW<br />
BAMO, BAMOBIL, BAMOCAR Battery-Motor-<strong>Controller</strong> up to 100kW<br />
5
Basic - Information<br />
Application in:<br />
All types of machines and installations up to a drive power of 1kW.<br />
Especially as<br />
4Q- servo drives in feed axes, for highly dynamic acceleration and braking applications,<br />
for large control ranges,<br />
for high efficiency,<br />
for small motor dimensions,<br />
for an even and smooth travel.<br />
For speed and torque regulation or combined speed and torque regulation with or without a<br />
superimposed position controller.<br />
Constant drives for hoisting equipment, spindle drives, pumps, transverse and longitudinal<br />
slitting drives, multi-motor parallel drives. Synchro –servo drives are compacter than other<br />
electrical drives.<br />
Application<br />
For use in:<br />
Insertion machines, testing machines, sheet-metal working machines, machine tools,<br />
machines for the plastics industry, automatic assembly machines, knitting and sewing<br />
machines, textile machines, grinding machines,<br />
wood and stone working machines, metal working machines, XY tables, machines for the<br />
food industry, robot and handling systems, rack feeders, extruders, calenders and<br />
also in many other machines and installations<br />
The motors are:<br />
designed for protection standard IP 65,<br />
compact, for harsh environments,<br />
for a high dynamic overload, maintenance-free<br />
Note:<br />
Braking operation for EC - drives<br />
For example.: Un-reeling machines, hoists, flyweights. The braking energy is dissipated in<br />
the regenerative circuit or fed back to the mains via an external inverter.<br />
Caution: The internal regenerative resistors have only a small continuous rating.<br />
Calculate the retarding power and use external regenerative circuit discharge resistors if<br />
necessary or for design safety. Calculation of regenerative power. See page 24.<br />
6
<strong>DS</strong> <strong>205.3</strong> ; <strong>DS</strong>403.4<br />
Feature<br />
Construction, characteristics:<br />
Cabinet-mounted device in an all-steel housing.<br />
In compliance with VDE/DIN and EU guidelines. (IP20, VGB4).<br />
Standard fully-digital regulation electronics.<br />
Power electronics from 5A ;3A (S1 - operation).<br />
Power input voltage 30V~ to 480V~.<br />
Independent 24V - chopper power supply unit for auxiliary voltages.<br />
DC decoupling between:<br />
the housing to all electrical parts<br />
auxiliary voltage connection to power unit and control electronics,<br />
power unit and control electronics<br />
Control electronics and logic inputs.<br />
The clearance in air and leakage distances comply with VDE.<br />
Used are:<br />
Generously dimensioned, fully insulated FET or IGBT - power semiconductors.<br />
Only commercially available, industrial standard components,<br />
SMD - placed,<br />
LED displays<br />
Characteristics:<br />
* Direct 30V~ to 480V~ mains connection<br />
* Independent 24V= auxiliary voltage connection.<br />
* <strong>Digital</strong> RS232, CAN-BUS (additional option) interfaces.<br />
* Analog inputs, programmable differential inputs,<br />
* <strong>Digital</strong> programmable inputs/outputs. Opto-decoupled,<br />
* Enable and limit switch logic,<br />
* Ready for operation signal BTB, relay contact.<br />
* Position, speed and torque regulation,<br />
* Incremental resolver or encoder (optionally a sinus transmitter),<br />
* Encoder output,<br />
* Static and dynamic current limit.<br />
* Standard, fully digital control unit,<br />
* Intrinsically safe, short-circuit proof power unit,<br />
* DC-BUS choke (EMC choke),<br />
* Integrated regenerative discharge circuit,<br />
* DC power bus.<br />
* Processor-independent safety switch-off when either the amplifier or the motor have<br />
* over voltage, under voltage, a short circuit, a line-to-earth fault or excess<br />
temperature.<br />
7
Basic - Information<br />
Power supply voltage <strong>DS</strong>205 1x oder 3x 30V~ bis 1x230V~ +10% 50/60 Hz<br />
Power supply voltage <strong>DS</strong>403 1x oder 3x 30V~ bis 1x480V~ +10% 50/60 Hz<br />
Auxiliary supply 24V= 10% / 2A Ripple voltage 4.7 Opto X8<br />
CAN-interface Opto X9<br />
RS232-interface 9600 Baud X10<br />
Opto<br />
X1<br />
8
<strong>DS</strong> <strong>205.3</strong> ; <strong>DS</strong>403.4<br />
Technical Data<br />
Ambient conditions<br />
Enclosure protection<br />
IP20, VGB4<br />
Norms<br />
EN60204,<br />
Ambient temperature<br />
0 bis +45 o C<br />
Maximum ambient temperature +45 o Cto+60 o C with power derating 2%/ o C<br />
Storage temperature<br />
-30 o Cto+80 o C<br />
Humidity in operation Klasse F rel. humidity 1000m with power derating 2%/100m<br />
Ventilation<br />
Built-in fan<br />
Mounting position Vertical, Horizontal with power derating 20%<br />
Program Type Software-Version Extension<br />
Firmware > FW-V350 x<br />
x<br />
x<br />
x<br />
9
Basic - Information<br />
10
<strong>DS</strong> <strong>205.3</strong> ; <strong>DS</strong>403.4<br />
Mechanische Installation<br />
Important notes:<br />
Mounting surface blank metal, not varnished (surface EMC contact)<br />
Check device for mechanical damage. Mount only perfect devices.<br />
Cut all power prior to assembly.<br />
Insert shortening plug and attach warning signs at installations<br />
already electrically connected.<br />
Assembly permitted only by competent professionals.<br />
Vertical mounting position.<br />
Note power reduction if mounted horizontally.<br />
Ensure adäquatem ventilation clearance. (at least 100mm).<br />
Use dimension diagram or drill template to trace fastening holes of<br />
device.<br />
Do not mark off from device.<br />
Drill mounting holes (M4) in mounting base.<br />
Screw in screws up to 4mm.<br />
Insert device and tighten screws.<br />
Mount filter and choke near to device.<br />
Surface-contact line shields to mounting surface.<br />
Keep unshielded cable ends as short as possible.<br />
Brake resistors can become very hot. (200°C).<br />
Mount resistors so that neither injuries (burns) nor damage caused by their heat can occur.<br />
Use vibration-proof bolted joints.<br />
Ensure adequate control cabinet ventilation. Use air conditioners for excessive room<br />
temperatures (>30°C).<br />
Caution: Operation with devices covered in dew is not permissible!<br />
11
Mechanical Installation<br />
Dimensions<br />
Size 1<br />
<strong>DS</strong>-<strong>205.3</strong> to <strong>DS</strong>-403.4<br />
Depth without connectors 190mm<br />
with connectors max. 250mm<br />
Screw for hex key M4x12 DIN 912<br />
12
<strong>DS</strong> <strong>205.3</strong> ; <strong>DS</strong>403.4<br />
Dimensions<br />
Dimensions accessories<br />
EMC-Filter<br />
Type Spannung Strom Masse Gew.<br />
V~ A~ HxBxTmm kg<br />
F250V-B90-16 1x250 1x16 45x90x40 0,4<br />
F400V-B51 1x400 1x5 35x51x40 0,3<br />
Filter for stricter EMC - requirements.<br />
DC-BUS filters and input capacitors are incorporated<br />
in the device.<br />
Mount filter close to device.<br />
Motor choke<br />
Type Strom Indukt. Masse Ge<br />
w.<br />
A mH HxBxTmm kg<br />
MDD 1.6a-5 5 1.9 95x54x108 1.3<br />
MDD 1.6b-10 10 1 95x58x108 1.4<br />
Motor choke cable core to screen capacitiance >5nF.<br />
Cable length 25m approx.<br />
13
Mechanical Installation<br />
Assembly<br />
For good EMC values we recommend blank metal, unvarnished mounting bases. Good<br />
surface contact is achieved by the blank metal rear wall of the device. Lay signal lines and<br />
power cables in separate cable channels, cross them at right angles.<br />
(Spacial separation of interference coupling).<br />
Assembty notice:<br />
Recommended DIN 912 M4x12 fixing bolt with<br />
lock washer.<br />
Place M4 tap holes at a vertical distance of<br />
312mm.<br />
Drilling template in appendix.<br />
Fix M4x12 screws.<br />
Distance to rear wall of control cabinet approx.<br />
4mm.<br />
Position device with the top edge (1).<br />
Slide it upwards to stop (2).<br />
Press its bottom up to rear wall of control<br />
cabinet (3)<br />
and lower it (4).<br />
Tighten screws.<br />
14
<strong>DS</strong> <strong>205.3</strong> ; <strong>DS</strong>403.4<br />
15
Electrical Installation<br />
Important notes<br />
With reference to allocation of connections to the plug and terminal numbers the connection<br />
notes are binding.!<br />
All other notes on this subject are not binding.<br />
The input and output lines can be changed and supplemented<br />
to comply with electrical regulations and guidelines.<br />
The regulations to be observed are:<br />
Connection and operation notes, local regulations,<br />
EU regulations such as the 2006/42/EG machine directive,<br />
VDE, TÜV and trade association regulations<br />
Electrical Installation<br />
Cut all power prior to the electrical installation.<br />
Make sure enabling is safe.<br />
Insert shortening plugs,<br />
attach warning signs<br />
Installation is permissible only by electro technically competent<br />
professionals.<br />
Compare connected loads with information on rating plate.<br />
Ensure adequate fuse protection for the feed, the auxiliary voltage and the external<br />
regenerative resistors.<br />
Lay power cables and control lines spacially separated. Perform shield connections and<br />
earthing work in compliance with EMC guidelines. Use the right lead cross sections.<br />
Caution: Operation without a“PE-connection “ is forbidden!<br />
Rating plate (example),<br />
726 Drehstrom-<strong>Servo</strong>verstärker<br />
<strong>DS</strong> 412-RS<br />
Leistungsanschluss 3(1) x 30V~ bis 480V~<br />
Nennstrom 12A eff IP20<br />
Hilfsspannung 24V=<br />
Tel +49 (0)7195/9283-0<br />
Fax+49(0)7195/928329<br />
Info@unitek-online.de<br />
www.unitek-online.de<br />
serial number<br />
044444<br />
16
17<br />
<strong>DS</strong> <strong>205.3</strong> ; <strong>DS</strong>403.4<br />
Block diagram<br />
A D<br />
REFERENZ<br />
RESOLVER<br />
INPUT<br />
RESOLVER<br />
&<br />
CAN<br />
CAN-V+<br />
CAN-GND<br />
CANH<br />
CANL<br />
HPRES<br />
FAULT<br />
Ballast<br />
Uesp<br />
IIST2A<br />
IIST1A<br />
PWM 6x<br />
RFE<br />
GND<br />
VCC<br />
-15<br />
+15<br />
GND24<br />
+24<br />
4x<br />
3x<br />
FRG<br />
RUN/FRG<br />
LMT1/END1<br />
LMT2/END2<br />
DIN1<br />
DIN2<br />
GNDE<br />
DOUT1<br />
DOUT2<br />
+24<br />
AIN1+<br />
AIN1-<br />
AIN2+<br />
AIN2-<br />
OUT-AN<br />
RFE<br />
2x<br />
RS232<br />
CAN<br />
Feedback<br />
INC-OUT<br />
X1<br />
4<br />
3<br />
7<br />
5<br />
6<br />
11<br />
12<br />
10<br />
13<br />
14<br />
8<br />
9<br />
15<br />
16<br />
20<br />
X10<br />
X9<br />
X7<br />
X8 TMS 1-3<br />
X4<br />
27/28<br />
29/30<br />
3/4<br />
7/8<br />
5/6<br />
9/10<br />
11<br />
12<br />
17<br />
16<br />
19<br />
20<br />
21<br />
22<br />
23<br />
24<br />
25<br />
26<br />
9pol<br />
9pol-D<br />
-D<br />
15pol-D<br />
9pol-D<br />
GND24<br />
+24<br />
AGND<br />
DOUT3<br />
+24<br />
BTB/RDY<br />
19<br />
17<br />
21<br />
1<br />
2<br />
18
Electrical Installation<br />
X1<br />
+24<br />
GND24<br />
+15<br />
-15<br />
VCC<br />
GND<br />
+15E<br />
+5E<br />
GNDE<br />
Block diagram<br />
IIST1A<br />
IIST2A<br />
Regenresistor<br />
BALintern<br />
X4<br />
1<br />
+UB 2<br />
3<br />
Bex<br />
PWM-B<br />
UBMA<br />
L3<br />
(N) L2<br />
X3<br />
6<br />
5<br />
Ballast<br />
L1<br />
4<br />
FAULT<br />
EKURZ<br />
HPRES<br />
TEMP<br />
PE<br />
8<br />
PWM 6x<br />
6x<br />
3x PWM-High<br />
3x PWM-Low<br />
KURZ<br />
M1<br />
M2<br />
M3<br />
3<br />
2<br />
1<br />
X3<br />
digi 205-403<br />
18
<strong>DS</strong> <strong>205.3</strong> ; <strong>DS</strong>403.4<br />
Connection diagram<br />
L1<br />
N<br />
PE<br />
+24V<br />
GND24<br />
Safety<br />
circuit<br />
Control<br />
Logic<br />
input<br />
Drive enable<br />
Analog<br />
setpoint 1<br />
Logic GND<br />
Logic<br />
input<br />
<strong>Digital</strong><br />
output<br />
Analog<br />
setpoint 2<br />
<strong>Digital</strong><br />
output 3<br />
Rotation<br />
enable<br />
+24V<br />
Analog<br />
output<br />
System<br />
GND<br />
Limit<br />
switch<br />
1<br />
2<br />
3<br />
4<br />
5<br />
6<br />
7<br />
8<br />
9<br />
10<br />
11<br />
12<br />
13<br />
14<br />
15<br />
16<br />
Mains voltage maximum 3x230V+10%<br />
X1-1<br />
BTB<br />
GND24<br />
+24<br />
END1<br />
END2<br />
FRG<br />
AIN1+<br />
AIN1-<br />
GNDE<br />
X1-2<br />
DIN1<br />
DIN2<br />
DOUT1<br />
DOUT2<br />
AIN2+<br />
AIN2-<br />
17 DOUT3<br />
18 RFE<br />
19 +24<br />
20 AOUT<br />
21 GND<br />
Auxiliary voltage<br />
Ready<br />
Auxiliary<br />
voltage<br />
Limit<br />
switch<br />
Enable<br />
Analog<br />
input 1<br />
GND System-<br />
GND<br />
31<br />
26 28<br />
31<br />
31<br />
32<br />
<strong>Digital</strong>-GND 31<br />
26<br />
<strong>Digital</strong><br />
input 31<br />
<strong>Digital</strong><br />
output<br />
Analog<br />
input 2<br />
<strong>Digital</strong><br />
output<br />
RFE<br />
input<br />
Analog<br />
output 3<br />
31<br />
32<br />
32<br />
32<br />
24V=<br />
Detail<br />
Page<br />
27<br />
28<br />
37..<br />
40<br />
PE8<br />
M3 1<br />
M2 2<br />
M1 3<br />
X3<br />
L1<br />
L2<br />
L3<br />
4<br />
5<br />
6<br />
X4<br />
1<br />
+UB2<br />
BAL3<br />
X7<br />
Feedback<br />
bridge for int. regen<br />
resistor<br />
Feedback<br />
ext. regen<br />
resistor<br />
EC<br />
MOTOR<br />
3<br />
RS IN<br />
Fx<br />
K1<br />
Line<br />
protection<br />
Master<br />
connector<br />
Mains<br />
filter<br />
Counter<br />
input<br />
X8<br />
INC-OUT<br />
Encoder output<br />
Encoder input<br />
41<br />
Connector with shielded cable<br />
CAN-<br />
MASTER<br />
X9<br />
CAN-BUS<br />
36<br />
Protective earth PE connection<br />
X10 RS232 35<br />
PC COMx<br />
<strong>DS</strong> 205.x<br />
EMC earth connections<br />
19
Electrical Installation<br />
L1<br />
L2<br />
L3<br />
PE<br />
+24V<br />
GND24<br />
Safety<br />
circuit<br />
Control<br />
Logic<br />
input<br />
Drive enable<br />
Analog<br />
setpoint 1<br />
Logic GND<br />
Logic<br />
input<br />
<strong>Digital</strong><br />
output<br />
Analog<br />
setpoint 2<br />
<strong>Digital</strong><br />
output 3<br />
Rotation<br />
enable<br />
+24V<br />
Analog<br />
output<br />
System<br />
GND<br />
Limit<br />
switch<br />
1<br />
2<br />
3<br />
4<br />
5<br />
6<br />
7<br />
8<br />
9<br />
10<br />
11<br />
12<br />
13<br />
14<br />
15<br />
16<br />
Mains voltage maximum 3x480V+10%<br />
X1-1<br />
BTB<br />
GND24<br />
+24<br />
END1<br />
END2<br />
FRG<br />
AIN1+<br />
AIN1-<br />
GNDE<br />
X1-2<br />
DIN1<br />
DIN2<br />
DOUT1<br />
DOUT2<br />
AIN2+<br />
AIN2-<br />
17 DOUT3<br />
18 RFE<br />
19 +24<br />
20 AOUT<br />
21 GND<br />
Auxiliary voltage<br />
Ready<br />
Auxiliary<br />
voltage<br />
Limit<br />
switch<br />
Enable<br />
Analog<br />
input 1<br />
GND System-<br />
GND<br />
31<br />
26 28<br />
31<br />
31<br />
32<br />
<strong>Digital</strong>-GND 31<br />
26<br />
<strong>Digital</strong><br />
input 31<br />
<strong>Digital</strong><br />
output<br />
Analog<br />
input 2<br />
<strong>Digital</strong><br />
output<br />
RFE<br />
input<br />
Analog<br />
output 3<br />
31<br />
32<br />
32<br />
32<br />
24V=<br />
Detail<br />
Page<br />
27<br />
28<br />
37..<br />
40<br />
PE8<br />
M3 1<br />
M2 2<br />
M1 3<br />
X3<br />
L1<br />
L2<br />
L3<br />
4<br />
5<br />
6<br />
X4<br />
1<br />
+UB2<br />
BAL3<br />
X7<br />
Feedback<br />
bridge for int. regen<br />
resistor<br />
Feedback<br />
ext. regen<br />
resistor<br />
EC<br />
MOTOR<br />
3<br />
RS IN<br />
Fx<br />
K1<br />
Line<br />
protection<br />
Master<br />
connector<br />
Mains<br />
filter<br />
Connection diagram<br />
Counter<br />
input<br />
X8<br />
INC-OUT<br />
Encoder output<br />
Encoder input<br />
41<br />
Connector with shielded cable<br />
CAN-<br />
MASTER<br />
X9<br />
CAN-BUS<br />
36<br />
Protective earth PE connection<br />
X10 RS232 35<br />
PC COMx<br />
<strong>DS</strong> 403.x<br />
EMC earth connections<br />
20
:<br />
<strong>DS</strong> <strong>205.3</strong> ; <strong>DS</strong>403.4<br />
EMC<br />
CNC/SPS<br />
L1 L2 L3<br />
PE<br />
EARTH BUS<br />
ELECTRONIC<br />
Input filter<br />
only with<br />
increased demands<br />
min 4ø<br />
double grounding<br />
15 pin connector<br />
X9 X8 X1:7 X1:8 X1:9<br />
CAN- INC- FRG analog<br />
BUS OUT RUN setpoint<br />
Shield on the<br />
connector housing<br />
Shield on the<br />
connector housing<br />
X7 X3: 1 2 3 PE<br />
GND X3: 4 5 6<br />
double grounding<br />
Motor chokes<br />
9<br />
PE<br />
4<br />
5<br />
ext. regen<br />
resistor<br />
min 4ø<br />
R B<br />
:<br />
Mounting plate<br />
All earth connection to the mounting plate<br />
should be as short as possible<br />
min 4ø<br />
Maschine frame<br />
RLG<br />
bl<br />
M<br />
3bl<br />
Maschine frame<br />
Under the following installation and test conditions the devices comply with the EU<br />
2004/108/EG guideline in standards EN61800-3<br />
Assembly:<br />
The controller is conductively mounted on a 500x500x2 mm blank metal assembly base.<br />
For 10 mm the assembly base is connected with the PE. For 10 mm the motor housing is<br />
connected with the PE. Zero of device<br />
For 2,5mm X-AGND is connected with the assembly base. Device’s –PE - screw X3:6<br />
connected to assembly base with a 4mm line<br />
Control connections:<br />
Signal lines shielded, analog signal lines twisted and shielded<br />
Mains three-phase connection:<br />
3x 400V~ with protective earthed conductor<br />
Motor connection:<br />
Motor connection shielded, surface earth contact<br />
When mounted in machines and installations it is forbidden to start<br />
the proper use of the device until the machine or the installation has<br />
been approved to comply with the regulations of the 2006/42/EG<br />
machine directive and the 2004/108/EG guideline.<br />
For cars ECE-R83, ECE-R100<br />
manufacturer’s certificate is available.<br />
21
22<br />
Electrical Installation<br />
Connectors<br />
CTS<br />
RTS<br />
5 GND<br />
FM<br />
X10<br />
1<br />
2<br />
4<br />
3<br />
nc<br />
nc<br />
8<br />
9<br />
7<br />
6<br />
RS232<br />
TX<br />
DTR<br />
RX<br />
nc<br />
Rotorlage<br />
Rotorlage<br />
Rotorlage<br />
Versorgung +5V<br />
Temperatur<br />
Kanal<br />
Kanal<br />
3<br />
N<br />
Motor<br />
B<br />
9<br />
11<br />
10<br />
12<br />
2<br />
1<br />
14<br />
13<br />
15<br />
M<br />
Kanal<br />
Kanal<br />
Kanal<br />
Kanal<br />
Temperatur<br />
Versorgung GND<br />
nc<br />
5<br />
2<br />
1<br />
3<br />
4<br />
nc<br />
nc<br />
8<br />
6<br />
7<br />
Motor<br />
B<br />
A<br />
N A<br />
Encoder X7<br />
Resolver<br />
Motor<br />
Temperatur<br />
nc<br />
nc<br />
nc<br />
10<br />
9<br />
11<br />
REF1<br />
COS1<br />
SIN2<br />
13<br />
12<br />
14<br />
15<br />
REF2<br />
4<br />
M<br />
nc<br />
1<br />
2<br />
3 COS2<br />
SIN1<br />
Motor (GND)<br />
Temperatur<br />
nc<br />
nc<br />
nc<br />
7<br />
5<br />
6<br />
8<br />
X7<br />
Netzanschluss<br />
Motoranschluss<br />
M1<br />
M3<br />
M2<br />
Schutzerde<br />
L1<br />
PE<br />
CAN-V+<br />
CAN-H<br />
1<br />
3<br />
4<br />
FM<br />
5<br />
2<br />
nc<br />
9<br />
8<br />
nc 6<br />
7<br />
CAN-GND<br />
nc<br />
nc<br />
CAN-L<br />
nc<br />
CAN-BUSX9<br />
Encoder<br />
Ausgang<br />
Kanal<br />
Kanal<br />
Kanal N nc 6 7<br />
A<br />
B<br />
9<br />
8<br />
Kanal<br />
Kanal<br />
Kanal<br />
Versorgung GND<br />
Versorgung +5V<br />
3<br />
M<br />
1<br />
2<br />
4<br />
5<br />
B<br />
A<br />
N<br />
X8<br />
8<br />
X3<br />
L2<br />
1<br />
2<br />
3<br />
4<br />
5<br />
8<br />
L1<br />
N<br />
int.Ballastwiderstand<br />
ext.Ballastwiderstand<br />
X4<br />
12<br />
DIN2<br />
<strong>Digital</strong>er Ausgang<br />
Analogeingang<br />
AIN2-<br />
DOUT3<br />
RFE<br />
DOUT1<br />
AIN2+<br />
DOUT2<br />
2<br />
16<br />
18<br />
17<br />
14<br />
15<br />
13<br />
Betriebsbereit<br />
Reglerfreigabe<br />
Analogeingang<br />
Hilfsspannung<br />
<strong>Digital</strong>er Eingang<br />
Logik-Null<br />
Endschalter<br />
4<br />
+24<br />
END1/LMT1<br />
END2/LMT2<br />
AIN1+<br />
AIN1-<br />
DIN1<br />
GNDE<br />
1<br />
FRG/RUN<br />
8<br />
10<br />
11<br />
9<br />
6<br />
7<br />
5<br />
GND24<br />
BTB/RDY<br />
BTB/RDY<br />
2<br />
3<br />
1<br />
X1<br />
<strong>Digital</strong>er Ausgang<br />
Drehfeld Freigabe<br />
+24<br />
AOUT<br />
Analoger Ausgang<br />
GND<br />
Analog-Null<br />
6 L3
<strong>DS</strong> <strong>205.3</strong> ; <strong>DS</strong>403.4<br />
Mains connection<br />
Connection to earthed mains or three-phase network.<br />
<strong>DS</strong><strong>205.3</strong> 1x230V~<br />
Do not, even briefly, exceed maximum<br />
maximal<br />
L1<br />
N<br />
1x 230V +10%<br />
connected voltage of275V~.<br />
PE<br />
Destruction hazard!!<br />
Power-Modul<br />
Device<br />
fuses<br />
Power<br />
relais<br />
<strong>DS</strong> <strong>205.3</strong><br />
X3:4<br />
X3:5<br />
X3:6<br />
F1.x<br />
K1<br />
L1<br />
N<br />
Mains filter<br />
F1 = FF safety fuses or<br />
semiconductor cutouts<br />
Booster line filter for stricter EMC<br />
requirements.<br />
DC-BUS filters and input capacitors<br />
mounted.<br />
X3:8<br />
PE<br />
<strong>DS</strong>403.3 1x 400V~<br />
Power-Modul<br />
maximal<br />
1x 480V +10%<br />
L1<br />
L2<br />
PE<br />
Device<br />
fuses<br />
Power<br />
relais<br />
<strong>DS</strong> 403.x<br />
F1.x<br />
K1<br />
X3:4<br />
L1<br />
X3:5<br />
L2<br />
X3:6<br />
X3:8<br />
PE<br />
Mains filter<br />
Do not, even briefly, exceed<br />
maximum connected voltage of 528V~.<br />
Destruction hazard!!<br />
F1 = FF safety fuses or semiconductor<br />
cutouts<br />
Booster line filter for stricter EMC<br />
requirements.<br />
DC-BUS filters and input capacitors<br />
mounted.<br />
Leakage current> 60mA<br />
Type<br />
Mains supply 1phase+N 1x30V -10% to<br />
1x480V +10% 50/60Hz<br />
Connection cross -<br />
section<br />
mm AWG<br />
Fuse AF<br />
Drive<br />
contacto<br />
r size<br />
Mains filter<br />
Type<br />
<strong>205.3</strong> L1=X3:4, N=X3:5 1 18 10 F250V-B90-16<br />
<strong>205.3</strong> L1=X3:4, L2=X3:5,L30=X3:6 1 18 10<br />
403.3 L1=X3:4, L2=X3:5 1 18 10 F400V-B91<br />
403.3 L1=X3:4, L2=X3:5,L30=X3:6 1 18 10<br />
PE connection point: Earth-Bolt X3:8 Warning! Use without PE is forbidden!<br />
23
Electrical Installation<br />
Connection to the grounded AC-or three-phase system (TN-C-Mains).<br />
Unbalanced grounded and do not connect grounded systems only isolation transformer!<br />
Connection on the T-NC network<br />
Power-Modul<br />
maximal<br />
1x 480V +10%<br />
L1<br />
L2<br />
L3<br />
PE<br />
Device<br />
fuses<br />
Power<br />
relais<br />
<strong>DS</strong> 403.x<br />
X3:4<br />
X3:5<br />
X3:6<br />
X3:8<br />
F1.x<br />
K1<br />
L1<br />
L2<br />
L3<br />
PE<br />
Mains filter<br />
Do not, even briefly, exceed maximum<br />
connected voltage of 528V~.<br />
Destruction hazard!!<br />
F1 = FF safety fuses or semiconductor<br />
cutouts<br />
Additional power filter in increased EMC<br />
conditions.<br />
DC link filter and input capacitors are<br />
installed.<br />
Leakage current> 60mA<br />
Mains connection<br />
Connection on the T-NC network with autotransformer.<br />
Do not, even briefly, exceed maximum<br />
connected voltage of 528V~.<br />
Destruction hazard!!<br />
Transformer fuse slow<br />
F1 = FF safety fuses or semiconductor<br />
cutouts<br />
Additional surge protection<br />
to transformer switching<br />
Overvoltages<br />
Additional power filter in increased EMC<br />
conditions.<br />
DC link filter and input capacitors are<br />
installed.<br />
Leakage current> 60mA<br />
When supply voltage
<strong>DS</strong> <strong>205.3</strong> ; <strong>DS</strong>403.4<br />
Mains connection<br />
Attention: In case of supply networks without PE conductor.<br />
Connection only via isolation transformer<br />
Connection on the TT network<br />
TT network<br />
Asymmetric three-or four-wire<br />
three-phase system with a direct<br />
ground.<br />
PE device on earth<br />
Transformer<br />
Transformer<br />
Filter<br />
Filter<br />
Connection on the IT network<br />
IT network<br />
Asymmetric three-or four-wire<br />
three-phase system with no<br />
direct grounding.<br />
PE device on earth<br />
Transformer<br />
Transformer<br />
Filter<br />
Filter<br />
25
Electrical Installation<br />
Inrush<br />
The initial inrush current is internally limited by<br />
an NTC resistor 10 times the rated current<br />
(about 2ms). The response is maintained<br />
between off and on again when a waiting time<br />
of 120sek is maintained. The NTC resistance is<br />
in the cooling power of the equipment fan.<br />
For faster turn-off, the inrush current to<br />
increase to 30 times the value (1ms). The<br />
switching contacts of the power contactors<br />
must be designed for these values.<br />
Precharge<br />
By using the assembly precharge the charge<br />
current to 2 times rated current is limited. The<br />
contactor K1 is switched time-delay.<br />
Auxiliary voltage connection:<br />
Mains potential-free 24V= +/- 10% / 2A auxiliary direct current.<br />
The auxiliary voltage has a: galvanic connection to the logic voltage,<br />
galvanic safety dc decoupling to all internal supply voltages of the device,<br />
an internal self-healing fuse,<br />
an EMC filter,<br />
an external fuse only for line protection.<br />
L1<br />
L2<br />
L3<br />
PE<br />
line<br />
protection<br />
contactor<br />
F1.x<br />
K1<br />
precharge<br />
tv<br />
K1<br />
Auxiliary voltage Precharge<br />
Power supply 24V=<br />
+24V=/-10%<br />
GND24<br />
X1:4<br />
X1:3<br />
+24 DOUTx<br />
100n<br />
X4:27,28<br />
Connector X4<br />
intern<br />
X4:29,30<br />
<strong>DS</strong>xx/BAxx<br />
self-resseting<br />
fuse<br />
100n<br />
5u<br />
100u 100n<br />
+15L<br />
GNDL<br />
VCC<br />
+15<br />
-15<br />
GND<br />
Input voltage24V DC X1:4<br />
GND24 X1:3<br />
Ripple 10%<br />
Power up current 2A<br />
Nominal current 0.8A<br />
100n<br />
DC/DC-converter<br />
GND connection must be earted!<br />
Note: In addition to the internal supply current (0.8A) the sum of the output<br />
currents (DOUT) must be provided by the mains module 24V.<br />
Note: If the auxiliary voltage is inferior to 20V - even in case of short-time<br />
voltage drop-outs - the internal mains module is switched off. Any data of the RAM are<br />
deleted!<br />
The speed and the position command values are set to zero and any calibrated data are<br />
deleted.<br />
The LED signal for the state “OK” is dark.<br />
26
<strong>DS</strong> <strong>205.3</strong> ; <strong>DS</strong>403.4<br />
Motor connection<br />
Motor power connection<br />
Use only Unitek approved, electronically commutated synchronous motors (brushless DC<br />
motors, EC motors) with a resolver or an incremental encoder.<br />
See Appendix A (specific motor connection and parametrizing rules).<br />
Power-Modul<br />
<strong>DS</strong> 205-<strong>DS</strong>403<br />
X3:8<br />
I-Ist2A<br />
X3:1<br />
X3:2<br />
X3:3<br />
PE<br />
M3<br />
M2<br />
M1<br />
Motor-connector<br />
EC<br />
MOTOR<br />
3<br />
RS/IN<br />
a. oth.<br />
I-Ist1A<br />
Motorchoke<br />
X7<br />
Feedback<br />
Cable indication PE M1 M2 M3<br />
Connector X3:8 X3:3 X3:2 X3:1<br />
Correct wiring is essential !<br />
Type <strong>DS</strong> 205 403<br />
Cable dim. mm 2 1 1<br />
Cable dim. AWG 18 18<br />
Motor cables,<br />
3 wires + simply shielded<br />
protective earth conductor for<br />
600V~, 1000V=, shield capacity<br />
150pF/m. See table for minimum<br />
cross-section<br />
Motor choke.<br />
Only required upwards of a shield<br />
capacity of >5nF. approx. 25m<br />
motor cable.<br />
Shielded connection:<br />
Surface connection at entry to<br />
control cabinet. Surface or as<br />
short as possible connection at<br />
the motor end.<br />
Use multiple earthing for long motor leads. (e.g. an earth clamp on the machine body every<br />
5 m). Connection sequence, cable cross section, shield connection.<br />
27
Electrical Installation<br />
Regenerative circuit<br />
The energy generated during braking is refed to the<br />
DC-BUS. The Elkos DC-Buses are able to store only<br />
a small amount of energy. The excess energy has to<br />
be converted into heat in the regenerative resistor.<br />
The internal resistor is designed for drives without<br />
flyweights.<br />
Always use external regenerative resistors for<br />
flyweights or design uncertainties.<br />
F2- protection from earth fault.<br />
Electronic limit from overload and regenerative<br />
discharge short circuit.<br />
Regen circuit<br />
Type <strong>DS</strong> 205 403<br />
Internal regen resistor Ohm 51 80<br />
Continius power W 50 50<br />
Pulse power 1s kW 6 6<br />
External resistor min. Ohm 51 80<br />
Fuse F2 AF 10 10<br />
External regen resistor<br />
Dimensionierung<br />
Maximum breaking power calculation<br />
Jg x n x n<br />
P max [W] = -----------------------------<br />
91 x t B<br />
Jg = Total inetia at motor [kgm 2 ]<br />
n = maximum speed [min -1 ]<br />
n = difference in speed [min -1 ]<br />
t B = braking time [ s ]<br />
Power regen resistor<br />
Pmax<br />
P regen resistor [W] = -------------------<br />
K1xK2<br />
28
<strong>DS</strong> <strong>205.3</strong> ; <strong>DS</strong>403.4<br />
Control Connection<br />
<strong>Digital</strong> input<br />
<strong>Digital</strong><br />
Input<br />
10...30V=<br />
<strong>Digital</strong> input<br />
(IP65)<br />
X1:5 Limit switch 1 END1/LMT1 (X1:E)<br />
X1:6 Limit switch 2 END2/LMT2 (X1:F)<br />
X1:7 Enable<br />
FRG/RUN (X1:G)<br />
X1:11 <strong>Digital</strong> Input 1 DIN1<br />
(X1:L)<br />
X1:12 <strong>Digital</strong> Input 2 DIN2 VCC (X1:M)<br />
X1:18 Rotation-enable RFE<br />
(X1:T)<br />
3k9<br />
100nF<br />
100nF<br />
1k5<br />
<strong>DS</strong>xx/BAxx<br />
PAx<br />
Opto-input<br />
Input voltage<br />
H-level (ON) +10 bis +30V<br />
L-level (Off) 0 bis +6V<br />
input current max. 14 mA<br />
Ratet voltage/curen<br />
Referenc ground<br />
+24V/10mA<br />
GNDE(X1:10)<br />
The enable input (FRG/RUN) and the input for<br />
the rotating field enable (RFE) are fixed, they cannot be programmed.<br />
Without the enable FRG/RUN the servo-drive is electronically disabled (no PWM pulses).<br />
Without the rotating field enable RFE the rotating field of the output stage is additionally<br />
electronically disabled (2nd<br />
disable channel).<br />
The drive is free of torque (no holding torque).<br />
The remaining four digital inputs can be programmed.<br />
The inputs LMT1 (X1:5) and LMT2 (X1:6) are preferably to be used as inputs of the output<br />
stage switch.<br />
Input Plug Function Status<br />
FRG/RUN X1.7 Enable fix<br />
RFE X1:18 Rotation Enable fix<br />
END1/LMT1 X1:5 Limit switch 1/Dig. Input programmable<br />
END2/LMT2 X1:6 Limit switch 2/Dig. Input<br />
DIN1 X1:11 <strong>Digital</strong> Input 1<br />
DIN2 X1:12 <strong>Digital</strong> Input 2<br />
External Power Supply for Inputs and Outputs<br />
Logic<br />
voltage<br />
24V=<br />
X1:4<br />
+24V<br />
<strong>DS</strong>400<br />
+24for<br />
for the logic and<br />
the auxiliary voltage<br />
Logic<br />
ground<br />
X1:10<br />
GNDE<br />
GNDE<br />
Logic reference<br />
29
Electrical Installation<br />
Safety input RFE (Rotation enable)<br />
Warning!<br />
If the input of the enable or of the rotating field enable are switched off, the<br />
drive is free of torque. The drive could move if there is no mechanical brake or<br />
block provided.<br />
The motor conductors are not dead. Only the rotating field is disabled. Prior to<br />
any work or maintenance on the motor or servo-drive, the servo-drive must be<br />
completely disconnected from the mains power supply.<br />
Operation with RFE input<br />
Two-channel disable of the enable via a safety<br />
switching device.<br />
Enable input FRG/RUN + rotating field enable<br />
input RFE.<br />
24V- Voltage<br />
GND24<br />
+24V=<br />
CNC/SPS<br />
Hardware<br />
Enable<br />
Logik - Voltage<br />
GND24<br />
+24V=<br />
CNC/SPS<br />
Hardware<br />
Enable<br />
Safety input RFE<br />
Switching-on<br />
Contacts of the safety device closed: enable<br />
FRG/RUN 0.5s after RFE.<br />
Safity<br />
Device<br />
PNOZ<br />
+24V=<br />
1<br />
2<br />
GND24<br />
3<br />
+24<br />
4<br />
5<br />
X1<br />
Safity<br />
Device<br />
PNOZ<br />
X1<br />
1<br />
2<br />
3<br />
4<br />
5<br />
Safety switch-off<br />
Contacts of the safety device open:<br />
- there is no FRG/RUN signal in the 1st<br />
disable<br />
channel to disable the PWM pulses<br />
in the processor,<br />
- there is no RFE signal in the 2nd<br />
disable<br />
channel to disable the PWM pulses at<br />
the output of the processor.<br />
Restart<br />
Release the safety switching device.<br />
Contacts of the safety device closed.<br />
The motor can only move after a second<br />
disable FRG/RUN (after the rotating field<br />
enable).<br />
GND24<br />
Logic - Voltage<br />
GND24<br />
+24V=<br />
6<br />
FRG/RUN<br />
Hardware<br />
7<br />
Enable<br />
8<br />
9<br />
GNDE<br />
10<br />
Logic-GND<br />
11<br />
12<br />
13<br />
14<br />
15<br />
16<br />
17<br />
RFE<br />
Rotation<br />
18<br />
enable<br />
19<br />
20<br />
21<br />
<strong>DS</strong>xx, BAxx<br />
24V- Voltage<br />
GND24 +24V=<br />
CNC/SPS<br />
Hardware<br />
Enable<br />
6<br />
FRG/RUN<br />
Hardware<br />
7<br />
Enable<br />
8<br />
9<br />
GNDE<br />
10<br />
Logic-GND<br />
11<br />
12<br />
13<br />
14<br />
15<br />
16<br />
17<br />
RFE<br />
Rotation<br />
18<br />
enable<br />
19<br />
20<br />
21<br />
<strong>DS</strong>xx, BAxx<br />
CNC/SPS<br />
Hardware<br />
Enable<br />
Operation without RFE input<br />
The input RFE must be bridged with the logic<br />
voltage.<br />
If the logic voltage corresponds to the supply<br />
voltage, the RFE input is bridged with +24V.<br />
Enable FRG/RUN at least 0.5s after the RFE<br />
signal.<br />
1<br />
2<br />
3<br />
4<br />
5<br />
6<br />
FRG / RUN<br />
Hardware<br />
7<br />
Enable<br />
8<br />
9<br />
GNDE<br />
10<br />
Logic-GND<br />
11<br />
12<br />
X1<br />
1<br />
2<br />
GND24<br />
3<br />
+24<br />
4<br />
5<br />
6<br />
FRG/RUN<br />
Hardware<br />
7<br />
Enable<br />
8<br />
9<br />
GNDE<br />
10<br />
Logic-GND<br />
11<br />
12<br />
X1<br />
13<br />
13<br />
14<br />
14<br />
15<br />
15<br />
16<br />
16<br />
Rotation<br />
enable<br />
17<br />
RFE<br />
18<br />
19<br />
20<br />
21<br />
<strong>DS</strong>xx, BAxx<br />
Rotation<br />
enable<br />
17<br />
RFE<br />
18<br />
19<br />
+24<br />
20<br />
21<br />
<strong>DS</strong>xx, BAxx<br />
30
<strong>DS</strong> <strong>205.3</strong> ; <strong>DS</strong>403.4<br />
Control signals<br />
<strong>Digital</strong> logic outputs (open emitter)<br />
The logic outputs 1 to 3 are rated for 24V and 1A (short-time: 2A)<br />
<strong>Digital</strong><br />
output<br />
24V/1A<br />
<strong>Digital</strong> output<br />
X1:13 <strong>Digital</strong> output 1 DOUT1<br />
X1:14 <strong>Digital</strong> output 2 DOUT2<br />
X1:17 <strong>Digital</strong> output 3 DOUT3<br />
100nF<br />
+24<br />
<strong>DS</strong>xx/BAxx<br />
(IP65)<br />
(X1:N)<br />
(X1:O)<br />
(X1:S)<br />
F_AUSx<br />
Output voltage<br />
On-level max. +24V<br />
Off-level
Electrical Installation<br />
Analog inputs<br />
analog<br />
inputs<br />
+/- 10V<br />
IN+<br />
IN-<br />
10k<br />
100k<br />
10k<br />
<strong>DS</strong>xx/BAxx<br />
100k<br />
100nF<br />
100k<br />
15k<br />
15k<br />
1.5V +/- 1.36V<br />
Sollx<br />
REF150<br />
Control signals<br />
Input Plug Basic- Function Voltage Status Parameter<br />
AIN1+,AIN1- X1:8, X1:9 Speed setpoint +/-10V prog.<br />
AIN2+,AIN2- X1:15,X1:16 Current limit +/-10V prog.<br />
Characteristics<br />
Differential input AIN1+/AIN1- AIN2+/AIN2-<br />
Input resistance<br />
70k<br />
Maximum voltage<br />
+/-12V<br />
Resolution<br />
11Bit + sign<br />
The direction of rotation of the motor can either be changed by swapping<br />
the ± connections at the differential input, or by means of a logic input or by programming.<br />
The analog inputs can be assigned to different functions.<br />
With a digital command value (RS232, x-bus)<br />
- the analog input AIN1can be programmed as external analog speed limit<br />
- and the analog input AIN2 can be programmed as external analog current limit.<br />
Analog Output +/- 10V<br />
Output Connection Basic function Voltage State Param.<br />
AOUT1 X2:20 Speed actual value 10V programmable<br />
GND X2:21 Signal zero 0V fixed<br />
32
<strong>DS</strong> <strong>205.3</strong> ; <strong>DS</strong>403.4<br />
Interface<br />
RS 232:<br />
Via the serial PC RS232 interface the <strong>DS</strong>400 amplifier is programmed and operated for the<br />
start-up.<br />
The software is described in the <strong>DS</strong> software manual.<br />
RxD<br />
TxD<br />
2<br />
3<br />
Connector at PC<br />
Stecker am PC<br />
2<br />
RxD<br />
3<br />
TxD<br />
4<br />
T2OU<br />
7<br />
The serial interface is galvanically<br />
coupled with the device - zero (GND) .<br />
8<br />
R2IN<br />
GND 5<br />
5 RS232<br />
Schirm am Steckergehäuse<br />
Shield at Connector housing<br />
<strong>DS</strong>xx/BAxx<br />
The <strong>DS</strong>xx (D connector X10) and the serial interface (COM1/COM2) of the pc must only be<br />
connected using a null modem cable.<br />
Do not use a null modem link cable!<br />
Install the cable only after disconnecting the device from the mains.<br />
The interface is hard-coded to 115200Baud.<br />
Null modem cable<br />
Pin assignment. Solder side.<br />
Contact shield with the plug housing.<br />
Cable length max. 10m<br />
RxD<br />
TxD<br />
GND<br />
RS232 PC<br />
6<br />
7<br />
8<br />
9<br />
1<br />
2<br />
3<br />
4<br />
5<br />
X10<strong>DS</strong>xx/BAxx<br />
6<br />
7<br />
8<br />
9<br />
1<br />
2<br />
3<br />
4<br />
5<br />
RxD<br />
TxD<br />
GND<br />
FM<br />
FM<br />
Schirm am Steckergehäuse<br />
Shield at connector housing<br />
FM = Female<br />
Connector<br />
In case of strong interferences at the<br />
interface a line filter should be<br />
installed.<br />
Notebooks with a USB-RS232<br />
converter are usually susceptible to<br />
interference.<br />
RxD<br />
TxD<br />
GND<br />
RS232 PC<br />
6<br />
7<br />
8<br />
9<br />
1<br />
2<br />
3<br />
4<br />
5<br />
FM<br />
X10<strong>DS</strong>xx/BAxx<br />
2k2<br />
2k2<br />
1k<br />
100n<br />
6<br />
7<br />
8<br />
9<br />
Schirm entkoppelt von X10<br />
Shield disconnected from X10<br />
1<br />
2<br />
3<br />
4<br />
5<br />
FM<br />
RxD<br />
TxD<br />
GND<br />
33
Electrical Installation<br />
CAN-BUS<br />
The CAN-BUS is a digital connection to the CNC control.<br />
Optimum conditions are achieved with CNC controls and CAN components of LABOD<br />
electronic or CAN Open.<br />
Programming and operation by means of the control panel via the CAN-BUS.<br />
Interface complies with the standard ISO 11898.<br />
Adjustment and programming see Manual <strong>DS</strong>-CAN.<br />
Interface<br />
CAN-BUS<br />
CAN-V+<br />
CANH<br />
CANL<br />
9<br />
CAN-V+<br />
7<br />
CANH<br />
2<br />
CANL<br />
CAN-VCC<br />
CANGND<br />
DC<br />
VCC<br />
DC GND<br />
The CAN-BUS input is galvanically<br />
separated.<br />
The power supply is from the<br />
intern DC/DC<br />
CANGND<br />
3<br />
CANGND<br />
Schirm am Steckergehäuse<br />
Shield at Connector housing<br />
<strong>DS</strong>xx/BAxx<br />
Pin assignment. Solder side.<br />
CAN-BUS cable<br />
Use a shielded bus conductor with a low shielding<br />
capacity.<br />
Signal plus GND (+supply).<br />
D-connector with a metal or metallized housing.<br />
LiYCY 4x0.25+shield.<br />
Designation<br />
Connector<br />
no.<br />
Cable colour Cable no.<br />
CAN-V+ 9 brown 1<br />
CAN-GND 3 white 4<br />
CAN-H 7 green 3<br />
CAN-L 2 yellow 2<br />
FM = Female Connector<br />
CAN-BUS connection with several <strong>DS</strong>-<strong>Servo</strong><br />
Master Adresse xx Adresse xx Adresse xx<br />
CAN-BUS<br />
CAN-L<br />
CAN-H<br />
CAN-GND<br />
CAN-V+<br />
(PE)<br />
X9 <strong>DS</strong>xx/BAxx X9 <strong>DS</strong>xx/BAxx X9 <strong>DS</strong>xx/BAxx<br />
1<br />
1<br />
1<br />
6<br />
6<br />
6<br />
2<br />
2<br />
2<br />
7<br />
7<br />
7<br />
3<br />
3<br />
3<br />
8<br />
4<br />
8<br />
4<br />
8<br />
4<br />
9<br />
9<br />
9<br />
5<br />
5<br />
5<br />
FM<br />
FM<br />
FM<br />
Schirm am Steckergehäuse Shield at connector housing<br />
120<br />
Terminating resistor at the end of the bus line > 120Ohm between the CAN-H and CAN-L<br />
34
<strong>DS</strong> <strong>205.3</strong> ; <strong>DS</strong>403.4<br />
Resolver<br />
Resolver - connection.<br />
Applicable only for <strong>DS</strong> xx-RS<br />
Motor-connector<br />
Motor-Stecker<br />
Resolver<br />
R1<br />
REF1<br />
R2<br />
REF2<br />
S2<br />
SIN1<br />
S4<br />
SIN2<br />
S1<br />
COS1<br />
S3<br />
COS2<br />
D-Stecker X7<br />
D-connector X7<br />
13<br />
REF1<br />
4<br />
REF2<br />
2<br />
SIN1<br />
15<br />
SIN2<br />
14<br />
<strong>DS</strong>xx/BAxx<br />
COS1<br />
3<br />
COS2<br />
47<br />
47<br />
10nF<br />
2x2u2<br />
10nF<br />
2x2u2<br />
REF1<br />
REF2<br />
The resolver is an absolute<br />
measuring system for one motor<br />
revolution. It is rugged and not<br />
sensitive to high motor<br />
temperatures. Its set-up is like a<br />
rotating transformer. The rotor is<br />
fed by the reference (10kHz).<br />
The stator provides the sinus and<br />
cosine signals modulated by the<br />
rotation reference.<br />
The amplitudes of these signals<br />
are evaluated and digitalized in<br />
the servo amplifier.<br />
The resolution is fixed to 12bit<br />
(4096 inc./rpm). The maximum<br />
possible rotational speed is<br />
15600. The digitalized signals are<br />
used for the rotor angle, the<br />
position and speed control and for<br />
the incremental output. The<br />
absolute accuracy is approx.+/- 10<br />
angular minutes.<br />
Connect.assignment<br />
Motor<br />
Temperatur<br />
12<br />
6<br />
1k<br />
100nF<br />
TEMP<br />
Soldered side<br />
Schirm am Steckergehäuse<br />
Shield at connector housing<br />
Schirm am Steckergehäuse<br />
Shield at connector housing<br />
Only <strong>UNITEK</strong> approved motors (Appendix A)<br />
with 2,4 or 6 pole resolvers must be used.<br />
Note motor-specific connection sheet!<br />
M, pin contact<br />
Connecting plug:<br />
Connecting lead:<br />
Cable length:<br />
Shielded connection:<br />
X7 - 15pin D-plug<br />
4 Twisted pair, individually shielded plus outer shield.<br />
For Link-chains, only suitable cable should be used.<br />
For > 25m, use only high quality resolver cable with adequate<br />
shielding properties.<br />
at plug X7 contact shield with the plug housing.<br />
At the motor plug - contact shield with the plug housing.<br />
For setup - parameters - see <strong>DS</strong> software manual<br />
35
Electrical Installation<br />
Encoder - connection.<br />
Applicable only for <strong>DS</strong> 4xx - IN<br />
Encoder TTL<br />
D-connector X7<br />
D-Stecker X7<br />
VCC +5V<br />
A<br />
A<br />
B<br />
B<br />
N<br />
10<br />
VCC +5V<br />
1<br />
4<br />
2<br />
11<br />
3<br />
<strong>DS</strong> xx/BAxx<br />
TMS<br />
Incremental encoders with 2<br />
counting tracks and a zero track plus<br />
3 rotor position tracks. Counting<br />
tracks with push-pull output.<br />
Counting - input corresponds to<br />
RS485. Maximum counting<br />
frequency 500kHz.<br />
The incremental encoder is<br />
galvanically coupled with the device<br />
- zero (GND) .<br />
Supply voltage 5V.<br />
Encoder TTL<br />
Motor-connector<br />
Motor-Stecker<br />
N<br />
ROTOR1<br />
ROTOR2<br />
ROTOR3<br />
GND<br />
9<br />
13<br />
14<br />
15<br />
6<br />
VCC +5V<br />
Connect.assignment<br />
Soldered side<br />
4k7<br />
TEMP<br />
12<br />
Motor<br />
Temperatur<br />
GND<br />
5<br />
TEMP<br />
Schirm am Steckergehäuse<br />
Shield at connector housing<br />
Schirm am Steckergehäuse<br />
Shield at connector housing<br />
M, pin contact<br />
Only <strong>UNITEK</strong> approved motors (Appendix A) with incremental encoders.<br />
Note motor-specific connection sheet!<br />
Connecting plug:<br />
Connecting lead:<br />
Cable length:<br />
Shielded connection:<br />
X7 - 15pin D-plug<br />
10 signal wires, shielded, minimum cross section 0,14 mm<br />
2 supply wires, minimum cross section 0, 5 mm.<br />
Use only suitable cables in a power carrier chain.<br />
The next step up for a section of >25m.<br />
at plug X7 contact shield with the plug housing.<br />
At the motor plug - contact shield with the plug housing.<br />
For setup - parameters - see <strong>DS</strong> software manual<br />
36
<strong>DS</strong> <strong>205.3</strong> ; <strong>DS</strong>403.4<br />
SINCOS 1Vss<br />
SIN / COS Connection<br />
only for <strong>DS</strong> xx-SC<br />
D-connector X7<br />
D-Stecker X7<br />
VCC +5V<br />
ka+<br />
10 VCC +5V<br />
1<br />
<strong>DS</strong> xx/BAxx<br />
TMS<br />
Incremental encoder with 2<br />
analog sinusoidal counter<br />
tracks and 1 zero track plus 2<br />
commutating tracks.<br />
Differential inputs 1Vss<br />
SIN/COS 1Vss<br />
Motor-connector<br />
Motor-Stecker<br />
kakb+<br />
kbkr+<br />
krkc+<br />
kc-<br />
4<br />
2<br />
11<br />
3<br />
9<br />
14<br />
15<br />
120<br />
120<br />
120<br />
1000<br />
SF1<br />
SF0<br />
Faktor<br />
Max. counting frequency<br />
500kHz<br />
The incremental encoder is<br />
galvanically connected with<br />
device zero (GND).<br />
Supply voltage 5V, provided<br />
by the servo.<br />
The resolution is automatically<br />
adjusted to an optimum.<br />
kd+<br />
7<br />
kd-<br />
GND<br />
TEMP<br />
13<br />
6<br />
12<br />
1000<br />
VCC +5V<br />
1k<br />
Connect.assignment<br />
Soldered side<br />
Motor<br />
Temperatur<br />
GND<br />
5<br />
GND<br />
100nF<br />
T-Motor<br />
Schirm am Steckergehäuse<br />
Shield at connector housing<br />
Schirm am Steckergehäuse<br />
Shield at connector housing<br />
M, pin contact<br />
Use only motors with SIN/COS encoders (SC) which have been approved by <strong>UNITEK</strong><br />
(Appendix A). Observe the motor specific connection data sheet (SC)!<br />
Connector<br />
X7 15-pole D-connector<br />
Connecting cable 4 signal conductors,<br />
twisted and shielded,<br />
min. cross-section 0.14mm<br />
2 signal conductors, shielded, min. cross-section 0.14mm<br />
4 supply lines, temp., min. cross-section 0.5mm<br />
Cable type<br />
(4x(2x0.14)+(4x0.14)C+4x0.5)C<br />
For link chains use appropriate cables!<br />
Cable length<br />
for >25m the cross-section of the cable used must be increased<br />
by one grade<br />
Shield connection across connector X7-connect the shield to the connector housing<br />
across the motor connector - connect the shield to the connector<br />
37
Electrical Installation<br />
Rotor position encoder - connection via a bl-tacho<br />
only for <strong>DS</strong> xx-bl<br />
Rotorlage + bl-Tacho<br />
Motor-connector<br />
Motor-Stecker<br />
D-connector X7<br />
D-Stecker X7 Adapter<br />
+15V<br />
TR+<br />
TMp<br />
TS+<br />
TT+<br />
ROTOR1<br />
ROTOR2<br />
10<br />
2<br />
1<br />
3<br />
9<br />
4<br />
11<br />
13<br />
14<br />
Rv<br />
Rv<br />
Rv<br />
Rv<br />
Rv<br />
Rv<br />
TR+<br />
TS+<br />
TT+<br />
TR-<br />
TS-<br />
TT-<br />
10 +15V VCC +5V<br />
2<br />
1<br />
3<br />
9<br />
4<br />
13<br />
14<br />
11<br />
4k7<br />
100k<br />
100k<br />
100k<br />
4k7<br />
4k7<br />
82k<br />
82k<br />
82k<br />
82k<br />
82k<br />
82k<br />
22k<br />
22k<br />
<strong>DS</strong> xx/BAxx<br />
Tacho R<br />
Tacho S<br />
Tacho T<br />
Rotor U1<br />
Rotor U2<br />
TMS<br />
3 rotor position encoder signals<br />
(Hall sensors) for the<br />
commutation; with or without a<br />
brushless tacho.<br />
The rotor position encoder is<br />
galvanically connected with the<br />
device zero (GND).<br />
The voltage of 15V is supplied<br />
by the servo-drive.<br />
Provide an adapter in case the<br />
tacho voltage at rated speed is<br />
superior to 10V~.<br />
For lower tacho voltages<br />
connect X7: pin 1, 9, and 11.<br />
Connect the tacho center point<br />
to X7:1.<br />
Rotor bl<br />
ROTOR3<br />
GND<br />
15<br />
6<br />
15<br />
6<br />
22k<br />
VCC +5V<br />
Rotor U3<br />
Connect.assignmen<br />
Soldered side<br />
TEMP<br />
12<br />
12<br />
4k7<br />
Motor<br />
Temperatur<br />
GND<br />
5<br />
5<br />
T-Motor<br />
100nF<br />
GND<br />
Schirm am Steckergehäuse<br />
Shield at connector housing<br />
Schirm am Steckergehäuse<br />
Shield at connector housing<br />
M, Stiftkontakt<br />
Use only motors with Rotor encoders (bl) which have been approved by <strong>UNITEK</strong> (Appendix<br />
A). Observe the motor specific connection data sheet (bl)!<br />
Connector<br />
X7 15-pole D-connector<br />
Connecting cable 4 signal conductors,<br />
twisted and shielded,<br />
min. cross-section 0.14mm<br />
2 signal conductors, shielded, min. cross-section 0.14mm<br />
4 supply lines, temp., min. cross-section 0.5mm<br />
Cable type<br />
(4x(2x0.14)+(4x0.14)C+4x0.5)C<br />
For link chains use appropriate cables!<br />
Cable length<br />
for >25m the cross-section of the cable used must be increased<br />
by one grade<br />
Shield connection across connector X7-connect the shield to the connector housing<br />
across the motor connector - connect the shield to the connector<br />
housing<br />
38
<strong>DS</strong> <strong>205.3</strong> ; <strong>DS</strong>403.4<br />
X8 Encoder-output-input<br />
X8 TTL- Encoder output or input (2)<br />
The D connector X8 is connected as input or output (default).<br />
Output X8 pin 6 not connected or bridge toGND<br />
Input X8 pin 6 bridge to +5V (X8:1)<br />
VCC-CNT<br />
LBR 1<br />
Inc-In<br />
D-connector X8<br />
D-Stecker X8<br />
VCC<br />
TMS<br />
Counter CNC-SPS or<br />
Zähler CNC-SPS oder<br />
2. TTL- Incremental-Feedback<br />
Out-In<br />
VCC-CNT<br />
A<br />
A<br />
B<br />
B<br />
N<br />
N<br />
6<br />
1<br />
2<br />
9<br />
3<br />
8<br />
7<br />
4<br />
470<br />
470<br />
470<br />
Inc-Out<br />
GND-CNT<br />
5<br />
GND<br />
Schirm am Steckergehäuse<br />
Shield at connector housing<br />
<strong>DS</strong>xx/BAxx<br />
9-pin D connector ( M, pins)<br />
Connector assignment<br />
soldering side<br />
Attention: X8 as input<br />
X8:6 (Select IN) with X8:1 (+5V) connect<br />
with the D connector M = male connector<br />
39
Electrical Installation<br />
X8 as TTL Encoder output<br />
The encoder signals supplied by the motor (feedback) are available at the output of the<br />
D-connector X8 for the CNC control.<br />
The encoder output is internally isolated.<br />
The voltage is supplied via the encoder line from the CNC/PLC control.<br />
Voltage supply +5V ±0.2V.<br />
The output signal corresponds to RS485.<br />
Option: Internal supply from the servo (LBR1 + LBR2)<br />
For RS and SC the resolution can be programmed (parameter 0xa4), Bit1).<br />
For IN it is equal to the number of encoder pulses.<br />
X8 Encoder-output-input<br />
Pulse signals (motor revolving clockwise)<br />
Output level low 4.5V<br />
Slope<br />
<strong>DS</strong> <strong>205.3</strong> ; <strong>DS</strong>403.4<br />
<strong>Servo</strong>-drive state<br />
LED displays on the <strong>Servo</strong><br />
The state “normal” is signalled by a bright green seven-segment display + decimal point<br />
(display of the state).<br />
The state “fault” is signalled by a bright red fault LED and the seven-segment display<br />
indicates the error no.<br />
The state “warning” is signalled by the flashing red fault LED and the seven-segment<br />
display indicates alternately the state and the warning no.<br />
Display of the servo-drive state<br />
Display Point/segment State State of NDrive<br />
flashing<br />
dark<br />
flashing<br />
bright<br />
dark<br />
Processor active<br />
Auxiliary voltage missing or inherent hardware failure<br />
Starting state after reset (auxil. voltage 24V off-on).<br />
The first enable stops the flashing display.<br />
Drive enabled<br />
Drive disabled (not enabled)<br />
OK=0<br />
OK=1,ENA=1<br />
OK=1,ENA=0<br />
bright Speed zero (standstill signal) N0 = 1<br />
bright Drive revolves clockwise, N currently positive N0 = 0<br />
bright Drive revolves anti-clockwise, N currently negative N0 = 0<br />
flashing<br />
bright<br />
dark<br />
bright for 0.1s<br />
Motor current reduced to continuous current Icns<br />
Motor current at max. current limit I max<br />
Normal operation; Motor current within the current<br />
limits<br />
A new command (value) was received from the BUS<br />
or RS232<br />
Icns = 1<br />
Icsn = 0<br />
Icns = 0<br />
Example:<br />
Motor revolving clockwise<br />
Point flashes<br />
bottom segment<br />
right segment<br />
= active processor<br />
= drive enabled<br />
= motor revolves clockwise<br />
41
Electrical Installation<br />
Error message on the <strong>Servo</strong><br />
In case of an error the red LED ‘fault’ lights up and the green 7-segment display indicates<br />
the error number.<br />
Error list<br />
Error list<br />
Display on the<br />
<strong>Servo</strong><br />
Error message<br />
on the NDrive<br />
Description<br />
0 BADPARAS Parameter error<br />
1 POWER FAULT Output stage error<br />
2 RFE FAULT Error in the safety circuit<br />
3 BUS TIMEOUT Transfer error BUS<br />
4 FEEDBACK Incorrect/faulty encoder signal<br />
5 POWERVOLTAGE No power supply voltage<br />
6 MOTORTEMP Motor temperature too high<br />
7 DEVICETEMP Device temperature too high<br />
8 OVERVOLTAGE Over voltage >1.8 x UN<br />
9 I_PEAK Overcurrent 300%<br />
A RACEAWAY Racing (without command value, incorrect polarity)<br />
B USER User’s error choice<br />
C<br />
RESERVE<br />
D<br />
RESERVE<br />
E CPU-ERROR Software error<br />
F BALLAST Ballast circuitry overload<br />
Flashing decimal<br />
point<br />
Dark decimal<br />
point<br />
Active processor<br />
Missing auxiliary voltage or device hardware failure<br />
Example:<br />
Fault<br />
FAULT LED<br />
Error no. 5<br />
red<br />
Power voltage (missing power voltage)<br />
42
<strong>DS</strong> <strong>205.3</strong> ; <strong>DS</strong>403.4<br />
Warnings<br />
Warnings<br />
The warning messages are displayed in the window ‘warnings’.<br />
Warning messages<br />
Warning<br />
display<br />
Warning message<br />
on the NDrive<br />
Description<br />
ID-address<br />
0x8f<br />
0 Bit 16<br />
1 Bit 17<br />
2 Bit 18<br />
3 Bit 19<br />
4 Bit 20<br />
5 POWERVOLTAGE Leistungsspannung zu klein oder fehlt Bit 21<br />
6 MOTORTEMP Motortemperature > 87% Bit 22<br />
7 DEVICETEMP Devicetemperature > 87% Bit 23<br />
8 OVERVOLTAGE Overvoltage >1,5 x UN Bit 24<br />
9 I_PEAK Overcurrent 200% Bit 25<br />
A Bit 26<br />
B Bit 27<br />
C I2R Power overload > 87% Bit 28<br />
D Bit 29<br />
E Bit 30<br />
F Regen Regen > 87% overload Bit 31<br />
LED displays on the servo<br />
In case of a warning state the red LED changes (low-frequency) and the seven-segment<br />
display shows alternately the warning no. (red LED) and the operating state (LED dark).<br />
Fault<br />
Example:<br />
The red fault LED flashes and the display shows alternately the warning number<br />
and the operating state.<br />
Warning no. 5 = POWERVOLTAGE<br />
43
Electrical Installation<br />
Optionen<br />
44
<strong>DS</strong> <strong>205.3</strong> ; <strong>DS</strong>403.4<br />
Guarantee<br />
Guarantee<br />
<strong>UNITEK</strong> guarantees that the device is free from material and production defects. Test<br />
results are recorded and archived with the serial number.<br />
The guarantee time begins from the time the device is shipped, and lasts one year. Unitek<br />
undertakes no guarantee for devices which have been modified for special applications.<br />
During the warranty period, <strong>UNITEK</strong> will, at its option, either repair or replace products that<br />
prove to be defective, this includes guaranteed functional attributes. <strong>UNITEK</strong> specifically<br />
disclaims the implied warranties or merchantability and fitness for a particular purpose. For<br />
warranty service or repair, this product must be returned to a service facility designated by<br />
<strong>UNITEK</strong>.<br />
For products returned to <strong>UNITEK</strong> for warranty service, the Buyer shall prepay shipping<br />
charges to <strong>UNITEK</strong> and <strong>UNITEK</strong> shall pay shipping charges to return the product to the<br />
Buyer.<br />
However, the Buyer shall pay all shipping charges, duties, and taxes for products returned<br />
to <strong>UNITEK</strong> from another country.<br />
The foregoing warranty shall not apply to defects resulting from:<br />
* improper or inadequate repairs effected by the Buyer or a third party,<br />
* non-observance of the manual which is included in all consignments,<br />
* non-observance of the electrical standards and regulations<br />
* improper maintenance<br />
* acts of nature<br />
All further claims on transformation, diminution, and replacement of any kind of damage,<br />
especially damage, which does not affect the <strong>UNITEK</strong> device, cannot be considered.<br />
Follow-on damage within the machine or system, which may arise due to malfunction or<br />
defect in the device cannot be claimed.<br />
This limitation does not affect the product liability laws as applied in the place of<br />
manufacture (i. e. Germany).<br />
<strong>UNITEK</strong> reserves the right to change any information included in this <strong>MANUAL</strong>.<br />
All connection circuitry described is meant for general information purposes and is not<br />
mandatory.<br />
The local legal regulations, and those of the Standards Authorities have to be adhered to.<br />
<strong>UNITEK</strong> does not assume any liability, expressively or inherently, for the information<br />
contained in this <strong>MANUAL</strong>, for the functioning of the device or its suitability for any specific<br />
application.<br />
All rights are reserved.<br />
Copying, modifying and translations lie outside <strong>UNITEK</strong>’s liability and thus are not<br />
prohibited. <strong>UNITEK</strong>’s products are not authorised for use as critical components in the life<br />
support devices or systems without express written approval.<br />
The onus is on the reader to verify that the information here is current.<br />
45


