Reference Manual - PG School, IARI Management System - IASRI
Reference Manual - PG School, IARI Management System - IASRI
Reference Manual - PG School, IARI Management System - IASRI
You also want an ePaper? Increase the reach of your titles
YUMPU automatically turns print PDFs into web optimized ePapers that Google loves.
<strong>Reference</strong> <strong>Manual</strong><br />
(Faculty Module)<br />
lanHkZ lafgrk<br />
( ladk; eksM~;wy )<br />
eSustesUV flLVe% ihth Ldwy] vkÃ-,-vkj-vkÃ-<br />
http://pgs.iasri.res.in<br />
Division of Computer Applications<br />
Indian Agricultural Statistics Research Institute (ICAR)<br />
Library Avenue , Pusa New Delhi‐110012<br />
lax.kd vuqiz;ksx izHkkx<br />
Hkkjrh; d`f"k lkaf[;dh vuqla/kku laLFkku ¼Hkk-+d`-v-i-½<br />
ykbcszjh ,osU;w] iwlk] ubZ fnYyh μ 110012
<strong>Management</strong> <strong>System</strong>: <strong>PG</strong> <strong>School</strong>, <strong>IARI</strong><br />
<strong>Management</strong> <strong>System</strong>: <strong>PG</strong> <strong>School</strong>, <strong>IARI</strong><br />
<strong>PG</strong> <strong>School</strong>, <strong>IARI</strong> is a deemed University. It has 25 disciplines in which masters and doctorate<br />
degrees are awarded. These include Genetics, Horticulture, Seed Science Technology, Plant<br />
Genetics Resources, Post Harvest Technology, Molecular biology & Biotechnology, Plant<br />
Physiology, Biochemistry, Microbiology, Agronomy, Soil Science and Agricultural<br />
Chemistry, Agricultural Physics, Environmental Sciences, Water Science and Technology,<br />
Agricultural Engineering, Plant Pathology, Entomology, Nematology, Agricultural<br />
Chemicals, Agricultural Economics, Agricultural Extension, Agricultural Statistics and<br />
Computer Application. These disciplines are physically situated in different buildings that are<br />
spread across the Pusa Campus covering different institutes under ICAR such as <strong>IARI</strong>,<br />
<strong>IASRI</strong>, and NB<strong>PG</strong>R. With the advances in the Internet technologies and the available<br />
network infrastructure, the working of <strong>PG</strong> <strong>School</strong> can be automated and an online system can<br />
be developed. The <strong>PG</strong> <strong>School</strong>, <strong>IARI</strong> Software Development Committee has also identified<br />
the problem. The online capability of the system will allow the students, faculty members and<br />
administrators to publish and retrieve the information from their respective disciplines. This<br />
would definitely help the users of the system save their time and efforts. The time so saved<br />
may be utilized for other development activities of the <strong>PG</strong> <strong>School</strong>, scientific research and<br />
better education. <strong>PG</strong> <strong>School</strong>, <strong>IARI</strong> <strong>Management</strong> <strong>System</strong> is being developed under the <strong>IASRI</strong><br />
institute funded project "Intranet Solutions for <strong>PG</strong> <strong>School</strong>, <strong>IARI</strong>" by Division of Computer<br />
Applications, <strong>IASRI</strong>. The system helps in achieving the <strong>PG</strong> <strong>School</strong> objectives by giving<br />
online access to various resources. The system is available at http://www.iasri.res.in to<br />
students, faculty members, scientists and administrative staff of <strong>PG</strong> <strong>School</strong>, <strong>IARI</strong>.<br />
1. User Login Account Creation<br />
1.1 Accessing the Login Page<br />
1. Click Start Button on left hand corner of your Monitor Screen.<br />
2. Drag the mouse and place the mouse-pointer over Programs.<br />
3. Look at the pop-up menu on right of the screen and search Internet Explorer.<br />
4. Drag gently mouse-pointer over Internet Explorer.<br />
5. Double-click Internet Explorer to start it.<br />
6. Find address-bar at top of the Internet Explorer Window.<br />
7. Type http://pgs.iasri.res.in/ in the address-bar and press Enter key.<br />
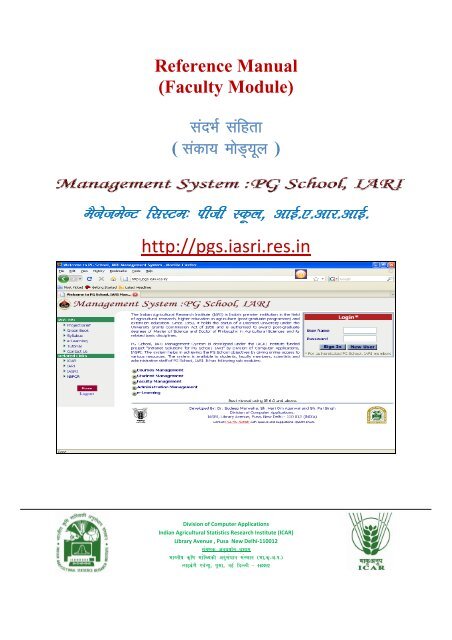
8. You will see the Log-in Page of <strong>Management</strong> <strong>System</strong>: P G <strong>School</strong>, <strong>IARI</strong> (Fig. 1.).<br />
2
<strong>Management</strong> <strong>System</strong>: <strong>PG</strong> <strong>School</strong>, <strong>IARI</strong><br />
Fig. 1. Login Page of <strong>PG</strong> <strong>School</strong>, <strong>IARI</strong>.<br />
1.2 Creation of Login Account for New Users<br />
1.2.1 Open User Registration Form<br />
1. Look at Login dialogue-box at top right corner of the Login page in Fig. 1.<br />
2. Click on New User button.<br />
3. You will see User Registration page (Fig. 2.).<br />
1.2.2 Fill User Registration Form<br />
The form in Fig. 2., contains various items. They are shown in blue font. Each item has some<br />
box or list-boxes or radio-buttons next to the item. You need to click inside a box and type in<br />
the desired information for *User ID, *First Name, Middle Name, Last Name, *Title, *Father's<br />
Name, *Password, *Confirm Password, Web Page, Phone, Mobile, *Address Correspondence,<br />
*Address Permanent. The items marked with * are mandatory. The User ID should be ‘Your<br />
First Name followed by Date of Birth(ddmmyyyy) e.g. dinesh23031984’. Password must be 8<br />
characters long and should contain at least one numeric character.<br />
3
<strong>Management</strong> <strong>System</strong>: <strong>PG</strong> <strong>School</strong>, <strong>IARI</strong><br />
Fig. 2. User Registration<br />
1. Fill in the text boxes next to the items name as indicated in above paragraph.<br />
2. As the case may be, click on either Male or Female button next to *Gender item.<br />
3. Click on list-box next to *Category item, drag the mouse pointer to GEN, SC, ST or OBC and<br />
click it as per your category.<br />
4. Click on list-box next to *User Type item, drag the mouse pointer to <strong>PG</strong> <strong>School</strong> Official,<br />
Faculty, Student or Teacher as per your status in <strong>PG</strong> <strong>School</strong>, <strong>IARI</strong>. Dean, Professor, Head,<br />
Professor, Head and Professor, Guide user type is Faculty. Administrator will upgrade the<br />
status as per his records.<br />
5. To enter your date of birth in the system,<br />
a. Click on first list box next to *D.O.B.item and click on day of your birth.<br />
b. Click on second list box next to *D.O.B.item and click on month of your birth.<br />
i. Click on third list box next to *D.O.B.item and click on year of your birth.<br />
6. Finally, click on Submit button. A sample Registration Form is shown in Fig. 3.<br />
7. On clicking the Submit button in Fig. 3., you will see the user verification screen Fig. 4.<br />
4
<strong>Management</strong> <strong>System</strong>: <strong>PG</strong> <strong>School</strong>, <strong>IARI</strong><br />
Fig. 3. Sample Filled in User Registration Form<br />
1.2.3 Receive Confirmation from the <strong>System</strong><br />
1. Click on Edit button, if you see some wrong information in Fig. 4. and wants to correct it.<br />
2. Click on Home button in Fig. 4., if you do not wish a login account on the system.<br />
3. Click on Verified button, if you believe the information is right and want to proceed with<br />
creation of user account of <strong>Management</strong> <strong>System</strong>: <strong>PG</strong> <strong>School</strong> <strong>IARI</strong>.<br />
4. You will get an acknowledgement from the system as in Web-page in Fig. 5.<br />
1.3 Login After Submission of your Application for Registration<br />
Once you have received thanks from the system Fig. 5., the <strong>System</strong> Administrator will receive your<br />
application for Registration. The <strong>System</strong> Administrator will confirm your identity as a faculty/<br />
Student/ Teacher/<strong>PG</strong> <strong>School</strong> Official and authorize you as authenticated user of the system. Once you<br />
become an authorized user you can login into the system.<br />
1. Access the website of the system (Section 1.1).<br />
2. Look at Login dialogue-box at top right corner of the Login page in Fig. 1.<br />
3. Fill in User Name and Password textboxes<br />
4. Click on Sign In button.<br />
5. You will see a similar page as shown in Fig. 6. This is your Home page.<br />
5
<strong>Management</strong> <strong>System</strong>: <strong>PG</strong> <strong>School</strong>, <strong>IARI</strong><br />
Fig. 4. User Verification Screen.<br />
Fig. 5. User Receiving Thanks after Registration<br />
6
<strong>Management</strong> <strong>System</strong>: <strong>PG</strong> <strong>School</strong>, <strong>IARI</strong><br />
Fig. 6. Home Page of a User<br />
2. Faculty’s Rights and Responsibilities<br />
2.1. Board of Studies:<br />
Professor of each discipline is the chairman of Board of Studies and has rights to add<br />
approved courses, offer courses in each trimester, allocate faculty to these courses,<br />
and allocate guide to every student. All these tasks are carried out through BoS Menu.<br />
2.1.1 Adding New Courses:<br />
1. Choose Add Courses from BoS item of the menu bar (Fig.7).<br />
2. Choose Course Number and Course Name<br />
3. Click on Add Course<br />
4. A new blank row will be generated in the table.<br />
7
<strong>Management</strong> <strong>System</strong>: <strong>PG</strong> <strong>School</strong>, <strong>IARI</strong><br />
Fig. 7. Add New Courses Page for the Professor<br />
5. Click on Modify for modifying Add New Courses Information.<br />
6. Fill the Add New Courses form as shown in Fig.8.<br />
7. Click on Save button.<br />
Fig. 8. Adding Syllabus and other particulars of a new course<br />
8
<strong>Management</strong> <strong>System</strong>: <strong>PG</strong> <strong>School</strong>, <strong>IARI</strong><br />
2.1.2 Offering Course in a Trimester:<br />
1. Choose Offer Courses from BoS item of the menu bar.<br />
2. Choose Academic Year and Trimester e.g. 2009-10 and I Trimester as shown in Fig. 9<br />
3. Click Add Courses Offered in Trimester.<br />
4. The Offer Courses form opens up as shown in Fig.10.<br />
5. Move desired courses from Courses box to selected courses using move right button<br />
(>>).<br />
6. Click on Save Changes.<br />
Fig. 9. Offering Courses for a trimester in an academic year<br />
Fig. 10. Selecting Offered Courses for a trimester in an academic year<br />
9
<strong>Management</strong> <strong>System</strong>: <strong>PG</strong> <strong>School</strong>, <strong>IARI</strong><br />
2.1.3 Allocating Faculty to Courses:<br />
1. Choose Allocate Faculty from BoS item of the menu bar as shown in Fig.11.<br />
Fig. 11. Allocating Faculty to Courses<br />
2. The screen displays all the offered courses along with the trimester in which it is offered.<br />
3. Click on Allocate for allocating faculty to a course.<br />
4. The Allocate faculty form will appear as shown in Fig. 12.<br />
5. Choose Course Leader, Course Associate 1 and Course Associate 2.<br />
6. Click on Allocate.<br />
10
<strong>Management</strong> <strong>System</strong>: <strong>PG</strong> <strong>School</strong>, <strong>IARI</strong><br />
Fig. 12. Allocating faculty to a course from parent discipline<br />
7. If you want to allocate faculty from Other Discipline click on Choose from Other<br />
Discipline<br />
8. Choose Discipline and Click on Submit on the next screen (Fig.13).<br />
Fig. 13. Selecting discipline for allocating faculty to a course from other discipline<br />
9. Choose Course Instructor from Other Discipline as shown in Fig.14.<br />
10. Click on Allocate. The faculty will be allocated to the course.<br />
11
<strong>Management</strong> <strong>System</strong>: <strong>PG</strong> <strong>School</strong>, <strong>IARI</strong><br />
Fig. 14. Choosing faculty member from other discipline for allocating to the course<br />
2.1.4 Allocating Guide to Student:<br />
1. Choose Allocate Guide from BoS item of the menu bar.<br />
2. Choose Enrolment Year and Degree e.g. 2009 and M.Sc. in the next screen (Fig. 15)<br />
3. Click on Submit.<br />
Fig. 15. Choosing enrollment year and degree of students for allocating guide<br />
4. The Allocate Guide page shows all the admitted students for the selected enrolment year<br />
and degree,<br />
5. Click on Allocate to allocate the Guide (Fig.16 ) for a particular student.<br />
6. Choose Guide Name and Click on Allocate (Fig.17).<br />
12
<strong>Management</strong> <strong>System</strong>: <strong>PG</strong> <strong>School</strong>, <strong>IARI</strong><br />
Fig. 16. Offering Courses for a trimester in an academic year<br />
Fig. 17. Choosing name of the guide for a student<br />
2.2 Plan of Post Graduate Work (PPW)<br />
2.2.1 Guide approval of PPW<br />
All Guides need to approve the PPW of his students before sending it to professor. He should<br />
do this after the acceptance of all the members of the advisory committee of the student.<br />
1. Choose ‘Guide Approval of PPW’ from PPW items of menu bar.<br />
Fig. 18. Guide’s View of his Student for PPW approval<br />
13
<strong>Management</strong> <strong>System</strong>: <strong>PG</strong> <strong>School</strong>, <strong>IARI</strong><br />
2. Click on student name for approval of student PPW (Fig.18). The next screen comes<br />
(Fig.19 ) that shows the PPW of the student.<br />
3. If the selected faculty have agreed to become his advisory committee members, then the<br />
guide should click on the Approve PPW button at the bottom of the page (Fig.19 ).<br />
2.2.2 Professor approval of PPW<br />
. Fig. 19. Student PPW for approval of guide<br />
1. Choose ‘Professor Approval of PPW’ from PPW items of menu bar. The page will show<br />
all the students of a particular discipline.<br />
2. Click student name from the list (Fig. 20). The page also shows the status of the PPW i.e.<br />
whether it is approved by the guide or not.<br />
3. On the next page student PPW is shown and if the guide has approved it then a button<br />
‘Approve PPW’ will also appear. If the guide has not approved it, then the message<br />
comes that guide has not approved the PPW yet.<br />
4. Click on ‘Approve PPW’ button to approve the PPW.<br />
14
<strong>Management</strong> <strong>System</strong>: <strong>PG</strong> <strong>School</strong>, <strong>IARI</strong><br />
. Fig. 20. Professor’s View of the Students for PPW approval<br />
2.2.3 Head approval of PPW<br />
1. Choose ‘Head Approval of PPW’ from PPW items of menu bar. The page will show all<br />
the students of a particular discipline.<br />
2. Click student name from the list (Fig. 21). The page also shows the status of the PPW i.e.<br />
whether it is approved by the guide and professor or not.<br />
3. On the next page student PPW is shown and if the guide and professor has approved it<br />
then a button ‘Approve PPW’ will also appear. If the guide or professor has not approved<br />
it, then the message comes that guide or professor has not approved the PPW yet.<br />
4. Click on ‘Approve PPW’ button to approve the PPW.<br />
. Fig. 20. Head’s View of the Students for PPW approval<br />
15
<strong>Management</strong> <strong>System</strong>: <strong>PG</strong> <strong>School</strong>, <strong>IARI</strong><br />
2.3 Registration of Students in a trimester<br />
All students need to register themselves in courses according to their PPW. For this they<br />
submit the request to register in a course to the course instructor. The course instructor<br />
registers the student in a course by accepting the request. The guide of each student examines<br />
the courses register by the student and approves it before sending it to the professor. The<br />
professor approves the student registration and submits it to <strong>PG</strong> <strong>School</strong> office.<br />
2.3.1 Faculty Approval of Students for a Course<br />
1. Choose ‘Faculty Approval of Students’ from Courses item of menu bar. The page will<br />
show all the courses of the faculty members.<br />
2. Click on the course number to register students under the course (Fig. 21).<br />
3. The next page will show the requests of students to register in a course (Fig.22) along<br />
with their status.<br />
4. Click on Approve for accepting the student request and Disapprove for rejecting.<br />
Fig. 21. Faculty’s View of his Course for Student Registration<br />
Fig. 22. Faculty Approval of Student Registration for a Course<br />
16
<strong>Management</strong> <strong>System</strong>: <strong>PG</strong> <strong>School</strong>, <strong>IARI</strong><br />
2.3.2 Guide Approval of Students for Registering in Courses<br />
1. Click ‘Guide Approval of Students’ from item Courses from Menu bar.<br />
2. The page will show the list of students of the guide (Fig. 23) along with the status.<br />
3. Click on student name to see all his registered courses (Fig. 24).<br />
4. Click on Approve or Disapprove for all courses of the student. Only those courses that are<br />
approved by the guide will be finally registered.<br />
Fig. 23. Guide’s Approval of Student Registration for Courses<br />
Fig. 24. Guide Approval of Student Registration for Courses<br />
17
<strong>Management</strong> <strong>System</strong>: <strong>PG</strong> <strong>School</strong>, <strong>IARI</strong><br />
2.3.3 Professor Approval of Students for Registering in Courses<br />
1. Click ‘Professor Approval of Students’ from item Courses from Menu bar.<br />
2. The page will show the list of students of the discipline (Fig. 23) along with the status.<br />
3. Click on student name to see all his registered courses (Fig. 24).<br />
4. Click on Approve button to register the student. The register button appears only if all<br />
courses are approved by faculty as well as by guide.<br />
Fig. 25. Professor’s Approval of Student Registration for Courses<br />
Fig. 26. Professor Approval of Student Registration for Courses<br />
18
<strong>Management</strong> <strong>System</strong>: <strong>PG</strong> <strong>School</strong>, <strong>IARI</strong><br />
2.4 Examination<br />
2.4.1 Assigning Examination Scheme<br />
1. Click ‘Examination Scheme’ from item Courses from Menu bar.<br />
2. The page will show the list of courses for the current trimester (Fig. 27) along with the<br />
scheme adopted for evaluation.<br />
3. Click on Assign link, the next page shows the form for entry of examination scheme for<br />
that course (Fig. 28).<br />
4. Enter the scheme and click assign button.<br />
5. The next page will show the assigned scheme (Fig. 29).<br />
6. Click on delete link if you want to delete the existing scheme and assign new one.<br />
Fig. 27. List of current courses for assigning examination scheme by Course Leader<br />
Fig. 28. Assigning examination scheme for a course<br />
19
<strong>Management</strong> <strong>System</strong>: <strong>PG</strong> <strong>School</strong>, <strong>IARI</strong><br />
Fig. 29. List of current courses with assigned examination scheme by Course Leader<br />
2.4.1 Assigning Grades to Students<br />
1. Click ‘Assign Grades’ from item Courses from Menu bar.<br />
2. The page will show the select box containing list of courses for the current trimester (Fig.<br />
30).<br />
3. Click on Enter grades after selecting a course (Fig. 30).<br />
4. The next page will show a form to enter the grades for each student according to the<br />
assigned examination scheme for that course (Fig. 31).<br />
5. Enter the grades for each student by selecting the roll number and click on submit.<br />
6. Only those roll numbers will appear in the select box whose grades have not submitted.<br />
Fig. 30. Selecting Course from the current courses for assigning grades<br />
Fig. 31. Entering grades for the student<br />
20
<strong>Management</strong> <strong>System</strong>: <strong>PG</strong> <strong>School</strong>, <strong>IARI</strong><br />
2.5 Personal Settings<br />
2.5.1 Changing User Id and Password<br />
1. The authorized user of the system such as students, faculty, guides professors and heads<br />
can change their user Id and password by selecting Change Password from Personal item<br />
from the menu bar.<br />
2. User Id and Password update form will appear change the user Id and password and click<br />
on Submit button.<br />
3. The user Id and password will be changed.<br />
2.5.2 Qualifications<br />
Fig. 32. Changing User Id and Password<br />
1. All the authorized user of the system needs to fill their prior qualification for the record of<br />
the <strong>PG</strong> <strong>School</strong>, <strong>IARI</strong>.<br />
2. Select ‘Qualifications’ from Personal item from the menu bar.<br />
3. Fill the qualifications as per the form. One qualification item to be submitted at a time.<br />
The user can as many items as he likes (Fig.33).<br />
4. The qualification table will show all the entered qualifications.<br />
5. Click on remove button to delete any qualification item.<br />
2.5.3 Edit Profile<br />
1. All the authorized user of the system can update their profile.<br />
2. Select ‘Edit Profile’ from Personal item from the menu bar.<br />
3. Fill the profile items as per the form. User can update their profile fields as and when<br />
required (Fig.34).<br />
4. Click on submit button to update the changed fields.<br />
21
<strong>Management</strong> <strong>System</strong>: <strong>PG</strong> <strong>School</strong>, <strong>IARI</strong><br />
Fig. 33. Updating qualifications of the users<br />
Fig. 34. Changing user profile fields<br />
22


