Everyday, Hideaway and Limited Series - Marquis Spas
Everyday, Hideaway and Limited Series - Marquis Spas
Everyday, Hideaway and Limited Series - Marquis Spas

You also want an ePaper? Increase the reach of your titles
YUMPU automatically turns print PDFs into web optimized ePapers that Google loves.
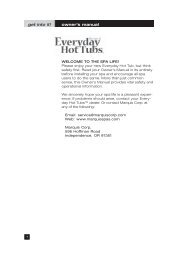
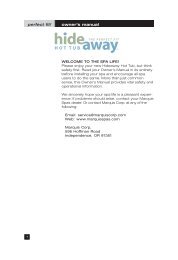
owner’s manual<br />
WELCOME TO THE SPA LIFE!<br />
Please enjoy your new <strong>Marquis</strong> spa, but think safety<br />
first. Read your Owner’s Manual in its entirety before<br />
installing your spa <strong>and</strong> encourage all spa users to do<br />
the same. More than just common sense, this<br />
Owner’s Manual provides vital safety <strong>and</strong> operational<br />
information.<br />
We sincerely hope your spa life is a pleasant experience.<br />
If problems should arise, contact your authorized<br />
dealer. Or contact <strong>Marquis</strong> Corp. at any of the<br />
following:<br />
Email: service@marquiscorp.com<br />
Web: www.marquisspas.com<br />
<strong>Marquis</strong> Corp.<br />
596 Hoffman Road<br />
Independence, OR 97351<br />
1
product reference<br />
SERIAL NUMBER LOCATION<br />
You will find the serial number on the silver tag in the<br />
equipment area.<br />
PLEASE FILL OUT AND KEEP FOR FUTURE<br />
REFERENCE<br />
Name of Purchaser__________________________________<br />
Date of Purchase ___________________________________<br />
Address ___________________________________________<br />
City _____________________State ____Zip Code _______<br />
Signature __________________________________________<br />
Telephone _________________________________________<br />
Spa Model/Color ___________________________________<br />
Spa Serial # ________________________________________<br />
Pack Serial # _______________________________________<br />
Dealer’s Name _____________________________________<br />
Dealer’s Address ___________________________________<br />
City _______________________State____Zip Code________<br />
Telephone ___________________________________________<br />
Every effort has been made to ensure the accuracy<br />
of this manual. However, <strong>Marquis</strong> Corp. reserves the<br />
right to improve its product without notice. This<br />
could create a minor variation between this manual<br />
<strong>and</strong> the actual product you receive. We apologize<br />
for any inconvenience this may cause.<br />
2
owner’s manual index<br />
IMPORTANT SAFETY INSTRUCTIONS<br />
120V, Cord Connected Models ....................................................... 4<br />
240V, Permanently Installed or Converted Models ....................... 5<br />
Safety ................................................................................................. 6-9<br />
INSTALLATION INSTRUCTIONS<br />
Location ............................................................................................. 10-11<br />
Filter Cartridge ...................................................................................12<br />
Electrical Requirements ....................................................................13-14<br />
STARTING YOUR SPA ...................................................................... 15-16<br />
OPERATING YOUR SPA ...................................................................17<br />
SPA SPECIFICATIONS<br />
630 ...................................................................................................................... 18<br />
Ultimate 630.......................................................................................................19-20<br />
530....................................................................................................................... 21<br />
Ultimate 530 ......................................................................................................22-23<br />
418 ...................................................................................................................... 24<br />
Ultimate 418........................................................................................................25-26<br />
315 ........................................................................................................................27<br />
Ultimate 315........................................................................................................28-29<br />
Rendezvous..................................................................................................... 30<br />
Retreat................................................................................................................. 31<br />
744E..................................................................................................................... 32-33<br />
641R..................................................................................................................... 34-35<br />
520M....................................................................................................................36-37<br />
319S......................................................................................................................38-39<br />
SPA CONTROL OPERATION<br />
All models........................................................................................................... 40-44<br />
Soundsations................................................................................................ 44-47<br />
EQUIPMENT DIAGRAM<br />
630, U630, 530, U530, 744E, 641R,........................................................... 48<br />
418, U418, 315, U315, Rendezvous, Retreat, 520M, 319S...................49<br />
TROUBLESHOOTING ................................................................................... 50-51<br />
LCD Diagnostic Messages ...........................................................................51<br />
MAINTENANCE ................................................................................................52-55<br />
SPA CARE AND ENJOYMENT GUIDE ................................................. 56-63<br />
Water Care Troubleshooting........................................................................ 64-65<br />
SpaBoutique ................................................................................................. 66<br />
OWNER’S PROTECTION PLAN................................................................ 67-68<br />
3
safety instructions<br />
The following instructions are required to be printed by Underwriters<br />
Laboratories (UL) as a condition of the listing of this product. They<br />
contain important safety information. We strongly encourage you to<br />
read <strong>and</strong> apply them.<br />
IMPORTANT SAFETY<br />
INSTRUCTIONS<br />
WHEN INSTALLING AND USING THIS ELECTRICAL<br />
EQUIPMENT, BASIC SAFETY PRECAUTIONS SHOULD<br />
ALWAYS BE FOLLOWED, INCLUDING THE FOLLOWING:<br />
1. READ AND FOLLOW ALL<br />
INSTRUCTIONS<br />
2. WARNING: To reduce the risk of injury, do not permit children to<br />
use this product unless closely supervised at all times.<br />
3. DANGER: RISK OF CHILD DROWNING. Extreme caution must<br />
be exercised to prevent unauthorized access by children. To avoid<br />
accidents, ensure that children cannot use the spa or hot tub unless<br />
they are supervised at all times.<br />
120 VOLT, CORD CONNECTED MODELS<br />
4. DANGER: RISK OF INJURY. Connect only to a grounded source.<br />
5. Do not bury the power cord.<br />
6. WARNING: To reduce the risk of electric shock, replace a damaged<br />
cord immediately.<br />
7. A ground terminal (pressure wire connector) is provided on the<br />
surface of the control box inside the equipment compartment. This<br />
connector should be bonded with a minimum No. 8 AWG (8.4mm 2 )<br />
(No. 6 AWG in C<strong>and</strong>a) solid copper wire between this unit <strong>and</strong> any<br />
metal ladders, metal water pipes, metal enclosures of electrical<br />
equipment, conduit, or metal equipment within five feet (1.5m) of the<br />
spa. If the spa is located on a reinforced concrete pad, the reinforced<br />
steel should also be bonded to the ground terminal.<br />
8. WARNING: Your spa may be equipped with a ground fault circuit<br />
interrupter (GFCI) on the end of the power supply cord. Before each<br />
use of the spa, with the plug connected to the power supply <strong>and</strong> the<br />
unit operating, press the “test” button. The unit should stop operating<br />
<strong>and</strong> the GFCI power indicator will go out. Wait thirty seconds <strong>and</strong><br />
then reset the GFCI by pressing the “Reset” button. The GFCI<br />
power indicator will turn on, restoring power to the spa. If the<br />
interrupter does not perform in this manner, it is an indication of an<br />
electrical malfunction <strong>and</strong> the possibility of an electric shock. Disconnect<br />
the plug from the receptacle until the fault has been identified<br />
<strong>and</strong> corrected.<br />
4
safety instructions<br />
240 VOLT, PERMANENTLY INSTALLED OR CONVERTED MODELS<br />
9. A ground terminal is provided on the terminal block (TB-1, terminal 7)<br />
located inside the control box. To reduce the risk of electric shock,<br />
connect this terminal to the grounding terminal of your electrical<br />
service or supply panel with a continuous green, insulated copper<br />
wire. The wire must be equivalent in size to the circuit conductors<br />
supplying the equipment. In addition, a bonding terminal (pressure<br />
wire connector) is provided on the outside of the control box for<br />
bonding to local ground points. To reduce the risk of electric shock,<br />
this connector should be bonded with a No. 8 AWG (8.42mm 2 ) (No. 6<br />
AWG in C<strong>and</strong>a) solid copper wire to any metal ladders, water pipes, or<br />
other metal within five feet (1.5m) of the spa to comply with local<br />
requirements.<br />
10. Your spa uses ground fault circuit interrupters in the electrical subpanel.<br />
Before each use of the spa <strong>and</strong> with the unit operating press<br />
the Test button on each breaker. The switch should click over to the<br />
“Trip” position. Wait thirty seconds <strong>and</strong> reset each GFCI breaker by<br />
switching it completely off <strong>and</strong> then completely on. The switch<br />
should then stay on. If either of the interrupters does not perform in<br />
this manner, it is an indication of an electrical malfunction <strong>and</strong> the<br />
possibility of an electric shock. Disconnect the power until the fault has<br />
been identified <strong>and</strong> corrected.<br />
ALL SPA MODELS<br />
11. Install the spa so proper drainage is provided.<br />
12.DANGER: RISK OF ELECTRIC SHOCK. Install the spa at least five<br />
feet (1.5m) away from metal surfaces, in accordance with the<br />
National Electric Code ANS/NMFPA70-1993. Each metal surface<br />
must be permanently connected to a minimum No. 8 (8.42mm 2 ) (No.<br />
6 AWG in C<strong>and</strong>a) solid copper conductor attached to the wire<br />
bonding connector on the terminal box provided for this purpose.<br />
13. DANGER: RISK OF ELECTRIC SHOCK. Do not permit any<br />
appliance, such as a light, telephone, radio, or television, etc. within<br />
five feet (1.5m) of the spa or hot tub.<br />
14.WARNING: To reduce the risk of injury:<br />
• Water temperatures between 100°F (38°C) <strong>and</strong> 104°F (40°C) are<br />
considered safe for a healthy adult. Lower water temperatures are<br />
recommended for extended use (exceeding 10 minutes) <strong>and</strong> for<br />
young children.<br />
• Since excessive water temperatures have a high potential for<br />
causing fetal damage during the early months of pregnancy,<br />
pregnant or possibly pregnant women should limit spa water<br />
temperatures to 100°F (38°C).<br />
• Before entering a spa, the user should measure the water temperature<br />
with an accurate, waterproof, fever thermometer since the<br />
tolerance of temperature-regulating devices may vary as much as +/-<br />
5°F (3°C).<br />
• The use of drugs, alcohol, or medication before or during spa use<br />
may lead to unconsciousness with the possibility of drowning.<br />
5
safety instructions<br />
• Persons suffering from obesity or with a medical history of heart<br />
disease, low or high blood pressure, circulatory system problems, or<br />
diabetes should consult a physician before using the spa.<br />
• Persons using medications should consult a physician before using<br />
a spa since some medication may induce drowsiness while other<br />
medication may affect heart rate, blood pressure, <strong>and</strong> circulation.<br />
15.DANGER: TO REDUCE THE RISK OF INJURY TO PERSONS.<br />
Do not remove the suction fittings.<br />
16.DANGER: RISK OF INJURY: Never operate a spa if the suction<br />
guard(s) is broken or missing. Never replace a suction guard with<br />
one rated less than the flow rate marked on the original suction<br />
guard. The suction guard(s) in the spa are sized to match the<br />
specific water flow created by the pump. Should the need arise to<br />
replace the suction guard(s) or the pump, be sure that the flow<br />
rates are compatible.<br />
17.DANGER: Children are especially sensitive to hot water. At no time<br />
should children have unsupervised access to the spa. Children must<br />
not be allowed to climb onto the spa cover. All <strong>Everyday</strong> Hot Tubs<br />
are equipped with a locking cover that meets the ASTM F1346-91<br />
St<strong>and</strong>ard for Safety Covers. Always lock the child resistant locks<br />
after using the spa for your children’s safety.<br />
18.SAVE THESE INSTRUCTIONS.<br />
WARNING: Do not permit electric appliance (such as a light, telephone,<br />
radio, or television) within five feet (1.5m) of this spa or hot tub.<br />
WARNING: Children should not use spas or hot tubs without adult<br />
supervision.<br />
WARNING: Do not use spas or hot tubs unless all suction guard(s)<br />
are installed to prevent body <strong>and</strong> hair entrapment.<br />
WARNING: Do not use drugs or alcohol before or during the use of<br />
a spa or hot tub to avoid unconsciousness <strong>and</strong> possible drowning.<br />
WARNING: People using medications <strong>and</strong>/or having an adverse<br />
medical history should consult a physician before using a spa.<br />
WARNING: The use of alcohol, drugs, <strong>and</strong> medication can greatly<br />
increase the risk of fatal hyperthermia.<br />
WARNING: Before entering the spa or hot tub measure the water<br />
temperature with an accurate thermometer.<br />
WARNING: Water temperature in excess of 104°F (40°C) may be<br />
injurious to your health.<br />
WARNING: Prolonged immersion in a spa or hot tub may be<br />
injurious to your health.<br />
WARNING: People with infectious diseases should not use a spa.<br />
WARNING: Pregnant or possibly pregnant women should consult a<br />
physician before using a spa or hot tub.<br />
WARNING: To avoid injury, exercise care when entering <strong>and</strong> exiting<br />
the spa or hot tub.<br />
WARNING: Do not use a spa or hot tub immediately following<br />
strenuous exercise.<br />
WARNING: Maintain water chemistry in accordance with<br />
manufacturer’s instructions.<br />
6
safety instructions<br />
SAFETY INSTRUCTIONS FOR FRENCH SPEAKING SPA OWNERS<br />
AVERTISSEMENT: Ne pas placer d’appareil électrique (luminaire,<br />
téléphone,radio, téléviseur, etc.) moins de 1.52 m de cette cuve de<br />
relaxation.<br />
AVERTISSEMENT: Ne pas laisser les enfants utiliser une cuve de<br />
relaxation sans surveillance.<br />
AVERTISSEMENT: Pour éviter que les cheveux ou une partie du<br />
corps puissent être aspirés, ne pas utiliser une cuve de relaxation si les<br />
grilles de prise d’aspiration ne sont pas toutes en place.<br />
AVERTISSEMENT: Pour éviter l’évanouissement et la noyade<br />
éventuelle, ne prendre ni drogue ni alcool avant d’utiliser une cuve de<br />
relaxation ni qu<strong>and</strong> on s’y trouve.<br />
AVERTISSEMENT: Les personnes qui prennent des médicaments ou<br />
ont des problemès de santé devraient consulter un médecin avant<br />
d’utiliser une cuve de relaxation.<br />
AVERTISSEMENT: La consommation d/alcool ou de drogue<br />
augmente considérablement les risques d’hyperthermie motrelle dans<br />
une cuve de relaxation.<br />
AVERTISSEMENT: Avant d’utiliser une cuve de relaxation mesurer la<br />
température de l’eau l’aide d’un thermométre précis.<br />
AVERTISSEMENT: Il peut être dangereux pour la santé de se plonger<br />
dans de l’eau plus de 40°C.<br />
AVERTISSEMENT: L’utilisation prolongée d’une cuve de relaxation<br />
peut être dangereuse pour la santé.<br />
AVERTISSEMENT: Les personnes atteintes de maladies infectieuses<br />
ne devraient pas utiliser une cuve de relaxation.<br />
AVERTISSEMENT: Les femmes enceintes, que leur grossesse soit<br />
confirmée ou non, devraient consulter un médecin avant d’utiliser une<br />
cuve de relaxation.<br />
AVERTISSEMENT: Pour éviter des blessures, user de prudence en<br />
entrant dans une cuve de relaxation et en sortant.<br />
AVERTISSEMENT: Ne pas utiliser une cuve de relaxation<br />
immédiatement aprés un exercice fatigant.<br />
ATTENTION: La tenteur de l’eau en matières dissoutes doit être<br />
conforme aux directives du fabricant.<br />
7
safety instructions<br />
PERSONAL SAFETY<br />
Prolonged immersion in hot water can result in HYPERTHERMIA, a<br />
dangerous condition which occurs when the internal temperature of<br />
the body reaches a level above normal (98.6°F, 37°C). The symptoms<br />
of hyperthermia include dizziness, fainting, drowsiness, lethargy, <strong>and</strong> a<br />
body temperature above 98.6°F (37°C). The physical effects of hyperthermia<br />
include unawareness of impending hazard, failure to perceive<br />
heat, failure to recognize the need to exit the spa, physical inability to<br />
exit the spa, fetal damage in pregnant women, <strong>and</strong> unconsciousness<br />
resulting in a danger of drowning.<br />
WARNING: The use of alcohol, drugs, or medication can greatly<br />
increase the risk of fatal hyperthermia in hot tubs <strong>and</strong> spas.<br />
Persons taking medications which induce drowsiness such as tranquilizers,<br />
antihistamines, or anticoagulants should not use the spa. Pregnant<br />
women <strong>and</strong> persons with a medical history of heart disease,<br />
diabetes, or high blood pressure should consult a physician before<br />
using the spa.<br />
8
safety instructions<br />
PERSONAL SAFETY DOs:<br />
• Be sure your spa is connected to the power supply correctly – only<br />
use a licensed electrical contractor.<br />
• Shut off power supply (unplug 120V models) before draining the<br />
spa or servicing the electrical components.<br />
• Test the Ground Fault Circuit Interrupter (GFCI) monthly.<br />
• Always test the water temperature with an accurate thermometer<br />
before entering the spa to be sure that it’s a safe temperature.<br />
• Remember that wet surfaces can be very slippery. Take care when<br />
entering <strong>and</strong> exiting the spa.<br />
• Lock the spa cover when the spa is not in use, whether it is empty<br />
or full of water.<br />
• Keep the water clean <strong>and</strong> sanitized with correct chemical care.<br />
• Turn on the jets when adding ANY chemicals to the spa water.<br />
• Clean the filter cartridge monthly to remove debris <strong>and</strong> mineral<br />
buildup which affects the performance of the hydrotherapy jets,<br />
limits the flow, or trips the high limit thermostat which will turn off<br />
the entire spa.<br />
PERSONAL SAFETY DO NOTs:<br />
• Don’t use the spa with the equipment compartment door<br />
removed.<br />
• Don’t use the spa for more than 10 minutes of time at water<br />
temperatures in excess of 102°F (39°C).<br />
• Don’t allow the jet pump to operate for an extended period of time<br />
with the cover in place. Extended pump operation causes a slow<br />
heat buildup due to water friction. The spa equipment controls are<br />
equipped with a built-in safety timer that automatically shuts off the<br />
jet pump after 15 minutes of continuous operation should it have<br />
been left on inadvertently.<br />
• Don’t operate the spa at any time with the filter cartridges<br />
removed.<br />
• Don’t lift or drag the cover by using the tie-down straps; always lift<br />
<strong>and</strong> carry by using the external h<strong>and</strong>les.<br />
• Don’t store chemicals in the spa’s equipment compartment.<br />
• Don’t hesitate to call your authorized dealer with any questions<br />
or maintenance concerns.<br />
9
installation instructions<br />
LOCATION<br />
For your portable spa to function properly <strong>and</strong><br />
safely, it must be located on a hard, flat, level<br />
surface. Inground spas require special installation<br />
techniques <strong>and</strong> should be planned in conjunction<br />
with your spa dealer. Improper installation can<br />
result in structural damage to the spa <strong>and</strong> the<br />
voiding of your spa warranty. Items to discuss with<br />
your dealer include: local construction codes;<br />
electrical service requirements; serviceability of<br />
equipment; present underground obstructions<br />
such as gas, water, <strong>and</strong> telephone lines; safety<br />
measures such as fences <strong>and</strong> locks; <strong>and</strong> visibility<br />
of the spa installation from the home, street, <strong>and</strong><br />
neighbors.<br />
• Allow for sufficient water drainage around the<br />
spa to help preserve the equipment <strong>and</strong> support<br />
structure. This includes indoor installations.<br />
• A filled spa can weigh in excess of 4,000<br />
pounds <strong>and</strong> the location should support the<br />
weight of the filled spa.<br />
• Locate the equipment compartment where it will<br />
be accessible. Your spa MUST be installed to<br />
permit access for servicing the equipment<br />
above <strong>and</strong>/or below any decks or floors. Access<br />
is essential <strong>and</strong> must allow adequate room for<br />
service.<br />
• Leave access to the circuit breakers in the sub<br />
panel (240V models) or to the interrupter switch<br />
(GFCI, 120V models) on the end of the power cord.<br />
• Be sure the spa is level <strong>and</strong> in the final position<br />
BEFORE filling with water. Check for power<br />
cords, tools, <strong>and</strong> hoses that may be caught<br />
underneath the spa.<br />
• IMPORTANT: DO NOT LET AN EMPTY SPA<br />
REMAIN EXPOSED TO DIRECT SUNLIGHT.<br />
Spa surface temperatures can reach in excess<br />
of 150°F (65°C) if left exposed to the sun.<br />
Significant damage can occur if this is allowed to<br />
happen, including warping <strong>and</strong> blistering of the<br />
surface. Damage, that occurs as a result of this<br />
exposure is not covered under the warranty.<br />
• CAUTION: Never try to move a spa that has not<br />
been fully drained. To do so could result in damage<br />
to the spa <strong>and</strong> physical injury to the mover.<br />
10
installation instructions<br />
OUTDOOR AND PATIO INSTALLATION<br />
To install the spa outdoors, we recommend a<br />
reinforced concrete pad at least four inches thick.<br />
The reinforcing material should be attached to a<br />
#8 AWG bonding wire per national <strong>and</strong> local<br />
electrical code.<br />
If you place the spa on the ground, even temporarily,<br />
place concrete pavers under the entire<br />
bottom of the spa. The concrete pavers should be<br />
a least two inches thick <strong>and</strong> level across the entire<br />
surface. The spa will inevitably settle <strong>and</strong> not<br />
remain level on this surface, thus it’s important to<br />
get it onto a solid foundation as soon as possible.<br />
DECK INSTALLATION<br />
Be sure the deck can support the weight of your<br />
filled spa by checking the deck’s maximum load<br />
capacity. Consult a qualified building contractor or<br />
structural engineer. Minimum requirement is 100<br />
pounds per square foot.<br />
INDOOR INSTALLATION<br />
There are special requirements if you place your<br />
spa indoors. Flooring material must provide<br />
adequate traction when wet. Proper drainage is<br />
essential to prevent water puddling. Proper ventilation<br />
to the area is required. The addition of a ventilation<br />
system is recommended. Please see your<br />
contractor for details.<br />
11
installation instructions<br />
SHUT-OFF VALVES<br />
Your spa is equipped with shut-off valves (see<br />
EQUIPMENT DIAGRAM) that shut off the water<br />
flow to the equipment system for dealer service.<br />
At times, a new spa or one that has recently been<br />
serviced, may have the shut-off valves partially<br />
closed which can restrict the water flow <strong>and</strong><br />
hinder jet performance. Be sure the valves are<br />
fully open.<br />
Shut-off valve in<br />
open position<br />
1) Center filter<br />
cartridge over canister<br />
FREEZE PROTECTION<br />
When a freeze condition is detected (which<br />
occurs when the temperature in the heater<br />
housing drops to 55°F (13°C) the jet pump is<br />
automatically activated. In areas with extremely<br />
cold winter conditions, your spa should be fine as<br />
long as it is left running at normal operating temperatures.<br />
For extra protection see your dealer for<br />
an optional freeze sensor. If you plan to turn the spa<br />
off, follow the instructions in this manual (see<br />
SUSPENDED USE OR WINTERIZING YOUR SPA).<br />
OVERHEATING<br />
In the case of extended hot weather, the spa<br />
water temperature may reach <strong>and</strong> maintain 104°F<br />
to 106°F (40°C to 41°C) or higher. This is due to the<br />
ambient temperature <strong>and</strong> the full insulation in the<br />
spa cabinet. You may have the option of shortening<br />
the pump-run time. See SPA CONTROL<br />
OPERATION for available options.<br />
FILTER CARTRIDGE<br />
Your portable spa is equipped with the Constant-<br />
Clean Filtration system.<br />
2) Screw filter<br />
cartridge in place<br />
3) Snap Vortex filter top<br />
in place<br />
NOTE: It is very important that the components of<br />
these filtration systems be installed properly in the<br />
proper part of the spa.<br />
1. Hold the Vortex filter cartridge <strong>and</strong> center it in<br />
the opening of the filter housing.<br />
2. Use the filter h<strong>and</strong>le <strong>and</strong> turn the filter<br />
cartridge clockwise to screw it in place. (Use<br />
caution not to overtighten as damage may<br />
occur to threads <strong>and</strong> is not covered under<br />
warranty.)<br />
3. Grasp the edge of the dome-shaped Vortex<br />
filter top. Center it over the ring <strong>and</strong> gently<br />
snap in place.<br />
12
installation instructions<br />
Safety guard of<br />
suction fitting must<br />
remain in place.<br />
SUCTION GUARDS<br />
The suction guard(s) in the footwell of your spa is<br />
an opening through which the jet pump draws<br />
water. Suction fittings are equipped with a safety<br />
guard. Suction through the fittings can be strong.<br />
The safety guard(s) must remain in place <strong>and</strong><br />
undamaged. A fitting with a damaged guard(s) can<br />
be dangerous, especially to small children or people<br />
with long hair. Should any part of the body become<br />
drawn to a fitting, turn the jet pump off immediately.<br />
Long hair should be restrained in a bathing cap,<br />
never allow it to float freely in the spa. Replace any<br />
missing or damaged suction guard(s).<br />
NOTE: It is normal for the flow rates of the suction<br />
fittings to vary from strong to barely noticeable.<br />
ELECTRICAL REQUIREMENTS<br />
It is the responsibility of the spa owner to ensure<br />
that all electrical connections are made by a qualified<br />
electrician in accordance with all national, state,<br />
<strong>and</strong> local electrical codes in effect at the time of<br />
installation.<br />
13<br />
240 Volt<br />
All connections must be made in<br />
accordance with the wiring diagram<br />
found on the inside of the control box<br />
cover. Connections must be made<br />
with copper conductors only – do NOT<br />
use aluminum wire. All conductors,<br />
circuit breakers, <strong>and</strong> fuses <strong>and</strong> the<br />
GFCI must be sized in accordance to<br />
the total amperage load as specified:<br />
• Permanently connected (Hard wired).<br />
• Rated 240V, 60Hz, 50A, three wires (#6 copper)<br />
plus ground (#8 copper), [4 wires total].<br />
• Circuit breaker or fuse size: 50A.<br />
• A disconnecting means must be installed within<br />
sight from the equipment <strong>and</strong> at least 5 feet<br />
(1.52m) from the inside walls of the spa.<br />
• Connect only to a circuit protected by a Class A<br />
Ground Fault Circuit Interrupter (GFCI).<br />
• For units used in other than single-family<br />
dwellings, a clearly labeled emergency switch<br />
shall be provided as part of the installation. The<br />
switch shall be readily accessible to the occupants<br />
<strong>and</strong> shall be installed at least five feet (1.52 m)<br />
away, adjacent to, <strong>and</strong> within sight of the unit.<br />
• A pressure wire connector is provided on the<br />
exterior of the control box to allow connection of a<br />
bonding wire to any metal ladder, metal water<br />
pipe, common bonding grid (reinforced concrete<br />
slab, ground plate beneath the spa), or any other<br />
metal within 5 feet (1.52 m) of the spa. The<br />
bonding wire shall be copper <strong>and</strong> at least #8<br />
AWG (8.42mm²), #6 in Canada.
installation instructions<br />
NOTE: Ensure that a Ground Fault Circuit Interrupter<br />
(GFCI) is properly installed. Failure to do so may result<br />
in spa malfunction or damage which is not warranted.<br />
GFCIs are available from your authorized dealer.<br />
120 Volt<br />
120 Volt spas shall be plugged into a properly<br />
grounded, grounding type 15 amp receptacle on a<br />
dedicated circuit. A dedicated circuit is a circuit with<br />
no other components that consume power, such as<br />
lights, televisions, radios, computers, or<br />
other electronic devices. These could<br />
cause your spa to malfunction by any of<br />
the following: unusual text on the control<br />
panel, slow heating, poor jet action,<br />
tripping house breaker, or blown fuses.<br />
Failure to follow these instructions could<br />
lead to premature failure of spa components<br />
that would not be covered under<br />
the warranty. The dedicated circuit shall<br />
meet the following specifications:<br />
• Rated 120V, 60Hz, 15A (2 wires plus ground)<br />
• Circuit breaker or fuse size: 15A<br />
• The receptacle must be at least 5 feet (1.52 m)<br />
from the spa.<br />
• The 15 foot GFCI power cord provided with the<br />
spa must be plugged directly into the receptacle.<br />
Do NOT use an extension cord or any other<br />
adaptor. Actual exposed length of cord will vary<br />
by model, but will never be less than 12 feet.<br />
Convert 120 Volt to 240 Volt<br />
120 Volt spas may be converted to operate on 240V,<br />
50A. All connections must be made by a licensed<br />
electrician.<br />
1. Disconnect the power by unplugging the power<br />
cord from the receptacle, removing the cord from<br />
the terminal block on the circuit board, <strong>and</strong> storing<br />
it with your owner’s manual.<br />
2.Locate the white wire connecting J11 to J32 on<br />
the circuit board. Remove the wire <strong>and</strong> discard.<br />
3.For 50A operation, move dip switch 10 to the OFF<br />
position.<br />
4.Install 240V power as indicated in the 240 Volt<br />
section.<br />
5.Rated 240V, 60Hz, 50A, three wires (#6 copper)<br />
plus ground (#8 copper), [4 wires total].<br />
14
starting your spa<br />
START-UP PROCEDURE<br />
Your spa is equipped with solid-state Comfort<br />
Controls specific to your spa model. Please see SPA<br />
CONTROL OPERATION.<br />
To start your spa, you need the water test strips in<br />
the chemical kit provided iwth your spa. It is important<br />
to follow each of these steps when starting<br />
your spa. Once you have completed the following<br />
steps, refer to the WATER TREATMENT section for<br />
proper start-up water maintenance.<br />
NOTE: Your spa has been filled <strong>and</strong> test-run at the<br />
factory. The first time your spa is filled with water,<br />
some discoloration from residual test water may<br />
appear. This will disappear when the spa is completely<br />
filled <strong>and</strong> the filtration system is functioning.<br />
Test the water for the proper chemical balance <strong>and</strong><br />
adjust as necessary. PROPER CHEMICAL BAL-<br />
ANCE IS IMPORTANT for your safety <strong>and</strong> the<br />
longevity of your spa.<br />
THERAPY PUMP<br />
Allow the spa to circulate on high-speed (see SPA<br />
CONTROL OPERATION) for four to five minutes to<br />
discharge air from the plumbing system. Do not<br />
expect hot water immediately from the jets; the<br />
heater will take several hours to heat the water.<br />
Start-up procedure for all models<br />
1. Place spa on a hard, flat, level surface. Make<br />
sure the power supply is off.<br />
2. Make sure the suction guard(s) in the footwell<br />
are in place <strong>and</strong> undamaged.<br />
3. Open the equipment door. (SEE EQUIPMENT<br />
DIAGRAM). Tighten all disconnects <strong>and</strong> open all<br />
shut-off valves.<br />
NOTE: Keep the drain valve closed at all times<br />
except when draining the spa (do not rely on the<br />
cap to stop the flow of water). Not doing so could<br />
result in damage to the drain valve due to freezing<br />
water.<br />
Fill spa with water to<br />
two-thirds of the way<br />
up the Vortex skimmer<br />
opening.<br />
4. Install filter cartridge. (See INSTALLATION<br />
INSTRUCTIONS, Filter Cartridge(s).)<br />
5. Fill the spa with water to two-thirds of the way<br />
up the Vortex skimmer openings. The use of a<br />
Fill Filter is recommended, especially in areas<br />
with high mineral content in the water.<br />
15
starting your spa<br />
Use TEMP+- pad to set<br />
water temperature.<br />
Spa cover helps<br />
maintain a constant<br />
water temperature.<br />
6. Turn the power on.<br />
7. Your spa is now in “pump priming” mode <strong>and</strong> a<br />
“Pr” message displays in the LCD window of<br />
the control panel. While in this mode the spa<br />
appears idle, which lasts approximately four to<br />
five minutes if not exited manually. To exit<br />
manually, press the TEMP+- pad.<br />
8. At this time the spa should have water flowing<br />
from the jets. If the pump has not primed <strong>and</strong><br />
the water is not flowing from the jets after two<br />
minutes TURN OFF POWER TO THE SPA<br />
<strong>and</strong> vent air from the pumps by slightly opening<br />
thepump unions. After turning the power on<br />
again, the spa initiates a new priming mode.<br />
Repeat steps above.<br />
9. The system requires approximately two minutes<br />
of water flow to determine the water temperature.<br />
After two minutes of water flow, the temperature<br />
is displayed as actual water temperature.<br />
After you have manually exited the priming<br />
mode (or allowed the spa to automatically exit)<br />
the LCD window momentarily displays 102°F<br />
(39°C) <strong>and</strong> then the display switches to - - °F.<br />
10. The factory default setting for water temperature<br />
is 102°F (39°C). Use the TEMP+- pad on the<br />
control panel to set the water temperature to<br />
the desired level. (See SPA CONTROL OPERA-<br />
TION, Temperature Display And Adjustment.)<br />
Your spa heats at the rate of approximately one<br />
degree per hour for 120V systems, <strong>and</strong> five<br />
degrees per hour for 240V systems.<br />
SPA COVER<br />
When the spa is not in use, the spa cover should<br />
be kept on the spa to retain the water’s heat <strong>and</strong> to<br />
keep out dirt, leaves, etc. Your heater maintains a<br />
constant water temperature between uses.<br />
For your safety <strong>and</strong> convenience, the cover is<br />
equipped with adjustable straps, safety locks, <strong>and</strong><br />
h<strong>and</strong>les. Use the exterior h<strong>and</strong>les to remove <strong>and</strong><br />
replace your cover. We suggest that you use the<br />
safety locks to help keep out unintended users<br />
<strong>and</strong> prevent the cover from being blown off in<br />
windy conditions.<br />
16
operating your spa<br />
MAXIMUM THERAPY JETTING SYSTEM<br />
HK TM 8 NECK JETS<br />
The neck jets are turned on <strong>and</strong> off (when the jet<br />
pump is on) using the small teardrop neck jet<br />
control lever.<br />
HK TM 12 JETS<br />
This small jet provides a targeted stream of water.<br />
HK TM 16 JETS<br />
The direction of water flow can be changed by<br />
redirecting the central nozzle. The water flow can be<br />
adjusted by turning the jet face using the four tabs.<br />
HK40 JET<br />
High-flow jet strategically positioned within the spa<br />
to provide passive <strong>and</strong> whole body massage.<br />
HK8 NECK JET CONTROL<br />
Use this control to increase or decrease the air flow<br />
to the neck jets.<br />
17
the 630<br />
5<br />
11<br />
Use the Bather’s<br />
panel to set the<br />
temperature,<br />
select the<br />
filtration, <strong>and</strong><br />
turn on the jets<br />
<strong>and</strong> lights.<br />
This valve<br />
controls the<br />
water flow of<br />
the neck jets.<br />
# Component Identification Qty.<br />
1 HK TM 12 Jets 24<br />
2 HK TM 16 Jets 4<br />
4 HK TM 8 Neck Jets 2<br />
5 Bathers Control Panel 1<br />
6 IR Sensor 1<br />
7 Filter Canisters 2<br />
8 Suction Fittings 4<br />
9 Floor Drain 1<br />
10 Light 1<br />
11 Neck Jet Valve 1<br />
12 Ozone Injector Fitting 1<br />
13 Spa Frog ® 1<br />
14 Spa Frog ® Return Fitting 1<br />
Physical Specifications<br />
Size<br />
Dimensions 84" x 84"<br />
Height 34"<br />
Interior Depth 32.5"<br />
Seating Capacity/Positions 6/7<br />
Weight Dry/Lbs. 780<br />
Weight Full/Lbs. 4032<br />
Water Capacity/Gallons 390<br />
Total Therapy Jets 30<br />
18
the ultimate 630<br />
5<br />
11<br />
16<br />
Use the Bather’s<br />
panel to set the<br />
temperature,<br />
select the<br />
filtration, <strong>and</strong><br />
turn on the jets<br />
<strong>and</strong> lights.<br />
This valve<br />
controls the<br />
water flow of<br />
the neck jets.<br />
Use PowerShift<br />
control to select<br />
jet zones.<br />
# Component Identification Qty.<br />
1 HK TM 12 Jets 16<br />
2 HK TM 16 Jets 4<br />
3 HK40 Jets 8<br />
4 HK TM 8 Neck Jets 2<br />
5 Bathers Control Panel 1<br />
6 IR Sensor 1<br />
7 Filter Canisters 2<br />
8 Suction Fittings 4<br />
9 Floor Drain 1<br />
10 Light 1<br />
11 Neck Jet Valve 1<br />
12 Ozone Injector Fitting 1<br />
13 Spa Frog ® 1<br />
14 Spa Frog ® Return Fitting 1<br />
15 Waterfall Valve 1<br />
16 PowerShift Controls 2<br />
17 Waterfall Feature 1<br />
19<br />
Physical Specifications<br />
Size<br />
Dimensions 84" x 84"<br />
Height 34"<br />
Interior Depth 32.5"<br />
Seating Capacity/Positions 6/7<br />
Weight Dry/Lbs. 780<br />
Weight Full/Lbs. 4032<br />
Water Capacity/Gallons 390<br />
Total Therapy Jets 30
ultimate 630<br />
ZONE 2A<br />
Upper-,<br />
mid- <strong>and</strong><br />
lower-back<br />
jets.*<br />
<br />
<br />
ZONE 1A<br />
Mid-, lowerback<br />
<strong>and</strong><br />
leg jets.*<br />
<br />
<br />
<br />
<br />
<br />
<br />
<br />
<br />
ZONE 2B<br />
Lowerbody<br />
jets.*<br />
<br />
<br />
ZONE 1B<br />
Upper- <strong>and</strong><br />
mid-back<br />
jets.*<br />
*Neck jets<br />
operate in<br />
zone 2.<br />
*Waterfall<br />
operates in<br />
zone 1.<br />
20
the 530<br />
5<br />
11<br />
Use the Bather’s<br />
panel to set the<br />
temperature,<br />
select the<br />
filtration, <strong>and</strong><br />
turn on the jets<br />
<strong>and</strong> lights.<br />
This valve<br />
controls the<br />
water flow of<br />
the neck jets.<br />
# Component Identification Qty.<br />
1 HK TM 12 Jets 24<br />
2 HK TM 16 Jets 4<br />
4 HK TM 8 Neck Jets 2<br />
5 Bathers Control Panel 1<br />
6 IR Sensor 1<br />
7 Filter Canisters 2<br />
8 Suction Fittings 4<br />
9 Floor Drain 1<br />
10 Light 1<br />
11 Neck Jet Valve 1<br />
12 Ozone Injector Fitting 1<br />
13 Spa Frog ® 1<br />
14 Spa Frog ® Return Fitting 1<br />
Physical Specifications<br />
Size<br />
Dimensions 84" x 84"<br />
Height 34"<br />
Interior Depth 32.5"<br />
Seating Capacity/Positions 5<br />
Weight Dry/Lbs. 780<br />
Weight Full/Lbs. 3699<br />
Water Capacity/Gallons 350<br />
Total Therapy Jets 30<br />
21
ultimate 530<br />
5<br />
11<br />
16<br />
Use the Bather’s<br />
panel to set the<br />
temperature,<br />
select the<br />
filtration, <strong>and</strong><br />
turn on the jets<br />
<strong>and</strong> lights.<br />
This valve<br />
controls the<br />
water flow of<br />
the neck jets.<br />
Use PowerShift<br />
control to select<br />
jet zones.<br />
# Component Identification Qty.<br />
1 HK12 Jets 16<br />
2 HK16 Jets 4<br />
3 HK40 Jets 8<br />
4 HK8 Neck Jets 2<br />
5 Bathers Control Panel 1<br />
6 IR Sensor 1<br />
7 Filter Canisters 2<br />
8 Suction Fittings 4<br />
9 Floor Drain 1<br />
10 Light 1<br />
11 Neck Jet Valve 1<br />
12 Ozone Injector Fitting 1<br />
13 Spa Frog ® 1<br />
14 Spa Frog ® Return Fitting 1<br />
15 Waterfall Valve 1<br />
16 PowerShift Controls 2<br />
17 Waterfall Feature 1<br />
22<br />
Physical Specifications<br />
Size<br />
Dimensions 84" x 84"<br />
Height 34"<br />
Interior Depth 32.5"<br />
Seating Capacity/Positions 5<br />
Weight Dry/Lbs. 780<br />
Weight Full/Lbs. 3699<br />
Water Capacity/Gallons 350<br />
Total Therapy Jets 30
ultimate 530<br />
ZONE 2A<br />
Upper-,<br />
mid- <strong>and</strong><br />
lower-back<br />
jets.*<br />
<br />
<br />
<br />
<br />
2<br />
<br />
1<br />
<br />
<br />
ZONE 1A<br />
Mid-, lowerback<br />
<strong>and</strong><br />
leg jets.*<br />
<br />
<br />
<br />
<br />
<br />
ZONE 2B<br />
Lowerbody<br />
jets.*<br />
<br />
ZONE 1B<br />
Upper- <strong>and</strong><br />
mid-back<br />
jets.*<br />
2<br />
1<br />
*Neck jets<br />
operate in<br />
zone 2.<br />
*Waterfall<br />
operates in<br />
zone 1.<br />
23
the 418<br />
5<br />
11<br />
Use the Bather’s<br />
panel to set the<br />
temperature,<br />
select the<br />
filtration, <strong>and</strong><br />
turn on the jets<br />
<strong>and</strong> lights.<br />
This valve<br />
controls the<br />
water flow of<br />
the neck jets.<br />
# Component Identification Qty.<br />
1 HK TM 12 Jets 14<br />
2 HK TM 16 Jets 2<br />
4 HK TM 8 Neck Jets 2<br />
5 Bathers Control Panel 1<br />
6 IR Sensor 1<br />
7 Filter Canisters 2<br />
8 Suction Fitting 1<br />
9 Floor Drain 1<br />
10 Light 1<br />
11 Neck Jet Valve 1<br />
12 Ozone Injector Fitting 1<br />
13 Spa Frog ® 1<br />
14 Spa Frog ® Return Fitting 1<br />
Physical Specifications<br />
Size<br />
Dimensions 77" x 84"<br />
Height 34"<br />
Interior Depth 32.5"<br />
Seating Capacity/Positions 4/7<br />
Weight Dry/Lbs. 600<br />
Weight Full/Lbs. 3436<br />
Water Capacity/Gallons 340<br />
Total Therapy Jets 18<br />
24
the ultimate 418<br />
5<br />
11<br />
16<br />
Use the Bather’s<br />
panel to set the<br />
temperature,<br />
select the<br />
filtration, <strong>and</strong><br />
turn on the jets<br />
<strong>and</strong> lights.<br />
This valve<br />
controls the<br />
water flow of<br />
the neck jets.<br />
Use PowerShift<br />
control to select<br />
jet zones.<br />
# Component Identification Qty.<br />
1 HK TM 12 Jets 10<br />
2 HK TM 16 Jets 2<br />
3 HK40 Jets 4<br />
4 HK TM 8 Neck Jets 2<br />
5 Bathers Control Panel 1<br />
6 IR Sensor 1<br />
7 Filter Canisters 2<br />
8 Suction Fitting 1<br />
9 Floor Drain 1<br />
10 Light 1<br />
11 Neck Jet Valve 1<br />
12 Ozone Injector Fitting 1<br />
13 Spa Frog ® 1<br />
14 Spa Frog ® Return Fitting 1<br />
15 Waterfall Valve 1<br />
16 PowerShift Control 1<br />
17 Waterfall Feature 1<br />
Physical Specifications<br />
Size<br />
Dimensions 77" x 84"<br />
Height 34"<br />
Interior Depth 32.5"<br />
Seating Capacity/Positions 4/7<br />
Weight Dry/Lbs. 600<br />
Weight Full/Lbs. 3436<br />
Water Capacity/Gallons 340<br />
Total Therapy Jets 18<br />
25
ultimate 418<br />
<br />
<br />
<br />
<br />
<br />
ZONE 2<br />
Upper-,<br />
mid- <strong>and</strong><br />
lower-back<br />
jets.*<br />
<br />
<br />
<br />
ZONE 1<br />
Lowerbody<br />
jets.*<br />
<br />
<br />
*Neck jets<br />
operate in<br />
zone 2.<br />
Waterfall<br />
operates in<br />
zone 1.<br />
26
the 315<br />
5<br />
11<br />
Use the Bather’s<br />
panel to set the<br />
temperature,<br />
select the<br />
filtration, <strong>and</strong><br />
turn on the jets<br />
<strong>and</strong> lights.<br />
This valve<br />
controls the<br />
water flow of<br />
the neck jets.<br />
# Component Identification Qty.<br />
1 HK TM 12 Jets 11<br />
2 HK TM 16 Jets 2<br />
4 HK TM 8 Neck Jets 2<br />
5 Bathers Control Panel 1<br />
6 IR Sensor 1<br />
7 Filter Canisters 2<br />
8 Suction Fitting 1<br />
9 Floor Drain 1<br />
10 Light 1<br />
11 Neck Jet Valve 1<br />
12 Ozone Injector Fitting 1<br />
13 Spa Frog ® 1<br />
14 Spa Frog ® Return Fitting 1<br />
Physical Specifications<br />
Size<br />
Dimensions 60" x 84"<br />
Height 29.5"<br />
Interior Depth 28"<br />
Seating Capacity/Positions 3/4<br />
Weight Dry/Lbs. 400<br />
Weight Full/Lbs. 2026<br />
Water Capacity/Gallons 195<br />
Total Therapy Jets 15<br />
27
the ultimate 315<br />
5<br />
11<br />
16<br />
Use the Bather’s<br />
panel to set the<br />
temperature,<br />
select the<br />
filtration, <strong>and</strong><br />
turn on the jets<br />
<strong>and</strong> lights.<br />
This valve<br />
controls the<br />
water flow of<br />
the neck jets.<br />
Use PowerShift<br />
control to select<br />
jet zones.<br />
# Component Identification Qty.<br />
1 HK TM 12 Jets 7<br />
2 HK TM 16 Jets 2<br />
3 HK40 Jets 4<br />
4 HK TM 8 Neck Jets 2<br />
5 Bathers Control Panel 1<br />
6 IR Sensor 1<br />
7 Filter Canisters 2<br />
8 Suction Fitting 1<br />
9 Floor Drain 1<br />
10 Light 1<br />
11 Neck Jet Valve 1<br />
12 Ozone Injector Fitting 1<br />
13 Spa Frog ® 1<br />
14 Spa Frog ® Return Fitting 1<br />
15 Waterfall Valve 1<br />
16 PowerShift Control 1<br />
17 Waterfall Feature 1<br />
28<br />
Physical Specifications<br />
Size<br />
Dimensions 60" x 84"<br />
Height 29.5"<br />
Interior Depth 28"<br />
Seating Capacity/Positions 3/4<br />
Weight Dry/Lbs. 400<br />
Weight Full/Lbs. 2026<br />
Water Capacity/Gallons 195<br />
Total Therapy Jets 15
ultimate 315<br />
<br />
<br />
<br />
<br />
<br />
ZONE 2<br />
Upper-,<br />
mid- <strong>and</strong><br />
lower-back<br />
jets.*<br />
<br />
ZONE 1<br />
Lowerbody<br />
jets.*<br />
<br />
*Neck jets<br />
operate in<br />
zone 2.<br />
29
the RENDEZVOUS<br />
4<br />
Use the Bather’s<br />
panel to set the<br />
temperature,<br />
select the<br />
filtration, <strong>and</strong><br />
turn on the jets<br />
<strong>and</strong> lights.<br />
# Component Identification Qty.<br />
1 HK12 Jets 10<br />
3 HK8 Neck Jets 2<br />
4 Bathers Control Panel 1<br />
5 Filter Canister 1<br />
6 Suction Fittings 2<br />
7 Floor Drain 1<br />
8 Light 1<br />
9 Neck Jet Valve 1<br />
10 Ozone Injector Fitting 1<br />
11 Spa Frog ® Return Fitting 1<br />
12 Spa Frog ® 1<br />
Physical Specifications<br />
Size<br />
Dimensions 68" x 68"<br />
Height 29.5"<br />
Interior Depth 28"<br />
Seating Positions 3<br />
Weight Dry/Lbs. 300<br />
Weight Full/Lbs. 1545<br />
Water Capacity/Gallons 150<br />
Total Therapy Jets 12<br />
30
the RETREAT<br />
4<br />
Use the Bather’s<br />
panel to set the<br />
temperature,<br />
select the<br />
filtration, <strong>and</strong><br />
turn on the jets<br />
<strong>and</strong> lights.<br />
# Component Identification Qty.<br />
1 HK12 Jets 10<br />
2 HK16 Jets 2<br />
3 HK8 Neck Jets 2<br />
4 Bathers Control Panel 1<br />
5 Filter Canister 1<br />
6 Suction Fittings 2<br />
7 Floor Drain 1<br />
8 Light 1<br />
9 Neck Jet Valve 1<br />
10 Ozone Injector Fitting 1<br />
11 Spa Frog ® Return Fitting 1<br />
12 Spa Frog ® 1<br />
Physical Specifications<br />
Size<br />
Dimensions 77" x 77"<br />
Height 29.5"<br />
Interior Depth 28"<br />
Seating Positions 4-5<br />
Weight Dry/Lbs. 475<br />
Weight Full/Lbs. 2977<br />
Water Capacity/Gallons 300<br />
Total Therapy Jets 14<br />
31
limited 744E<br />
5<br />
10<br />
Use the Bather’s<br />
control panel to<br />
set the<br />
temperature,<br />
select the<br />
filtration, <strong>and</strong><br />
turn on the jets<br />
<strong>and</strong> lights.<br />
This valve<br />
controls the<br />
water flow of<br />
the neck jets.<br />
# Component Identification Qty.<br />
1 HK TM 8 Jets 26<br />
2 HK12 Jets 12<br />
3 HK TM 16 Jets 2<br />
4 HK40 Jets 4<br />
5 Bather’s Control Panel 1<br />
6 Filter Canisters 2<br />
7 Suction Fittings 4<br />
8 Ozone-ready Injector Fitting 1<br />
9 Light 1<br />
10 Neck Jet Valve 1<br />
11 Jet Selector 1<br />
12 Floor Drain 1<br />
13 Waterfall Feature (option) 1<br />
14 Waterfall Valve (option) 1<br />
15 Spa Frog® Sanitation (option) 1<br />
16 Spa Frog® Return Fitting (option) 1<br />
Physical Specifications<br />
Size<br />
Dimensions 90" x 90"<br />
Height 34"<br />
Interior Depth 32.5"<br />
Seating Capacity/Positions 7<br />
Weight Dry/Lbs. 825<br />
Weight Full/Lbs. 4161<br />
Water Capacity/Gallons 400<br />
Total Therapy Jets 44<br />
32
limited 744E<br />
ZONE 1<br />
ZONE 2A<br />
Upper-,<br />
mid- <strong>and</strong><br />
lower-body<br />
jets.*<br />
ZONE 2B<br />
Lowerback<br />
jets.*<br />
33<br />
*Neck jets<br />
operate in<br />
all zones.
limited 641R<br />
5<br />
10<br />
Use the Bather’s<br />
control panel to<br />
set the<br />
temperature,<br />
select the<br />
filtration, <strong>and</strong><br />
turn on the jets<br />
<strong>and</strong> lights.<br />
This valve<br />
controls the<br />
water flow of<br />
the neck jets.<br />
# Component Identification Qty.<br />
1 HK TM 8 Jets 19<br />
2 HK12 Jets 16<br />
3 HK TM 16 Jets 2<br />
4 HK40 Jets 4<br />
5 Bather’s Control Panel 1<br />
6 Filter Canisters 2<br />
7 Suction Fittings 4<br />
8 Ozone-ready Injector Fitting 1<br />
9 Light 1<br />
10 Neck Jet Valve 1<br />
11 Jet Selector 1<br />
12 Floor Drain 1<br />
13 Waterfall Feature (option) 1<br />
14 Waterfall Valve (option) 1<br />
15 Spa Frog® Sanitation (option) 1<br />
16 Spa Frog® Return Fitting (option) 1<br />
Physical Specifications<br />
Size<br />
Dimensions 84" x 84"<br />
Height 34"<br />
Interior Depth 32.5"<br />
Seating Capacity/Positions 6<br />
Weight Dry/Lbs. 740<br />
Weight Full/Lbs. 3659<br />
Water Capacity/Gallons 350<br />
Total Therapy Jets 41<br />
34
J<br />
limited 641R<br />
ZONE 1<br />
ZONE 2A<br />
Upper- <strong>and</strong><br />
mid- back,<br />
<strong>and</strong> leg<br />
jets.*<br />
ZONE 2B<br />
Lowerbody<br />
jets.*<br />
2<br />
1<br />
*Neck jets<br />
operate in<br />
all zones.<br />
35
limited 520M<br />
5<br />
10<br />
Use the Bather’s<br />
control panel to<br />
set the<br />
temperature,<br />
select the<br />
filtration, <strong>and</strong><br />
turn on the jets<br />
<strong>and</strong> lights.<br />
This valve<br />
controls the<br />
water flow of<br />
the neck jets.<br />
# Component Identification Qty.<br />
1 HK TM 8 Jets 6<br />
2 HK12 Jets 9<br />
3 HK TM 16 Jets 1<br />
4 HK40 Jets 4<br />
5 Bather’s Control Panel 1<br />
6 Filter Canisters 1<br />
7 Suction Fittings 2<br />
8 Floor Drain 1<br />
9 Light 1<br />
10 Neck Jet Valve 1<br />
11 Jet Selector 1<br />
12 Ozone-ready Injector Fitting 1<br />
13 Spa Frog® Sanitation (optional) 1<br />
14 Spa Frog® Return Fitting (option) 1<br />
Physical Specifications<br />
Size<br />
Dimensions 77" x 77"<br />
Height 34"<br />
Interior Depth 32.5"<br />
Seating Capacity/Positions 5<br />
Weight Dry/Lbs. 450<br />
Weight Full/Lbs. 2660<br />
Water Capacity/Gallons 265<br />
Total Therapy Jets 20<br />
36
limited 520M<br />
ZONE 1A<br />
Upper- <strong>and</strong><br />
mid- <strong>and</strong><br />
lower-back<br />
jets.*<br />
ZONE 1B<br />
Lowerbody<br />
jets.*<br />
*Neck jets<br />
operate in<br />
all zones.<br />
37
limited 319S<br />
5<br />
10<br />
Use the Bather’s<br />
control panel to<br />
set the<br />
temperature,<br />
select the<br />
filtration, <strong>and</strong><br />
turn on the jets<br />
<strong>and</strong> lights.<br />
This valve<br />
controls the<br />
water flow of<br />
the neck jets.<br />
# Component Identification Qty.<br />
1 HK TM 8 Jets 2<br />
2 HK12 Jets 12<br />
3 HK TM 16 Jets 1<br />
4 HK40 Jets 4<br />
5 Bather’s Control Panel 1<br />
6 Filter Canisters 2<br />
7 Suction Fitting 1<br />
8 Ozone-ready Injector Fitting 1<br />
9 Light 1<br />
10 Neck Jet Valve 1<br />
11 Jet Selector 1<br />
12 Floor Drain 1<br />
13 Waterfall Feature (option) 1<br />
14 Waterfall Valve (option) 1<br />
15 Spa Frog ® Sanitation (option) 1<br />
16 Spa Frog® Return Fitting (option) 1<br />
Physical Specifications<br />
Size<br />
Dimensions 84" x 60"<br />
Height 29.5"<br />
Interior Depth 28"<br />
Seating Capacity/Positions 3/4<br />
Weight Dry/Lbs. 410<br />
Weight Full/Lbs. 1786<br />
Water Capacity/Gallons 165<br />
Total Therapy Jets 19<br />
38
limited 319S<br />
ZONE 1A<br />
Upper- <strong>and</strong><br />
mid- <strong>and</strong><br />
lower-back<br />
jets.*<br />
ZONE 1B<br />
Lowerbody<br />
jets.*<br />
*Neck jets<br />
operate in<br />
all zones.<br />
39
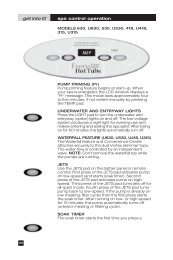
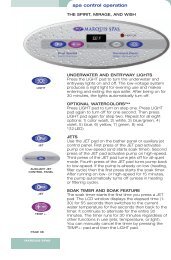
spa control operation<br />
ALL MODELS<br />
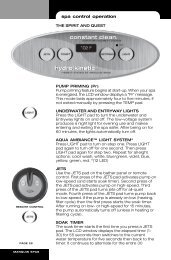
PUMP PRIMING (Pr)<br />
Pump priming feature begins at start-up. When<br />
your spa is energized, the LCD window displays a<br />
“Pr” message. This mode lasts approximately four<br />
to five minutes, if not exited manually by pressing<br />
the TEMP pad.<br />
UNDERWATER AND ENTRYWAY LIGHTS<br />
Press the LIGHT pad to turn the underwater <strong>and</strong><br />
entryway (option) lights on <strong>and</strong> off. The low-voltage<br />
system produces a night light for evening use <strong>and</strong><br />
makes entering <strong>and</strong> exiting the spa safer. After being<br />
on for 60 minutes, the lights automatically turn off.<br />
WATERFALL FEATURE (U630, U530, U418, U315,<br />
744E, 641R, 319S)<br />
The Waterfall feature <strong>and</strong> Convenience Center<br />
attaches securely to the dual Vortex skimmer tops.<br />
The water flow is controlled by an independent<br />
valve. NOTE: Don’t remove the waterfall top while<br />
the pumps are running.<br />
JETS<br />
Use the JETS pad on the bather panel or remote<br />
control. First press of the JETS pad activates pump<br />
on low-speed (<strong>and</strong> starts soak timer). Second<br />
press of the JETS pad activates pump on highspeed.<br />
Third press of the JETS pad turns jets off for<br />
all-quiet mode. Fourth press of the JETS pad turns<br />
pump back to low-speed. If the pump is already on<br />
low (heating, filter cycle) then the first press starts<br />
the soak timer. After running on low- or high-speed<br />
for 15 minutes, the pump automatically turns off<br />
(unless in heating or filtering cycle).<br />
40<br />
SOAK TIMER<br />
The soak timer starts the first time you press a<br />
JETS pad. The LCD window displays the elapsed<br />
time (1-30) for 55 seconds then switches to the<br />
current water temperature for five seconds then<br />
back to the timer. It continues to alternate for the<br />
entire 30 minutes. The timer runs for 30 minutes
spa control operation<br />
regardless of other functions in use (jets, temperature,<br />
or light). You can manually cancel the timer by<br />
pressing the TEMP+- pad <strong>and</strong> then the LIGHT pad.<br />
CONSTANTCLEAN WATER MANAGEMENT<br />
with built-in sanitation (see page 61).<br />
SOLID-STATE OZONATOR<br />
The ozonator greatly reduces the amount of<br />
chemical sanitizer you need in the water to keep<br />
your water clean. The ozonator functions whenever<br />
the system is operating on filter or clean up cycles.<br />
You should occasionally inspect your ozonator to<br />
ensure it continues to light (see MAINTENANCE,<br />
Every Three to Four Months). A good time to do this<br />
is when you drain <strong>and</strong> fill your spa.<br />
SMARTCLEAN FILTRATION<br />
Your spa is preset at the factory with a default<br />
setting to filter itself using the jet pump on lowspeed<br />
for two hours twice in a 24-hour period.<br />
These settings represent the filter settings necessary<br />
for average use. The timing of the first filter<br />
cycle is determined by when the spa was initially<br />
energized. The first cycle begins six minutes after<br />
this initial power-up. The second filter cycle begins<br />
12 hours after the first cycle.<br />
Factory Default Settings:<br />
• Filter Cycle Duration: F2 (2 hours)<br />
• Filter Cycles: 2C (twice per day)<br />
• SmartClean: 1H (1 hour)<br />
<strong>Marquis</strong> Ozonator<br />
reduces the need for<br />
chemical sanitizers.<br />
These settings represent the most commonly used<br />
settings, but your use may be different, depending<br />
upon many variables – frequency, number of<br />
bathers, duration, water capacity, etc. These variables<br />
affect the quality of water <strong>and</strong> the way it<br />
should be managed to achieve the most effective<br />
cleansing. Selectable choices for the settings of the<br />
operation systems allow flexibility <strong>and</strong> ensure your<br />
<strong>Everyday</strong> Hot Tub remains easy to maintain for your<br />
particular set of circumstances.<br />
To adjust the filter settings<br />
First press of the SETTINGS pad displays the filter<br />
time settings (F1, F2, F4, F6). Use the TEMP+- pad to<br />
scroll through the options. When desired selection<br />
has been reached, press SETTINGS pad again to<br />
enter selection <strong>and</strong> advance to the filter cycle<br />
settings (2C, 1d, 1n). For example, if you select 2C<br />
<strong>and</strong> F2, your spa will filter two hours twice a day for a<br />
total of four hours of filtration daily.<br />
41
spa control operation<br />
Use the TEMP+- pad to scroll through filter cycle<br />
options. When desired selection has been<br />
reached, press the SETTINGS pad to enter selection<br />
<strong>and</strong> advance to the SmartClean settings.<br />
Selectable filter cycles <strong>and</strong> cycle duration<br />
• 2C: twice per day (once every 12 hours)<br />
• 1d: once during the day<br />
• 1n: once during the night<br />
• F1: 45 minutes<br />
• F2: 2 hours<br />
• F4: 4 hours<br />
• F6: 6 hours<br />
SMARTCLEAN<br />
Since a spa is always covered when not in use, it<br />
stays fairly free of debris or outside contamination.<br />
Contamination to a spa’s water occurs during<br />
usage, so filtering immediately after usage is the<br />
most effective time to clean the spa water. Your<br />
spa is preset at the factory with a default setting to<br />
filter for one hour (1H) every time your spa is used.<br />
This filtration cycle begins 30 minutes after the spa<br />
light or jet pump has been deactivated. The pump<br />
runs on low-speed to filter the water for the cycle’s<br />
duration.<br />
Selectable SmartClean Settings<br />
• 1H: 1 hour<br />
• 2H: 2 hours<br />
• 3H: 3 hours<br />
• 4H: 4 hours<br />
• OH: Off<br />
To adjust the SmartClean settings:<br />
Use the TEMP+- pad to scroll through options. When<br />
desired selection has been reached. Press SET-<br />
TINGS pad to enter selection <strong>and</strong> exit settings mode.<br />
TEMPERATURE DISPLAY AND ADJUSTMENT<br />
Factory Default Settings:<br />
• Temperature: 102°F (39°C)<br />
The LCD window displays the actual water temperature.<br />
Pressing the TEMP+- pad makes the<br />
numbers flash, then pressing the pad again (repeatedly)<br />
increases the set temperature one<br />
degree at a time, up to 104°F (40°C). After a short<br />
42
spa control operation<br />
pause, the actual temperature displays. Press<br />
TEMP+- pad repeatedly to decrease the set temperature<br />
to 80°F (27°C).<br />
*NOTE: In event of a power outage, all settings<br />
revert to the preset, default settings.<br />
HEAT MODE<br />
Your spa comes preset in the st<strong>and</strong>ard heat mode.<br />
For most applications, the st<strong>and</strong>ard mode should be<br />
used. If you are in a warm weather climate <strong>and</strong> the<br />
spa does not require as much heat, the economy<br />
mode may work best. For a vacation home or for<br />
very infrequent use, the sleep mode provides<br />
filtration <strong>and</strong> circulation with lower energy dem<strong>and</strong>.<br />
In economy mode your spa heats only during the<br />
filter cycle. In sleep mode your spa will maintain a<br />
water temperature that is 20°F (7°C) below the set<br />
temperature. This ensures your spa will be ready to<br />
use more quickly (allow about one hour per one<br />
degree F for heating your spa’s water) when<br />
increasing the temperature to the desired level.<br />
The spa’s heat mode can be adjusted to one of<br />
three different settings:<br />
St<strong>and</strong>ard Mode<br />
The spa water heats to the temperature as set at<br />
the bather’s panel. In this mode the filtration pump<br />
turns on for two minutes every half-hour to “poll” or<br />
check the water. If heat is needed the unit heats to<br />
the set temperature. The LCD window steadily<br />
displays the actual temperature in this mode.<br />
Economy Mode<br />
In this mode the spa only heats to the set temperature<br />
during a filter cycle. The LCD window displays<br />
“Ec” alternately flashing with the actual temperature<br />
when the spa is up to temperature <strong>and</strong> “Ec” steadily<br />
when the spa’s water temperature is below the set<br />
temperature.<br />
43<br />
Sleep Mode<br />
Your spa will maintain a water temperature that is<br />
20°F (7°C) below the set temperature. Heater<br />
functions only during a filter cycle. The LCD window<br />
displays “SL” flashing alternately with the actual<br />
temperature when the spa is up to set temperature<br />
<strong>and</strong> displays “SL” steadily when below set<br />
temperature.
spa control operation<br />
To Adjust the Heat Mode:<br />
First press the SETTINGS pad to display the heat<br />
mode settings (St, Ec, SL). Use the TEMP+– pad to<br />
scroll through the options. When desired selection<br />
has been reached, press SETTING pad again to enter<br />
selection <strong>and</strong> advance to the filter cycle settings (F1,<br />
F2, F4, F6).<br />
HEAT LIGHT<br />
The HEAT light illuminates when the heater is on. The<br />
pump circulates on low-speed whenever the thermostat<br />
calls for heat.<br />
SYSTEM LOCK<br />
Once you find <strong>and</strong> establish the settings that work<br />
best for your individual needs, use system lock to<br />
keep from inadvertently changing the settings.<br />
Press the TEMP+- pad <strong>and</strong> then immediately press<br />
the SETTINGS pad. Unlock by repeating sequence.<br />
While the system is locked, you may still operate the<br />
jets <strong>and</strong> light. The LCD window displays LC to indicate<br />
the system is locked when you try to change the<br />
temperature or settings.<br />
REMOTE CONTROLS<br />
Wireless Remote (optonal)<br />
Underwater light<br />
Press the LIGHT pad to turn the underwater light<br />
on <strong>and</strong> off. The low-voltage system produces a<br />
night light for evening use <strong>and</strong> makes entering <strong>and</strong><br />
exiting the spa safer. After being on for 60 minutes,<br />
the light automatically turns off. For best results<br />
point the remote at the IR sensor in the spa.<br />
Jets<br />
First press of the JETS pad activates pump on lowspeed<br />
(<strong>and</strong> starts soak timer). Second press of the<br />
JETS pad activates pump(s) on high-speed. Third<br />
press of the JETS pad turns jets off for all-quiet<br />
mode. Fourth press of the JETS pad turns pump<br />
back to low-speed. If the pump is already on low<br />
(heating, filter cycle) then the first press starts the<br />
soak timer. After running on low- or high-speed for<br />
15 minutes, the pump automatically turns off (unless<br />
in heating or filtering cycle).<br />
NOTE: During times of inactivity wireless remotes<br />
should always be stored in the cup holder on the lip<br />
of the spa. By storing the floating remote out of<br />
water it will be less susceptible to water intrusion, a<br />
44
spa control operation<br />
situation that can occur after extended water exposure.<br />
More often water intrusion occurs when spa<br />
owners attempt to replace the batteries in their remote<br />
<strong>and</strong> then do not properly reseal it. Battery replacement<br />
should only be attempted by spa care professionals.<br />
Dolphin Remote (optional)<br />
Spa functions<br />
Use the pads to control light <strong>and</strong> jets. See OPERAT-<br />
ING YOUR SPA.<br />
Dolphin Remote Soundsations operation<br />
It is designed with sophisticated technology that will<br />
allow you to consolidate many of your existing<br />
remote controls along with the Soundsations audioready<br />
system in your spa. It’s packed with easy-touse<br />
features such as:<br />
• Preprogrammed to operate the cable converter<br />
supplied by your cable system provider.<br />
• Preprogrammed technology for easy setup.<br />
• Color-coded keys to quickly locate popular<br />
functions<br />
• Code library for video <strong>and</strong> audio components<br />
• Code Search to help program control of older<br />
components<br />
• Learning function to allow programming with<br />
another infrared (IR) remote<br />
• Combination IR <strong>and</strong> RF (radio frequency) capability<br />
that can send comm<strong>and</strong>s through the optional<br />
RF base station to devices in your house.<br />
Before you can use your Dolphin remote, you will<br />
need to program it to operate the specific home<br />
entertainment components you wish to control.<br />
Follow the instructions detailed in Dolphin Remote<br />
manual to set up your remote <strong>and</strong> enjoy our new<br />
remote control.<br />
45
spa control operation<br />
SOUNDSATIONS AUDIO-READY SYSTEM<br />
Spa location <strong>and</strong> speaker cord routing<br />
The factory-installed speaker cord located inside the<br />
spa’s equipment compartment is 100 ft. long. You<br />
must locate the spa close enough to the audio<br />
source to allow the cord to be run so it is not exposed<br />
to damage <strong>and</strong> does not create a trip hazard.<br />
NOTE: A 200 ft. long speaker cord is available as an<br />
optional replacement for the supplied 100 ft. cord.<br />
Ask your authorized dealer for details.<br />
Do not replace the supplied speaker cord with any<br />
other type of cord.<br />
WARNING! Risk of electric shock: Audio source must<br />
be placed in a protected location at least five feet<br />
from the spa. Do not use a portable stereo. Do not<br />
use home audio equipment outside.<br />
Decide on the best path for the speaker cord <strong>and</strong><br />
then route the speaker cord out of the equipment<br />
compartment in the most appropriate manner for the<br />
installation.<br />
The speaker cord must be installed by a licensed<br />
electrician in accordance with the National Electric<br />
Code <strong>and</strong> all local building codes. Additional installation<br />
advise from an A/V technician may be helpful or<br />
necessary if there are any special circumstances,<br />
such as connecting to unique or complicated home<br />
theater systems.<br />
Connections<br />
CAUTION! Risk of electric shock: The stereo cordconnection<br />
within the equipment compartment <strong>and</strong><br />
the supplied 100 ft. cord which is used to conduct the<br />
audio signal to the spa are intended to carry a low<br />
voltage (12V) audio signal supplied by a conventional<br />
household-type audio system. The cord-connection<br />
<strong>and</strong> cord are not to be used for any other purpose.<br />
2 inches (5.0cm)<br />
Outer jacket<br />
1/2 inch (1.3cm)<br />
Strip approximately 2" off<br />
the outer jacket of the<br />
speaker cord.<br />
46<br />
CAUTION! Before making any connections, turn off<br />
the stereo receiver <strong>and</strong> unplug it from the power<br />
source. Failure to do so may result in damage to the<br />
system.<br />
1. To prepare the end of the speaker cord, strip<br />
approximately 2" off the outer jacket.<br />
2. To prepare the ends of the wires, strip approximately<br />
½" of insulation from each wire. Then, twist the bare<br />
ends of each wire so there are no loose str<strong>and</strong>s of wire.<br />
WARNING! Never use broken or frayed wire, as<br />
damage or electrical shock may result.
spa control operation<br />
+<br />
R<br />
-<br />
-<br />
L<br />
+<br />
Wire connections.<br />
RED<br />
BLACK<br />
WHITE<br />
GREEN<br />
CAUTION! Exposing too much wire or having wires<br />
with frayed ends could cause wires to touch each<br />
other, which could damage the equipment.<br />
3. Wire connections<br />
A. Red = Right (+)<br />
B. Black = Right (-)<br />
C. White = Left (-)<br />
D. Green = Left (+)<br />
NOTE: Do not connect speaker cord to any speaker<br />
terminals already in use.<br />
4. Check all connections to the stereo receiver.<br />
Make sure all wires are connected in phase<br />
(+ to + <strong>and</strong> – to –). Correct any wiring problems<br />
before reconnecting the stereo receiver to the<br />
power source.<br />
You should perform a routine inspection (every<br />
three months) of the Soundsations Audio System<br />
to ensure that the system is operating properly.<br />
If the cord or cord-connection is damaged; if the<br />
door to the equipment compartment shows signs<br />
of deterioration; if excessive water is entering the<br />
equipment compartment; or if there are other signs<br />
of damage to related components, turn off the spa<br />
<strong>and</strong> have the damaged component repaired by a<br />
qualified service person.<br />
Recommended components<br />
Use stereo receivers rated from 60 to 120 peak<br />
watts per channel <strong>and</strong> rated from 8 to 16 ohms.<br />
The Soundsations Audio System has automatic<br />
protection circuits to protect against overload. This<br />
circuit activates at high volume levels to reduce<br />
output, causing a decrease in volume. This is<br />
normal operation <strong>and</strong> indicates that the power<br />
input may be exceeding safe levels. If this<br />
protection circuit has been activated, turn down<br />
the volume to allow the system to reset itself <strong>and</strong><br />
resume normal operation. Sustained listening at<br />
high volume settings is not recommended.<br />
CAUTION! Please read this installation guide<br />
completely before the installation. Failure to follow<br />
the instructions in this guide voids all warranties on<br />
the Soundsations Audio System.<br />
47
equipment diagram<br />
MODELS 630, U630, 530, U530, 744E, 641R<br />
# Component Qty.<br />
1 Control box <strong>and</strong> heater 1<br />
2 MP160 pump 1<br />
3 HP130 pump 1<br />
4 Slice valves 2<br />
5 Pump unions 4<br />
7 Motor mounts 8<br />
8 Hose bib drain 1<br />
9 Light bulb 1<br />
10 Ozone fitting 1<br />
11 Check valve 1<br />
12 Ozonator (option 744E, 641R) 1<br />
13 Soundsations plug (option) 1<br />
48
equipment diagram<br />
MODELS 418, U418, 315, U315, Rendezvous,<br />
Retreat, 520M, 319S<br />
# Component Qty.<br />
1 Control box <strong>and</strong> heater 1<br />
2 HP120 pump (315, U315, Rendezvous,<br />
Retreat) 1<br />
or MP160 pump (315, 418, U418,<br />
319S, 520M upgrade)<br />
3 Slice valves 2<br />
4 GFCI (315, U315, Rendezvous, Retreat,<br />
319M, 520M) 1<br />
5 Pump unions 2<br />
6 Pump plug 1<br />
7 Motor mounts 4<br />
8 Light bulb 1<br />
9 Check valve 1<br />
10 Ozonator fitting 1<br />
11 Ozonator (option 520M, 319S) 1<br />
12 Hose bib drain 1<br />
13 Soundsations plug (option) 1<br />
49
troubleshooting<br />
PLEASE NOTE: The following corrective actions<br />
may be performed by the spa owner. If the trouble<br />
cannot be corrected in the steps below, please<br />
contact your <strong>Marquis</strong> <strong>Spas</strong> ® dealer for service.<br />
(Improper servicing by an unauthorized service<br />
provider or spa owner could result in damage not<br />
covered by the warranty <strong>and</strong> could cause serious<br />
injury.)<br />
EQUIPMENT WILL NOT OPERATE<br />
• Check the control panel LCD window for<br />
diagnostic code.<br />
• 240V <strong>Spas</strong>: Check the circuit breaker on the<br />
main circuit panel.<br />
• 120V <strong>Spas</strong>: Check the GFCI power cord <strong>and</strong><br />
reset if necessary (see IMPORTANT SAFETY<br />
INSTRUCTIONS at beginning of manual).<br />
• Check the condition of the power cord.<br />
INADEQUATE JET ACTION<br />
• Be sure the shut-off valves are completely open.<br />
• Open the jets by turning the jet face to allow for<br />
maximum water flow.<br />
• Check for obstruction or restrictions at suction<br />
guard(s) or filters, such as leaves, etc.<br />
• Check to ensure water is at proper level <strong>and</strong><br />
add water if needed.<br />
NO HEAT<br />
• Check temperature displayed in the LCD<br />
window for desired temperature setting.<br />
• Inspect the filter cartridge for dirt <strong>and</strong> debris.<br />
• Check that the water is at proper level, 2/3 up<br />
the Vortex skimmer opening.<br />
• Check HEAT MODE to be certain spa is not in<br />
SLEEP MODE.<br />
• Lower ambient temperatures may result in<br />
heat loss.<br />
NOTE: Do not expect instant hot water from the<br />
jets. It will take the heater 12-24 hours to heat the<br />
water to the temperature you desire.<br />
LIGHT DOES NOT WORK<br />
• Press the LIGHT pad on the control panel.<br />
• Reposition the light bulb in the socket. (See<br />
REPLACING LIGHT BULB.)<br />
• Replace the light bulb with a 6 WATT BULB<br />
(GE 918 ONLY).<br />
50
troubleshooting<br />
LCD DIAGNOSTIC MESSAGES<br />
The advanced technology built into the spa allows it to<br />
perform a number of self-diagnostic system checks <strong>and</strong><br />
it can display a variety of messages in the LCD window<br />
on the control panel.<br />
HH: Overheat. The spa has shut down. DO NOT<br />
ENTER THE WATER. Contact your dealer for service.<br />
OH: Overheat protection. If a malfunction occurs <strong>and</strong> the<br />
spa water reaches 110°F (43°C), the system completely<br />
shuts down. In such a condition, DO NOT ENTER THE<br />
WATER. Turn off all power to the spa <strong>and</strong> contact your<br />
dealer for service. Several conditions could lead to<br />
overheating, for example, low water level, shut-off valves<br />
closed while heater is on, dirty filter, <strong>and</strong> restriction in the<br />
plumbing lines. After the power if turned back on, the spa<br />
will not restart itself until the water temperature within the<br />
spa drops to a lower, predetermined temperature. As a<br />
double safety feature, a secondary high-limit sensor<br />
shuts the system off if the water temperature in the<br />
heater housing reaches 118°F (48°C). In this case, the<br />
spa may be restarted by pressing any panel pad after the<br />
water has cooled to 110°F (42°C). If the switch trips<br />
repeatedly, do not use the spa <strong>and</strong> contact your dealer<br />
for service.<br />
IC: Ice. Potential freeze condition detected.<br />
SA: Spa is shut down. Sensor plugged into sensor “A”<br />
jack is not working.<br />
Sb: Spa is shut down. Sensor plugged into sensor “B”<br />
jack is not working.<br />
Sn: A sensor has malfunctioned. If alternating with spa<br />
temperature, it may just be a temporary condition. If<br />
flashing by itself, spa is shut down. Contact your dealer<br />
for service.<br />
HL: A significant difference between temperature<br />
sensors has been detected. This could indicate a flow<br />
problem. Check water level in spa <strong>and</strong> refill if necessary. If<br />
water level is okay, make sure the pumps have been<br />
primed.<br />
LF: Persistent low flow problems. Heater is shut down,<br />
but other spa functions continue to run normally. Check<br />
water level <strong>and</strong> refill if necessary. Contact your dealer for<br />
service.<br />
dr: Possible inadequate water, poor flow, or air bubbles<br />
detected in the heater. Spa is shut down for 15 minutes.<br />
Check water level <strong>and</strong> refill if necessary. If okay, check<br />
that pumps have been primed. Press any button to reset.<br />
51<br />
dY: Inadequate water detected in heater. Spa is shut<br />
down. follow directions for “dr” message.
maintenance<br />
WEEKLY MAINTENANCE<br />
1. Removing Debris<br />
Remove any debris from the Vortex skimmer <strong>and</strong><br />
suction guard(s) on the inside of the spa. Blocked<br />
intakes can impede the flow of water through the<br />
jetting system.<br />
Water level should be<br />
two-thirds up the<br />
Vortex skimmer<br />
opening.<br />
2. Water Level<br />
Replenish the water level if necessary so that it is<br />
approximately two-thirds up the Vortex skimmer<br />
opening. (See STARTING YOUR SPA.)<br />
MONTHLY MAINTENANCE<br />
1. Filter Care<br />
We cannot stress enough the importance of a<br />
clean filter for proper water filtration. Dirty filters<br />
can restrict water flow, cause hazy water, <strong>and</strong><br />
prevent your chemicals from working properly.<br />
Many water treatment products clear or clarify the<br />
water by clumping microscopic particles <strong>and</strong><br />
minerals together so that these larger particles<br />
can be effectively trapped in the filter. A filter<br />
clogged with debris <strong>and</strong> calcium deposits does<br />
not trap particles properly.<br />
The Maintenance Reminder on the control panel<br />
indicates a CL every 30 days to remind you to<br />
clean your filter.<br />
Removing the Filter<br />
Grasp the edge of the dome-shaped Vortex filter<br />
top, pull up firmly, but gently, to remove it.<br />
Grasp edge of Vortex<br />
filter top, pull gently.<br />
Turn filter cartridge<br />
counterclockwise to<br />
unscrew.<br />
Turn the filter cartridge counterclockwise to<br />
unscrew it from its base. Lift out the filter cartridge.<br />
Use a hose to clean the filter cartridge or use a<br />
bucket <strong>and</strong> Filter Cleaner to soak the filters (you<br />
will need to flip the filter after the designated time<br />
to completely clean the entire length).<br />
NOTE: Keep an extra set of filters on h<strong>and</strong> so<br />
you always have a clean set ready for immediate<br />
spa enjoyment. Remember to replace the filter<br />
cartridge at least once a year. Replacement filters<br />
are available from your authorized dealer.<br />
52
maintenance<br />
Reinstalling the Filter<br />
Repeat the steps above in reverse. Do not<br />
overtighten the filter as it may cause the threads<br />
on the bottom to strip <strong>and</strong> fail to hold the filter in<br />
place. When replacing the Vortex filter top, center<br />
the top over the raised filter ring <strong>and</strong> press down<br />
firmly until the top snaps into place. (See INSTAL-<br />
LATION INSTRUCTIONS, Filter Cartridge.)<br />
EVERY THREE TO FOUR MONTHS<br />
Draining <strong>and</strong> Filling the Spa<br />
The average spa needs to be drained every three to<br />
four months. After months of continually adding<br />
chemicals to the water <strong>and</strong> introducing body oils<br />
<strong>and</strong> lotions, the water can be difficult to manage <strong>and</strong><br />
chemicals are not as effective as usual. You may<br />
also notice excessive foaming. A maintenance<br />
reminder appears on the control panel as “CH” to<br />
remind you to change water. More frequent<br />
draining may be required depending on use.<br />
Check the end cap of<br />
the optional ozonator<br />
for a purple glow.<br />
1. Leakage Detection<br />
Open the equipment door <strong>and</strong> check for signs of<br />
water leakage around the pump. Pump seals<br />
wear out over time, especially with improper<br />
water chemistry. Early detection of pump seal<br />
failure can significantly reduce repair costs.<br />
2. Ozonator Operation<br />
Check to see if the bulb is lighted. The ozonator<br />
functions whenever the system is running on<br />
filter or clean up cycles. The end cap of the<br />
ozonator should glow if functioning properly. If not,<br />
the bulb has burned out. Contact your dealer for<br />
service.<br />
3. Draining the Spa<br />
A. Turn off the power to the spa.<br />
B. Remove the hose bib plug from the external<br />
drain <strong>and</strong> fill connection <strong>and</strong> attach a hose.<br />
C. Open the drain valve in the equipment<br />
compartment.<br />
D. When the spa is empty, close the drain valve<br />
<strong>and</strong> remove the hose. Reinstall hose bib plug.<br />
NOTE: Keep the drain valve closed at all times<br />
except when draining the spa (do not rely on the cap<br />
to stop the flow of water). Not doing so could result in<br />
damage to the drain valve due to freezing water.<br />
Replacing Mineral Cartridge<br />
The Spa Frog ® mineral cartridge should be replaced<br />
every four months. You may still feel the “spent”<br />
minerals inside, but they are no longer effective <strong>and</strong><br />
need to be replaced.<br />
53
maintenance<br />
AS NEEDED MAINTENANCE<br />
1. Cover Care<br />
It is recommended that you use Cover Cleaner<br />
to keep the spa cover clean <strong>and</strong> conditioned.<br />
Proper care of the cover increases the life <strong>and</strong><br />
keeps it looking great in even the harshest<br />
conditions. NOTE: Do not use regular household<br />
products or products that contain silicone,<br />
alcohol, steel wool, or bleach.<br />
2. DuraWood Exterior<br />
Clean the exterior of the spa with a mild soap <strong>and</strong><br />
water solution. Cleaners containing alcohol,<br />
Acetone, Nitrobenzene, <strong>and</strong> Cyclohexanol can<br />
dissolve <strong>and</strong> discolor the DuraWood exterior.<br />
3. Wood Exterior<br />
The wood exterior has been treated with a waterbased<br />
wood preservative at the factory. We<br />
suggest the exterior be treated every six months<br />
with an additional coat of preservative for maximum<br />
weather protection. Your dealer can suggest<br />
the best preservative for your environment.<br />
4. Clean the DuraShell ® Interior<br />
Once the spa is drained, clean the DuraShell<br />
interior – especially at the water line. We suggest<br />
the Glove Sponge to clean without scratching.<br />
Clorox bleach (diluted) is the only approved<br />
cleaning agent for DuraShell – any other<br />
products should be avoided.<br />
NOTE: Due to the high-gloss, fine finish of the<br />
acrylics, imperfections in the surface texture<br />
may occur. These in no way compromise the<br />
integrity of the spa shell.<br />
NOTE: Do not leave an empty spa uncovered.<br />
Direct sunlight on the spa surface<br />
can cause severe damage or blemishing<br />
<strong>and</strong> can result in the voiding of any surface<br />
warranties.<br />
Remove lamp socket<br />
from back of light<br />
assembly.<br />
5. Excess Debris<br />
Grit <strong>and</strong> debris tracked into the spa should be<br />
removed with a spa vacuum.<br />
6. Water Line<br />
To avoid buildup of oils <strong>and</strong> lotions at the water<br />
line, clean the interior when needed. We suggest<br />
the Glove Sponge to clean without scratching.<br />
54
maintenance<br />
NOTE: Do not use the same brush or sponge to<br />
clean the exterior of the spa <strong>and</strong> the interior of<br />
the spa. Soap <strong>and</strong> other product residue used<br />
on the outside of the spa can cause foaming of<br />
the spa water <strong>and</strong> scratches to the spa surface.<br />
6. Light Bulb Replacement<br />
A. Turn off the power to the spa.<br />
B. Remove the equipment area door to find the<br />
light access. (See EQUIPMENT DIAGRAM.)<br />
C. Remove the lamp socket from the back of<br />
the light assembly by turning counterclockwise<br />
<strong>and</strong> pulling at the same time.<br />
D. Gently pull the bulb out of the lamp socket<br />
<strong>and</strong> replace it with a 6 watt bulb only (GE<br />
#918) available from your spa dealer.<br />
E. Install the lamp socket back into the light<br />
assembly <strong>and</strong> replace door.<br />
SUSPENDED USE OR WINTERIZING THE SPA<br />
Your spa was designed for year-round use <strong>and</strong><br />
many people find the combination of hot water,<br />
therapy jets, <strong>and</strong> cool winter temperatures to be<br />
especially soothing. However, if you decide to discontinue<br />
the use of your spa for any extended period<br />
of time, we suggest you follow the steps below.<br />
55<br />
NOTE: During long periods of inactivity, damage can<br />
occur to equipment from condensation within the<br />
equipment compartment.<br />
1. Turn off the power to the spa.<br />
2. Drain the spa. (See DRAINING AND REFILLING<br />
THE SPA.)<br />
3. Remove all residual water from the seating<br />
<strong>and</strong> footwell. If necessary, bail out the<br />
remaining water then dry the spa with<br />
towels. A wet/dry vacuum is recommended<br />
for best results.<br />
4. Using the wet/dry vacuum, place vacuum<br />
nozzle over each jet nozzle to remove water<br />
from plumbing lines, starting with the highest<br />
jet <strong>and</strong> finishing with the lowest jet.<br />
5. Unscrew the pump plug from the pump.<br />
(See STARTING YOUR SPA.)<br />
6. Again, using the wet/dry vacuum, place<br />
nozzle over the exposed pump opening to<br />
remove excess water. The pump should be<br />
removed from the spa <strong>and</strong> stored in a climatecontrolled<br />
room.<br />
7. Clean the spa interior.<br />
8. Clean the filter cartridge.<br />
9. Reinstall the spa cover <strong>and</strong> lock in place.<br />
NOTE: Direct sunlight on the spa surface can<br />
cause severe damage or blemishing <strong>and</strong> can<br />
result in the voiding of any surface warranties.
spa care <strong>and</strong> enjoyment guide<br />
IMPORTANT CHEMICAL SAFETY<br />
PROCEDURES<br />
1. Always keep chemicals out of reach of children.<br />
2. Read product labels carefully prior to use.<br />
3. When dissolving, always add chemicals to water,<br />
do not add water to chemicals. Some dry chemicals<br />
should be dissolved prior to adding them to<br />
the spa. Using a clean container, dip some water<br />
from the spa. Mix until dissolved, then add to<br />
circulating water.<br />
4. CAUTION: Do not mix chemicals together. Add<br />
them separately to the spa water.<br />
5. All chemical products should be stored in a cool,<br />
dry, well-ventilated area where the average<br />
temperature does not exceed 90°F (32°C). Keep<br />
storage area clean of debris such as rags,<br />
newspaper, <strong>and</strong> combustible materials.<br />
6. Keep chemicals away from open flame or other<br />
heat source. Do not smoke near chemicals. If a<br />
dry chlorine chemical fire should occur, use water<br />
only. Do not use a dry chemical fire extinguisher<br />
to attempt to put out the fire.<br />
7. When adding chemicals, always keep the water<br />
circulating in the spa with jets in a downward<br />
circular pattern for better chemical distribution.<br />
Add chemicals to the spa water one at a time.<br />
Allow several minutes between any new chemical<br />
additions using the jet action to evenly distribute<br />
throughout the spa.<br />
8. After adding chemicals, wait the amount of time<br />
recommended on the chemical container<br />
before retesting your water for an accurate<br />
reading. Retest your spa water before using.<br />
9. If you have any questions or concerns about the<br />
correct procedures for h<strong>and</strong>ling chemicals,<br />
please contact your spa dealer or <strong>Marquis</strong> Corp.<br />
56
spa care <strong>and</strong> enjoyment guide<br />
WATER CARE<br />
There are three things necessary for clean safe water:<br />
1. CIRCULATE: Water has to be circulated<br />
regularly; it can not be stagnant.<br />
2. FILTER: Water has to be filtered to remove<br />
particulate <strong>and</strong> debris.<br />
3. SANITIZE: Water has to be sanitized to kill<br />
organisms like algae, bacteria <strong>and</strong> virus.<br />
The control system in your spa will automatically<br />
circulate <strong>and</strong> filter. (See SPA CONTROL<br />
OPERATION, ConstantClean <strong>and</strong> SmartClean<br />
sections.) The sanitation requires minimal effort if<br />
done consistently <strong>and</strong> properly.<br />
To sanitize spa water, three things are required:<br />
1. BALANCE: The water must be balanced so<br />
the sanitizer can work <strong>and</strong> spa equipment is<br />
protected.<br />
2. SHOCK: Shock to oxidize organics <strong>and</strong><br />
maximize sanitizer efficiency.<br />
3. SANITIZE: Maintain a proper level of sanitizer at<br />
all times.<br />
UNDERSTANDING WATER BALANCE<br />
Water balance is the interrelation of factors that<br />
determine the quality of the spa water. The effectiveness<br />
of chemicals <strong>and</strong> other additives are<br />
dependent on all these factors working together or<br />
“in balance”. The primary elements to water<br />
balance are the calcium hardness, total alkalinity<br />
<strong>and</strong> pH.<br />
It’s important to underst<strong>and</strong> a spa is not just a “small<br />
swimming pool” <strong>and</strong> the care of a spa should be<br />
h<strong>and</strong>led differently. Spa water is kept at a temperature<br />
of up to 104°F (40°C) but pool chemicals are<br />
designed for cool water. Plus the ratio of people per<br />
gallon in a spa is much higher than in a pool – four<br />
people in a spa is the equivalent of having 200<br />
people in a typical backyard pool. This increased<br />
“bather load” increases the residue from soaps,<br />
perfumes, body oils, cosmetics, <strong>and</strong> other contaminants.<br />
Always use water treatment products recommended<br />
for use in your spa.<br />
pH Balance<br />
Keeping the pH balanced is the most critical<br />
component of water balance. Calcium hardness<br />
57
spa care <strong>and</strong> enjoyment guide<br />
<strong>and</strong> total alkalinity act as buffers to stabilize the pH.<br />
When they are properly adjusted, the pH will be<br />
stable <strong>and</strong> easy to maintain. The pH is a measure of<br />
the relative acidity <strong>and</strong> basicity of the water. The<br />
ideal pH range is 7.2 - 7.8. When the pH falls below<br />
7.2 the water can become corrosive. Low pH can<br />
cause damage to metal in the control system <strong>and</strong><br />
heater, excessive sanitizer consumption, <strong>and</strong> skin<br />
irritation. A pH above 7.8 can be scale-forming <strong>and</strong><br />
allow metals or minerals in the water to form<br />
deposits <strong>and</strong> stain spa surfaces.<br />
Alkalinity<br />
Alkalinity acts as a buffer to prevent the pH from<br />
changing as other substances are added to the<br />
water. Stability of the pH is directly related to the<br />
alkalinity. The alkalinity should be between 80 - 140<br />
ppm. Alkalinity below 80 ppm makes it difficult to<br />
stabilize the pH. Alkalinity above 140 ppm may<br />
increase the pH <strong>and</strong> cause cloudy water, scaling,<br />
<strong>and</strong> decreased efficiency of the sanitizer.<br />
Note: Alkalinity & pH Increaser <strong>and</strong> Alkalinity & pH<br />
Decreaser will affect both the pH <strong>and</strong> alkalinity.<br />
Generally, smaller additions will change the pH <strong>and</strong><br />
have a very minor effect on the alkalinity. Larger<br />
additions will also affect the pH, but will have a much<br />
greater effect on the alkalinity. (Example: If the pH is<br />
very high <strong>and</strong> the alkalinity is within range, adding a<br />
few smaller doses of pH <strong>and</strong> alkalinity Decreaser<br />
instead of one large dose will reduce the pH with<br />
little effect on the alkalinity.)<br />
Calcium Hardness<br />
Do not use soft water in your spa. It is critical to have<br />
calcium in your water <strong>and</strong> in most cases tap water is<br />
fine. The ideal range of calcium is between 200 –<br />
300 ppm. The calcium hardness is normally<br />
adjusted when filling or refilling after draining the spa.<br />
High calcium levels can cause scale buildup on spa<br />
surfaces <strong>and</strong> equipment. Your spa can be protected<br />
against high calcium by using Metal & Stain<br />
Remover per the directions on the container. Low<br />
calcium levels can cause spa water to become<br />
highly corrosive <strong>and</strong> damaging to the equipment<br />
components <strong>and</strong> plumbing. To raise calcium levels,<br />
use Calcium Hardness Increaser. Most authorized<br />
dealers can test the calcium hardness of your water.<br />
58
spa care <strong>and</strong> enjoyment guide<br />
BALANCE<br />
When initially filling or refilling your spa follow<br />
these steps to achieve proper water balance.<br />
IMPORTANT! Always follow instructions on the<br />
chemical container when adding chemicals.<br />
1. Test the spa water using a test strip or test<br />
kit. Determine the pH <strong>and</strong> alkalinity of the<br />
water.<br />
2.If adjustments are needed for the pH <strong>and</strong>/or<br />
alkalinity, always balance the alkalinity before<br />
balancing the pH. The product(s) you should<br />
use to adjust pH <strong>and</strong>/ or alkalinity are pH &<br />
Alkalinity Up or pH & Alkalinity Down. Make<br />
any additions per the directions on the bottle<br />
<strong>and</strong> then test <strong>and</strong> repeat if necessary until all<br />
readings are in the desired range.<br />
3.Increase the calcium hardness if necessary.<br />
SHOCK<br />
Initial Treatment<br />
Shock the spa using granular Chlorine Sanitizer or<br />
non-chlorine Spa Shock. Add directly to the spa<br />
per the instructions on the container. For the<br />
initial treatment, Chlorine Sanitizer is preferred as<br />
it will also establish a residual of sanitizer.<br />
Maintenance Treatment<br />
Once bacteria <strong>and</strong> other wastes are neutralized<br />
by the sanitizer, they stay in the water unless<br />
oxidized or shocked. Often called chloramines or<br />
bromamines, they create dull, cloudy water <strong>and</strong><br />
can cause odor <strong>and</strong> eye or skin irritation. Shock<br />
treatment rids your spa of these wastes for clear,<br />
sparkling water. Shocking with non-chlorine Spa<br />
Shock or granular Chlorine Sanitizer is<br />
recommended once a week or whenever the<br />
water appears dull or cloudy or has a strong odor.<br />
Non-chlorine Spa Shock allows use of the spa 15<br />
minutes after shock treatment.<br />
NOTE: A strong bromine or chlorine odor typically<br />
indicates the spa needs to be shocked – not that<br />
there is too much bromine or chlorine in the water.<br />
A properly balanced spa that is shocked regularly<br />
will not have an odor.<br />
59
spa care <strong>and</strong> enjoyment guide<br />
SANITIZE<br />
ConstantClean System<br />
The ConstantClean system utilizes a combination<br />
of sanitizers to increase water quality <strong>and</strong><br />
significantly decrease maintenance. The<br />
combination of a Spa Frog ® Mineral Cartridge* <strong>and</strong><br />
the factory installed ozonator greatly reduce the<br />
amount of sanitizer required. Instead of the normal<br />
3 - 5 ppm of bromine, you now only need to<br />
maintain 1 - 2 ppm of bromine.<br />
* The built-in sanitation system is not available in<br />
some international markets. However, the ozone<br />
system is st<strong>and</strong>ard on all spa models in all countries.<br />
Please see your dealer for recommended<br />
alternate treatment method if Spa Frog ® is not<br />
available.<br />
60
spa care <strong>and</strong> enjoyment guide<br />
Setting<br />
Window ><br />
BUILT-IN SANITATION SYSTEM*<br />
After shocking the spa water with Chlorine<br />
Sanitizer granuals or non-chlorine Spa Shock, bring<br />
the spa water to operating temperature. Then<br />
install the Spa Frog ® cartridges.<br />
ADJUST THE MINERAL CARTRIDGE*<br />
Remove the protective cellophane wrap from the<br />
Spa Frog ® mineral cartridge. While holding the<br />
bottom of the cartridge, turn the top until the<br />
number six appears in the setting window.<br />
NOTE: This cartridge should be replaced every<br />
three to four months. You will still feel the “spent”<br />
minerals inside, but they are no longer effective<br />
<strong>and</strong> the cartridge needs to be replaced. It is<br />
recommended to drain <strong>and</strong> refill the spa at the<br />
same time you replace the mineral cartridge.<br />
ADJUST THE BROMINE CARTRIDGE*<br />
Remove the protective cellophane wrap from the<br />
Spa Frog ® bromine cartridge. Finding the right<br />
setting for the bromine cartridge will require<br />
monitoring your usage for the first few weeks.<br />
Begin with an initial setting based on the chart<br />
below <strong>and</strong> monitor bromine levels daily for the first<br />
week or so, adjusting the cartridge by one setting<br />
per day until a 1 - 2 ppm level has been achieved.<br />
To adjust cartridge, remove from system <strong>and</strong> turn<br />
to the next highest setting if the bromine level is<br />
low, or the next lower setting if the bromine level is<br />
high. The bromine cartridge needs to be replaced<br />
when empty between two <strong>and</strong> four weeks.<br />
Always maintain 1 - 2 ppm of bromine.<br />
Suggested Initial Bromine Cartridge Settings<br />
Filter cycle duration<br />
Spa Gallons<br />
150-250 250-300 300-400<br />
One hour 1 2 3<br />
Two hours 1 2 2<br />
Four hours 1 1 2<br />
Install cartridges in the<br />
holder.<br />
61
spa care <strong>and</strong> enjoyment guide<br />
Cartridge holder cap<br />
INSTALL THE CARTRIDGES<br />
Locate <strong>and</strong> remove the cartridge holder cap on the<br />
top lip of the spa. Push down <strong>and</strong> turn the holder<br />
counterclockwise to unlock. Lift holder out. Snap the<br />
Spa Frog ® mineral cartridge into the area of the holder<br />
marked “MINERALS” (top portion), making sure to line<br />
up the indentation near the top of the cartridge with<br />
the raised line on the holder. Then snap the Spa<br />
Frog ® bromine cartridge into the area of the holder<br />
marked “BROMINE”. Be sure to line up the indentation<br />
on the cartridge with the raised line on the holder.<br />
After cartridges are snapped in, return the holder,<br />
push down, <strong>and</strong> then turn clockwise to lock into<br />
place. Replace the cap.<br />
CAUTION: H<strong>and</strong> tighten only; avoid over tightening;<br />
avoid bending the holder to help prevent damage to<br />
the holder.<br />
REMOVE THE CARTRIDGES<br />
Reverse above procedures to remove cartridges.<br />
*The built-in sanitation system is not available in some<br />
international markets. See your dealer for recommended<br />
alternate water treatment method.<br />
62
spa care <strong>and</strong> enjoyment guide<br />
WATER CARE REGIMEN<br />
SpaCare products are classified by easy to follow<br />
usage guidelines. The information below indicates<br />
whether the product should be used daily, weekly,<br />
monthly, when filling, or as needed – if special water<br />
conditions arise.<br />
DAILY<br />
Sanitizer<br />
Maintain 1 - 2 ppm of bromine at all times.<br />
WEEKLY<br />
Shock Treatment<br />
Sanitizer combines with bacteria <strong>and</strong> neutralizes it<br />
on contact. However, the used sanitizer/bacteria<br />
particle is still present in the spa water. Used<br />
sanitizer in the water emits an odor <strong>and</strong> causes<br />
cloudy water. To oxidize, or rid the spa of this<br />
used sanitizer, you must shock the spa once a<br />
week.<br />
AS NEEDED PRODUCTS<br />
pH & Alkalinity Up<br />
pH & Alkalinity Down<br />
These two products work to raise or lower the<br />
pH <strong>and</strong> alkalinity in the spa. They are only needed<br />
if the test strip indicates the levels are not in the<br />
ideal ranges.<br />
Water Clarifier<br />
Microscopic particles can pass through the spa<br />
filter <strong>and</strong> create cloudy water. Water Clarifier<br />
combines these microscopic particles into larger<br />
particles that can be trapped in the filter to clear<br />
cloudy water.<br />
Spa Defoamer<br />
If foam appears in your spa, the action of the jets<br />
will keep it from dissipating. The use of Spa<br />
Defoamer instantly rids your spa water of foam.<br />
Metal <strong>and</strong> Stain Remover<br />
Metal <strong>and</strong> Stain Remover will remove metals<br />
such as iron <strong>and</strong> copper from spa water. Used on<br />
a weekly basis, it will protect the spa from possible<br />
scaling caused by high levels of calcium.<br />
63
spa care <strong>and</strong> enjoyment guide<br />
TROUBLESHOOTING GUIDE<br />
P: Problem<br />
S: Solution<br />
Cloudy Water<br />
P: Inadequate filtration or dirty filter.<br />
S: Ensure that the filter is securely installed.<br />
Clean or replace filter. Increase the length of<br />
clean up <strong>and</strong>/or filter cycles.<br />
P: Water is not balanced.<br />
S: Test water <strong>and</strong> adjust pH, alkalinity, <strong>and</strong><br />
sanitizer as needed. Shock to oxidize <strong>and</strong><br />
destroy organics in the water.<br />
P: Unfiltered particles or chemically saturated.<br />
S: Use Water Clarifier to combine particles.<br />
P: High total dissolved solids<br />
S: Drain, clean, <strong>and</strong> refill the spa.<br />
Chemical Odor<br />
P: Too many chloramines/bromamines in the<br />
water.<br />
S: Treat water with Spa Shock then adjust<br />
sanitizer level as necessary.<br />
P: Dull looking water, difficult to manage. High<br />
total dissolved solids (TDS) may be the cause.<br />
S: Drain <strong>and</strong> refill with fresh water.<br />
Musty Odor<br />
P: Not enough sanitizer in water – bacteria or<br />
algae in water.<br />
S: Add sanitizer as necessary <strong>and</strong> shock. Readjust<br />
sanitizer level if necessary.<br />
Yellow Water<br />
P: Low pH <strong>and</strong>/or low alkalinity.<br />
S: Test <strong>and</strong> adjust pH with pH <strong>and</strong> Alkalinity Up.<br />
Adjust alkalinity if necessary.<br />
Foaming<br />
P: High concentration of body oils, lotions or<br />
soaps, as well as excessive organics.<br />
S: Use Spa Defoamer <strong>and</strong> adjust pH <strong>and</strong><br />
sanitizer as needed.<br />
64<br />
Scum Line in Spa<br />
P: Body oils <strong>and</strong> dirt.<br />
S: Use Glove Sponge to clean the spa. Test <strong>and</strong><br />
adjust the sanitizer <strong>and</strong> pH if necessary.<br />
Increase the clean up cycle.
spa care <strong>and</strong> enjoyment guide<br />
No Sanitizer Reading<br />
P: Sanitizer level is too low.<br />
S: Shock <strong>and</strong>/or adjust Spa Frog® bromine<br />
cartridge until the sanitizer registers in the<br />
recommended range.<br />
P: Test strip remains “white” even after sanitizer<br />
has been added.<br />
S: Sanitizer level could be extremely high. It can<br />
bleach the reagents on the test strip <strong>and</strong> give a<br />
false reading.<br />
Remove spa cover <strong>and</strong> activate jets <strong>and</strong> air<br />
control. Allow jets to run for 30 minutes. Test<br />
water to see if desired level has been reached.<br />
Adjust Spa Frog ® bromine cartridge to reduce<br />
bromine level.<br />
High Sanitizer Reading<br />
P: Too much chlorine or bromine added or<br />
dispensed into the spa.<br />
S: Remove spa cover <strong>and</strong> activate jets <strong>and</strong> air<br />
control. Allow jets to run for 30 minutes. Test<br />
water to see if desired level has been reached.<br />
Adjust Spa Frog ® bromine cartridge to reduce<br />
bromine level.<br />
Eye or Skin Irritation<br />
P: Contaminants or excessive amount of<br />
chloramines/bromamines in water.<br />
S: Treat water with Spa Shock. Adjust sanitizer<br />
level.<br />
P: pH is low.<br />
S: Adjust as needed.<br />
Corrosion of Metal<br />
P: Low pH.<br />
S: Adjust pH with pH <strong>and</strong> Alkalinity Up.<br />
Green Water/Algae<br />
P: Low sanitizer level or high pH.<br />
S: Adjust pH, shock <strong>and</strong>/or adjust Spa Frog ®<br />
bromine cartridge as necessary.<br />
Erratic pH<br />
P: Alkalinity <strong>and</strong>/or calcium hardness are too low<br />
causing pH “bounce”.<br />
S: Test <strong>and</strong> adjust alkalinity <strong>and</strong>/or calcium<br />
hardness to bring them into the ideal range.<br />
65
spa care <strong>and</strong> enjoyment guide<br />
spa boutique<br />
TM<br />
SPABOUTIQUE<br />
A collection of unique items to delight your senses,<br />
free your time, <strong>and</strong> make your life easier.<br />
SpaCare gives you maintenance products to ease<br />
spa care – inside, outside, <strong>and</strong> especially the water.<br />
SpaTherapy surrounds your senses with aromas,<br />
visions, sounds <strong>and</strong> feel-good products to bring you<br />
<strong>and</strong> your environment to life.<br />
SpaStyle brings convenience items to enhance<br />
your lifestyle, while soaking in the spa or relaxing on<br />
the deck.<br />
SpaBoutique offers a full range of spa <strong>and</strong> backyard<br />
accessories, including SpaCare products, Spa Frog ®<br />
products, replacement filter cartridges, cover lifters,<br />
steps, <strong>and</strong> more. See your authorized dealer for a<br />
complete catalog of items.<br />
66
owner’s protection plan<br />
MARQUIS SPAS ® LIMITED WARRANTY<br />
[5] SPA SHELL, SPA SHELL LEAKS, AND STRUCTURE<br />
<strong>Marquis</strong> <strong>Spas</strong> warrants the spa shell against peeling, cracking, yellowing,<br />
blistering, or delamination for a period of five years*. Spa shell <strong>and</strong> structure are<br />
warranted against leaks for a period of five years*.<br />
[5] SPA CABINET<br />
<strong>Marquis</strong> <strong>Spas</strong> warrants the DuraWood exterior against peeling, cracking,<br />
blistering, or delamination for a period of five years*. Natural cedar exterior is<br />
warranted to be free from defects at time of delivery.<br />
[5] PLUMBING<br />
<strong>Marquis</strong> <strong>Spas</strong> warrants the internal plumbing, internal glue joints, <strong>and</strong> all bonded<br />
parts against leaking for five years*.<br />
[3] MAJOR COMPONENTS AND SYSTEMS<br />
<strong>Marquis</strong> <strong>Spas</strong> warrants the jet pump, pump seal, controls, equipment pack,<br />
<strong>and</strong> no-fault heater against any malfunction or defect in materials or workmanship<br />
for a period of three years*.<br />
[1] FACTORY-INSTALLED PARTS<br />
<strong>Marquis</strong> <strong>Spas</strong> warrants all factoryinstalled spa parts <strong>and</strong> components including<br />
drain bib, GFCI cord, gaskets, fuses, removable jet fittings**, skimmer lid**, light<br />
bulb**, light lens**, spa cover**, cover locks <strong>and</strong> latches** for a period of one<br />
year.* Filter cartridge <strong>and</strong> chrome jet covers are excluded from extended<br />
warranty, but are warranted to be free from defects at time of sale.<br />
TRANSFERABLE<br />
This warranty is transferable to all subsequent spa owners.<br />
*Warranty coverage begins from date of purchase by the original owner, or<br />
begins one year after date of manufacture, whichever begins first, <strong>and</strong><br />
extends for the specified length of time for each component.<br />
**Customer must return part to <strong>Marquis</strong> <strong>Spas</strong> dealer for replacement.<br />
This warranty extends to the original retail purchaser of the spa for personal, family<br />
or household purposes only. This warranty is transferable. Warranty coverage<br />
begins from date of purchase by the original owner, or begins one year after date<br />
of manufacture, whichever begins first, <strong>and</strong> extends for the specified length of time<br />
for each component.<br />
In order to obtain the benefit of this warranty, the spa owner shall notify their<br />
authorized <strong>Marquis</strong> <strong>Spas</strong> dealer of any problem or warranty claim within thirty days<br />
of the time the problem is discovered. In the event the spa owner is unable to<br />
obtain parts or service from an authorized <strong>Marquis</strong> <strong>Spas</strong> dealer, the spa owner<br />
should contact the Customer Service Department of <strong>Marquis</strong> <strong>Spas</strong>. Notice of a<br />
problem can be sent to <strong>Marquis</strong> <strong>Spas</strong> via email at service@marquiscorp.com or in<br />
writing to <strong>Marquis</strong> <strong>Spas</strong>, 596 Hoffman Road, Independence, OR 97351-9601.<br />
Direct all correspondence to Customer Service Department.<br />
PERFORMANCE OF WARRANTY<br />
<strong>Marquis</strong> <strong>Spas</strong> agrees to repair any plumbing or surface defects <strong>and</strong> to repair or<br />
furnish a replacement for any factory-installed components covered under this<br />
warranty which, upon test <strong>and</strong> examination by <strong>Marquis</strong> <strong>Spas</strong>, prove defective. All<br />
materials for examination must be returned to <strong>Marquis</strong> <strong>Spas</strong> freight prepaid.<br />
67
owner’s protection plan<br />
<strong>Marquis</strong> <strong>Spas</strong> unconditionally warrants the no-fault heater against any failure that<br />
requires replacement. Unconditional is defined as warranty coverage without<br />
exception if the component fails to operate properly within the spa’s system,<br />
including, but not limited to, water chemistry damage.<br />
Replacement parts, including light bulbs, skimmer lids, removable jet fittings,<br />
covers, cover locks <strong>and</strong> latches must be returned by the customer to the<br />
authorized <strong>Marquis</strong> <strong>Spas</strong> dealer for replacement.<br />
Your authorized <strong>Marquis</strong> <strong>Spas</strong> dealer reserves the right to assess a travel or trip<br />
charge for service calls.<br />
THIS WARRANTY IS LIMITED TO THE REPLACEMENT OR REPAIR OF THE<br />
DEFECTIVE ITEMS AS STATED IN THIS SECTION OF THE WARRANTY.<br />
INVALIDATION OF WARRANTY<br />
This warranty is void if this spa has been subjected to alteration, misuse or abuse,<br />
or if any repairs on the spa are performed or attempted by anyone other than an<br />
authorized <strong>Marquis</strong> <strong>Spas</strong> service center. “Alteration” is defined as any component<br />
or plumbing change, electrical conversion, or the addition of any alternative<br />
heating or sanitation device(s) other than <strong>Marquis</strong> <strong>Spas</strong> recommended<br />
components which contribute to component or unit failure. “Misuse <strong>and</strong> abuse”<br />
shall include, without limitation, any installation, maintenance or operation of the<br />
spa other than in accordance with <strong>Marquis</strong> <strong>Spas</strong> printed instructions (located in<br />
the Owner’s Manual) or use of the spa in a manner or for a purpose other than for<br />
which it was designed. Under no circumstances shall <strong>Marquis</strong> <strong>Spas</strong> or any of its<br />
representatives be held liable for injury to any person or damage to any property,<br />
however arising.<br />
Other items not included in this warranty are freight expense; labor <strong>and</strong> material<br />
costs associated with removal <strong>and</strong>/or replacement of spa; damage to the spa<br />
surface <strong>and</strong> equipment due to the use of trichlor chlorine, or other harsh<br />
chemicals not recommended by <strong>Marquis</strong> <strong>Spas</strong>; damage to or fading/staining of<br />
the spa surface or equipment caused by impact, scratching, abrasive or corrosive<br />
cleaners, or extreme water temperatures (outside the range of 32°F to 120°F, 0°C<br />
to 49°C). Damage to the spa surface caused by leaving the spa uncovered <strong>and</strong><br />
empty of water with direct exposure to sunlight may cause solar heat distress <strong>and</strong><br />
would invalidate this warranty.<br />
Other costs not associated to the direct repair of the spa, such as phone charges,<br />
missed work, <strong>and</strong> damage caused to the spa beyond <strong>Marquis</strong> <strong>Spas</strong> control, are<br />
not included in this warranty. Items beyond <strong>Marquis</strong> <strong>Spas</strong> control include but are<br />
not limited to damage resulting from: improper electrical connections; accidents;<br />
failure to follow procedures defined in the Owner’s Manual; cleaning agents; <strong>and</strong><br />
natural occurrences such as lightning.<br />
IMPORTANT: SOME STATES DO NOT ALLOW THE EXCLUSION OR LIMITATION<br />
OF INCIDENTAL OR CONSEQUENTIAL DAMAGES, SO THE ABOVE LIMITATION<br />
OR EXCLUSION MAY NOT APPLY TO YOU.<br />
DISCLAIMERS<br />
There are no additional warranties, express or implied, which extend beyond the<br />
terms of this limited warranty.<br />
No other person or entity has been authorized to make any warranty,<br />
representation or promise of performance not included in this express written<br />
warranty, <strong>and</strong> <strong>Marquis</strong> <strong>Spas</strong> shall not be bound by any such additional warranty,<br />
representation or promise.<br />
68<br />
THIS WARRANTY GIVES YOU SPECIFIC LEGAL RIGHTS, AND YOU MAY<br />
ALSO HAVE OTHER RIGHTS WHICH VARY FROM STATE TO STATE.