
Create successful ePaper yourself
Turn your PDF publications into a flip-book with our unique Google optimized e-Paper software.
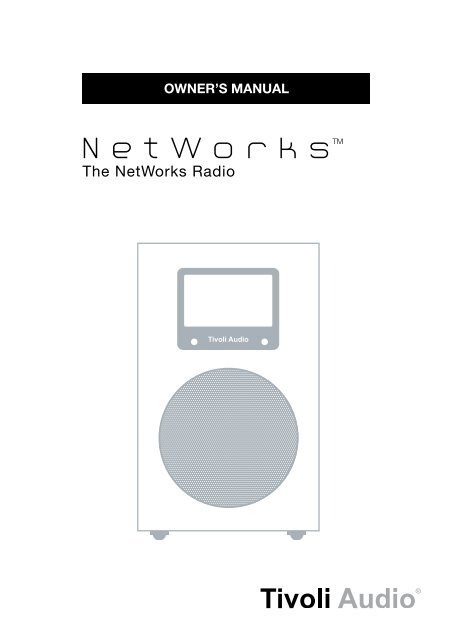
OWNER’S <strong>MANUAL</strong><br />
1
Table of Contents:<br />
Safety Instructions.............................................................................................................................3<br />
Introduction; Getting Started (Setup); WiFi Reception......................................................................5<br />
Top control; Remote control functions...............................................................................................7<br />
Rear panel controls............................................................................................................................9<br />
Bottom inputs and outputs..............................................................................................................10<br />
Tuning Internet stations; Adding new stations; SuperBuffer .........................................................11<br />
<strong>Tivoli</strong> EQ; Favorites; My Added Stations; Station Search................................................................12<br />
Podcasts; Local Stations; Setting the clock and date; Languages; Re-set....................................12<br />
Info; Software Upgrade; Setting the alarms.....................................................................................13<br />
Streaming music files from a computer...........................................................................................14<br />
Display Off; Placement; Cleaning; Troubleshooting.........................................................................16<br />
Display messages............................................................................................................................17<br />
Warranty...........................................................................................................................................18<br />
Specifications..................................................................................................................................19
Important Safety Instructions<br />
1. Read these instructions.<br />
2. Keep these instructions.<br />
3. Heed all warnings.<br />
4. Follow all instructions.<br />
5. WARNING – To reduce the risk of fire or electric shock, do not expose this apparatus to rain<br />
or moisture.<br />
6. Clean only with a dry cloth.<br />
7. Do not block any ventilation openings. Install in accordance with the manufacturer’s instructions.<br />
8. Do not install near any heat sources such as radiators, heat registers, stoves, or other apparatus<br />
(including amplifiers) that produce heat.<br />
9. Do not defeat the safety purpose of the polarized or grounding-type plug. A polarized plug has<br />
two blades with one wider than the other. A grounding type plug has two blades and a third<br />
grounding prong. The wide blade or the third prong are provided for your safety. If the provided<br />
plug does not fit into your outlet, consult an electrician for replacement of the obsolete outlet.<br />
10. Protect the power cord from being walked on or pinched particularly at plugs, convenience<br />
receptacles, and the point where they exit from the apparatus.<br />
11. Only use attachments/accessories specified by the manufacturer.<br />
12. Use only with the cart, stand, tripod, bracket, or table specified by the<br />
manufacturer, or sold with the apparatus. When a cart is used, use caution<br />
when moving the cart/apparatus combination to avoid injury from tip-over.<br />
13. Unplug this apparatus during lightning storms or when unused for long<br />
periods of time.<br />
14. Refer all servicing to qualified service personnel. Servicing is required<br />
3
when the apparatus<br />
has been damaged in any way, such as power-supply cord or plug is damaged, liquid has<br />
been spilled or objects have fallen into the apparatus, the apparatus has been exposed to<br />
rain or moisture, does not operate normally, or has been dropped.<br />
15. The radio must be located such that the bottom AC socket and connected power cord are<br />
readily accessible.<br />
16. This product has been tested and found to comply with the limits for Part 15 of the FCC rules.<br />
This device complies with Part 15 of the FCC Rules. Operation is subject to the condition<br />
that this device does not cause harmful interference. However, there is no guarantee that<br />
interference will not occur in a particular installation. If this equipment does cause harmful<br />
interference to radio or television reception, which can be determined by turning the product<br />
on and off, the user is encouraged to try to correct the interference by one or more of the<br />
following measures:<br />
• Reorient or relocate the receiving antennas.<br />
• Increase the separation between the equipment and the receiver.<br />
• Connect the equipment to an outlet on a circuit different from that to which<br />
the receiver is connected.<br />
17. This Class B digital device complies with the Canadian ICES-003.<br />
18. For added protection for this product during a lightning storm, or when it is left unattended<br />
and unused for long periods of time, unplug it from the wall outlet. This will prevent damage to<br />
the product to lightning and power-line surges.<br />
19. Operate this product only from the type of power source indicated on the bottom panel.<br />
For products using an external power supply, use an exact replacement if lost or damaged.<br />
For products operating from battery power, refer to the user manual.<br />
20. Unplug this product from the wall outlet and refer servicing to qualified service personnel<br />
under the following conditions:<br />
a. When the power supply cord or plug is damaged.<br />
b. If liquid has been spilled or objects have fallen into the product.<br />
c. If the product has been exposed to water or rain.<br />
d. If the product does not operate normally by following the operating instructions.<br />
e. If the product has been dropped or damaged in any way.<br />
f. When the product exhibits a distinctive change in performance.<br />
21. If the LCD becomes cracked and damaged, do not touch the liquid.<br />
22. Keep this product a safe distance away from naked flame, such as a lit candle.<br />
23. Apparatus shall not be exposed to dripping or splashing and no objects filled with liquids, such<br />
as vases, shall be placed on the apparatus.<br />
24. The recommended operating temperature range is 41˚ F to 104˚ F (5˚ C to 40˚ C).<br />
4
NetWorks Instructions<br />
Congratulations on your purchase of the NetWorks radio. We believe the NetWorks is one of the<br />
finest table radios on the market. Its sound quality, ease of use, unique features, and distinctive<br />
design are unmatched.<br />
We’ve taken the liberty of saving some diverse Internet radio stations to the stations presets. After<br />
you connect your NetWorks to your network, please explore each preset and enjoy listening as<br />
you read through this owner’s manual.<br />
In order to take full advantage of what your new radio is capable of, please take a moment to read<br />
this owner’s manual and the safety instructions. If you have any questions, please do not hesitate<br />
to contact your dealer or distributor.<br />
Please save the carton and original packing should you ever need to ship your radio, as<br />
shipping damage is not covered by the factory warranty.<br />
On behalf of all of us, thank you for choosing <strong>Tivoli</strong> <strong>Audio</strong> and enjoy your new NetWorks radio.<br />
About <strong>Tivoli</strong> <strong>Audio</strong><br />
<strong>Tivoli</strong> <strong>Audio</strong> was founded by Tom DeVesto with the mission of bringing simple to use, elegantly<br />
designed, high quality audio products to consumers. As CEO and head of research and development<br />
at his former company, Cambridge SoundWorks, Tom was responsible for the development<br />
of many of the best selling home entertainment and multi-media products on the market. He also<br />
held senior management positions in product development at both Advent and Kloss Video.<br />
*Cambridge SoundWorks is a registered trademark of Creative Labs, Singapore.<br />
Packed with your NetWorks you should find one each:<br />
• 2.74 meter (9') power cord<br />
• Remote control (battery installed)<br />
• 55.8cm (22") USB accessory cable<br />
• Warranty registration card<br />
Before you use your NetWorks, you’ll need:<br />
• A broadband Internet connection.<br />
• A wireless (WiFi) network connected to your broadband Internet, preferably via a router;<br />
• Or an Ethernet cable (not included) for the Ethernet connection if WiFi is unavailable.<br />
Getting Started:<br />
1. Be sure your wireless network is powered on and connected to your broadband Internet.<br />
2. Connect the included power cord to the power input on the bottom of NetWorks and plug<br />
the other end of the cord into a wall outlet.<br />
3. Press the power button on the remote control or the center of the top control wheel to turn<br />
the NetWorks on.<br />
4. Select “Internet Radio” from the list of sources.<br />
5. Select the WLAN country region nearest you even if WiFi won’t be used.<br />
6. The NetWorks will automatically scan for all wireless networks. After the scan it shows names of<br />
the wireless networks found in addition to offering options to rescan, select a wired connection<br />
(Ethernet)*, or set up the wireless configuration manually. Use the pq buttons on the remote<br />
control to highlight the network you want and then press Select. The display will show<br />
5
“Connecting”. After connecting you may begin using your NetWorks.<br />
* If you prefer to connect using a direct Ethernet cable, connect the cable (not included) to<br />
the Ethernet input located on the bottom of NetWorks.<br />
7. If you are prompted to enter a password, your network uses a security encryption system.<br />
You must enter the correct code to allow NetWorks to communicate with your network. The<br />
codes are case sensitive so be sure to enter the code exactly as it is configured in your wireless<br />
network. Use the pq buttons to change character pages. Use the tu buttons to highlight<br />
characters and the Select button to enter the character. After you’ve selected all the characters<br />
for your password, press the ‘ ’ character to enter your password.<br />
a) the ‘
Guide to Features (Top):<br />
1<br />
1. POWER/VOLUME/SNOOZE/MUTE: Briefly<br />
press the center of the control wheel to power<br />
NetWorks on. Press and hold the center of the<br />
control wheel to power NetWorks off. Rotate<br />
the wheel clockwise to increase the volume and<br />
counterclockwise to decrease the volume. Press<br />
the center of the wheel to activate Snooze after<br />
the alarm activates. The Snooze time is fixed<br />
at 7 minutes. Press the center of the wheel to<br />
mute the audio. The display will show an icon of<br />
a speaker with a line through it. Press again to<br />
restore audio output or adjust the volume.<br />
Guide to Features (Remote Control):<br />
MUTE<br />
SNOOZE<br />
ALARM SLEEP SOURCE INFO<br />
1 2 3 4 5<br />
VOLUME<br />
MENU<br />
SELECT<br />
1. SOURCE: Press to view the master source list (Internet radio, Music Player, Auxiliary) and use<br />
the pq buttons and the Select button to select the desired source. When the NetWork is set<br />
to Internet radio, the display will show the last station tuned.<br />
2. POWER: Press to power the NetWorks on or off. The radio will power on to the last source used.<br />
3. VOLUME +/–: Press the + button to raise the volume level or the – button to lower the volume<br />
level. If the audio ever sounds distorted, lower the volume level to avoid damaging the speaker.<br />
Adjusting the volume while the NetWorks is muted will cancel the muting.<br />
4. pq: Press these buttons briefly to move up or down through the menu.<br />
5 . t u: Press to navigate back or forward through pages while in the main menu. Also used for<br />
highlighting characters when entering an Internet station’s name or entering your password<br />
(if required by your network). Also, press and hold the right arrow button to save a tuned Internet<br />
station to Favorites.<br />
6. SELECT/MENU: Press briefly to select the item highlighted in the menu with an arrow, or<br />
press and hold to enter the main menu.<br />
7
7. MUTE/SNOOZE: Press to mute the audio (an icon of a speaker with a line through it will show<br />
on the display) when the unit is playing and press again to restore sound or adjust the volume.<br />
Press to mute the alarm for 7 minutes after the alarm sounds. The alarm will re-sound after 7<br />
minutes. During Snooze, a count down will be shown on the display except when the analog<br />
clock face is displayed. The Snooze time is not adjustable.<br />
8. PRESETS #1-5/music player controls: Your NetWorks has five Internet radio stations already<br />
saved to the presets for you to enjoy. Should you wish to replace them with your own selections,<br />
press and hold a preset button to save the currently tuned station to a preset. “Preset<br />
Saved” will briefly show on the display. Once stored, press the preset button briefly to recall the<br />
station associated with that preset. If no station has been stored and the preset button is pressed,<br />
the display will show “Preset Empty”. Presets cannot be stored in Music Player mode. This will<br />
not work when the Source menu is displayed.<br />
9. INFO: In Internet radio mode, the Info button will cycle through current status (“Playing” or<br />
“Station unavailable”), audio format, station description, genre, and station location. Each<br />
time a station is tuned the Info category will default to current playing status. When playing<br />
Podcasts, the Info button will cycle through Episode name, Description, Show description,<br />
Genre, and Location.<br />
In Music Player mode, for Shared Media, the Info button will cycle through artist, song, album,<br />
and format, and track time. For Shared Folders and a USB device, the Info button will cycle<br />
between Filename, Path, and Format.<br />
10. SLEEP: Press to start the 20 minute sleep timer. The NetWorks will display the remaining sleep<br />
time and automatically power off after 20 minutes. Press again to cancel the sleep timer. The<br />
amount of sleep time is not adjustable.<br />
11. ALARM: Press to access the alarm menu with NetWorks on or off. For more see “How To set<br />
the Alarm”.<br />
The sensor for the remote control is positioned in the lower left corner of the front panel display.<br />
When using the remote, aim it in this general direction. Sunlight flooding the sensor can sometimes<br />
cause erratic behavior.<br />
When replacing the remote’s battery, use a brand name 3V lithium button cell, model number<br />
CR2025. Install the battery so the positive side is facing you. Dispose of the spent battery according<br />
to your state’s regulations. Do not incinerate.<br />
When using the remote control within close proximity to the front panel remote sensor, you might<br />
notice some flashing of the display. This is normal.<br />
8
Guide to Features (Rear panel):<br />
The rear panel controls provide basic functionality should you lose the remote control or<br />
the remote is not located nearby.<br />
5<br />
1<br />
2<br />
3<br />
4<br />
1. MONO/STEREO: Press in for Stereo only when the optional NetWorks Speaker is connected.<br />
The display will show an “ST” for Stereo or “M” when the Mono/Stereo button is in the Mono<br />
position. Note: It is possible for the source material (such as an Internet station) to be broadcast<br />
in mono even if the Stereo position is selected.<br />
2. BALANCE: Leave this control in the “Left” position unless the optional NetWorks Speaker is<br />
connected. When the optional NetWorks Speaker is connected, rotate the knob to the left or right<br />
to adjust the sound from each speaker, or leave in the center detent position for equal balance.<br />
3. HEADPHONE: Connect a set of headphones (not included) to this 3.5mm female mini stereo<br />
variable output. The headphone volume is controlled by the wheel on the top of NetWorks<br />
and the volume buttons on the remote. Connected headphones will mute the main speaker.<br />
Avoid listening to headphones at high volume levels to prevent hearing damage.<br />
4. USB: For your convenience you may connect the included USB cable to the USB input and<br />
then connect your USB device to the cable. Or connect your digital storage device (such as a<br />
memory stick) to this USB Type A 2.0 input. The display will briefly show “USB device found”.<br />
Set the source to Music Player mode and select USB.<br />
Use the music player controls (Presets 1, 2, & 3) to control music playback. All of the tracks<br />
for an artist or album will playback until the end of that folder is reached and then repeat.<br />
Note: Some MP3 players, including the iPod, use dedicated software to playback music and<br />
to charge, and therefore won’t be recognized by the NetWorks radio. In these cases, when<br />
such a device is connected to the USB input, the LCD will briefly show “USB unsupported”<br />
and might not charge. To play these MP3 players, including the iPod, connect the player’s<br />
headphone output to the NetWorks Auxiliary input and charge the device (if necessary) through<br />
other means. If a Real music file will not play, it should be converted to MP3, WMA, or AAC<br />
format for playback through the NetWorks.<br />
9
5. PRESETS #1-5, SOURCE, MENU/SELECT, pqt u:<br />
See “Guide to Features (Remote Control)”.<br />
Guide to features (Bottom):<br />
8<br />
1<br />
6<br />
ETHERNET<br />
12VDC<br />
1000mA<br />
R-SPR<br />
7<br />
5<br />
3<br />
4<br />
SUB OUT REC OUT MIX IN AUX IN<br />
2<br />
1. 12VDC/1A: Connect an optional external power supply to this input, or use an optional 1A fused,<br />
12VDC adaptor for operation in a boat or camper. The connector must be 5.5mm/2.1mm center<br />
positive. It is normal for the external power supply to become warm during use. This input<br />
should never be used simultaneously with the power cord input.<br />
2. AUX IN: To hear audio from another device such as a CD or MP3 player, connect said device’s<br />
audio output to this 3.5mm female stereo input. Note: You may need to adjust the volume level<br />
differently for an auxiliary device than the level used for radio listening.<br />
3. MIX IN: Connect the audio output from a computer to this 3.5mm female stereo input. The<br />
computer’s audio will be mixed in with the audio from whatever mode the NetWorks is in.<br />
The volume level of the computer’s audio is controlled by the computer.<br />
4. SUB OUT: Connect one end of the audio cable included with <strong>Tivoli</strong> <strong>Audio</strong>’s Model Subwoofer<br />
(not included) to this 3.5mm female output.<br />
5. REC OUT: To record from the NetWorks, connect the inputs from a recording device (such as<br />
a cassette deck) to this 3.5mm female stereo fixed output.<br />
6. ETHERNET: If a WiFi signal is unavailable or is unreliable, securely connect a standard Ethernet<br />
cable (not included) to this input.<br />
7. R-SPR: Connect the male RCA from the optional NetWorks Speaker to this female RCA output,<br />
adjust the Balance control to the center detent position, and place the Mono/Stereo switch in the<br />
Stereo position. Bend the NetWorks Speaker connecting cable so the NetWorks radio sits flush.<br />
8. POWER CORD INPUT: Insert the correct end of the included power cord securely into this<br />
input and connect the other end of the cord into an electrical outlet. Damage as a result of<br />
using the NetWorks with an incorrect voltage is not covered by the factory warranty.<br />
Helpful hint: When connecting mini cables (not included) to the bottom inputs and outputs, bend<br />
the cables so the NetWorks sits flush.<br />
Be sure the NetWorks is turned off when connecting/disconnecting audio cables.<br />
10
Internet Radio mode- Tuning Stations:<br />
1. In Internet radio mode, press and hold the Select button to enter the main menu.<br />
2. Select “Station List”.<br />
3. Select “Stations” (or Podcasts).<br />
4. Next, choose Location, Genre, or Station Search and press the Select button. Location allows<br />
you to choose from a list of countries. Genre allows you to choose from a list of formats. For<br />
a detailed description of Favorites, and Station Search, see the section marked “Menu options<br />
and specific features” on the page below.<br />
Note: <strong>Tivoli</strong> <strong>Audio</strong> is not responsible for broadcast content.<br />
A Word About Internet Stations:<br />
Adding Internet stations:<br />
If there is an Internet station you do not see listed in the Stations menu, you can send <strong>Tivoli</strong> <strong>Audio</strong><br />
an email requesting the station be added: addstation@tivoliportal.com, or visit our dedicated<br />
NetWorks site at: http://tivoliportal.com.<br />
In your email you should include all information necessary to identify the station (station name,<br />
location, URL, etc). It’s also possible to add radio stations and view other information via <strong>Tivoli</strong><br />
<strong>Audio</strong>’s dedicated site: http://tivoliportal.com.<br />
Unavailable, Please try later:<br />
Although this message is usually a result of a station’s URL not responding, exceeding the<br />
maximum number of listeners, or a slow connection between the server and the NetWorks radio,<br />
there might be other reasons. Some stations don’t broadcast 24 hours a day or 7 days a week,<br />
and some are not always on-line. Some stations will also change their audio formats (codecs)<br />
and/or streaming protocols, which can result in the stations no longer showing in the Stations list<br />
even though their websites can still be accessed on a computer. Still other stations might change<br />
their links. If you have a computer, try acquiring the Internet station using your PC to see if the<br />
results are the same. If you suspect the station is no longer broadcasting or its link is outdated,<br />
send <strong>Tivoli</strong> <strong>Audio</strong> an email so we can upgrade the station data: addstation@tivoliportal.com, or<br />
use the site: http://tivoliportal.com.<br />
This message might also be displayed when streaming a music file from a computer if the file is<br />
corrupted.<br />
Menu options and specific features:<br />
Note: A check mark symbol is used to indicate the current setting.<br />
1. SuperBuffer (found in the main menu in Internet radio mode only): Located in the main<br />
menu in Internet radio mode, this unique feature developed by <strong>Tivoli</strong> <strong>Audio</strong> increases the buffer<br />
time by four to reduce the frequency of drop-outs. If you experience an Internet radio station<br />
that is dropping out frequently, select “on” to engage this feature. The display will show “x4”<br />
when SuperBuffer is on. Loading of stations might take slightly longer whenever SuperBuffer<br />
is on. Drop-outs can be caused by different conditions. SuperBuffer cannot eliminate<br />
drop-outs completely.<br />
11
2. <strong>Tivoli</strong> EQ (found in main menu): Use the pq and Select buttons to adjust the Bass and Treble.<br />
The adjusted values will be shown in “User EQ”. Use the pq buttons to turn Loudness On or<br />
Off. Turning Loudness on when listening at low volume levels is recommended since it boosts<br />
high and low frequencies resulting in a more natural sound. Use the pq and Select buttons<br />
to activate any one of the pre-set EQ settings. Selecting a preset EQ will over-ride any adjustment<br />
made to the Bass and Treble settings but Loudness will be unaffected. The “Flat” EQ<br />
restores the audio settings of the NetWorks to factory defaults, meaning Bass and Treble will<br />
be re-set to zero. However, if the Bass and Treble had been adjusted, those settings will still be<br />
shown in “User EQ”. Simply selecting “User EQ” will reactivate the Bass and Treble settings. In<br />
the EQ menu page, the numbers to the right hand side indicate the bass and treble settings.<br />
3. Favorites (found under “Station list” in Internet radio mode only): In addition to storing<br />
five presets for Internet radio, you can save virtually an unlimited number of additional Internet<br />
stations in a menu called “Favorites”. While listening to an Internet station or Podcast you wish<br />
to save in Favorites, press and hold the right arrow button. Select whether you wish to store<br />
the station to Favorites. When you enter the Favorites list, select “Stations” or “Podcasts” (if<br />
you have also saved Podcasts). Use the arrow buttons to locate the station/Podcast you want.<br />
Press the Select button to play the station/Podcast, or press and hold the right arrow key for<br />
the option to delete the station/Podcast.<br />
4. My Added Stations (found under “Station list” in Internet radio mode only): Located<br />
under the “Stations” category, this will list any Internet stations you request <strong>Tivoli</strong> <strong>Audio</strong> to<br />
add to your radio only.<br />
5. Station Search (found in “Stations” under “Station list” in Internet radio mode only):<br />
Use the pq buttons to change character pages. Use the tu buttons to highlight characters<br />
and the Select button to enter the character.<br />
a) the ‘
password (if applicable), EQ settings, and any other customized settings. In the rare event<br />
you encounter an operational problem, unplug the NetWorks for a few seconds and plug it<br />
back in. If this fails to cure the problem, try the factory re-set.<br />
11. Info (found under “Settings”): This shows information about your NetWorks radio which you<br />
might be asked to provide should you phone or email with questions about software or repair.<br />
This differs from the Info button on the remote control.<br />
12. Software Upgrade (found in the main menu under “Internet Setup” in Internet radio<br />
mode only): A message will appear automatically in Internet radio mode advising you when<br />
new software is available. Otherwise, to check to see if an Upgrade is available, access the<br />
“Internet Setup” in the main menu in Internet radio mode and select “Software Upgrade”. It<br />
is recommended you check for a software Upgrade after completing initial set-up of your<br />
NetWorks to be sure its software is fully up-to-date. Several different Upgrades might be<br />
necessary. The Networks will automatically re-boot after a successful upgrade. In the unlikely<br />
event you experience any odd behavior after a software upgrade, perform a factory reset.<br />
WARNING: It is vital the NetWorks not be powered off or unplugged during the<br />
software Upgrade process or else the radio will require servicing to restore operation.<br />
How to set the Alarm:<br />
1. Press the Alarm button on the remote or enter the Alarm menu under “Settings”. The Alarm<br />
button on the remote will access the alarm menu even when the NetWorks is off.<br />
2. Select Alarm 1 or 2.<br />
3. Select “Time”. Adjust the hours with the pq buttons and press Select to save and repeat the<br />
process for the minutes. You will see a message confirming the alarm time and alarm has been set.<br />
4. Select the same alarm again to change the other options such as to set the alarm on or off,<br />
Schedule (whether you want the alarm to sound every day (“Daily”) at the set time, or only on<br />
weekdays, only on weekends, or just once); the source you wish to wake to, the volume level<br />
of the alarm (set by the pq buttons, not the Volume buttons); and select “Save” to store<br />
the changes.<br />
Note: You must select “Save” after making any changes or else the changes will not<br />
be saved in memory.<br />
5. If you access the alarm menu while the NetWorks is off, once you’ve finished making and<br />
saving you’re adjustments, press the alarm button again or the left arrow button (t ) to return<br />
the NetWorks to off mode.<br />
Alarm Quick Set: If you don’t need to change any settings in the alarm menu and just want to set<br />
the alarm to wake, press and hold the Alarm button on the remote control to set Alarm 1. Press<br />
and hold again to set Alarm 2. Press and hold again to set both Alarm 1 and 2. Or press and hold<br />
a fourth time to cancel both alarms.<br />
During a power outage, the alarm time(s) and clock will be maintained by an integrated back-up memory.<br />
However, if power is lost during the same time the alarm is set to activate, the alarm cannot activate.<br />
If you wish to wake to an Internet station, be sure the station is broadcasting during the time the<br />
alarm is set to activate. If waking to an Internet radio station that is unavailable or takes too long<br />
to load, the alarm will default to the tone as a back-up. If waking to an internet station and there<br />
is a problem connecting to your network, the NetWorks may not be able to default to the tone as<br />
a back up. If you are setting the alarm and are concerned about your network’s reliability, consider<br />
13
waking to the Tone. Note: Be sure headphones are not connected or the speaker will be muted<br />
and you will not hear the alarm sound.<br />
When the alarm sounds you have three options:<br />
1) Press the Snooze button to mute the alarm for 7 minutes;<br />
2) Press any remote control button (except Power or Snooze) to turn the alarm off; or<br />
3) Press the power button to turn the NetWorks off but keep the alarm set.<br />
If no action is taken the alarm will sound for one hour and then shut off automatically.<br />
Music Player mode Set up:<br />
To access music files from your computer connected to the same network as the NetWorks and<br />
play them through the radio, you must configure the NetWorks to one of two methods available:<br />
Shared Media (UPnP: Universal Plug and Play) or Shared Folders (CIFS), with the former being<br />
the easier of the two methods. Shared Media also generally provides a wider selection of search<br />
criteria. If you already have Windows Media Player 11 installed on your computer along with music<br />
files, skip to “Operating Shared Media after Setup” to see if you can begin streaming now.<br />
Note: The generic term “PC” is used simply for convenience sake. For advice regarding streaming<br />
music from an Apple computer, please consult our web portal at http://tivoliportal.com<br />
1. Shared Media (UPnP): (RECOMMENDED METHOD!)<br />
Media sharing uses Windows Media Player (WMP) 11 and above as media server. WMP 11<br />
can be downloaded from Microsoft’s website (www.microsoft.com). The Share Media mode<br />
does not require any special setup in the NetWorks, but your PC needs to be configured to<br />
allow the radio access to the media. You will only have to do it once following these steps:<br />
1) Verify your PC Is connected to the same network (wired or wireless) as the NetWorks.<br />
2) Install WMP 11 if not already installed on your PC.<br />
3) Open WMP 11. To add new media files to the library, click the “Library” tab and “Add to Library”.<br />
If the folder list is not shown, click “Advanced Options”. Now click “Add” and select the<br />
folders you wish to add, then click “OK”. Click “OK” again to close the “Add to Library” page.<br />
4) Turn the NetWorks on, press the Source button and select Music Player mode, then select<br />
“Shared media”. Now select your computer’s name. The NetWorks display will show<br />
“Unauthorized”. Click the “Library” tab on your computer in WMP 11 and select “Media<br />
sharing”. The NetWorks will be show as an “Unknown Device”. Select the unknown device<br />
and click “Allow”, then click “OK”. Press the Select button again to authorize the NetWorks<br />
to access the menu. Select “Music” from the NetWorks menu and select the rest of the<br />
options on the display until your music file starts play.<br />
Operating Shared Media after Set-Up:<br />
1) Select the Music Player mode under “Source” in the NetWorks.<br />
2) Select Shared Media. The NetWorks will scan for all available computers.<br />
If no computers are found the display will show “Empty”. Otherwise:<br />
3) Use the pq buttons to highlight your computer and press Select.<br />
4) Select from the various media categories shown (Music, Playlists, etc). Note: Selecting<br />
“Video” or “Pictures” (if shown) will result in the display showing “Empty”. The actual menu<br />
structure from this point forward is provided by the media server not the NetWorks and<br />
might change across systems. Use the pq buttons to highlight the file you wish to play<br />
and press Select.<br />
14
As with the USB input, the Music Player cannot play back protected music files that use<br />
Apple’s proprietary coding. Songs or albums purchased through iTunes use this format. Also<br />
note there are many versions of the Real <strong>Audio</strong> format. Also note there are many versions of the<br />
Real <strong>Audio</strong> format. If a Real music file will not play, it should be converted to MP3, WMA, or<br />
AAC format for playback through the NetWorks.<br />
2. Shared Folders (CIFS): (WINDOWS XP HOME)<br />
In order to set up the NetWorks to playback music stored on shared network computers,<br />
please follow the instructions below.<br />
1) Press the “Start” key on your computer.<br />
2) Select “All Programs”.<br />
3) Select “Accessories”.<br />
4) Select “Windows Explorer”.<br />
5) Locate the folder you want to share.<br />
6) Right click the folder and click “Sharing and Security”.<br />
7) Do one of the following:<br />
a) If the “Share this folder on the network” check box is available, select the box and click<br />
“Okay”.<br />
b) If the “Share this folder on the network” check box is not available, your computer is not<br />
on a network. If you would like to set up a home or small office network, click the “Network<br />
Setup Wizard” link and follow the instructions to turn on file sharing. Once file sharing is<br />
enabled, start this procedure over again.<br />
8) Turn on the NetWorks, press the Source button, select Music Player mode<br />
and “Shared folders”.<br />
9) Select the workgroup name and then select the computer name. Now select the desired<br />
folder and continue to select the folders you wish to access.<br />
Note for Windows VISTA: You have to turn on the Guest account via manage user accounts<br />
in the control panel in VISTA, then add access to either ‘Everyone’ or ‘Guest’ on the shared<br />
drive. You can create a new account for the NetWorks with a password if you are concerned<br />
about security. The Guest account has no password by default, so the NetWorks will connect<br />
to it from its factory default settings.<br />
Operating Shared Folders (CIFS) after Set-Up:<br />
1) Select the Music Player mode under Source in the NetWorks and select Shared Folders.<br />
2) NetWorks searches for all available domains and shows all found domains.<br />
This may take a minute or so.<br />
3) Once you select a domain, a list of PCs on the domain is displayed.<br />
4) Select the PC you wish to access.<br />
5) Once a Domain and PC have been chosen, a list of all of the<br />
shared folders in the system is displayed.<br />
6) Select a folder and a file to play within the folder.<br />
As with the USB input, the Music player cannot play back protected music files that use Apple’s<br />
proprietary coding. Songs or albums purchased through iTunes use this format. Also note there<br />
are many versions of the Real <strong>Audio</strong> format. If a Real music file will not play, it should be converted<br />
to MP3, WMA, or AAC format for playback through the NetWorks.<br />
15
The Display:<br />
The display’s backlight and contrast are controlled automatically via a small sensor in the lower<br />
right corner of the front panel. There are no manual adjustments other than turning the display off<br />
whenever the NetWorks is turned off. This option is found in the main menu under “Settings”. If<br />
selected, the display will go dark after the NetWorks is turned off. This might be useful when using<br />
the NetWorks as an alarm clock in a bedroom and complete darkness is desired. The display will<br />
return to normal when the NetWorks is powered on again, the alarm sounds, or the snooze countdown<br />
is active. With the unit off, while the display is dark, press any button on the remote control<br />
(except Power or Alarm) to turn the display on for 5 seconds. This will allow you to see the time<br />
without having to turn the radio on and off again. With the unit off, press any button on the<br />
remote two times and the display will turn on or off without having to turn the NetWorks on and<br />
accessing the main menu. Note: The display can be affected by hot and cold temperatures.<br />
Placement:<br />
Place the NetWorks on a flat, stable surface. The NetWorks’ driver is shielded and may be used<br />
in close proximity to a computer monitor or television set. Do not obstruct the rear bass port.<br />
Placement in a bookcase, corner, or against a wall will inflate the bass.<br />
Cleaning:<br />
Never use any harsh cleansers or solvents on the NetWorks cabinet or plastic panels, as this<br />
could damage the finish.<br />
NOTE: <strong>Tivoli</strong> <strong>Audio</strong> cabinets use real wood veneers. Since natural wood varies greatly, it is not<br />
possible to achieve an exact wood color/grain match between models. You may also notice<br />
the wood darken over time with exposure to sunlight. Again, this is normal for real wood.<br />
TROUBLESHOOTING:<br />
If you are unable to get the NetWorks radio to connect to your WiFi network and you have a PC,<br />
confirm your PC can connect to your WiFi network to verify it is operational.<br />
Check that your network doesn’t restrict connections to particular MAC addresses. View the<br />
NetWorks’ MAC address in the main menu under “Info”, shown as “Radio ID”.<br />
Check that a DHCP server is available, or that you configured a static IP address on the NetWorks.<br />
You can configure a static IP address on the NetWorks in the main menu under “IR Set Up”.<br />
Check that your network’s firewall isn’t blocking any outgoing ports.<br />
If using an Ethernet cable, be sure the cable is fully inserted into the NetWorks Ethernet jack and<br />
you’ve selected “Wired” under “Manual settings” In “Internet Setup”.<br />
In the rare event you encounter an operational problem, unplug the NetWorks for a few seconds<br />
and plug it back in. If this fails to cure the problem, try the factory re-set.<br />
16
The following is a description of SOME OF the messages<br />
the NetWorks could display:<br />
Message<br />
Failed to<br />
connect<br />
Network error<br />
Format error<br />
Read error<br />
Connecting...<br />
Loading...<br />
Playing...<br />
Stopped<br />
USB update<br />
Waiting for<br />
Ethernet<br />
Type<br />
Error<br />
Error<br />
Error<br />
Error<br />
Info<br />
Info<br />
Info<br />
Info<br />
Info<br />
Info<br />
Description<br />
Seen when a WiFi network-related error occurs.<br />
Some examples of circumstances which will trigger<br />
a ‘Failed to connect’ are:<br />
1) NetWorks fails to connect to WiFi network<br />
2) Wrong network security key entered<br />
Seen when a server/connection-related error occurs.<br />
Some examples of circumstances which will trigger a<br />
‘Network error’ are:<br />
1) NetWorks fails to connect to WiFi network<br />
2) NetWorks fails to connect to an Internet station<br />
3) NetWorks was streaming a Internet station and<br />
connection failed midway through the streaming<br />
4) NetWorks fails to connect to a PC for streaming music<br />
Seen when the NetWorks has a problem playing the media due<br />
to unsupported format type. Some examples of circumstances<br />
which will trigger a ‘Format error’ are:<br />
1) NetWorks tunes to a Internet radio station which is being<br />
transmitted using an unsupported audio codec<br />
2) NetWorks tries to play a music file from a PC or USB device<br />
which is in a format not supported<br />
Seen when a USB device is detected but its file system<br />
cannot be read.<br />
Seen when NetWorks tries to establish connection with a<br />
network, server, or Internet station.<br />
Seen once the NetWorks has established connection and<br />
starts buffering the station/stream.<br />
Seen once NetWorks has completed connecting and loading,<br />
and starts playing the stream. This is the point when the<br />
station becomes audible.<br />
Seen when an Internet radio station is currently not transmitting<br />
or the station’s or music file’s stream is un-decodable.<br />
Seen when the NetWorks is unplugged or loses power during<br />
a software upgrade and must be serviced to restore normal<br />
operation.<br />
Seen when the NetWorks is in “Wired” mode and an Ethernet<br />
cable is not connected or there’s a problem with the cable or<br />
the network.<br />
17
Limited Warranty:<br />
<strong>Tivoli</strong> <strong>Audio</strong> manufactures its products to very high standards and we are confident our products<br />
will perform well. Accordingly, we provide a limited warranty on this product against manufacturing<br />
defects in material and workmanship to the original owner, for a period of one year from the original<br />
date of purchase. This warranty is non-transferable.<br />
This Limited Warranty covers the functionality of the product for its normal, intended use as<br />
specified in this Owner’s Manual. It does not cover a malfunction or damage that has resulted<br />
from improper or unreasonable use or installation, faulty ancillary equipment, modifications,<br />
unauthorized repair, shipping damage or loss, abuse, accidents, use on improper voltage/current,<br />
power surges, lightning or other acts of God, excess moisture, normal wear and tear, commercial<br />
use, or purchase from unauthorized dealers. Proof of purchase as evidence the unit was purchased<br />
from an authorized dealer may be required for warranty service. Please contact the<br />
dealer of purchase or local distributor for warranty service or repair.<br />
Returns of any model purchased directly from <strong>Tivoli</strong> <strong>Audio</strong> via our website, telephone, mail, or<br />
fax: must have a Return Authorization (RA) number clearly indicated on the outside of the package.<br />
An RA number can be obtained by phoning <strong>Tivoli</strong> <strong>Audio</strong> customer service (1.877.297.9479)<br />
with the product’s model name, serial number, approximate date of purchase, and detailed<br />
description of the problem, or by filling out the RA form on our web site (www.tivoliaudio.com).<br />
PRODUCTS RETURNED TO TIVOLI AUDIO WITHOUT A VALID RA # WILL BE RETURNED<br />
UNOPENED TO THE SENDER.<br />
Please refrain from opening this product or taking it apart as doing so will void this Limited<br />
Warranty. There are no user serviceable parts inside. <strong>Tivoli</strong> <strong>Audio</strong> will not pay for costs incurred<br />
due to correction of reception problems, elimination of externally generated static/noise, loss of<br />
time, inconvenience, loss of use of product, or damage caused by improper use of this product.<br />
In the event the product is returned during the warranty term and is eligible for service under this<br />
Limited Warranty, we will repair or replace any defective parts within a reasonable period of time<br />
and free of charge.<br />
THIS LIMITED WARRANTY GIVES YOU SPECIFIC LEGAL RIGHTS SUBJECT TO SPECIFIED<br />
CONDITIONS. YOU MAY ALSO HAVE OTHER LEGAL RIGHTS WHICH APPLY TO THE PRODUCT<br />
YOU HAVE ACQUIRED. SOME PLACES DO NOT ALLOW THE EXCLUSION, RESTRICTION,OR<br />
MODIFICATION OF CERTAIN IMPLIED RIGHTS OR THEIR EFFECT. IN THOSE SITUATIONS THIS<br />
LIMITED WARRANTY WILL ONLY APPLY TO THE EXTENT THAT THE APPLICABLE LAW ALLOWS.<br />
The provisions of the Limited Warranty are in lieu of any other warranties or conditions, except<br />
those provided by law. This Limited Warranty does not affect any legal rights provided to you by<br />
law and does not preclude any remedy you may have under law.<br />
In states where liability limits are not precluded by statute, the maximum liability of <strong>Tivoli</strong> <strong>Audio</strong><br />
shall not exceed the purchase price paid by you for the product. In states where limitations of<br />
liability are precluded by law, <strong>Tivoli</strong> <strong>Audio</strong> shall be liable for no more than the direct damages for<br />
bodily injury, and/or real or personal property arising from the negligence of <strong>Tivoli</strong> <strong>Audio</strong>.<br />
Where not prohibited by law, <strong>Tivoli</strong> <strong>Audio</strong> shall not be liable for special, incidental, consequential,<br />
or indirect damages. Some places do not allow limitations on the exclusion or limitation of relief,<br />
special, incidental, consequential or indirect damages, or the limitation of liability to specified<br />
amounts, so the above limitations or exclusions may not apply to you.<br />
18
This Limited Warranty is void if the label bearing the serial number has been removed or defaced.<br />
For service outside the USA, please contact your local distributor.<br />
If you purchased an extended service contract from your dealer and service is required after the<br />
term of this Limited Warranty has expired, please contact your extended service contract provider<br />
to obtain service.<br />
For your convenience, you may register your product for warranty service online at our website,<br />
www.tivoliaudio.com. There is no legal obligation for you to provide personal information. However,<br />
such information allows us to maintain a record of the <strong>Tivoli</strong> <strong>Audio</strong> products acquired by you and<br />
better understand the purchasers of our products. The information collected will be used for<br />
marketing purposes by <strong>Tivoli</strong> <strong>Audio</strong> and, where permitted, to contact you in relation to the products<br />
you have acquired or other products which might be of interest to you from <strong>Tivoli</strong> <strong>Audio</strong> or other<br />
companies. The information that you provide may be processed in another country.<br />
Please visit the <strong>Tivoli</strong> <strong>Audio</strong> FAQ section at http://tivoliportal.com prior to any request for<br />
warranty service as information available there may answer your questions or concerns.<br />
You may email questions to us at mail@tivoliaudio.com<br />
For your convenience, you may register your product for warranty coverage on-line at www.tivoliaudio.com.<br />
Specifications:<br />
Model:<br />
The NetWorks Radio<br />
Drivers:<br />
3.5" full range, magnetically shielded<br />
Receiving bands: Internet radio: 2412-2462MHz<br />
Formats: WMA, Real <strong>Audio</strong>, MP3, and in Music Player mode, AAC.<br />
Dimensions: 5.51"W x 8.74"H x 5.12"D (140mm W x 222mm H x 130mm D)<br />
Weight:<br />
4.0 lbs./1.814 kg<br />
All specifications subject to change without notice.<br />
<strong>Tivoli</strong> <strong>Audio</strong> reserves the right to make product changes without notice.<br />
<strong>Tivoli</strong> <strong>Audio</strong>, the <strong>Tivoli</strong> <strong>Audio</strong> logo, NetWorks, and SuperBuffer are registered trademarks of <strong>Tivoli</strong> <strong>Audio</strong>, LLC.<br />
Patent Pending.<br />
End Users shall:<br />
a. Refrain from modifying, translating, reverse engineering, decompiling, disassembling or using other means to<br />
discover the Source Code or otherwise replicate the functionality of the Client Code, except to the extent that<br />
this restriction is expressly prohibited by applicable law.<br />
b. Disclaim Real Networks Inc. of all warranties and conditions other than those set forth in this End User<br />
License, express and implied, including implied warranties or conditions of merchantability and fitness for<br />
a particular purpose; and effectively exclude all liability for indirect, special, incidental and consequential<br />
damages, such as lost profits.<br />
c. Recognize that this product contains technology subject to certain intellectual property rights of Microsoft.<br />
Use or distribution of such technology outside of this product is prohibited without the appropriate license<br />
from Microsoft.<br />
19
This manual was written by Peter Skiera and cannot be<br />
reproduced in whole or in part without the permission<br />
of <strong>Tivoli</strong> <strong>Audio</strong>. The information included within this<br />
owner’s manual was accurate at the time of printing.<br />
<strong>Tivoli</strong> <strong>Audio</strong> shall not be held liable for operational,<br />
technical, or editorial errors/omissions. Visit our website<br />
for the latest version of the owner’s manual.<br />
http://tivoliportal.com<br />
For more information about other exciting products<br />
from <strong>Tivoli</strong> <strong>Audio</strong>, please visit our website or contact<br />
us directly:<br />
<strong>Tivoli</strong> <strong>Audio</strong>, LLC<br />
Seaport Center<br />
70 Fargo Street, Suite 900<br />
Boston, MA 02210 USA<br />
1.877.297.9479<br />
www.tivoliaudio.com<br />
help@tivoliaudio.com<br />
NWIRNA0909