Omni-Flow® 4000 Plus Medication Management System ... - Hospira
Omni-Flow® 4000 Plus Medication Management System ... - Hospira
Omni-Flow® 4000 Plus Medication Management System ... - Hospira

Create successful ePaper yourself
Turn your PDF publications into a flip-book with our unique Google optimized e-Paper software.
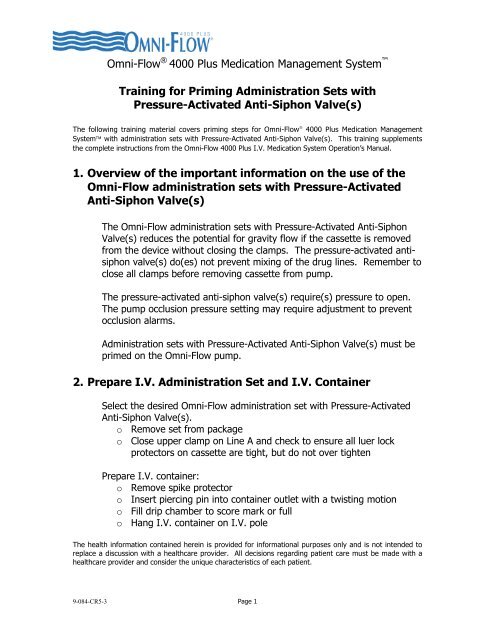
<strong>Omni</strong>-Flow ® <strong>4000</strong> <strong>Plus</strong> <strong>Medication</strong> <strong>Management</strong> <strong>System</strong> <br />
Training for Priming Administration Sets with<br />
Pressure-Activated Anti-Siphon Valve(s)<br />
The following training material covers priming steps for <strong>Omni</strong>-Flow ‚ <strong>4000</strong> <strong>Plus</strong> <strong>Medication</strong> <strong>Management</strong><br />
<strong>System</strong>‰ with administration sets with Pressure-Activated Anti-Siphon Valve(s). This training supplements<br />
the complete instructions from the <strong>Omni</strong>-Flow <strong>4000</strong> <strong>Plus</strong> I.V. <strong>Medication</strong> <strong>System</strong> Operation’s Manual.<br />
1. Overview of the important information on the use of the<br />
<strong>Omni</strong>-Flow administration sets with Pressure-Activated<br />
Anti-Siphon Valve(s)<br />
The <strong>Omni</strong>-Flow administration sets with Pressure-Activated Anti-Siphon<br />
Valve(s) reduces the potential for gravity flow if the cassette is removed<br />
from the device without closing the clamps. The pressure-activated antisiphon<br />
valve(s) do(es) not prevent mixing of the drug lines. Remember to<br />
close all clamps before removing cassette from pump.<br />
The pressure-activated anti-siphon valve(s) require(s) pressure to open.<br />
The pump occlusion pressure setting may require adjustment to prevent<br />
occlusion alarms.<br />
Administration sets with Pressure-Activated Anti-Siphon Valve(s) must be<br />
primed on the <strong>Omni</strong>-Flow pump.<br />
2. Prepare I.V. Administration Set and I.V. Container<br />
Select the desired <strong>Omni</strong>-Flow administration set with Pressure-Activated<br />
Anti-Siphon Valve(s).<br />
o Remove set from package<br />
o Close upper clamp on Line A and check to ensure all luer lock<br />
protectors on cassette are tight, but do not over tighten<br />
Prepare I.V. container:<br />
o Remove spike protector<br />
o Insert piercing pin into container outlet with a twisting motion<br />
o Fill drip chamber to score mark or full<br />
o Hang I.V. container on I.V. pole<br />
The health information contained herein is provided for informational purposes only and is not intended to<br />
replace a discussion with a healthcare provider. All decisions regarding patient care must be made with a<br />
healthcare provider and consider the unique characteristics of each patient.<br />
9-084-CR5-3 Page 1
<strong>Omni</strong>-Flow ® <strong>4000</strong> <strong>Plus</strong> <strong>Medication</strong> <strong>Management</strong> <strong>System</strong> <br />
3. Prepare <strong>Omni</strong>-Flow Pump and Inserting Set<br />
o Confirm the cassette lever is in the locked position<br />
o Toggle the [ON/CHARGE] switch, located in the rear of the pump,<br />
to the ON position<br />
o The Restore Previous Programming message is displayed, select<br />
YES or NO<br />
o Slowly pull up and turn the cassette-locking lever to the unlocked<br />
position<br />
o Insert the cassette by grasping the cassette so that the collection<br />
bag and patient line are at the top and the luer lock connectors are<br />
pointing to the right<br />
o Insert cassette into holster located along the right side of the pump<br />
o Slowly turn the cassette-locking lever to the locked position.<br />
o To secure, press down on the cassette lever<br />
o Remind the clinician to turn the locking lever slowly to<br />
prevent sudden release of spring mechanism<br />
o Open all clamps on the set and confirm no fluid is flowing in the<br />
drip chamber on Line A<br />
o Attach the air elimination bag to hanger located on the bottom<br />
right corner of the pump<br />
4. Cassette Priming<br />
When “Priming the Cassette” screen is displayed and the [Prime Cassette]<br />
key is Pressed and Released, the pumping action of the system pulls<br />
fluid from Line A into the cassette thereby clearing air into the air<br />
elimination bag.<br />
Steps for Power Prime Cassette:<br />
o Press and Release [Prime Cassette] key on Line A<br />
o After all air is cleared from the cassette into collection bag, press<br />
the [ENTER] key<br />
o Attach any extension sets or other devices to the distal end of the<br />
patient line<br />
9-084-CR5-3 Page 2
<strong>Omni</strong>-Flow ® <strong>4000</strong> <strong>Plus</strong> <strong>Medication</strong> <strong>Management</strong> <strong>System</strong> <br />
5. Patient Line Priming<br />
There are two options for priming the Patient Line: (A) Power Prime and<br />
(B) Set Rate Prime.<br />
A. Patient Line Power Prime Steps<br />
When “Priming the Patient Line” screen is displayed and the [Prime<br />
Patient Line] key is Pressed and Released, the pumping action of<br />
the system pulls fluid from Line A into the cassette and down the<br />
patient line thereby clearing air from the patient line. The pressureactivated<br />
anti-siphon valve(s) prevent(s) gravity prime mode from<br />
priming the patient line.<br />
Steps for Power Prime Patient Line:<br />
o Press and Release [Prime Patient Line] key on Line A to<br />
power prime line<br />
o NOTE: If additional power primes are needed to prime the<br />
patient line, repeat the following steps<br />
� Press the [Escape] key<br />
� When the Cassette Test Screen displays, enter<br />
[YES] to bypass the cassette test and return to<br />
the base screen<br />
� When the base screen displays, press Line A<br />
[Prime Patient Line] to power prime the patient<br />
line<br />
o Press the [ENTER] key when the patient line is fully primed.<br />
The device performs a 36 second cassette test.<br />
o Following successful completion of cassette test the pump is<br />
ready to program.<br />
9-084-CR5-3 Page 3
<strong>Omni</strong>-Flow ® <strong>4000</strong> <strong>Plus</strong> <strong>Medication</strong> <strong>Management</strong> <strong>System</strong> <br />
B. Patient Line Set Rate Priming<br />
When “Priming the Patient Line” screen is displayed, press the<br />
[ENTER] key. Select Line A continuous infusion. The pumping<br />
action of the system pulls fluid from Line A into the cassette and<br />
down the patient line thereby clearing air from the patient line. The<br />
pressure-activated anti-siphon valve(s) prevent(s) gravity prime<br />
mode from priming the patient line.<br />
Steps for Rate Set Prime Patient Line:<br />
o Press [ENTER]<br />
o Press [ESCAPE]<br />
o Select [YES] to bypass the Cassette Test<br />
o Press [ENTER]<br />
o Press [Continuous] for Line A<br />
o Enter a rate of 300 mL/hr and a total volume of 3 mL<br />
o NOTE: The additions of any extension sets or other devices<br />
may require additional volume<br />
o Press the [ENTER] key and delivery will begin<br />
o When patient line is fully primed, Press Stop for Line A and<br />
then press the [ENTER] key<br />
(While priming, the alarm may sound but pumping will<br />
continue. Allow the infusion pump to continue until the line<br />
is fully primed.)<br />
o If the alarm sounds, press Mute twice followed by Stop for<br />
Line A and then press the [ENTER] key<br />
The health information contained herein is provided for informational purposes only and is not intended to<br />
replace a discussion with a healthcare provider. All decisions regarding patient care must be made with a<br />
healthcare provider and consider the unique characteristics of each patient.<br />
<strong>Omni</strong>-<strong>Flow®</strong> is a registered trademark of <strong>Hospira</strong>.<br />
<strong>Medication</strong> <strong>Management</strong> <strong>System</strong> is a trademark of <strong>Hospira</strong>.<br />
©2004 <strong>Hospira</strong>, Lake Forest, IL 60045<br />
9-084-CR5-3 Page 4