G 7881 - Brochure - 2006 final.qxp
G 7881 - Brochure - 2006 final.qxp
G 7881 - Brochure - 2006 final.qxp

You also want an ePaper? Increase the reach of your titles
YUMPU automatically turns print PDFs into web optimized ePapers that Google loves.
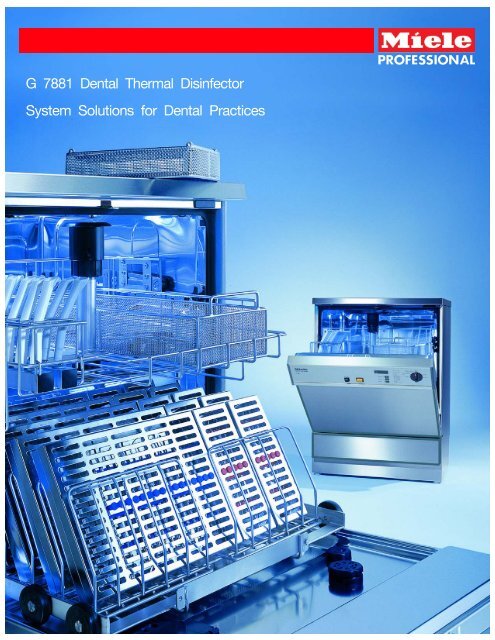
G <strong>7881</strong> Dental Thermal Disinfector<br />
System Solutions for Dental Practices
2<br />
The Heart of Integrated Instrument Reprocessing:<br />
The Miele G <strong>7881</strong> Dental Disinfector
Systematic, Streamlined, Simplified<br />
Miele is proud to introduce the G <strong>7881</strong><br />
Dental Disinfector. Featuring excellent<br />
cleaning, fast throughput, and high<br />
level disinfection, the G <strong>7881</strong> both<br />
streamlines and simplifies instrument<br />
reprocessing in the dental practice.<br />
This practice of simplified instrument<br />
management will help you increase<br />
revenue, lower operating expense, and<br />
ensure the highest level of office safety.<br />
This automated, repeatable cleaning<br />
process greatly reduces staff workload,<br />
allowing them more time chairside. The<br />
result: more patient appointments<br />
throughout the day, with a marked<br />
increase in revenue.<br />
The G <strong>7881</strong> is an extremely cost-effective<br />
means of cleaning instruments. While not<br />
only eliminating the handwashing of<br />
instruments, the system features a very<br />
low per-cycle cost, with low water and<br />
detergent consumption.<br />
The G <strong>7881</strong> also brings reliably safe<br />
instrument cleaning to your practice,<br />
greatly reducing your dependence on<br />
ultrasonics. The G <strong>7881</strong> not only<br />
exceeds OSHA standards, but provides<br />
industry-leading high level disinfection as<br />
well, with a microbial contamination<br />
reduction of 99.999999%.<br />
Leading Features for Optimal Results<br />
For state of the art reprocessing, the<br />
new G <strong>7881</strong> includes a deionized (DI)<br />
water intake valve for connection to an<br />
external pure water source. Leading<br />
instrument manufacturers recommend a<br />
DI water rinse as the <strong>final</strong> processing<br />
step prior to sterilization.<br />
Rinsing with DI water ensures the<br />
elimination of detergent residues and<br />
naturally occurring minerals which could<br />
lead to instrument stains and corrosion.<br />
Since the G <strong>7881</strong> features a dedicated<br />
DI water intake, consumption of DI water<br />
is less than 2.5 gallons per cycle,<br />
making the system both economical and<br />
efficient to operate.<br />
For full integration of your Dental<br />
Disinfector, Miele now introduces the<br />
exclusive Décor Panel. This unique<br />
feature allows the unit to blend in<br />
seamlessly with your cabinetry,<br />
bringing the polished, professional<br />
look of the rest of your office into your<br />
instrument reprocessing center.<br />
With an outstanding set of benefits,<br />
including high water circulation, fast<br />
throughput, and exacting temperature<br />
controls, the Miele G <strong>7881</strong> provides<br />
reliable, industry leading cleaning and<br />
high level disinfection to the modern<br />
dental practice.<br />
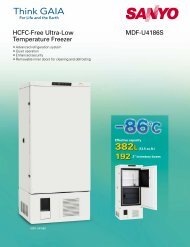
Left photo: Featured is the G <strong>7881</strong> w/ optional<br />
Décor Panel.<br />
3
Introduction to the Miele Thermal Disinfector<br />
Cleaning and Disinfection Made Simple<br />
Miele: Competence in Thermal Disinfection<br />
For more than three decades, Miele<br />
has been a leading innovator in the<br />
development of washer-disinfectors for<br />
use in medical and dental settings.<br />
Intensive application-related research<br />
and close cooperation with hygiene<br />
specialists, instrument manufacturers,<br />
and end-users have made Miele the<br />
market leader in this field.<br />
Generation G 78<br />
With its new G 78 generation of Dental<br />
Thermal Disinfectors, Miele is once<br />
again blazing a trail as the leading<br />
manufacturer of washer-disinfectors.<br />
The new G 78 series represents a major<br />
step forward in machine-based washing<br />
and disinfection technology. It offers<br />
superb performance and reliability.<br />
Miele is a trusted partner to the dental<br />
professional, offering comprehensive advisory<br />
service as well as technical assistance,<br />
where required.<br />
With the ability to wash, disinfect, rinse, and<br />
dry, Miele Dental Thermal Disinfectors are<br />
the clear choice of washers for today's<br />
dental professional.<br />
4
Cleaning and Disinfection<br />
The G <strong>7881</strong> Dental Thermal Disinfector<br />
is the result of closely studying the<br />
requirements of dental practices and<br />
specialized clinics. It has been developed<br />
specifically for the cleaning and disinfection<br />
of dental instruments and accessories,<br />
and is suitable for reducing the risk<br />
of infection as a result of injuries to dental<br />
professionals.<br />
This system aims to optimize the flow of<br />
contaminated material in dental practices.<br />
Ideally, the dentist places contaminated<br />
instruments into a cassette. The cassettes<br />
are then processed in the G <strong>7881</strong> Dental<br />
Thermal Disinfector. This system heats the<br />
water to a temperature of 93°C/200°F and<br />
maintains it for 10 minutes, resulting in<br />
high level disinfection as defined by the<br />
Spaulding categories without the use of<br />
chemical disinfectants. This system’s<br />
strong cleaning abilities reliably remove<br />
blood which has been dried for up to 6<br />
hours to a virtually untraceable degree,<br />
practically eliminating the need for further<br />
manual cleaning.<br />
Systematic Cleaning<br />
The G <strong>7881</strong> Dental Thermal Disinfector<br />
has a freshwater circulation system set<br />
up for connection to cold water. Each<br />
wash phase takes in 2.2 gal. of fresh<br />
water. The incoming water is first<br />
cleaned in the water inlet filter. The water<br />
softener ensures a consistently high<br />
water quality. The powerful circulation<br />
pump, with a turnover volume of 106<br />
gal. per minute, circulates the water<br />
through the wide range spray arms with<br />
directionally adjusted injectors.<br />
Three spray arms, which combine high<br />
and low pressure jets, have significant<br />
advantages for cleaning effectiveness.<br />
The differences in the flow velocities result<br />
in a low frequency amplitude modulation.<br />
The wash solution is permanently<br />
circulated through a quadruple filter<br />
system: a coarse filter, a large area filter, a<br />
fine filter, and a microfine filter ensure that<br />
even the smallest particles are being<br />
retained and cannot get through to the<br />
circulation pump.<br />
During the heating phase in the disinfection<br />
program, the steam condenser is<br />
activated at temperatures above<br />
55°C/130°F. This prevents the escape of<br />
steam and vapors from the machine and<br />
eliminates the annoyance of unpleasant<br />
odors. More importantly, this also<br />
ensures that no contaminated aerosols<br />
can affect the environment.<br />
Three automatic dispenser devices provide<br />
exact allocation of detergent, neutralizing,<br />
and rinsing agents. Containers for<br />
detergents may be conveniently stored in<br />
dispensing unit G 7896.<br />
When retrieving the cassettes from the<br />
disinfector, they are safe for handling.<br />
The staff will be protected against<br />
infection to a high degree while handling<br />
the instruments because of the high<br />
level disinfection that takes place<br />
during the cycle. The instruments and<br />
cassettes should then be checked,<br />
wrapped, and sterilized.<br />
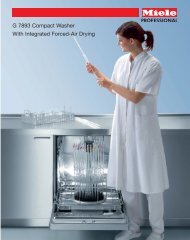
Right photo: Featured is the G <strong>7881</strong> Package # 1<br />
with optional DOS G60/1 liquid detergent<br />
dispenser pump. 5
Quality, Safety and Efficiency Combined to<br />
Achieve Maximum Cleaning Results<br />
High Tech and High Quality<br />
Miele Quality<br />
• High quality stainless steel<br />
• Titanium coated heating elements<br />
• Heavy-duty, reinforced hoses<br />
• Complex filtration systems for water<br />
inlet and wash cabinet<br />
• Double wall construction with insulation<br />
High Performance in a Compact Form<br />
• Front-loading operation<br />
• 5 programs with Multitronic electronic<br />
controls<br />
• Digital time/temperature display<br />
• Diodes indicate the completion of<br />
programs, the need to add salt for the<br />
water softener, and to refill detergent,<br />
neutralizing and rinsing agents<br />
• Freshwater circulation system for strict<br />
hygiene<br />
• Three dispenser devices for powder<br />
detergents, neutralizing and rinsing<br />
agents<br />
• Liquid detergents can be automatically<br />
dispensed using a connection to the<br />
optional dispenser module<br />
• Built-in water softener<br />
• Steam condenser operative in disinfection<br />
program<br />
• Powerful circulation pump with 106<br />
gal./min. throughput<br />
• Drain pump with maximum delivery head<br />
of 3 ft.<br />
• Waterproof system to prevent flooding in<br />
case of leakage<br />
• Extremely quiet operation<br />
On the Outside<br />
The G <strong>7881</strong> Dental Thermal Disinfector<br />
can be used as a freestanding unit, or<br />
can be built under a continuous worktop.<br />
On the Inside<br />
The two level wash cabinet is made of high<br />
quality chromium-nickel steel and offers<br />
a large capacity (internal dimensions<br />
H 18 1/2” x W 20 1/2” x D 20 1/2”).<br />
The double wall construction provides<br />
heat and sound insulation and is<br />
especially designed to save energy and<br />
be particularly quiet in operation.<br />
6
G <strong>7881</strong> Dental Thermal Disinfector:<br />
Safe and Economical<br />
Individual Solutions<br />
There is a range of accessories available<br />
for the Miele Thermal Disinfector. These<br />
include the DOS G60 automatic liquid<br />
detergent dispenser module, the G 7896<br />
Storage Cabinet, and various Stainless<br />
Steel Bases for an ergonomic approach<br />
to loading and unloading.<br />
The Disinfection Programs<br />
The G <strong>7881</strong> Dental Thermal Disinfector<br />
offers programs for thermal disinfection<br />
with simultaneous cleaning and rinsing<br />
of instruments and accessories and<br />
optional drying.<br />
The thermal disinfection takes place<br />
at 93°C/200°F with a holding time of<br />
10 minutes, resulting in a high level<br />
disinfection as defined by the Spaulding<br />
categories.<br />
Disinfection Vario Program<br />
The Disinfection Vario program is the<br />
most widely used and recommended<br />
program. The disinfection capabilities<br />
allow the instruments to be handled<br />
safely by the staff after the cycle has<br />
finished. The thermal disinfection<br />
process (93ºC for 10 min.) occurs during<br />
the <strong>final</strong> rinse cycle. This is important<br />
because the instruments will be at their<br />
hottest at the end of the program,<br />
allowing for faster and more efficient<br />
drying results.<br />
Wash Program<br />
This program will clean the instruments<br />
without disinfection. The temperature of<br />
60ºC efficiently washes dirty instruments<br />
in a short amount of time (approx. 35 min.).<br />
Rinse Program<br />
This program is ideal for the rinsing of<br />
instruments which may have been<br />
treated in a pre-soak solution. Separate<br />
rinsing eliminates potential problems<br />
caused by the build-up of foam.<br />
Baskets and Inserts<br />
Miele offers a wide range of specialized<br />
baskets and inserts. The baskets and<br />
inserts have been designed for individual<br />
instruments. Hollow instruments can be<br />
cleaned and disinfected by using injector<br />
basket O 177/1. Hinged instruments<br />
should be opened and placed in a mesh<br />
tray, i.e. the E 378 or E 379. A combination<br />
of baskets and inserts can be used to<br />
clean the specific instruments of a dental<br />
practice.<br />
Disinfection must be accompanied by<br />
cleanliness, because even disinfected<br />
soil offers an almost ideal environment<br />
for new microbial growth. The cleaning<br />
efficiency of the G <strong>7881</strong> Dental Thermal<br />
Disinfector ensures decontaminated<br />
instruments free of soil. Even blood<br />
which has been dried for up to 6 hours<br />
is reliably removed to a virtually<br />
untraceable degree.<br />
Program<br />
Contents<br />
1. Preliminary<br />
Rinse<br />
Disinfection<br />
Vario<br />
Water<br />
circulation<br />
Disinfection<br />
93 o C-10’<br />
Wash<br />
– –<br />
Rinse<br />
Water<br />
circulation 4’<br />
Disinfection 93ºC – 10' Program<br />
This program will clean and provide<br />
high level disinfected instruments. The<br />
thermal disinfection process (93ºC for 10<br />
min.) occurs during the first cycle step to<br />
ensure that only disinfected water is<br />
dispensed into the sewage system.<br />
2. Cleaning 55°C<br />
3. Interim<br />
Rinse I<br />
4. Interim<br />
Rinse II<br />
Neutralizing<br />
rinse<br />
Water<br />
circulation<br />
93°C-10’<br />
(Disinfection)<br />
Neutralizing<br />
rinse<br />
Water<br />
circulation<br />
60°C –<br />
– –<br />
Water<br />
circulation<br />
–<br />
5. Final Rinse<br />
93°C-10’<br />
(Disinfection)<br />
75°C 65°C –<br />
6. Drying Optional: 10’ Optional: 10’ Optional: 10’ –<br />
Approximate<br />
cycle time<br />
(without drying)*<br />
54’ 50’ 35’ 4’<br />
* Cycle time depends upon a number of variables including electrical supply, incoming water<br />
temperature, and incoming water pressure.<br />
7
Extensive Biological Testing Conducted to<br />
Prove Cleaning and Disinfection Capabilities<br />
Thoroughly Tested By Renowned US Institutions<br />
Tests were conducted by:<br />
Gayle Macdonald, R.D.H., Ph.D.<br />
University of Southern California School<br />
of Dentistry<br />
Chris H. Miller, Ph.D.<br />
Indiana University<br />
School of Dentistry<br />
John A. Molinari, Ph.D.<br />
University of Detroit Mercy<br />
School of Dentistry<br />
Eliot I. Sakols, D.M.D., M.S.<br />
Orthodontist<br />
Kenneth W. Stoffers, D.M.D., M.S.<br />
The University of Michigan<br />
School of Dentistry<br />
John M. Young, D.D.S., M.Sc.<br />
The University of Texas at San Antonio<br />
School of Dentistry<br />
All test protocols will be sent upon request.<br />
Teresa M. Morton, Ph.D<br />
Eastern Michigan University<br />
Department of Biology<br />
James L. VandenBosch, Ph.D.<br />
Eastern Michigan University<br />
Department of Biology<br />
The investigators above conducted<br />
scientific tests on the G 7781 Dental Thermal<br />
Disinfector. They do not work for Miele, and<br />
hence do not endorse this product. The<br />
investigators above conducted scientific<br />
tests on the Miele G 7781, the predicate<br />
device to the new G <strong>7881</strong>.<br />
Leslie B. Heffez, D.M.D., M.S., F.R.C.D.<br />
University of Illinois<br />
School of Dentistry<br />
Special contribution by:<br />
Nancy Andrews, R.D.H.<br />
Consultant<br />
Testing Thermal Disinfection<br />
To prove the disinfection abilities of<br />
the Miele Dental Thermal Disinfector<br />
extensive biological and physical studies<br />
were conducted by renowned institutions<br />
throughout the United States and<br />
Germany. The disinfection parameters<br />
93°C/200°F/10 min. provide high level<br />
disinfection. Although disinfection is not as<br />
absolute as and does not replace<br />
sterilization, it offers a high degree of<br />
protection against infection for dental<br />
professionals. The areas of effectiveness<br />
are removal or inactivation of vegetative<br />
bacteria, microbacteria, fungi, fungal spores,<br />
and viruses. Spores are not inactivated.<br />
In all tests conducted by US institutions,<br />
Hu-Friedy scalers and hemostats as<br />
well as A-dec ® evacuation tips were<br />
contaminated with microorganisms and<br />
blood. In some cases, hydroxyapatite<br />
was added to the contamination to<br />
simulate tooth material.<br />
The microbial challenge was determined<br />
prior to disinfection. Each instrument was<br />
inoculated with up to 500,000,000<br />
microorganisms, usually by submerging<br />
the instruments completely in the<br />
contaminated soil. Up to 12 instruments<br />
constituted a test load, i.e. 6,000,000,000<br />
microorganisms in the wash chamber. To<br />
prove the effectiveness of the machine<br />
when fully loaded, the chamber was then<br />
filled up with uninoculated instruments.<br />
In most cases no microorganisms could<br />
be recultured, indicating that usually<br />
each and every microorganism was<br />
removed or killed.<br />
The Spaulding category high-level<br />
disinfection is the same type of means as<br />
in the sterilant category except that the<br />
use pattern is different. The sterilant is<br />
used as a high-level disinfectant by<br />
e.g. reducing the exposure time within<br />
its effective range of tuberculocidal,<br />
virucidal, and bactericidal action.<br />
The following microorganisms were<br />
used to test the Miele Dental Thermal<br />
Disinfector:<br />
• Mycobacterium tuberculosis<br />
ATCC 25177 (H37Ra)<br />
• Enterococcus faecium ATCC 49224<br />
• Pseudomonas aeruginosa<br />
ATCC 15422<br />
• Salmonella choleraesuis ATCC 10708<br />
• Staphylococcus aureus ATCC 6538<br />
In different models which use the<br />
same thermal disinfection parameters<br />
(93°C/200°F/10 min.) the following<br />
microorganisms were tested for:<br />
• Streptococcus faecium ATCC 6057<br />
• Klebsiella pneumoniae ATCC<br />
• Stophylococcus aureus ATCC 5G511<br />
• Escherichia coli ATCC 11229<br />
• M. terrae ATCC 15755<br />
• Proteus vulgaris ATCC<br />
8
Extensive Biological Testing Conducted to<br />
Prove Cleaning and Disinfection Capabilities<br />
Increasing the Microbial Challenge<br />
To consider the worst case scenario,<br />
these tests were conducted in two<br />
series: one series in which the<br />
instruments were processed in the Miele<br />
Dental Thermal Disinfector immediately<br />
after inoculation; in the second test<br />
series the instruments were dried for 6<br />
hours after inoculation with organisms<br />
and blood, but before processing.<br />
To further increase the challenge, part of<br />
the instruments were scratched both with<br />
a rotating metal brush and with a<br />
grinding stone. The resulting fine and<br />
deep scratches on the surface of the<br />
instruments are hard to clean and<br />
disinfect, and may provide a safe harbor<br />
for microorganisms. Nonetheless,<br />
scratched instruments are commonly<br />
used in practice.<br />
Mycobacterium Tuberculosis<br />
Infections with tuberculosis have been<br />
spreading again in the United States during<br />
the last few years. For this reason, special<br />
emphasis was laid upon the disinfection<br />
abilities regarding this organism.<br />
Hinged, hollow, and hand instruments were<br />
inoculated with the Mycobacterium<br />
tuberculosis, strain ATCC 25177, and blood.<br />
The estimated microbial load was 10 8<br />
organisms per instrument. Three hinged, 3<br />
hollow, and 6 hand instruments constituted<br />
one test load. Both test series with and<br />
without drying were conducted.<br />
The results showed that no live organisms<br />
were present after the disinfection cycle,<br />
indicating a log-reduction factor of at least<br />
8. Tuberculocidal action was proved.<br />
Pseudomonas Aeruginosa<br />
Salmonella Choleraesuis<br />
Staphylococcus Aureus<br />
Tests on these bacteria are required for<br />
disinfectants. These bacteria were tested<br />
for in the Miele Dental Thermal<br />
Disinfector even with the elevated<br />
challenge of 6 hours drying and<br />
scratched instruments. The inoculum<br />
also contained blood and hydroxyapatite<br />
to simulate tooth material.<br />
In most cases no organisms could be<br />
recultured, indicating that usually each<br />
and every organism was killed.<br />
Enterococcus Faecium<br />
The bacterium E. faecium, ATCC 49224,<br />
was tested in a similar fashion as the<br />
Mycobacterium tuberculosis.<br />
In no cases could any organisms be<br />
recultured. A log-reduction factor of at<br />
least 8 was proved.<br />
Hepatitis B Virus<br />
The HBV cannot be artificially cultured.<br />
Hence, the direct testing of the HBV is<br />
not feasible. However, the Enterococcus<br />
faecium possesses similar heat<br />
resistance properties as the HBV*. E.g.<br />
the German Federal Health Authority<br />
accepts the testing of E. faecium as a<br />
replacement for HBV**.<br />
The Miele Dental Thermal Disinfector<br />
achieves a log-reduction factor of at least<br />
8 for E. faecium.<br />
HIV<br />
The Human Immunodeficiency Virus (HIV)<br />
causing the Acquired Immunodeficiency<br />
Syndrome (AIDS) is very unstable in the<br />
presence of heat. An American study<br />
shows that HIV is reduced to 1/10<br />
at 60°C/140°F after 24 seconds***. After<br />
10 minutes at this temperature a<br />
log-reduction factor of 25 is achieved. That<br />
means that from 10 25 HI viruses it is likely<br />
for 1 virus to survive.<br />
The Miele Dental Thermal Disinfector<br />
reaches a temperature of 93°C/200°F<br />
and holds it for 10 minutes. Therefore it is<br />
safe to assume that HIV will be reduced<br />
according to a high-level disinfection<br />
standard. For this reason the HIV was not<br />
specifically tested for with this system.<br />
Proven Cleaning Abilities<br />
A wide range of cleaning studies have<br />
been conducted utilizing common<br />
dental instruments.<br />
One study was conducted with fresh<br />
human blood. This blood was not<br />
defibrinated so that it would clot after a<br />
short time. This certainly represents the<br />
most realistic testing possible. Two test<br />
series were conducted both with<br />
immediate cleaning and with cleaning after<br />
a drying time of 6 hours. Both new and<br />
scratched instruments were utilized.<br />
After completion of the cleaning and<br />
disinfection cycle the instruments were<br />
tested for traces of blood residues with<br />
Hemastix. In most cases no blood<br />
residues could be found. In very few cases<br />
residues could be traced in hinges of<br />
hemostats. However, these residues were<br />
close to the detection limit of the test.<br />
Other cleaning tests that were conducted<br />
affirmed the claims of this brochure:<br />
Orthodontic and surgical instruments<br />
taken from actual patient use, dental<br />
instruments inoculated with sheep blood<br />
and hydroxyapatite, and instruments<br />
contaminated with dental cement.<br />
Disinfection Parameters<br />
93°C/200°F/10 min.<br />
The thermal disinfection process relies<br />
upon the two physical parameters<br />
temperature (93°C/200°F, accuracy:<br />
+4°C/7.2°F -2°C/3.6°F) and time (10 min.).<br />
The Miele Dental Thermal Disinfector<br />
strictly adhered to these parameters<br />
throughout the wash cabinet, even fully<br />
loaded. No cold spots could be detected.<br />
*G. Spicher: Zur Desinfektion bei Virushepatitis,<br />
in: German Federal Health, Authority leaflet ”Bundesgesundheitsblatt”,<br />
Vol. 22, 1979, No. 617, pp. 114–116.<br />
** G. Spicher, J. Peters: Richtlinie des Bundesgesundheitsamtes<br />
zur Prüfung von thermischen Desinfektionsverfahren,<br />
in: lbid, Vol. 23, 1980, No. 23, pp. 364–367.<br />
*** J. S. McDougal, L. S. Martin, S. P. Cort, M. Mozen, C. M.<br />
Heldebrant, B. L. Evatt: Thermal Inactivation of the Acquired<br />
Immunodeficiency Syndrome Virus, Human T Lymphotropic<br />
Virus-III/Lymphadenopathy-associated Virus, with<br />
Special Reference to Antihemophilic Factor, in: The Journal<br />
of Clinical Investigation, Inc., Vol. 76, August 1985,<br />
pp. 875–877<br />
9
Safety and Infection Control for the Dental Staff,<br />
the Dental Patient, and Our Environment<br />
Systematic Protection from Infection<br />
Cleaning: The Most Important Step<br />
Without proper cleaning, sterilization is<br />
not possible. A clean and debris-free<br />
surface is required during steam<br />
sterilization, allowing steam to contact<br />
all instrument surfaces. Tests have<br />
demonstrated that bacteria can survive<br />
a steam sterilization cycle if they are<br />
protected under dried debris. The Miele<br />
Thermal Disinfector provides superior<br />
cleaning, virtually eliminating the need to<br />
manually scrub an instrument.<br />
Disinfection is Not Sterilization<br />
Disinfection is generally a less lethal<br />
process than sterilization. It eliminates<br />
virtually all recognized pathogenic<br />
microorganisms but not necessarily all<br />
microbial forms (e.g. bacterial endospores)<br />
on inanimate objects. Disinfection does<br />
not ensure an overkill, and therefore<br />
disinfection processes lack the margin<br />
of safety achieved by sterilization<br />
procedures. Hence, disinfection processes<br />
cannot replace sterilization.<br />
Disinfection efficiency is measured by the<br />
log-reduction factor. A log-reduction factor<br />
of 1 indicates that from 10 organisms, it is<br />
likely for one organism to survive on<br />
instrument surfaces. The microbial<br />
population is reduced by 90%.<br />
A log-reduction factor of 8 means that from<br />
100,000,000 microorganisms, it is likely for<br />
one organism to survive, i. e. the microbial<br />
contamination is reduced by 99.999999%.<br />
The Miele G <strong>7881</strong> Dental Thermal<br />
Disinfector achieves a log-reduction factor<br />
of 8.<br />
Caring for Our Environment<br />
Although environmental concerns should<br />
not decrease infection control standards, it<br />
is always preferable to choose equipment<br />
that provides an environmentally friendly<br />
method. Chemical agents used in thermal<br />
disinfection usually put a lesser burden<br />
on our environment than chemical<br />
disinfectants.<br />
In the interest of maintaining the highest<br />
possible standard of efficiency and<br />
safety, the following steps are widely<br />
accepted by the dental profession:<br />
10<br />
Top photo: Featured is the G <strong>7881</strong> with optional<br />
Stainless Steel Décor Panel.
The Miele Thermal Disinfector is an Integral Part<br />
of Instrument Reprocessing<br />
6 Steps for Hygienic Processing of Instruments<br />
1. Containment and Transportation<br />
Immediately after use, contaminated<br />
instruments are transported safely* in<br />
cassettes or on trays to the sterilization<br />
area. Waste is segregated and disposed<br />
of in appropriate waste receptacles.<br />
2. Cleaning and Disinfection<br />
Instruments and cassettes should be<br />
placed directly into the machine after<br />
use at chairside. The contaminated<br />
instruments can be kept in the machine<br />
for interim dry storage for up to 6 hours.<br />
An automated washing program should<br />
then be selected. This system also offers<br />
an optional drying cycle, which is<br />
recommended.<br />
3. Inspection and Sorting<br />
After cleaning, disinfection, and drying,<br />
the instruments can be safely checked<br />
for normal wear and damage.<br />
4. Preparation for Sterilization<br />
Instruments and cassettes are placed in<br />
sterilization pouches or wrap, and sealed<br />
according to manufacturers directions to<br />
ensure sterilization until use.<br />
5. Sterilization<br />
Packaged instruments are processed<br />
through the complete cycle of a steam<br />
autoclave, chemical vapor sterilizer, or<br />
dry heat sterilizer, according to<br />
manufacturers’ directions for each type<br />
of sterilizer.<br />
6. Storage of Sterile Instruments<br />
It is essential to preserve sterility until<br />
use. Packaged sterilized instruments<br />
may be stored on clean shelves or in<br />
clean drawers.<br />
*Appropriate PPE including gloves, masks, eyewear, and<br />
protective outer lab coat or grown, must be worn while<br />
handling all unsterilized instruments according to the<br />
current OSHA Bloodborne Pathogens Standard.<br />
11
Systematic Instrument Care<br />
Instruments Suitable<br />
for Thermal Disinfection<br />
Only instruments that are thermally<br />
stable up to 97°C/206.6°F and corrosion<br />
resistant should be processed in the<br />
disinfector. The majority of dental<br />
instruments consist of high quality<br />
stainless steel. The stainless steel<br />
quality varies depending on the specific<br />
instrument criteria.<br />
Generally, only high-quality stainless steel<br />
instruments are recommended for<br />
cleaning in the Miele Thermal Disinfector.<br />
Miele recommends that instruments<br />
made from aluminum, chrome, nickel,<br />
carbon, or carbide steel, or instruments<br />
that are chrome plated should not be<br />
processed in the machine.<br />
If there are questions regarding the<br />
suitability of any instrument for use in the<br />
G <strong>7881</strong>, contact your Miele representative.<br />
Water Quality<br />
Water quality can sometimes have an<br />
effect on the instruments that are<br />
washed in the Miele Thermal Disinfector.<br />
Some areas of the United States have<br />
better water quality than other areas.<br />
For areas where water quality is<br />
questionable, Miele recommends the<br />
use of an external water purification unit<br />
connected to the DI intake valve on the<br />
back of the unit.<br />
The external purification unit is then able<br />
to supply either DI or reverse osmosis<br />
(RO) water during the <strong>final</strong> rinse of the<br />
program, virtually eliminating any minerals<br />
or compounds that may be damaging to<br />
the instruments. And through Miele’s<br />
integrated DI intake valve, this pure water<br />
is only used when it is needed, in the <strong>final</strong><br />
rinse cycle, greatly reducing the costs<br />
associated with a pure water system.<br />
12
G <strong>7881</strong> Dental Disinfector<br />
At A Glance<br />
G <strong>7881</strong><br />
•93 o C (~200 o F) for 10 minutes for high level disinfection<br />
• Selectable programs for rinsing, cleaning and high level<br />
disinfection<br />
• 106 gallon/minute water circulation for excellent cleaning<br />
• White finish exterior<br />
• Exclusive Miele Décor Panel for integration into cabinetry<br />
• Integrated extra water inlet for DI water, used in areas where<br />
water quality is poor<br />
• Integrated heat exchanger, preventing the release of heat,<br />
humidity and odors in the room<br />
• Can be used in small reprocessing areas<br />
• Integrated water softener<br />
• Audible alarm<br />
• Equipped with dispensing systems for detergent,<br />
neutralizing agent and rinse aid<br />
• Optional liquid dispensing system<br />
• Dimensions:<br />
33.46”H with lid x 23.54”W x 24”D<br />
(32.28”H without removable lid)<br />
• Electric:<br />
208V60Hz,2x30Amp(convertible to 3 phase, 3x20Amp)<br />
13
The Miele Exclusive<br />
Décor Panel<br />
The Modern Dental Practice<br />
As a business owner, you understand<br />
the impact a clean, modern dental<br />
practice has on your patients. You and<br />
your staff take pride in it. You want to<br />
showcase the latest in dental<br />
technology, yet keep the office<br />
functional and streamlined. The<br />
practice becomes a reflection of both<br />
your professionalism and your talent.<br />
Whether planning a new practice or<br />
enjoying an existing design, the new<br />
G <strong>7881</strong> has your specific practice in mind.<br />
Left photo: Featured is the G <strong>7881</strong> w/ optional<br />
Décor Panel.<br />
Custom Integration<br />
To seamlessly integrate your instrument<br />
reprocessing center with the rest of<br />
your practice, Miele introduces the<br />
exclusive Miele Décor Panel.<br />
This unique feature allows the new<br />
Miele dental disinfector to blend<br />
seamlessly with your cabinetry,<br />
bringing the polished, professional look<br />
of the rest of your office into your<br />
instrument reprocessing center.<br />
Ease of Installation<br />
The exclusive Miele Décor Panel<br />
feature allows you to match your<br />
dental disinfector to your cabinetry by<br />
simply replacing the two white front<br />
panels on your machine.<br />
Available through Miele or your local<br />
custom cabinet manufacturer, Miele<br />
stocks the most common laminates for<br />
matching the A-dec Preference ICC. For<br />
custom applications, these panels are<br />
available in a full palette of colors and<br />
designs or in stainless steel, providing you<br />
with an exact match for your office and<br />
instrument reprocessing center.<br />
15
G <strong>7881</strong> Package #1:<br />
General Dentistry<br />
This equipment package is recommended<br />
for the general dentist who utilizes cassette<br />
systems.<br />
This package of baskets and inserts will<br />
hold 18+ cassettes in the E 523 inserts<br />
(depending on the size), as well as hinged<br />
and other instruments placed in open<br />
mesh tray E 379.<br />
Left photo: Featured is the G <strong>7881</strong> Package # 1<br />
with optional DOS G60/1 liquid detergent<br />
dispenser pump in foreground and G 7896 AW<br />
storage unit in background.<br />
17
G <strong>7881</strong> Package #2:<br />
Oral Surgery<br />
This equipment package is recommended<br />
for oral surgeons who have a need to<br />
process reusable hollow instruments (i.e.<br />
suction tips) and also use cassettes.<br />
The specially designed O 177/1 upper<br />
basket has 26 jets that will shoot water<br />
and detergent up through the inside of the<br />
hollow instrument, eliminating the need<br />
for manual scrubbing with a brush.<br />
This package of baskets and inserts will<br />
hold 12+ cassettes in the E 523 inserts<br />
(depending on the size), as well as hinged<br />
and other instruments placed in open<br />
mesh tray E 379 and hollow instruments<br />
in the O 177/1 injector basket.<br />
Left photo: Featured is the G <strong>7881</strong> Package<br />
# 2 with optional Stainless Steel Décor Panel.<br />
19
Upper and Lower Baskets<br />
O 190<br />
• The standard upper basket for general<br />
dentistry<br />
• Holds inserts to support cassettes<br />
• Holds inserts for loose instruments<br />
• Built-in spray arm and water coupling<br />
system for optimal spray volume<br />
• Rolls out for easy loading and unloading<br />
• Article No. 69119001<br />
O 177/1<br />
• The standard upper basket for oral<br />
surgery offices cleaning hollow<br />
instruments<br />
• 26 jets plus 12 funnels for direct injection<br />
of hollow instruments with inner diameter<br />
of 1/8” or larger<br />
• For cleaning instruments with smaller<br />
inner diameters, replace jets with injection<br />
funnels DRM19 (19mm width)<br />
or DRM 29 (29mm width)<br />
• Right top of basket holds inserts for<br />
cassettes or loose instruments<br />
• Built-in spray arm and water coupling<br />
system for optimal spray volume<br />
• Rolls out for easy loading and unloading<br />
• Article No. 69117702<br />
U 874<br />
• Holds inserts to support cassettes<br />
• Holds inserts for loose instruments<br />
• Rolls out for easy loading and unloading<br />
• Article No. 69187403<br />
20
Individual Inserts<br />
Insert E 523<br />
• Holds various cassettes from small<br />
hygiene to large oral surgery<br />
• Holds 6 or more cassettes<br />
• Fits in O 190 and O 177/1 upper baskets<br />
and U 874 lower basket<br />
• Recommended holder for Hu-Friedy<br />
cassettes<br />
• Cassettes not included<br />
• Article No. 69552301<br />
Half Universal Mesh Tray E 379 (1/2)<br />
• Holds various hand instruments<br />
• Constructed of 1/16” wire mesh<br />
• Fits in O 190 and O 177/1 upper baskets<br />
• Insert dimensions:<br />
3 15 /16” Hx7 1 /16” Wx18 3 /32” D<br />
• Article No. 69537901<br />
Full Universal Mesh Tray E 378 (1/1)<br />
• Holds various hand instruments<br />
• Constructed of 1/16” wire mesh<br />
• Fits in U 874 lower basket<br />
• Insert dimensions:<br />
3 15 /16” Hx18 3 /32” Wx18 3 /32” D<br />
• Article No. 69537801<br />
21
Specialty Inserts<br />
Mesh Tray E 146 (1/6)<br />
• Mesh basket with lid for hand instruments<br />
• Constructed of 1/16” and 1/8” wire<br />
mesh openings<br />
• Ideal for larger hinged instruments<br />
requiring maximum water flow<br />
• Fits in E 131 insert<br />
• Insert dimensions:<br />
2 5 /32” Hx5 7 /8” Wx8 27 /32” D<br />
• Article No. 69514601<br />
Mesh Tray E 363 (1/6)<br />
• Mesh basket with lid for hand instruments<br />
• Constructed of 1/32” wire mesh openings<br />
• Small mesh openings make it ideal for<br />
cleaning thinner pointed instruments<br />
• Fits in E 131 insert<br />
• Insert dimensions:<br />
2 5 /32” Hx5 7 /8” Wx8 27 /32” D<br />
• Article No. 69536301<br />
E 328 Support Insert<br />
• Upright support of single and<br />
double-ended instruments<br />
• Fits in E 146 and E 363 mesh baskets<br />
(baskets not included)<br />
• Article No. 69732801<br />
Insert E 131/1<br />
• Holds up to 5 cassettes or mesh baskets<br />
• Two will fit in a single U 874 lower basket<br />
• Cassettes not included<br />
• Article No. 69513102<br />
Insert E 130 (1/2)<br />
• For cleaning up to 10 trays<br />
(max. tray size: 6 3 /4” Wx1 1 /4” thick)<br />
• Two can fit in a single U 874 lower basket<br />
• Trays not included<br />
• Insert dimensions:<br />
7”Hx7”Wx17 1 /2” D<br />
• Article No. 69513001<br />
22
Specialty Accessories<br />
Stainless Steel Base - UE 30-60/60-78<br />
• 12” height for ergonomic loading and<br />
unloading<br />
• Recommended for freestanding<br />
applications<br />
• Base dimensions:<br />
12” H x 24” W x 24” D<br />
• Article No. 69376009<br />
DOS G60/1 Module<br />
• Automatically and reliably adds liquid<br />
detergent during each cycle<br />
• Eliminates need for manual fill of the<br />
powder detergent door cup<br />
• Required for liquid detergents and<br />
Detergent Package #2<br />
• Article No. 69747007<br />
G 7896 Storage Cabinet<br />
• Holds up to 4 DOS G 60/1 modules<br />
and 4 chemical storage containers<br />
• A single unit can serve two G <strong>7881</strong>s<br />
G 7896 AE (shown top)<br />
• Stainless steel front, sides and top<br />
• Article No. 69789602<br />
G 7896 AW<br />
• White enamel front and sides,<br />
grey laminate top<br />
• Article No. 69789601<br />
Stainless Steel Décor Panel<br />
• True 304-grade stainless steel<br />
• Article No. PROF304F<br />
Limber Maple Décor Panel<br />
• Wilsonart 10734-60<br />
• Article No. PROF10734W<br />
Mounting Kit Floor Brackets<br />
• Prevent machine from falling forward in<br />
freestanding applications<br />
• One kit needed per machine<br />
• Article No. 00253531<br />
Cool Down Kit<br />
• May be required for locations with<br />
PVC drain plumbing<br />
• Article No. COOL-DOWN KIT<br />
Oyster Gray Décor Panel<br />
• Formica 929-5<br />
• Article No. PROF929F<br />
Concrete Stone Décor Panel<br />
• Formica 7267-58<br />
• Article No. PROF7267F<br />
Sand Stone Décor Panel<br />
• Formica 7265-58<br />
• Article No. PROF7265F<br />
Custom Laminate Décor Panel<br />
• Please allow 6-8 weeks for delivery<br />
• Please call Miele for Article No.<br />
23
Detergents<br />
neodisher TM MA<br />
Powder Detergent (10 kg)<br />
• Yields approx 300 cycles<br />
• Powder alkaline detergent<br />
• Powder alternative to neodisher TM FA<br />
• Article No. US486876<br />
neodisher TM FA<br />
Liquid Detergent (5 L)<br />
• Yields approx 100 cycles<br />
• Liquid alkaline detergent<br />
• Liquid alternative to neodisher TM MA<br />
• Requires DOS G60/1 dispensing system<br />
• Article No. US489533<br />
DOS G60/1 Module<br />
• Automatically and reliably adds liquid<br />
detergent during each cycle<br />
• Eliminates need for manual fill of the<br />
powder detergent door cup<br />
• Required for liquid detergents and<br />
Detergent Package #2<br />
• Article No. 69747007<br />
neodisher TM N<br />
Acid Neutralizer (5 L)<br />
• Yields approx 500 cycles<br />
• Liquid neutralizing agent released<br />
immediately following the alkaline main<br />
wash cycle<br />
• Restores pH balance in wash chamber<br />
• For use with neodisher TM FA or MA<br />
• Article No. US482433<br />
neodisher TM Mielclear<br />
Rinse Aid (1 L)<br />
• Yields approx 300 cycles<br />
• Protects dental instruments and allows<br />
better drying results<br />
• Article No. US496646<br />
Water Softener Reactivator<br />
• For recharging the on-board water<br />
softener<br />
• Extremely pure reactivator free of any<br />
dyes and additives<br />
neodisher TM Medizym<br />
Near-Neutral pH Liquid Detergent (5 L)<br />
• Yields approx 100 cycles<br />
• Liquid near-neutral pH detergent<br />
• Requires DOS G60/1 dispensing system<br />
• Article No. US404033<br />
neodisher TM Z<br />
Acid Neutralizer (5 L)<br />
• Yields approx 500 cycles<br />
• Liquid neutralizing agent released<br />
immediately following the main<br />
wash cycle<br />
• For use with neodisher TM Medizym<br />
• Article No. US483033<br />
Left photo: Featured is the G <strong>7881</strong> Package # 1<br />
with optional DOS G60/1 liquid detergent<br />
dispenser pump.<br />
25
Technical Data<br />
Control Unit<br />
Control system supplied with five standard programs:<br />
Disinfection Vario 93ºC/200ºF<br />
Disinfection 93ºC/200ºF<br />
Wash<br />
Rinse<br />
Drain<br />
Cleaning Mechanism<br />
Rotary:<br />
Three multi-jet spray arms<br />
Direct Injection:<br />
Using optional O 177/1 Upper Basket<br />
Drying<br />
Flash heat drying using standard sump heating element<br />
Water Softener<br />
Built-in, with adjustable water hardness<br />
Automatic reactivation<br />
Detergent Dispensing<br />
Machine is equipped with a standard powder door cup<br />
An optional automatic dispensing module is available for dispensing of liquid detergents<br />
Main Circulation Pump<br />
Circulation:<br />
106 gal/min (400 l/min)<br />
Construction:<br />
ABS plastic impeller and housing<br />
Cabinet and Chamber<br />
Materials and Construction:<br />
Exterior:<br />
White front panels standard, with optional stainless steel panel or custom panels available<br />
Interior:<br />
Type 304 SS sides, back, and top<br />
Type 316 SS bottom and door<br />
Plumbing Connections<br />
One or two water connections as follows:<br />
Tap<br />
a. Cold water for wash cycles. 5’5” connection hose with 3/4” hose thread unions<br />
Minimum flow rate of 2.5 gpm/10-147 psi (recommended 25-60 psi)<br />
DI Source (use optional) b. 5’6” connection hose with 3/4” hose thread unions<br />
Minimum flow rate of 2.5 gpm/10-147 psi (recommended 25-60 psi)<br />
Drain Connections<br />
Connection<br />
One 7/8” ID flexible drain hose, 4’7” long<br />
Maximum drain height, 39.4”<br />
Maximum drain length, 13’<br />
Electrical Requirements<br />
Single Phase 208 V, 60 Hz, 2x30Amps<br />
Three Phase 208 V, 60 Hz, 3x20Amps (Available as an optional conversion)<br />
Unit is equipped with a 5’11”, 10 AWG, 3 wire, unterminated power cord<br />
Units are CSA approved (certificate 1319665)<br />
Dimensions<br />
Interior:<br />
18.5”H x 20.5”W x 20.5”D<br />
Exterior:<br />
33.46”H x 23.54”W x 24.0”D (Height is 32.28” without lid)<br />
Noise Level<br />
Miele Professional<br />
9 Independence Way<br />
Princeton, NJ 08540<br />
✆ 800-991-9380<br />
609-419-4241<br />
dentaldisinfector.com<br />
©<strong>2006</strong> Miele, Inc.<br />
B999623 04/06
G <strong>7881</strong> Dental Thermal Disinfector<br />
Installation and In-service Manual
1. Examine exterior packaging for damage<br />
● If damaged, notify carrier and then please call 800-666-0486 for Miele's Returns department.<br />
2. Uncrating instructions<br />
● Carefully cut the two packing straps.<br />
● Lift cardboard box off of machine.<br />
● Properly dispose of all packaging materials. All of the protective packaging material is environmentally<br />
safe and can be recycled.<br />
● Carefully lift machine from pallet. Do not lift machine by its lid!<br />
3. Remove Operating Instructions manual from the rear of the machine. Save for reference.<br />
Note: You will need the manual and installation diagram for the remaining steps.<br />
4. Open machine door via the emergency release and remove accessory items<br />
(i.e. water inlet filter, drain hose, warranty card, water softener funnel, red empty 5L neutralizer container, steam deflector, etc.)<br />
● Slowly pull the emergency release cable located at the bottom<br />
of the machine (see illustration).<br />
5. Remove styrofoam blocks from upper basket support and discard<br />
6. Connect drain hose to the rear of the machine using enclosed hose clamp<br />
All plumbing work must be performed by licensed professionals and adhere to all applicable Local, State, and Federal Codes. Note:<br />
plumbing code in certain areas may require the use of the optional Cool Down Kit (Item # Cool Down Kit) to reduce the temperature<br />
of the effluent. Contact Miele Technical Service for ordering and installation information.<br />
●<br />
●<br />
●<br />
The drainage system is fitted with a non-return valve which prevents dirty water from flowing back into<br />
the machine via the drain hose.<br />
The drainage system must be able to take a minimum drainage flow of 4 gal/min.<br />
The onsite drain connection point should be located between 1 ft. (0.3 m) and 3 ft. (1 m) above<br />
the lower edge of the machine.<br />
• If it is lower that 1 ft. (0.3 m), lay the hose in a curve at a height of at least 1 ft. (0.3 m).<br />
The drain hose is approx. 5 ft. (1.4 m) long, is flexible and has an internal diameter of 7/8 in. (22 mm). It<br />
must not be shortened. Hose clamps are supplied for securing it in position.<br />
The drainage system must not exceed 12 ft. (4 meters).<br />
The machine should preferably be connected to a separate drainage system such as a standpipe or floor drain.<br />
However, if local code permits the drain hose can be connected to an under-sink ¾" tailpiece.<br />
2<br />
Miele ● 9 Independence Way ● Princeton, NJ 08540 ● 609-419-9898 ● 800-991-9380 ● Fax 609-419-4241 ● www.dentaldisinfector.com
7. Either attach proper plug to power cord or hardwire to electrical supply<br />
All electrical work must be performed by licensed professionals and adhere to all applicable Local, State, and Federal Codes.<br />
The machine comes equipped for a connection to 208 V, 60 Hz, 1 phase power supply. It is equipped with a 6ft.<br />
long, 10/3 AWG power cord, without a plug. The installer may either install an electrical plug or hardwire the<br />
machine into an electrical junction box that has been installed on the wall or in a cabinet adjacent to the<br />
machine. It should be connected to the main power supply.<br />
Voltage:<br />
Frequency:<br />
Rated Load:<br />
Circuit Breaker:<br />
Black:<br />
White:<br />
Green:<br />
208 V, 1 phase<br />
Possible conversion to three-phase - Contact Miele Technical Support for<br />
additional information. The conversion diagram and the wiring diagram is<br />
secured to the inner side of the service panel.<br />
60 Hz<br />
60 kW<br />
2 x 30 A<br />
Connect to L1 (hot)<br />
Connect to L2 (hot)<br />
Connect to GND (ground)<br />
WARNING – THIS APPLIANCE MUST BE GROUNDED<br />
The machine must only be operated with the voltage, frequency, and fusing shown on the<br />
data plate located on the rear of the machine and on the plinth (behind the service panel).<br />
8. If applicable, connect the optional DOS G 60/1 power supply and feed hose<br />
(Please refer to DOS G 60/1 Installation Instructions that are shipped with the unit)<br />
Miele ● 9 Independence Way ● Princeton, NJ 08540 ● 609-419-9898 ● 800-991-9380 ● Fax 609-419-4241 ● www.dentaldisinfector.com 3
9. Installation & activation/deactivation of the water intake connections<br />
All plumbing work must be performed by licensed professionals and adhere to all applicable Local, State, and Federal Codes.<br />
The Miele G <strong>7881</strong> Dental Disinfector is equipped with both a DI Water intake (marked “H2O PUR”) hose and a<br />
Cold Tap Water intake (marked with a blue sticker) hose. Leading instrument manufacturers recommend a DI<br />
water rinse as the <strong>final</strong> processing step prior to sterilization. Rinsing with DI water ensures the elimination of<br />
detergent residues and naturally occurring minerals which could lead to instrument stains and corrosion. However,<br />
if water quality is not an issue, the machine can be installed using the Cold Tap Water intake only (see below).<br />
Acceptable water pressure (flow rate) for both intake valves: 10-147 psi each<br />
Recommended water pressure (flow rate) for both intake valves: 25-60 psi each<br />
●<br />
●<br />
●<br />
DI Water Intake: ¾"(19 mm) GHT female hose thread, connected to external DI water supply source<br />
Cold Tap Water Intake: ¾"(19 mm) GHT female hose thread, connected to cold tap water source<br />
Use the proper inline cartridge filter: Matte finish for the DI intake, chrome finish for the Cold Tap intake<br />
1. Turn off the machine with the "On/Off" button.<br />
2. Turn the program selector to the "Stop" f position.<br />
3. Press and hold the "Display” 4 and "Start” 6 buttons at the same time.<br />
4. Simultaneously turn the machine on with the "On/Off" button.<br />
The current program status "P…" will appear in the display and the "Fill/Drain” indicator will illuminate.<br />
5. Press the "Drying” U button once. "E01" (programming level 1) will appear in the display.<br />
6. Turn the program selector one switch position counter-clockwise (11 o’clock position).<br />
If machine is installed with both the DI Water & Cold Tap Water intakes:<br />
7. Press the "Display” 4 button as many times as necessary until the display shows the number “110.”<br />
Once the number "110" has been reached the G <strong>7881</strong> will activate the DI Intake Valve for the <strong>final</strong> rinse.<br />
8. Press the "Start” 6 button. "SP" will appear in the display.<br />
9. Press the "Start” 6 button again.<br />
OR:<br />
If machine is installed with only the Cold Tap Water intake:<br />
7. Press the "Display" 4 button as many times as necessary until the display shows the number “111.”<br />
Once the number "111" has been reached the G <strong>7881</strong> will deactivate the DI Intake Valve.<br />
8. Press the "Start” 6 button. "SP" will appear in the display.<br />
9. Press the "Start" 6 button again.<br />
The inlet hose must not be shortened or damaged in any way.<br />
10. Adjust the feet to the proper height/Install machine on solid non-carpeted surface<br />
● Undercounter<br />
Note: Removal of lid not necessary for all undercounter installations.<br />
• Open the door, remove fixing screws on the left and right sides using a Phillips head screwdriver.<br />
• Pull the machine lid approx. 5mm forwards, lift it upwards, and remove.<br />
• Adjust feet to proper height.<br />
• Slide machine into place, making sure machine is level in all directions.<br />
• Secure machine to the front edge of the worktop using screws to the left and right of the front trim.<br />
Do not use silicone sealant in gaps between the machine & neighboring units.<br />
• Secure machine to countertop, making certain to not pinch hoses.<br />
● Freestanding<br />
• Use Mounting Kit (Item #00253531)<br />
11. Install the Steam Deflector if applicable<br />
Note: A Steam Deflector protects the countertop and comes packaged with the unit.<br />
4<br />
Miele ● 9 Independence Way ● Princeton, NJ 08540 ● 609-419-9898 ● 800-991-9380 ● Fax 609-419-4241 ● www.dentaldisinfector.com
12. Test the water hardness and activate softener if necessary<br />
Note: If not using water softener, please set and save the water softener setting at 0.<br />
Before using the machine for the first time the water softener should be programmed according to the hardness<br />
of the incoming water. You can determine water hardness with a simple test kit or by contacting your local water<br />
authority.<br />
Note: the G <strong>7881</strong> is set at the factory for a water hardness level of 19 gr/gal (340 ppm). If your hardness level is<br />
other than the factory default then the G <strong>7881</strong> must be reprogrammed to the proper setting. Reference the Water<br />
Hardness Table below for the correct value.<br />
Water Hardness Table<br />
Settings<br />
0-20<br />
gr/gal<br />
1-20<br />
ppm<br />
CaCo3<br />
0 1 20<br />
0 2 40<br />
0 3 50<br />
4 4 70<br />
5 5 90<br />
6 6 110<br />
7 7 130<br />
8 8 140<br />
9 9 160<br />
10 10 180<br />
11 11 200<br />
12 12 220<br />
13 13 230<br />
14 14 250<br />
15 15 270<br />
16 16 290<br />
17 17 310<br />
18 18 320<br />
19 19 340<br />
20 20 360<br />
Settings<br />
21-40<br />
gr/gal<br />
21-40<br />
ppm<br />
CaCo3<br />
21 21 380<br />
22 22 400<br />
23 23 410<br />
24 24 430<br />
25 25 450<br />
26 26 470<br />
27 27 490<br />
28 28 500<br />
29 29 520<br />
30 30 540<br />
31 31 560<br />
32 32 580<br />
33 33 590<br />
34 34 610<br />
35 35 630<br />
36 36 650<br />
37 37 670<br />
38 38 680<br />
39 39 700<br />
40 40 720<br />
ne<br />
neodishe<br />
gr/gal<br />
41-60<br />
ppm<br />
CaCo3<br />
41 41 740<br />
42 42 760<br />
43 43 770<br />
44 44 790<br />
45 45 810<br />
46 46 830<br />
47 47 850<br />
48 48 860<br />
49 49 880<br />
50 50 900<br />
51 51 920<br />
52 52 940<br />
53 53 950<br />
54 54 970<br />
55 55 990<br />
56 56 1010<br />
57 57 1030<br />
58 58 1040<br />
59 59 1060<br />
60 60 1080<br />
A. Filling the salt reservoir:<br />
Only Miele approved reactivation salt should be used in the G <strong>7881</strong>.<br />
Do not use other types of salt, e.g. table salt, agricultural, or gritting salt. These could contain<br />
components which are insoluble in water and could damage the water softener. If in doubt,<br />
consult Miele's Professional Department.<br />
The salt reservoir holds approx. 2.5 kg of salt.<br />
Inadvertently filling the sale reservoir with cleaning agent will damage the water softener.<br />
Before filling, make sure that you are using reactivation salt.<br />
Miele ● 9 Independence Way ● Princeton, NJ 08540 ● 609-419-9898 ● 800-991-9380 ● Fax 609-419-4241 ● www.dentaldisinfector.com 5
12. Test the water hardness and activate softener if<br />
necessary (continued)<br />
A. Filling the salt reservoir<br />
● Remove the bottom basket from the machine.<br />
● Unscrew the salt reservoir cap.<br />
Before filling the salt reservoir with reactivation salt for<br />
the first time, fill it with approx. ¾ gallon of water.<br />
● Place the funnel provided in place<br />
(see illustration).<br />
● Carefully fill the reservoir with salt. Displaced<br />
water will run out as it is being filled.<br />
● Wipe any residual salt off the screw threads<br />
on the socket.<br />
● Screw the cap on firmly.<br />
● Immediately after this step: Run the "Rinse" program<br />
to remove any traces of salt from the cabinet.<br />
Note: There may be a delay before the "Rinse" program<br />
starts due to the reactivation of the water softener.<br />
B. Setting the water softener<br />
● Turn off the machine with the "On/Off" button.<br />
● Turn the program selector to the "Stop” f position.<br />
● Press and hold the "Display" 4 and "Start” 6 buttons at the same time.<br />
Simultaneously turn the machine on with the "On/Off" button. The current program<br />
status "P…" will appear in the display and the "Fill/Drain: indicator will illuminate.<br />
● Press the "Drying" U button once. "E01" (programming level 1) will appear in the<br />
display.<br />
● Turn the program selector one switch position clockwise (1 o'clock position).<br />
The number "19" will appear in the display (this indicates the factory water hardness<br />
setting in gr/gal, equivalent to 340 ppm).<br />
● Press the "Display" 4 button as many times as necessary or hold it in until the<br />
required value (hardness level in gr/gal) appears in the display. Once the number "60"<br />
has been reached the counter will begin again at "0.<br />
● Press the “Start” 6 button. “SP” will appear in the display.<br />
● Press the “Start” 6 button again.<br />
The setting will now be stored in memory. The display will go<br />
out. For future serving, it is useful to make a note of your water<br />
hardness level.<br />
● Enter your water hardness level here:<br />
__________ gr/gal or __________ ppm<br />
C. Salt Indicator (see illustration)<br />
Reactivation takes place automatically during a program.<br />
The "Recharging" indicator (#1 in illustration) illuminates.<br />
When the salt reservoir is empty, the "Recharge"<br />
indicator (#2 in illustration) illuminates to remind you<br />
to fill the reservoir.<br />
6<br />
Miele ● 9 Independence Way ● Princeton, NJ 08540 ● 609-419-9898 ● 800-991-9380 ● Fax 609-419-4241 ● www.dentaldisinfector.com
13. Prime the pumps<br />
Note: Only use detergent and neutralizer recommended by Miele.<br />
Take care when handling liquid agents and additives as they may contain irritant or corrosive ingredients. Follow the manufacturer's<br />
safety instructions and relevant Health and Safety procedures carefully. Wear protective gloves and goggles.<br />
A. Priming the neutralizer dispensing system<br />
● Turn the program selector to the "Stop” f position.<br />
● Turn off the machine.<br />
● Press and hold the "Display" 4 and "Start" 6 buttons at the same time.<br />
Simultaneously turn the machine on with the "On/Off" button.<br />
The current program status "P…" will appear in the display and<br />
the "Fill/Drain" indicator will illuminate.<br />
● Press the "Drying" U button twice, "E02" (programming level) will appear in the<br />
display.<br />
● Turn the program selector to the 5 o'clock position. "do3" appears in the display.<br />
● Press the "Display" 4 button. The dispensing system will be primed automatically. "do3"<br />
will appear in the display when priming is finished.<br />
Note: Run the "Rinse" program to dilute and drain away any agents that may remain in the wash cabinet every time the dispensing<br />
system has been primed.<br />
B. Refilling the neutralizing agent<br />
When the "Neutralizer" indicator illuminates (seen right)<br />
● Replace the current neutralizer container with<br />
a full one.<br />
● The indicator light should go out.<br />
● If the container has been allowed to run dry,<br />
the light will not go out until the priming<br />
process is performed.<br />
C. Setting & priming the optional DOS G60/1 detergent dispensing system<br />
As a separate option, the G <strong>7881</strong> can be fitted with the DOS G60/1 liquid detergent dispenser.<br />
The DOS unit is supplied with its own installation instruction manual. Follow the instructions for<br />
connecting the dispensing option. Once connected to the G <strong>7881</strong> secure the detergent supply<br />
tube in the detergent bottle.<br />
Setting the detergent dosage<br />
● Turn the program selector to the "Stop" f position.<br />
● Turn off the machine with the "On/Off" button.<br />
● Press and hold the "Display" 4 and "Start" 6 buttons at the same time.<br />
Simultaneously turn the machine on with the "On/Off" button.<br />
● The current program status "P…" will appear in the display and the "Fill/Drain:<br />
indicator will illuminate.<br />
● Press the "Drying" U button twice. "E02" (programming level 2) will appear<br />
in the display.<br />
● Turn the program selector to "Wash" (2 o'clock position).<br />
● Press the "Display" 4 button as many times as necessary to set the dosage<br />
amount .40 (50 ml).<br />
Miele ● 9 Independence Way ● Princeton, NJ 08540 ● 609-419-9898 ● 800-991-9380 ● Fax 609-419-4241 ● www.dentaldisinfector.com 7
13. Prime the pumps (continued)<br />
C. Setting & priming the optional DOS G60/1 detergent dispensing system (continued)<br />
● Turn the program selector to the 1 o'clock position. "do1" appears in the display.<br />
● Press the "Display" 4 button. The dispensing system will be primed automatically.<br />
"do1" will appear in the display when the priming is finished. Ensure that priming has<br />
occurred by visually inspecting machine chamber for dispensed detergent. If priming<br />
has not occurred, repeat priming step.<br />
● Press the "Start” 6 button. "SP" will appear in the display.<br />
● Press the "Start” 6 button again. The setting will now be stored in memory. The<br />
display will go out.<br />
● After priming, run the "Rinse" program to remove detergent residues from<br />
the wash chamber.<br />
Note: If detergent is allowed to become empty, reference G <strong>7881</strong> Operating Instructions for priming the system.<br />
14. Add the rinse aid<br />
Rinse aid is necessary to ensure water does not cling to and leave marks on items during the drying phase. It also<br />
enables items to dry faster after they have been washed. Rinse aid is poured into the storage reservoir and a<br />
pre-set amount is dispensed automatically. The rinse aid reservoir holds approximately 180 ml.<br />
Inadvertently filling the rinse aid reservoir with detergent (including liquid detergent) will<br />
damage the reservoir. To avoid damage and ensure proper results only use Miele<br />
approved rinse aid.<br />
A. Adding rinse aid<br />
● The reservoir must be filled with rinse aid<br />
when the"Rinse Aid" indicator illuminates<br />
(as seen in illustration).<br />
There is also a level indicator for the rinse aid<br />
reservoir on the inside of the door.<br />
● Open the door fully.<br />
●<br />
Unscrew the cap (see illustration).<br />
8<br />
Miele ● 9 Independence Way ● Princeton, NJ 08540 ● 609-419-9898 ● 800-991-9380 ● Fax 609-419-4241 ● www.dentaldisinfector.com
14. Add the rinse aid (continued)<br />
A. Adding rinse aid<br />
Pour rinse aid into the storage container until the level<br />
indicator is dark (see arrow in the illustration). Use a<br />
funnel if necessary.<br />
● Screw the cap back on and wipe up any<br />
spilled rinse aid. This prevents over-foaming<br />
from occurring during the next program.<br />
● Wait until the "Rinse aid" indicator on the<br />
control panel illuminates before adding more<br />
rinse agent.<br />
B. Setting the dosage<br />
● The dosage adjuster in the opening as settings<br />
from 1 to 6 (1-6ml) It is factory-set to 3 (3ml).<br />
● Use a higher setting if spots are left after drying.<br />
● If surfaces become cloudy and/or streaky,<br />
use a lower setting.<br />
15. Load baskets & inserts into the machine<br />
The G <strong>7881</strong> normally requires a top and bottom basket. Various inserts and special baskets are also available for<br />
a wide variety of instruments.<br />
A. Preparation<br />
● Ensure that no acid or solvent residue, especially hydrochloric acid or chlorides, gets<br />
into the wash cabinet.<br />
B. Load the bottom basket<br />
● Insert lower basket with handle, circled in photo,<br />
facing out of the machine.<br />
● Add all applicable inserts.<br />
C. Load the top basket into the wash chamber<br />
● Add all applicable inserts.<br />
Miele ● 9 Independence Way ● Princeton, NJ 08540 ● 609-419-9898 ● 800-991-9380 ● Fax 609-419-4241 ● www.dentaldisinfector.com 9
15. Load baskets & inserts into the machine (continued)<br />
D. Adjust the top basket coupling<br />
● Fully insert top basket, ensuring water coupling<br />
connects with water inlet in the top of the<br />
chamber. Not inserted into machine, this water<br />
coupling must be 4-5 mm higher than the water<br />
connection inlet. If it is not, loosen the plastic<br />
nut, push the adapter 4-5 mm higher than the<br />
water connection inlet, and tighten the plastic nut.<br />
16. Décor panel mounting instructions (optional)<br />
1. Remove the Lower Panel from the G <strong>7881</strong> via the<br />
2 mounting screws (A).<br />
2. Remove the Lower Panel Décor Frame mounting piece via the D<br />
6 phillips head screws (B).<br />
3. Slide out the Lower White Décor Panel and replace it<br />
with the laminate sheet.<br />
4. Replace the Lower Panel Décor Frame mounting piece via the<br />
6 phillips head screws (B). Set Lower Panel aside.<br />
5. Remove the bottom piece of the Upper Panel Décor Frame<br />
via the 3 phillips head screws (C).<br />
6. Open the machine door so side screws are accessible (D).<br />
7. Remove both sides of the Upper Panel Décor Frame via the<br />
3 phillips head screws on each side (D).<br />
8. Slide out the Upper White Décor Panel and replace it with the<br />
laminate sheet.<br />
9. Replace the sides of the Upper Panel Décor Frame via the<br />
3 phillips head screws on each side (D).<br />
10. Close the machine door so bottom screw holes are<br />
accessible (C).<br />
11. Replace the bottom piece of the Upper Panel Décor Frame<br />
via the 3 phillips head screws (C).<br />
12. Replace the Lower Panel on the G <strong>7881</strong> via the two<br />
mounting screws (A).<br />
B<br />
C<br />
B<br />
D<br />
A<br />
A<br />
17. Run the program cycle. Program will take ~50 minutes.<br />
If successful, the G <strong>7881</strong> is now ready to operate<br />
10<br />
Miele ● 9 Independence Way ● Princeton, NJ 08540 ● 609-419-9898 ● 800-991-9380 ● Fax 609-419-4241 ● www.dentaldisinfector.com
Technical Data<br />
Control Unit<br />
Control system supplied with five standard programs:<br />
Disinfection Vario 93ºC/200ºF<br />
Disinfection 93ºC/200ºF<br />
Wash<br />
Rinse<br />
Drain<br />
Cleaning Mechanism<br />
Rotary:<br />
Three multi-jet spray arms<br />
Direct Injection: Using optional O 177/1 Upper Basket<br />
Drying<br />
Flash heat drying using standard sump heating element<br />
Water Softener<br />
Built-in, with adjustable water hardness<br />
Automatic reactivation<br />
Detergent Dispensing<br />
Machine is equipped with a standard powder door cup<br />
An optional automatic dispensing module is available for dispensing of liquid detergents<br />
Main Circulation Pump<br />
Circulation:<br />
106 gal/min (400 l/min)<br />
Construction:<br />
ABS plastic impeller and housing<br />
Cabinet and Chamber<br />
Materials and Construction:<br />
Exterior:<br />
White front panels standard, with optional stainless steel panel or custom panels available<br />
Interior:<br />
Type 304 SS sides, back, and top<br />
Type 316 SS bottom and door<br />
Plumbing Connections<br />
One or two water connections as follows:<br />
Tap<br />
a. Cold water for wash cycles. 5’5” connection hose with 3/4” hose thread unions<br />
Minimum flow rate of 2.5 gpm/10-147 psi (recommended 25-60 psi)<br />
DI Source (use optional)<br />
b. 5’6” connection hose with 3/4” hose thread unions<br />
Minimum flow rate of 2.5 gpm/10-147 psi (recommended 25-60 psi)<br />
Drain Connections<br />
Connection<br />
One 7/8” ID flexible drain hose, 4’7” long<br />
Maximum drain height, 39.4”<br />
Maximum drain length, 13’<br />
Electrical Requirements<br />
Single Phase 208 V, 60 Hz, 2 x 30 Amps<br />
Three Phase 208 V, 60 Hz, 3 x 20 Amps (Available as an optional conversion)<br />
Unit is equipped with a 5’11”, 10 AWG, 3 wire, unterminated power cord<br />
Units are CSA approved (certificate 1319665)<br />
Dimensions<br />
Interior:<br />
18.5”H x 20.5”W x 20.5”D<br />
Exterior:<br />
33.46”H x 23.54”W x 24.0”D (Height is 32.28” without lid)<br />
Noise Level<br />
< 60 dBa<br />
Customizable Décor Panels<br />
Main Panel:<br />
442 mm H x 586 mm W, 1.2 mm thick<br />
Toe Kick Service Panel:<br />
117 mm H x 586 mm W, 1.2 mm thick<br />
Stainless Steel and select Laminate Décor Panels available through Miele. Custom panels available with a 6-8<br />
week delivery time.<br />
Miele ● 9 Independence Way ● Princeton, NJ 08540 ● 609-419-9898 ● 800-991-9380 ● Fax 609-419-4241 ● www.dentaldisinfector.com 11
Miele Professional<br />
9 Independence Way<br />
Princeton, NJ 08540<br />
✆ 800-991-9380<br />
609-419-4241<br />
dentaldisinfector.com<br />
©<strong>2006</strong> Miele, Inc.<br />
B999617 11/06
DENTAL WASHER<br />
DISINFECTOR<br />
GUIDELINES<br />
Instrument Handling<br />
Recommendations<br />
1. After use, all dirty instruments<br />
are placed back in cassettes<br />
or trays. Wipe off all gross<br />
debris and cements/<br />
composites directly after<br />
treatment.<br />
2. Instruments should not be<br />
pre-soaked, rinsed or<br />
hand-scrubbed.<br />
3. Cassettes and/or loose<br />
instruments are placed into<br />
the Miele Dental Washer<br />
Disinfector.<br />
4. The Miele Dental Washer<br />
Disinfector serves as the “dirty<br />
storage area” and will clean<br />
and disinfect instruments that<br />
have been sitting for up to 6<br />
hours. Do not allow dirty<br />
instruments to sit overnight.<br />
5. Recommended cycle:<br />
Disinfection VARIO.<br />
6. Choose optional 10 minute<br />
drying cycle if desired, and<br />
press the Start button.<br />
7. Open the door immediately<br />
after the cycle ends to release<br />
hot air & steam and let<br />
instruments cool.<br />
8. The instruments/cassettes are<br />
safe to handle and ready for<br />
wrapping and sterilization.<br />
9. The sterile instruments should<br />
be stored in dust-sealed<br />
cabinets before their next use.<br />
What Instruments are Suitable to be Processed<br />
in the Dental Washer Disinfector?<br />
Recommended Instruments<br />
All instruments, accessories and<br />
other items that have heat<br />
resistance to a temperature of up<br />
to 95°C/203°F and corrosion<br />
resistance in the presence of heat<br />
and alkalinity<br />
Plastic instruments that can<br />
withstand high temperatures<br />
General high-quality stainless<br />
steel instruments<br />
Hollow instruments<br />
(aspiration tips, etc.)<br />
Cassettes or trays<br />
(stainless steel or resin)<br />
Hinged instruments (scissors,<br />
forceps, etc.) Place into machine<br />
with the hinge open at 90°<br />
Non-Recommended<br />
Instruments<br />
Instruments made from<br />
Aluminum, Chrome, Chrome<br />
Plated, Nickel, Carbon or Carbide<br />
Steel<br />
Plastic instruments that cannot<br />
withstand high temperatures<br />
Mirrors<br />
Handpieces<br />
Fiber-optics<br />
Burrs<br />
Drill-bits<br />
Grinders<br />
Suction/syringe tips<br />
Tip: Ask the instrument<br />
manufacturer for their advice on<br />
the suitability for processing in<br />
this system.<br />
10. NOTE: Do not leave machine<br />
running when leaving for the<br />
day unless cycle is completed<br />
and door is cracked open.
Problem Cause Solution<br />
Spotting<br />
Not using water softener<br />
Determine the water hardness from local water authority.<br />
(white residue) Water softener timer not set properly<br />
Set the water softener to appropriate setting using the Operating Instructions handbook.<br />
Not reactivating water softener properly<br />
Replenish reactivation salt as soon as the light comes on according to the instructions in the<br />
Failure to remove gross debris prior to Operating Instructions handbook.<br />
processing<br />
Rust (textured<br />
brown deposits<br />
on instruments)<br />
Chloride-Induced<br />
Pitting (points of<br />
corrosion, with a<br />
small hole in the<br />
middle)<br />
Discoloration<br />
(yellowish or<br />
brownish tint on<br />
instruments)<br />
Unsatisfactory<br />
cleaning results<br />
or white residues<br />
Alkaline detergent in powder<br />
form<br />
Facilitates cleaning process<br />
neodisherTM FA Alkaline detergent in liquid<br />
form<br />
Facilitates cleaning process<br />
Note: Requires optional<br />
automated liquid dispensing<br />
unit<br />
neodisherTM N Neutralizing agent<br />
Restores pH balance to<br />
prevent instrument corrosion<br />
and prolongs machine life<br />
Mielclear Rinse Aid<br />
Protects instruments against<br />
corrosion<br />
Breaks down surface<br />
tension for faster drying<br />
results<br />
Somat Salt<br />
Reactivation Salt<br />
Activates resin used to<br />
soften water; prevents<br />
instrument corrosion<br />
Corrosion from carbon steel instruments<br />
“Fly corrosion” Corrosion spreads from<br />
carbon instruments to stainless steel<br />
instruments<br />
Chlorides in tap water<br />
Chemical attack on instruments from<br />
chlorides or other halide ions<br />
Source for chlorides is often tap-water<br />
or use of improper cleaning agents<br />
Silicates in the water<br />
Not using proper procedure:<br />
Dirty instruments stored in machine<br />
longer than 6 hours<br />
Incorrect detergent dosage<br />
Overloaded machine<br />
Spray arm coupling not engaged<br />
Detergent, neutralizer or rinse aid not<br />
being dispensed<br />
Failure to remove gross debris prior to<br />
processing<br />
CLEANING<br />
AGENTS<br />
Name What It Does Directions for Use & Refilling Tips<br />
neodisherTM MA<br />
Detergent must be manually added to machine<br />
before every wash cycle.<br />
Pour about 3/4 scoop of powder into the dispenser<br />
on the door before each cycle.<br />
The door of the dispenser should not be blocked<br />
by trays or other devices.<br />
Detergent is automatically dispensed when used in<br />
conjunction with optional liquid dispensing unit.<br />
Refill when indicator light comes on.<br />
Indicator light comes on before detergent container<br />
is completely empty.<br />
Neutralizing agent will be automatically dispensed<br />
at proper time during wash cycle.<br />
Refill when indicator light comes on.<br />
Indicator light comes on before neutralizer<br />
container is completely empty.<br />
Mielclear will be automatically dispensed at proper<br />
time during wash cycle.<br />
Unscrew the cap in the door to refill when level<br />
indicator turns light.<br />
Pour Mielclear into storage container in the door<br />
until level indicator darkens.<br />
Set machine according to local water hardness.<br />
When Recharge indicator light turns on, refill with<br />
Reactivation Salt. See Operating Instructions for<br />
further instructions.<br />
Run the Rinse Cycle immediately after refilling<br />
water softener to be sure all salt is dissolved.<br />
TROUBLESHOOTING GUIDE<br />
Too much as well as too little detergent may have<br />
adverse cleaning effects.<br />
If detergent container becomes completely empty<br />
and air fills the pick-up tubes, it will be necessary to<br />
prime the pumps.<br />
If neutralizing agent container becomes completely<br />
empty and air fills the pick-up tubes, it will be<br />
necessary to prime the pumps.<br />
Make sure that any spillage is wiped off the door<br />
after refilling or run the Rinse cycle immediately<br />
after refilling.<br />
Consumption of salt is dependent upon local water<br />
hardness.<br />
Do not process carbon steel instruments in the Miele dental washer disinfector.<br />
Separate stainless & carbon instruments throughout the cleaning and sterilization process.<br />
Treat instruments with neodisher TM IR.<br />
Have water tested for chlorides. It may be necessary to get an external water purification<br />
system if chloride level exceeds 50 ppm.<br />
Have water tested for chlorides. It may be necessary to get an external water purification<br />
system if chloride level exceeds 50 ppm.<br />
Use only Miele approved cleaning solutions.<br />
Remove corrosion with neodisher TM IR or it may be necessary to replace instruments.<br />
Treat instruments and the Miele dental washer disinfector wash chamber with<br />
neodisher TM IS.<br />
Do not allow dirty instruments to sit for more than 6 hours.<br />
Check the dosage of the detergent and adjust if necessary. Too little as well as too much<br />
detergent may have adverse cleaning effects.<br />
Place instruments into machine allowing water and detergent to touch every surface.<br />
Do not overload. Make sure the spray arm can easily rotate and is not blocked by any devices.<br />
There should be a tight fit between the coupling and the water inlet connector at the<br />
top of the chamber. Follow directions in the Operating Instructions handbook.<br />
Check dispensing, be sure rinse aid dispenser is filled<br />
Remove gross debris<br />
QUESTIONS? Call 1-800-991-9380 or email: dental@mieleusa.com<br />
©<strong>2006</strong> Miele, Inc. B999649 09/06