
You also want an ePaper? Increase the reach of your titles
YUMPU automatically turns print PDFs into web optimized ePapers that Google loves.
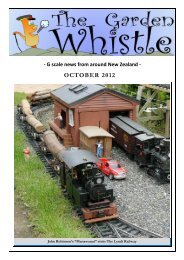
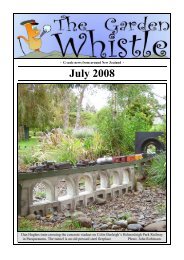
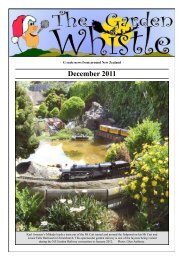
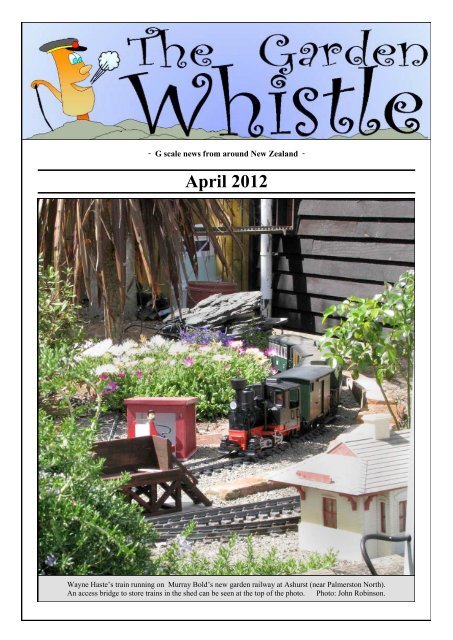
- G scale news from around New Zealand -<br />
<strong>Apr</strong>il <strong>2012</strong><br />
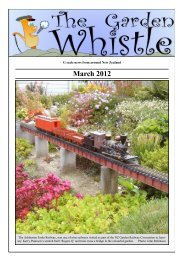
Wayne Haste’s train running on Murray Bold’s new garden railway at Ashurst (near Palmerston North).<br />
An access bridge to store trains in the shed can be seen at the top of the photo. Photo: John Robinson.
The <strong>Garden</strong> <strong>Whistle</strong> - <strong>Apr</strong>il <strong>2012</strong><br />
From the (retiring) Editor<br />
This issue completes eight full years since I<br />
took on the job as editor.<br />
Looking back over the last eight years, it has<br />
grown in size from 4 to 6 pages in A5 format to<br />
now be 12 to 24 pages in A4 format.<br />
It has also transformed from just being Christchurch<br />
club newsletter to slowly becoming the<br />
de-facto national newsletter for all G scale clubs<br />
in New Zealand.<br />
Of course a newsletter is only as good as the<br />
content in it, so I want to thank a number of people<br />
who have provided contributions on a regular<br />
basis. At the risk of f<strong>org</strong>etting someone, I am<br />
going to name them - because they deserve the<br />
thanks: John Robinson and Wayne Haste from<br />
Wellington, Michael Hilliar and Robert Graham<br />
from Auckland, Lloyd Dickens and Lee Collet<br />
from the Wairarapa, Grant Alexander and Raynor<br />
Johnston from Hamilton and Ian Galbraith<br />
for doing the proof reading. To the many others<br />
from around the country (and even further<br />
afield) who have provided occasional contributions,<br />
thank you one and all.<br />
I believe voluntary clubs that have people<br />
squatting in the same position for long periods<br />
often end up going stale. With that in mind, I<br />
have been doing this job quite long enough. At<br />
the AGM of the Christchurch <strong>Garden</strong> Railway<br />
Society (this month) I will be standing aside to<br />
let someone else take over and inject some new<br />
ideas and enthusiasm.<br />
To whoever you maybe, I wish you good luck.<br />
Just remember that I made some changes, and<br />
you shouldn’t be afraid to make some changes<br />
too.<br />
Glen Anthony,<br />
(Retiring) Editor<br />
Rocky Creek Railway<br />
Text & photos by Glen Anthony (Christchurch)<br />
Fresh on the back of the <strong>Garden</strong> Railway<br />
Convention, the February meeting in Christchurch<br />
was held at Glen and Brenda Anthony’s<br />
Rocky Creek railway.<br />
There wasn’t anything new to be seen that<br />
hadn’t been seen the month before. In fact there<br />
was less, because due to the threat of rain I didn’t<br />
put out many of my buildings as they are not<br />
weather proof.<br />
But the idea of hosting a meeting is not about<br />
putting your trains and stuff out on display. Its<br />
actually the opposite, the trains stay in the shed,<br />
to keep the tracks free for everyone else to run<br />
theirs.<br />
The first job in preparation for the day<br />
was to find the track cleaner. I’ve been<br />
slowly converting some of my engines to<br />
budget battery power. By budget, I mean<br />
using the right number of batteries to<br />
achieve a good speed when wired directly<br />
to the motor, so there is no need for expensive<br />
controllers.<br />
Ken Henderson’s railcar part way through repainting<br />
But having to clean the track gave me the<br />
opportunity to get ’up close and personal’<br />
with the track for the first time in ages. It<br />
Page 2
The <strong>Garden</strong> <strong>Whistle</strong> - <strong>Apr</strong>il <strong>2012</strong><br />
was during this<br />
time that I discovered<br />
lots of<br />
new earthquake<br />
damage that I<br />
hadn’t noticed<br />
before. Bridges<br />
where the piles<br />
were cemented<br />
in the ground<br />
and the top attached<br />
to the<br />
track have been<br />
ripped apart in<br />
the middle,<br />
when somehow<br />
the ground had<br />
dropped but the<br />
track hadn’t.<br />
Strange things<br />
happen in and<br />
earthquake and you don’t try to understand<br />
them.<br />
Kerry’s DG crossing one of the earthquake damaged bridges. The top has lifted off the legs.<br />
Anyway on to the meeting. In spite of the<br />
drizzly start to the day there was a good turn<br />
out.<br />
Kabita turned up with a proposed track plan<br />
for her new railway. I’m not sure if asking for<br />
some advise helped or hindered her as I think<br />
she got as many different opinions as there were<br />
people at the meeting.<br />
Another person contemplating a new railway<br />
is new member<br />
Ken Henderson.<br />
Ken has purchased<br />
some<br />
equipment from<br />
Ian Sandford and<br />
arrived with a<br />
railcar originally<br />
built by Robin<br />
Knight. Ken was<br />
in the process of<br />
repainting it and<br />
the wet paint got<br />
some assistance<br />
to dry as it did a<br />
few laps of the<br />
railway.<br />
Dennis Lindsay turned up with the latest hand<br />
made point for his railway, built on a compound<br />
curve. Kerry Paterson arrived with his big NZR<br />
recabbed DG was had its first run on the railway.<br />
There were also numerous other trains run<br />
during the afternoon. Last to run was Karl<br />
Arnesen who was given some grief about having<br />
two locos with the same name and number on<br />
them (it seems rivet counters are still alive and<br />
well). He is now looking for a transfer to fix that<br />
problem. Anyone who can help out should contact<br />
Karl.<br />
Some discussion took place asking why both locos had the same number on them!<br />
Page 3
The <strong>Garden</strong> <strong>Whistle</strong> - <strong>Apr</strong>il <strong>2012</strong><br />
A Bold new railway in the Manawatu<br />
A view of the railway. Behind the umbrella you can just see the gazebo, which is also a good place to watch trains from<br />
Text & photos by John Robinson (Wellington)<br />
Long-time Wellington <strong>Garden</strong> Railway Group<br />
member Murray Bold, and his dearly beloved<br />
Janice, relocated from their home in central<br />
Palmerston North, a home with a small easy care<br />
garden to a comfortable ¼ acre semi rural home<br />
in the Manawatu hinterland. Unlike most of us,<br />
Murray is upsizing in preparation to retirement.<br />
A happy coincidence is that it is a perfect garden<br />
for a large railway, or is it?<br />
The experience Murray has gained in building<br />
his previous railways has been put rapidly into<br />
practice with his new railway built over the recent<br />
spring and summer. It was built so fast that<br />
the new railway doesn’t have a name yet. The<br />
railway was constructed through an existing<br />
slightly raised garden which contains a number<br />
of mature shrubs. Some were given a long overdue<br />
prune by Grant Alexander who was visiting<br />
over the preceding week. The garden also contained<br />
a couple of significant features; a large<br />
tree at one end and a handy gazebo towards the<br />
other, which the railway needed to navigate<br />
around.<br />
The transpiring track plan is a long figure of 8<br />
with a cut off track through the gazebo end of<br />
the 8 that can then be used to run as a smaller<br />
loop, we’ll call it the gazebo loop. The gazebo<br />
loop is track powered and the rest of the main<br />
line is unpowered.<br />
There are<br />
stations at<br />
each end of<br />
the 8. The<br />
station on<br />
the gazebo<br />
loop is the<br />
main station<br />
and<br />
includes a<br />
steam up<br />
bay. From<br />
the gazebo<br />
loop a<br />
branch is<br />
being laid<br />
to storage<br />
tracks in<br />
Murray’s<br />
workshop.<br />
Wayne’s Stai<strong>nz</strong> is on the powered loop. The unpowered loop is in the foreground passing the gazebo<br />
Page 4
The <strong>Garden</strong> <strong>Whistle</strong> - <strong>Apr</strong>il <strong>2012</strong><br />
The track is all<br />
laid on the<br />
ground in a<br />
sand ballast<br />
bed. Track is a<br />
mix of the usual<br />
commercial<br />
brands, and<br />
some aluminium<br />
salvaged<br />
from Murray’s<br />
former railway.<br />
It has been recycled<br />
using<br />
Ian Galbraith’s<br />
double rail<br />
bender.<br />
Many of the<br />
buildings have<br />
come from<br />
Murray’s previous railway and some from Chris<br />
Rogers’s regrettably defunct railway. The bridges<br />
on the unpowered loop were supplied by<br />
Grant Alexander, with the truss bridge believed<br />
to have originate from Michael Hilliar and the<br />
other from the late John Dunne (Havelock<br />
North). The bridge to the workshop came from<br />
the old Palmerston North railway. There is naturally<br />
a lot to be done as the railway matures into<br />
its surrounds, and as Janice correctly says, it is a<br />
railway through<br />
the garden not a<br />
model railway<br />
garden.<br />
Waynes Murray’s Staniz scratch is on built the NZR powered D class loop. loco The and unpowered battery wagon loop is crossing the foreground a viaduct by passing the gazebo the gazebo<br />
yummy afternoon tea. The turnout was acceptable<br />
but I do feel sorry for those who couldn’t<br />
make the day, you really did miss a fun day.<br />
We ran track powered, battery powered and live<br />
steam locos. Mostly as is usual visiting stock<br />
put drivers to the test on the challenging grades<br />
and ensuring proper train control was used, especially<br />
on the cut of track forming the gazebo<br />
loops. You are free to assume there may have<br />
been the usual humoured panic when train con<br />
So that brings<br />
us to the<br />
WGRG March<br />
running afternoon<br />
hosted at<br />
Murray and<br />
Janice’s on a<br />
glorious sunny<br />
calm warm late<br />
summer day.<br />
The sort of day<br />
that you just<br />
want to be out<br />
there running<br />
trains with your<br />
mates, and eating<br />
Janice’s Waynes is in the foreground passing the gazebo<br />
Chris Drowley’s train approaching a tunnel. The route of the incline to the garage can be seen.<br />
Page 5
The <strong>Garden</strong> <strong>Whistle</strong> - <strong>Apr</strong>il <strong>2012</strong><br />
Grant Alexander’s live steam arrives at the main station<br />
Chris Drowley’s loco arriving at Hydrangea Halt<br />
trol was not up to standard.<br />
The person who travelled the furthest to get<br />
there was Grant Alexander all the way from<br />
Cambridge, and it was great to catch up with<br />
him again after GROW hosted the 2011 <strong>Garden</strong><br />
Railway Convention. I’ll let the pictures tell the<br />
story of the types of trains we ran. Conversation<br />
covered many helpful topics on garden railways<br />
and some less helpful offerings. Boys will be<br />
boys. All up a classic running day, I do hope we<br />
get invited back, this is a great drivers railway.<br />
Thanks for the hospitality Murray and Janice.<br />
David A’s critter with Murray’s train on the lower track<br />
The control stand at right controls the powered circuit and points. This can be unplugged and removed when not in use.<br />
Page 6
The <strong>Garden</strong> <strong>Whistle</strong> - <strong>Apr</strong>il <strong>2012</strong><br />
Jan & Feb Wairarapa Running<br />
Ian Galbraith’s work train.<br />
Lloyd Dickens’s train pulling into the siding.<br />
Our running day on 25 February was hosted<br />
by Warren Stringer.<br />
The layout was set up on Warren’s front lawn<br />
with temporary track supplied by Warren and<br />
Lee Collett. (photo below).<br />
Warren is waiting for more track and hopefully<br />
his permanent layout will be up and running<br />
when he hosts his next club day.<br />
Ian Galbraith’s C16 pulling a freight train.<br />
Photos by Lee Collett (Carterton)<br />
Here are some photos from the Club running<br />
day at Jim McIntyre’s place on 15th January.<br />
(Top three photos and bottom photo).<br />
This was Ian and Ann Galbraith’s last running<br />
day with our club before moving to the South<br />
Island. All our club members wish them all the<br />
best.<br />
Warren’s Shay with Murray’s diesel in back ground.<br />
Jim McIntyre’s Dash 9 pulling a rake of box cars at the January running day.<br />
Page 7
The <strong>Garden</strong> <strong>Whistle</strong> - <strong>Apr</strong>il <strong>2012</strong><br />
Lloyd Dickens Running Day<br />
The Standard railcar built by the late Beauchamp Dickens can be seen in the wharf siding on Lloyd’s railway<br />
Text & photos by Lloyd Dickens (Masterton)<br />
My running day in mid March for the<br />
Wairarapa <strong>Garden</strong> Railway Group was a fine,<br />
very warm day.<br />
I had spent some days previously preparing<br />
the railway. It had been allowed to get into disrepair<br />
as I had been spending my time keeping<br />
my brothers Maples Railway going and visiting<br />
him. Beauchamp died in late February but I am<br />
pleased to report that his railway will survive.<br />
It’s the case of selling the railway and throwing<br />
in the farm and a house. Joan, his widow, is<br />
moving to a new house in Masterton.<br />
My railway up to now had been intended to<br />
have a logging theme, but after my visit last<br />
year to the Isle of Man I have decided to convert<br />
Murray Clarke’s U60 German Shunter. The Isle of Man<br />
Laxey Wheel can be seen in the background<br />
it to an Isle of Man railway. I already have one<br />
Isle of Man Locomotive “Caledonia” and have<br />
another on order. Now I have Beauchamp’s<br />
Laxey Wheel so the new theme is starting take<br />
shape. I am also blessed with a wharf Beauchamp<br />
built for me some years ago. Also I have<br />
in my garage on the layout his 1/24 th scale 5 ton<br />
Bedford truck built from a plastic kit from<br />
Emhar.<br />
The logging railway theme was to the fore on<br />
my running day. I ran two of Beauchamp’s<br />
geared Locomotives, the Heisler and the Climax.<br />
Warren Stringer brought along his Shay so<br />
the main geared locomotives where present. Later<br />
in the afternoon I ran my live steam Shay.<br />
Joan brought along Beauchamp’s Standard railcar<br />
he built from scratch and Murray had is Mallet<br />
pulling two tank wagons built by Wayne<br />
Haste of Wellington.<br />
I am trying out a new grass on my railway, No<br />
Mow. It comes from a Nelson outfit. It grows<br />
only 2-3cm in height and is a rich green. To<br />
weed it you water it with salty water. It is a<br />
New Zealand Native and lives on the coast so is<br />
used to salt. It is planted in small blocks about<br />
30cm apart. Within one year it will cover the<br />
whole area. I will keep you informed on its progress.<br />
Like watching grass grow. The web site is<br />
http://www.nomow.co.<strong>nz</strong>/ and I am using Fine<br />
Tide Turf - Selleria Microphylla Native<br />
Page 8
The <strong>Garden</strong> <strong>Whistle</strong> - <strong>Apr</strong>il <strong>2012</strong><br />
Wayne Haste’s Wagon Builds<br />
Photos & info from Wayne Haste (Wellington): Wayne is now building his own bogies from scratch. Here are<br />
the detailed parts being cut out. To the right is the finished body of OBB high side wagon 00d, which is just waiting for<br />
the bogies (above left) to be completed.<br />
00d now finished. Construction shown in the top photos.<br />
The prototype was built in 1890’s and used for general<br />
and seasonal timber traffic on the 750mm gauge OBB.<br />
Ow 282. One of two wagons that ran on a private company<br />
(Sudharzeisenbahn) line in East Germany. When Germany<br />
was cut into East and West, the railway was literally<br />
cut in half. It has since been rebuilt by the HSB and run<br />
tourist and local trains.<br />
These are Chinese produced copies of Saxon cars. I have<br />
removed the old decals (no such railway) then repainted<br />
and correct decals applied. 12 have been done for a client.<br />
Gwd 10200. Some of this wagon still exists today on the<br />
750mm OBB lines in Austria.<br />
Page 9
The <strong>Garden</strong> <strong>Whistle</strong> - <strong>Apr</strong>il <strong>2012</strong><br />
The Fraser Line<br />
Three loops at the main station allowed slower trains to pull in to allow faster trains to over take.<br />
Text & photos by Glen Anthony (Christchurch)<br />
In complete contrast to what we experienced<br />
when we last visited on the garden railway convention,<br />
the weather at Ross and Gwyn’s this<br />
time was very pleasant; no wind, sunny and hot!<br />
Rather than hiding behind the garage to get out<br />
of the wind, we were hiding under the trees to<br />
get out of the sun! A brief last glimpse of summer<br />
on a stunning 27deg day.<br />
As you will see elsewhere in this issue, the<br />
railway was measured at 136 metres long at the<br />
recent garden railway convention, and it is the<br />
longest one in the Canterbury area. The long run<br />
was fully utilised with three or four trains running<br />
at any one time during most of the afternoon.<br />
(One on track power and three on various<br />
battery powered systems).<br />
First to start running trains was the Paterson<br />
family who bought some of their Thomas the<br />
Tank Engine trains. Kelly (age 4) was in control<br />
of James, followed by Lorraine (age 5) who<br />
drove Percy.<br />
The line quickly became very busy as more<br />
and more trains rolled out of the indoor set-up<br />
yard and down the incline to the ground level<br />
track. Having many trains on the line was much<br />
more interesting than just watching one. Luckily<br />
the line has two places for passing. One is the<br />
main yard which has a number of loops. Slower<br />
trains occasionally pulled in to let faster trains<br />
Engine & driver swap. Kerry, Kelly & Lorraine Paterson<br />
Ian Galbraith’s railcar passing some of Ross’ signals<br />
Page 10
The <strong>Garden</strong> <strong>Whistle</strong> - <strong>Apr</strong>il <strong>2012</strong><br />
over take them. But just as in<br />
the story “The Hare and the<br />
Tortoise ”, its not always<br />
about speed. The fastest train<br />
on the line soon drained its<br />
battery and limped into the<br />
yard, meanwhile the slower<br />
trains passed it and carried<br />
on running for another hour<br />
or more.<br />
Ross has built a computer<br />
controlled signalling system<br />
using various components<br />
and scratch built signals. It is<br />
designed for track powered<br />
trains, and detects which<br />
section is drawing power.<br />
The computer logic then displays<br />
red and yellow signals<br />
behind the train and works<br />
out which way the points are<br />
set to display green on the<br />
correct signals ahead. Of<br />
course this works fine for<br />
Ross’ track powered trains<br />
but the visiting battery powered<br />
trains became ‘ghost’<br />
trains on the system and so<br />
the usual rule of watching<br />
what is ahead of you prevailed.<br />
Dean Farrow’s railcar passes through at afternoon tea time<br />
Don Ellis’ Santa Fe passenger. The fastest train on the line....but only for an hour.<br />
We were privileged<br />
to have two<br />
new members arrive,<br />
Ian and Ann<br />
Galbraith who<br />
have recently<br />
moved down from<br />
Masterton. They<br />
have settled in<br />
Rangiora, (and Ian<br />
is busy planning<br />
where the garden<br />
railway will go).<br />
We look forward<br />
to more on that<br />
later.<br />
Thanks Ross &<br />
Gwyn for a great<br />
day!<br />
Graeme Moar’s train leaving the train shed with Glen and Don’s train waiting at the signal.<br />
Page 11
The <strong>Garden</strong> <strong>Whistle</strong> - <strong>Apr</strong>il <strong>2012</strong><br />
MacDiarmid Ken & Liz’s Meeting Railway<br />
Trains running in opposite directions pass at one of the stations on the line<br />
Text by Ken MacDiarmid (Auckland)<br />
Photos by Greg Booth (Auckland)<br />
Well, our week started with about six inches<br />
of flood water in our basement/garage/train storage<br />
area, and after three days of frantic carpet<br />
airing, ended still slightly smelly!!<br />
None of our 35 (about) society members attending<br />
were unkind enough to mention it.<br />
Ken’s layout which incorporates many of Henrik’s<br />
suggestions, is run completely on Digital<br />
command control using the very sophisticated<br />
ESU Ecommand Operating System, with NCE 5<br />
and 10 amp boosters, LGB handheld cabs, and a<br />
variety of decoders, from Loksound 1 and 3amp<br />
to Digitrax 5 amp with relays, and Le<strong>nz</strong> for the<br />
smaller Ford railtruck. In addition we have<br />
been busy exploring the iPod......<br />
An iPod (or iPhone) sports a vast number of<br />
“apps”, and one of these we discovered turns<br />
these iGadgets into a sophisticated handheld<br />
model railway controller, with - to date - only<br />
one fault - it operates only on Le<strong>nz</strong> or Ecos central<br />
stations. This iPod does very well, with a<br />
colour graphic interface and a Wi-Fi reliable<br />
range greater than any other radio control systems<br />
we have used. [Look it up! Its in Appstore/<br />
Utilities and named Touchcab.]<br />
Herein lies the great virtue of the Loksound system,<br />
that it can be mixed with any NMRA compatible<br />
segment. Inexpensive American high<br />
current decoders and boosters can be paired with<br />
clever German electronic architecture. Even<br />
LGB!<br />
In spite of Murphy’s law the double track layout<br />
functioned well on it’s first real test, needing<br />
two “Loco Engineers” for running trains in opposing<br />
directions, (see the layout diagram)<br />
through the long loop, with diverging single and<br />
double track sections. The additional bottom<br />
horseshoe gives us a height difference of 5 feet<br />
from the lowest yard to the spiral, with an average<br />
gradient of 3.5% and a total track length of<br />
170 meters plus storage sidings<br />
Here we were very indebted to Jenny Keal<br />
who gave Hugh permission to come and help us<br />
Page 12
The <strong>Garden</strong> <strong>Whistle</strong> - <strong>Apr</strong>il <strong>2012</strong><br />
run the layout. Thanks Jenny.<br />
The layout control system has an “if only I’d<br />
known” history. We tried an automatic signalled<br />
train control system which hinged on tracing<br />
locomotives on and off the sections of single<br />
track, to avoid head-on smashes. We could not<br />
buy dependable reed switches in NZ, and as they<br />
failed, so did the whole system. So we chopped<br />
the heart out of it and ended with a simple but<br />
not prototypical signal system which indicated<br />
when a single track section was occupied. That<br />
meant that the engine driver had to wait at the<br />
junction until he sighted the opposing train moving<br />
through the turnout. Thereafter, as he inched<br />
forward he switched the turnout before him<br />
AND the signal turned to green.<br />
Pretty sneaky!<br />
But it looks good, and it works - after a fashion.<br />
We will have to find big fat reed switches somewhere.<br />
The track plan does not show indoor storage sidings<br />
The very relaxed 'pot luck dinner' captured<br />
twenty members who stayed on to share and<br />
keep us entertained until after 9pm that night<br />
with a great deal of discussion about the Christchurch<br />
convention with its different structure.<br />
Though people seemed to see value in it Brenda<br />
and Glen set it up only because a hall was so<br />
difficult to find in shattered Christchurch.<br />
An enjoyable day.<br />
The indoor storage yard.<br />
Brian scratch built this Mid West Quarry building.<br />
Left Top: Michael Hilliar & John Reinecke<br />
Left Bottom: Crossing the diamond crossing under the house<br />
Page 13
The <strong>Garden</strong> <strong>Whistle</strong> - <strong>Apr</strong>il <strong>2012</strong><br />
Murray’s Measuring Machine<br />
Text by Murray Bold (Palmerston North)<br />
Photos by Don Ellis (Christchurch)<br />
In August 2009, I decided to try and build a<br />
wagon that would measure the length of a G<br />
scale track. I started with a Hartland 3 plank<br />
open wagon and added 2 more planks to make it<br />
about 5 cm high.<br />
At the Christchurch Convention this year,<br />
Lloyd Dickens had a Revolution controlled battery<br />
powered camera car loco. I hooked on behind<br />
his loco and measured the 9 track lengths<br />
±1.5%.<br />
I enjoy using Picaxe microcontrollers and<br />
decided to use an 18X. I changed the wheels to a<br />
pair that were as near to 100mm circumference<br />
as possible. This made the calculations much<br />
easier. I also added a slotted disc on the axle and<br />
infrared interrupter on the chassis to trigger the<br />
Picaxe input. The rest was mainly software.<br />
I took the wagon to the Wairarapa Convention<br />
and measured the tracks there in 2010.<br />
Lengths of the garden railways visited during the convention in Christchurch (in order of visit)<br />
Owner Railway Actual<br />
length<br />
Scale<br />
1:24<br />
Glen & Brenda Anthony Rocky Creek Railway 39.8m 0.95km<br />
Kevin & Michelle Leigh Somerset & Willard 38.0m 0.91km<br />
Scale<br />
1:29<br />
Andrew & Bindy Hamers 58.9m 1.7km<br />
Dean & Lois Farrow The Fenceline Railway 35.1m 0.84km<br />
Kerry & Crisma Paterson Ashburton Forks Railway 110.6m 2.6km<br />
Karl & Alison Arnesen Jessie Falls & Mt Catt Railroad 83.2m 2.4km<br />
Brian Allison Blackridge Lines 50.0m 1.45km<br />
Ross & Gwyn Fraser The Fraser Line 136.7m 3.96km<br />
Neil & Denise Wiggins<br />
Tuahiwi Valley Lumber & Mining<br />
Company<br />
90.2m 2.6km<br />
To work out the scale length multiply the actual length by your scale i.e. x 24 for 1/24 scale or 29 for 1/29 scale<br />
Page 14
The <strong>Garden</strong> <strong>Whistle</strong> - <strong>Apr</strong>il <strong>2012</strong><br />
Rosebrook Tunnel Rebuild<br />
Text & photos by Lee Collett (Carterton)<br />
Attached are photos of a major reconstruction<br />
of the Rosebrook tunnel lining. The photo below<br />
show the tunnel lining on a lean due to the<br />
weight of earth and rocks on top. Wagons<br />
were scraping one side of the tunnel. We<br />
found that<br />
the tunnel<br />
was leaning<br />
to the<br />
left.<br />
A new<br />
square tunnel<br />
liner<br />
was built.<br />
The following photos shows the construction<br />
work. It took about 4 hours to replace the old<br />
with the new lining. After it was finished the<br />
line was open and up and running. The second<br />
to last photo shows the first train through the<br />
tunnel pulling<br />
Christine’s<br />
new<br />
Swiss dairy<br />
container<br />
wagon.<br />
Digging out the old tunnel liner<br />
The new square one fitted<br />
First train through to test the clearance.<br />
The finished hill ready for plants to grow again<br />
Page 15
The <strong>Garden</strong> <strong>Whistle</strong> - <strong>Apr</strong>il <strong>2012</strong><br />
Chris Drowley’s Wagon ‘bashes<br />
The shortened carriage on the Tree Hutt Railway at Hutt Hospital<br />
By Chris Drowley (Wellington).<br />
Here are a couple of the “Train” wagons I have<br />
modified for a bit of fun.<br />
The shorty passenger car was a special for the<br />
Hutt Hospital “Tree Hutt Railway”. Two windows<br />
were removed from a Green Passenger<br />
Car. This was the maximum length that would<br />
navigate the track without touching the protective<br />
polycarb sides.<br />
Made from two tanks and a flat wagon<br />
The Tank Wagon was a<br />
play for myself. It was<br />
made using two red tank<br />
cars and a flat wagon. It<br />
only took a couple of hours<br />
to “bash” including painting.<br />
I used 3M Plastic primer<br />
and satin black spray<br />
paints purchased from SuperCheap.<br />
They gave an<br />
ultra quick dry and really<br />
good colour cover. The<br />
best part was you can glue<br />
this plastic with plumbers<br />
PVC guttering glue.<br />
Editor’s Note: “Train” is a<br />
new brand imported by<br />
Mack's Track (Wellington).<br />
Page 16
Beauchamp was my brother. Born<br />
15 years before me he was a much older<br />
brother who I had little to do with in<br />
the early years because of the age difference<br />
and living so far apart. Those<br />
who attended the Wairarapa Convention<br />
will have visited his <strong>Garden</strong> railway.<br />
Beauchamp was a farmer and a<br />
craftsman. When he semi retired to<br />
Masterton he started on OO gauge and<br />
built a large English theme layout. I<br />
recently relocated it and while it was<br />
never intended to be shifted, in the end<br />
it moving a lot easier than I expected.<br />
He also built three model boats including<br />
the Endeavour and the Bounty<br />
from scratch.<br />
The <strong>Garden</strong> <strong>Whistle</strong> - <strong>Apr</strong>il <strong>2012</strong><br />
Beauchamp Charles Dickens<br />
1930 - <strong>2012</strong><br />
In 2000 after I saw a TV program on<br />
<strong>Garden</strong> Railways I suggested he built<br />
one. I purchased a live steam locomotive<br />
and Beauchamp an LGB locomotive.<br />
He used some brass rail and<br />
welded together steel strips to make up<br />
a large section of the railway. He made<br />
all the turnouts and semaphore signals<br />
which where operated from the turnout controls.<br />
Beauchamp started casting concrete slabs from<br />
plastic sheet used as moulds and so many buildings<br />
and a castle were constructed. He later built<br />
a Mill and church from wood. The railway is the<br />
same length as a tennis court and 5 metres wide.<br />
It consists of a double loop. He also added a<br />
gondola and a model of the Laxey Water wheel<br />
from the Isle of Man.<br />
He started building his own wagons but soon<br />
was purchasing them. His locomotive and wagon<br />
collection soon expanded, mainly in the<br />
American outline style. He built many different<br />
box cars mainly to carry 12 volt batteries which<br />
powered most of his locomotives.<br />
When he tired of a particular type of locomotive<br />
he changed direction so going from steam<br />
outline to diesel. In steam he got Moguls, all<br />
Beauchamp Dickens on his Maples <strong>Garden</strong> Railway<br />
three main geared locomotives, a large 2-8-8-2<br />
Mallet and a K27 2-8-2 down to a LGB Tram<br />
and LINZ locomotive. He got both the Dash 9<br />
and Class 66 Diesel’s and then setup container<br />
trains representing USA and UK modern container<br />
trains. He also built a small bush tram and<br />
some box cars to go with the diesel locomotives.<br />
His most impressive build was the 4 truck Shay,<br />
Limas Class 150 Shay. This consisted of a<br />
standard 2 truck Shay with the extra Tender carrying<br />
the extra trucks. He was helped by this<br />
from a release of individual trucks by Bachmann.<br />
We used to visit each other alternatively each<br />
week and run our trains on each others layout.<br />
This encouraged us too keep everything up to<br />
scratch. I will greatly miss these running days<br />
with my brother.<br />
Lloyd Dickens<br />
Page 17
By Kevin Leigh (Christchurch)<br />
The <strong>Garden</strong> <strong>Whistle</strong> - November 2011<br />
The <strong>Garden</strong> <strong>Whistle</strong> - <strong>Apr</strong>il <strong>2012</strong><br />
NZR Chopper couplers 1/24<br />
( fabricated in brass )<br />
This article will briefly explain how I fabricated NZR style buffers for use on 1/24 scale or<br />
‘G’ gauge loco’s and rolling stock. They are not 100% accurate to the prototype ,but they work<br />
well and are convincing enough. They're inexpensive to build, using, readily available brass<br />
stock from the K&S stand.<br />
A<br />
1<br />
2<br />
K&S Brass Shapes<br />
1. 3/8” x 3/16” -hollow rectangle<br />
2. 5/32” x 5/32” -hollow square<br />
3. 1/8” x 1/8” -hollow/solid square<br />
4. 3/32” x 1/32” -strip<br />
5. 1/2” x 1/16” -strip,( to cut disc from) or .<br />
5b. 1/2” -round bar, (cut discs<br />
on lathe, or, by hand )<br />
6. 0.8mm -brass wire or equivalent<br />
7. 1/16” -brass rod / wire<br />
The buffer face, shown here was cut from a piece<br />
of 1/2 inch bar stock, with a 3.5mm hole bored<br />
into it. It can alternatively be made using 1/2” x<br />
1/16” flat strip and scribing 11.64mm circles and<br />
drilling out the 3.5mm hole, cutting out the disc<br />
with a piercing saw ,then filing the outer edge<br />
smooth. The curve on the buffer face can be<br />
formed once the whole buffer has been fabricated.<br />
For now we only need a disc with a hole in it.<br />
A<br />
slot<br />
3<br />
B<br />
4<br />
The buffer head was formed by taking the length<br />
of (3/8 x 3/16) hollow rectangle and drilling a series<br />
of 3.5mm through holes about 20mm apart.<br />
The hole on one side was then filed square to allow<br />
the (5/32 ) hollow square to fit in.<br />
A slot was made in the (5/32) hollow square only<br />
big enough to allow space to get a file into the gap<br />
later.<br />
Don’t file the slot smooth yet. The remaining side<br />
walls will be used to guide the 1/8 bar, and keep it<br />
square while on the soldering jig.<br />
A<br />
slot<br />
B<br />
The hollow (5/32) square was then inserted into the<br />
square hole in the (3/8 x 3/16) rectangle hollow<br />
and pushed right in.<br />
Once firmly seated the hollow square was trimmed<br />
off .<br />
Page 18
The <strong>Garden</strong> <strong>Whistle</strong> - <strong>Apr</strong>il <strong>2012</strong><br />
A<br />
5<br />
Soldering it all together<br />
A jig was made by taking a small block of wood.<br />
Into this was drilled a 1/8 hole into which was inserted<br />
a short length of 1/8 dowel .<br />
The buffer face is placed over the dowel to rest on the<br />
block of wood.<br />
Then place over this ,the hollow rectangle with the<br />
partly cut away and trimmed off square, check that all<br />
is arranged okay. Solder it all together with a hot iron.<br />
The wood will burn , avoid using MDF for the jig<br />
A<br />
Once soldered the buffer head was roughly trimmed<br />
off, then filed to give it some shape .<br />
The 1/8 square bar had a slot cut into it, once again to<br />
allow space to get a file in.<br />
6<br />
To ease the soldering ,and stop the assembly falling apart<br />
when heated, small balls of wet tissue paper can be placed<br />
around delicate parts to act as a heat sink, and keep parts<br />
in place<br />
A<br />
B<br />
The peg was changed in the<br />
jig to a much shorter one.<br />
The formed head was then<br />
placed back on the jig. The<br />
slotted 1/8 bar was the fed<br />
into the head<br />
A<br />
B<br />
C<br />
7<br />
8<br />
and pushed in to the face. The assembly was then<br />
checked for squareness . All was soldered in place<br />
with a hot iron .This forms the shank.<br />
To replicate mid production buffers ,a gusset was required.<br />
(Choose which is to be the top)<br />
For this the 3/32 x 1/32 strip was used. One end is<br />
filed square to fit then soldered in place ,the step is<br />
then repeated for the gusset on the other side.<br />
These were trimmed and filed to shape later when<br />
satisfied they were in the correct place.<br />
( this part of the exercise can be frustrating as parts<br />
may want to let go ,use of a heat sink and patience<br />
was required ,it all works out in the end)<br />
A strip op 3/32 x 1/32 strip was soldered to the bottom<br />
of the buffer head, two holes of 1mm were then<br />
drilled in it to provide a location for the bridle to fit.<br />
The ‘U’ was then cut out of the face and shaped.<br />
Page 19
The <strong>Garden</strong> <strong>Whistle</strong> - <strong>Apr</strong>il <strong>2012</strong><br />
9 10 11<br />
C<br />
1/16”<br />
12<br />
1/16” holes were made in the head for the coupling pin using the<br />
plan as a guide for their location. Then enlarged slightly.<br />
The bridle hoop was formed from a piece of 0.8mm wire bent over<br />
a 3/16” drill bit. This was made longer than it needed to be. The<br />
strip on the bottom of the bridle was made from 3/32 x 1/32 strip<br />
using the bottom bracket to mark the location for the o.8mm holes.<br />
It was then slid onto the bridle hoop and soldered in place. The<br />
hook will need to be made before the bridle can be fine tuned.<br />
13<br />
C<br />
.<br />
0.9mm hole<br />
For an early style buffer no gussets were<br />
fitted. 1/16 coupling holes were made in the<br />
same way. A 0.9mm hole was made through<br />
the back bottom corner of the head. The bridle<br />
was made from 0.8mm square brass<br />
which was made into a hoop in the same<br />
way over a 3/16” drill bit. The ends were<br />
folded over, soldered and shaped to form<br />
eyes with a 0.8mm hole made in both eyes.<br />
A 0.8mm piece of brass wire was then<br />
passed through a bridle eye through the<br />
buffer and out through the other<br />
eye ,soldered and trimmed. The bridle<br />
should move freely.<br />
14<br />
15<br />
1/16”<br />
collar<br />
0.5mm<br />
0.5mm<br />
.<br />
The coupling pins were made from 1/16” hollow tube.<br />
1/16 solid would have worked just as well.<br />
A slot was formed on the end and tidied up. Using some 1/16 aluminium<br />
hollow rod one end was crimped and filed flea and shaped<br />
until it fitted into the slot of the previous piece. When all fitted<br />
well a 0.5mm hole was made through the brass rod ,across the slot<br />
through the aluminium rod and out the other side. A 0.5mm brass<br />
wire was passed through the hole and soldered in place, trimmed<br />
and tidied up .<br />
A collar was made for the other end. After making sure that the<br />
pin was long enough to fit through the head a collar was soldered<br />
in place. A small chain was then soldered to this end which will<br />
later be attached to the head.<br />
Page 20
The <strong>Garden</strong> <strong>Whistle</strong> - <strong>Apr</strong>il <strong>2012</strong><br />
15<br />
A B C<br />
1.8mm<br />
5.4mm<br />
9.3mm<br />
16<br />
The hook was made from of 1/2 x 1/16 strip<br />
by reducing the drawing that I was using to<br />
1/24th scale on the photo copier . I t was then<br />
glued to the brass with PVA . When it was<br />
dry ,the hook was cut out and shaped with<br />
files.<br />
The hook still needed to be fine tuned when<br />
fitted to the buffer to ensure that when coupling<br />
to other rolling stock there weren’t going<br />
to be problems.<br />
It wasn’t too difficult to style an early type of<br />
hook from this same cut out.<br />
The side chain hooks were made in much the<br />
same way as the hook was made ,by reducing<br />
a photo to size, making copies and gluing<br />
them to the brass, cutting them out and filing<br />
them to shape. The chain was from Spotlight.<br />
These hooks should be<br />
about 1/24 th scale<br />
23mm<br />
25mm<br />
Cut slot in<br />
headstock<br />
to fit<br />
17<br />
2mm Nut<br />
To mount the buffers, a carrier was formed<br />
from 3/8 x 3/16 rectangle stock.<br />
The buffer was trimmed to 25mm. A small<br />
piece of 5/32 square was slid over the rear of<br />
the shank and soldered in place.<br />
A 1.6mm hole was drilled 23mm from the<br />
face and threaded with a 2mm tap.<br />
The rear of the shank was rounded off to allow<br />
it to move freely. A 2mm hole was made<br />
in the centre of the carrier at the rear for a<br />
2mm screw to pass through in to the shank.<br />
Washers were soldered to 2mm screws to<br />
form eyebolts. 2mm holes were made in the<br />
front of the carrier to allow for mounting to<br />
the headstock. A centring spring was made<br />
from phosphor bro<strong>nz</strong>e strip and soldered to<br />
the rear of the carrier.<br />
2mm Screw<br />
Washer soldered to<br />
screw to form eyebolt<br />
Slot cut for<br />
washer<br />
18<br />
19 20<br />
21<br />
Page 21
The <strong>Garden</strong> <strong>Whistle</strong> - <strong>Apr</strong>il <strong>2012</strong><br />
Ornamental arrangement<br />
22<br />
The slot in the front of the carrier was<br />
opened out to 11mm , this gave the coupler<br />
a 30 degree swing each way.<br />
The carrier slot can be altered to suit<br />
conditions .<br />
Alternatively a slotted guide can be made<br />
24<br />
23<br />
Screw<br />
5/32x5/32<br />
from 5/32 square and attached to the headstock<br />
and the buffer secured by other means<br />
behind the headstock.<br />
Such as the original coupler mounting<br />
point , if changing couplers on existing<br />
Rolling stock. In this case the shank stays at<br />
1/8 square .<br />
25<br />
26<br />
In this case a screw was passed through the original<br />
screw hole ,and the 5/32 square guide was<br />
used<br />
27<br />
Add sleeve if making the full carrier<br />
Leave sleeve off if just using the headstock<br />
guide and mounting to existing point.<br />
All of this is only a guide to how I have done<br />
this, you may choose to improve on this and<br />
enhance your own couplers .<br />
Page 22
The <strong>Garden</strong> <strong>Whistle</strong> - <strong>Apr</strong>il <strong>2012</strong><br />
As a follow on ,I will show how I fabricated a transition head to enable,<br />
Loco’s fitted with NZR buffers at scale height to couple to wagons that have Aristocraft<br />
or Bachmann knuckles.<br />
Kevin Leigh.<br />
Page 23
Auckland:<br />
Date TBA - Derek and June Lane, 10 Tiber Rd.,<br />
Forrest Hill.<br />
Club Contact: Auckland G Scale Society.<br />
C/- Michael Hilliar, 22 Halver Road, Manurewa, Auckland<br />
2102. Ph 09 266-4745 email: mhilliar@orcon.net.<strong>nz</strong><br />
The The <strong>Garden</strong> <strong>Whistle</strong> - November - May 2011 2011<br />
The <strong>Garden</strong> <strong>Whistle</strong> - March <strong>2012</strong><br />
Club Events and Contacts<br />
STOP PRESS: Just announced:<br />
8 th NZ <strong>Garden</strong> Railway<br />
Convention<br />
Waikato:<br />
Saturday 14 <strong>Apr</strong>il - Grant and Donna Alexander<br />
Cambridge 1863 State highway 1, Cambridge<br />
Saturday 5 May - Raynor Johnston, Horsham<br />
Downs. 147 Osborne Road, RD1<br />
Club Contact: GROW: <strong>Garden</strong> Railway Operators of Waikato!<br />
Grant Alexander, PO Box 1172, Cambridge. Ph 07 823-0059.<br />
gscale@clear.net.<strong>nz</strong><br />
To be based again at<br />
Tirimoana School Hall<br />
Glendene<br />
Auckland<br />
26 th and 27 th January 2013.<br />
(Auckland anniversary weekend)<br />
Wairarapa:<br />
Easter Sunday 8 <strong>Apr</strong>il - Jeremy Were, 423 High Street South, Carterton. 1:30pm<br />
Club Contact: Wairarapa <strong>Garden</strong> Railway Group. C/- Murray Clarke, 4 Taylor Street, Carterton. Ph 06 379 7659.<br />
Wellington:<br />
Sunday 15 <strong>Apr</strong>il - John Robinson, Tawa from 1:30pm<br />
Wednesday 2 May - BBC evening at Mack's Track Plimmerton Station from 7:30pm<br />
Sunday 13 May - Robin Gunston and Dave Allen, Whitby from 1:30pm<br />
Phone John for more details. 0274 427 160<br />
Club Contact: Wellington <strong>Garden</strong> Railway Group Incorporated. www.culcreuchfold.<strong>org</strong>.<strong>nz</strong>/wgrg.htm<br />
C/- John Robinson, PO Box 56039, Tawa, Wellington 5249 Ph 0274 427 160 wgtngardenrail@gmail.com<br />
Christchurch:<br />
Sunday 22 <strong>Apr</strong>il - AGM. Neil Wiggins. 172 Tuahiwi Road, Tuahiwi , North Canterbury. From 1pm.<br />
If running afternoon is cancelled due to rain, the AGM will be held at Don’s work at 2pm.<br />
Phone Neil to check if weather looks doubtful - Ph 03 313 1091<br />
AGM (starts 2pm). Positions to be filled:<br />
1. Chairperson/Secretary. 2.Treasurer. 3.Newsletter Editor.<br />
All running afternoon’s 1-4pm. If weather looks doubtful, please phone host to check if meeting is still on.<br />
Club Contact: Christchurch <strong>Garden</strong> Railway Society P.O. Box 7145, Christchurch 8240<br />
Chairperson: . Email:<br />
The <strong>Garden</strong> <strong>Whistle</strong> is published monthly by the Christchurch <strong>Garden</strong> Railway Society and features news<br />
from various G scale clubs in New Zealand.<br />
Each club is a separate identity and the contact details can be found above.<br />
Contributions of articles and/or photos are always welcome. Photos should be sent as separate jpg attachments.<br />
Editor: Glen Anthony. 59 Colombo Street, Christchurch 8022. Email: glen.bren@paradise.net.<strong>nz</strong><br />
Page 24