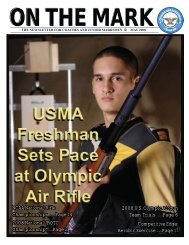
FALL 2011 - Civilian Marksmanship Program
FALL 2011 - Civilian Marksmanship Program
FALL 2011 - Civilian Marksmanship Program

You also want an ePaper? Increase the reach of your titles
YUMPU automatically turns print PDFs into web optimized ePapers that Google loves.
6<br />
SIGHT ADJUSTMENT AND ZEROING<br />
three shots on the<br />
target being used for<br />
new shooter training,<br />
then apply 20 clicks<br />
of elevation, shoot<br />
three more shots, go<br />
20 clicks left (or right),<br />
shoot three shots, go<br />
20 clicks down, shoot<br />
three shots, and<br />
finally, go 20 clicks<br />
right (or left) and<br />
shoot three shots.<br />
The last 6-shot group<br />
should be in the<br />
same location as the<br />
first group and the<br />
Sights sold with most rifles manufactured<br />
in other countries indicate<br />
the direction to move the shot/shot<br />
group based on where the shot<br />
group is located. If the shot group<br />
is “bei” or AT the right (R), turn the<br />
sight in that direction to move the<br />
shot group to the left.<br />
distances between the four shot groups should be<br />
relatively equal. You should then be able to use these<br />
distances to calculate the number of clicks per scoring<br />
ring that are required for that particular sight.<br />
Sight Knob Directions. After deciding which direction<br />
to move a shot group and how many clicks of<br />
change to make, the next step is to apply that adjustment<br />
to the correct sight knob. This, however, is<br />
where it gets tricky. Some sights move shot groups<br />
down when they are turned clockwise, while other<br />
sights move shot groups down when turned counterclockwise.<br />
The same goes for windage adjustments. To<br />
make matters worse, sights made in the USA usually<br />
show the direction the shot group will move when<br />
turned in the direction indicated by the arrow, while<br />
sights made in Europe have arrows indicating where<br />
the shot/shot group is located. These sights, which<br />
are common on precision target rifles, have arrows<br />
indicating that the shot/shot groups are AT the left/<br />
right (bei L or bei R) or are AT high or low (bei H or bei<br />
T). Thus, when a shot/shot group is AT the left (bei L),<br />
turn the knob in the direction indicated by the L arrow<br />
and the shot group will move to the right.<br />
The coach’s duty in this case is to examine each<br />
sight that will be used by shooters in the program so<br />
that you can clearly explain which direction to turn the<br />
sight knobs to move shot groups in the desired direction.<br />
For beginners, it is a good idea to make up small<br />
cards to give to each shooter for the rifle they are using<br />
that show which direction to turn the sights.<br />
CALCULATING SIGHT ADJUSTMENTS<br />
With an understanding of the basic principles of<br />
sight adjustment and how sights work, new shooters<br />
are ready to analyze their shot groups, calculate sight<br />
adjustments, apply those adjustments to their sights<br />
and test their calculations. The sight adjustment process<br />
follows these steps:<br />
1. Fire a Shot Group. The first step in sight<br />
adjustment is to fire a shot group. Beginners should<br />
start with 5-shot<br />
groups. As shooters<br />
acquire more skill,<br />
three or even twoshot<br />
groups can be<br />
used. Ultimately, a<br />
highly skilled shooter<br />
who can precisely<br />
call shots can make<br />
adjustments based<br />
on one shot, but<br />
that ability is several<br />
months of practice<br />
away for new shooters.<br />
At this stage, it is<br />
also best for shooters<br />
to fire their groups<br />
without attempting to<br />
use a spotting scope.<br />
That will come later.<br />
2. Analyze the<br />
Shot Group. After<br />
retrieving the target,<br />
determine where the<br />
center of the shot<br />
group is. If there is a<br />
flier that is clearly out<br />
of the group, disregard<br />
that shot and<br />
find the center of the<br />
good shots. Do this<br />
by drawing either a<br />
real or imaginary line<br />
through the group.<br />
The crossing point is<br />
the group center.<br />
Analyze Shot Group<br />
After firing a tight shot group, the<br />
next step in calculating sight adjustments<br />
is to determine where the<br />
center of the group is.<br />
Calculating Sight Changes<br />
After finding the group center,<br />
calculate the vertical and horizontal<br />
distances in scoring rings to the target<br />
center. For this shot group, the<br />
vertical distance is 2 rings (1/2 of<br />
the ten ring on this target is equal to<br />
one scoring ring distance) and the<br />
horizontal distance is 2 ½ rings.