Danfoss Link⢠BR Boiler Relay - Danfoss.com
Danfoss Link⢠BR Boiler Relay - Danfoss.com
Danfoss Link⢠BR Boiler Relay - Danfoss.com

You also want an ePaper? Increase the reach of your titles
YUMPU automatically turns print PDFs into web optimized ePapers that Google loves.
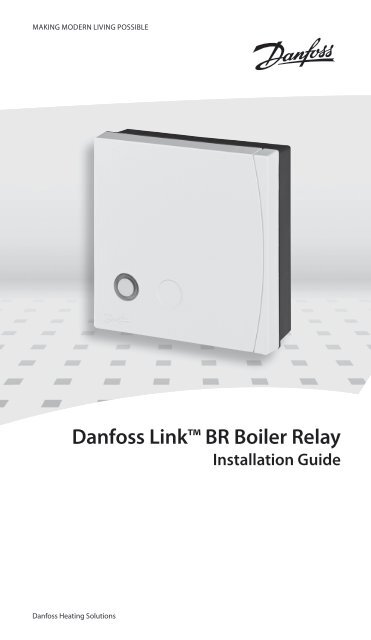
MAKING MODERN LIVING POSSIBLE<br />
<strong>Danfoss</strong> Link <strong>BR</strong> <strong>Boiler</strong> <strong>Relay</strong><br />
Installation Guide<br />
<strong>Danfoss</strong> Heating Solutions
Installation Guide<br />
<strong>Danfoss</strong> Link <strong>BR</strong><br />
Table of Contents<br />
Introduction. ................................................. 5<br />
Installation ................................................... 5<br />
Mounting .................................................... 5<br />
Wiring ....................................................... 6<br />
Adding the device ............................................ 6<br />
Configure <strong>Danfoss</strong> Link <strong>BR</strong>. ................................. 7<br />
Configure the <strong>BR</strong> Control Type ............................... 8<br />
Configure the <strong>BR</strong> Control Reference Room. ................... 9<br />
Perform network test . . . . . . . . . . . . . . . . . . . . . . . . . . . . . . . . . . . . . . . . 10<br />
Factory reset ............................................... 10<br />
Status indicator. ............................................ 10<br />
Technical specifications. .................................... 11<br />
Disposal instructions ....................................... 11<br />
Important information<br />
For safety reasons the heating system must have a bypass<br />
function. This is either built into the boiler or it must be<br />
installed in the system.<br />
Demount other heating control timers in the installation or<br />
they will interfere with the <strong>Danfoss</strong> Link heating control<br />
algorithm. If weather <strong>com</strong>pensation is present it should be set<br />
to constant <strong>com</strong>fort.<br />
2 VIFZM202 © <strong>Danfoss</strong> 04/2012
Installation Guide<br />
<strong>Danfoss</strong> Link <strong>BR</strong><br />
Introduction<br />
The <strong>Danfoss</strong> Link <strong>BR</strong> (<strong>Boiler</strong> <strong>Relay</strong>) is a device for turning<br />
gas and oil boilers ON/OFF depending on heating demand.<br />
The <strong>Danfoss</strong> Link <strong>BR</strong> is powered by 230 V~.<br />
Installation<br />
The <strong>Danfoss</strong> Link wireless system’s transmission range is sufficient<br />
for most applications; however each building has different<br />
obstacles affecting <strong>com</strong>munication and maximum transmission<br />
distance.<br />
If <strong>com</strong>munication problems occur <strong>Danfoss</strong> suggests that accessories<br />
would be required to support the system, such as repeaters.<br />
In exceptional cases the wireless system may not be suitable for<br />
your installation.<br />
Be aware that installation and placement must be<br />
according to local building regulations.<br />
Mounting<br />
VIFZM202 © <strong>Danfoss</strong> 04/2012<br />
3
Installation Guide<br />
<strong>Danfoss</strong> Link <strong>BR</strong><br />
Wiring<br />
<strong>Danfoss</strong> Link <strong>BR</strong><br />
Electronics<br />
N L 1 2 3 4<br />
230 V AC<br />
Remove<br />
jumper<br />
if fitted<br />
<strong>Boiler</strong> ON/OFF terminals<br />
Note: Refer to boiler manufacturer’s manual for wiring connections<br />
to the boiler.<br />
Adding the device<br />
The process of adding the <strong>Danfoss</strong> Link <strong>BR</strong><br />
to a system is performed on the <strong>Danfoss</strong><br />
Link CC.<br />
Note that the <strong>Danfoss</strong> Link <strong>BR</strong><br />
must be added as a Service<br />
Device.<br />
When adding, press and<br />
release the install button,<br />
and observe that the LED<br />
gives a fast green flash.<br />
If adding is successful the LED turns green permanently.<br />
For further information, see the <strong>Danfoss</strong> Link CC instruction<br />
manual.<br />
Note: If adding the <strong>Danfoss</strong> Link <strong>BR</strong> to the <strong>Danfoss</strong> Link CC is<br />
unsuccessful, make sure the right <strong>Danfoss</strong> Link CC software<br />
version is applied. Correct version: 2.3.27 or higher.<br />
4 VIFZM202 © <strong>Danfoss</strong> 04/2012
Installation Guide<br />
<strong>Danfoss</strong> Link <strong>BR</strong><br />
Configure <strong>Danfoss</strong> Link TM <strong>BR</strong><br />
Select “Manage Devices” in<br />
“Rooms and Devices”.<br />
Select “Configure Device”.<br />
Select Device to configure<br />
Press “Configure Heating” to<br />
bring up the heating configuration,<br />
which will show the<br />
current heating preferences<br />
and allow them to be edited<br />
by pressing the buttons.<br />
VIFZM202 © <strong>Danfoss</strong> 04/2012<br />
5
Installation Guide<br />
<strong>Danfoss</strong> Link <strong>BR</strong><br />
Configure the <strong>BR</strong> Control Type<br />
Press the “Select Type”<br />
button.<br />
Select one of the modes.<br />
Default <strong>BR</strong> setting is<br />
“Automatic On/Off”.<br />
Automatic On/Off:<br />
The boiler is only ON when there is heat demand from a<br />
reference room in the system. Re<strong>com</strong>mended for modulating<br />
boilers and non-condensing boilers.<br />
TPI (Time Proportional Interval):<br />
A duty cycle is calculated and used to control the boiler.<br />
• 6 cycles/hour is re<strong>com</strong>mended for condensing non-modulating<br />
gas boilers.<br />
• 3 cycles/hour is re<strong>com</strong>mended for condensing non-modulating<br />
oil boilers.<br />
Note: If the installation has a mixing shunt for floor heating, it is<br />
re<strong>com</strong>mended to adjust the set point temperature as high as<br />
needed on the coldest day of the year. The TPI control will lower<br />
the supply line temperature to the necessary level needed at all<br />
time. TPI is implemented in <strong>Danfoss</strong> Link CC software version<br />
2.4.x or higher.<br />
6 VIFZM202 © <strong>Danfoss</strong> 04/2012
Installation Guide<br />
<strong>Danfoss</strong> Link <strong>BR</strong><br />
Always On:<br />
The boiler is kept ON regardless of heat demands.<br />
Configure the <strong>BR</strong> Control Reference Room<br />
From the “Configure Heating” screen it is possible to select the<br />
control reference (i.e. the boiler will be turned ON if any of the<br />
selected rooms call for heat). By default all rooms are selected.<br />
Press the “Select Rooms”<br />
button.<br />
Any number of rooms can be<br />
selected for use as reference.<br />
Room include/exclude is toggled<br />
simply by pressing the<br />
room-button.<br />
VIFZM202 © <strong>Danfoss</strong> 04/2012<br />
7
Installation Guide<br />
<strong>Danfoss</strong> Link <strong>BR</strong><br />
Perform network test<br />
Once the <strong>Danfoss</strong> Link <strong>BR</strong> and all other<br />
devices in the system have been registered<br />
and the <strong>Danfoss</strong> Link CC is placed in its<br />
final position, perform a network test (see<br />
separate <strong>Danfoss</strong> Link CC manual).<br />
Note: If the connection to the <strong>Danfoss</strong> Link CC<br />
is lost for more than 1½ hour, the <strong>Danfoss</strong><br />
Link <strong>BR</strong> will go into safety mode. In this<br />
mode the boiler will be turned ON continuously.<br />
Factory reset<br />
Turn off the power to the device, then press and hold the install<br />
button in front of the device for approx. 5 sec. while the power<br />
is switched on again. The button must be held until LED gives a<br />
red flash.<br />
Status indicator<br />
Green LED ON<br />
Red LED ON<br />
Green LED fast flash<br />
Green LED short flash<br />
Red LED slow flash<br />
<strong>Relay</strong> OFF/Standby<br />
<strong>Relay</strong> ON/Heating<br />
Adding or link test<br />
Ready for adding<br />
Adding not OK<br />
Link test not OK<br />
Safe State Active<br />
8 VIFZM202 © <strong>Danfoss</strong> 04/2012
Installation Guide<br />
<strong>Danfoss</strong> Link <strong>BR</strong><br />
Technical specifications<br />
Operation voltage<br />
230 V AC, 50 Hz<br />
Standby consumption 1.6 W<br />
Load<br />
3 amps resistive<br />
1 amp inductive<br />
Rated impulse voltage 2.5 kV<br />
Switching<br />
Type 1B<br />
Regulation<br />
ON/OFF<br />
Ambient temperature 0˚ to +45˚C<br />
Transmission frequency Wireless Z-wave 868.42 MHz<br />
Transmission range in<br />
normal buildings<br />
Up to 30 m<br />
Transmission power Max. 1 mW<br />
Pollution situation Degree 2<br />
Ball pressure test<br />
75˚C<br />
Software classification Class A<br />
IP class 40<br />
Dimensions<br />
84 × 84 × 30 mm<br />
Disposal instructions<br />
VIFZM202 © <strong>Danfoss</strong> 04/2012<br />
9
Installation Guide<br />
<strong>Danfoss</strong> Link <strong>BR</strong><br />
10 VIFZM202 © <strong>Danfoss</strong> 04/2012
Installation Guide<br />
<strong>Danfoss</strong> Link <strong>BR</strong><br />
VIFZM202 © <strong>Danfoss</strong> 04/2012<br />
11
<strong>Danfoss</strong> A/S<br />
Heating Solutions<br />
Haarupvaenget 11<br />
8600 Silkeborg<br />
Denmark<br />
Phone: +45 7488 8000<br />
Fax: +45 7488 8100<br />
Email: heating.solutions@danfoss.<strong>com</strong><br />
www.heating.danfoss.<strong>com</strong><br />
90055v01s1-00 VIFZM202 © <strong>Danfoss</strong> 04/2012