PushFast Brochure - Plastic Systems
PushFast Brochure - Plastic Systems
PushFast Brochure - Plastic Systems

You also want an ePaper? Increase the reach of your titles
YUMPU automatically turns print PDFs into web optimized ePapers that Google loves.
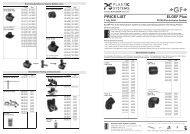
Jointing Procedure<br />
It is important to remember that the performance of the Push-Fast joint is dependant on the efficiency of the seal between<br />
the elastromeric sealing ring, the pipe and the socket. Damage to the pipe or fitting or the presence of dirt or grit will<br />
adversely affect the performance of the joint.<br />
Factory fitted protective packaging should be left in position until the components are ready for use.<br />
1<br />
Remove protectors from spigots and sockets and inspect for damage, paying particular attention to any scoring of the<br />
spigot. Scored spigots must be cut back to an undamaged section.<br />
Pipe Insertion Depth<br />
Pipe Size Insertion Depth<br />
(mm)<br />
(mm)<br />
90 155<br />
110 130<br />
125 145<br />
160 195<br />
180 200<br />
225 230<br />
250 250<br />
7<br />
Apply the DuraFuse Push-Fast lubricant, spray or gel to the spigot, grip ring and the elastromeric<br />
sealing ring in the socket. Typical usage of lubricant is as follows:<br />
2<br />
Push-Fast pipes are supplied with a factory machine chamfer. Any site cut pipes should be cut square and similarly<br />
chamfered. The quality of the chamfer is important to ensure the seal performs optimally.<br />
Pipe Size<br />
Number of Joints<br />
(mm) per 400g Spray/ 500g Gel<br />
90 100<br />
110 80<br />
125 60<br />
160 30<br />
180 30<br />
225 25<br />
250 20<br />
3<br />
4<br />
5<br />
6<br />
Inspect the elastromeric sealing ring and the respective locating grooves for any damage and replace if necessary.<br />
If dirt or grit is present, the seal must be removed and the seal groove and socket thoroughly cleaned of all foreign<br />
matter before replacing the seal.<br />
Inspect the grip ring as above and remove any foreign particles without removing the grip ring from the socket groove.<br />
Once all components are clean, it is important to ensure they remain clean by replacing protectors or plastic bags over<br />
the ends unless jointing is to be carried out immediately.<br />
The spigot ends of any site cut pipes should be marked with the insertion depth, using a suitable pipe marker:<br />
8<br />
Excessive use of lubricant on the joint may prevent the joint from locking correctly, particularly if<br />
the lubricant is highly viscous in texture. We supply a recommended silicon lubricant and gel<br />
suited for this application.<br />
Align the pipe and fitting and enter the spigot into the mouth of the socket. Apply sufficient force<br />
to the end of the pipe/fitting remote from the joint so that the spigot enters the socket up to the<br />
marked insertion depth. Smaller sized pipe and fittings should be entered using hand-applied force,<br />
where assistance of a crowbar and a wooden block may be necessary for larger sizes.