Training Manual for NTCIP Based TS2 / 2070 Controllers - HART
Training Manual for NTCIP Based TS2 / 2070 Controllers - HART
Training Manual for NTCIP Based TS2 / 2070 Controllers - HART

Create successful ePaper yourself
Turn your PDF publications into a flip-book with our unique Google optimized e-Paper software.
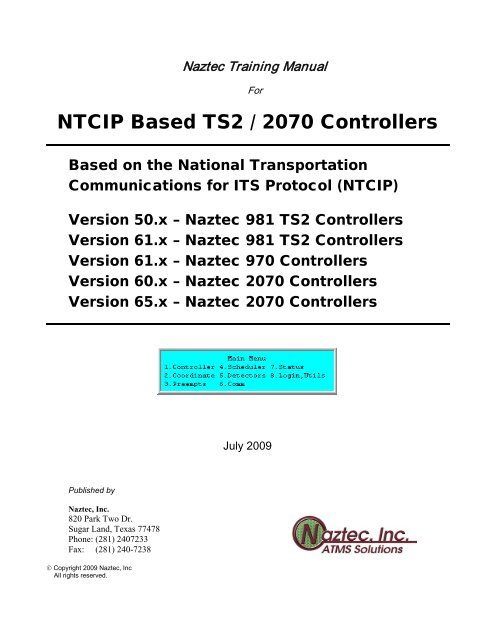
Naztec <strong>Training</strong> <strong>Manual</strong><br />
For<br />
<strong>NTCIP</strong> <strong>Based</strong> <strong>TS2</strong> / <strong>2070</strong> <strong>Controllers</strong><br />
<strong>Based</strong> on the National Transportation<br />
Communications <strong>for</strong> ITS Protocol (<strong>NTCIP</strong>)<br />
Version 50.x – Naztec 981 <strong>TS2</strong> <strong>Controllers</strong><br />
Version 61.x – Naztec 981 <strong>TS2</strong> <strong>Controllers</strong><br />
Version 61.x – Naztec 970 <strong>Controllers</strong><br />
Version 60.x – Naztec <strong>2070</strong> <strong>Controllers</strong><br />
Version 65.x – Naztec <strong>2070</strong> <strong>Controllers</strong><br />
July 2009<br />
Published by<br />
Naztec, Inc.<br />
820 Park Two Dr.<br />
Sugar Land, Texas 77478<br />
Phone: (281) 2407233<br />
Fax: (281) 240-7238<br />
© Copyright 2009 Naztec, Inc<br />
All rights reserved.
Naztec Terms of Use Agreement<br />
USE OF THIS NAZTEC, INC. SOFTWARE MANUAL IS SUBJECT TO THESE TERMS OF USE.<br />
Agreement<br />
Please read this User Agreement carefully be<strong>for</strong>e using the in<strong>for</strong>mation provided in this <strong>Manual</strong>. This Agreement explains the terms and<br />
conditions governing the use of this <strong>Manual</strong> ("Terms of Use"), and it is your responsibility to read and understand them. By using the <strong>Manual</strong><br />
you expressly agree to be bound by these Terms of Use and to follow them as well as all applicable laws and regulations governing the<br />
<strong>Manual</strong>. If you do not agree to be bound by these Terms of Use, you may not access or use this <strong>Manual</strong>. Naztec, Inc. reserves the right to<br />
change these Terms of Use at any time, effective immediately upon posting the <strong>Manual</strong> from our company website. By continuing to use the<br />
<strong>Manual</strong> after we post any such change, you accept the revised Terms of Use. If you violate these Terms of Use, Naztec, Inc. may terminate<br />
your use of the <strong>Manual</strong>, bar you from future use of the <strong>Manual</strong>, and take appropriate legal action against you.<br />
Permitted Use<br />
You agree that you are only authorized to read, view and retain a copy of pages of this <strong>Manual</strong> <strong>for</strong> your own personal use, and that you will<br />
not duplicate, download, publish, modify or otherwise distribute the material on this <strong>Manual</strong> <strong>for</strong> any purpose other than to review product<br />
in<strong>for</strong>mation <strong>for</strong> personal use or the use of a government or non-profit organization.<br />
No Commercial Use<br />
Users may not use this <strong>Manual</strong> <strong>for</strong> any commercial purposes such as to sell merchandise or services of any kind. You must obtain our prior<br />
written consent to make commercial offers of any kind, whether by advertisements, solicitations, links, or by any other <strong>for</strong>m of<br />
communication. Naztec, Inc. will investigate and take appropriate legal action against anyone who violates this provision.<br />
Copyright<br />
All content included on this <strong>Manual</strong>, including text, graphics, logos, icons, images, and software is the property of Naztec, Inc. or its content<br />
suppliers and is protected by United States and international copyright laws. This compilation (that is, the collection, arrangement and<br />
assembly) of all content on this <strong>Manual</strong> is the exclusive property of Naztec, Inc. and is protected by U.S. and international copyright laws.<br />
Naztec, Inc. reserves the right to revise the pages of the <strong>Manual</strong> or withdraw access to them at any time.<br />
Trademarks<br />
The Naztec logo and trademarks that appear throughout the <strong>Manual</strong> belong to Naztec, Inc., its affiliates or third party trademark owners, and<br />
are protected by U.S. and international trademark laws. Without Naztec Inc express prior written permission, you may not display or use in<br />
any manner, the Naztec logos or trademarks. Nothing in this <strong>Manual</strong> shall be construed as granting any license or other right to the<br />
intellectual property or other proprietary rights of Naztec, Inc., its affiliates or any third party, whether by estoppels, implication or otherwise.<br />
All contents of the <strong>Manual</strong> are: © Copyright 2000 Naztec, Inc. or its licensors. All Rights Reserved.<br />
Disclaimer of Warranty<br />
YOU UNDERSTAND AND EXPRESSLY AGREE THAT YOUR USE OF THE MANUAL AND THE INFORMATION FOUND THERE<br />
IS ENTIRELY AT YOUR RISK. NAZTEC, INC. AND ITS AFFILIATES AND LICENSORS MAKE NO WARRANTIES OR ANY<br />
REPRESENTATIONS OF ANY KIND, EITHER EXPRESS OR IMPLIED, INCLUDING BUT NOT LIMITED TO WARRANTIES OF<br />
TITLE OR NON-INFRINGEMENT OR IMPLIED WARRANTIES OF MERCHANTABILITY, FITNESS FOR A PARTICULAR<br />
PURPOSE, NON-INFRINGEMENT OR OTHER VIOLATION OF RIGHTS IN RELATION TO THE AVAILABILITY, ACCURACY,<br />
VALIDITY, COMPLETENESS, RELIABILITY OR CONTENT OF THESE PAGES AND/OR THE MANUAL. NAZTEC, INC. SHALL<br />
NOT BE LIABLE FOR ANY DIRECT, INDIRECT, INCIDENTAL, SPECIAL OR CONSEQUENTIAL DAMAGES, LOST PROFITS OR<br />
FOR BUSINESS INTERRUPTION ARISING OUT OF THE USE OF OR INABILITY TO USE THIS MANUAL, EVEN IF NAZTEC,<br />
INC. HAS BEEN ADVISED OF THE POSSIBILITY OF SUCH DAMAGES. TO THE MAXIMUM EXTENT PERMITTED BY LAW,<br />
YOU HEREBY RELEASE AND FOREVER WAIVE ANY AND ALL CLAIMS YOU MAY HAVE AGAINST NAZTEC, INC., ITS<br />
AFFILIATES AND LICENSORS FROM LOSSES OR DAMAGES YOU SUSTAIN IN CONNECTION WITH YOUR USE OF THE<br />
MANUAL.<br />
SOME JURISDICTIONS DO NOT ALLOW EXCLUSION OF CERTAIN WARRANTIES OR LIMITATIONS OF LIABILITY, SO THE<br />
ABOVE LIMITATIONS OR EXCLUSIONS MAY NOT APPLY TO YOU. THE LIABILITY OF NAZTEC, INC. WOULD IN SUCH<br />
CASE BE LIMITED TO THE GREATEST EXTENT PERMITTED BY LAW.<br />
Applicable Law<br />
These Terms of Use and all legal issues related to the <strong>Manual</strong> shall be governed by the laws of the State of Texas, without regard to conflict<br />
of laws principles. You agree that any dispute involving these terms of use or this <strong>Manual</strong> will be heard in a court with jurisdiction in Fort<br />
Bend County, Texas. You further agree that the prevailing party in any legal action will be entitled to recover its reasonable attorneys fees<br />
incurred in connection with that action. If <strong>for</strong> any reason a court of competent jurisdiction finds any provision of these Terms of Use to be<br />
unen<strong>for</strong>ceable, the remaining terms will continue in full <strong>for</strong>ce and effect.<br />
Entire Agreement<br />
These Terms of Use are the final and entire agreement between you and Naztec, Inc. with respect to this subject and replace any and prior or<br />
contemporaneous understandings or agreements, written or oral, regarding the subject matter. Any waiver of any provision of these Terms of<br />
Use shall be effective only if in writing and signed by an authorized representative of Naztec, Inc.<br />
Naztec <strong>NTCIP</strong> <strong>Based</strong> NEMA <strong>TS2</strong> and <strong>2070</strong> Controller <strong>Manual</strong> – July 2009 Page 1-2
Table of Contents<br />
1 INTRODUCTION ............................................................................................................................................................. 1-8<br />
2 GETTING STARTED ...................................................................................................................................................... 2-9<br />
2.1 <strong>TS2</strong> OPERATING MODES .................................................................................................................................................... 2-9<br />
2.2 <strong>2070</strong> OPERATING MODES ................................................................................................................................................... 2-9<br />
2.3 HARDWARE I/O DIFFERENCES BETWEEN NEMA <strong>TS2</strong> AND TEES <strong>2070</strong> CONTROLLERS .................................................... 2-9<br />
2.4 DIFFERENCES BETWEEN NEMA <strong>TS2</strong> AND <strong>2070</strong> I/O PORTS ............................................................................................... 2-9<br />
2.5 DATABASE INITIALIZATION AND PHASE MODE SELECTION ............................................................................................. 2-10<br />
3 INTERFACE & NAVIGATION .................................................................................................................................... 3-11<br />
3.1 KEYBOARD AND DISPLAY ................................................................................................................................................ 3-11<br />
3.1.1 Naztec “Plus” Features ........................................................................................................................................... 3-11<br />
3.1.2 Left and Right Menu Indicators and Cursor Movement ........................................................................................... 3-11<br />
3.1.3 Audible Tones ........................................................................................................................................................... 3-12<br />
3.1.4 Entry Field Types ..................................................................................................................................................... 3-12<br />
3.1.5 Function Keys ........................................................................................................................................................... 3-12<br />
3.1.6 Alternate Functions .................................................................................................................................................. 3-13<br />
4 BASIC CONTROLLER OPERATION ........................................................................................................................ 4-15<br />
4.1.1 Phases Modes of Operation (MM->1->1) ............................................................................................................... 4-15<br />
4.1.2 Vehicle Actuated Mode ............................................................................................................................................. 4-15<br />
4.1.3 Volume Density Mode .............................................................................................................................................. 4-16<br />
4.1.4 Pedestrian Actuated Mode ....................................................................................................................................... 4-17<br />
4.1.5 Phase Times (MM->1->1->1) ................................................................................................................................. 4-18<br />
4.1.6 Phase Options (MM->1->1->2) .............................................................................................................................. 4-20<br />
4.1.7 Phase Options+ (MM->1->1->3) ........................................................................................................................... 4-21<br />
4.1.8 Call, Inhibit, Redirect (MM->1->1->5) ................................................................................................................... 4-24<br />
4.1.9 Alternate Phase Programs (MM->1->1->6) ........................................................................................................... 4-24<br />
4.1.10 [v60][v61][v65] Times+ (MM->1->1->7) ................................................................................................................ 4-25<br />
4.1.11 Copy Phase Utility (MM->1->1->8) ..................................................................................................................... 4-26<br />
4.1.12 Advance Warning Beacon (MM->1->1->9) .......................................................................................................... 4-26<br />
4.2 RINGS, SEQUENCES AND CONCURRENCY ......................................................................................................................... 4-27<br />
4.2.1 Ring Sequence (MM->1->2->4) .............................................................................................................................. 4-27<br />
4.2.2 Ring, Concurrency, Startup (MM->1->1->4) .......................................................................................................... 4-28<br />
4.2.3 Phase Assignments and Sequences <strong>for</strong> STD8 Operation .......................................................................................... 4-29<br />
4.2.4 How Barriers Affect the Phase Timing in Each Ring Under STD8 .......................................................................... 4-30<br />
4.2.5 USER Mode - 16 Phase Sequential Operation ......................................................................................................... 4-30<br />
4.2.6 Ring Parameters+ (MM->1->2->5) ........................................................................................................................ 4-30<br />
4.3 OVERLAPS (MM->1->5) .................................................................................................................................................. 4-31<br />
4.3.1 General Overlap Parameters (MM->1->5->1) ....................................................................................................... 4-31<br />
4.3.2 Overlap Program Selection and Configuration (MM->1->5->2) ........................................................................... 4-32<br />
4.4 OVERLAP TYPES ............................................................................................................................................................... 4-33<br />
4.4.1 <strong>NTCIP</strong> Overlap Type: Normal (NORMAL) .............................................................................................................. 4-33<br />
4.4.2 <strong>NTCIP</strong> Overlap Type: Minus Green Yellow (-GrnYel) ............................................................................................ 4-34<br />
4.4.3 Naztec Overlap Type: Left Turn Permissive (L-PERM) ........................................................................................... 4-34<br />
4.4.4 Naztec Overlap Type: Flashing Red (FL-RED) ....................................................................................................... 4-35<br />
4.4.5 Naztec Overlap Type: FAST FL ............................................................................................................................... 4-35<br />
4.4.6 Naztec Overlap Type: Right Turn (R-TURN) ........................................................................................................... 4-36<br />
4.4.7 Naztec Overlap Type: Ped Overlap (Ped-1)............................................................................................................. 4-36<br />
4.4.8 Naztec Overlap Type: Min Green (Ped-1) ............................................................................................................... 4-37<br />
4.4.9 Naztec Overlap Type: Minus Walk (-WALK) [v61] ................................................................................................. 4-37<br />
4.4.10 Naztec Overlap Type: R-T,ILL [v61] ..................................................................................................................... 4-37<br />
4.5 OVERLAP PLUS MENU (MM->1->5->2->2) ..................................................................................................................... 4-38<br />
4.5.1 Overlap Plus Menu specific to Version 61.x ............................................................................................................ 4-38<br />
4.5.2 Overlap Plus menu specific to Version 65.x ............................................................................................................. 4-38<br />
4.6 ADDITIONAL OVERLAP FEATURES ................................................................................................................................... 4-39<br />
4.6.1 [v60][v61][v65] Lead Green Feature .......................................................................................................................... 4-39<br />
4.6.2 [v61] Delay ................................................................................................................................................................ 4-39<br />
Naztec <strong>NTCIP</strong> <strong>Based</strong> NEMA <strong>TS2</strong> and <strong>2070</strong> Controller <strong>Manual</strong> – July 2009 Page 1-3
4.6.3 [v60][v65] Green Extension Inhibit (GreenExtInh) .................................................................................................... 4-39<br />
4.6.4 [v65] Transit .............................................................................................................................................................. 4-39<br />
4.7 FLASHING YELLOW ARROWS USING OVERLAPS ............................................................................................................... 4-40<br />
4.7.1 Version 61.x Flashing Yellow Overlap Programming ............................................................................................. 4-41<br />
4.7.2 Ver. 65.x Flashing Yellow Overlap Programming ................................................................................................... 4-43<br />
4.8 OVERLAP STATUS DISPLAY (MM->1->5->3) .................................................................................................................. 4-43<br />
4.9 AUTOMATIC FLASH (MM->1->4) .................................................................................................................................... 4-44<br />
4.9.1 Flash Parameters (MM->1->4->1) ......................................................................................................................... 4-44<br />
4.9.2 Ø / Overlap Flash Settings (MM->1->4->2) ........................................................................................................... 4-45<br />
4.10 EVENTS AND ALARMS (MM->1->6->4) ......................................................................................................................... 4-46<br />
4.10.1 Pattern / Preempt Events (MM->1->6->7) [v50][v61] (MM->1->6->7->1) [v65] ............................................ 4-46<br />
4.10.2 The Events Buffer (MM->1->6->2) ....................................................................................................................... 4-47<br />
4.10.3 The Alarms Buffer (MM->1-6->5) ......................................................................................................................... 4-47<br />
4.10.4 Clear Event and Alarm Buffers. ............................................................................................................................. 4-47<br />
4.10.5 The Detector Events Buffer (MM->1->6->9) ........................................................................................................ 4-48<br />
4.11 PREDEFINED EVENT / ALARM FUNCTIONS...................................................................................................................... 4-48<br />
4.12 ENABLE RUN TIMER (MM17) ................................................................................................................................ 4-48<br />
4.13 [V61] TEMPERATURE ALERT (MM18) .................................................................................................................... 4-48<br />
4.13.1 Temp Setup (MM181) ................................................................................................................................. 4-48<br />
4.13.2 Temp Status (MM182) ................................................................................................................................ 4-48<br />
4.14 UNIT PARAMETERS (MM->1->2->1) ............................................................................................................................. 4-49<br />
5 DETECTION ................................................................................................................................................................... 5-53<br />
5.1 DETECTOR PROGRAMMING (MM->5) .............................................................................................................................. 5-53<br />
5.1.1 Vehicle Parameters (MM->5->1, Left Menu) .......................................................................................................... 5-53<br />
5.1.2 Detector Diagnostic Vehicle Parameters (MM->5->1, Right Menu) ...................................................................... 5-54<br />
5.1.3 Vehicle Options (MM->5->2, Left Menu) ................................................................................................................ 5-54<br />
5.1.4 Vehicle Options (MM->5->2, Right Menu) ............................................................................................................. 5-55<br />
5.1.5 Vehicle Parameters+ (MM->5->3) ......................................................................................................................... 5-56<br />
5.1.6 [v60][v61][v65] Queue Detector Programming .......................................................................................................... 5-57<br />
5.1.7 Pedestrian Parameters (MM->5->4) ....................................................................................................................... 5-57<br />
5.2 ALTERNATE DETECTOR PROGRAMS (MM->5->5) ........................................................................................................... 5-58<br />
5.3 [V60][V61][V65] PHASE RECALL MENU (MM->5->6) ......................................................................................................... 5-58<br />
5.4 DETECTOR STATUS SCREENS (MM->5->7) ...................................................................................................................... 5-59<br />
5.4.1 Vehicle Detection Status (MM->5->7->1 and MM->5->7->2) .............................................................................. 5-59<br />
5.4.2 Pedestrian Detection Status (MM->5->7->3) ......................................................................................................... 5-59<br />
5.4.3 [v60][v61][v65] Detector Delay, Extend Status (MM->5->7->4) .............................................................................. 5-60<br />
5.4.4 Vol/Occ Real-Time Sample (MM->5->7->5) .......................................................................................................... 5-60<br />
5.4.5 [v60][v61][v65] Speed Sample (MM->5->7->6) ........................................................................................................ 5-60<br />
5.5 [V60][V61][V65] VOLUME / OCCUPANCY PARAMETERS ....................................................................................................... 5-61<br />
5.5.1 Volume and Occupancy Period (MM->5->8->1) .................................................................................................... 5-61<br />
5.5.2 [v60][v61][v65] Speed Detectors (MM->5->8->2) ..................................................................................................... 5-61<br />
5.5.3 [v65] Speed Thresholds (MM->5->8->3) ................................................................................................................ 5-61<br />
6 BASIC COORDINATION ............................................................................................................................................. 6-62<br />
6.1 OVERVIEW OF THE COORDINATION MODULE ................................................................................................................... 6-62<br />
6.2 COORDINATION MODES ................................................................................................................................................... 6-62<br />
6.2.1 Coordination Modes (MM->2->1, Left Menu) ........................................................................................................ 6-62<br />
6.2.2 Coordination Modes+ (MM->2->1, Right Menu) ................................................................................................... 6-63<br />
6.3 PATTERN TABLE (MM->2->4) ......................................................................................................................................... 6-67<br />
6.4 SPLIT TABLES FOR <strong>NTCIP</strong> MODES FIXED AND FLOAT (MM->2->7) ........................................................................... 6-67<br />
6.4.1 Accessing the Split Tables (MM->2->7) .................................................................................................................. 6-67<br />
6.4.2 Programming Each <strong>NTCIP</strong> Split Tables <strong>for</strong> Fixed & Float ..................................................................................... 6-68<br />
6.5 EASY CALCS GENERATED FOR <strong>NTCIP</strong> MODES FIXED AND FLOAT .............................................................................. 6-69<br />
6.5.1 [v61] Permissive Periods For <strong>NTCIP</strong> FIXED and FLOAT ....................................................................................... 6-69<br />
6.6 TRANSITION, COORD Ø+ (MM->2->5) ............................................................................................................................ 6-70<br />
6.6.1 Transition Parameters (Left Menu) .......................................................................................................................... 6-70<br />
6.6.2 Yield Point Adjustments, Return Hold and Offset Reference (Right Menu) ............................................................. 6-71<br />
6.6.3 Coord Yield and Early Yield Adjustments ................................................................................................................ 6-72<br />
6.7 RECALLING PEDS WITH REST-IN-WALK .......................................................................................................................... 6-73<br />
6.8 MAXIMUM PHASE TIMING USING FIXED FORCE-OFFS .................................................................................................... 6-73<br />
6.9 ALTERNATE TABLES+ (MM->2->6) ................................................................................................................................ 6-74<br />
Naztec <strong>NTCIP</strong> <strong>Based</strong> NEMA <strong>TS2</strong> and <strong>2070</strong> Controller <strong>Manual</strong> – July 2009 Page 1-4
6.10 EXTERNAL I/O (MM->2->2) .......................................................................................................................................... 6-74<br />
6.11 COORDINATION STATUS DISPLAYS (MM->2->8) ........................................................................................................... 6-74<br />
6.11.1 Coordination Overview Status Screen (MM->2->8->1) ....................................................................................... 6-74<br />
6.11.2 Easy Calcs Status Screen (MM->2->8->2) ........................................................................................................... 6-78<br />
6.11.3 [v50][v60][v61] CIC Calcs Status Screen (MM->2->8->3) ...................................................................................... 6-78<br />
6.12 [V61] PATTERN OFFSETS / PREEMPT INHIBITS (MM->2->9) ............................................................................................ 6-79<br />
6.13 COORD DIAGNOSTICS ..................................................................................................................................................... 6-79<br />
6.13.1 Why Coord Patterns Fail ....................................................................................................................................... 6-80<br />
6.13.2 Coordination Clear Fault Status Display (MM->2->8->4) .................................................................................. 6-80<br />
6.13.3 Coordination Diagnostic Status Display (MM->2->8->5) .................................................................................... 6-81<br />
6.13.4 [v61] Copy Pattern Program (MM->2->8->7) ....................................................................................................... 6-82<br />
6.13.5 [v61] Copy Split Program (MM->2->8->8)............................................................................................................ 6-82<br />
6.13.6 [v65] Split Edit (MM->2->9->1) ............................................................................................................................. 6-82<br />
7 TIME BASE SCHEDULER ........................................................................................................................................... 7-83<br />
7.1 THEORY OF OPERATION ................................................................................................................................................... 7-83<br />
7.2 CONTROLLER TIME BASE (MM->4->1) ........................................................................................................................... 7-83<br />
7.3 ADVANCED SCHEDULE (MM->4->3) ............................................................................................................................... 7-84<br />
7.4 EASY SCHEDULE (MM->4->2) ......................................................................................................................................... 7-84<br />
7.5 DAY PLAN TABLE (MM->4->4) ....................................................................................................................................... 7-85<br />
7.6 ACTION TABLE (MM->4->5) ........................................................................................................................................... 7-85<br />
7.7 TIME BASE PARAMETERS (MM->4->6) ........................................................................................................................... 7-86<br />
7.8 TIME BASE STATUS (MM->4->7) .................................................................................................................................... 7-86<br />
7.9 [V60] SPECIAL FEATURES (MM->4->8) ............................................................................................................................ 7-86<br />
7.10 [V60][V61][V65] TIME BASE SCHEDULER – MORE FEATURES (MM->4->9) ...................................................................... 7-87<br />
7.10.1 Copy Day Plan Utility (MM->4->9->1) ................................................................................................................ 7-87<br />
7.10.2 TBC <strong>Manual</strong> Control Screen (MM->4->9->2) ...................................................................................................... 7-87<br />
7.10.3 [v60][v61][v65] GPS/WWW Status (MM->4->9->3) ............................................................................................... 7-87<br />
7.10.4 [v61] Special Function Modes (MM->4->9->4) .................................................................................................... 7-87<br />
8 PREEMPTION ................................................................................................................................................................ 8-88<br />
8.1 PREEMPT SELECTION (MM->3)........................................................................................................................................ 8-88<br />
8.2 HIGH PRIORITY PREEMPTS 1 – 6 ....................................................................................................................................... 8-88<br />
8.2.1 Preempt Times (MM->3->1).................................................................................................................................... 8-88<br />
8.2.2 Preempt Phases (MM->3->2) .................................................................................................................................. 8-89<br />
8.2.3 Preempt Options (MM->3->3) ................................................................................................................................ 8-89<br />
8.2.4 Preempt Times+ (MM->3->4) ................................................................................................................................. 8-90<br />
8.2.5 Preempt Overlaps+ (MM->3->5) ............................................................................................................................ 8-91<br />
8.2.6 Preempt Options+ (MM->3->6) .............................................................................................................................. 8-91<br />
8.2.7 [v61] Preempt Inhibit Control (MM->3->7) ............................................................................................................ 8-92<br />
8.3 LOW-PRIORITY PREEMPTS 7 – 10 ..................................................................................................................................... 8-93<br />
8.3.1 [v65] <strong>2070</strong> Controller Screens ................................................................................................................................... 8-93<br />
8.3.2 [v61] <strong>TS2</strong> Controller screens ..................................................................................................................................... 8-94<br />
8.3.3 Low Priority Features in version 61 ........................................................................................................................ 8-95<br />
8.3.4 Platoon Progression Features .................................................................................................................................. 8-95<br />
Naztec <strong>NTCIP</strong> <strong>Based</strong> NEMA <strong>TS2</strong> and <strong>2070</strong> Controller <strong>Manual</strong> – July 2009 Page 1-5
9 STATUS DISPLAYS, LOGIN & UTILITIES .............................................................................................................. 9-97<br />
9.1 STATUS DISPLAYS (MM->7) ............................................................................................................................................ 9-97<br />
9.1.1 Phase Timing Status Display (MM->7->1) ............................................................................................................. 9-97<br />
9.1.2 Coord Status Display (MM->7->2) ......................................................................................................................... 9-98<br />
9.1.3 Alarm Status Display (MM->7->5) ......................................................................................................................... 9-98<br />
9.1.4 <strong>TS2</strong> Comm Port Status (MM->7->6) ....................................................................................................................... 9-98<br />
9.1.5 Reports and Buffers (MM->7->7) ............................................................................................................................ 9-98<br />
9.1.6 [v50/v61] MMU Status (MM->7->8) ......................................................................................................................... 9-99<br />
9.1.7 Overlaps Status Displays (MM->7->9->1) ............................................................................................................. 9-99<br />
9.1.8 Easy Calcs (MM->7>9->2) ..................................................................................................................................... 9-99<br />
9.1.9 Overview Status Screen (MM->7>9->5) ................................................................................................................. 9-99<br />
9.1.10 Phase Input / Inhibits (MM->7>9->6) .................................................................................................................. 9-99<br />
9.1.11 Fault Timers (MM->7>9->7) .............................................................................................................................. 9-100<br />
9.1.12 [v50][v61] Other Inputs (MM->7>9->8) ................................................................................................................ 9-100<br />
9.1.13 [v61] Screen Calls (MM->7>9->9) ...................................................................................................................... 9-100<br />
9.2 LOGIN AND UTILITIES .................................................................................................................................................... 9-101<br />
9.2.1 Login Utilities (MM->8->1 & MM->8->2) ........................................................................................................... 9-101<br />
9.2.2 [v50/v61] Controller Print Utility (MM->8->3) ...................................................................................................... 9-101<br />
9.2.3 Initialize Controller Database (MM->8->4) ......................................................................................................... 9-102<br />
9.2.4 [v50][v61] Load Software Utility (MM->8->5) ........................................................................................................ 9-103<br />
9.2.5 [v50/v61] Self Tests (MM->8->6) ............................................................................................................................ 9-104<br />
10 DATA COMMUNICATIONS ................................................................................................................................ 10-105<br />
10.1 COMMUNICATION MENU (MM->6) ............................................................................................................................ 10-105<br />
10.2 STREETWISE COMMUNICATIONS ............................................................................................................................... 10-105<br />
10.3 GENERAL COMMUNICATION PARAMETERS (MM->6->1) ........................................................................................... 10-105<br />
10.4 <strong>TS2</strong> COMMUNICATIONS PORT PARAMETERS .............................................................................................................. 10-107<br />
10.4.1 Selecting the Port (MM->6->2) ......................................................................................................................... 10-107<br />
10.4.2 Setting the Parameters (MM->6->2->1) ........................................................................................................... 10-107<br />
10.4.3 Example Com Parameter Settings For a 981 Master Sub-System ..................................................................... 10-108<br />
10.5 <strong>2070</strong> COMMUNICATIONS PORT PARAMETERS (MM->6->2) ....................................................................................... 10-109<br />
10.6 [V61] TRANSFER DATA UTILITY (MM->6->3) ............................................................................................................. 10-110<br />
10.7 [V61][V65] REQUEST DOWNLOAD (MM->6->4) ........................................................................................................... 10-110<br />
10.8 [V61] IP SETUP (<strong>TS2</strong> ETHERNET PORT OPTION) (MM->6->5) ..................................................................................... 10-110<br />
10.9 [V60][V65] <strong>2070</strong> IP SETUP ( MM->6->5) ...................................................................................................................... 10-111<br />
10.10 [V60][V65] <strong>2070</strong> BINDING (MM->6->6) ..................................................................................................................... 10-111<br />
10.11 [V60][V61][V65] BASIC IP INTERFACE CONNECTIVITY TEST ....................................................................................... 10-111<br />
10.12 <strong>TS2</strong> COM STATUS .................................................................................................................................................... 10-112<br />
10.13 <strong>2070</strong> COM STATUS ................................................................................................................................................... 10-112<br />
10.14 <strong>TS2</strong> GPS INTERFACE ................................................................................................................................................ 10-112<br />
10.15 <strong>2070</strong> GPS INTERFACE .............................................................................................................................................. 10-113<br />
11 SDLC PROGRAMMING ....................................................................................................................................... 11-114<br />
11.1.1 Activating <strong>TS2</strong> Devices (MM->1->3->7) [v60][v61], (MM->1->3->1) [v65] ...................................................... 11-114<br />
11.1.2 [v65]SDLC Parameters (MM->1->3->2) ........................................................................................................... 11-114<br />
11.1.3 [v60][v61][v65] MMU Permissives (MM->1->3->4) ............................................................................................ 11-115<br />
11.1.4 [v60][v61][v65]Channel MMU Map (MM->1->3->5) .......................................................................................... 11-115<br />
11.1.5 [v61] Perm Diag (MM->1->3->6) ...................................................................................................................... 11-115<br />
11.1.6 SDLC Status Display (MM->1->3->8) [v60][v61] (MM->1->3->7) [v65] ........................................................... 11-115<br />
11.1.7 Clearing Critical SDLC Faults (MM->8->7) .................................................................................................... 11-115<br />
Naztec <strong>NTCIP</strong> <strong>Based</strong> NEMA <strong>TS2</strong> and <strong>2070</strong> Controller <strong>Manual</strong> – July 2009 Page 1-6
12 CHANNEL AND I/O PROGRAMMING ............................................................................................................ 12-116<br />
12.1 CHANNEL ASSIGNMENTS (MM->1->3->1)[V50][V61], (MM->1->8->1)[V65] ............................................................... 12-116<br />
12.1.1 Ø/Olp# and Type ................................................................................................................................................ 12-116<br />
12.1.2 Flash ................................................................................................................................................................... 12-116<br />
12.1.3 Alt Hz .................................................................................................................................................................. 12-117<br />
12.1.4 Dim Parameters ................................................................................................................................................. 12-117<br />
12.1.5 Flashing Green Clearance [v61][v65] .................................................................................................................. 12-117<br />
12.2 CHANNEL PARAMETERS (MM->1->3->3) [V50][V61], (MM->1->8->3)[V60][V65] ........................................................ 12-118<br />
12.2.1 [v60][v65] Chan+ Flash Settings (MM->1->8->4) .............................................................................................. 12-118<br />
12.3 IO PARAMETERS ........................................................................................................................................................ 12-119<br />
12.4 [V61] <strong>TS2</strong> I/O MAPPING, LOGIC AND COLOR CHECK (MM->1->3->9) ....................................................................... 12-121<br />
12.4.1 [v61] <strong>TS2</strong> Programmable I/O Logic (MM->1->3->9->1) ................................................................................. 12-121<br />
12.4.2 [v61] <strong>TS2</strong> Fully Mappable I/O <strong>for</strong> BIU 1 and BIU 2 (MM->1->3->9->2) ......................................................... 12-121<br />
12.4.3 [v61] Color Check Disable (MM->1->3->9->3) and Color Check Status (MM->1->3->9->4) ..................... 12-126<br />
12.5 [V60][V65] <strong>2070</strong> IO USER MAP (MM->1->8->9) .......................................................................................................... 12-127<br />
12.6 [V60][V65] CUSTOMIZING <strong>2070</strong> INPUTS (MM->1->8->9->1) ....................................................................................... 12-128<br />
12.6.1 [v65] 33x Input File (MM->1->8->9->1->6) .................................................................................................... 12-129<br />
[V60][V65] CUSTOMIZING <strong>2070</strong> OUTPUTS (MM->1->8->9->2) ........................................................................................... 12-130<br />
12.7 [V60][V65] <strong>2070</strong> PROGRAMMABLE IO LOGIC (MM->1->8->7) .................................................................................... 12-131<br />
12.8 [V60][V65] <strong>2070</strong> IO VIEWER (MM->1->8->8) ............................................................................................................. 12-132<br />
13 CONTROLLER EVENT/ALARM DESCRIPTIONS ......................................................................................... 13-133<br />
14 HARDWARE I/O AND INTERFACES ................................................................................................................ 14-137<br />
14.1 <strong>TS2</strong> AND <strong>2070</strong>(N) I/O MAPS ...................................................................................................................................... 14-137<br />
14.1.1 A-Connector - <strong>TS2</strong> (type-2) and <strong>2070</strong>N .............................................................................................................. 14-137<br />
14.1.2 B-Connector - <strong>TS2</strong> (type-2) and <strong>2070</strong>N .............................................................................................................. 14-138<br />
14.1.3 C-Connector - <strong>TS2</strong> (type-2) and <strong>2070</strong>N ............................................................................................................. 14-139<br />
14.1.4 <strong>TS2</strong> and <strong>2070</strong>(N) - I/O Modes 0 – 3 .................................................................................................................. 14-140<br />
14.1.5 <strong>TS2</strong> and <strong>2070</strong>(N) - I/O Modes 4 – 7 .................................................................................................................. 14-141<br />
14.1.6 <strong>TS2</strong> D-Connector - DIAMOND Mapping ........................................................................................................... 14-142<br />
14.1.7 <strong>TS2</strong> D-Connector - Texas 2, V14 (TX2-V14) Standard Mapping ....................................................................... 14-143<br />
14.1.8 [v61] <strong>TS2</strong> D-Connector - Texas 2, V14 (TX2-V14) Alternate 820A Mapping ..................................................... 14-144<br />
14.1.9 <strong>TS2</strong> D-Connector – 40 Detector Mapping ......................................................................................................... 14-145<br />
14.1.10 <strong>TS2</strong> D-Connector – Santa Clara County (SCC) Mapping ................................................................................ 14-146<br />
14.2 <strong>2070</strong> SPECIFIC I/O MAPS ............................................................................................................................................ 14-147<br />
14.2.1 <strong>2070</strong> 2A (C1 Connector) Mapping – Caltrans TEES Option (Mode 0) ............................................................. 14-148<br />
14.2.2 <strong>2070</strong> 2A (C1 Connector) Mapping – NY DOT Mode 1 ...................................................................................... 14-150<br />
14.2.3 <strong>2070</strong> 2A (C1 Connector) Mapping – Mode 2 ..................................................................................................... 14-152<br />
14.2.4 <strong>2070</strong> 2A (C1 Connector) Mapping – Mode 3 ..................................................................................................... 14-154<br />
14.2.5 <strong>2070</strong> 2A (C1 Connector) Mapping – Mode 6 ..................................................................................................... 14-156<br />
14.2.6 <strong>2070</strong> 2A (C1 Connector) Mapping – Mode 7 ..................................................................................................... 14-158<br />
14.2.7 <strong>2070</strong>(N) D-Connector – TEES Mapping ............................................................................................................ 14-160<br />
14.2.8 <strong>2070</strong>(N) D-Connector – 820A-VMS Mapping .................................................................................................... 14-161<br />
14.3 MODEL 970 (C1 CONNECTOR) MAPPING ................................................................................................................... 14-162<br />
14.4 TERMINAL & FACILITIES BIU MAPPING .................................................................................................................... 14-164<br />
14.4.1 Default BIU Input Map (MM->1->3->3) [v61] .................................................................................................. 14-164<br />
14.4.2 Default BIU Output Map (MM->1->3->3) [v61] ................................................................................................ 14-166<br />
14.4.3 Solo TF BIU1 Input Map (Note: output map same as Default output map) ....................................................... 14-168<br />
14.4.4 24 Out Chan Output Map (output map same as Default output map) ................................................................ 14-170<br />
14.5 <strong>TS2</strong> AND <strong>2070</strong> COMMUNICATIONS PORTS .................................................................................................................. 14-172<br />
14.5.1 <strong>TS2</strong> Communication Ports.................................................................................................................................. 14-172<br />
14.5.2 <strong>2070</strong> Communication Ports ................................................................................................................................ 14-172<br />
14.5.3 External Communication Ports Provided on the <strong>2070</strong>N Expansion Chassis ..................................................... 14-173<br />
14.6 <strong>2070</strong> / <strong>2070</strong>N MODULES ............................................................................................................................................. 14-173<br />
15 INDEX ...................................................................................................................................................................... 15-175<br />
Naztec <strong>NTCIP</strong> <strong>Based</strong> NEMA <strong>TS2</strong> and <strong>2070</strong> Controller <strong>Manual</strong> – July 2009 Page 1-7
1 Introduction<br />
This manual fully describes software release versions 50 and 61 <strong>for</strong> the Naztec <strong>TS2</strong> / 970 controller that comply<br />
with the NEMA <strong>NTCIP</strong> 1202 versions 1 and 2. This manual also documents version 60 and 65 (Apogee) <strong>for</strong> the<br />
Naztec <strong>2070</strong> controller which complies with the current TEES specifications required by CALTRANS <strong>for</strong> their<br />
QPL compliance. The foundation of each version is an <strong>NTCIP</strong> compliant database that is cross compatible between<br />
controller versions. The differences between versions are relatively minor and can be documented within a unified<br />
manual without maintaining separate documentation <strong>for</strong> each software version and controller model.<br />
In this document, the notation [v61] labels new features in <strong>TS2</strong> Version 61 not available in the TS Version 50 or<br />
<strong>2070</strong> controllers. The label [v60][v61][v65] implies that the feature is available in the <strong>2070</strong> controller (version 60,<br />
version 61, and version 65) and <strong>TS2</strong> Version 61, but not in <strong>TS2</strong> Version 50. Any feature that is not labeled as<br />
version specific is available in all controller versions. Per<strong>for</strong>ming a search on this document <strong>for</strong> the string “[v” will<br />
find all occurrences of features that are unique to a particular version.<br />
Naztec <strong>NTCIP</strong> <strong>Based</strong> NEMA <strong>TS2</strong> and <strong>2070</strong> Controller <strong>Manual</strong> – July 2009 Page 1-8
2.1 <strong>TS2</strong> Operating Modes<br />
The <strong>TS2</strong> controller operates in two basic cabinet configurations:<br />
• <strong>TS2</strong> (Type-1) – controller I/O passed as data on a high speed SDLC interface<br />
2 Getting Started<br />
• <strong>TS2</strong> (Type-2) – controller I/O supplied over the SDLC and as point-to-point cabinet wiring (like TS1)<br />
The NEMA <strong>TS2</strong> Type-1 specification is based on an SDLC serial data link which transmits I/O messages on a high speed data<br />
path between devices in the cabinet. NEMA <strong>TS2</strong> Type-2 supports older NEMA TS1 cabinet facilities where all I/O to the<br />
controller is point-to-point wiring to a back-panel.<br />
Type-2 controllers operate in either TS1 or <strong>TS2</strong> Type-1 cabinets whereas Type-1 controllers operate only in Type-1 cabinets.<br />
The I/O in <strong>TS2</strong> Type-2 controllers (ABCD connectors) is always active regardless of the state of any SDLC interface present.<br />
However, the <strong>TS2</strong> Type-1 SDLC interface is only active if a NEMA Bus Interface Unit (BIU) is programmed as active.<br />
“Hybrid” combinations are possible that allow a <strong>TS2</strong> controller to operate in a TS1 cabinet with all cabinet I/O from the ABCD<br />
connectors (Type-2) and detector inputs provided from a Type-1 SDLC detector rack in the same cabinet. Another “Hybrid”<br />
approach supports TS1 conflict monitors or <strong>TS2</strong> MMU (Malfunction Management Units) in TS1 or TS cabinets.<br />
2.2 <strong>2070</strong> Operating Modes<br />
The <strong>2070</strong> controller operates in four basic cabinet configurations:<br />
• <strong>2070</strong> FIO – TEES Field I/O supports C1 connectors in 170/179 cabinets<br />
• <strong>2070</strong> <strong>TS2</strong> – Software supports <strong>TS2</strong> Type-1 in NEMA cabinet facilities using the TEES C12S connector<br />
• <strong>2070</strong>N – TEES specification supports <strong>TS2</strong> Type-2 cabinet facilities (ABCD connectors)<br />
• <strong>2070</strong> ATC – TEES specification that supports the ATC cabinet currently under development<br />
“Hybrid” combinations are possible combining these modes in the same cabinet configuration. Naztec, Inc. takes a unique<br />
position in the <strong>2070</strong> controller market by supporting NEMA <strong>TS2</strong> Type-1 devices using the TEES C12S connector. Because<br />
the electrical specifications <strong>for</strong> the TEES C12S and NEMA SDLC interfaces are equivalent, the <strong>2070</strong> can support both NEMA<br />
and TEES cabinets as a controller software option.<br />
2.3 Hardware I/O Differences Between NEMA <strong>TS2</strong> and TEES <strong>2070</strong> <strong>Controllers</strong><br />
Naztec provides uni<strong>for</strong>mity between software versions to support <strong>NTCIP</strong> <strong>for</strong> NEMA <strong>TS2</strong> and <strong>2070</strong> controller specifications.<br />
To the developer, this uni<strong>for</strong>mity promotes a common code base that minimizes software maintenance costs and support. To<br />
the end user, this uni<strong>for</strong>mity provides a common user interface and documentation base which minimizes training and support<br />
requirements. The primary difference between software versions results from the I/O devices which are radically different in<br />
each hardware specification. Features unique to a software version are noted with a version specific label [v50], [v60] ,[v61] or<br />
[v65]. Because these differences are concentrated primarily in the IO of the hardware, we have dedicated separate chapters to<br />
the Data Communications (Chapter 10), SDLC Programming (Chapter 11) and Channel and I/O Programming (Chapter 12).<br />
2.4 Differences Between NEMA <strong>TS2</strong> and <strong>2070</strong> I/O Ports<br />
Naztec <strong>TS2</strong> and <strong>2070</strong> controllers support an Ethernet interface that allows the user to assign one or more IP addresses to the<br />
controller. In addition to the Ethernet interface, NEMA <strong>TS2</strong> and <strong>2070</strong> I/O ports can be categorized as one of the following:<br />
1) Asynchronous (ASYNC) – EIA RS-232 compliant devices that uses hardware and software handshaking protocols<br />
2) Synchronous (SYNC) – SDLC compliant devices that use a “synchronous clock” line to strobe data between devices<br />
3) FIO Ports – separate inputs and outputs <strong>for</strong> NEMA Type-2 or <strong>2070</strong>N connectors (ABCD) or 170/179 C1 connectors<br />
The NEMA plat<strong>for</strong>m provides a Mode setting <strong>for</strong> each hardware RS-232 Com Port that allows different software functions and<br />
protocols to be assigned to the port. For example, the System-Up port on a <strong>TS2</strong> controller may be assigned a DEFAULT or<br />
<strong>NTCIP</strong> protocol to communicate with the central system. The PC/Print hardware port may be assigned to different software<br />
functions to communicate with a GPS, Opticom or MMU device.<br />
Naztec <strong>NTCIP</strong> <strong>Based</strong> NEMA <strong>TS2</strong> and <strong>2070</strong> Controller <strong>Manual</strong> – July 2009 Page 2-9
As discussed in section 2.2, the Naztec <strong>2070</strong> provides the flexibility of operating in any NEMA, TEES or ATC cabinet<br />
configuration using a concept called “port binding”. This allows a software function (system up, system down, GPS, etc) to be<br />
assigned to a software port (such as ASYNC1 or ASYNCH2) which is in turn “bound” to a physical hardware port (such as<br />
SP1 or SP2) defined by the equipment specifications. In addition, the TEES C12S connector may be bound to different<br />
software ports (such as SYNC1 or SYNC2) that support the various SDLC protocols in NEMA and ATC cabinets.<br />
Another concept to understand fully is the difference between “port binding” and “port mapping”. Port Binding associates a<br />
controller software function with a physical hardware port defined by the <strong>TS2</strong> or TEES standard. Port Mapping allows the<br />
individual pins of an FIO port to be re-mapped to con<strong>for</strong>m to specific cabinet requirements required by the user.<br />
NEMA defines different Port Maps <strong>for</strong> the ABC connectors which are hardware or software selectable. Naztec also supports<br />
Port Maps <strong>for</strong> the D connector as a controller software feature. Custom Port Maps may be provided to respond to user needs.<br />
170/179 cabinets also require different Port Maps <strong>for</strong> the C1 connector. Naztec allows each pin to be customized in software<br />
through the <strong>2070</strong> keyboard and can provide custom Port Maps <strong>for</strong> specific user applications.<br />
2.5 Database Initialization and Phase Mode Selection<br />
The <strong>TS2</strong> database may be initialized with one of the following factory defaults:<br />
• NONE – Initializes each value in the controller database to zero<br />
• STD-8ø – Initializes the controller database to Standard 8 Phase operations (dual-quad operation)<br />
• DIAMOND – Initializes the controller database to the Diamond Phase Mode.<br />
• USER-LOC – reserved <strong>for</strong> a special application required by a Naztec user<br />
The <strong>2070</strong> or ATC database may be initialized with one of the following factory defaults:<br />
• Full Clr – Initializes each value in the controller database to zero<br />
• Full STD-8ø – Initializes the controller database to Standard 8 Phase operations (dual-quad operation)<br />
• Full DIAMOND – Initializes the controller database to the Diamond Phase Mode.<br />
• Specific user modes – reserved <strong>for</strong> a special application required by various agencies like NYSDOT<br />
The Clear & Init All utility (MM->8->4->1) allows the user to initialize the controller to a default database after turning the<br />
Run Timer to OFF (MM->1->7). The run timer disables all outputs from the controller and insures that the cabinet is in flash<br />
when the database is initialized. The user should use caution when initializing the controller database because all existing<br />
program data will be erased and overwritten. When the MM->8->4->1 screen indicates that the initialization is complete, the<br />
user should turn the Run Timer to ON (MM->1->7) to finalize the initialization (i.e. finalizing phase sequence and<br />
concurrency based on phase mode programming, latching output mapping, binding communications, etc.) and activate the unit.<br />
After the controller is initialized, the following Phase Modes selected under Unit Parameters (MM->1->2->1) determine the<br />
phase structure and barriers <strong>for</strong> the unit.<br />
• STD8 – Standard 8 Phase<br />
• QSeq – Quad Sequential<br />
• 8Seq – 8 Phase Sequential<br />
• DIAM – Diamond Phase Mode<br />
• USER – User Programmable Mode (using 16 phases in 4 rings)<br />
Naztec <strong>NTCIP</strong> <strong>Based</strong> NEMA <strong>TS2</strong> and <strong>2070</strong> Controller <strong>Manual</strong> – July 2009 Page 2-10
3.1 Keyboard and Display<br />
Keyboard sequences in this manual are referenced to the Main Menu<br />
using the “Main Disp” key on the <strong>TS2</strong> and the “*” key on the <strong>2070</strong>.<br />
For example, sequence MM->1->1 indicates that the “1.Controller”<br />
option is selected from the Main Menu shown to the right.<br />
3.1.1 Naztec “Plus” Features<br />
3 Interface & Navigation<br />
The controller database provides a one-to-one match with object<br />
definitions in the National Transportation and Communications <strong>for</strong><br />
ITS Protocol (<strong>NTCIP</strong>) specification. <strong>NTCIP</strong> provides guidelines to<br />
extend the base <strong>NTCIP</strong> feature set using MIB extensions<br />
(Manufacturer In<strong>for</strong>mation Blocks). Naztec refers to these MIB extensions as “Plus” Features which are identified on separate<br />
on menus with the “+” character. For example, the following menu groups <strong>NTCIP</strong> based phase options under menu selection 2<br />
and “plus” phase options under menu selection 3. Menu item 6 is also an example of Naztec MIB extensions provided as<br />
“plus” features.<br />
3.1.2 Left and Right Menu Indicators and Cursor Movement<br />
Four cursor keys provide navigation between user editable fields. If the user leaves a field that has been changed, then an<br />
implied ENTR key is issued. This feature eliminates an extra ENTR keystroke when a data field is changed. The red ENTR<br />
key on the <strong>TS2</strong> and the red ENT key on the <strong>2070</strong> controller are identical.<br />
Most keystroke sequences display a Left Menu indicated by a right arrow (“->”) in the top right corner of the screen. Move the<br />
cursor beyond the left or right boundary of a Left Menu screen to display the Right Menu screen. A Right Menu screen will<br />
display a left arrow (“1->1->1. The Right Menu<br />
provides access to phases 9-16. Scroll past the left or right boundary of with the left or right arrow keys to “wrap” the cursor to<br />
the next column in the adjacent menu.<br />
The “->” symbol indicates a “Left menu” has been selected ( “
3.1.3 Audible Tones<br />
The following three audible tones are produced to indicate the result of each keystroke. Set Tone Disable to ON under Unit<br />
Parameters (MM->1->2->1) to turn off all audible tone indications.<br />
[v50][v61] Key Click<br />
If no other sounds are to be produced in response to a keystroke, the key click provides the user with audible feedback that the<br />
controller accepted the keystroke. This tone is a short clicking sound.<br />
[v50][v61] Acceptance Tone<br />
Two short beeps are issued when the controller successfully executes a command. This tone is usually sounded when an<br />
entered data value has been accepted and written to EEPROM.<br />
Error Tone<br />
A single long tone (approximately 1/3 second) indicates that an operation is unsuccessful, when a value entered is out of range<br />
or as a warning message.<br />
3.1.4 Entry Field Types<br />
Toggle Fields<br />
Toggle fields are on/off entries that are toggled with any number key on the keyboard. A toggle field is enabled (or true) if the<br />
value shown is the ‘X’ character. A toggle field is disabled (or false) if the value shown is a ‘.’ character.<br />
Numeric Fields<br />
Numeric data fields accept entries as whole numbers, decimal numbers, dates or time-of-day. An entry is made by pressing a<br />
numeric key corresponding to a desired digit. For multi-digit fields, the left-most or most-significant digit is entered first. As<br />
each subsequent digit is entered, the left-most digit is shifted left so that the entire number is right justified in the field. This<br />
entry/sequence is similar to the data entry used with most calculators.<br />
Selection Fields<br />
Selection fields are multiple choice entries toggled by any numeric keys. Examples of selection fields are day-of-week entries<br />
and flash settings.<br />
Selection Field Groups<br />
Selection field groups consist of two to eight fields on the same row that are updated as a group. Programming these fields can<br />
be done without moving the cursor. With the cursor on the row that you wish to edit, place it so that it rests between the first<br />
entry and the row label. Next, to cycle any entry of the group, press the numeric key that correlates with the field in the<br />
column you wish to edit.<br />
Select/Proceed Fields<br />
Select/proceed fields are places where the cursor stops to allow the operator to issue a command to the controller. The two<br />
main occurrences of these fields are inside menus and on warning screens. Menu screens allow the user to move the cursor to<br />
the number of the menu item, and then press ENTR to make the selection. The user may also press the number that correlates<br />
to the menu option of choice. Warning screens prompt the user with instructions to cancel or to proceed with the command<br />
that created the warning.<br />
3.1.5 Function Keys<br />
Escape Key (ESC)<br />
The ESC key causes the controller to exit the active screen and display the previous screen. Each previous screen will be<br />
accessed until the main menu is reached. If ESC is pressed prior to saving (pressing enter) data that has been entered in an edit<br />
field, then the controller will display a warning screen allowing the user to abort the escape operation, thus giving the user an<br />
opportunity to save the data.<br />
Enter Key <strong>TS2</strong>: ENTR <strong>2070</strong>: ENT<br />
The ENTR key instructs the controller to process the current field. In the case of data entry fields, this instructs the controller<br />
to store the new value in memory. If the screen is a select field, then the controller will load the specified screen or take the<br />
desired action. In the case of proceed fields, an enter correlates to a ‘yes’.<br />
Naztec <strong>NTCIP</strong> <strong>Based</strong> NEMA <strong>TS2</strong> and <strong>2070</strong> Controller <strong>Manual</strong> – July 2009 Page 3-12
Display Control Key <strong>TS2</strong>: MAIN/DISP <strong>2070</strong>: *<br />
The display control key offers the user a quick way to move to the Main Menu, and turn on display backlighting. If the<br />
MAIN/DISP key is pressed in any location other than the main menu, then the controller will immediately return the user to the<br />
main menu.<br />
Alternate Function Key <strong>TS2</strong>: ALT FCN <strong>2070</strong>: 'F'<br />
The alternate function key provides access to various features such as help and the default status screen. The ALT FCN key<br />
(<strong>TS2</strong>) or ‘F’ key (<strong>2070</strong>) is used in combination with other keystrokes defined in the next section.<br />
3.1.6 Alternate Functions<br />
Alternate function key sequences require two keystrokes. The user first presses and releases the ALT FCN key (<strong>TS2</strong>) or the<br />
‘F’ key (<strong>2070</strong>), then immediately presses and releases the key that corresponds to the desired function.<br />
Help Screen (ALT FCN, ALT FCN) <strong>TS2</strong>: ALT FCN ALT FCN <strong>2070</strong>: ‘F’ ‘F’<br />
The help alternate function command causes the controller to load context sensitive help. When the help function is executed,<br />
the controller displays help in<strong>for</strong>mation that corresponds to the screen or fields where the cursor is located.<br />
Restore/Clear Field (ALT FCN, ESC) <strong>TS2</strong>: ALT FCN ESC <strong>2070</strong>: ‘F’ ESC<br />
The restore command restores the original contents of a data entry field. Once the value in a field has been changed, if the user<br />
wants to revert back to the original contents of the field prior to having pressed ENTR, they may select this alternate function<br />
and the original contents will be placed in the active field.<br />
[v50][v61] Back-Light Control (ALT FCN, MAIN/DISP)<br />
<strong>TS2</strong> keystrokes: ALT FCN MAIN/DISP<br />
<strong>TS2</strong>: ALT FCN MAIN/DISP<br />
The backlight alternate function allows the user to toggle the back lighting on/off without having to be in the main menu.<br />
Print Active Screen <strong>TS2</strong>: ALT FCN 0<br />
This alternate function will print the contents of the current screen to a serial printer. During printing, the controller keyboard<br />
is non-responsive. If you want to use the keyboard while printing is underway, you must either wait until printing is complete,<br />
or use the ESC key to abort printing.<br />
Key Calls Mode <strong>TS2</strong>: ALT FCN 1 <strong>2070</strong> keystrokes: ‘F’ 1<br />
This mode is activated from the Timing Status screen (MM->7->1). Once in this mode, enter two digits <strong>for</strong> the phase number<br />
and use the Down Arrow key to apply a phase call and the Up Arrow key to remove the phase call. This mode is handy <strong>for</strong><br />
testing purposes and any calls placed in this mode will be removed once you leave the Phase Status screen.<br />
Naztec <strong>NTCIP</strong> <strong>Based</strong> NEMA <strong>TS2</strong> and <strong>2070</strong> Controller <strong>Manual</strong> – July 2009 Page 3-13
Overview Status Screen <strong>TS2</strong>: ALT FCN 9 <strong>2070</strong>: ‘F’ 9<br />
The Controller section in the overview status screen reports:<br />
• OFF – controller Run Timer is OFF<br />
• TIMING - FREE or COORD also displayed with TIMING<br />
• FLASH-LS or FLASH-CVM - controller initiated flash through load switches (LS) or dropping CVM to the monitor<br />
The cause of flash is also displayed as STARTUP, AUTOMATIC, PREEMPT SDLC or FAULT<br />
If FAULT is displayed, the cause is also displayed as CRIT SDLC, MMU PERM or MMU FIELD<br />
• STOP-TIME - If STOP-TIME is displayed, then INPUT or MAN-CNTRL is also displayed<br />
• SEQ TRANS – if there is an error transitioning to a new sequence that places a phase in a different ring.<br />
• INIT-ERR - When the controller fails to start running due to an initial ring/phase error, the following codes may be<br />
shown in the Controller column of the Overview Status Screen. These codes provide general in<strong>for</strong>mation about the<br />
reason <strong>for</strong> the failure. Multiple, closely related types of initialization errors may share the same code.<br />
o<br />
o<br />
o<br />
o<br />
o<br />
o<br />
INIT Err1 – Two phases in one ring are set to be active at startup<br />
INIT Err2 – One phase does not have a proper initial entry<br />
INIT Err3 – “Yellow Next” phase is not in ring sequence<br />
INIT Err4 – Initialization phases are not compatible with “yellow next” phase<br />
INIT Err5 – Compatible phases in a group do not reference each other<br />
INIT Err6 – Ring sequence does not agree with ring assignment in phase programming<br />
• [v61] PROCESSOR – is displayed if the controller has a CPU fault has multiple power failures in a 24 hour period.<br />
• [v61] RESTART – is displayed if the controller restarts unexpectedly.<br />
• [v61] STARTUP FLASH/ALL RED - When the controller is timing the Startup Flash an/or All-Red startup<br />
interval, the time remaining (in seconds) is displayed in the first column on the default overview status screen. This<br />
status is updated in real-time.<br />
• [v61] T&F BIU or MMU – This is displayed <strong>for</strong> any enabled T&F BIU or MMU that does not respond upon<br />
power-up. If they do not respond, it will causes the controller to remain in flash but it does not accumulate errors on<br />
the SDLC status screen, which occurs only after a device has been successfully communicated with.<br />
The Monitor status displays OK, FAULT, RESET (if monitor reset button is pressed) or NO DATA (if the controller is<br />
programmed to communicate with an MMU and the SDLC to the MMU is not active). If the Monitor is in a FAULT, an<br />
additional status message is displayed to show the cause of the fault (CVM/FltMon, 24V-1, CONFLICT, RED-FAIL, etc.).<br />
The Cabinet status displays OK, FLASH or NO DATA (if the controller is programmed to communicate with a Terminal<br />
Facility BIU and the SDLC to the cabinet is not active). If the Cabinet is in FLASH, then the cause is also displayed as<br />
LOCAL (from a cabinet switch) or MMU.<br />
The System status displays OFFLINE if the controller is not programmed to operate in a closed-loop system. If the<br />
controller is programmed <strong>for</strong> closed-loop, the System will displays ON-LINE if the controller is communicating with a<br />
master or FALLBACK if the fallback timer has expired indicating communications is disrupted.<br />
Naztec <strong>NTCIP</strong> <strong>Based</strong> NEMA <strong>TS2</strong> and <strong>2070</strong> Controller <strong>Manual</strong> – July 2009 Page 3-14
The Controller Main Menu (MM->1) accesses the basic operating<br />
features of the controller. Master programming (9.) is provided only<br />
if the <strong>TS2</strong> version currently loaded in the controller supports it, or if<br />
Feature Profile is set to zero under Unit Parameters in the <strong>2070</strong>.<br />
4.1.1 Phases Modes of Operation (MM->1->1)<br />
4 Basic Controller Operation<br />
A controller services competing demands <strong>for</strong> right-of-way from<br />
vehicle and pedestrian phases. A phase is composed of vehicle and<br />
pedestrian intervals assigned to each traffic movement at an<br />
intersection. Naztec provides 16 separate vehicle/pedestrian phases<br />
that may be serviced sequentially (in a common ring) or<br />
concurrently (in separate rings). The phase sequence defines the<br />
order of the phases in each ring and concurrency defines which phases may be active in separate rings at the same time.<br />
Vehicle detectors and pedestrian detectors (push-buttons) call phases during the red / don’t walk interval to request service<br />
from the controller and extend the phase after a call from a competing phase is received. The controller provides a set of<br />
base phase timings (min green, walk, vehicle and pedestrian clearances) and a series of detector settings to control the<br />
extension of green when a competing call is received from another phase. The three modes of operation that extend a phase<br />
are the Vehicle Actuated Mode, Volume Density Mode and Pedestrian Actuated Mode.<br />
4.1.2 Vehicle Actuated Mode<br />
Vehicle and Pedestrian Detectors Place a Service Demand on the Phase<br />
The Vehicle actuated mode guarantees a minimum green period to service vehicle calls received during the red interval.<br />
Vehicle detectors may extend the minimum green up to a Max1 or Max2 limit unless a Gap,extension timer expires.<br />
Vehicle actuated mode applies a fixed Gap,extension timer to limit the extension of phase green.<br />
The Minimum Green and Vehicle extension timers begin counting down at the onset of green. Vehicle extension allows<br />
detector actuations to extend the phase as long as the Gap,extension timer has not expired between actuations. The max<br />
timers limit vehicle extension and begin during the green interval after a conflicting vehicle or pedestrian call is received on<br />
another phase. The max setting (either Max1 or Max2) is selectable by time-of-day.<br />
In the example below, two vehicles call the phase during the red interval from a presence detector located at the stop bar.<br />
When the phase turns green, these two vehicles leave the presence detector be<strong>for</strong>e the Minimum Green time expires and a<br />
“gap-out” occurs after the Gap,extension timer expires. In this case, the minimum green time is guaranteed even though the<br />
gap timer has expired. The phase will terminate after timing yellow and all-red clearance because a conflicting phase has<br />
requested service. During red clearance, all phases display a red indication.<br />
A phase will dwell (or rest) in the green interval in the absence of a conflicting call unless Red Rest is programmed <strong>for</strong> that<br />
phase. Red Rest will cause the phases to remain in red until another call is received. Red Revert controls how quickly a<br />
phase may be reserviced once it has entered red rest and another call is received <strong>for</strong> that phase.<br />
Minimum Green is Guaranteed When Gap-out Condition Occurs<br />
Naztec <strong>NTCIP</strong> <strong>Based</strong> NEMA <strong>TS2</strong> and <strong>2070</strong> Controller <strong>Manual</strong> – July 2009 Page 4-15
In the example below, a third vehicle actuation extends vehicle extension past the end of minimum green. Vehicle detectors<br />
may continue to extend the phase green up to the Max1 or Max-2 limit after a conflicting phase is called. However, once a<br />
“gap-out” occurs, the phase will terminate with a yellow and all-red clearance so that a conflicting phase may be serviced<br />
during the phase red interval.<br />
Vehicle Detectors May Extend the Green to the Max1 or Max2 limit<br />
In summary, vehicle actuated mode arbitrates demand <strong>for</strong> service from competing phases by:<br />
• Limiting the minimum green guaranteed to the phase<br />
• Limiting the extension of green based on the Gap,extension (or gap separation) between vehicles<br />
• Limiting the maximum green after a call <strong>for</strong> service is received from a competing phase<br />
4.1.3 Volume Density Mode<br />
Volume Density Mode extends vehicle-actuated operation by:<br />
• Extending Minimum Green based on the number of vehicle calls during the yellow and red intervals<br />
• Reducing Gap,extension over a specified period to a specified minimum gap setting<br />
The variable initial time is essentially the sum of the Minimum Green and the accumulated Added Initial time. The Added<br />
Initial parameter specifies the number of seconds accumulated per actuation during the yellow and red interval of the phase.<br />
Variable initial time may not be increased beyond the limits of the Max Initial parameter. The accumulated Added Initial<br />
time is reset after the phase green has been serviced.<br />
In the example below, Added Initial is set to 1” and “times per actuation” (T/Ac) is set initially to the Minimum Green.<br />
T/Ac is extended by 2 vehicle calls each adding 1” of Added Initial to the T/Ac timer. During Min Green, the Gap,extension<br />
timer “gaps-out” sending the phase to Yellow + All-Red Clearance after the T/Ac timer expires.<br />
The T/Ac timer guarantees the Min Green plus Added Initial (2” in this example). Additional calls received during the<br />
Yellow and Red interval may increase the T/Ac timer up to the Max Initial setting.<br />
Added Initial Features Provided by Volume Density Operation<br />
Gap reduction may be delayed using Time Be<strong>for</strong>e Reduction (TBR) or Cars Be<strong>for</strong>e Reduction (CBR). TBR delay begins<br />
after the start of green when a conflicting phase is received and continues to countdown as long as there is a serviceable<br />
conflicting call. TBR is reset if the conflicting call goes away. The Cars Be<strong>for</strong>e Reduction (CBR) delay expires when the<br />
sum of the vehicles counted on the associated phase detector is greater than the CBR value specified. Both approaches<br />
delay the reduction of the gap while the initial queue dissipates during the initial green period.<br />
After the TBR or CBR delay expires, the initial Gap,extension<br />
will be reduced to the Min Gap value over the Time to Reduce<br />
(TTR) period. The Min Gap value limits the reduction of the<br />
Gap,extension time as illustrated to the right. If all serviceable<br />
conflicting calls are removed, Gap,extension , TBR and TTR will<br />
reset and gap reduction will not take place until the next serviceable conflicting call is received. The Min Gap value is the<br />
limiting headway (of separation between vehicles) needed to extend the green interval to the Max1 or Max2 setting.<br />
Naztec <strong>NTCIP</strong> <strong>Based</strong> NEMA <strong>TS2</strong> and <strong>2070</strong> Controller <strong>Manual</strong> – July 2009 Page 4-16
4.1.4 Pedestrian Actuated Mode<br />
Pedestrian displays always time concurrently with the vehicle displays of a phase. During free operation, if a pedestrian call<br />
is being serviced and no vehicle calls are present to extend the phase, the pedestrian clearance interval will end at the onset<br />
of yellow as shown below. The “Don’t Walk” indication flashes during the pedestrian clearance interval and changes to a<br />
steady “Don’t Walk” indication at the end of ped clearance. If the associated phase is resting in green, a subsequent<br />
pedestrian call will reinitiate (or recycle) pedestrian sequence if there is not a call (or check) on a conflicting phase. The<br />
phase cannot enter its yellow clearance until the pedestrian clearance ceases, unless PedClr-Through-Yellow is enabled as a<br />
Phase Option. PedClr-Through-Yellow allows flashing “Don’t Walk” to time concurrently with yellow clearance.<br />
Ped Clearances Ends Prior to Vehicle Clearance if PedClr-Thru-Yellow is Not Enabled<br />
Ped Clearances Times With Vehicle Clearance if PedClr-Thru-Yellow is Enabled<br />
Enabling PedClr-Thru-Yellow reduces the total time provided to the pedestrian by the yellow clearance time if the walk<br />
time and ped clearance time remain constant. There<strong>for</strong>e, if PedClr-Thru-Yellow is enabled, do not add the yellow clearance<br />
interval to ped clearance when calculating the ped crossing time. Vehicle detection may extend the green beyond the end of<br />
the pedestrian clearance interval as shown below and is by Max-1 or Max-2 after a call is received from a competing phase.<br />
In Free Operation, Vehicle Calls May Extend the Green Beyond Ped Clearance<br />
If Rest-in-Walk is enabled <strong>for</strong> the phase, the controller will rest in the walk interval in free operation until a conflicting call<br />
is received. During coordination, this feature insures that the end of ped clearance occurs at the <strong>for</strong>ce-off point of the phase.<br />
In Free Operation, Rest-In-Walk Extends Walk Until a Conflicting Phase is Received<br />
Ped/Grn Delay allows the beginning of the green interval or the beginning of the walk to be delayed by a programmed<br />
amount as illustrated below: This feature is fully discussed under Phase+ Options.<br />
Green Delay Used to Suppress the Start of Green When a Ped Call is Serviced<br />
Ped Delay Used to Suppress the Start of Walk When a Ped Call is Serviced<br />
Naztec <strong>NTCIP</strong> <strong>Based</strong> NEMA <strong>TS2</strong> and <strong>2070</strong> Controller <strong>Manual</strong> – July 2009 Page 4-17
4.1.5 Phase Times (MM->1->1->1)<br />
Minimum Green<br />
The Minimum Green parameter (0-255 sec) determines the minimum<br />
duration of the green interval <strong>for</strong> each phase. When setting this time,<br />
consider the storage of vehicles between the detector and the stopbar<br />
<strong>for</strong> the associated approach.<br />
Gap, Extension<br />
Gap,extension (also known as Passage time) determines the extensible portion of the green interval (0-25.5 sec). The phase<br />
remains in the extensible portion as long as an actuation is present and the passage timer has not expired. The timer is reset<br />
with each subsequent actuation and does not start timing again until the actuation is removed.<br />
Max-1 Green<br />
Max-1 (0-255 sec) limits the maximum time of the green interval after a serviceable conflicting call is received. The<br />
maximum green timer does not begin timing until a serviceable conflicting call is received. Max-1 is set as the default max<br />
setting but may be overridden Max-2.<br />
Max-2 Green<br />
Max-2 (0-255 sec) also limits the maximum time of the green interval after receiving a serviceable conflicting call. Max-2<br />
may be selected by ring from an external controller input or as a pattern option. Max-2 may also be selected by-phase<br />
under Phase Options+ (next section). This last method allows Max-1 to be enabled <strong>for</strong> some phases and Max-2 <strong>for</strong> others.<br />
Yellow Clearance<br />
The Yellow Clearance parameter (0-25.5 sec) determines the yellow clearance interval of the associated phase.<br />
Red Clearance<br />
The Red Clearance parameter (0-25.5 sec) determines the all-red clearance interval of the associated phase.<br />
Walk<br />
The Walk time parameter provides the length of the walk indication<br />
(0-255 sec).<br />
Pedestrian Clearance<br />
Pedestrian Clearance (0-255 sec) is the duration of the flashing<br />
pedestrian clearance (“Don’t Walk”) output.<br />
Red Revert Time<br />
The Red-Revert Time parameter determines the minimum time (0-<br />
25.5 sec) that the phase must remain in red rest be<strong>for</strong>e it is recycled to green. The controller uses the greater of the phase<br />
Red-Revert Time or the Unit Parameter, Red-Revert, to limit how quickly each phase green is recycled.<br />
Added Initial<br />
Added-Initial (0-25.5 sec) is an optional volume-density feature that extends the Minimum Green timer. The T/Ac (time per<br />
actuation) timer is set initially to Min Green. Each detector actuation during the yellow and red interval extends the T/Ac<br />
timer by the Added Initial value if the detector option Added-Initial is enabled. Detector actuations received during the red<br />
interval continue to extend T/Ac by the Added Initial value until the Max Initial limit is reached. In this way, the T/Ac timer<br />
behaves as a parallel timer with Min-Green. The greater of Min-Green or T/Ac defines the minimum green time period.<br />
Maximum Initial<br />
Maximum-Initial (0-255 sec) is an optional volume density feature that limits the extension of Min Green using Added<br />
Initial. The minimum or guaranteed green period cannot be greater than the Max Initial value specified. Note, that addedinitial<br />
operation is defeated if one of the three following conditions is satisfied. If any of these conditions are true, then Min<br />
Green guarantees the initial green of the phase.<br />
• Max Initial is equal to of less than the Min Green value assigned to the phase.<br />
• The Added Initial value assigned to the phase is zero.<br />
• The Added.Initial detector option is not enabled <strong>for</strong> the detectors calling the phase.<br />
Naztec <strong>NTCIP</strong> <strong>Based</strong> NEMA <strong>TS2</strong> and <strong>2070</strong> Controller <strong>Manual</strong> – July 2009 Page 4-18
Time Be<strong>for</strong>e Reduction (Time B4)<br />
Time-Be<strong>for</strong>e-Reduction (0-255 sec) delays gap reduction after<br />
receiving a conflicting call. After Time-B4 expires, the unit begins<br />
reducing Gap,extension over the specified Time-to-Reduce (TTR)<br />
period. Gap reduction is an optional volume density feature that is<br />
limited by the Min Gap value specified <strong>for</strong> the phase.<br />
Cars Be<strong>for</strong>e Reduction (Cars B4)<br />
Cars-Be<strong>for</strong>e-Reduction (0-255 vehicles) is an alternate method to<br />
delay gap reduction after a serviceable conflicting call. This feature applies the total number of detector actuations received<br />
during the yellow and all-red intervals to calculate the delay. Gap reduction begins when the total detector actuations<br />
exceeds the Cars-B4 value or after the Time-B4 timer expires (whichever comes first). After the Cars-B4 or Time-B4 delay,<br />
passage time is reduced to the Min Gap in a linear fashion during the Time-to-Reduce (TTR) period.<br />
Cars-Be<strong>for</strong>e-Reduction does not replace Time-Be<strong>for</strong>e-Reduction and both are active at the same time. There<strong>for</strong>e, set Time-<br />
Be<strong>for</strong>e-Reduction greater than Max-1 to <strong>for</strong>ce the controller to use Cars-Be<strong>for</strong>e-Reduction. The detector option,<br />
Added.Initial must also be enabled <strong>for</strong> calling detector to enable Cars-Be<strong>for</strong>e-Reduction.<br />
Time To Reduce (TTR)<br />
Time-to-Reduce (0-255 sec) is an optional volume-density parameter used reduce Gap,extension to the Min Gap. The linear<br />
rate of change applied to gap reduction is the difference between Gap,extension and Min Gap divided by TTR. For example,<br />
assume that Gap,extension is initially set to 4.5 seconds, Min Gap is set to 3.2 seconds and Time-to-Reduce (TTR) is set to<br />
40”. The gap reduction rate over the TTR period is (4.5” – 3.2”) / 40” or 0.033” of gap reduction per second. There<strong>for</strong>e, the<br />
first reduced passage time is 4.5” – (4.5” * 0.03”) = 4.4”. The second passage time is 4.4” – (4.4” * 0.03”) = 4.3”. Gap<br />
reduction continues in a linear fashion over the Time-to-Reduce period to reduce passage to the Min Gap.<br />
Reduce By<br />
The Reduce-By parameter (0-25.5 sec) provides an <strong>NTCIP</strong> alternative to linear gap reduction. Time-To-Reduce specifies<br />
the period over which the Gap,extension time is reduced. However, instead of reducing Gap,extension in a linear fashion ,<br />
the extension time is reduced by the Reduce By time equally over the TTR period.<br />
Minimum Gap Time<br />
The Minimum-Gap Time specifies the lowest allowable time (0-25.5 sec) to which the gap time can be reduced.<br />
Dynamic Max Limit<br />
Dynamic-Max-Limit and active maximum (MAX1, MAX2) determine the upper and lower limit during dynamic max<br />
operation. If the dynamic max limit is greater than the active Max-1 or Max-2, then it becomes an upper limit. If the<br />
dynamic max limit is less than the active Max-1 or Max-2, then it becomes a lower limit. Maximum recall or a failed<br />
detector that is assigned to the associated phase disables dynamic max operation <strong>for</strong> the phase.<br />
Dynamic Max Step<br />
Dynamic-Max-Step (0-25.5 sec) determines the stepwise adjustment to the max time. When a phase maxes out twice in a<br />
row one dynamic step value is added to the running max time and to each successive max out afterwards. After two gap<br />
outs in a row, each subsequent successive gap out reduces the running max by one dynamic step.<br />
Naztec <strong>NTCIP</strong> <strong>Based</strong> NEMA <strong>TS2</strong> and <strong>2070</strong> Controller <strong>Manual</strong> – July 2009 Page 4-19
4.1.6 Phase Options (MM->1->1->2)<br />
Enable Phase<br />
Enable is the most important phase option because unless a phase is<br />
enabled it can never be serviced. When a controller is initialized,<br />
phases 1-8 are enabled and phases 9-16 are not enabled by default.<br />
Minimum Vehicle Recall<br />
Minimum-Recall places a call on the associated phase when the phase is not timing the green interval. Minimum Recall<br />
only “calls” the phase and does not “extend” the phase during the Minimum Green interval.<br />
Maximum Vehicle Recall<br />
Maximum-Recall places a call on the associated phase while the phase is timing the red and yellow intervals, and extends<br />
the associated phase to the Maximum Green time.<br />
Pedestrian Recall<br />
When enabled, Pedestrian-Recall causes a recurring call similar to an external call. However, it will not recycle pedestrian<br />
service until a conflicting phase has been served.<br />
Soft Vehicle Recall<br />
Soft-Vehicle-Recall generates a call on the associated phase when all conflicting phases are in Green Dwell or Red Dwell,<br />
and there is no serviceable conflicting call.<br />
Lock Calls<br />
When Lock-Calls (also known as “memory on”) is enabled, any call during the yellow or red interval places a constant call<br />
<strong>for</strong> service on the phase and sets the NEMA “check” output <strong>for</strong> that phase. Lock-Calls insures that the call remains in effect<br />
until the phase is serviced, even if the detector call is removed. If Lock-Calls is not enabled, the Yellow.Lock and Red.Lock<br />
detector options (MM->5->2, right menu) determine the locking options <strong>for</strong> each detector calling the phase.<br />
Detector placement usually determines whether the phase is locked or not locked. Phases called by stop-bar detectors are<br />
typically not locked to allow permitted left-turn and right-turn-on-red movements to remove the call on the phase. Phases<br />
called by approach detectors set back more than one car length from the stop-bar are generally locked.<br />
Automatic Flash Entry Phase<br />
When Automatic-Flash is activated, the controller continues to service the phases in the current sequence. After the<br />
programmed Automatic-Flash Entry Phases are serviced, the controller will clear to all-red, then proceed to the<br />
programmed flashing operation until the Automatic-Flash input is<br />
deactivated.<br />
Automatic Flash Exit Phase<br />
After the Automatic-Flash input is deactivated, the controller will<br />
exit programmed flash and proceed to the beginning of the<br />
Automatic-Flash Exit Phases.<br />
Dual Entry<br />
Dual-Entry phases are called into service when a concurrent phase in another ring is serviced. This insures that a phase in<br />
each ring is always being serviced even when there is only a demand <strong>for</strong> service in one ring. The through phases are<br />
usually programmed <strong>for</strong> Dual-Entry to allow the ring without the call to rest in the through movement.<br />
Enable Simultaneous Gap<br />
Enable-Simultaneous-Gap allows the Gap,extension timer to reset if the phase(s) in the other ring(s) have not gapped out.<br />
When Enable-Simultaneous-Gap is not set and the phase is at a barrier, it will remain gapped out and be ready to cross the<br />
barrier when the phases in the other ring(s) gap out. Enable-Simultaneous-Gap is typically set <strong>for</strong> the “main street” phases<br />
to allow Gap,extension to reset in free operation.<br />
Naztec <strong>NTCIP</strong> <strong>Based</strong> NEMA <strong>TS2</strong> and <strong>2070</strong> Controller <strong>Manual</strong> – July 2009 Page 4-20
Guaranteed Passage<br />
Guaranteed-Passage-Time is an optional volume-density feature used with gap reduction. Enabling Guaranteed- Passage-<br />
Time insures that one full Gap,extension time is provided to the last vehicle after a gap-out condition. This insures that the<br />
actuated phase retains the right-of-way <strong>for</strong> a period equal to the difference between the Gap,extension time and the reduced<br />
gap be<strong>for</strong>e the green interval terminates.<br />
Rest In Walk<br />
In free operation, Rest-In-Walk causes a phase to rest in walk until there is a serviceable conflicting call. Rest-In-Walk may<br />
be used under coordination to time the end of ped clearance at the beginning of yellow clearance. The walk should always<br />
be recycled when using Rest-In-Walk in coordination (see section 6.7).<br />
Conditional Service<br />
Conditional Service causes a gapped/maxed phase to conditionally service a preceding actuated phase in the same ring if<br />
sufficient time remains in the phase prior to being maxed out.<br />
Non-Actuated 1 and Non-Actuated 2<br />
Non-Actuated 1 allows a phase to respond to external hardware input CNA1 (call to non-actuated, ring 1). Non-Actuated 2<br />
allows a phase to respond to external hardware input CNA1 (call to non-actuated, ring 1).<br />
Added Initial Calculation<br />
The Added-Initial-Calculation controls added initial is applied under volume-density operation and may be set to:<br />
• ‘S’ - Sum of the added initial from all of the detectors calling the phase during the yellow and red interval<br />
• “L” - use the Largest value from the group of added initial detectors calling the phase<br />
4.1.7 Phase Options+ (MM->1->1->3)<br />
Reservice<br />
Reservice works in conjunction with Conditional Service (discussed in<br />
the last section). Once a phase leaves to conditionally service a<br />
previous phase, it cannot be serviced again until the next cycle unless<br />
Reservice is enabled <strong>for</strong> that phase and there is enough time left in the<br />
phase (prior to being maxed out) to service the original phase.<br />
PedClr Thru Yellow<br />
When PedClr-Thru-Yellow is enabled, the end of the pedestrian clearance interval times concurrently with the yellow<br />
clearance interval. When PedClr-Thru-Yellow is not enabled, ped clearance always ends be<strong>for</strong>e the yellow vehicle<br />
clearance begins.<br />
SkipRed-NoCall<br />
SkipRed-NoCall allows the red clearance interval to be skipped if there is not call on a terminating phase during the yellow<br />
clearance interval. SkipRed-NoCall is enabled on a per-phase basis<br />
Red Rest<br />
Red-Rest allows a phase to rest in red instead of green dwell in the absence of any calls. If Red-Rest is enabled and no other<br />
phases are called, the phase will terminate the green after a “gap-out” condition and move to the red rest state. The phase<br />
will remain in red rest in the absence of calls and can return to service after the Red-Revert timer has expired. An external<br />
Red-Rest inputs will override this software feature <strong>for</strong> the associated ring.<br />
Max II<br />
When Max II is enabled <strong>for</strong> a phase, Max II is applied with or without and external Max II controller input or pattern entry<br />
calling <strong>for</strong> Max II. Note that a mixture of Max I and Max II settings may be accomplished with this feature because Max II<br />
may be enabled <strong>for</strong> some phases and not others.<br />
[v60][v65] Red Rest on Gap<br />
When enabled, Red Rest on Gap allows a phase to gap-out and remain in red-rest in the absence of calls on other concurrent<br />
phases in the same ring.<br />
Naztec <strong>NTCIP</strong> <strong>Based</strong> NEMA <strong>TS2</strong> and <strong>2070</strong> Controller <strong>Manual</strong> – July 2009 Page 4-21
[v60][v65] Max Inhibit<br />
This feature allows the user to select Max Inhibit by phase under coordination rather than a Coord Mode option (MM->2-<br />
>1) which applied inhibit max to all phases.<br />
Ped Delay<br />
Ped-Delay works together with Grn/Ped Delay described below<br />
to either delay the start of the green or the walk interval when a<br />
pedestrian call is serviced.<br />
If Ped-Delay is enabled with an "X", the walk interval is delayed<br />
by the Grn/Ped Delay time. In the screen to the right, Ped-Delay<br />
is enabled <strong>for</strong> phase 8 and the Grn/Ped Delay is 5". When a<br />
pedestrian call is serviced, the pedestrian walk period is delayed 5" after the start of green on phase 8. During this delay<br />
period, you will observe "DlyW" displayed in the status screen under MM->7->1.<br />
If Ped-Delay is disabled, the start of green is delayed by the Grn/Ped Delay time. This "head start ped" feature allows the<br />
pedestrian to enter the crosswalk while the vehicle indication is red. In the above screen, Ped-Delay is not enabled <strong>for</strong> phase<br />
4 and Grn/Ped Delay is 5". When a ped call is serviced, the start of green is delayed 5” after Walk begins on phase 4.<br />
Grn/Ped Delay<br />
Grn/Ped Delay works together with Ped/Delay described above. This value can delay the beginning of the walk interval<br />
(Ped Delay enabled) or delay the beginning of green (Ped Delay disabled). Grn/Ped Delay programming is not applied<br />
when there is no pedestrian call <strong>for</strong> service.<br />
Grn/Ped Delay is included in the coordination diagnostic check MM->2->8->5 to insure that the sum of Grn/Ped Delay +<br />
Walk + Ped Clearance + Yellow + All Red is satisfied by the split time. Ped times are checked by the coord diagnostic if<br />
STOP-IN-WALK is OFF or if STOP-IN-WALK is ON and "Rest-In-Walk" is enabled <strong>for</strong> the phase.<br />
Grn/Ped Delay is omitted during preemption and the controller will time the appropriate walk and ped clearance times<br />
assigned to each preempt. Grn/Ped Delay is also omitted during manual control enable when the phase is terminated by<br />
interval advance.<br />
Enable Ped Delay to delay the Walk interval by the programmed Grn/Ped Delay value<br />
Conflicting Ø<br />
Disable Ped Delay to delay the Green interval by the programmed Grn/Ped Delay value<br />
Conflicting Ø programming allows concurrent phases in different rings to be<br />
designated as conflicting phases. This effectively places a separate barrier<br />
between the two phases. This feature is useful when opposing left-turn<br />
movements require that each left-turn be serviced non-concurrently. In a<br />
dual-ring, quad 8-phase configuration, if phases 1 and 5 were designated as<br />
conflicting phases, the effective ring configuration would appear as follows:<br />
To assign conflicting phases, enter the number of the conflicting phase under the parent phase. In the menu above, “5”<br />
entered under phase 1 would prevent 1 and 5 from running together even though they are concurrent phases. It is not<br />
necessary to duplicate the entry in the column <strong>for</strong> the conflicting phase, i.e., by putting a 1 under phase 5 when there is<br />
already a 5 under phase 1. Take care not to program conflicting phases that are allowed to begin together at the barrier or<br />
the conflicting phase in ring 2 will be skipped. For example, if you never want phase 1 and 5 to run together, be sure to set<br />
the Free Ring Seq under Unit Parameters to a sequence number that leads 1 or 5 and lags the other phase.<br />
Naztec <strong>NTCIP</strong> <strong>Based</strong> NEMA <strong>TS2</strong> and <strong>2070</strong> Controller <strong>Manual</strong> – July 2009 Page 4-22
Omit Yel, Yel Ø<br />
Omit Yel allows the yellow output of a phase to go dark when a specified phase is also timing yellow clearance. “Allow Skip<br />
Yel” must be enabled under Unit Parameters (See section 4.8) to enable this option.<br />
In the example below, Omit Yel, Yel Ø is used to prevent the left-turn yellow arrow and yellow ball from being<br />
simultaneously illuminated in a 5-section left-turn display. Whenever both phases terminate simultaneously, only the solid<br />
yellow indication is displayed during the clearance interval. In this example, phase 6 is programmed as the Omit Yel, Yel Ø<br />
under phase 1 in the Options+ menu below.<br />
MM->1->1->3: Phase Plus Options<br />
When the yellow clearance of the phase specified in the<br />
column of the table (in this example Ø1) and the Omit Yel Ø<br />
(in this example Ø 6) are both timing, only the Omit Yel Ø<br />
will display an output. This insures that a single clearance<br />
indication is displayed from the Omit Yel Ø shown in the left<br />
figure when Ø 6 displays a solid yellow indication.<br />
Ped Out/Ovrlap Ø (MM->1->1->3)<br />
The Ped Out/OverlapØ feature allows one phase to share the<br />
pedestrian outputs of another phase within the same ring. This<br />
allows pedestrian outputs <strong>for</strong> an active phase to be redirected to<br />
the pedestrian outputs of a non-active phase. A similar operation<br />
may also be accomplished using the PED_1 overlap type to<br />
provide a separate set of outputs <strong>for</strong> pedestrian phases assigned to<br />
the overlap.<br />
The Ped Out/OverlapØ feature allows the user to steer (or redirect) the pedestrian outputs of a phase to another phase. In<br />
the example menu above, the pedestrian outputs <strong>for</strong> phase 1 are directed to the pedestrian outputs of phase 2. When ped<br />
call is serviced on phase 1, the walk and ped clearance indications are driven on phase 2. In this case, a ped call serviced<br />
during phase 2 will also drive the walk and ped clearance indications assigned to phase 2.<br />
Ped Out/OverlapØ programming may also be used to service a<br />
pedestrian movement that overlaps two sequential phases. The<br />
designated pedestrian movement must be entered under both phases<br />
as shown to the right. If phase 1 and 2 are consecutive phases in the<br />
sequence, the walk indication serviced during phase 1 will be<br />
redirected to the walk output on phase 2. This walk indication will<br />
hold until the end of the walk interval programmed <strong>for</strong> phase 2.<br />
Pedestrian clearance programmed <strong>for</strong> phase 2 will terminate the<br />
pedestrian movement which overlaps phase 1 and 2.<br />
Operation of the pedestrian overlap is according to the following rules:<br />
• The overlapping phases must be adjacent in the ring sequence, i.e., 1&2, 3&4, 4&1 <strong>for</strong> a STD8<br />
• If the first sequential phase has a ped call, it will begin timing the Walk interval upon entry.<br />
• At the end of the walk interval, if there is a ped call on the second sequential phase, the first phase will remain in<br />
walk while timing normal green and through yellow and red clearances.<br />
• Upon entering the second sequential phase, the pedestrian timing of that phase will apply. The pedestrian<br />
movement must terminate prior to termination of the second overlap phase.<br />
The Ped Out/OverlapØ feature was provided be<strong>for</strong>e Naztec added the PED_1 Overlap type described in section 4.4.7. The<br />
Naztec <strong>NTCIP</strong> <strong>Based</strong> NEMA <strong>TS2</strong> and <strong>2070</strong> Controller <strong>Manual</strong> – July 2009 Page 4-23
PED_1 Overlap type is a more flexible method to achieve the same operation described above. The PED_1 Overlap type<br />
allows walk and pedestrian clearance to overlap two or more consecutive phases; however, the outputs are not confined to<br />
the walk and ped clearance outputs of the parent phase. The walk output of the PED_1 Overlap type is driven by the green<br />
output of the overlap and the ped clearance output is driven by the red output.<br />
StartYel, Next Ø<br />
When the controller is programmed to start in yellow, it will normally progress to the next sequential phase in the sequence.<br />
StartYel, Next Ø designates the next phase to be serviced after startup in yellow. If phase 2 is programmed with a value of 4<br />
and the startup programming <strong>for</strong> phase 2 is yellow, then phases 4 and 8 will be serviced next instead of 3 and 7.<br />
4.1.8 Call, Inhibit, Redirect (MM->1->1->5)<br />
The Call, Inhibit, Redirect menu provides access to three independent<br />
features in the version 61 controller.<br />
1) The Call feature allows a phase green to indirectly call another<br />
phase. Each controller phase can be assigned up to 4 Call Ø's.<br />
In the menu above, ø6 is a called when ø1 is green and ø1 is<br />
receiving a detector call, min or max recall.<br />
2) The Inhibit Ø's feature places omits on inhibited phases while a phase is ON. This option can be used to prevent the<br />
controller from “backing into the previous phase” without crossing the barrier. For example, in the menu above, phase<br />
2 inhibits phase 5 and phase 6 inhibits phase 1. This programming is useful with protected/permitted left-turn displays<br />
when you do not want to create a yellow trap condition by allowing phase 2 to “back into” phase 1 or phase 6 to “back”<br />
into phase 5 without crossing the barrier.<br />
3) The Redirect Ø Calls feature (MM->1->1->5, right menu)<br />
redirects a phase call from one phase to another phase. The<br />
redirected call is only issued when the programmed phase is<br />
green and the phase called is red. For example, in the right<br />
menu, when phase 4 is green, detector calls on phase 3 are<br />
directed to phase 8. This is useful when 3+7 are leading and<br />
calls are serviced on 4+7 prior to a later call on phase 3.<br />
Redirecting calls from phase 3 to phase 8 will allow a late turn to<br />
be serviced if the left-turn display is protected/permitted.<br />
4.1.9 Alternate Phase Programs (MM->1->1->6)<br />
Alternate Phase Programs (or alternate maps) allow the phase<br />
timings, phase options and call/inhibit/redirect programming to be<br />
changed by time-of-day using timing patterns.<br />
Alternate Phase Programs may be assigned to any of the 48 patterns<br />
under Alt Tables+ (MM->2->6) as shown in the menu to the right.<br />
Alternate Interval Times (MM->1->1->6->1)<br />
Alternate Interval Times may be “attached” to patterns to vary phase<br />
times by time-of-day. Entries in this table are made by column and not<br />
by phase. For example, in the right menu, the Min Grn <strong>for</strong> phase 2 may<br />
be programmed in Column 1 or Column 4 as shown. However, most<br />
users assign phases to the same column number to make the entries<br />
more readable.<br />
Keep in mind, that if you wish to override only one phase time in a<br />
column, you must provide all entries <strong>for</strong> that phase or else zero values will be substituted <strong>for</strong> that phase. For example,<br />
column 1 sets MinGrn <strong>for</strong> Ø2 to 5”. However, all entries <strong>for</strong> Ø 2 (except walk) will be set to zero values when this<br />
alternate phase timing is called. The entries shown in column 4 represent the correct way to program alternate phase times<br />
<strong>for</strong> Ø 2.<br />
Alternate Phase Options (MM->1->1->6->2)<br />
Eight separate alternate phase option tables are provided to modify the base phase options programmed under controller<br />
menu MM->1->1->2. Again, remember to program all options <strong>for</strong> the phase you assign to each column even if you only<br />
want to vary one value.<br />
Naztec <strong>NTCIP</strong> <strong>Based</strong> NEMA <strong>TS2</strong> and <strong>2070</strong> Controller <strong>Manual</strong> – July 2009 Page 4-24
Alternate Call/Inhibit/Redirect (MM->1->1->6->3)<br />
Two separate alternate tables are provided to modify call/inhibit/redirect features. These alternate tables may also be<br />
assigned to a coordination pattern that called by time-of-day through the TBC scheduler.<br />
4.1.10 [v60][v61][v65] Times+ (MM->1->1->7)<br />
Times+ (MM->1->1->7) provides enhanced features that extend the<br />
basic <strong>NTCIP</strong> Times features under MM->1->1->1.<br />
[v60][v65] Walk 2<br />
The Walk2 clearance time is used in place of the Walk time if the pedestrian button is depressed longer than 2 seconds.<br />
This feature can be used to provide a “longer” clearance time to those with disabilities. However, it will be necessary to<br />
work with local grounds assisting the blind and disabled to educate those who can benefit from the longer pedestrian<br />
(clearance) times. This longer time is displayed during the walk period (i.e. longer walk time) and not during the flashing<br />
don’t walk period.<br />
[v60][v61][v65] BikeClr<br />
A new Times+ feature called Bike Clearance insures that the yellow + all-red clearance terminating a phase is at least as<br />
long as the BikeClr value specified in the Times+ menu if the last detection prior to gap-out is from a BIKE detector (MM-<br />
>5->3). Note that BikeClr times concurrently with the yellow + all-red interval of the phase as shown below. If the last<br />
detection prior to gap-out is received from a BIKE detector, the controller will extend the red-clearance of the phase to<br />
insure the total bike clearance specified <strong>for</strong> the phase.<br />
BikeClr Extends All-red Clearance If the Last Detection is From a BIKE Detector<br />
[v65] Max1+<br />
In version 65 Naztec added the ability to allow timing to go beyond the standard 255 seconds. If the user programs this<br />
timer it will be used in place of the Max 1 time programmed in MM111. A maximum of 999 seconds can be<br />
programmed. Users must program Max1+ if DynMxLm+ has been programmed.<br />
[v65] Max2+<br />
In version 65 Naztec added the ability to allow timing to go beyond the standard 255 seconds. If the user programs this<br />
timer it will be used in place of the Max 2 time programmed in MM111. A maximum of 999 seconds can be<br />
programmed Users must program Max1+ if Max2+ has been programmed.<br />
[v65] DynMxLm+<br />
In version 65 Naztec added the ability to allow timing to go beyond the standard 255 seconds. If the user programs this<br />
timer it will be used in place of the Dynamic Max Limit timer programmed in MM111. A maximum of 999 seconds<br />
can be programmed. Users must program Max1+ and Max2+ (if Max2 was programmed) when programming this<br />
location.<br />
[v65] GrnFlsh<br />
In version 65, this parameter was added <strong>for</strong> signals in Mexico. In Mexico, a typical clearance is GREEN, GREEN FLASH,<br />
YELLOW, RED. Naztec created an extra interval <strong>for</strong> the green flashing interval. This parameter is where a user will set the<br />
time interval <strong>for</strong> the Green Flashing period. When programming this parameter the user must consider the green flash as<br />
part of a clearance interval. There<strong>for</strong>e the parameter is programmed by calculating “how much of the first X seconds of the<br />
yellow interval will the indication be flashing green as opposed to showing yellow”.<br />
Naztec <strong>NTCIP</strong> <strong>Based</strong> NEMA <strong>TS2</strong> and <strong>2070</strong> Controller <strong>Manual</strong> – July 2009 Page 4-25
4.1.11 Copy Phase Utility (MM->1->1->8)<br />
The Copy Phase Utility allows the user to copy phase<br />
programming from one phase to another phase. This can speed up<br />
data entry and reduce errors if complementary phases in each ring have similar programming values. This utility copies all<br />
phase times, options, and phase options+ programming from menus MM->1->1->1, MM->1->1->2 and MM->1->1->3.<br />
4.1.12 Advance Warning Beacon (MM->1->1->9)<br />
This feature is used to illuminate a warning beacon in advance of a<br />
traffic signal to alert the driver a specified number of seconds be<strong>for</strong>e<br />
the phase begins yellow clearance. The warning beacon is activated<br />
by an auxiliary output via a selected action that is associated with a<br />
coordination pattern. The beacon is activated <strong>for</strong> the specified number of seconds after the phase is <strong>for</strong>ced off.<br />
To activate this feature the user must set up a coordination pattern and associated split table. When setting up cycle lengths<br />
and split times, make sure you accommodate the length of time that the phase will remain on while the sign is illuminated<br />
<strong>for</strong> the particular split phase (normally chosen as the coord phase). The time in the cycle length needed to output the<br />
advanced warning sign and clear out the associated phase must be accommodated so that all other splits still have enough<br />
time to guarantee their minimums and clearances.<br />
Consider the example of outputting a five second advanced<br />
warning sign with phase 2, the coordinated phase. If using<br />
ENDGRN coordination with phase 2, the following will occur at<br />
the zero point in the cycle. Normally phases 2 and 6 run together<br />
there<strong>for</strong>e phase 6 will terminate at the zero point and phase 2 will<br />
be extended by five seconds, while the sign is being outputted.<br />
Then phase 2 will begin its clearances. Thus split 1 will be compromised by the time programmed under this menu item<br />
plus the clearance of the coord phase. If this is the case, please insure that the split time <strong>for</strong> these phases have enough time<br />
to guarantee its minimum. Early yields may be considered so that the sign is actuated prior to the zero point in the cycle.<br />
Also keep in mind that if another phase is associated with the coord phase (as phase 6 in this example), it will be terminated<br />
while the sign is being outputted.<br />
Naztec <strong>NTCIP</strong> <strong>Based</strong> NEMA <strong>TS2</strong> and <strong>2070</strong> Controller <strong>Manual</strong> – July 2009 Page 4-26
4.2 Rings, Sequences and Concurrency<br />
Naztec controllers support 16 phases assigned to four rings. Phases may time concurrently with phases in other rings that<br />
are defined as concurrent phases. Any phase not defined as a concurrent phase is considered to be a conflicting phase. The<br />
controller uses ring sequence and concurrency definitions to determine the order that the phases are serviced and to insure<br />
that conflicting phases never time concurrently. Phase concurrency establishes “barriers” between non-concurrent phases.<br />
Phase Mode defines the sequence and concurrency relationship of the phases assigned to each ring. Phase Modes is<br />
programmed under Unit Parameters and illustrated below. The most common mode, STD8 is comprised of 8 phases<br />
operating in two rings. Phases on either side of the barrier (concurrency group) may time together in separate rings.<br />
Eight Phase Sequential (8Seq) mode has no concurrency relationship and all phases time sequentially in a single ring.<br />
Quad Sequential (QSeq) mode is a combination of STD8 and 8Seq and is typically used to provide dual ring operation <strong>for</strong><br />
the major street and sequential (or split) phasing <strong>for</strong> the cross street.<br />
USER phase mode applies to phase sequences that require more than 8 phases or more than two rings. USER mode also<br />
allows up to 16 phases to be serviced sequentially by assigning the sequences to rings 1 and 2 as discussed in section 4.2.5.<br />
Phase Mode<br />
Ring Sequence / Concurrency<br />
STD8 – Standard 8 Phase<br />
QSeq – Quad Sequential<br />
8Seq – 8 Phase Sequential<br />
DIA – Texas Diamond<br />
USER sequence based on the Texas Diamond Specification<br />
USER – User defined phase mode<br />
4.2.1 Ring Sequence (MM->1->2->4)<br />
Seq#<br />
16 seq # combinations are provided in the sequence table<br />
Ring #<br />
Four rings are provided <strong>for</strong> each of the 16 sequences<br />
Sequence Data<br />
A maximum of 8 consecutive phases may be programmed <strong>for</strong> each ring. STD-8ø initializes the controller with 16 default<br />
sequences that providing every lead/lag combination possible <strong>for</strong> eight-phase operation, dual ring operation.<br />
Each sequence must contain the same phases assigned to the same ring. Do not assign a phase to different rings in different<br />
sequences or you will generate a SEQ TRANS fault under MM->7->9->5) and send the controller to flash.<br />
In addition, a phase must be provided in the coordinated ring <strong>for</strong> each concurrency (or barrier) group. For example,<br />
consider the USER sequence below in coordination with ø 6 selected as the coord phase. A “dummy phase” must be<br />
included in ring 2 because a phase must be assigned to each side of the barrier in the coordinated ring.<br />
R1<br />
R2<br />
1 2 3 4<br />
5 6<br />
Coord<br />
Wrong! No phase<br />
provided in coord<br />
ring right of barrier<br />
R1<br />
1 2 3 4<br />
5 6<br />
R2 8<br />
Coord<br />
Correct! Dummy Phase 8<br />
provided in coord ring<br />
on the right of barrier<br />
Naztec <strong>NTCIP</strong> <strong>Based</strong> NEMA <strong>TS2</strong> and <strong>2070</strong> Controller <strong>Manual</strong> – July 2009 Page 4-27
4.2.2 Ring, Concurrency, Startup (MM->1->1->4)<br />
Phase ø<br />
Phase ø identifies the phase of the entries in the row.<br />
Ring (Rg)<br />
The Ring value assigns each phase to a ring.<br />
Start Up Phases<br />
• RED – phase startup in the red interval<br />
• WALK - startup in the green and walk interval<br />
• GREEN - startup in the green interval (pedestrian calls are removed <strong>for</strong> the startup phase)<br />
• YELLOW - startup in the yellow interval<br />
• RedCl - startup in the red interval (applies the Start Red Time defined under Unit Parameters)<br />
• OTHER- reserved <strong>NTCIP</strong> value<br />
Note: You can also control which phases are serviced next using the StartYel, Next Ø option under MM->1->1->3.<br />
Concurrent Phases<br />
Concurrent Phases define which phases may time together in each ring. The Phase ø itself does not need to be included in<br />
the concurrency group. However, any phase that is allowed to time with the Phase ø in another ring must be listed as a<br />
concurrent phase. Phases that are assigned to a sequence and do not belong to a concurrency group time sequentially while<br />
are other phases in the sequence are resting in red.<br />
Naztec <strong>NTCIP</strong> <strong>Based</strong> NEMA <strong>TS2</strong> and <strong>2070</strong> Controller <strong>Manual</strong> – July 2009 Page 4-28
4.2.3 Phase Assignments and Sequences <strong>for</strong> STD8 Operation<br />
Most traffic signals apply STD8 operation even if all eight phases are not enabled. NEMA assigns the left-turn movements<br />
to the odd-numbered phases and the through movements to the even numbered phases. It is easy to remember this<br />
convention if you recall that the even numbered through phases are assigned in a clockwise manner (2-4-6-8) and the leftturn<br />
phases opposing each thru are numbered in pairs 1-2, 3-4, 5-6 and 7-8. Many agencies assign phase 1-2-5-6 to the<br />
major (coordinated) street and 3-4-7-8 to the cross street as shown below. Other agencies assign phases to a direction<br />
(north, south, east or west) if the non-intersecting streets in the network are parallel.<br />
STD8 requires that:<br />
1-2-3-4 operate in ring 1<br />
5-6-7-8 operate in ring 2<br />
1-2 are concurrent with 5-6<br />
3-4 are concurrent with 7-8<br />
When a controller is initialized <strong>for</strong> STD8 under MM->8->4->1, the following phase sequence table is automatically<br />
programmed in the sequence table. These defaults provide all 16 combinations of leading and lagging left-turn sequences<br />
<strong>for</strong> the 8 phase, dual-ring operation illustrated above. The user may customize this table as desired under MM->1->2->4.<br />
Seq #<br />
1<br />
2<br />
3<br />
4<br />
5<br />
6<br />
7<br />
8<br />
Phase Seq.<br />
1 2 3 4<br />
5 6 7 8<br />
1 2 3 4<br />
6 5 7 8<br />
2 1 3 4<br />
5 6 7 8<br />
2 1 3 4<br />
6 5 7 8<br />
1 2 3 4<br />
5 6 8 7<br />
1 2 3 4<br />
6 5 8 7<br />
2 1 3 4<br />
5 6 8 7<br />
2 1 3 4<br />
6 5 8 7<br />
Seq #<br />
9<br />
10<br />
11<br />
12<br />
13<br />
14<br />
15<br />
16<br />
Phase Seq.<br />
1 2 4 3<br />
5 6 7 8<br />
1 2 4 3<br />
6 5 7 8<br />
2 1 4 3<br />
5 6 7 8<br />
2 1 4 3<br />
6 5 7 8<br />
1 2 4 3<br />
5 6 8 7<br />
1 2 4 3<br />
6 5 8 7<br />
2 1 4 3<br />
5 6 8 7<br />
2 1 4 3<br />
6 5 8 7<br />
16 Default Phase Sequences <strong>for</strong> STD8 (Every Combination of Lead/Lag Left-turns)<br />
Naztec <strong>NTCIP</strong> <strong>Based</strong> NEMA <strong>TS2</strong> and <strong>2070</strong> Controller <strong>Manual</strong> – July 2009 Page 4-29
4.2.4 How Barriers Affect the Phase Timing in Each Ring Under STD8<br />
This chapter began with a discussion of basic actuated and volume density features as related to a single phase. Individual<br />
phase timing and options determine how a phase services vehicle and pedestrian calls and transfers the right-of-way to a<br />
competing phase. Barriers also affect how phases terminate because a phase may be extended by a phase in another ring<br />
that is timing concurrently. Phases in each ring cross the barrier at the same time.<br />
In the example below, Min Recall calls phases 1, 2, 7 and 8 but does not extend these phases. Without a vehicle call to<br />
extend phases 1, 2, 7 and 8, a gap-out occurs after one Gap,extension and the phase will terminate and move to the next<br />
phase in the sequence. In this example, phases 1, 2, 7 and 8 must dwell in green until the phases in the other ring are also<br />
ready to cross the barrier. If the phase setting, Enable Simultaneous Gap is not enabled on phases 1, 2, 7 and 8, their<br />
respective Gap,extension timers will not reset once gap-out is reached.<br />
Max Recalls on phases 3, 4, 5 and 6 not only call these phases during their red intervals, but also extend the phases during<br />
the green interval as shown below. A Max Recall acts like a constant vehicle call on the phase that extends the phase to the<br />
maximum setting currently in effect (either Max-1 or Max-2). The Gap, Extension timer is never reset during Max Recall.<br />
STD8 Operation - Min Recalls on Phases 1, 2, 7 and 8 and Max Recalls on Phases 3, 4, 5 and 6<br />
It is important to note that a phase cannot cross a barrier until the concurrent phase in the other ring are also ready to cross<br />
the barrier. In this example, ø2 extends until ø6 has timed it’s maximum because the phase concurrency <strong>for</strong> STD8 allows<br />
phase 1-2 to time concurrently with ø5-6, but never with 3-4 or 7-8. Similarly, ø 8 extends until ø 4 “maxes” out to cross<br />
the second barrier with simultaneously with ø4.<br />
Coordinated operation is similar to the free operation example shown above except that the maximum times allocated to<br />
each phase are typically governed by Split Times. The same “barrier rules” rules apply during coordinated operation as<br />
during free operation and unused split time from both rings must be available be<strong>for</strong>e it can transfer across the barrier.<br />
4.2.5 USER Mode - 16 Phase Sequential Operation<br />
The Sequence Table provides a maximum of 8 phases in each ring<br />
sequence. USER mode can provide a maximum of 16 sequential<br />
phases by continuing the ring sequence at the end of ring 1 in ring 2 as<br />
shown to the right. This is possible because phases are assigned to rings in the phase concurrency table. The example<br />
above illustrates 12 sequential phases assigned in the order 7-9-15-4-2-3-12-5-1-6-11-14.<br />
When the Concurrent Phase programming <strong>for</strong> each sequential phase is zero, the phases in row 1 of the sequence table<br />
should be assigned to ring 1 of the Ring/StartUp/Concurrency table (MM->1->1->4) and the phases in ring 2 of the<br />
sequence should be assigned to ring 2. Do not move phases to a different ring when changing sequences, or else you will<br />
generate a SEQ TRANS fault under MM->7->9->5 sending the controller to flash.<br />
Sequential Operation may be combined with overlaps to define complex display sequences. The sequence order may be<br />
changed by defining a new phase sequence in the sequence table. However, each phase sequence in the table must contain<br />
the same number of phases and the ring assignment in the sequence table and the Ring/StartUp/Concurrency table must<br />
agree. You may omit (OMT) phases in the sequence through the Mode setting in the Split Table; however, you should<br />
never omit a phase in the sequence table if the phase is enabled under phase options (MM->1->1->2).<br />
4.2.6 Ring Parameters+ (MM->1->2->5)<br />
NEMA <strong>TS2</strong> only defines ring inputs (like Stop Time 1) <strong>for</strong> rings 1 and<br />
2. The Ring Parameters+ screen allows the user to map the ring I/O<br />
<strong>for</strong> ring 1 and 2 to any of the 4 rings available in the controller. The<br />
default assumes that ring inputs <strong>for</strong> rings 1 and 3 and rings 2 and 4 are identical.<br />
Naztec <strong>NTCIP</strong> <strong>Based</strong> NEMA <strong>TS2</strong> and <strong>2070</strong> Controller <strong>Manual</strong> – July 2009 Page 4-30
4.3 Overlaps (MM->1->5)<br />
Sixteen fully programmable overlaps may be assigned to any load<br />
switch channel in the terminal facility (cabinet). Overlaps are<br />
customized channel outputs driven by one or more included phases<br />
that are typically consecutive phases in the ring sequence.<br />
In the illustration to the right, OL1 is defined as an overlap of two included<br />
phases (Ø 1+ Ø 2). OL1 turns green when the first included phase turns<br />
green and clears with the last included phase in the sequence. Because Ø 1<br />
and Ø 5 time together in this example, it does not matter if the included<br />
phases are defined as 1+2 or 1+6. The overlap extends from the beginning of<br />
Ø1 until the end of Ø2 or Ø6 green in either case. However, if Ø 5 extends<br />
past the end of Ø 1, the overlap operation varies significantly depending on<br />
whether the included phases are 1+2 or 1+6 as shown below.<br />
Consecutive Included Ø 1+ Ø 2 in the Same Ring<br />
Non-consecutive Included Ø 1+6 in Separate Rings<br />
Overlaps may be defined with any number of phases in the same ring as shown below. This feature is useful in sequential<br />
phase operation (8SEQ or USER phase mode) to create signal displays that overlap any number of phases in the sequence.<br />
When Included Phases Are Not Consecutive, the Overlap Will Time Multiple Clearances During the Sequence<br />
4.3.1 General Overlap Parameters (MM->1->5->1)<br />
The following General Overlap Parameters apply to overlaps 1-16<br />
Lock Inhibit<br />
If Lock Inhibit is OFF, the controller will not proceed to the next phase following the last included phase until the overlap<br />
has completed timing the overlap green extension and clearance intervals. If Lock Inhibit is ON, the controller will time the<br />
next phase in the sequence during the overlap green extension and clearance intervals.<br />
Conflict Lock Enable<br />
Conflict Lock Enable is used together with the Lock Inhibit feature. If Conflict Lock Enable is ON, the controller<br />
suppresses all conflicting vehicle and pedestrian phases and conflicting overlaps until the end of overlap green extension,<br />
yellow and all-red clearance. If Conflict Lock Enable is OFF, then the conflicting vehicle and pedestrian phases and<br />
conflicting overlaps may proceed while the overlap is timing its clearances. The table below summarizes how the<br />
parameters Lock Inhibit and Conflicting Lock Enable work together to determine how the overlaps are terminated.<br />
Lock Inhibit Conflicting Lock Enable Effect on overlap clearance timing<br />
OFF OFF or ON Insures that the overlap green extension, yellow and all-red<br />
clearances are finished be<strong>for</strong>e the next phase is serviced<br />
ON OFF Allows the next phase (including any conflicting phase or overlap)<br />
to begin while the overlap completes timing green extension and<br />
clearances<br />
ON ON Allows the next phase to begin with the overlap green extension<br />
and clearances, but suppresses any conflicting phases or<br />
overlaps programmed <strong>for</strong> the overlap<br />
Effect of Lock Inhibit and Conflicting Lock Enable on Overlap Termination<br />
Naztec <strong>NTCIP</strong> <strong>Based</strong> NEMA <strong>TS2</strong> and <strong>2070</strong> Controller <strong>Manual</strong> – July 2009 Page 4-31
Parent Phase Clearance<br />
Parent Ø Clearances determines whether the overlap times it’s clearances with the included phases or uses the clearance<br />
times programmed <strong>for</strong> each individual overlap. If Parent Ø Clearances is ON, the clearance times of the included phase<br />
terminating the overlap are used. If Parent Ø Clearances is OFF, the yellow and all-red clearances as programmed in<br />
each overlap are used.<br />
[v61] Program Card<br />
If Program Card is ON, the first 8 overlaps are programmed via hardware jumpers on an external card inserted into the <strong>TS2</strong><br />
controller. These jumper positions assign the included phases <strong>for</strong> overlaps 1-8 overriding any overlap programming in the<br />
controller. The Program Card option is not a standard option <strong>for</strong> Naztec <strong>TS2</strong> controllers.<br />
[v61] Fast-Fl Rate<br />
This value controls the flash rate of the FAST-FL overlap type.<br />
4.3.2 Overlap Program Selection and Configuration (MM->1->5->2)<br />
Each overlap is selected separately from MM->1->5->2. TS1<br />
convention refers to overlaps 1-4 as overlap A-D. This convention has<br />
been carried over into <strong>TS2</strong>. For example, Overlap A to the right<br />
corresponds to overlap “1” in <strong>TS2</strong>.<br />
Included Phases<br />
A maximum of 8 Included Phases (or parent phases) may be assigned<br />
to each overlap.<br />
Modifier Phases<br />
A maximum of eight Modifier Phases may be assigned to the overlap to alter the operation based on the Overlap Type<br />
Overlap Type<br />
The Overlap Type parameter (NORMAL, -Grn/Yel or other sets the overlap operation as described in the next section<br />
Overlap “Trailing” Green Extension<br />
The overlap Green parameter extends the overlap green <strong>for</strong> 0-255 sec after an included phase terminates and the controller<br />
moves to the non-included phases. This overlap parameter is called “trailing green” in some controllers.<br />
Overlap “Trailing” Yellow and Red Clearance<br />
Parent Phase Clearance (section 4.3.1) determines whether the overlap times yellow and all-red clearance with the<br />
included phases or uses the separate yellow and all-red clearances programmed in the menu above. If Parent Ø Clearances<br />
is OFF, the yellow and all-red clearances <strong>for</strong> each overlap are used.<br />
Naztec <strong>NTCIP</strong> <strong>Based</strong> NEMA <strong>TS2</strong> and <strong>2070</strong> Controller <strong>Manual</strong> – July 2009 Page 4-32
4.4 Overlap Types<br />
The operation of each of the 16 overlaps is governed by the Overlap Type and the ModifierPhase(s). Examples are<br />
presented below to illustrate the operation available with each overlap type. Naztec provides overlap features based on<br />
customer requirements and does not endorse any particular mode of operation provided in these examples. The user should<br />
develop applications from these features that comply with local policies and with the <strong>Manual</strong> of Traffic Control Devices.<br />
• Normal (<strong>NTCIP</strong>) – modifier phase causes the overlap to go dark<br />
• –GrnYel (<strong>NTCIP</strong>) – modifier phase used to suppress the overlap green<br />
• OTHER (Naztec MIB) – selects one of the following Types+ under overlap Program Parms+:<br />
o<br />
o<br />
o<br />
o<br />
o<br />
o<br />
o<br />
o<br />
o<br />
L-Perm – suppresses the solid green in a protected/permitted left-turn while the opposing left-turn (modifier<br />
phase) is green (this left-turn display is used by some agencies to resolve the “yellow-trap).<br />
Fl Red – flashing red arrow used by some agencies <strong>for</strong> the permitted left-turn indication (another left-turn<br />
display designed to address the “yellow trap” safety issue.<br />
Fast-FL – Fast FL is used in Canada. It flashes the GREEN signal at the rate specified in the Fast-Fl Rate<br />
parameter (see MM151). It is used <strong>for</strong> protected-permissive left turns. An overlap set to this type<br />
will flash green when the user programs both the included phase and modifier phase and that phase is active.<br />
R-Turn – used to drive a right-turn green arrow when a non-conflicting left-turn is being serviced and move<br />
immediately to a solid green indication of the through movement associated with the right turn<br />
Ped_1 – used to drive a walk indication timed with the first included phase and ped clearance which overlaps<br />
the following included phases defined <strong>for</strong> the overlap<br />
MinGrn – identical to the NORMAL overlap type, except that the overlap green extension is timed as a min<br />
green period when the overlap green period begins<br />
FlYel-4 or FlYel-3 – this is used to Flash a yellow arrow during permissive left turns. See section 4.7 <strong>for</strong><br />
further details.<br />
Minus Walk (-WALK) [v61] - The -WALK type operation works the same as a NORMAL overlap<br />
except:<br />
• It is only when the Walk output of an inhibit phase is active that the overlap is inhibited<br />
• Only the Green of the overlap is darkened when inhibited by an inhibit walk.<br />
R-T,ILL [v61] - Also known as an Illinois overlap, this overlap will output based on the following<br />
conditions:<br />
• If the modifier phase is green, the overlap will be red<br />
• If the controller is running the modifier phase, and the phase next is also a modifier<br />
phase then the overlap will remain red<br />
• In all other conditions, the modifier phase does not alter the overlap.<br />
4.4.1 <strong>NTCIP</strong> Overlap Type: Normal (NORMAL)<br />
The Included Phases and the modifier phases control the Normal overlap type as follows:<br />
• The overlap is green when an included phase is green, or an included phase is timing yellow/red clearance and<br />
an included phase is next<br />
• The overlap is yellow when an included phase is yellow and an included phase is not next<br />
• The overlap is red when the overlap green and yellow are not on<br />
• The overlap is dark (all outputs off) when a modifier phase is on during it’s green, yellow or all-red interval<br />
The examples below illustrate a NORMAL overlap type with included phases Ø1 and Ø2. The Ø1 modifier blanks out the<br />
overlap outputs as long as the Ø1 outputs are green or yellow. The Ø2 modifier blanks out the overlap as long as the Ø2<br />
outputs are green or yellow. If the modifier selected is the last included phase in the sequence (in this case Ø2), the yellow<br />
Naztec <strong>NTCIP</strong> <strong>Based</strong> NEMA <strong>TS2</strong> and <strong>2070</strong> Controller <strong>Manual</strong> – July 2009 Page 4-33
clearance will be omitted as shown.<br />
NORMAL Type: Modifier Phases Blanks Out the Overlap When the Modifier is Green or Yellow<br />
Note: if you specify a modifier phase <strong>for</strong> a NORMAL overlap type, be sure that your conflict monitor is programmed to<br />
allow the overlap output channel to go blank when the modifier phase is timing. It also may be necessary to adjust the<br />
monitor to accept an output sequence that omits yellow clearance such as the example above. The user is responsible to<br />
configure the phase sequence, phase concurrency and overlap programming to comply with the MUTCD.<br />
4.4.2 <strong>NTCIP</strong> Overlap Type: Minus Green Yellow (-GrnYel)<br />
Both the Included Phases and the Modifier Phases control this overlap type as follows:<br />
• The overlap is green when an included phase is green, or an included phase is timing yellow/red clearance and<br />
an included phase is next. In both of these cases, the modifier phase is not green.<br />
• The overlap is yellow when an included phase is yellow, an included phase is not next, and a modifier phase is<br />
not green<br />
• The overlap is red when the overlap green or yellow is not on<br />
The –GrnYel overlap type uses the green output of the modifier phase to suppress the overlap. If the overlap is red when<br />
the modifier turns green, the overlap will be suppressed until the yellow clearance of the modifier phase (see example<br />
below with the modifier set to Ø1).<br />
In the second example (modifier set to Ø2), the overlap will terminate at the point when the modifier phase is NEXT and<br />
remain suppressed until the end of the modifier green. This is the same configuration used in our last example <strong>for</strong> the<br />
NORMAL overlap type; however, in this case, the overlap displays a solid red indication when Ø1 is green instead of a<br />
“blank” indication used with the NORMAL type.<br />
Please insure that all –GrnYel overlaps are included as preempt dwell overlaps in preempt Overlaps+ (MM->3->1->5).<br />
-GrnYel Type: Modifier Phases Suppresses the Overlap During When the Modifier Phase is Green<br />
4.4.3 Naztec Overlap Type: Left Turn Permissive (L-PERM)<br />
Both the Included Phases and the Modifier Phases control this overlap type as follows:<br />
• The overlap turns green when an included phase, that is not a modifier phase, turns green (this is true even if a<br />
modifier phase is already displaying a green indication)<br />
• The overlap remains green as long as one of the included phases remain green<br />
• The overlap is yellow when an included phase is yellow and an included phase is not on or next<br />
• The overlap is red when it is not green or yellow<br />
These overlap outputs can provide the permissive green, yellow, and red<br />
indications <strong>for</strong> a 5-section left-turn display. The protected left-turn phase<br />
provides the green and yellow arrow indications. The modifier phase is used<br />
with the L-PERM type to suppress the overlap display when the protected<br />
movement is lagging but not leading. The included phases are entered as the<br />
two through movements <strong>for</strong> the barrier, and the modifier phase is entered as<br />
the conflicting through movement <strong>for</strong> the left turn. The example to the right defines an overlap used to drive the permitted<br />
indications in a left-turn display where Ø1 is the protected left-turn movement. This overlap is defined with Ø2 & Ø6 as<br />
Naztec <strong>NTCIP</strong> <strong>Based</strong> NEMA <strong>TS2</strong> and <strong>2070</strong> Controller <strong>Manual</strong> – July 2009 Page 4-34
the included phases, and Ø2 as the modifier phase.<br />
The L-PERM overlap type suppresses the overlap green indication until the adjacent through phase turns green in the<br />
lagging left-turn display. This prevents the driver in the through direction (Ø6 in this case) from seeing a green indication in<br />
the left-turn display while the through indications are solid red. Once the adjacent through phase (in this case Ø6) turns<br />
green, the overlap remains green until the barrier is reached.<br />
If the phase sequence is reversed (Ø1 leading instead of lagging), the<br />
overlap does not need to be suppressed, so the L-PERM overlap displays a<br />
solid green indication as shown to the right. During a dual-lead sequence<br />
(Ø1 and Ø5 leading), the overlap is suppressed with a solid read indication<br />
until the end of Ø1.<br />
4.4.4 Naztec Overlap Type: Flashing Red (FL-RED)<br />
Both the Included Phases and the Modifier Phases control this overlap type as follows:<br />
• The overlap is green when an included phase is green, or an included phase is timing yellow/red clearance and<br />
an included phase is next<br />
• The overlap is yellow when an included phase is yellow and an included phase is not next<br />
• The overlap is flashing red when the overlap green or yellow are not active, the modifier phase is green, and the<br />
modifier phase is not in ped clearance, or walk..<br />
• The overlap is dark when the overlap is not green, yellow, or flashing red<br />
This overlap type was developed to drive a flashing red indication in a 4-section left-turn signal display in place of the solid<br />
green permitted indication. An animation of this sequence is provided at the following URL address:<br />
http://www.naztec.com/systems/cupertino-left-turn.htm<br />
This overlap type requires two consecutive overlaps. The solid red indication in<br />
the display is driven from the first overlap and the flashing red display is driven<br />
from the second overlap red output. Never set Overlap A (1) to type FL-RED<br />
because it will be used to also clear the red of the previous overlap (i.e. overlap<br />
A (1) cannot used this feature). For example, if the protected movement (green<br />
and yellow arrow is assigned to phase 1, the solid red indication should be<br />
driven from overlap A (1) red and the flashing red indication should be driven<br />
from overlap B (2) red.<br />
The overlaps <strong>for</strong> this configuration are shown to the<br />
right <strong>for</strong> a dual-lead sequence. Since the overlap is<br />
gated with the adjacent through movement's green,<br />
the overlap will go back to green when the adjacent<br />
turn goes to yellow, and the included left turn is next.<br />
This means that this feature should not be used if the<br />
adjacent through phase is utilizing the "walk through<br />
yellow" feature. The FL RED overlap type flashes at<br />
a rate of 60 flash cycles per minute (or once per<br />
second). This rate flashes the overlap red output at<br />
500ms on, followed by 500ms off.<br />
4.4.5 Naztec Overlap Type: FAST FL<br />
The flash rate may be programmed within a range of values (OFF, 60, 120, 150 or 180 cycles per minute) from<br />
MM151, General Overlap Parameters. Fast FL is used in Canada. It flashes the GREEN signal at the rate specified<br />
in the Fast-Fl Rate parameter. It is used <strong>for</strong> protected-permissive left turns. An overlap set to this type will flash green<br />
when the user programs both the included phase and modifier phase and that phase is active.<br />
Naztec <strong>NTCIP</strong> <strong>Based</strong> NEMA <strong>TS2</strong> and <strong>2070</strong> Controller <strong>Manual</strong> – July 2009 Page 4-35
4.4.6 Naztec Overlap Type: Right Turn (R-TURN)<br />
The Included Phases and Modifier Phases are used to program this overlap type as follows:<br />
• The overlap turns green when an included phase is green that is not also a modifier phase<br />
• The overlap remains green if the next phase is also an included phase<br />
• The overlap goes from green to red, without yellow, when the included next phase that is also a modifier phase<br />
turns green<br />
• The overlap is yellow when an included phase is yellow, and an included phase is not next<br />
• The overlap is red when the overlap is not green or yellow, or modifier phase is green<br />
This overlap type provides a green right-turn arrow when a non-conflicting left turn is active. The overlap was designed to<br />
allow the right-turn arrow to remain illuminated through the compatible left turn clearances and move to red when the<br />
through movement becomes active.<br />
4.4.7 Naztec Overlap Type: Ped Overlap (Ped-1)<br />
Ped Overlaps are useful where there is a large median to store pedestrians midway in the crosswalk and the crossing can be<br />
broken into two sequential portions. The order of the included phases assigned to the overlap affects the mode of operation.<br />
This is the only overlap type where the order of the included phases is significant.<br />
If each included phases is consecutive in the phase sequence, the ped<br />
overlap walk interval will begin timing with the first parent phase. Ped<br />
Clearance begins with the first included phase and ends with the ped<br />
clearance programmed <strong>for</strong> the last included phase assigned to the<br />
overlap.<br />
Ped 1 Overlap Type With Included Phases 5 + 8 (note the order of the included phases)<br />
Note how the operation of the PED 1 overlap changes when the order of the included phases is reversed. This operation is<br />
useful only if the pedestrian indication needs to be serviced more than once per cycle. The PED 1 overlap type will also<br />
service multiple pedestrian movements if the included phases assigned to the overlap are not consecutive.<br />
The following rules must be followed to select included phases <strong>for</strong> Ped Overlaps.<br />
• The included phases must be in the same ring<br />
• The included phases must be sequential in the ring sequence, in order <strong>for</strong> the ped output to stay active between<br />
phase transitions. For instance, if you are overlapping 1+2 ped, then phases 1&2 must appear in order in the ring<br />
sequence. If they do not, then the ped will clear, and reactivate when the next included phase becomes active.<br />
• For overlapping to occur, the following must happen: The walk must go active in the current included phase,<br />
and a ped call must be active in a subsequent included phase be<strong>for</strong>e the end of walk of the current phase.<br />
Naztec <strong>NTCIP</strong> <strong>Based</strong> NEMA <strong>TS2</strong> and <strong>2070</strong> Controller <strong>Manual</strong> – July 2009 Page 4-36
4.4.8 Naztec Overlap Type: Min Green (Ped-1)<br />
This overlap type is identical to the NORMAL overlap type with the exception that the overlap green extension is used to<br />
insure the minimum period that the overlap is green.<br />
4.4.9 Naztec Overlap Type: Minus Walk (-WALK) [v61]<br />
The –WALK type operation works the same as a NORMAL overlap except:<br />
• The Overlap is inhibited only when the Walk output of an inhibit phase is active<br />
• Only the Green of the overlap is darkened when inhibited by an inhibit walk.<br />
To Program the -WALK overlap type:<br />
• On the Overlap Program screen (MM->15->2->#->1) enter the included phases, and then the inhibit phases on<br />
the Modifier Phases row. Then set the Type to R-T/OTH.<br />
• On the Overlap, Program, Confl Prog+ screen (MM->1->5->2->#->2), set the Type+ to “-WALK”<br />
4.4.10 Naztec Overlap Type: R-T,ILL [v61]<br />
This overlap is also known as an Illinois overlap. This overlap will output based on the following conditions:<br />
• If the modifier phase is green, the overlap will be red<br />
• If the controller is running the modifier phase, and the phase next is also a modifier phase then the overlap will<br />
remain red<br />
• In all other conditions, the modifier phase does not alter the overlap.<br />
Naztec <strong>NTCIP</strong> <strong>Based</strong> NEMA <strong>TS2</strong> and <strong>2070</strong> Controller <strong>Manual</strong> – July 2009 Page 4-37
4.5 Overlap Plus Menu (MM->1->5->2->2)<br />
Conflicting phases, pedestrian and overlaps terminate an overlap<br />
when the conflicting phase, pedestrian movement or overlap is next<br />
and continue to suppress the overlap while the conflicting phase,<br />
pedestrian movement or conflicting overlap is timing green and<br />
yellow clearance. Conflicting Peds may be used to omit a right-turn<br />
indication when a pedestrian movement is serviced. The example below shows the right-turn arrow (overlap 1) conflicting<br />
with the ped signals during phase 2.<br />
In this example, a right-turn indication (overlap 1 green) conflicts with the pedestrian signals during phase 2<br />
The conflict between the right arrow and the walk indication may be avoided by programming the pedestrian phase as a<br />
Conflicting Ped to suppress the overlap whenever a ped call is placed on Ø2. The overlap will continue to be suppressed<br />
during Ø2 until the pedestrian call is serviced. The overlap will also be suppressed if the ped call is issued continuously<br />
(ped recall is placed on Ø2).<br />
Here, a Conflicting Ped parameter is used to prevent the right-turn arrow conflict with the pedestrian signals<br />
4.5.1 Overlap Plus Menu specific to Version<br />
61.x<br />
The following screen is specific to the <strong>TS2</strong> firmware Version<br />
61.x and found at MM1522.<br />
4.5.2 Overlap Plus menu specific to Version 65.x<br />
The following screen is specific to the Model <strong>2070</strong> Apogee<br />
Version 65.x software and is found at MM1523.<br />
These additional features are explained in the section below.<br />
Naztec <strong>NTCIP</strong> <strong>Based</strong> NEMA <strong>TS2</strong> and <strong>2070</strong> Controller <strong>Manual</strong> – July 2009 Page 4-38
4.6 Additional Overlap Features<br />
4.6.1 [v60][v61][v65] Lead Green Feature<br />
The Lead Green parameter (ON/OFF) delays the start of the overlap green much like the Green/Ped Delay which delays the<br />
start of a phase green or walk indication.<br />
4.6.2 [v61] Delay<br />
The Delay parameter (0-255 seconds) is the time the overlap will remain dark, i.e. there is no red, yellow, green shown<br />
once the overlap is supposed to go green. It is used primarily in Canada.<br />
4.6.3 [v60][v65] Green Extension Inhibit (GreenExtInh)<br />
Green Extension Inhibit phases overrides the green extension setting in the overlap. For instance, if included phases are<br />
1+2, and the overlap times a green extension/trailing time of 10 seconds, setting phase 1 as a GrnExtInh phase will inhibit<br />
the extension if the overlap terminates at the end of phase 1 instead of phase 2.<br />
4.6.4 [v65] Transit<br />
Used with Naztec’s additional Transit software. If the overlap is providing the right-of-way to the transit vehicle (i.e. a train<br />
on a dedicated path, the transit value is the value of the transit input # that it is linked to. Currently the Transit software has<br />
4 transit inputs so the valid programming values would be 0, 1,2,3 or 4 where the value of “0” indicates no transit input.<br />
Naztec <strong>NTCIP</strong> <strong>Based</strong> NEMA <strong>TS2</strong> and <strong>2070</strong> Controller <strong>Manual</strong> – July 2009 Page 4-39
4.7 Flashing Yellow Arrows using Overlaps<br />
Agencies may choose the optional use of flashing yellow arrow method <strong>for</strong> permissive left turns (see below). This is the<br />
implementation discussed in NCHRP Report 493. It was issued an MUTCD interim approval by the FHWA on March 20,<br />
2006. A full explanation can be found at http://onlinepubs.trb.org/onlinepubs/nchrp/nchrp_rpt_493.pdf<br />
========================================================================================<br />
WARNING<br />
THE FLASHING YELLOW ARROW MOVEMENT IS BEING DEVELOPED BASED UPON RESEARCH<br />
PERFORMED IN NCHRP PROJECT 3-54. THIS PROGRAM IS AUTHORIZED BY THE FEDERAL HIGHWAY<br />
ADMINISTRATION AND IS CURRENTLY IN AN EXPERIMENTAL PHASE.<br />
Naztec, Inc. does not provide any guidelines, warrants, or recommendations <strong>for</strong> the use of protected/permissive leftturn<br />
phasing. The underlying assumption is that the traffic engineer has decided that flashing yellow arrow<br />
protected/permissive control is the most appropriate left-turn treatment. It is also assumed that the deploying<br />
agency has made all necessary considerations regarding this control method and has determined that it is consistent<br />
with relevant traffic engineering standards and practices. Please note that the operation of this feature is subject to<br />
change pending actions by the regulating standards organizations. It is the responsibility of an agency acquire<br />
permission by FHWA <strong>for</strong> the use of the Flashing Yellow Arrow. A link <strong>for</strong> this approval is provided below:<br />
http://mutcd.fhwa.dot.gov/resources/interim_approval/ia_10_flashyellarrow.htm<br />
========================================================================================<br />
Naztec <strong>NTCIP</strong> <strong>Based</strong> NEMA <strong>TS2</strong> and <strong>2070</strong> Controller <strong>Manual</strong> – July 2009 Page 4-40
4.7.1 Version 61.x Flashing Yellow Overlap Programming<br />
Version 61 accomplishes this by using existing pedestrian yellows outputs that are not normally used by the Walk and<br />
Don’t Walk intervals. This feature allows the Flashing Yellow Arrow (FYA) output from an overlap to be mapped to the<br />
yellow output of a pedestrian channel. The yellow output is typically not used and there<strong>for</strong>e available <strong>for</strong> FYA use. In<br />
other words, the Overlap, during the modified phase period of that overlap, drives the pedestrian channel that is mapped to<br />
it, to flash the yellow arrow. This feature allows an FYA signal to be implemented without using a second full load switch<br />
position or cumbersome cabinet re-wiring. For example, we will change a protected only Phase 1 Left-turn to a Protect-<br />
Permissive using a 4-head signal with Flashing Yellow. We will program Overlap B (Overlap 2) that will utilize the<br />
Yellow Flash output from Phase 2 Ped Yellow.<br />
Please note the user should assign only even-numbered overlaps <strong>for</strong> the Flashing Yellow Arrow(FYA). Odd-numbered<br />
overlaps that are one less than FYA must remain unassigned because the yellow is used as an alternate way to get the FYA<br />
output.<br />
Channels are set up via MM131. In this example we will use the default channel setup <strong>for</strong> a typical <strong>TS2</strong> Cabinet.<br />
First set up overlap # 2 via MM152(olp) 21. Make sure you program the type as R-T/OTH and set up the<br />
included phase as the protected/permitted phase and the modifier phase as the conflicting through movement.<br />
Next go to the MM152(olp) 22 screen and make sure that you program the Type+ as FlYel-4 <strong>for</strong> a 4 section<br />
head. Note if you have a 3-section head you can program Type+ as FlYel-3.<br />
Use the FYA mapping screen (MM154) to map FYA outputs of overlaps to Pedestrian Clearance outputs of<br />
channels. Assume that Phase 2 Ped is programmed as the default Ped 2 channel, Channel 13.<br />
The # columns show which of 4 FYA signals is being programmed. The Olp column shows the overlaps that are<br />
programmed as type FlYel-4. Up to four 4-output FYA overlaps may be mapped to Ped Clearance outputs. The first four<br />
overlaps that are programmed as type FlYel-4 will be shown in order. The user may enter the number of an output channel<br />
that is assigned as type “PED” to use its Ped clearance output. A zero entry means that no mapping takes place and the<br />
FYA output will appear as it usually does on the yellow overlap output of the overlap that is one number less than the main<br />
FYA overlap. For example, if overlap 6 is configured as type FlYel-4, its flashing yellow output will appear on the yellow<br />
output of overlap 5. If Ped Clearance mapping is setup, it will also appear on the ped clearance output of the channel<br />
programmed on this screen.<br />
Note that if a channel assignment is made to a channel that is not assigned as Ped, the FYA mapping does not occur.<br />
Note, too, that the overlap associated with the FYA mapping entry (#) is dependent upon whether it is first, second, etc. of<br />
the overlaps configured as FlYel-4. If overlap types are changed such that this order is changed, the Fl Yel Arrow mapping<br />
should be reviewed to ensure that the FYA outputs are mapped to the desired Ped Clearance outputs.<br />
Naztec <strong>NTCIP</strong> <strong>Based</strong> NEMA <strong>TS2</strong> and <strong>2070</strong> Controller <strong>Manual</strong> – July 2009 Page 4-41
Running special operations such as preemption, may affect the output of this arrow such that you may have to “hard code”<br />
the clearance times to insure proper hardware monitoring of this channel.<br />
Channels 13-16 Pedestrian Movements Assignment Example<br />
The following is a reprint from the MMU manual which lays out the Ver 61 channel and left turn arrow channel<br />
assignments <strong>for</strong> a standard 16 channel <strong>TS2</strong> controller using 4 left turn arrows.<br />
FYA Programming 4 Left Turns, Peds on 13-16<br />
8/30/2007<br />
CONTROLLER<br />
Controller Channel Assignments<br />
Channel 1 2 3 4 5 6 7 8 9 10 11 12 13 14 15 16<br />
Type OLP VEH OLP VEH OLP VEH OLP VEH OLP OLP OLP OLP PED PED PED PED<br />
# 2 2 4 4 6 6 8 8 9 9 9 9 2 4 6 8<br />
Controller FYA Overlap Setup<br />
Notes<br />
Overlap 2 4 6 8 1 Assign only Even-numbered overlaps as FYA.<br />
Olp Included 1 3 5 7<br />
Odd-numbered overlaps one less than FYA<br />
Olp Modifier 2 4 6 8<br />
must remain unassigned b/c the yellow is used<br />
FYA out on Chan 13 14 15 16<br />
as an alternate way to get the FYA output.<br />
OLP Type R-T/OTH R-T/OTH R-T/OTH R-T/OTH<br />
OLP Type+ FLYel-4 FLYel-4 FLYel-4 FLYel-4<br />
MMU-516L<br />
MMU FYA Setup<br />
FYA # 1 2 3 4<br />
Type FYA FYA FYA FYA<br />
FYA Channel 1 3 5 7<br />
Yel Input Chan 13 14 15 16<br />
Permissive 1 2 4 6 8<br />
Permissive 2 13 14 15 16<br />
Please note that the Channel numbers in parentheses are not programmed on the Program Card.<br />
Their FYA functionality is entered on the FYA Setup Screen as indicated above.<br />
MMU Prog Card<br />
Channel 1 2 3 4 5 6 7 8 9 10 11 12 13 14 15 16<br />
1 (2) 5 6 (13) 15<br />
2 5 6 13 15<br />
3 (4) 7 8 (14) 16<br />
4 7 8 14 16<br />
5 (6) 13 (15)<br />
6 13 15<br />
7 (8) 14 (16)<br />
8 14 16<br />
9<br />
10<br />
11<br />
12<br />
13 15<br />
14 16<br />
15<br />
Naztec <strong>NTCIP</strong> <strong>Based</strong> NEMA <strong>TS2</strong> and <strong>2070</strong> Controller <strong>Manual</strong> – July 2009 Page 4-42
4.7.2 Ver. 65.x Flashing Yellow Overlap Programming<br />
This version is similar to version 61.x except the user can use existing overlap yellow or pedestrian yellows outputs.<br />
Programming the same example above, we will change a protected only Phase 1 Left-turn to a Protect-Permissive using a<br />
4-head signal with Flashing Yellow. We will program Overlap A (Overlap 1) that will utilize the Yellow Flash output from<br />
Phase 2 Ped Yellow.<br />
First set up the overlap via MM152(olp)11. Make sure you program the type as FYA-4 and set up the included<br />
phase as the protected/permitted phase and the modifier phase as the conflicting through movement.<br />
Use the Output Channels+ screen (MM184) to tell channel 13 that it is having an overlap override applied, whose<br />
source is via Overlap A( Overlap 1) and that it is to flash the yellow output. Assume that Phase 2 Ped is programmed as the<br />
default Ped 2 channel, Channel 13.<br />
In summary, Flashing Yellow Arrow works a little different in ver 65, it’s a little more flexible. In theses versions overlaps<br />
have 4 outputs. They have RED, YELLOW, GREEN, and AUX. In the channel+ screen, you tell which channel’s yellow<br />
output is going to be overridden by the overlap AUX output. Keep in mind that you do not have to use a ped channel, but<br />
can use any channel. For ver 65, you can elect to utilize a whole channel <strong>for</strong> the FYA output, or an existing pedestrian<br />
channel.<br />
Please note the following nuances with the FYA software. The yellow arrow will flash <strong>for</strong> a minimum of 2.0 seconds to<br />
insure proper clearances <strong>for</strong> the cabinet’s conflict monitor. Also note, when the time of day pattern or preempt disables an<br />
overlap that is an FYA overlap, the software will finish out the yellow be<strong>for</strong>e dropping the overlap. Finally, when time of<br />
day or preempt allows an omitted FYA overlap to be reestablished, it will not wait until the overlap is timing green or red,<br />
not yellow.<br />
4.8 Overlap Status Display (MM->1->5->3)<br />
Overlap Status is shown <strong>for</strong> each of the 16 overlaps in<br />
the controller. Intervals and timing show the individual<br />
clearance and extension timers <strong>for</strong> each overlap as<br />
shown in the figure to the right.<br />
Naztec <strong>NTCIP</strong> <strong>Based</strong> NEMA <strong>TS2</strong> and <strong>2070</strong> Controller <strong>Manual</strong> – July 2009 Page 4-43
4.9 Automatic Flash (MM->1->4)<br />
“Cabinet Flash” is a fallback mode of operation after an equipment<br />
failure or conflicting signal indication is detected by the MMU.<br />
During “Cabinet Flash”, the transfer relays disable all channel<br />
outputs from the controller and flash the load switches though a<br />
separate flasher device.<br />
Automatic Flash (or programmed flash) provides two alternate means of flashing the load switch channels through the<br />
controller instead of the cabinet flasher. This operation is controlled through the Flash Mode setting found in the<br />
parameters section of the Automatic Flash menu.<br />
4.9.1 Flash Parameters (MM->1->4->1)<br />
The Flash Parameters determine the:<br />
• Flash Mode used to flash the signal displays during<br />
automatic (or programmed) flash<br />
• Source of the input triggering automatic flash<br />
• Clearance times when the controller leaves automatic flash and returns to stop-and-go operation<br />
Flash Mode<br />
This entry determines the source of the flash data when the controller goes into flash. Three modes are available.<br />
• CHANNEL – Channel settings are applied during Automatic Flash (see section 4.9.1)<br />
• Ø/Olap – Phase/overlap flash settings (discussed in the next section) are applied during Automatic Flash<br />
• VOLT/MON – the controller voltage-monitor and the fault-monitor signals are de-asserted during automatic flash<br />
causing the MMU to disengage the transfer relays and flash the cabinet through the flasher<br />
Input Src<br />
The Input Source defines the external input <strong>for</strong> Automatic Flash. This allows the controller to be easily adapted to TS1<br />
cabinets without rewiring the external input. Valid values are D-CONN (D-connector input), TEST-A or TEST-B.<br />
Yellow Clearance<br />
If a channel is selected to flash yellow, then this parameter determines its yellow clearance time when it leaves flash.<br />
Red Clearance<br />
If a channel is selected to flash red, then this parameter determines its red clearance time when it leaves flash.<br />
[v61] Restart Upon Exit<br />
When set, this parameter causes a restart upon exit from automatic flash. It is intended to be used with Channel Flash or<br />
VOLT_MON flash modes. The variables such as all red time or startup flash will take effect is this parameter is<br />
programmed to “ON”. This parameter is ignored when set to “OFF”.<br />
[v61] Pre-empt Flash Mode<br />
This entry allows preempt flash mode to be different than automatic flash mode. Legacy operation is supported by the<br />
default mode set to “AUTO”, which makes the preemption flash mode to be the same as the automatic flash mode. It<br />
determines the source of the flash data when the controller goes into Preemption Flash. Three modes are available.<br />
• AUTO – Automatic Flash settings are applied as programmed on this screen<br />
• Ø/Olap – Phase/overlap flash settings are applied during Preemption Flash<br />
• VOLT/MON – the controller voltage-monitor and the fault-monitor signals are de-asserted during automatic flash<br />
causing the MMU to disengage the transfer relays and flash the cabinet through the flasher.<br />
Naztec <strong>NTCIP</strong> <strong>Based</strong> NEMA <strong>TS2</strong> and <strong>2070</strong> Controller <strong>Manual</strong> – July 2009 Page 4-44
[v61] Pre Restart Upon Exit<br />
This parameter <strong>for</strong>ces the controller to go through an external startup procedure when exiting the Preemption Flashing<br />
dwell period. It is intended to be used with Preempt Flash or VOLT_MON flash modes. The variables such as all red time<br />
or startup flash will take effect is this parameter is programmed to “ON”. This parameter is ignored when set to “OFF”.<br />
Additional notes on the [v61] the specific Flash Parameters<br />
1) External Start with Preempt active causes startup flash until both are removed<br />
2) Automatic flash and preempt call: When the preemption is set to NOT override automatic flash, it will cause the<br />
automatic flash to remain active until both automatic flash and preempt calls are inactive.<br />
4.9.2 Ø / Overlap Flash Settings (MM->1->4->2)<br />
Ø/Overlap Flash Settings provide an alternative to the CHANNEL<br />
flash settings and allow the user to specify which phases and/or<br />
overlaps flash yellow when Automatic Flash is activated. All<br />
undefined phases and overlaps will flash red unless programmed to<br />
flash yellow in this menu.<br />
Naztec <strong>NTCIP</strong> <strong>Based</strong> NEMA <strong>TS2</strong> and <strong>2070</strong> Controller <strong>Manual</strong> – July 2009 Page 4-45
4.10 Events and Alarms (MM->1->6->4)<br />
StreetWise provides a distinction between low-priority events and<br />
high-priority alarms. Events are uploaded periodically (perhaps only<br />
once per day) <strong>for</strong> historical purposes. However, alarms are typically<br />
relayed to central as soon as possible.<br />
A maximum of 128 events and alarms may be enabled through separate<br />
controller menus; however, each numbered events refers to the same<br />
numbered alarm. If an alarm is to be enabled, it must first be enabled<br />
as an event. However, an event may be enabled as an event without<br />
being enabled as an alarm. This scheme allows user defined highpriority<br />
alarm to be reported immediately to central while low-priority<br />
events are stored <strong>for</strong> record purposes.<br />
4.10.1 Pattern / Preempt Events (MM->1->6->7) [v50][v61] (MM->1->6->7->1) [v65]<br />
Pattern changes and Preempt Events are stored in the events log and<br />
enabled separately from Event / Alarm Parameters.<br />
Pattern Events<br />
A Pattern Event and time-stamp is generated whenever there is a<br />
change in the active coordination pattern.<br />
Preempt Events<br />
A Preempt Event and time-stamp is generated whenever preemption begins or ends.<br />
Local Transmit Alarms<br />
Do not enable Local Transmit Alarms if the local controller is being polled by a closed loop master or StreetWise. This<br />
feature should only be enabled if the local controller is programmed to <strong>for</strong>ward alarms over a dialup modem.<br />
Re-Assign User Alarm IN<br />
These two entries allow the general-purpose NEMA Inputs, Alarm In 1 and Alarm In 2 to be mapped to the alarm # that is<br />
entered. If this entry is 0, then the Alarm inputs are mapped to their default alarm numbers that are shown in parenthesis.<br />
The alarm input flexibility that this provides allows users to mimic other manufacturers controllers when replacing them in<br />
existing non-standard NEMA cabinets.<br />
Mon/Flash Alarm Delay (31)(secs) [v61]<br />
Alarm # 31 is a new alarm with a built-in Delay Feature. This alarm becomes active after the user-programmed delay<br />
expires if the monitor, or a controller fault, causes the cabinet to flash. Specifically, the alarm is activated by:<br />
1) A controller fault<br />
2) A non-critical SDLC fault, including non-response after power-up<br />
3) NEMA input “MMU Flash In” if the Local Flash Input is not active<br />
4) NEMA input “Stop Time In” if the Local Flash Input is not active<br />
This alarm will issue a pulse when three power-ups occur without sufficient time between them. The user should enter the<br />
seconds that the flash alarm may exist without setting the alarm. This allows momentary flashing due to MMU startup<br />
flash to NOT generate this alarm. If short flashes occur three times without meeting the delay, and these occur with less<br />
than 12 hours in between occurrences, then this alarm is asserted momentarily.<br />
This alarm can be avoided <strong>for</strong> Monitor Startup Flash periods by setting a time (in seconds) in the delay parameter that is<br />
greater than the monitor’s startup flash time. This alarm is not intended <strong>for</strong> use with CVM Auto-Flash Mode in the 980 as<br />
this mode of auto-flash causes the Monitor to flash the cabinet and it is indistinguishable from a monitor fault flash.<br />
Map Ped Ins 1,3,5,7 to User Alarms [v61]<br />
This feature will map Pedestrian inputs 1, 3, 5, & 7 to user alarms 3, 4, 5 and 6. The user enters “ON” to enable this feature<br />
and “OFF” to disable this feature. When this feature is enabled, these inputs will not place the respective pedestrian<br />
calls.<br />
Naztec <strong>NTCIP</strong> <strong>Based</strong> NEMA <strong>TS2</strong> and <strong>2070</strong> Controller <strong>Manual</strong> – July 2009 Page 4-46
4.10.2 The Events Buffer (MM->1->6->2)<br />
The Events Buffer stores event data so it can be uploaded to a closed loop master and/or the central StreetWise system. In<br />
the example above, each event is date and time stamped with the "Stn" (controller Station ID address).<br />
• Event# 1 records Alarm# 1 when the controller was last<br />
powered up<br />
• Event# 2 records a local pattern event (LPT) when pattern #<br />
2 became active<br />
• Event# 3 records preempt #3 activated at 14:47<br />
• Event# 4 shows when the preempt left at 15:27<br />
• Event# 5 records a local pattern event (LPT) running<br />
<strong>NTCIP</strong> pattern # 254 (FREE).<br />
• Event# 6 records a local pattern event (LPT) running <strong>NTCIP</strong> pattern # 255 (FLASH)<br />
The Event Buffer (internal buffer) holds 40 events and a separate Event Display Buffer (shown above) displays the last 10<br />
events until StreetWise can poll the in<strong>for</strong>mation from the local controller. After 10 events are recorded, the most recent<br />
event will be placed in Event #1 and all events will pushed down the list to the next event # (First-in First-out stack).<br />
There<strong>for</strong>e, Local Events should be polled from StreetWise frequently enough to avoid losing any event in<strong>for</strong>mation stored<br />
in the controller's event buffer. StreetWise interprets these event codes to generate query reports at the central office, so you<br />
don't have to view them from the controller.<br />
4.10.3 The Alarms Buffer (MM->1-6->5)<br />
The internal Alarms Buffer and Event Buffer are very similar;<br />
however, only events that are enabled as alarms under menu MM-<br />
>1->6->4 will be logged to the Alarm Buffer. Alarms enabled<br />
under menu MM->1->6->4 MUST also be enabled as events under<br />
menu MM->1->6->2 to be stored in the Alarm Buffer. Note that<br />
local pattern events (LPT) and preempt events (PRE) are stored in<br />
the Event Buffer, not in the Alarm Buffer. However, if preempts are<br />
required as alarms, the preempt inputs may be wired to external<br />
alarm inputs in the cabinet as shown in the table.<br />
The internal Alarm Buffer holds 20 alarms, all of which are displayed on the front panel until StreetWise can poll the<br />
in<strong>for</strong>mation from the local controller. As new alarms are added to the alarm buffer, it will always overwrite the alarms<br />
beginning at Alarm #1. Existing alarms will remain, if not overwritten. For example, if all 20 alarms are stored in the<br />
buffer, the 21st alarm will overwrite Alarm #1 and the existing alarms will remain in the buffer and still be displayed. Also<br />
a power down/up will clear the internal alarm buffer.<br />
4.10.4 Clear Event and Alarm Buffers.<br />
MM->1->6->3 clears the Event Buffer and MM->1->6->6 allows<br />
the user to manually clear the Alarm Buffer.<br />
Naztec <strong>NTCIP</strong> <strong>Based</strong> NEMA <strong>TS2</strong> and <strong>2070</strong> Controller <strong>Manual</strong> – July 2009 Page 4-47
4.10.5 The Detector Events Buffer (MM->1->6->9)<br />
Detector Events are stored in a separate 50 record buffer and uploaded<br />
to StreetWise with the Local Event buffer. In the display to the right,<br />
Detector 1 at Station ID 701 failed at 07:04 with a fault code "D3" and<br />
became active again at 07:16.<br />
<strong>NTCIP</strong> 2.3.5.4.2 OCCUPANCY DATA calls <strong>for</strong> detector faults to be<br />
stored as occupancy data using the following values. These codes are<br />
interpreted by StreetWise and converted to “friendly” text messages.<br />
The following table documents the occupancy values <strong>for</strong> each NEMA detector faults.<br />
Fault (decimal) Fault (Hexadecimal) Fault (Stored as Occupancy Data)<br />
210 D2 Max Presence Fault<br />
211 D3 No Activity Fault<br />
217 D9 Erratic Output Fault<br />
4.11 Predefined Event / Alarm Functions<br />
See chapter 13 <strong>for</strong> a complete alarm listing with definitions <strong>for</strong> each alarm.<br />
4.12 Enable Run Timer (MM17)<br />
Enable Run shows the current status of the Run Timer programmed under menu MM->1->7. As discussed in chapter 2, the<br />
Run Timer is used with the Clear & Init All utility (MM->8->4->1). This utility allows the user to initialize the controller<br />
to a default database after turning the Run Timer to OFF (MM->1->7).<br />
The run timer disables all outputs from the controller and insures that the<br />
cabinet is in flash when the database is initialized. The user should use<br />
caution when initializing the controller database because all existing<br />
program data will be erased and overwritten. When the initialization is<br />
complete, the user should turn the Run Timer to ON (MM->1->7) to finalize the initialization (i.e. finalizing phase<br />
sequence and concurrency based on phase mode programming, latching output mapping, binding communications, etc.) and<br />
activate the unit. Note: when the run timer is first activated, calls are placed <strong>for</strong> all phases not omitted and <strong>for</strong> pedestrians<br />
that have walk and Ped clearance times that are programmed under MM111.<br />
4.13 [v61] Temperature Alert (MM18)<br />
This feature is utilized with Naztec’s TempAlert Road Temperature Measuring and Sensing System, which uses TempAlert<br />
probes embedded in the roadway and TempAlert rack mounted detectors that communicate to the 980 <strong>TS2</strong> controller’s<br />
PCPrint port via RS232 communications. The controller scans up to two<br />
temperature channels via a communications port and can relay this in<strong>for</strong>mation to<br />
Streetwise ATMS. The user must set up the PC Print port to communicate with the<br />
TempAlert detector. Program the Comm General parameters (MM61)<br />
PC/Print port’s Mode to TEMP ALT and you can program other parameters such as Baud Rate under Comm Port<br />
Parameters, P-2 PC/Print (MM622).<br />
4.13.1 Temp Setup (MM181)<br />
This menu allows the user to set temperature thresholds <strong>for</strong> the TempAlert<br />
probes.<br />
4.13.2 Temp Status (MM182)<br />
This menu shows the status <strong>for</strong> each probe.<br />
Naztec <strong>NTCIP</strong> <strong>Based</strong> NEMA <strong>TS2</strong> and <strong>2070</strong> Controller <strong>Manual</strong> – July 2009 Page 4-48
4.14 Unit Parameters (MM->1->2->1)<br />
Start Up Flash<br />
Start-up Flash (0-255 sec) determines how long a controller will<br />
remain in flash following a power interruption. During Start-up<br />
Flash, the Fault Monitor and CVM (Controller Voltage Monitor)<br />
outputs are inactive. The Start Red Time can be used to time an<br />
all-red interval immediately after the Start-up Flash interval.<br />
Red Revert<br />
Red Revert (0-25.5 sec) applies to all phases that are programmed as red rest phases. This parameter insures that the phase<br />
will remain in red rest <strong>for</strong> the minimum period specified be<strong>for</strong>e the phase is reserviced. Each phase may override this value<br />
under Phase Times (MM->1->1->1).<br />
Backup Time<br />
Backup Time (0 – 255 sec.) is used to test the communications between a secondary controller and a field or central master.<br />
If no communications have been received be<strong>for</strong>e the backup delay timer expires, the controller considers the system to be<br />
offline and reverts to its internal time based scheduler <strong>for</strong> its operating mode.<br />
A zero Backup Time allows StreetWise to override the active pattern in the controller indefinitely if the remote override<br />
time in StreetWise is set to 255.<br />
Auto Pedestrian Clear<br />
The Automatic Pedestrian Clear parameter may be either enabled or disabled. This option determines the behavior of the<br />
pedestrian clearance interval <strong>for</strong> the controller when manual control is enabled. When enabled, it prevents the pedestrian<br />
clearance interval from being terminated by the Interval Advance input.<br />
Phase Mode<br />
Phase Mode sets the operating mode and automatically programs the default phase sequence and concurrencies <strong>for</strong> the<br />
specified mode. The Run Timer must be turned OFF under MM->1->7 to change Phase Mode. This insures that the<br />
controller outputs are off and not driving any channel outputs. The five Phase Modes were covered in section 4.2.<br />
Diamond Mode<br />
Diamond Mode only applies if the Phase Mode is set to DIAMOND. The three Diamond Modes are 4-Phase, 3-Phase, and<br />
Separate Intersection. Please refer to the Naztec Operations <strong>Manual</strong> <strong>for</strong> Texas Diamond <strong>Controllers</strong> <strong>for</strong> a description of the<br />
various diamond operations.<br />
Local Flash Start<br />
Set Local Flash Start to ON to <strong>for</strong>ce the controller to per<strong>for</strong>m an “External Start” when the Local Flash input transitions<br />
from active to inactive. This feature was originally used in NEMA cabinets that were built prior to <strong>TS2</strong>-98 and that didn't<br />
have a diode/capacitor network installed in the cabinet on the EXT START input. The Local Flash Start parameter<br />
essentially replaced a diode/cap circuit with a software feature. When the feature is enabled (ON), it would issue a virtual<br />
EXT START to the controller when the Local Flash Input transitioned to the INACTIVE state (i.e. when the maintenance<br />
flash switch was turned off).<br />
Start Red Time<br />
Start Red Time (0-25.5 seconds) is an all-red period at the end of Startup Flash when the controller is reset (power-up or an<br />
SDLC fault is cleared). Startup values (MM->1->1->4) must be set to RED CLR be<strong>for</strong>e Start Red Time can be applied.<br />
[v61] Min PedClr Tm<br />
Minimum Pedestrian Clearance Time guarantees the specified ped clearance time (in seconds) <strong>for</strong> all active phases. This<br />
value applies to all operational modes except stop timing (police button operation). An error message is displayed from<br />
menu MM->1->1->1 if the user attempts to enter a ped clearance time less than the Min PedClr Tim.<br />
Allow
Allow Skip Yellow<br />
Allow Skip Yellow must be enabled in order to use the OMIT YEL, YEL Ø discussed in the last section under options plus.<br />
Disable Initial Ped<br />
Disable Initial Pedestrian Movements disables pedestrian calls during<br />
the first cycle after a controller reset. This is a temporary value that is<br />
not part of the controller database and is always set to OFF after the<br />
controller powers up.<br />
Free Ring Seq<br />
The default phase sequence <strong>for</strong> FREE operation is Seq # 1 (dual-ring,<br />
left-turns first sequence). Free Ring Seq is initialized to “0” when you<br />
initialize the controller to STD8 operation that does not override the<br />
default Seq # 1. Any other value (2-16) <strong>for</strong> Free Ring Sequence overrides Seq# 1 as the default phase sequence <strong>for</strong> FREE<br />
operation.<br />
Stop-Time Over Preempt (priority)<br />
Stop-Time Over Preempt causes the Stop-Time inputs to have priority over Preempt inputs. Stop-Time is often wired to the<br />
output of the conflict monitor unit so that in the event of a monitor fault, the controller is halted to help diagnose the fault.<br />
Since preemption has priority over stop-time, a preempt will cause the controller to begin timing again and the diagnostic<br />
in<strong>for</strong>mation will be lost. Setting Stop-Time Over Preempt to ON prevents a preempt from overriding stop timing and<br />
preserves this diagnostic in<strong>for</strong>mation. However, be aware that preempts will be ignored if the Stop-Time switch on the<br />
maintenance panel is activated.<br />
Feature Profile<br />
This parameter allows predefined selections to be removed from the menu screens. The default value, 0, allows all menu<br />
selections to be visible and accessed according to security definitions. Currently, the only other value allowed is 1 which<br />
removes selection 9 from the main menu screen on the 981 <strong>TS2</strong> master controller and the <strong>2070</strong> controllers with Apogee.<br />
Enable Run<br />
Enable Run shows the current status of the Run Timer programmed under menu MM->1->7. As discussed in a previous<br />
section of this chapter, the Run Timer is used with the Clear & Init All utility (MM->8->4->1). This utility allows the user<br />
to initialize the controller to a default database after turning the Run Timer to OFF (MM->1->7). The run timer disables<br />
all outputs from the controller and insures that the cabinet is in flash when the database is initialized. The user should use<br />
caution when initializing the controller database because all existing program data will be erased and overwritten. When<br />
the initialization is complete, the user should turn the Run Timer to ON (MM->1->7) to finalize the initialization (i.e.<br />
finalizing phase sequence and concurrency based on phase mode programming, latching output mapping, binding<br />
communications, etc.) and activate the unit. Note: when the run timer is first activated, calls are placed <strong>for</strong> all phases not<br />
omitted and <strong>for</strong> pedestrians that have walk and Ped clearance times that are programmed under MM111.<br />
Display Time<br />
Display Time sets the timeout (0-99 minutes) that reverts the display to its default screen and logs off the user. If security is<br />
set under MM->8->2, the user must “log in” with a security access code after the Display Time expires. If the Display Time<br />
is set to zero, a value of one minute is used to insure that the screen does not timeout.<br />
Tone Disable<br />
Set Tone Disable to ON to disable audible tones <strong>for</strong> keyboard operations.<br />
Max Cycle Tm<br />
Maximum-Cycle-Time is a manual override value used to check that the controller is cycling properly. If no value is<br />
entered, the controller will calculate a value based on the controller phase and coordination programming. A different<br />
value is calculated <strong>for</strong> free and <strong>for</strong> coordinated operation. Enter a value (in seconds) to override the calculated value that<br />
the controller uses to per<strong>for</strong>m this check. This feature is enabled/disabled using the Cycle Fault Action parameter and by<br />
enabling the appropriate events/alarms as described below.<br />
Naztec <strong>NTCIP</strong> <strong>Based</strong> NEMA <strong>TS2</strong> and <strong>2070</strong> Controller <strong>Manual</strong> – July 2009 Page 4-50
CycFlt Actn<br />
A Cycle-Fault-Actn is declared when the Max Cycle Tm or the preemption seek times (Max Seek Trak Tim or Max Seek<br />
Dwel Tim) are exceeded. The Cycle Fault Action setting determines whether the controller generates an ALARM or enters<br />
FLASH when the cycle fault occurs. A cycle fault occurs only if the controller does not service valid demand within the<br />
allotted time while it is operating in a coordinated mode. A cycle failure is declared if it is operating free.<br />
Max Seek Trak Tim<br />
Maximum-Seek-Track-Clearance-Time is used to check if the track phases become active as quickly as expected when a<br />
railroad preempt is received. Enter a value at least one second greater than the maximum time anticipated <strong>for</strong> the controller<br />
will take to achieve track clearance. A zero entry disables the feature.<br />
Max Seek Dwel Tim<br />
Maximum-Seek-Preempt-Dwell-Time is used to check if the preempt dwell phases become active within the maximum<br />
expected time following the beginning of track clearance during railroad preemption or from the beginning of an<br />
emergency preempt. Enter a value at least one second greater than the maximum time anticipated to achieve preempt<br />
dwell. A zero entry disables the feature.<br />
[v61] Local Flash Start<br />
Local Flash Start should only be used in 170 type cabinets when the Local Flash Input is used to energize the flash-transfer<br />
relays and restart the controller simultaneously. Set Local Flash Start to DRK in a 170-type cabinet that requires the<br />
controller indications to initialize in the DARK state when the controller resets and the flash transfer relays are energized.<br />
This setting should typically be set to OFF <strong>for</strong> TS1 cabinets that provide hardware circuits to delay the flash transfer relays<br />
after Local Flash Input resets the controller.<br />
[v60][v65] MCE (<strong>Manual</strong> Control Enable) Timeout (0-255 minutes)<br />
If MCE is applied and no interval advance is issued <strong>for</strong> this amount of time (in minutes), then MCE is disabled. To reenable<br />
MCE, the MCE input must be cycled OFF and then back ON.<br />
[v60][v65] Audio Ped Time (0-255 seconds)<br />
Each pedestrian output has a dedicated IO pin called the “Audible Ped Output”. If the amount of Walk time left in the Ped<br />
is greater than the time specified by this parameter, then the output is asserted.<br />
[v60][v65] CNA (Call to Non-Actuated) Free Time (0-254 seconds, 255 disables CNA)<br />
CNA Free Time is the amount of time that CNA can be applied be<strong>for</strong>e it is automatically disabled. CNA must be deasserted,<br />
then re-asserted <strong>for</strong> CNA to be active. If the value is 0, then CNA does not time out. If the value is 255, CNA is<br />
ignored.<br />
[v60][v65] Clearance Decide<br />
The default phase next decision is made at the beginning of yellow clearance when a phase terminates. Setting Clearance<br />
Decide to ON <strong>for</strong>ces the controller to reevaluate phase next at the end of all-red clearance. This prevents the phase from<br />
moving to another phase if the call is lost during the clearance intervals.<br />
[v60][v65] LPAltSrc<br />
Setting this parameter allows low-priority preempts 7-10 to be assigned to oscillating inputs on preempts 1-4 instead of 3-6.<br />
[v60][v65] AuxSwitch<br />
Setting this parameter to “STOPTIME” allows the user to toggle the <strong>2070</strong> Front Panel Auxiliary Switch to the “ON”<br />
position and stop the Apogee software from advancing any Phase timer. Toggling the switch to the “OFF” position will<br />
continue controller’s phase timing from the point it was halted. Setting this Parameter to “UNUSED” will ignore the<br />
toggling of the <strong>2070</strong> Front Panel Auxiliary Switch.<br />
[v61] Color Check<br />
In versions 61.3n or later, the color check feature compares the active channel color outputs to the status as reported by the<br />
MMU. It was added <strong>for</strong> versions 61.3n or above. If these disagree <strong>for</strong> 800-900 ms, then the controller declares a “color<br />
check” fault. The feature has a global enable (Color Check) on the controller parameters screen (MM->1->2->1), at the<br />
bottom. There is a screen to disable checking <strong>for</strong> individual color outputs at MM->1->3->9->3. Set this parameter to ON if<br />
you want to enable the Color Check feature.<br />
Naztec <strong>NTCIP</strong> <strong>Based</strong> NEMA <strong>TS2</strong> and <strong>2070</strong> Controller <strong>Manual</strong> – July 2009 Page 4-51
[v61] Allow Phase CIR with Preempt<br />
This unit parameter allows the Phase Call-Inhibit-Redirect (CIR) (MM115) features to be active during preemption.<br />
If enabled (ON), then CIR programming remains in effect during preemption. If not enabled (OFF), then CIR programming<br />
is disabled from the beginning of preemption through the Dwell interval. It is re-enabled at the end of preempt dwell so<br />
that it will be in effect as the controller returns to normal (non-preempted) operation.<br />
[v61] MCE Disable<br />
Programming this unit parameter will effect the <strong>Manual</strong> Control Enable (MCE) input. This entry has three options:<br />
OFF - The <strong>Manual</strong> Control Enable function is disabled<br />
ON - The MCE is enabled <strong>for</strong> standard operation<br />
TIMED - The MCE is enabled, but after being active <strong>for</strong> the time entered in MCE DISBL(min), it input it<br />
ignored until it cycles to the inactive state.<br />
[v61] MCE Disable (min)<br />
If the MCE Disable is set to TIMED, then this parameter determines the number of minutes that an active input will be<br />
recognized. This feature allows automatic recovery if the MCE switch is left ON inadvertently. MCE Disable is<br />
programmable from 1-24 minutes.<br />
Naztec <strong>NTCIP</strong> <strong>Based</strong> NEMA <strong>TS2</strong> and <strong>2070</strong> Controller <strong>Manual</strong> – July 2009 Page 4-52
5.1 Detector Programming (MM->5)<br />
5 Detection<br />
Naztec controllers provide all <strong>NTCIP</strong> objects related to detection<br />
with additional “plus” features to enhance functionality. NEMA TS<br />
1 provides one detector input per phase to call and extend the phase<br />
(each phase has one source or channel of detection). <strong>TS2</strong> cabinets provide separate detector inputs that can be individually<br />
programmed to call and/or extend any phase. Each of the 64 “logical” detectors in the controller can be visualized as an<br />
input channel assigned to a call phase. These “logical” detectors may be sourced from “physical” detectors in the detector<br />
rack or from another “logical” detector (1-64).<br />
5.1.1 Vehicle Parameters (MM->5->1, Left Menu)<br />
Detectors may be assigned to an active phase to drive the actuated<br />
features of the controller or may be used as system detectors to<br />
collect volume and occupancy or detect queue failures. The Call<br />
phase parameter defines an input channel <strong>for</strong> the phase that will<br />
receive the call when a detector has been actuated. The Switch phase<br />
allows a detector to call and extend the call phase, while also<br />
providing extends to a secondary phase.<br />
Delay, Extend and Queue times modify the phase input. The Delay timer inhibits the detector input until the Delay timer<br />
expires. The Extend timer “stretches” the detector call <strong>for</strong> a user specified extend time. The Queue timer inhibits a detector<br />
after a delay time based on the start of the green interval.<br />
Call Phase<br />
The Call Phase receives detector actuations when the phase is red if Call option is enabled <strong>for</strong> the detector (MM->5->2).<br />
The Call Phase also receives detector actuations when the phase is green if the Extend or Queue option <strong>for</strong> the detector is<br />
enabled. If Call Phase is set to zero, the call and extend features of the detector are disabled, but volume and occupancy<br />
may still be sampled. Occupancy measured during the green, yellow or red interval requires a Call Phase other than zero.<br />
Switch Phase<br />
The Switch Phase is extended when the assigned Call Phase is red or yellow, and the Switch Phase is green. Note that the<br />
Call Phase is not called when the Switch Phase is green. This feature is typically used <strong>for</strong> protected/permitted left-turn<br />
applications to call and extend a protected left-turn phase after the cross street is serviced and extend the permitted<br />
indication by programming a Switch Phase corresponding with the adjacent through movement.<br />
Delay<br />
The Delay parameter is the amount of time in tenths of seconds (0-255.0 sec) that the actuation from the detector is delayed<br />
when the assigned phase is not green.<br />
Extend<br />
The Extend parameter is the amount of time in tenths of seconds (0-25.5 sec) that the actuation is extended after the point of<br />
termination, when the phase is green. Extend is only effective when the Extend option is enabled <strong>for</strong> the detector under<br />
Vehicle Options (MM->5->2).<br />
Queue Limit<br />
Queue Limit (0-255 sec) determines how long a detector actuation is active after the start of the green interval. After the<br />
timer expires, actuations from the detector are ignored. Queue Limit is only effective when the Queue option is enabled and<br />
the Extend option is disabled <strong>for</strong> the detector under Vehicle Options (MM->5->2).<br />
Naztec <strong>NTCIP</strong> <strong>Based</strong> NEMA <strong>TS2</strong> and <strong>2070</strong> Controller <strong>Manual</strong> – July 2009 Page 5-53
5.1.2 Detector Diagnostic Vehicle Parameters (MM->5->1, Right Menu)<br />
Vehicle Parameters include detector diagnostics programmed from the<br />
right menu of MM->5->1. The No Activity time insures that the detector<br />
has received a call within the specified period. The Max Presence time fails<br />
the detector if a constant call exceeds the specified period (both of these<br />
values are expressed in minutes). Erratic Counts (expressed in actuations<br />
per minute) isolates a chattering detector that is issuing false calls.<br />
If any of these diagnostics fail, the controller will place a recall on the phase<br />
called by the detector. This recall insures the greater of Min Green or the<br />
Fail Time programmed under Vehicle Parameters. Real-time vehicle alarm status is provided under MM->5->7->1 and<br />
MM->5->7->2.<br />
Vehicle Detector - No Activity<br />
No Activity (0-255 min) fails the detector if it has not issued a call within the specified period of time. The failed detector<br />
will continue to place a call on the assigned Call Phase and extend the Call Phase until the detector receives a call and<br />
resets the No Activity failure. The No Activity failure will continue to service the Call Phase <strong>for</strong> the greater of Min Green or<br />
the specified Fail Time <strong>for</strong> the detector. NEMA requires that No Activity logs a value of 211 in the current occupancy<br />
sample <strong>for</strong> the detector. A value of 0 disables this feature and a common practice is to call an alternate detector map<br />
through a pattern to disable No Activity diagnostics late at night when traffic volumes are light.<br />
Vehicle Detector - Max Presence<br />
Max Presence (0-255 min) fails the detector if it has issued a constant call after the specified period of time. The failed<br />
detector will continue to place a call on the assigned Call Phase and extend the Call Phase until the constant call on the<br />
detector is reset. The Max Presence failure will continue to service the Call Phase <strong>for</strong> the greater of Min Green or the<br />
specified Fail Time <strong>for</strong> the detector until the detector is reset. NEMA requires that Max Presence logs a value of 210 in the<br />
current occupancy sample <strong>for</strong> the detector. A value of 0 disables this feature; however, it is not necessary to disable Max<br />
Presence during light traffic conditions because a Max Presence failure will provide a min recall on the phase instead of<br />
driving the phase to max with a constant call.<br />
Vehicle Detector - Erratic Counts<br />
Erratic Counts is expressed in counts-per-minute (0-255 cpm) instead of seconds. This detector diagnostic isolates a<br />
“chattering” detector that is issuing false calls to the controller. Typical values <strong>for</strong> Erratic Counts range from 40-70. The<br />
Erratic Counts failure will continue to service the Call Phase <strong>for</strong> the greater of Min Green or the specified Fail Time until<br />
the number of counts per minute drops below the specified threshold. NEMA requires that Erratic Counts logs a value of<br />
217 in the current occupancy sample <strong>for</strong> the detector. A value of 0 disables this feature; however, it is not necessary to<br />
disable Erratic Counts during light traffic conditions.<br />
Vehicle Detector - Fail Time<br />
When a detector diagnostic fails, a call is issued to the Call Phase of the failed detector and the Call Phase is extended by<br />
the greater of Min Green or the specified Fail Time (1-254 seconds). If the Fail Time exceeds the Max Green time <strong>for</strong> the<br />
Call Phase, the issued call will go to Max Green. Note that a 0” Fail Time disables this call and extend feature when a<br />
detector fails. A 0” Fail Time will always prevent a failed detector from placing a call, so the default Fail Time <strong>for</strong> STD8 is<br />
set to 2 seconds. This insures that the greater of Fail Time or Min Green is applied to recall the phase when the detector<br />
fails. A Fail Time equal to 255” insures that a constant call<br />
extends the phase when a detector fails.<br />
5.1.3 Vehicle Options (MM->5->2, Left Menu)<br />
Each of the 64 “logical” detectors may be programmed to Call<br />
and/or Extend the Call Phase specified under Vehicle<br />
Parameters. Extend overrides the Queue option as shown in the<br />
example to the right. There<strong>for</strong>e, do not enable Extend if the<br />
Queue time under Vehicle Parameters (MM->5->1) is to be<br />
applied. Extend and Queue are mutually exclusive.<br />
Naztec <strong>NTCIP</strong> <strong>Based</strong> NEMA <strong>TS2</strong> and <strong>2070</strong> Controller <strong>Manual</strong> – July 2009 Page 5-54
Vehicle Option - Call<br />
The Call option enables a detector to call the Call Phase when the Call Phase is not green and any assigned Switch phase is<br />
also not green. If the assigned Switch phase is zero, then a call is issued to the Call Phase whenever the Call Phase is not<br />
green. There<strong>for</strong>e, if a Switch phase is not assigned, the detector will call the Call Phase whenever it is in yellow or red.<br />
Vehicle Option - Extend<br />
The Extend option resets Extension timer of the assigned phase to extend the green interval. The Extend option overrides<br />
the Queue option as described below.<br />
Vehicle Option - Queue<br />
The Queue option allows the detector to extend the assigned phase until either a gap occurs (no actuation) or the green has<br />
been active longer than Queue limit specified under Vehicle Parameters (MM->5->1). This feature is useful <strong>for</strong> detectors<br />
located at or close to the stop-bar that call and extend the phase during the initial green, but drop out after the queue clears<br />
to allow setback detectors to gap out the phase farther upstream. The Extend detector option <strong>for</strong> this detector must be<br />
disabled <strong>for</strong> this feature to operate.<br />
Vehicle Option - Added Initial<br />
This option enables the detector to accumulate vehicle volumes during<br />
the yellow and red intervals that are used with added initial<br />
calculations. Added Initial must be enabled <strong>for</strong> the detector be<strong>for</strong>e<br />
volume density parameters become effective. Providing timing <strong>for</strong><br />
Added Initial and Max Initial under menu MM->1->1->1 does not<br />
imply that Added Initial will extend the Min Green time. You must<br />
enable Added Initial <strong>for</strong> the detector calling the phase be<strong>for</strong>e these<br />
volume density settings become effective.<br />
5.1.4 Vehicle Options (MM->5->2, Right Menu)<br />
The phase option, Lock Calls (MM->1->1->2) applies a constant call on the phase even if the call is reset be<strong>for</strong>e the phase<br />
is serviced. Red Lock Calls and Yellow Lock Calls are <strong>NTCIP</strong> features that apply locking to each detector rather than lock<br />
all calls to the phase. This provides individual control over each detector assigned to a Call Phase allowing some detectors<br />
to lock the call and others to reset the call prior to the phase being serviced.<br />
Vehicle Option - Red Lock Calls<br />
Red Lock Calls lock a call to the assigned phase if the actuation occurs during the red interval.<br />
Vehicle Option - Yellow Lock Calls<br />
Yellow Lock Calls allows the detector to lock a call to the assigned phase if the actuation occurs during the yellow interval.<br />
Vehicle Option - Occupancy<br />
Set Occupancy to log the occupancy of the detector. Occupancy is expressed as the ratio of the accumulated vehicle<br />
actuations during the sample period divided by the Volume/Occupancy Period. This ratio is expressed as a percentage in<br />
half percents over the range (0-200). The Volume/Occupancy Period is set in the Report Parameters (MM->5->8->1).<br />
Vehicle Option - Volume<br />
The Volume Detector option enables the detector to collect volume data. Volume is the accumulated number of actuations<br />
during the Volume/Occupancy Period. The Volume/Occupancy Period is set in the Report Parameters (MM->5->8->1).<br />
Naztec <strong>NTCIP</strong> <strong>Based</strong> NEMA <strong>TS2</strong> and <strong>2070</strong> Controller <strong>Manual</strong> – July 2009 Page 5-55
5.1.5 Vehicle Parameters+ (MM->5->3)<br />
These plus features extend <strong>NTCIP</strong> by providing additional Modes of<br />
detector operation. Delay Phases allow the delay assigned to a<br />
detector to be inhibited only when the assigned Delay Phase(s) are<br />
active. Detector occupancy may be measured only during the green,<br />
yellow, and/or red intervals of the Call Phase assigned to the<br />
detector.<br />
Vehicle Parms+ - Occ: G Y R<br />
Occupancy may be measured during any combination of of the Green, Yellow and/or Red interval of the Call Phase. If G,<br />
Y and R are not selected, occupancy will be sampled continuously. Occupancy during G+Y can be used when detectors are<br />
located at or near the stop-bar. Be sure to select “Occ” <strong>for</strong> the detector under MM->5->2 as discussed in the last section.<br />
Vehicle Parms+ - Delay Phases<br />
If Delay Phases is zero, the detector will time the delay specified <strong>for</strong> the detector under Vehicles Parameters (MM->5->1).<br />
If either Delay Phase entry is not zero, the detector delay is only timed when Delay Phases are being serviced.<br />
Vehicle Parms+ - Mode<br />
The Mode parameter defines the following operating modes of the detector:<br />
• NORMAL – Normal operating mode is determined by the <strong>NTCIP</strong> detector options and parameters.<br />
• Stopbar A - The assigned phase may be extended by the detector <strong>for</strong> the amount of time specified in the Extend<br />
parameter or until a gap occurs. Once a gap occurs, the programmed detector channel will ignore any future<br />
actuations during the green interval. Assigning the value of 0 to the Extend parameter will allow a phase to be<br />
extended until a gap occurs.<br />
• Stopbar B - During the green interval, the detector will receive actuations as long as the detector has not been<br />
vacant <strong>for</strong> the specified amount of time in the Extend parameter. Once the Extend timer has expired, that detector<br />
will be disabled <strong>for</strong> the remainder of the green interval. If an actuation occurs be<strong>for</strong>e the Extend timer expires, the<br />
timer is reset to its programmed value. An Extend timer value of 0 will allow the detector to receive actuations<br />
only as long as there is a constant detection on that detector.<br />
• NRM_RR – Normal Red Rest mode allows the delay assigned to a detector to <strong>for</strong>ce the controller to red rest<br />
instead of calling a phase. This application was developed <strong>for</strong> left-turn applications where inhibit phases prohibit<br />
a through movement from backing into a turn phase and a feature was needed to service the turn phase after<br />
moving to red rest to prevent the “yellow trap”. The delay timed by the NRM_RR detector be<strong>for</strong>e red rest is<br />
applied is programmed in the delay setting under Detector Parms, MM->5->1.<br />
• [v60][v61][v65] BIKE – When this mode is enabled, the detector will be used to generate any additional Bike<br />
Clearance time programmed <strong>for</strong> the phase called by the detector (MM->1->1->7). In addition, an actuation of the<br />
BIKE detector will time the Bike Extension value programmed <strong>for</strong> the detector under MM->5->1 (Extend<br />
parameter).<br />
• [v60][v61][v65] Q-Alrm – A Queue detector generates alarm 28 when a specified QUEUE timer expires. The<br />
additional programming required <strong>for</strong> this operation is documented in the next section (5.1.6).<br />
• [v61] Adapt – An Adaptive detector measures the degree-of-saturation of the phase called by the detector based<br />
on occupancy measured during green + yellow clearance.<br />
• [v65] TRAFCN – This mode is used when interfacing to the Naztec/Traficon VU COM communications module<br />
through the <strong>2070</strong> Serial communications port.<br />
Naztec <strong>NTCIP</strong> <strong>Based</strong> NEMA <strong>TS2</strong> and <strong>2070</strong> Controller <strong>Manual</strong> – July 2009 Page 5-56
Vehicle Parms+ - Src (Source)<br />
Each of the 64 “logical” detectors in the controller may receive their source directly from a “physical” detector channel or<br />
indirectly from another “logical” detector using the Source feature. The default Source (Src) setting is zero that implies that<br />
the detector is sourced from a “physical” detector in the detector rack. A Source (Src) setting in the range of 1-64 implies<br />
that the detector is sourced indirectly from any of the 64 detectors that are currently active in the controller.<br />
5.1.6 [v60][v61][v65] Queue Detector Programming<br />
The Q-Alrm detector mode was defined in the last section. Keep in mind that a Q-Alrm detector is intended to be a system<br />
only detector to generate Alarm # 28 and cannot be used to call a phase. There<strong>for</strong>e, you must source a separate detector<br />
used to call a phase if you want this detector to also serve as a Queue Alarm detector (see the Src feature in the last section).<br />
However, detector diagnostics (max presence, no activity and erratic count) may be programmed <strong>for</strong> a queue detector and<br />
used to trap error conditions when they occur.<br />
This detector feature requires that:<br />
1) Queue parameter is enabled <strong>for</strong> the detector under MM->5->2 (section 5.1.5)<br />
2) Queue time is programmed under MM->5->1. This is the number of minutes (0-255) used to test a constant<br />
call on the detector and generate Alarm # 28.<br />
3) Extend time under MM->5->1 is set to the number of seconds (0-25.5) required to detect an OFF condition<br />
over the detector. This resets the Queue timer and Alarm # 28.<br />
4) Queue is enabled and Extend is disabled <strong>for</strong> the queue detector under MM->5->2.<br />
5) A Queue Alarm Number (1-16) is assigned to the first Delay Phase under MM->5->3<br />
A maximum of 16 queue alarms may be reported by returning a Queue Alarm Number (1-16) associated with each queue<br />
detector. The Queue Alarm Number (1-16) is assigned to the first Delay Phase under MM->5->3 <strong>for</strong> each queue detector.<br />
This value is returned with Alarm #28 and allows multiple detectors to share the same Queue Alarm. The central system is<br />
capable can distinguish which queue detector(s) activated Alarm # 28 using the first Delay Phase associated with each<br />
detector.<br />
5.1.7 Pedestrian Parameters (MM->5->4)<br />
The Pedestrian Parameters allow <strong>for</strong> mapping of pedestrian<br />
inputs to call the pedestrian service <strong>for</strong> a phase. Detector<br />
diagnostics are also provided to isolate pedestrian detector failures<br />
like those provided to isolate vehicle detector failures. The realtime<br />
pedestrian alarm failures are shown under Pedestrian<br />
Detector Alarm Status (MM->5->7->3).<br />
Ped Parameter - Call Phase<br />
The Call Phase parameter sets the phase called by the pedestrian detector. A zero value disables the pedestrian input.<br />
Ped Parameter - No Activity<br />
The No Activity parameter (0-255 min) fails the diagnostic if a pedestrian actuation is not received be<strong>for</strong>e the No Activity<br />
timer expires. A zero value disables the pedestrian input.<br />
Ped Parameter - Maximum Presence<br />
The Maximum Presence parameter (0-255 min) is a diagnostic feature. If the detector exhibits a constant actuation <strong>for</strong> the<br />
specified amount of time (0-255 min), then the detector is considered to have failed. The Pedestrian Detector Alarm Status<br />
(MM->5->7->3) shows the detector’s failure mode. A zero value disables the pedestrian input.<br />
Ped Parameter - Erratic Counts<br />
The Erratic Counts parameter is a diagnostic feature. The detector is considered to have failed if it exhibits too many<br />
actuations per minute. The Pedestrian Detector Alarm Status shows the detector’s failure mode. Enter the data as the<br />
number of counts per minute (0-255 cpm). A zero value disables the pedestrian input.<br />
Naztec <strong>NTCIP</strong> <strong>Based</strong> NEMA <strong>TS2</strong> and <strong>2070</strong> Controller <strong>Manual</strong> – July 2009 Page 5-57
5.2 Alternate Detector Programs (MM->5->5)<br />
Alternate Detector Programs provide a method of changing detector<br />
parameters through the pattern. This is similar to Alternate Phase<br />
Programs discussed in section 4.1.9. Three Alternate Detector<br />
Programs provide 16 columns used to modify a specified detector<br />
(Det#).<br />
The left menu <strong>for</strong> the Vehicle Parameters selection is shown to the right. The other Alternate Detector Programs are<br />
summarized below.<br />
• Alternate Vehicle Parameters<br />
o Call Phase<br />
o Switch Phase<br />
o Delay<br />
o Extend<br />
o Queue Time<br />
o No Activity Diagnostic<br />
o Maximum Presence Diagnostic<br />
o Erratic Count Diagnostic<br />
o Fail Time Parameter<br />
• Detector Options<br />
o Enable Call<br />
o Enable Extend<br />
o Enable Queue<br />
o Enable Added.Initial<br />
o Enable Red.Lock<br />
o Enable Yellow Lock<br />
o Enable Occupancy Sampling<br />
o Enable Volume Sampling<br />
• Vehicle Parameters+<br />
o Occupancy on Green / Yellow / Red<br />
Interval<br />
o Delay Phases<br />
o Detector Mode<br />
• Ped Parameters<br />
o Phase called by the ped detector<br />
o No Activity Diagnostic<br />
o Maximum Presence Diagnostic<br />
o Erratic Count Diagnostic<br />
5.3 [v60][v61][v65] Phase Recall Menu (MM-<br />
>5->6)<br />
This menu consolidates all phase recall options on a common<br />
screen accessed under the Detection menu. These are the same<br />
options accessed under Phase Options (MM->1->1->2).<br />
Naztec <strong>NTCIP</strong> <strong>Based</strong> NEMA <strong>TS2</strong> and <strong>2070</strong> Controller <strong>Manual</strong> – July 2009 Page 5-58
5.4 Detector Status Screens (MM->5->7)<br />
The Detector Status Screens include separate real-time indication<br />
<strong>for</strong> each vehicle and pedestrian detector along with current alarm<br />
status from the detector diagnostics. Accumulated V/O (volume<br />
and occupancy) data is displayed <strong>for</strong> the current Sample Period.<br />
Speed trap measurements are also displayed.<br />
5.4.1 Vehicle Detection Status (MM->5->7->1 and MM->5->7->2)<br />
The Vehicle Detection Status screen displays real-time vehicle calls<br />
and alarms. This is a post-processed status, that is, calls are displayed<br />
after modification due to mapping, alarms, delays, and extends. These<br />
are the actual calls passed to the controller phase logic.<br />
Vehicle Call<br />
Vehicle Call status indicates the presence of a call <strong>for</strong> detector channels 1-64. The source of the channel is selected in the<br />
Vehicle Parameters+ screen. It is important to note that the screen status displays the calls after they have been modified<br />
by extend and delay settings <strong>for</strong> the channel. A detector diagnostic alarm will place a constant call when the Call Phase is<br />
not green and will extend the phase in accordance with the Fail Time setting of the detector when the Call Phase is green.<br />
Vehicle Alarm<br />
The Vehicle Alarm field shows the results of the detector diagnostics programmed under the Vehicle Parameter screen.<br />
When an alarm is indicated, a call will be placed on the corresponding channel’s detection input.<br />
5.4.2 Pedestrian Detection Status (MM->5->7->3)<br />
Ped Call<br />
Ped Call indicates the status of the pedestrian call <strong>for</strong> pedestrian<br />
channels 1-8. The active display accounts <strong>for</strong> calls generated by<br />
the pedestrian diagnostics, so keep in mind that this status screen<br />
does not show the raw inputs from the pedestrian detectors.<br />
Ped Alarm<br />
The Pedestrian Alarm indicates the real-time status of pedestrian channel alarms 1-8. When an alarm is present, a constant<br />
pedestrian call will be placed on the pedestrian Call Phase until the diagnostic error is corrected. The parameters <strong>for</strong> these<br />
alarms are set in the Pedestrian Parameters options (MM->5->4)<br />
Naztec <strong>NTCIP</strong> <strong>Based</strong> NEMA <strong>TS2</strong> and <strong>2070</strong> Controller <strong>Manual</strong> – July 2009 Page 5-59
5.4.3 [v60][v61][v65] Detector Delay, Extend Status (MM->5->7->4)<br />
This real-time status screen displays any active delay and/or extension<br />
timing <strong>for</strong> each detector. Notice that row 1 corresponds to detectors 1 –<br />
3, row 2 to detectors 4 – 6, etc.<br />
5.4.4 Vol/Occ Real-Time Sample (MM->5->7->5)<br />
The Volume/Occupancy Real-Time Sample status screen allows the<br />
user to view the real-time sample as volume and occupancy is being<br />
accumulated. The sample is stored and reset at the conclusion of<br />
each Vol/Occ Period specified in under MM->5->8->1.<br />
Volume<br />
The Volume field shows the accumulated vehicle actuations <strong>for</strong> the channel during the current Vol/Occ Period. Volume is<br />
recorded as zero when a detector diagnostic failure occurs and a detector alarm is generated.<br />
Occupancy<br />
The Occupancy field indicates a measure of vehicle presence over the detector or a NEMA specified error code when the<br />
detector fails a detector diagnostic. If a detector alarm is not active, the occupancy values indicates the percentage of the<br />
Vol/Occ Period that a vehicle is present over the detector. This value ranges from 0-200 with each increment representing<br />
0.5%. The total detector “on time” may be calculated by multiplying the occupancy measure by the Vol/Occ Period and<br />
dividing this product by 200.<br />
When a detector alarm is active, the occupancy value represents a NEMA specified error code <strong>for</strong> the failed detector<br />
diagnostic in the range of 200 – 255 as shown below. The active alarm code may be viewed in the detector buffer found<br />
under MM->1->6->9. These codes are interpreted by StreetWise and converted to “friendly” text messages in the Local<br />
Detector Event query.<br />
Fault (decimal) Fault (Hexadecimal) Fault (Stored as Occupancy Data)<br />
210 D2 Max Presence Fault<br />
211 D3 No Activity Fault<br />
212 D4 Open Loop Fault<br />
213 D5 Shortened Loop Fault<br />
214 D6 Excessive Inductance Change<br />
215 D7 Watchdog Fault<br />
217 D9 Erratic Output Fault<br />
5.4.5 [v60][v61][v65] Speed Sample (MM->5->7->6)<br />
The Naztec Version 61 controller provides 16 speed traps consisting of two detectors, a specified Zone Length and Car<br />
Length (see section 5.5.2 below). The Real-Time Speed/Length Sample displays the average speed <strong>for</strong> each speed trap<br />
during the active Vol/Occ Period.<br />
Naztec <strong>NTCIP</strong> <strong>Based</strong> NEMA <strong>TS2</strong> and <strong>2070</strong> Controller <strong>Manual</strong> – July 2009 Page 5-60
5.5 [v60][v61][v65] Volume / Occupancy Parameters<br />
5.5.1 Volume and Occupancy Period (MM->5->8->1)<br />
Detector volumes and/or occupancy are sampled at a rate determined<br />
by the Volume/Occupancy Period. Enter the Volume/Occupancy<br />
Period in minutes (0-99) or seconds (0-255). The actual period is the<br />
sum of the minutes and seconds, so you can enter values of seconds<br />
greater than 60, using a combination of minutes and seconds.<br />
5.5.2 [v60][v61][v65] Speed Detectors (MM->5->8->2)<br />
The Speed Detectors screen defines the speed trap detectors <strong>for</strong><br />
each of the 16 speed stations. The Up detector number is the<br />
upstream detector which first detects the vehicle in the travel lane.<br />
The Dn detector number is the downstream detector that is<br />
detected next.<br />
The Zone Len is the separation between the detectors in feet. Use the distance between the leading edge of the upstream<br />
detector and the leading edge of the downstream detector. The Veh Length is the average vehicle length (in feet) specified<br />
<strong>for</strong> the calculation.<br />
5.5.3 [v65] Speed Thresholds (MM->5->8->3)<br />
The Speed Thresholds screen allows the user to view detector<br />
volumes and occupancies based on the analysis period as<br />
programmed under MM->5->8->1.<br />
Naztec <strong>NTCIP</strong> <strong>Based</strong> NEMA <strong>TS2</strong> and <strong>2070</strong> Controller <strong>Manual</strong> – July 2009 Page 5-61
6.1 Overview of the Coordination Module<br />
6 Basic Coordination<br />
The Coordination Module or “Coordinator” is always active in an <strong>NTCIP</strong> based controller, even during free and flash<br />
operation. <strong>NTCIP</strong> defines the Coord Status and Free Status objects that describe the active state of the controller as show<br />
below. This status in<strong>for</strong>mation is displayed under MM->2->8->5 in the controller.<br />
Pattern# Coord FreeStat Active State of the Coordinator<br />
0 FREE PATTERN Coordinator has selected default free pattern# 0 by time-of-day<br />
1 - 48 ACTIVE CoorActv Coordinator is running one of the 48 patterns under coordination<br />
1 - 48 FREE COMMAND Coordinator is running one of the 48 patterns in free operation<br />
254 FREE COMMAND Coordinator is running the <strong>NTCIP</strong> Free Pattern# 254<br />
255 FREE COMMAND Coordinator is running the <strong>NTCIP</strong> Flash Pattern# 255<br />
The Free Status also reflects other conditions (see table in section 6.11.1) such as plan, cycle, split and offset errors and<br />
external overrides such as preemption and manual control enable. However, it is important to note that patterns 1-48 can be<br />
activated as either Coord Patterns or Free Patterns. A Free Pattern can be created using a zero second cycle length to use<br />
any of the pattern features shown below during free operation.<br />
6.2 Coordination Modes<br />
This section describes coordination parameters accessed from the<br />
Main Menu using keystroke MM->2. The first menu item<br />
provides access to Coordination Modes and Coordination Modes+<br />
menus. The Coordination Modes (MM->2->1, left menu) provide<br />
basic <strong>NTCIP</strong> features related to coordination. Coordination<br />
Modes+ (MM->2->1, right menu) provides Naztec enhancements<br />
to <strong>NTCIP</strong> coordination.<br />
Coordination Modes determine the <strong>for</strong>ce-off method (FIXED, FLOAT or OTHER), the offset correction method used<br />
during transition and which maximum settings are applied (or inhibited) during coordination. Coordination Modes+ select<br />
OTHER <strong>for</strong>ce-off+ methods and determine if a controller is operating as a secondary in a closed loop system or using<br />
external coordination. Pedestrian features related to coordination are also modified through the Modes+ settings.<br />
Coordination Modes apply to all coordination patterns and may not be modified by time-of-day. [v61]The only exception<br />
is the Force-off method FIXED may be overridden by the Flt option added in version 61. The Flt option is specified by<br />
pattern under Trans,CoorØ+ (MM->2->5, right menu).<br />
6.2.1 Coordination Modes (MM->2->1, Left Menu)<br />
Test OpMode (Operational Mode)<br />
The Test OpMode parameter allows the operator to manually<br />
override the active pattern in the Coordination Module The “Test”<br />
mode parameter selects the active pattern (1-48) or reverts to a<br />
standby mode (Test 0). The standby mode allows the controller to receive the active pattern from another source such as a<br />
closed-loop master or the local time-of-day schedule. Be aware that Test Mode (1-48) overrides all other operational modes<br />
including the time base scheduler, closed loop and central control. There<strong>for</strong>e, any pattern updates from these other<br />
operational modes will be ignored unless the Test Mode has been set to Automatic (Standby) mode (Test 0). The following<br />
are valid entries <strong>for</strong> the Test OpMode parameter.<br />
0 Automatic (Standby) – TestOpMode 0, or standby mode allows the controller to receive the active pattern<br />
from the internal time base scheduler, external interconnect, a closed loop master or central control system.<br />
TestOpMode 0 is the typical default operation.<br />
1-48 <strong>Manual</strong> Pattern Override – Test OpMode can be used to select one of the 48 patterns from the pattern table,<br />
and overrides all other pattern commands. It is common practice to <strong>for</strong>ce the controller to a desired pattern <strong>for</strong><br />
testing purposes and to check coordination diagnostics as discussed later in this chapter.<br />
254 <strong>Manual</strong> Free – selects free operation defined by NEMA as pattern 254<br />
255 <strong>Manual</strong> Flash – selects auto flash operation defined by NEMA as pattern 255<br />
Naztec <strong>NTCIP</strong> <strong>Based</strong> NEMA <strong>TS2</strong> and <strong>2070</strong> Controller <strong>Manual</strong> – July 2009 Page 6-62
Note: Startup-flash and conflict fault flash override the current Test Mode setting; however, Test Mode has a higher priority<br />
than any of the other operational modes and is typically only used <strong>for</strong> test applications.<br />
Correction Mode<br />
The Correction Mode parameter controls whether Long-way or a combination of Short-way/Long-way transition is used to<br />
synchronize offsets during coordination. The correction mode is also selected on a pattern by pattern basis through the<br />
short-way, long-way and dwell settings in the Trans,CoorØ+ menu described later in this chapter. The Dwell transition<br />
method is selected under the Trans,CoorØ+ menu when the Long% and Short% values <strong>for</strong> the pattern are coded as zero.<br />
LONG<br />
The Coordination Module transitions to a new offset reference by increasing the split times by the<br />
long-way% value programmed in the Trans,CoorØ+ menu.<br />
SHORT/LONG The Coordination Module selects the quickest transition method by either lengthening split times<br />
using the long-way% value or by shortening split times using the short-way% value programmed in<br />
the Trans,CoorØ+ menu.<br />
Maximum Mode<br />
The Maximum Mode parameter determines which maximum green time is active, or if maximum green time is inhibited<br />
during coordination. These settings do not apply to floating <strong>for</strong>ce-offs because FLOAT sets the max timer equal to the split<br />
time to insure that slack time developed in the non-coordinated phases is passed to the coord phase.<br />
MAX_1<br />
MAX_2<br />
Selecting the MAX_1 mode allows Maximum 1 phase timing to terminate a phase when FIXED or<br />
OTHER <strong>for</strong>ce-off methods are in effect. If MAX_1 is selected, then Maximum 1 timing may be<br />
overridden by the Max2 setting on a pattern by pattern basis as discussed in section 6.9, Alt Tables+.<br />
Selecting the MAX_2 mode allows Maximum 2 phase timing to terminate a phase when FIXED or<br />
OTHER <strong>for</strong>ce-off methods are in effect. This setting is equivalent to the Max2 setting discussed in section<br />
6.9, Alt Tables+.<br />
MAX_INH Selecting MAX_INH inhibits Maximum 1 and Maximum 2 timing from terminating a phase when<br />
FIXED or OTHER <strong>for</strong>ce-off methods. When MAX_INH is in effect and a max call is placed on a phase,<br />
the max timer will decrement to zero (MM->7->1); however, the phase will not terminate under<br />
coordination until it is <strong>for</strong>ced-off.<br />
[v61]Version 61 now insures that MAX_INH does not inhibit the floating max timer under FLOAT, that<br />
is, the Maximum Mode setting has no effect under floating <strong>for</strong>ce-offs).<br />
Flash Mode (FlshMode)<br />
This setting is defined in section 4.9.1 and is duplicated on the Coordination Modes screen <strong>for</strong> convenience.<br />
Force-Off Mode<br />
Force-offs are predefined points in the signal cycle used to terminate the active phase and limit the time allocated to each<br />
active phase. <strong>NTCIP</strong> specifies FIXED and FLOAT <strong>for</strong>ce-off methods. A third <strong>NTCIP</strong> method, defined as OTHER,<br />
activates one of the seven additional Force-Off+ Modes under the Coordination Modes+ menu. The <strong>NTCIP</strong> based Force-<br />
Off modes are defined as follows:<br />
FLOAT<br />
FIXED<br />
OTHER<br />
Phases other than the coordinated phase(s) are active <strong>for</strong> their assigned split time only. This causes<br />
unused split time to revert to the coordinated phase.<br />
Phases are <strong>for</strong>ced-off at fixed points in the cycle. This allows unused split time of a phase to revert to<br />
the phases served next in the sequence.<br />
[v50], [v60] The coordination mode is determined by the Force-Off+ and Easy Float parameters.<br />
6.2.2 Coordination Modes+ (MM->2->1, Right Menu)<br />
Force-Off+ Mode [v50], [v60]<br />
Shortway+ Mode [v50], [v60], [v61]<br />
The Force-Off+ Mode and Shortway+ entry is only active if the Force-Off<br />
Mode under Coordination Modes is set to OTHER. This entry allows <strong>for</strong><br />
seven additional coordination modes as described below. All OTHER<br />
modes are covered in a document on Advanced Coordination available from<br />
Naztec .<br />
Naztec <strong>NTCIP</strong> <strong>Based</strong> NEMA <strong>TS2</strong> and <strong>2070</strong> Controller <strong>Manual</strong> – July 2009 Page 6-63
Easy Float<br />
Easy Float only applies if OTHER is selected as the <strong>for</strong>ce-off mode and EASY is selected as the <strong>for</strong>ce-off+ mode.<br />
OFF The maximum allocated to each phase is allowed to exceed the programmed split time (like FIXED).<br />
ON A floating max time is used to insure that the time allocated to each phase does not exceed the programmed split<br />
This insures that all slack time from the non-coordinated phases is passed to the beginning of the coord phase.<br />
Closed Loop<br />
The Closed Loop entry enables the System Operational Mode and allows the coordination pattern to originate from an onstreet<br />
master or from the central control system.<br />
OFF The controller does not respond to pattern commands from an on-street master or the central system.<br />
ON System Operational Modes are based on the hierarchy of control system. The central system and closed loop<br />
masters provide the highest level of control followed by the local time based scheduler in each secondary<br />
controller. The local TEST Operational Mode overrides commands from the external closed-loop system and<br />
the internal time-of-day scheduler.<br />
Auto Error Reset<br />
Coordination failures may occur under the coord diagnostic, if a vehicle or pedestrian call is not serviced <strong>for</strong> three cycles or<br />
if the maximum cycle counter is exceeded. A coordination failure is not reset by the next pattern change issued to the<br />
controller if Auto Error Reset is OFF. If Auto Error Reset is ON, the next system or time-of-day pattern change issued to<br />
the controller will reset the failure when the new pattern goes into effect.<br />
External<br />
External coordination enables the External Operational Mode and allows the pattern selection based on the external offset,<br />
cycle, and split inputs from the D-connector..<br />
OFF Disables external (hardwire interconnect) coordination inputs and outputs.<br />
ON<br />
Enables external coordination inputs and outputs<br />
Latch Secondary Force Offs<br />
This setting applies to the OTHER Force-off+ methods of coordination and insures that secondary <strong>for</strong>ce-offs are applied at<br />
the same point as primary <strong>for</strong>ce-offs.<br />
Stop-in Walk<br />
Stop-In-Walk is a very important feature that allows the split time of a phase less than the minimum pedestrian<br />
requirements (sum of the walk + ped clearance + yellow + all-red clearance).<br />
Stop-In-Walk causes the local cycle counter to “stop” during coordination if a <strong>for</strong>ce-off is applied to the phase and it is still<br />
timing walk or pedestrian clearance. This feature should only be used when pedestrian actuations are infrequent. Stop-In-<br />
Walk is enhanced by short-way offset correction because the coordinator can usually re-synchronize the offset within one<br />
cycle when ped clearance only extends 5 – 10” beyond the <strong>for</strong>ce-off.<br />
OFF Stop-in-Walk OFF <strong>for</strong>ces the user to provide adequate split time to service the walk and ped clearance intervals<br />
assigned to the phase. The coordination diagnostic will fail the pattern if the split times do not adequately meet<br />
the pedestrian requirements.<br />
ON Stop-in-Walk ON disables the coord diagnostic that insures that the split time is adequate to service the minimum<br />
pedestrian times. The local counter will “STOP” at the <strong>for</strong>ce-off and ”suspended” until the end of ped<br />
clearance. At the end of ped clearance, the local cycle counter will begin incrementing and the coordinator will<br />
immediately begin correcting the offset using short-way transition if specified <strong>for</strong> the pattern.<br />
Note: Rest-in-Walk programmed <strong>for</strong> a phase defeats Stop-in-Walk and requires that pedestrian times be serviced<br />
within the programmed split time.<br />
Stop-In-Walk may effect arterial phases that are push button actuated when there is no side road demand. If a late arterial<br />
Ped call comes in, the coordinator may utilize Stop-in Walk to finish processing the arterial Ped clearance times during the<br />
first split, thus correcting during the side road splits. If this is not desired, program the arterial phases as Rest-in-Walk and<br />
program the Walk Recycle, Leave Walk Be<strong>for</strong>e and Leave Walk After parameters as described below.<br />
Naztec <strong>NTCIP</strong> <strong>Based</strong> NEMA <strong>TS2</strong> and <strong>2070</strong> Controller <strong>Manual</strong> – July 2009 Page 6-64
Walk Recycle<br />
This parameter is used in association with arterial phases. The Options under this parameter will take effect only when<br />
Rest-In-Walk is set <strong>for</strong> the arterial phase(s). If Rest-In-Walk is not set, this parameter is ignored. When Rest-In-Walk is<br />
not set, the arterial pedestrians are subject to PedLeav and Ped Yld parameters as well as opposing phase demand.<br />
Walk Recycle and the two Leave Walk settings described below, determine how walk intervals are terminated and recycled<br />
during coordination when the controller is resting in a phase and there is time available to re-service the pedestrian<br />
movement be<strong>for</strong>e the phase is <strong>for</strong>ced off.<br />
Walk Recycle only recycles the walk interval if a ped call has been placed on the phase or if the phase is programmed <strong>for</strong><br />
Rest-In-Walk. A ped recall set through the phase options or through the Split Table Mode setting (PED or MxP) will not<br />
recycle the walk unless a ped detector has also called the phase or Rest-In-Walk is set. If you want to rest-in-walk on the<br />
arterial phases, then program Rest-In-Walk <strong>for</strong> those phases under menu MM->1->1->2.<br />
NO_RECYCLE After servicing walk and ped clearance, the controller will continue to rest in the coordinated phase<br />
until the next cycle (Local counter = 0) be<strong>for</strong>e recycling the walk.<br />
IMMEDIATE<br />
Ø1256_INH<br />
Ø3478_INH<br />
NO_PED_INH<br />
NEVER<br />
Leave Walk Be<strong>for</strong>e<br />
If a ped call is issued during or after ped clearance, the walk will be recycled immediately at the Ped<br />
Yield point of the phase if the controller continues to rest in that phase. If Rest-In-Walk is set, the<br />
controller will recycle the walk immediately at the end of ped clearance if a conflicting call does not<br />
exist. This locks out any new conflicting calls until the end of pedestrian clearance in the next<br />
cycle. There<strong>for</strong>e, Inhibit 1256 or Inhibit 3478 is recommended if Rest-In-Walk is set <strong>for</strong> the<br />
coordinated phase.<br />
This option is useful when the coord phases are Ø4 and Ø8. The coord phase walk is not recycled<br />
until the permissive window <strong>for</strong> the cross street (Ø1256) has had an opportunity to service<br />
conflicting pedestrian and vehicle calls.<br />
This option is useful when the coord phases are Ø2 and Ø6. The coord phase walk is not recycled<br />
until the permissive window <strong>for</strong> the cross street (Ø3478) has had an opportunity to service<br />
conflicting pedestrian and vehicle calls<br />
This option allows the walk of the coord phase to recycle when the pedestrian omits are lifted on the<br />
coordinated phase (i.e. the earliest point in the cycle when the coordinator will allow a walk interval<br />
to be serviced).<br />
This option prevents the walk from being recycled after the phase serviced by the walk has begun.<br />
A pedestrian call will not recycle the walk until the controller services a conflicting phase.<br />
This parameter is used in association with arterial phases. The Options under this parameter will take effect only when<br />
Rest-In-Walk is set <strong>for</strong> the arterial phase(s). If Rest-In-Walk is not set, this parameter is ignored. The following entries<br />
determines when a phase will leave walk if it is resting in walk but has not been recycled:<br />
TIMED<br />
The PedLeav point is the latest point in the cycle that allows the controller to begin Ped clearance and<br />
have end it at the <strong>for</strong>ce-off of the phase. The TIMED option allows the controller to rest-in-walk until<br />
the PedLeav point if a conflicting call is received on another phase.<br />
ON DEMAND This option ignores the PedLeav point during coordination and allows the controller to leave walk<br />
immediately when a conflicting call is received.<br />
Leave Walk After<br />
These entries are the same as Leave Walk Be<strong>for</strong>e except they apply to phases resting in walk after being recycled. This<br />
parameter is used in association with arterial phases. The Options under this parameter will take effect only when Rest-In-<br />
Walk is set <strong>for</strong> the arterial phase(s). If Rest-In-Walk is not set, this parameter is ignored.<br />
Coord Yield<br />
The Coord Yield parameter is expressed as a positive and negative number ( - 15 to +15”). This parameter is used to adjust<br />
the default yield point of the coord phase under <strong>NTCIP</strong> coordination (FIXED and FLOAT modes). This adjustment is<br />
applied to only the coordinated phases, where the Early Yield adjustment defined in section 6.6.2 is applied to all of the<br />
non-coordinated phases.<br />
Naztec <strong>NTCIP</strong> <strong>Based</strong> NEMA <strong>TS2</strong> and <strong>2070</strong> Controller <strong>Manual</strong> – July 2009 Page 6-65
[v65] Expanded Splits<br />
Version 65.x <strong>for</strong> the <strong>2070</strong> controller provides the ability to extend cyles, offsets and split times beyond 255 seconds. Turn<br />
Expanded Splits ON to extend coordination times to 999 seconds. A separate pattern table and split table is provided <strong>for</strong><br />
maintaining these extended values. All other coordination programming is unchanged when Expanded Splits is enabled.<br />
[v61] Shortway+<br />
When enabled, this feature allows the controller’s local cycle counter to get in step more quickly when shortway<br />
transitioning.. Specifically, if the coordinator is running ‘fast or shortway’ to get in step and a phase terminates be<strong>for</strong>e its<br />
<strong>for</strong>ce-off, the cycle counter is allowed to advance to the value of the phase’s <strong>for</strong>ce-off. If all of that time is not required, the<br />
cycle counter is advanced to a value that allows the local coordinator to get in step. The local cycle counter will not<br />
advance more than 15 seconds using this feature.<br />
[v61] No Added Initial<br />
This Feature allows Added Initial Timing to be disabled whenever coordination is active (i.e. Not Free). Set this parameter<br />
to ON if you want Added Initial Timing to be disabled during coordination. Set to OFF if you want to continue to use<br />
Added Initial Timing during coordination.<br />
Naztec <strong>NTCIP</strong> <strong>Based</strong> NEMA <strong>TS2</strong> and <strong>2070</strong> Controller <strong>Manual</strong> – July 2009 Page 6-66
6.3 Pattern Table (MM->2->4)<br />
Coordinated Patterns are defined by a Cycle length (normally 1-255<br />
sec.). Free patterns are specified in the Pattern Table with a zero<br />
second Cycle length. The 48 patterns in the Pattern Table along with<br />
Pattern# 254 (free) and Pattern# 255 (flash) provide a total of 50<br />
patterns. Only one pattern may be active at a time.<br />
Cycle Time<br />
Cycle Time specifies the cycle length and ranges from 0-255 seconds if Expanded Splits is OFF, or 0-999 if Expanded<br />
Splits is ON. Cycle Time is typically set to the sum of the split times in each ring during coordination. However, a Cycle<br />
Time of 0” implies a free pattern as discussed in section 6.1.2. Many features available to patterns under coordination are<br />
also available to a free pattern programmed with a zero second cycle length. This allows different free patterns to be called<br />
by time-of-day or through the system that vary the operation of the controller during free operation. Note in Version 65.x, if<br />
Expanded Splits is set to “ON cycle lengths can vary from 1-999 seconds.<br />
Offset Time<br />
Offset Time defines the length of time that the local counter (Loc) lags behind the system time base (TBC). Offset ranges<br />
from 0-255 seconds if Expanded Splits is OFF, or 0-999 if Expanded Splits is ON. Each controller in a coordinated system<br />
references the system time base to midnight to synchronize the offset time <strong>for</strong> each active pattern in the system. The<br />
system maintains coordination as long as each controller in the system maintains the same midnight time reference. Note<br />
that if the offset value is greater than or equal to the cycle time, then the controller is <strong>for</strong>ced into free mode by the<br />
coordination diagnostic.<br />
Split Number<br />
Split Number is used to reference one of the 32 Split Tables associated with the pattern. The Split Tables are interpreted<br />
differently based on the <strong>for</strong>ce-off method. Most of these modes require split times <strong>for</strong> each phase programmed through the<br />
Split Table. However, some of the OTHER <strong>for</strong>ce-off methods require the setting the <strong>for</strong>ce-off and yield points <strong>for</strong> each<br />
phase. This chapter on, Basic Coordination, discusses the FIXED and FLOAT <strong>for</strong>ce-off methods that simplify coordination<br />
under <strong>NTCIP</strong> coordination. The OTHER methods of coordination are discussed in Chapter 13 under Advanced<br />
Coordination.<br />
Sequence Number<br />
The Sequence Number selects one of the 16 phase sequences to use with the pattern. Each phase sequence provides eight<br />
(8) entries per ring <strong>for</strong> each of the 4 rings. Phase sequences are fully discussed in Section 4.2.1 of this manual. A sequence<br />
number of 0 in the database defaults to sequence number 1. Only entries between 1-16 are valid if entered through the<br />
keyboard.<br />
6.4 Split Tables <strong>for</strong> <strong>NTCIP</strong> Modes FIXED and FLOAT (MM->2->7)<br />
This section discusses how to program the Split Table when the <strong>NTCIP</strong> <strong>for</strong>ce-off modes (FIXED and FLOAT) are<br />
specified. The <strong>NTCIP</strong> coordination modes allow you to specify a split time in seconds to each phase and let the controller<br />
calculate all of the internal <strong>for</strong>ce-off and yield points <strong>for</strong> the pattern. <strong>NTCIP</strong> provides the OTHER coord mode to let the<br />
manufacturer provide additional methods of coordination. Naztec provides seven OTHER coord modes using the Forceoff+<br />
setting as discussed in the chapter on Advanced Coordination<br />
6.4.1 Accessing the Split Tables (MM->2->7)<br />
The Split Table allocates the cycle time (in seconds) to each of the 16 phases enabled in the controller. One of these phases<br />
is set as the Coordinated Phase to reference the Offset of the pattern. The recall Mode of each phase can also be set in the<br />
Split Table and overrides the recalls set in phase options when the Split Table is called by the active pattern. A maximum<br />
of 32 split tables may be individually assigned to any of the 48 patterns in the Pattern Table. Each split table (1-32) is<br />
selected individually from menu MM->2->7.<br />
The following Split Menu will appears after the split number has<br />
been selected from MM->2->7. Selection 1 is used to modify the<br />
Split Table. Selection 2, “Plus Features” is only available with the<br />
OTHER <strong>for</strong>ce-off methods. Plus Features are not needed <strong>for</strong> FIXED<br />
and FLOAT because these modes automatically calculate the<br />
permissive period and simplify additional programming required <strong>for</strong> the OTHER non-<strong>NTCIP</strong> modes.<br />
Naztec <strong>NTCIP</strong> <strong>Based</strong> NEMA <strong>TS2</strong> and <strong>2070</strong> Controller <strong>Manual</strong> – July 2009 Page 6-67
6.4.2 Programming Each <strong>NTCIP</strong> Split Tables <strong>for</strong> Fixed & Float<br />
Split Time<br />
Split Time sets the maximum time allocated to each phase during the<br />
signal cycle. Split Time ranges from 0-255 seconds if Expanded<br />
Splits is OFF, or 0-999 if Expanded Splits is “ON”. The FIXED<br />
<strong>for</strong>ce-off method allows unused split time, or “slack time” to be used by the next phase in the sequence. The FLOAT<br />
method guarantees that “slack time” from the non-coordinated phases is used by the coord phase.<br />
The controller diagnostic (discussed later in this chapter) insures that each split meets or exceeds the minimum times<br />
programmed <strong>for</strong> the phase. Each split time must be sufficient to service the minimum green, vehicle clearance and all-red<br />
clearance to prevent the min times from extending the phase past <strong>for</strong>ce-off point. In addition, if Stop-In-Walk is set to OFF,<br />
the diagnostic insures that each split is long enough to service the minimum pedestrian times (walk and ped clearance) prior<br />
to the <strong>for</strong>ce-off. The coordination diagnostic is always run prior to the pattern becoming active. If diagnostic errors are<br />
detected, the pattern is fails and the controller is placed into the free mode.<br />
Coordinated Phase<br />
The Coordinated Phase designates one phase in the split table as the offset reference. The offset may be referenced to the<br />
beginning or the end of the Coordinated Phase using the programming features from MM->2->5 (right menu).<br />
Only one phase should be designated as the Coordinated Phase. If multiple coord phases are specified in different rings,<br />
the coordinator will not be able to reference the offset if the phases do not begin (or end) at the same point in the cycle.<br />
There<strong>for</strong>e, specify one Coordinated Phase <strong>for</strong> the offset reference and apply a MAX<br />
mode setting (discussed in the next section) if you want to guarantee split time allocated<br />
to the coordinated movements. Consider, <strong>for</strong> example, when a lead left-turn sequence is<br />
used, and there is only one designated lead left (Phase 1) as pictured. In this case the<br />
Coordinated Phase should be the first “standalone” through phase (Phase 2) in the<br />
sequence after crossing the barrier. The same will apply to lag left turn sequences.<br />
Setting Return Hold (MM->2->5) insures that the controller holds in the coordinated phase once it returns to the phase.<br />
Applying a MAX Mode setting to the coord phase in the Split Table also “holds” the coord phase with a max call. Naztec<br />
recommends that you set Return Hold <strong>for</strong> all lead/lag left-turn sequences, because this guarantees that the Coordinated<br />
Phase is held to it’s <strong>for</strong>ce-off even if the max timer expires.<br />
It is possible to gap out of the Coordinated Phase if Return Hold and the MAX Mode parameters are not set. This allows<br />
the controller to leave the Coordinated Phase and re-service a preceding left turn phase if there is enough time in the cycle<br />
to service the phase be<strong>for</strong>e <strong>for</strong>cing off the coord phase and crossing the barrier. The Early Yield adjustment defined in<br />
Section 6.6.2 may also be used to yield to the cross street phases be<strong>for</strong>e the barrier to service the cross street early.<br />
Split Table Mode Setting<br />
The Mode settings override recalls programmed in Phase Options (MM->1->1->2) whenever the split table is active.<br />
NON<br />
MIN<br />
MAX<br />
PED<br />
MxP<br />
OMT<br />
The None setting applies the base recall settings programmed under MM->1->1->2<br />
The Min setting applies a minimum recall to the phase when the split table is active<br />
The Max setting applies a maximum recall to the phase when the split table is active<br />
The Ped setting applies a pedestrian recall to the phase when the split table is active<br />
The Max + Ped setting applies maximum and pedestrian recalls to the phase when the split is active<br />
The Omit setting omits the phase when the split table is active<br />
Enb<br />
[v60][v61][v65] The Enable setting enables a phase that is not enabled in the phase options (MM->1->1->2)<br />
Naztec <strong>NTCIP</strong> <strong>Based</strong> NEMA <strong>TS2</strong> and <strong>2070</strong> Controller <strong>Manual</strong> – July 2009 Page 6-68
6.5 Easy Calcs Generated For <strong>NTCIP</strong> Modes FIXED and FLOAT<br />
All that is required to<br />
allocate cycle time using<br />
FIXED and FLOAT are<br />
the Split Times (in<br />
seconds) <strong>for</strong> each phase.<br />
The controller automatically calculates the internal <strong>for</strong>ce-off and yield points<br />
(called Easy Calcs) given the split times and sequence of the pattern. The<br />
OTHER coordination methods provide greater control over the yield point<br />
settings, but at the expense of additional complexity. The <strong>NTCIP</strong> yield point<br />
adjustments, Coord Yield (section 6.2.2) and Early Yield (section 6.6.2) allow the user to fine-tune the default yield points<br />
if desired (this topic is discussed in the chapter on Advanced Coordination). However, <strong>for</strong> most users, the Easy Calcs<br />
(<strong>for</strong>ce-off and yield points calculated under FIXED and FLOAT) are “hidden from view” and all the user is concerned<br />
about is insuring that the split times provided pass the coord diagnostic. The Split Table above assigns phase 2 as the<br />
Coordinated Phase with 20” Split Times allocated to each phase.<br />
The pattern example to the right represents a 100” cycle with the offset<br />
referenced to Begin-of-Green (BegGRN) coord Ø2. All splits are 25” as<br />
shown in the Split Table# above and the clearance times <strong>for</strong> each phase<br />
are 4”. The zero point of the cycle (Loc = 0) coincides with the<br />
beginning of the coordinated phase (in this case, phase 2). The green<br />
interval <strong>for</strong> Ø2 and Ø6 is applied at Loc=21 to provide a 25” Split Time<br />
Each phase in the sequence is <strong>for</strong>ced off 25” after the <strong>for</strong>ce-off <strong>for</strong> the<br />
previous phase starting at the coord phase and proceeding across the<br />
barriers.<br />
The Easy Calcs status screen (MM->2->8->2) displays the internal calculations <strong>for</strong> this example under FIXED or FLOAT<br />
<strong>NTCIP</strong> modes. Secondary Force-offs only apply to the OTHER modes, so under FIXED and FLOAT, the Primary and<br />
Secondary Force-offs are the same. The Yield points opens the Permissive Periods to service vehicle and pedestrian calls<br />
<strong>for</strong> each phase. The Apply points close the Permissive Periods as discussed in the next section.<br />
6.5.1 [v61] Permissive Periods For <strong>NTCIP</strong> FIXED and FLOAT<br />
The vehicle permissive period is defined as the portion of the cycle during which vehicle calls can be serviced if there is a<br />
vehicle call on the phase. The permissive period begins at the VehYield point and ends at the VehApply point that inhibits<br />
vehicle calls from being serviced until the next signal cycle.<br />
The pedestrian permissive period is defined as the portion of the cycle during which pedestrian calls can be serviced if there<br />
is a pedestrian call on the phase. The permissive period begins at the PedYield point and ends at the PedApply point that<br />
inhibits pedestrian calls from being serviced until the next signal cycle.<br />
The vehicle and pedestrian Yield points open "windows of opportunity" to service calls <strong>for</strong> each phase. The vehicle and<br />
pedestrian Apply points close the permissive windows <strong>for</strong> each phase.<br />
Default Yield Points <strong>for</strong> FIXED and FLOAT<br />
The default VehYield points <strong>for</strong> the 100” cycle example are<br />
illustrated to the right. The FIXED and FLOAT coord modes set<br />
the Yield points <strong>for</strong> all non-coordinated phases at the <strong>for</strong>ce-off of<br />
the coord phase. The default Yield point of the coord phase and the<br />
“pseudo” coord phase is set 10" later. This allows the controller to<br />
service the non-coordinated phases immediately at the end of the<br />
coordinated phase. However, if no calls exist on the noncoordinated<br />
phases at the barrier, the controller will dwell in the<br />
coord phase <strong>for</strong> 10” be<strong>for</strong>e it is reserviced. The default yield<br />
points delay the permissive period <strong>for</strong> the coord phase to allow<br />
“late” side street to be serviced after the barrier.<br />
Naztec <strong>NTCIP</strong> <strong>Based</strong> NEMA <strong>TS2</strong> and <strong>2070</strong> Controller <strong>Manual</strong> – July 2009 Page 6-69
VehApply Points<br />
The controller automatically calculates vehicle Apply points <strong>for</strong><br />
FIXED and FLOAT to close the permissive period to veh calls<br />
on each phase. Each VehApply point is calculated by subtracting<br />
the minimum vehicle times (min green or max initial + yellow +<br />
all-red ) from the <strong>for</strong>ce-off point of the phase. This insures that<br />
minimum veh times are serviced without overrunning the <strong>for</strong>ceoff.<br />
This default VehApply point is applied as late in the cycle as<br />
possible to maximize the permissive period <strong>for</strong> “late” vehicle<br />
calls. Naztec provides a Min Perm setting <strong>for</strong> vehicle calls to<br />
minimize the veh permissive window as shown to the right.<br />
PedApply Points<br />
The controller automatically calculates<br />
pedestrian Apply points <strong>for</strong> FIXED and<br />
FLOAT to close the permissive period <strong>for</strong><br />
ped calls on each phase. If Stop-In-Walk<br />
is OFF, the PedApply point is calculated<br />
by subtracting the minimum pedestrian<br />
times (walk + ped clearance + yellow +<br />
all-red) from the <strong>for</strong>ce-off point of the<br />
phase. This insures the minimum ped<br />
times are serviced without overrunning<br />
the <strong>for</strong>ce-off. If Stop-In-Walk is ON, the<br />
default PedApply point is applied 5” prior<br />
to the <strong>for</strong>ce-off to allow late ped calls to<br />
overrun the <strong>for</strong>ce-off. The Min Perm /P<br />
setting minimizes the ped permissive<br />
window as shown to the right.<br />
6.6 Transition, Coord Ø+ (MM->2->5)<br />
6.6.1 Transition Parameters (Left Menu)<br />
Offset Correction may be set to LONG (long-way) or SHORT/LONG<br />
(short/long-way) under MM->2->1. Transition,CoordØ+ specifies the amount of short, long or dwell <strong>for</strong> each pattern.<br />
Short (Short-way Transition %)<br />
This field sets the percent reduction applied to each split time in the Split Table during short-way transition. Valid values<br />
<strong>for</strong> this parameter are 0-24%. Short-way is disabled when the parameter is set to zero. The controller diagnostic (discussed<br />
later in this chapter) insures that minimum phase times are satisfied <strong>for</strong> each programmed split with short-way applied and<br />
insure that the phase minimums do not extend beyond a <strong>for</strong>ce-off. Short-way transition is very effective when used with<br />
the Stop-In-Walk feature discussed in the last section.<br />
Long (Long-way Transition %)<br />
This field sets the percent extension applied to each split time in the Split Table during long-way transition. Valid values<br />
<strong>for</strong> this parameter are 0-99%. Long-way is disabled when the parameter is set to zero. You may <strong>for</strong>ce the controller to use<br />
long-way only by coding a zero Short value <strong>for</strong> the pattern. Many users do this as a means to avoid the additional<br />
constraints imposed by the coord diagnostic <strong>for</strong> short-way transition. However, selecting SHORT/LONG as the Correction<br />
and providing short and long-way transition % values greater than zero allows the controller to select the quickest way to<br />
transition and synchronize the offset <strong>for</strong> the active pattern.<br />
Naztec <strong>NTCIP</strong> <strong>Based</strong> NEMA <strong>TS2</strong> and <strong>2070</strong> Controller <strong>Manual</strong> – July 2009 Page 6-70
Dwell (Dwell in coord phase)<br />
Dwell transition is enabled <strong>for</strong> a pattern if both Short and Long values are set to zero and Dwell is set to 1-99 seconds. The<br />
Dwell method corrects the offset by resting at the end of the coordinated phase until the desired offset is reached or until the<br />
Dwell time expires. The controller will continue to dwell in the coord phase each cycle until the desired offset is reached.<br />
Increasing the Dwell time reduces the number of cycles to achieve coordination, but increases delay <strong>for</strong> drivers waiting on<br />
the non-coordinated phases. Dwell offset correction is not as popular as the short-way/long-way method <strong>for</strong> this reason.<br />
No Short Ø’s<br />
This feature allows four phases to be excluded from short-way transition as “no short-way phases”. Split times that are not<br />
long enough to service the minimum phase times with short-way applied will fail the coordination diagnostic. Occasionally,<br />
it is more convenient to exclude a phase from short-way as a “no short-way phases” than to increase the split time to pass<br />
the coord diagnostic or to reduce the short-way percent applied to all of the phases. This feature promotes the use to shortway<br />
transition to reduce the time need to get the offset in sync.<br />
6.6.2 Yield Point Adjustments, Return Hold and Offset Reference (Right Menu)<br />
These entries relate to the Coord Phase selected in<br />
the Split Table and referenced by each Pattern. The<br />
Coord Phase provides the “sync” point during<br />
coordination. The pattern Offset is referenced to<br />
either the beginning or end of the coord phase as<br />
specified by in this table. This menu provides the<br />
ability to return and hold the coord phase active<br />
until it’s <strong>for</strong>ce-off and the also the ability to modify<br />
the yield points of the non-coordinated phases.<br />
Early Yield (EarlyYld)<br />
The Early Yield parameter (0-25 seconds) modifies the yield calculations under <strong>NTCIP</strong> coordination (FIXED and FLOAT<br />
<strong>for</strong>ce-off modes). This adjustment is applied to all the non-coordinated phases, where the Coord Yield adjustment is<br />
applied to the coordinated phases.<br />
Return Hold (RetHold)<br />
Return Hold only applies to <strong>NTCIP</strong> FIXED and FLOAT modes. Enabling RetHold causes a hold to be placed on the<br />
coordinated phase until it is <strong>for</strong>ced-off. Disabling RetHold allows the controller to gap-out of the coordinated phase to<br />
service a competing vehicle or pedestrian call on another phase.<br />
The MAX Mode setting in the Split Table can also be used to extend the coord phase. However, Naztec recommends that<br />
unless you wish to gap out of the coord phase, that you set Return Hold as a default. This insures that if the max timer<br />
expires during a lead/lag sequence, that you will never leave the coord phase until it’s <strong>for</strong>ce-off point.<br />
Offset Reference<br />
The Offset Reference synchronizes the<br />
offset to either the beginning of the coord<br />
phase (BegGRN) or the end of the coord<br />
phase green (EndGRN). The 100” cycle<br />
example to the right shows how <strong>for</strong>ce-off<br />
points change when the Offset Reference is<br />
changed.<br />
You must insure the Offset Reference<br />
agrees with the offset reference in the<br />
computer model used to develop the<br />
pattern. For BegGRN corresponds with the<br />
Synchro “<strong>TS2</strong> 1 st Green” offset method.<br />
EndGrn corresponds with “Begin Yellow”<br />
in Synchro.<br />
Naztec <strong>NTCIP</strong> <strong>Based</strong> NEMA <strong>TS2</strong> and <strong>2070</strong> Controller <strong>Manual</strong> – July 2009 Page 6-71
[v61] Flt<br />
The Flt pattern option is provided to override the FIXED <strong>for</strong>ce-off method programmed under Coord Modes as discussed in<br />
section 6.2.1. If FIXED is selected as the default under MM->2->1, you can use this pattern option to override the <strong>for</strong>ce-off<br />
method as FLOAT on a pattern-by-pattern basis. This allows one pattern to guarantee slack time to either the next phase in<br />
the sequence or to the coord phase as a pattern or time-of-day feature.<br />
[v61] [v65] MinPermV/P<br />
These two parameters allow the minimum permissive window <strong>for</strong> vehicles (V/) and <strong>for</strong> pedestrians (/P) to be selected on a<br />
pattern-by-pattern basis. Enabling this feature prevents a “late” vehicle and/or pedestrian call from being serviced if the call<br />
received after the <strong>for</strong>ce-off of the preceding phase. The MinPermV/P adjustments are illustrated in the next section.<br />
6.6.3 Coord Yield and Early Yield Adjustments<br />
The default yield points calculated by Easy Calcs are acceptable without modification <strong>for</strong> most applications. In fact most<br />
users continue to run coordination <strong>for</strong> years and never question the default yield point calculations. This section discusses<br />
how to adjust the default yield points calculated under FIXED and FLOAT without having to delve into the OTHER<br />
coordination modes.<br />
The default VehYield points <strong>for</strong> the<br />
coord phase(s) may be adjusted using<br />
Coord Yield. The default VehYield<br />
points <strong>for</strong> the non-coordinated phases<br />
may be adjusted using Early Yield.<br />
The VehYield point of the noncoordinated<br />
phases may be adjusted<br />
using Early Yield as defined in section<br />
6.6.2 (MM->2->5). This<br />
parameter moves the VehYield point<br />
of the non-coordinated phases as<br />
much as 25" prior to the barrier<br />
change. Typically, this value is not<br />
changed because the user does not<br />
want to leave the coordinated phases<br />
early in a progressed signal system.<br />
However, there are unique<br />
applications when adjusting these<br />
default yield points is desirable.<br />
The diagram to the right illustrates the<br />
Coord Yield and Early Yield adjustments<br />
when ø 1 is leading and the barrier is<br />
crossed at the end of ø2<br />
The VehYield points are slightly different<br />
when the coordinated phase begins at the<br />
barrier, as in the case of a lagging left-turn<br />
sequence (see figure to the right).<br />
The non-coordinated phases (other than the<br />
lagging turn phase) still yield at the barrier.<br />
The coord phases still yield 10” later.<br />
However, the yield point <strong>for</strong> the lagging<br />
left turn is placed at the <strong>for</strong>ce-off of the<br />
coord phase.<br />
Naztec <strong>NTCIP</strong> <strong>Based</strong> NEMA <strong>TS2</strong> and <strong>2070</strong> Controller <strong>Manual</strong> – July 2009 Page 6-72
6.7 Recalling Peds With Rest-In-Walk<br />
Pedestrian recalls may be placed on any phase during coordination through the<br />
Mode setting in the split table, but any setting other than NON (none) overrides<br />
the phase recall settings programmed under MM->1->1->2 or MM->5->6.<br />
Pedestrian recalls can be applied through the Mode setting by selecting PED to<br />
apply a ped recall MxP to place a MAX and PED recall on the phase. The PED<br />
and MxP mode settings do not recycle the walk indications if the controller is<br />
resting in the phase and the walk interval has timed out. This operation is<br />
accomplished using the walk recycle feature defined in section 6.2.2.<br />
Agencies often want the controller to rest-in-walk in the coordinated phase to<br />
provide the maximum opportunity <strong>for</strong> pedestrians to begin crossing the street.<br />
Rest-In-Walk under MM->1->1->2 must be set <strong>for</strong> each phase to rest in the<br />
walk interval and time the end of ped clearance at the <strong>for</strong>ce-off point<br />
(beginning of yellow). The controller calculates an Easy Calc point, called<br />
PedLeav that defines the end of the end of the Rest-In-Walk period. This coordination feature replaces the walk-restmodifier<br />
method used in TS1controllers to achieve rest-in-walk operation.<br />
The PedLeav point is calculated by subtracting ped clearance time from the <strong>for</strong>ce-off point of the phase as shown above. If<br />
Walk Recycle is set to NO_RECYLE or<br />
NEVER, then Rest-In-Walk feature will not<br />
operate properly. There<strong>for</strong>e, set Walk_Recycle<br />
under Coord Modes+ (MM->2->1, right menu)<br />
to recycle the walk indication if Rest-In-Walk<br />
is used.<br />
6.8 Maximum Phase Timing<br />
Using FIXED Force-offs<br />
Force-offs calculated <strong>for</strong> FIXED and FLOAT<br />
are fixed points in the cycle that do not change<br />
even though phases may skip, gap-out early<br />
and transfer slack time to the next phase in the<br />
sequence. FIXED <strong>for</strong>ce-offs allow slack time<br />
to be used by the next phase in the sequence.<br />
Max phase timing under FIXED may be<br />
inhibited (MAX_INH) or set to MAX_1 or<br />
MAX2.<br />
FLOAT <strong>for</strong>ce-offs insure that all slack time is transferred from the coordinated FLOAT apples a floating max time<br />
(FloatMx) equal to the green portion of the split to terminate the phase prior to the <strong>for</strong>ce-off if the time allocated to the<br />
phase exceeds programmed split time. This insures slack time transfers to the coord phase in the sequence.<br />
The example to the right applies FIXED <strong>for</strong>ce-offs with the<br />
Maximum mode set to MAX_INH. ø 3 gaps out early and<br />
moves to ø4 because the vehicle permissive window <strong>for</strong> ø4<br />
is open. Because max timing is inhibited, slack time from<br />
ø3 is transferred and used by ø4 if veh calls exist extending<br />
ø 4 to the <strong>for</strong>ce-off <strong>for</strong> ø4.<br />
The next example illustrates FIXED <strong>for</strong>ce-offs with the<br />
Maximum mode set to MAX_1. In this case, the active<br />
max1 phase time <strong>for</strong> ø4 is set equal to the green portion of<br />
the split assigned to ø4 which is equivalent to the FloatMx<br />
automatically set using FLOAT. Setting the active max1<br />
value greater than FloatMx allows ø4 to use a portion of the<br />
slack time from ø3. Setting max1 to a “large” value allows<br />
the max timer to extend the phase to the <strong>for</strong>ce-off of ø4 and<br />
achieves the same effect as setting the Maximum mode to MAX_INH.<br />
Naztec <strong>NTCIP</strong> <strong>Based</strong> NEMA <strong>TS2</strong> and <strong>2070</strong> Controller <strong>Manual</strong> – July 2009 Page 6-73
6.9 Alternate Tables+ (MM->2->6)<br />
The Alternate Tables+ menu attaches any of the Alternate Phase<br />
Programs (section 4.1.9) or the Alternate Detector Programs<br />
(section 5.2) to any of the 48 patterns. There are a total of 8<br />
Alternate Phase Option Programs, 3 Alternate Phase Time<br />
Programs, 3 Alternate Detector Group Programs and 2 Call/Inhibit<br />
Programs assignable to each patterns in Alternate Tables+ in the left<br />
menu of MM->2->6.<br />
The right menu of Alternate Tables+ allows overlaps 1-8 to be<br />
individually enabled or disabled by pattern. One application of this<br />
feature is to convert a protected/permitted left-turn signal to<br />
protected-only through a pattern that disables an overlap driving the permissive indications.<br />
The CIC plan (1-4) <strong>for</strong> Critical Intersection Control may also be enabled or disabled <strong>for</strong> each pattern. CIC provides an<br />
adaptive split feature and is not available on the <strong>2070</strong>.<br />
Enabling CNA1 when a pattern is active applies a hold during coordination on any phases programmed <strong>for</strong> “Non-actuated<br />
1”. CNA1 provides an external method of coordination commonly used with older UTCS type systems. However, external<br />
coordination has been replaced with internal time base methods described in this chapter.<br />
Max2 may be selected <strong>for</strong> each pattern from Alternate Tables+ and overrides the Maximum setting in Coord Modes MM-<br />
>2->1. Max2 has no effect under coordination if the floating <strong>for</strong>ce-offs (FLOAT) is active (see section 6.2.1). This feature<br />
is also used to call a free pattern (0” cycle length) by time-of-day and change the current max timing in effect from Max1 to<br />
Max2.<br />
6.10 External I/O (MM->2->2)<br />
External I/O allows an external source to select the active pattern<br />
using Offset and Plan inputs provided on the D-connector. External<br />
coordination schemes date back to early TS1 days when an on-street<br />
master selected the active pattern of all secondary controllers in the<br />
system through an AC current based hardwire interconnect<br />
External I/O programming is provided in version 61 <strong>for</strong> backward<br />
compatibility with these older systems. The External I/O programming shown to the right associates the Offset / Plan<br />
inputs with the <strong>NTCIP</strong> pattern provided in the pattern table.<br />
6.11 Coordination Status Displays (MM->2->8)<br />
The Coordination Status Displays:<br />
• Show the current state of the Coordination Module and it’s<br />
various Operation Modes (the active pattern and it’s source<br />
along with the timers that relate to the active pattern)<br />
• List the internal <strong>for</strong>ce-off and yield points driving the active pattern (Easy Calcs)<br />
• List the optional dynamic <strong>for</strong>ce-of and yield points if CIC operation is in effect (CIC Calcs)<br />
• Display phases that were skipped if the active pattern fails and allow the user to clear the fault<br />
• Diagnose the Next pattern to isolate faults be<strong>for</strong>e they occur<br />
6.11.1 Coordination Overview Status Screen (MM->2->8->1)<br />
The Coordination Overview Status Screen is grouped into the<br />
following three distinct areas. These three areas are combined on<br />
one status display to avoid changing menus to display the current<br />
status of the coordinator:<br />
• The current Operation Modes and source (Src) of the<br />
Active pattern<br />
• The real-time status of the Active pattern and offset synchronization<br />
• Alternate phase times and options, detector group and Call/Inhibit/Redirects assigned to the Active pattern<br />
(bottom line of the Coordination Overview Status Screen above)<br />
Naztec <strong>NTCIP</strong> <strong>Based</strong> NEMA <strong>TS2</strong> and <strong>2070</strong> Controller <strong>Manual</strong> – July 2009 Page 6-74
Operational Modes and Active Pattern<br />
The left-hand area of the Coordination<br />
Overview Status Screen provides the<br />
current pattern # generated by each of the<br />
Coordination Modes and the, Next pattern<br />
# and the Active pattern # in effect.<br />
The controller may receive a pattern<br />
change from any of the Coordination Modes discussed in this chapter. These modes generate the Source (Src) of the Active<br />
pattern based on the following hierarchy of control:<br />
• Test patterns have the highest priority and can only be overridden by modifying the Test OpMode value in the<br />
database (see MM->2->1)<br />
• Remote (Remo) patterns downloaded from StreetWise have the next highest level of priority.<br />
• System (Sys) generated patterns downloaded from a closed loop master becomes active if the Closed Loop<br />
parameter in Coordination Modes+ is ON (see MM->2->1).<br />
• External (Ext) generated patterns are selected using D-connector plan/offset inputs rather than data communication<br />
to a central based or master based system<br />
• TBC generated patterns are selected by any manual override of the Time Base Scheduler, see section 7.10.2. (TBC<br />
is usually in stand-by and there<strong>for</strong>e defaults to the current Tod pattern from the Time Base Scheduler)<br />
• Tod generated patterns are selected by the Time Base Scheduler (see section 7.1 in the next chapter)<br />
During a pattern change, the Next pattern becomes Active when the Local (Loc) cycle counter reaches zero. This assures a<br />
smooth transition between pattern changes that may affect active cycle, splits, offsets or sequence.<br />
Active Pattern Real-time Status<br />
The right-hand area of the Coordination Overview Status Screen provides the status of the Active pattern and the cycle<br />
counters related to offset synchronization.<br />
Coordination may be ACTIVE, FREE or OTHER as indicated in the right corner of this display. ACTIVE implies that<br />
coordination is active and that the Cycle and Offset values displayed and all Easy Calcs are in effect. FREE implies that<br />
coordination is not active and that cycle length, offset and Easy Calcs are ignored. OTHER is displayed when coordination<br />
is ACTIVE and a valid preempt call is received.<br />
Naztec <strong>NTCIP</strong> <strong>Based</strong> NEMA <strong>TS2</strong> and <strong>2070</strong> Controller <strong>Manual</strong> – July 2009 Page 6-75
FreeStatus is defined in <strong>NTCIP</strong> 1210, section 2.5.11 and is summarized in the table below:<br />
FreeStatus Display<br />
<br />
COMND<br />
Definition<br />
Coordinator is not running free (Coordination is active)<br />
a) The current pattern (0, 254 or 255) is calling <strong>for</strong> FREE operation<br />
b) The current pattern (1-48) is calling <strong>for</strong> FREE (Cycle = 0)<br />
PATRN The controller is running FREE under Pattern 0<br />
PlnER<br />
a) the pattern called is invalid ( 48 < pat# < 254 is not valid in version 61)<br />
b) the sum of the splits in a ring does not equal the cycle length<br />
c) the splits in one ring do not cross a barrier with another ring<br />
d) no coord phase or two coord phases assigned to the same ring<br />
e) coord phase are in separate rings, but are not concurrent<br />
CycER Cycle length is less than 30”<br />
SplER<br />
OftER<br />
FAIL<br />
OTHER<br />
INPUT<br />
TRANS<br />
a) Split time is not sufficient to service minimum phase times<br />
b) Split time is zero <strong>for</strong> an enabled phase<br />
The offset is greater than or equal to the Cycle length<br />
Coordination failure - a valid vehicle or ped call has not been serviced <strong>for</strong> 3<br />
consecutive cycles<br />
a) A railroad or light rail preemption input has been activated<br />
b) MCE (<strong>Manual</strong> Control Enable) has been activated<br />
The external FREE input has been activated and the FREE pattern is Active<br />
Diamond operation is in transition<br />
Tbc and Local Cycle Counters<br />
The Tbc cycle counter <strong>for</strong> the Active<br />
pattern is a midnight time reference.<br />
Imagine that the Tbc counter is set to<br />
zero at midnight (00:00:00) and<br />
allowed to count up to the active<br />
Cycle length over and over again until<br />
the current time (now) is displayed on<br />
this screen. Every time the Tbc<br />
counter rolls over to zero, you have a<br />
sync point <strong>for</strong> the Active pattern that<br />
synchronizes the system Time Base at midnight.<br />
The Programmed Offset is added to the zero point of the Tbc counter to provide the “synch” point <strong>for</strong> the coord phase<br />
(either BegGRN or EndGRN) at Loc = 0. Time Base Coordination provides a way to synchronize the coord phases of all<br />
the controllers in a system running a common cycle length because the Tbc counter in each controller shares the same Time<br />
Base (midnight) reference. The controller is in SYNCH when the Coord Phase (Loc = 0) is lined up with the Programmed<br />
Offset applied to the Tbc counter.<br />
Naztec <strong>NTCIP</strong> <strong>Based</strong> NEMA <strong>TS2</strong> and <strong>2070</strong> Controller <strong>Manual</strong> – July 2009 Page 6-76
Understanding Offset Errors and SHORT, LONG, SYNC and STOP<br />
The controller is in SYNC when the Error (Err) display above is zero. If the controller is not in SYNC, it is in transition<br />
(SHORT, LONG or DWELL), or the Local counter is has stopped because pedestrian service has just overrun a <strong>for</strong>ce-off<br />
applying STOP-IN-WALK. The Error (Err) display shows how far the Local counter is “out of step” with the<br />
Programmed Offset and Tbc counter and is calculated as:<br />
Err = Tbc counter – Loc counter - Prog Offset<br />
The controller applies short-way, long-way or dwell transition to bring the Local counter (beginning or end of the coord<br />
phase green) into sync with the Programmed Offset. When the Programmed Offset is zero and the controller is in SYNC<br />
(Err = 0), the Loc counter and Tbc counter are equal. In summary, Loc=0 is referenced to either the beginning or end of<br />
coord phase green (controller offset reference). This point in the cycle need to line up with the current offset relative to the<br />
system time reference (Tbc counter plus the Prog offset) to insure synchronization across the network.<br />
The Controller is in SYNC When the Local Zero Counter (Loc = 0) is Aligned With the Programmed Offset<br />
The above illustration shows the Tbc counter referenced to midnight <strong>for</strong> a 90” Cycle with a 7” Programmed Offset. The<br />
controller is in SYNC because Local 0 is aligned with the Programmed Offset and the offset reference of coord phase 2 is<br />
begin-of-green.<br />
LONG-way Transition Moves the Offset “Forward in Time” by Increasing Split Times the Long-way%<br />
In the above case, the synch point (Local 0) is lagging 5” behind the Programmed Offset of 7”. Five seconds is only 6% of<br />
the current 90” cycle, so if at least 6% Long-way transition is programmed (MM->2->5), the controller can easily correct<br />
Local 0 to the current offset within one cycle. The controller accomplishes this transition by running the Local cycle<br />
counter “slow” by the Long-way% specified during the transition. This avoids recalculating the Easy Calcs and also<br />
insures that the programmed phase times (min greens, clearances, etc.) are all timed correctly. The user should understand<br />
that during Long-way, each Split Time is lengthened by the Long-way% value programmed <strong>for</strong> the pattern.<br />
Naztec <strong>NTCIP</strong> <strong>Based</strong> NEMA <strong>TS2</strong> and <strong>2070</strong> Controller <strong>Manual</strong> – July 2009 Page 6-77
SHORT-way Transition Moves the Offset “Back in Time” by Decreasing Split Times the Short-way%<br />
In the example above, the synch point (Local 0) is ahead of the Programmed Offset by 5”. If SHORT/LONG is selected<br />
under Coord Modes (MM->2->1) and at least 6% Short-way is programmed <strong>for</strong> this pattern, the controller will shorten the<br />
Split Times by the Short-way% value programmed under MM->2->5. During Short-way transition, the reduced Split Times<br />
must be adequate to service the minimum phase times or else the controller diagnostic will fail and the controller will be<br />
placed into free operation. Short-way is very effective with the Stop-In-Walk feature discussed in section 6.2.2 and allows<br />
the controller to transition quickly when an occasional pedestrian service extends a phase past it’s <strong>for</strong>ce-off.<br />
6.11.2 Easy Calcs Status Screen (MM->2->8->2)<br />
Easy Calcs show the current <strong>for</strong>ce-offs and yield calculations<br />
<strong>for</strong> the active pattern under FIXED, FLOAT or one of the<br />
OTHER coordination modes. Easy Calcs are identical <strong>for</strong> the<br />
FIXED and FLOAT modes except that “FloatMx” is used to<br />
limit each non-coordinated phase to it’s programmed split and<br />
move any “slack time” to the coordinated phase. Most users<br />
find these default Easy Calc calculations acceptable <strong>for</strong> their<br />
application and do not have to review these values with every<br />
pattern change.<br />
6.11.3 [v50][v60][v61] CIC Calcs Status Screen (MM->2->8->3)<br />
The CIC Calcs provided under menu MM->2->8->3 are only<br />
applicable if CIC (Critical Intersection Control) is enabled <strong>for</strong><br />
the coordination pattern. CIC provides a dynamic split<br />
adjustment. Phases that gap-out two cycles in a row provide<br />
“slack time” to phases that max-out during coordination. If CIC<br />
is enabled, the controller will make a dynamic adjustment to the<br />
primary <strong>for</strong>ce-off and yields shown in the CIC Calcs screen.<br />
CIC is fully discussed in the Advanced Coordination document<br />
available from Naztec.<br />
Naztec <strong>NTCIP</strong> <strong>Based</strong> NEMA <strong>TS2</strong> and <strong>2070</strong> Controller <strong>Manual</strong> – July 2009 Page 6-78
6.12 [v61] Pattern Offsets / Preempt Inhibits (MM->2->9)<br />
<strong>NTCIP</strong> specifies one offset per pattern referenced to either the<br />
beginning or end of the coord phase specified in the Split<br />
Table (MM->2->4). For example, assume that the 10” offset<br />
<strong>for</strong> Pat# 1 in the Pattern Table (right) is referenced to Coord<br />
Phase Ø2 specified in Split Table 1 and that the offset<br />
reference is begin-of-green (BegGRN).<br />
Assuming that the offset in the Pattern Table refers to the<br />
Coord Phase in ring 1, three additional offsets may be<br />
specified <strong>for</strong> additional coord phases in rings 2-4 under the<br />
Pattern Offsets menu (right). This allows up to 4 separate<br />
intersections to be controlled with a separate offset in each<br />
ring. T phase operate independently in each ring, so the phase<br />
concurrency table allow each phase to be concurrent with all<br />
phases in the other rings. In the menu example MM->2->9<br />
(right), bus preemption is inhibited <strong>for</strong> Bus Preempt # 3 <strong>for</strong><br />
Pat# 1 and platoon Progression 1-4 is inhibited <strong>for</strong> Pat# 2.<br />
Each “lag” offset (2-4) is referenced to the <strong>NTCIP</strong><br />
offset in ring 1in the pattern table as shown in the<br />
figure to the right. If the offset in ring 1 is 10’, then<br />
the true offset <strong>for</strong> ring 2 is 10” + 48” (lag offset) or<br />
58” as shown in the figure.<br />
6.13 Coord Diagnostics<br />
This section documents why coord patterns fail and how to use Coord Diagnostics to isolate problems in a pattern. The<br />
Coord Diagnostics check patterns be<strong>for</strong>e they become Active to insure that phases do not skip or run past their intended<br />
<strong>for</strong>ce-off point under traffic conditions. Coord Diagnostics check to make sure that the sum of the splits in each ring equals<br />
the programmed cycle length and that the phases in each ring cross the barrier at the same point in the cycle. When a Coord<br />
Diagnostic fails, the controller provides text messages to allow you to isolate the problem with the programmed cycle,<br />
offset, split or sequence that has failed the diagnostic.<br />
Naztec <strong>NTCIP</strong> <strong>Based</strong> NEMA <strong>TS2</strong> and <strong>2070</strong> Controller <strong>Manual</strong> – July 2009 Page 6-79
6.13.1 Why Coord Patterns Fail<br />
NEMA requires that the controller monitor vehicle and pedestrian calls during coordination and detect phases that are<br />
skipped. If a vehicle or pedestrian call is not serviced <strong>for</strong> more than two consecutive cycles, the controller fails the pattern<br />
and runs FREE. NEMA also requires that split times are adequate to service the minimum phase times. When coordination<br />
fails and the controller goes to FREE, the FreeStatus display is set to one of the following values. FreeStatus was defined<br />
in the section on the Coordination Status Display (see section 6.11.1):<br />
FreeStatus Display<br />
<br />
PlnER<br />
Status During Coordination or During a Coord Fail<br />
Coordinator is not running free (Coordination is active)<br />
a) the pattern called is invalid ( 48 < pat# < 254 is not valid in version 61)<br />
b) the sum of the splits in a ring does not equal the cycle length<br />
c) the splits in one ring do not cross a barrier with another ring<br />
d) no coord phase or two coord phases assigned to the same ring<br />
e) coord phase are in separate rings, but are not concurrent<br />
CycER Cycle length is less than 30”<br />
SplER<br />
OftER<br />
FAIL<br />
a) Split time is not sufficient to service minimum phase times<br />
b) Split time is zero <strong>for</strong> an enabled phase<br />
The offset is greater than or equal to the Cycle length<br />
Coordination failure - a valid vehicle or ped call has not been serviced <strong>for</strong> 3<br />
consecutive cycles. Coord diagnostics insure that this failure does not occur in STD8<br />
operation with FIXED and FLOAT <strong>for</strong>ce-off methods.<br />
However, USER mode operation and OTHER modes of coordination do not per<strong>for</strong>m<br />
the same diagnostic checks and it is quite possible to skip a phase if <strong>for</strong>ce-off and yield<br />
points are not specified correctly.<br />
6.13.2 Coordination Clear Fault Status Display (MM->2->8->4)<br />
The Clear Fault Status Display records any phase skipped <strong>for</strong> more<br />
than two consecutive cycles and the pattern number in effect at the<br />
time coordination failed.<br />
The Coord Fault can be cleared from this screen to reset<br />
coordination; however, the proper way to recover from coord failure<br />
is to run the Coord Diagnostics discussed in the next section because resetting the failure does not fix the problem. A<br />
Coord Fault will also be cleared when a new Tod pattern is called by the Time Base Scheduler if Auto Err Reset is set ON<br />
(see Coordination Modes+, MM->2->1, right menu).<br />
Naztec <strong>NTCIP</strong> <strong>Based</strong> NEMA <strong>TS2</strong> and <strong>2070</strong> Controller <strong>Manual</strong> – July 2009 Page 6-80
6.13.3 Coordination Diagnostic Status Display<br />
(MM->2->8->5)<br />
The Coord Diagnostic was designed to isolate coordination errors<br />
and identify the cause of the failure. All patterns should be checked<br />
with diagnostic or from StreetWise utilities that emulate these diagnostics. This will help you eliminate pattern errors<br />
be<strong>for</strong>e they are placed in operation under traffic.<br />
The Coord Diagnostic displays the active Pattern # and<br />
the Cycle length and Offset programmed in the Pattern<br />
Table (MM->2->4). The Coord status my be FREE (0),<br />
ACTIV (1) or OTHER (2) and corresponds with the<br />
coord status described in the<br />
The Coord Diagnostic is typically used in conjunction<br />
with the Test mode to test coord patterns be<strong>for</strong>e placing<br />
them in service. The controller must be manually <strong>for</strong>ced<br />
into each pattern under TEST (MM->2->1) and then<br />
checked with MM->2->8->5 to insure that the Fault: and<br />
Data: fields in the above menu display OK.<br />
StreetWise provides coord diagnostics that emulate the<br />
coord diagnostics in the controller and allows you to test<br />
patterns without downloading the database to the<br />
controller. The same rules used in the controller are<br />
applied in the StreetWise diagnostics because the<br />
controller’s diagnostics are the final checks on the<br />
pattern and determine if the coord plan passes<br />
(CoordActv) or fails (Failed).<br />
During a pattern change, the new pattern # becomes the<br />
Next pattern in menu MM->7->2 and does not become<br />
the Active pattern until the Local counter of the current<br />
Active pattern reaches zero. The Coordination<br />
Diagnostics status display above shows the current Active pattern and a full cycle may elapse be<strong>for</strong>e a TEST pattern<br />
becomes Active. However, the Coord Diagnostics are run immediately on the Next pattern entered under MM->2->1, so it<br />
is not necessary to wait until the TEST pattern becomes Active in this display to check the Fault: and Data: fields <strong>for</strong> errors.<br />
The Coord Diagnostic will stop on the first error encountered with the TEST pattern. There<strong>for</strong>e, if a problem is isolated<br />
and corrected, the Coord Diagnostics must be checked again <strong>for</strong> additional errors. When the Fault: and Data: fields each<br />
display OK, the pattern has been fully tested and can be placed into service.<br />
Diagnostic Check STD8 QSeq 8Seq USER DIAMOND<br />
Zero Split Check<br />
Phase Checks<br />
Ring Sum Checks<br />
Barrier Checks<br />
N/A<br />
Naztec <strong>NTCIP</strong> <strong>Based</strong> NEMA <strong>TS2</strong> and <strong>2070</strong> Controller <strong>Manual</strong> – July 2009 Page 6-81
Coord Diagnostic - Phase Time Checks<br />
The Coord Diagnostics per<strong>for</strong>m extensive checks to insure that each Split Time is long enough to service the minimum<br />
phase times of each phase. This insures that a <strong>for</strong>ce-off is not issued to a phase while it is servicing a minimum phase time.<br />
The diagnostics take into account the following to insure minimum phase times are guaranteed <strong>for</strong> each split.<br />
1) Short-way Offset Correction<br />
The programmed split time <strong>for</strong> each phase is reduced by the amount of short-way programmed <strong>for</strong> the pattern<br />
under MM->2->5. This insures that the minimum phase times are satisfied during short-way transition when the<br />
split times are reduced to align the coord phase with the programmed offset. You can easily calculate the split<br />
adjustment per<strong>for</strong>med by the Coord Diagnostic as follows:<br />
Short-way Split = Split * (100 – Short-way%) / 100<br />
This adjustment is not made if the phase is assigned as a No Short Phase under MM->2->5. Split times <strong>for</strong> "No<br />
Short Phases" are not reduced by short-way transition.<br />
2) Minimum Phase Times<br />
There are actually two minimum phase times checked by the Coord Diagnostic. Note that these minimums times<br />
are checked using the current phase times and options associated with the coord pattern. If any alternate phase<br />
times or phase options are associated with the pattern, the alternate values will be used to per<strong>for</strong>m these checks.<br />
a) Vehicle Min Phase Time - This minimum is calculated by taking the greater of the "Min Green" or "Max<br />
Initial" and adding the "Yellow Clearance" and "All-Red" time of each phase.<br />
Veh Min = Min Green + Yellow + All-Red<br />
or if volume density is used,<br />
Veh Min = Max Initial + Yellow + All-Red<br />
b) Pedestrian Min Phase Time - If STOP-IN-WALK is OFF (MM->2->1), then the coord diagnostic will also<br />
insure the split times are long enough to service all pedestrian times. Setting STOP-IN-WALK to ON allows an<br />
occasional pedestrian call to violate the programmed split. The pedestrian times will always be guaranteed if<br />
“Rest-in-Walk” is enabled, even if the STOP-IN-WALK parameter is ON.<br />
If PedClr-Thru-Yellow is not enabled <strong>for</strong> the phase, the pedestrian min phase time is:<br />
Ped Min = Walk + Ped Clearance + Yellow + All-Red<br />
If PedClr Thru Yellow is enabled, the pedestrian and vehicle clearances time together and the ped min is:<br />
Ped Min = Walk + Ped Clearance + All-Red<br />
6.13.4 [v61] Copy Pattern Program (MM->2->8->7)<br />
The Copy Pattern Program copies the pattern table (cycle, offset,<br />
split# and sequence#) from one pattern to another pattern. If you<br />
wish to modify the split table of the new pattern, then copy the<br />
existing split table # to a new split table # using the Copy Split<br />
program and edit the Split# in the new pattern under menu MM->2-<br />
>4.<br />
6.13.5 [v61] Copy Split Program (MM->2->8->8)<br />
The Copy Split Program copies the split table data (split time, coord<br />
phase and mode setting) from one split table to another split table.<br />
6.13.6 [v65] Split Edit (MM->2->9->1)<br />
The Split Edit screen allows the user to specifically edit split times<br />
<strong>for</strong> splits 1-24. Uses can use this screen to modify the splits of the<br />
phases while the controller is currently running a coordination<br />
pattern. It is helpful when users take too long in modifying (editing)<br />
the split, and the controller begins to make the editing changes to the<br />
database, thus generating a coordination failure. Programming this<br />
screen allows all changes to be made without modifying the current<br />
running pattern until the users commit to it.<br />
Naztec <strong>NTCIP</strong> <strong>Based</strong> NEMA <strong>TS2</strong> and <strong>2070</strong> Controller <strong>Manual</strong> – July 2009 Page 6-82
7 Time Base Scheduler<br />
7.1 Theory of Operation<br />
The Advanced Schedule is a fully compliant <strong>NTCIP</strong> based time-of-day schedule. <strong>NTCIP</strong> defines an annual schedule in<br />
terms of day-of-week, month and day-of-month. This implies that the schedule applies to the current year. Naztec provides<br />
Easy Schedule to facilitate programming the <strong>NTCIP</strong> Advanced Schedule; however, there is only one schedule in the<br />
controller database because Easy Schedule is provided as an alternative method of programming the Advanced Schedule.<br />
The Advanced Schedule selects the Day Plan <strong>for</strong> the current day. The Day Plan contains the time-of-day events <strong>for</strong> the<br />
current day used to select actions from the Action Table. The controller updates the current TBC pattern once per minute<br />
based on the scheduled events from the Action Table.<br />
Each day the controller checks the Scheduler to determine the most applicable Day Plan. If the current day is not specified<br />
in the Advanced Schedule, the controller will run “free” in Pattern# 0. The controller checks the current Day Plan once per<br />
minute to retrieve the current time-of-day action. The controller then per<strong>for</strong>ms a lookup in the Action Table to determine<br />
the active TBC Pattern. The TBC Pattern determines the current time-of-day operation of the controller.<br />
All programming related to the Scheduler is accessed from MM->4<br />
shown to the right.<br />
7.2 Controller Time Base (MM->4->1)<br />
The Set Date/Time entry screen allows the user to set the current time<br />
and date also referred to as the controller’s time base.<br />
Date<br />
The Date parameter is entered in MM-DD-YY <strong>for</strong>mat. All six<br />
numeric digits must be entered, including leading zeroes. Setting the date automatically updates the Day field in ver. 60 &<br />
61.<br />
Day<br />
The Day parameter specifies the day of week (SUN-SAT). Setting the date automatically updates the Day field in ver. 60<br />
& 61. There<strong>for</strong>e, it is not necessary to update this field after the date has been set.<br />
Time<br />
The Time parameter is entered as HH:MM in 24-hour military <strong>for</strong>mat. All four numeric digits must be entered including<br />
any leading zeros. Pressing the Enter key after entering the 4 time digits will automatically zero out the Seconds field<br />
Secs<br />
The Seconds parameter will update the seconds portion of the real time clock seconds. The second entry is provided<br />
separately from the hour and minute fields to facilitate setting the time base to a known reference.<br />
Naztec <strong>NTCIP</strong> <strong>Based</strong> NEMA <strong>TS2</strong> and <strong>2070</strong> Controller <strong>Manual</strong> – July 2009 Page 7-83
7.3 Advanced Schedule (MM->4->3)<br />
The <strong>NTCIP</strong> based Advanced Schedule is an annual calendar <strong>for</strong><br />
the current year used to select the Day Plan <strong>for</strong> the current day.<br />
Each entry of the scheduler specifies a day-of-week, month, dayof-month,<br />
and the Day Plan assigned to the entry. Each entry<br />
identifies the day or range of days during which the Day Plan is in<br />
effect.<br />
It is possible <strong>for</strong> two or more schedule entries to specify the same day of the year. In this situation, the scheduler will<br />
always select the most specific entry. An entry is defined as more specific if the range of days defined by that entry is<br />
narrower in scope than another entry. For example, the user may assign Day Plan 1 <strong>for</strong> the entire month of March in one<br />
entry and Day Plan 2 <strong>for</strong> March 7 in a separate entry. This would appear to be a duplicate entry because two different day<br />
plans are programmed <strong>for</strong> March 7. However, in this situation, the Advanced Schedule would select Day Plan 2, because it<br />
more specific to the current day. The priority order of day plan selection is based upon month, day-of-week, then day of<br />
month. If no Day Plan is assigned to the current date (based on the time base of the unit), the controller will run free in<br />
Pattern # 0.<br />
The user may select multiple entries <strong>for</strong> Day, Month, and Date.<br />
For example, selecting all fields under Day implies that this entry<br />
applies to every day of the week. If a Day field is not selected,<br />
then the schedule is not considered valid <strong>for</strong> that particular day.<br />
There<strong>for</strong>e, when entering a schedule event <strong>for</strong> a specific date, such<br />
as March 7, it is good practice to make that event applicable to<br />
every day of the week. This will prevent the user from having to change the day-of-week <strong>for</strong> the entry when the calendar<br />
year changes.<br />
Day<br />
The Day parameter defines the day-of-week or multiple days <strong>for</strong> the entry.<br />
Month<br />
The Month parameter defines the month or range of months <strong>for</strong> the entry based on Begin Month–End Month.<br />
Date<br />
The Date parameter indicates which days of the month that the entry will be allowed. More than one day of month may be<br />
selected.<br />
Day Plan<br />
The Day Plan number selects the Day Plan (1-32) placed in effect when the scheduled entry becomes active.<br />
7.4 Easy Schedule (MM->4->2)<br />
Easy Schedule is an alternative method of coding the <strong>NTCIP</strong> based<br />
Advanced Schedule. The Day entry provides a separate entry <strong>for</strong><br />
each day-of-week or range of days (M-F or ALL). Setting the Day<br />
selection to OFF disables the event #.<br />
The Month and DOM (Day-Of-Month) entries specify begin and end values <strong>for</strong> each range. Four digits must be provided<br />
<strong>for</strong> each entry (including zero place holders). The range specified will automatically be transferred to the Advanced<br />
Schedule as a range of “X” values <strong>for</strong> the individual month and day entries. This “easy” method allows each entry to be<br />
specified as a range instead of having to code each individual “X” field in the Advanced Schedule.<br />
Note that each entry provided in Easy Schedule applies to a consecutive range of days, months or days of month. It is<br />
possible to specify a non-consecutive range in the Advanced Schedule (such as a DOM entry including 1-4, 7, 20-25, 30 in<br />
the same event#). This complex DOM entry will display in Easy Schedule as “**-**” because it is not defined as a<br />
consecutive series of days. Complex events are programmed in the Advanced Schedule and less complex entries are<br />
programmed in Easy Schedule as a shortcut method.<br />
Naztec <strong>NTCIP</strong> <strong>Based</strong> NEMA <strong>TS2</strong> and <strong>2070</strong> Controller <strong>Manual</strong> – July 2009 Page 7-84
7.5 Day Plan Table (MM->4->4)<br />
The Scheduler reads the active Day Plan <strong>for</strong> the current date once<br />
per minute to update the current Action. The Action drives the<br />
active Pattern and controls the state of the special function outputs<br />
from the Action Table.<br />
Time<br />
The Time parameter in 24-hour military <strong>for</strong>mat (HH:MM) defines the time-of-day that the associated Action will become<br />
active. All four numeric digits must be entered, including any leading zeroes.<br />
Action<br />
The Action parameter (1-100) is associated with the Action in the Action Table. <strong>NTCIP</strong> defines Action 0 as the “donothing”<br />
action. There<strong>for</strong>e, do not be misled into thinking that Action 0 places the intersection into free operation. It is<br />
good practice to assign an event and Action at 00:00 <strong>for</strong> every Day Plan called by the Advanced Schedule. This insures that<br />
even if the controller date is changed and a new Day Plan is referenced that at least the first Action at specified <strong>for</strong> 00:00<br />
will be selected.<br />
Link<br />
The Link parameter joins (or links) two or more Day Plans to increase the number event entries from 16 to 32. The link<br />
parameter contains the Day Plan number the Day Plan is linked to. Multiple Day Plans may link to the same Day Plan by<br />
specifying the same Link entry in each plan; however, linking more than two Day Plans in a chain is not supported.<br />
7.6 Action Table (MM->4->5)<br />
The Action selected by the current Day Plan controls the state of<br />
Auxiliary and Special Function hardware outputs. In addition, the<br />
source of the source of preempt 1 and 2 may be selected by the<br />
current Action table. The time-of-day Scheduler allows the Day Plan<br />
to call different Actions to turn outputs ON and OFF and share the same pattern between actions. This scheme minimizes<br />
the number of patterns required to cycle outputs ON and OFF.<br />
Pattern<br />
The Pattern parameter (1-48) defines the TBC Pattern selected by the current Action. A value of zero or 254 will cause the<br />
controller to run free. It is very easy to confuse Action 0 and Pattern 0. Just remember that a zero Action is no action and<br />
Pattern 0 always runs free. However, keep in mind that to insure free operation in an <strong>NTCIP</strong> controller, one should<br />
program Pattern 254 instead of Pattern 0.<br />
Aux Outputs<br />
The Auxiliary settings define the state of each auxiliary output when the associated action is active. These outputs are<br />
activated by Day Plan Actions or are manually controlled from the central system. The <strong>2070</strong> and <strong>TS2</strong> Ver 50 controllers<br />
provide 3 Aux outputs and <strong>TS2</strong> Ver 61 provides 8 Aux outputs per action.<br />
Special Function Outputs<br />
The Special-Function settings defines the state of each special function output when the associated action is active. These<br />
outputs are activated by Day Plan Actions or manually controlled from the central system. The <strong>2070</strong> and <strong>TS2</strong> Ver 50<br />
controllers provide 8 Special Function outputs and <strong>TS2</strong> Ver 61 provides 24 Special Function outputs per action.<br />
[v60][v65] Preempt Outputs<br />
The <strong>2070</strong> software allows the source of the inputs <strong>for</strong> preempt 1 and 2 to be programmed through the Action Table. The<br />
source <strong>for</strong> Pre.1 and Pre.2 may be set to a value between 0 and 4. Zero calls <strong>for</strong> the default input <strong>for</strong> each preempt. Setting<br />
Pre.1 to 3 would source preempt 1 with the input from Preempt 3 when the action is active.<br />
Naztec <strong>NTCIP</strong> <strong>Based</strong> NEMA <strong>TS2</strong> and <strong>2070</strong> Controller <strong>Manual</strong> – July 2009 Page 7-85
7.7 Time Base Parameters (MM->4->6)<br />
Time Base Parameters provide additional <strong>NTCIP</strong> features to modify<br />
the behavior of the controller’s Time Base.<br />
Daylight Savings<br />
The Daylight Savings parameter determines specifies if daylight savings is active, and which method is be used. The<br />
ENABLE US mode references daylight savings to the first Sunday in April and the last Sunday in October.<br />
Time Base Sync Ref<br />
The Time Base Synchronization Reference defines the number of minutes after midnight to synchronize the time base. This<br />
reference provides the zero point <strong>for</strong> the TBC counter uses to synchronize the offset called in the pattern.<br />
[v60][v61][v65] GMT Offset<br />
The GMT (Greenwich Mean Time) Offset adjusts the system time base <strong>for</strong> Universal Standard Time (see section 10.13).<br />
[v61] Daylight Saving Time Override<br />
For Version 61, there is an additional screen on the right side, which allows the<br />
user to override the default Daylight Saving time schedule with parameters that<br />
they can program. As of 2007, you will not have to program the default values<br />
of Daylight Savings time, which are currently set to begin the second Sunday in March and end on the first Sunday in<br />
November. If Congress mandates another change don’t <strong>for</strong>get to enter the leading ‘0’ <strong>for</strong> the Month, if necessary. If the<br />
last Sunday of the month is designated (week 4 or 5) please program a 5 under the Week parameter.<br />
7.8 Time Base Status (MM->4->7)<br />
Interpreting Time Base Status requires a thorough understanding of<br />
the relationship between the Advanced Schedule, day plans and<br />
actions. Compare these four status fields with the graphic provided<br />
in section 7.1. If you visualize these status fields as four steps used<br />
to select the current TBC pattern based on the current date and<br />
time, then you will understand the <strong>NTCIP</strong> time-of-day scheduler.<br />
1. The Schedule Event # is the active event selected by the scheduler based on the current day-of-week, month and<br />
day-of-month. This event # is useful to determine which event is more specific if more than one entry in the<br />
scheduler references the current day.<br />
2. The Day Plan # is the active day plan specified by the scheduler <strong>for</strong> the current Schedule Event #. The Day Plan<br />
# is programmed <strong>for</strong> each event in the Advanced Schedule and Easy Schedule.<br />
3. The Day Plan Event # is the active day plan entry selected by the scheduler <strong>for</strong> the current time-of-day. The Day<br />
Plan Event # references the event selected in the active Day Plan #.<br />
4. The Action # is the active action selected by the scheduler <strong>for</strong> the current Day Plan. The controller reads the<br />
current Day Plan entries once every minute to update the current Action#. This value is used to reference the<br />
Pattern # and the special function output status specified in the Action Table.<br />
7.9 [v60] Special Features (MM->4->8)<br />
The Special Features table allows the 8 Auxiliary and 24<br />
Special Function bits to be mapped to different features<br />
available in Version 61.<br />
Under the current software version:<br />
• Special function bits 17 – 20 are reserved <strong>for</strong> Bus Preemption Inhibit<br />
• Special function bits 21 – 24 are reserved <strong>for</strong> Platoon Progression Inhibit<br />
• Any of the special function bits (1 – 24) may be mapped to Dimming Enable<br />
• Aux function 1 and Special function bits 1, 9 and 17 are reserved <strong>for</strong> VO Logging Inhibit<br />
• Aux function 2 and Special function bits 2, 10 and 18 are reserved <strong>for</strong> Speed Logging Inhibit<br />
Naztec <strong>NTCIP</strong> <strong>Based</strong> NEMA <strong>TS2</strong> and <strong>2070</strong> Controller <strong>Manual</strong> – July 2009 Page 7-86
7.10 [v60][v61][v65] Time Base Scheduler – More Features (MM->4->9)<br />
7.10.1 Copy Day Plan Utility (MM->4->9->1)<br />
The Copy Day Plan Utility copies the 16 Event # entries from one<br />
Day Plan # to another Day Plan #. The Link field specified in the<br />
From #: Day Plan is not copied.<br />
7.10.2 TBC <strong>Manual</strong> Control Screen (MM->4->9->2)<br />
The TBC <strong>Manual</strong> Control Screen allows the user to manually<br />
select the active Pattern and special function outputs as a keyboard<br />
entry. These selections override the Pattern and special function<br />
outputs specified <strong>for</strong> the current Action called from the Time Base<br />
Scheduler. There<strong>for</strong>e, this screen provides the ability to override<br />
the actions of the scheduler.<br />
The controller also allows the active Pattern to be manually controlled from the Test Mode under MM->2->1. However,<br />
patterns selected from the Test Mode cannot be overridden by future events in the scheduler, whereas patterns entered from<br />
the TBC <strong>Manual</strong> Control Screen are replaced by the next scheduled event.<br />
7.10.3 [v60][v61][v65] GPS/WWW Status (MM->4->9->3)<br />
See section 10.13 and 10.14.<br />
7.10.4 [v61] Special Function Modes (MM->4->9->4)<br />
There are two non-time-of-day controlled Special Function Modes that<br />
the user can program. They are; No Right Turn sign control during<br />
Walk & Ped Clear, No Right Turn sign control during rail preempt, or a<br />
Reset pulse output after delay to reset cabinet equipment or relay logic.<br />
To program the above features, go to MM->4->9->4. For each Special Function Output 1-4, select the mode and add a<br />
value if appropriate. The modes are:<br />
OFF<br />
NRT:WLK/PCLR<br />
NRT:RR PRE<br />
NRT:WLK+RRPre<br />
RESET PULSE<br />
No Right Turn: during Walk and Ped-Clear intervals<br />
No Right Turn: during railroad preemption<br />
No Right Turn: during Walk & Ped Clr and during rail preempt<br />
As the name implies<br />
For the Walk/Ped-clear NRT sign control, the user must enter the phase of the Walk/PedClr that is to control the sign.<br />
For the NRT:RR PRE mode, the Prmpt/ExtCoor Out (Channel & I/O Parameters screen) must be set to 820A. There<strong>for</strong>e,<br />
<strong>for</strong> the NRT:RR PRE, there is no entry to make. It should turn on the special function output when a railroad preemption<br />
becomes active.<br />
For the WLK+RRPre mode, this is the WLK/PCLR mode and the RR PRE modes combined. There<strong>for</strong>e, the value is the<br />
phase # of the Walk/PedClr that is to control the sign.<br />
For the Reset Pulse input, the user must enter the time, in seconds, to delay the 1second pulse from the de-assertion of one<br />
of the alarm inputs or from power-up. User input alarms 3 & 4 (Alarm #s 7 & 8) are used <strong>for</strong> this feature. The delayed<br />
pulse on the special function output is generated when either of the alarms is de-asserted after both have been active<br />
(ground-true).<br />
Naztec <strong>NTCIP</strong> <strong>Based</strong> NEMA <strong>TS2</strong> and <strong>2070</strong> Controller <strong>Manual</strong> – July 2009 Page 7-87
8.1 Preempt Selection (MM->3)<br />
Preempts 1-10 are selected using item 3 from the Main Menu.<br />
This will display the following input screen allowing you to enter<br />
a value from 1 to 10. Upon pressing the ENTR key, a submenu<br />
will be displayed <strong>for</strong> the preemption that you selected.<br />
8.2 High Priority Preempts 1 – 6<br />
8 Preemption<br />
High priority preempts 1 through 6 may be programmed as RAIL<br />
or EMERG (emergency) high priority preempts. Each input is<br />
activated by a separate ground true input provided from the<br />
terminal facility. <strong>TS2</strong> maps each input to a terminal facility BIU<br />
(type 1 cabinet). In addition, <strong>TS2</strong> (type 2) allows preempts to be<br />
mapped to D-connector inputs as specified by the end user. Programming <strong>for</strong> low priority preempts 7-10 is provided in the<br />
next section, 8.4.<br />
8.2.1 Preempt Times (MM->3->1)<br />
This screen provides entries <strong>for</strong> various time parameters defined in<br />
<strong>NTCIP</strong>. The entries in the first column relate to the preempt input or<br />
call. The second column groups the minimum times provided to the<br />
phase in service when the preempt call is received. The third column lists the track and dwell intervals. Each of these<br />
parameters is described below.<br />
Delay<br />
The preempt Delay parameter (0-600 sec) is timed prior to the track clearance interval and dwell intervals. If the Lock<br />
Input associated with the preempt input is enabled (set to ON), the Minimum Duration and Minimum Dwell periods are<br />
guaranteed even if the preempt call is removed. However, if the Lock Input is not enabled (set to OFF), and the preempt<br />
call is removed during the preempt Delay period, the request <strong>for</strong> service is dropped and the preempt sequence is not<br />
activated.<br />
Minimum Duration (MinDura)<br />
The Minimum Duration parameter (0-9999 sec) determines the shortest period that a preempt call is active. The Minimum<br />
Duration time begins at the end of the preempt Delay period, and prevents an exit from the dwell state until the set amount<br />
of time has elapsed.<br />
Maximum Presence (MaxPres)<br />
Maximum Presence (0-9999 sec) limits the period of time a preempt input is considered valid. When a preempt call exceeds<br />
this limit, the controller stops recognizing the call and returns to normal operation. Once a call becomes invalid, it will<br />
remain invalid until the input resets and becomes inactive. This feature is useful to limit the call from an emergency<br />
vehicle that has stopped upstream of the detector with the emitter locked on. A setting of 0 disables this feature.<br />
Minimum Green (MinGrn)<br />
The preempt Minimum Green parameter (0-255 sec) insures that a preempt call will not terminate an active phase green<br />
indication be<strong>for</strong>e the lesser of the preempt Minimum Green or the active phase Minimum Green.<br />
Minimum Walk (MinWlk)<br />
The preempt Minimum Walk parameter (0-255 sec) insures that a preempt call will not terminate an active phase walk<br />
interval be<strong>for</strong>e the lesser of the preempt Minimum Walk time or the active phase Walk time. When an active walk<br />
indication is driven by a phase output, the walk will continue to be illuminated while the walk interval times on the active<br />
phase. However, if the active walk indication is driven by a Ped_1 overlap, the walk display will terminate immediately<br />
and move to pedestrian clearance when preempted even though walk continues to time on the included phase defining the<br />
overlap.<br />
Enter Pedestrian Clear (PedClr)<br />
The preempt Pedestrian Clear time (0-255 sec) insures that a preempt call will not terminate an active phase pedestrian<br />
clearance be<strong>for</strong>e the lesser of the preempt Pedestrian Clear time or the active phase Pedestrian Clearance time.<br />
Naztec <strong>NTCIP</strong> <strong>Based</strong> NEMA <strong>TS2</strong> and <strong>2070</strong> Controller <strong>Manual</strong> – July 2009 Page 8-88
Track Green (Track Grn)<br />
The Track Green parameter (0-255 sec) determines the green interval of the Track Vehicle Phases serviced during the track<br />
clearance movement. The track clearance movement is typically used only rail type preempts rather than high-priority or<br />
low-priority emergency vehicle preempts.<br />
Minimum Dwell (Min Dwell)<br />
The Minimum Dwell parameter (1-255 sec) determines the minimum time guaranteed to the dwell phases listed under the<br />
Dwell Phase parameters. The dwell state will not terminate prior to the expiration of the Minimum Dwell time and the<br />
Minimum Duration time, nor will it terminate if the preempt call is still present.<br />
8.2.2 Preempt Phases (MM->3->2)<br />
Track Vehicle Phases (Track Veh)<br />
The Track Phase parameters allow a maximum of 8 track clearance<br />
phases to be serviced during the track green interval of the<br />
preemption sequence. Only one phase per ring should be entered <strong>for</strong><br />
the track interval. All track phases selected must be concurrent and serviced simultaneously to insure adequate track<br />
clearance be<strong>for</strong>e the train arrives. [v60][v61][v65] Versions 60/61 allow you to specify track phases that are only enabled<br />
during preemption.<br />
Dwell Vehicle Phases (Dwell Veh [v60][v61][v65])<br />
The Dwell Phase parameters allow a maximum of 12 dwell phases to be serviced during the dwell interval of the<br />
preemption sequence. Eight dwell phases may be entered on the first row and four additional dwell phases on the second<br />
row in this menu. It is not required that the dwell phases be concurrent. If more than one dwell phase is specified per ring,<br />
the controller will service the dwell phases based on the current phase sequence or the optional preempt Pattern selected.<br />
Care must be exercised to insure that no dwell phase conflicts with the priority vehicle that issues the preemption. Note that<br />
versions 60, 61 and 65 allows you to specify dwell phases that are enabled only during preemption.<br />
Dwell Pedestrian Movements (Dwell Ped[v60][v61][v65])<br />
The Dwell Ped parameters allow a maximum of 8 pedestrian movements to be serviced during the dwell interval of the<br />
preemption sequence. Dwell Ped Movements must always be defined as Dwell Vehicle Phases.<br />
Exit Phases (Exit)<br />
Exit Phases (also called Return phases) determine how the controller leaves preemption and returns to normal stop-and-go<br />
operation. The controller returns to the Exit Phases at the end of the preemption dwell interval unless the coordination<br />
Stop-in-Walk is enabled as explained below. Only one Exit Phase is allowed in each active ring and all Exit Phases must<br />
be concurrent.<br />
8.2.3 Preempt Options (MM->3->3)<br />
Lock Input<br />
Enabling the Lock Input parameter (to ON), locks the preempt call and guarantees that the preempt Delay, Minimum Dwell<br />
and Minimum Duration are serviced even if the preempt call is removed. A “locked” preempt, holds a constant call on the<br />
preempt input during the Minimum Dwell and Minimum Duration<br />
periods. Once these minimum times have been met, the preempt call<br />
reflects the actual state of the preempt input<br />
If the Lock Input is disabled (set to OFF) the preempt call reflects the<br />
state of the actual input. There<strong>for</strong>e, if the preempt call drops be<strong>for</strong>e<br />
the preempt Delay time has elapsed, the preempt sequence does not<br />
occur. However, once the preemption begins timing Minimum Dwell<br />
and Minimum Duration, these minimum times will be guaranteed.<br />
Naztec <strong>NTCIP</strong> <strong>Based</strong> NEMA <strong>TS2</strong> and <strong>2070</strong> Controller <strong>Manual</strong> – July 2009 Page 8-89
Override Auto Flash<br />
Enabling the Override Auto Flash parameter (to ON) allows preempt calls to have priority over automatic flash. Stated<br />
another way, if automatic flash is active when a preempt call is recognized, auto flash is terminated, including appropriate<br />
clearances, and the preempt sequence is executed. After the preemption is finished, the controller returns to automatic<br />
flash. If Override Auto Flash is set to OFF, the preemption does not override automatic flash. If auto flash is active when a<br />
preempt call is received, the call is ignored as long as auto flash is active.<br />
Override higher # preempt<br />
Preempts possess an implied priority order with the lowest numbered Preempt (#1) having the highest priority and the<br />
highest numbered Preempt (#10) having the lowest priority. Override higher # preempt is used to override this priority<br />
order based on the preempt number.<br />
If Override higher # preempt is set to ON, then the specified preempt has priority over higher numbered ones and allows<br />
the preemption to interrupt any higher numbered preempts that are active. If this parameter is set to OFF, then this preempt<br />
cannot interrupt higher numbered preempts. Note that higher numbered preempts cannot interrupt lower numbered ones<br />
regardless of the settings of their respective Override higher # preempt parameters.<br />
Flash in Dwell<br />
Flash in Dwell allows the controller flash during preempt dwell instead of displaying phases or running a limited sequence<br />
of phases. If set to ON, phases in the Dwell Vehicle Phase list flash yellow during the preempt dwell. All other phases<br />
flash red.<br />
Link to preempt #<br />
The Link to preempt # parameter allows the specified preempt to initiate a higher priority preempt. At the termination of<br />
the dwell time, the linked preempt automatically receives a call, which is maintained as long as the demand <strong>for</strong> this, the<br />
original, preempt are active. Linking provides a method of implementing dual track clearance intervals and other complex<br />
preemption sequences.<br />
8.2.4 Preempt Times+ (MM->3->4)<br />
The Preempt Times+ screen includes fields <strong>for</strong> interval and call<br />
times that are not defined in the <strong>NTCIP</strong> standards.<br />
[v61] Inhibit in Delay<br />
The Inhibit in Delay parameter (0-255 seconds) allows you to specify a delay to override the time-of-day inhibits <strong>for</strong> special<br />
function bits 17-24. Bus preempts and platoon progression inhibits associated with special function bits 17 – 24 are<br />
enabled <strong>for</strong> each pattern under menu MM->2->9.<br />
Extend Dwell<br />
The Extend Dwell parameter (0-255 seconds) extends the preempt call much like the vehicle detector extension parameter<br />
extends a vehicle call. This feature is useful, to extend a preempt call in an optical preemption system when an optical<br />
sensor is installed at the leading edge of a large intersection. In this situation, the sensor stops receiving the signal from the<br />
emergency vehicle be<strong>for</strong>e it clears the intersection and Extend Dwell can be used to stretch the preempt call input to allow<br />
the emergency vehicles to clear the intersection.<br />
Return Max/Min<br />
The Return Max parameter (0-255 seconds) insures that the Exit phases service the current maximum (Max-1 or Max-2) or<br />
minimum programmed <strong>for</strong> the phase based on the selection chosen under MM36.<br />
Exit (Return) Clearances<br />
The Exit (Return) Clearances are pedestrian clearance (PedClr, 0-255 seconds) and yellow/all-red vehicle clearance (0-25.5<br />
seconds). These exit clearances are timed <strong>for</strong> the Vehicle Dwell Phases as the controller exits the preempt dwell state. The<br />
three clearance times provided are Pedestrian Clearance, Yellow Clearance, and Red Clearance.<br />
Naztec <strong>NTCIP</strong> <strong>Based</strong> NEMA <strong>TS2</strong> and <strong>2070</strong> Controller <strong>Manual</strong> – July 2009 Page 8-90
8.2.5 Preempt Overlaps+ (MM->3->5)<br />
Users have the choice to allow overlap indications to be displayed or not<br />
displayed during preemption track clearance and dwell intervals.<br />
By default, all overlaps are disabled (i.e. displayed as all red indications)<br />
during preemption. There<strong>for</strong>e, during the track clearance interval and the<br />
dwell interval, all overlaps are turned off (i.e. displayed as all red indications) even if the included phases defining these<br />
overlaps are assigned as track clearance and dwell phases.<br />
The Preempt Overlaps+ screen allows up to 12 overlaps to be programmed (i.e. turned on and allowed to display green<br />
and yellow indications) with the track clearance phases and / or the vehicle dwell phases. For each group, eight overlap<br />
entries are provided on the first row, and four additional overlaps are provided on the following row.<br />
If any –GrnYel overlaps are programmed and used as dwell phases, the user should also include (program) them in preempt<br />
Overlaps+ (MM->3->1->5).<br />
[v60][v61][v65] These versions allow you to specify track and dwell phases that are enabled only during preemption.<br />
These phases can be used to drive an overlap assigned as a track clear or dwell indication only during preemption.<br />
8.2.6 Preempt Options+ (MM->3->6)<br />
Preempt Enable<br />
Preempt Enable must be set to ON to enable the preempt input and allow the<br />
preempt to take place.<br />
Type<br />
The preempt Type may be identified as a railroad (RAIL) or an emergency vehicle (EMERG) preempt. This setting is only<br />
used to identify the preempt and is included on preempt event log entries.<br />
Output<br />
Each preempt has an Output signal that represents the preempt active status. The setting determines when the output<br />
becomes active during the preempt cycle as follows:<br />
Pattern<br />
• <strong>TS2</strong> - The output is active from the time the preempt is recognized until it is complete. The output is not active<br />
while the call delay period is timing.<br />
• DELAY - The output becomes active when the call is received and includes the call delay period. The output<br />
remains active while the preempt is active.<br />
• DWELL - The output becomes active when the preempt dwell state is reached. It is not active during the call<br />
delay period, begin clearances, or track interval.<br />
The Pattern parameter (0-24) associates any programming assigned to a pattern with a preempt. If Coord+Preempt<br />
(described below) is enabled, the Pattern parameter is disabled, preventing a preempt from changing a coordination pattern<br />
in effect when the preempt call is received. If Coord+Preempt is not enabled, the specified Pattern (1-24) will be invoked<br />
after the preempt Delay expires and the preempt becomes active.<br />
When a Pattern is implemented during preemption, coordination is not active (because Coord+Preempt is OFF), but any<br />
other features attached to the pattern will be in effect. These features include phase recall mode assigned to the active split<br />
table, and alternate phase and detector programming attached to the pattern.<br />
Skip Track if Override<br />
This ON/OFF toggle field allows the track clearance interval to be skipped if the current preempt is overriding a lower<br />
priority preempt. Set this entry to ON to cause the track interval not to be serviced.<br />
CAUTION: Use this feature carefully, it is only appropriate <strong>for</strong> complex, multi-track clearance situations. Inappropriate<br />
use can cause the track clearance interval to be skipped when it should not be.<br />
The Exit Phases parameter is a list of up to 8 phases that are active following the termination of a preemption sequence.<br />
Naztec <strong>NTCIP</strong> <strong>Based</strong> NEMA <strong>TS2</strong> and <strong>2070</strong> Controller <strong>Manual</strong> – July 2009 Page 8-91
Coord+Preempt<br />
The Coord+Preempt parameter allows coordination to proceed in the background during the preempt sequences. This<br />
allows the controller to return to the phase(s) currently active in the background cycle rather than specific Exit phases<br />
discussed in section 8.3.2. This option allows the controller to return from preemption to coordination in SYNC without<br />
going through a transition period to correct the offset. Many agencies utilize the Coor+Preempt option when coordination<br />
is interrupted frequently by preemption. Do not program any Exit phases when Coord+Preempt is turned ON.<br />
Please note that because preemption is an emergency operation, there are times that the coordinator must go FREE to insure<br />
the safety of the motoring public. One example is during railroad preemption track clearance phase timing. If Track<br />
Clearance phases and timing are programmed, the coordinator will go free to insure that the vehicles will move off the<br />
track. Once the dwell phases begin timing, the coordinator will begin to transition back to being in SYNC.<br />
Lnk Aft Dwell<br />
This parameter is used with the Link to preempt # parameter found under the Peemption Options+ menu ( MM33).<br />
When this parameter is set to OFF, the preemption that is programmed under MM33 will be run after the current<br />
preemption is completed. If this parameter is set to ON, the preemption will not link to the other preemption programmed<br />
under MM33.<br />
Return Min/Max<br />
This parameter is used with the Return Max parameter found under the Peemption Times+ menu ( MM34). If this<br />
parameter is set to MAX, the time programmed under MM34 will be used as the Maximum Green timer <strong>for</strong> the Exit<br />
Phases. If this parameter is set to MIN, the time programmed under MM34 will be used as the Minimum Green timer<br />
<strong>for</strong> the Exit Phases.<br />
[v61] Max_2<br />
Turn the Max_2 setting ON to enable Max 2 phase timing when the controller exits preemption. This feature can be used<br />
to provide additional time to the return phase in free operation.<br />
[v61] All Red B4 Dwell<br />
This feature prevents the controller going directly into the dwell interval if the preempt happens to begin when the dwell<br />
phases are active. There<strong>for</strong>e, if the user needs to time an all red interval prior to serving the Dwell Phases, this parameter<br />
should be programmed to “0N”. If set to “ON, the feature requires that the controller clear to all red be<strong>for</strong>e entering the<br />
dwell interval. There<strong>for</strong>e, the phase red clear time <strong>for</strong> the terminating phase(s) or red-revert times would apply.<br />
This is used by some agencies to prevent yellow trap situations. By clearing to all red, all phases must terminate together.<br />
These agencies use this feature in association with 4 channel preemptions and protected/permissive turning situations. The<br />
agencies want the intersection to clear to red, then go back to the dwell phases (or simply go all red be<strong>for</strong>e the dwell<br />
phases), so the on-coming emergency vehicle will know that the conflicting permissive movement is green and that they are<br />
truly in a preemption situation. This option will use the Red Revert time, if appropriate, as the time to remain all red.<br />
[v61][v65] Volt Mon Flash<br />
Setting this parameter to “ON” will <strong>for</strong>ce to unit to use the cabinet hardware to flash during the dwell period if Flash in<br />
dwell is enabled.<br />
8.2.7 [v61] Preempt Inhibit Control (MM->3->7)<br />
This menu provides a manual override of the 8 bus preempt and platoon<br />
progression inhibits. Bus preempts 1 – 1 correspond with Preempts # 7 – 10<br />
and special function outputs 17 – 20. Special function outputs 21 – 24<br />
correspond with platoon progression 1 – 4. This menu provides a way to override the time-of-day inhibits <strong>for</strong> buss<br />
preemption and platoon progression generated from the schedule <strong>for</strong> the current pattern (see MM->4->8).<br />
Naztec <strong>NTCIP</strong> <strong>Based</strong> NEMA <strong>TS2</strong> and <strong>2070</strong> Controller <strong>Manual</strong> – July 2009 Page 8-92
8.3 Low-Priority Preempts 7 – 10<br />
Low-priority preempts are dedicated to preempt # 7 – 10 and can be used <strong>for</strong> bus and EMERG (emergency vehicle)<br />
preemption. Preempts 7 – 10 may be enabled as bus preempts by setting the Bus Prmp parameter to ON in menu MM->3-<br />
>7 (below). Preempts 7 – 10 may also be enabled as low-priority emergency vehicle preempts by setting the Bus Prmp<br />
parameter to EMERG.<br />
The same physical inputs are shared <strong>for</strong> high-priority preempts 3 – 6 and low-priority inputs 7 – 10. The controller<br />
distinguishes between a high-priority and low priority input by recognizing a steady ground-true input as high-priority and<br />
a 6.25Hz oscillating signal as a low-priority input. The oscillating input is also recognized in a Type-1 cabinet facility when<br />
interfaced to a BIU through the SDLC port.<br />
All programming required <strong>for</strong> bus preemption is provided from menu MM->3->7 <strong>for</strong> preempts 7 – 10. However, lowpriority<br />
EMERG preempts share programming with high-priority preempts as shown in the table below.<br />
Preempt # Preempt Input Type (typical) Programming Shared With Other Preempt<br />
1 1 RAIL No<br />
2 2 RAIL No<br />
3 3 RAIL or EMERG – H Prior No<br />
4 4 RAIL or EMERG – H Prior No<br />
5 5 RAIL or EMERG – H Prior No<br />
6 6 RAIL or EMERG – H Prior No<br />
7 3 (oscillating) BUS or EMERG – L Prior 7 EMERG shares programming with preempt 3<br />
8 4 (oscillating) BUS or EMERG – L Prior 8 EMERG shares programming with preempt 4<br />
9 5 (oscillating) BUS or EMERG – L Prior 9 EMERG shares programming with preempt 5<br />
10 6 (oscillating) BUS or EMERG – L Prior 10 EMERG shares programming with preempt 6<br />
A bus preempt responds differently from a low-priority EMERG vehicle preempt when activated. When a low-priority<br />
EMERG vehicle preempts is activated, the controller will apply programming associated with the high-priority preempt to<br />
transfer control to the high-priority dwell phase. When a low-priority bus preempt is activated, the controller will continue<br />
to service the current phase until it gaps out or maxes out (free operation) or is <strong>for</strong>ced off (under coordination). The bus<br />
preempt will then move immediately to the bus phase specified in the menu above.<br />
8.3.1 [v65] <strong>2070</strong> Controller Screens<br />
The following screen is used <strong>for</strong> low priority preemption programming:<br />
Enable<br />
The Enable parameter must be set to ON to enable bus preemption or OFF to disable the preempt. The parameter may also<br />
be set to EMERG to enable a low-priority emergency vehicle preemption or TRANS <strong>for</strong> a Transit preemption variable.<br />
The primary difference between the ON (bus preempt) option and the EMERG (low-priority emergency vehicle) or<br />
TRANS options lies in the preempt response during coordination. A preempt 7 bus preempt will be recognized as the lowpriority<br />
preempt which shares a preempt input with Preempt #3.<br />
Naztec <strong>NTCIP</strong> <strong>Based</strong> NEMA <strong>TS2</strong> and <strong>2070</strong> Controller <strong>Manual</strong> – July 2009 Page 8-93
Prior Phases<br />
Whenever a 6.25 Hz oscillating signal is applied to this input, the controller will either dwell in the Prior Phases specified if<br />
these phases are active, or move immediately to the Prior Phases without violating the min times and pedestrian times of<br />
the phases currently being serviced.<br />
Coor+Preempt<br />
The Coor+Preempt feature <strong>for</strong> low-priority preemption is the same as the feature discussed in the high priority preemption<br />
section. Many agencies utilize the Coor+Preempt option when coordination is interrupted frequently by preemption to<br />
minimize the transition time returning to coordination.<br />
Min / Max Times<br />
Min time guarantees a minimum service <strong>for</strong> the preempt if the priority phases are active when the preempt input is applied.<br />
The Max time is used to terminate the bus phases after the specified max time. Both values are in seconds (0 – 255).<br />
LockMode and Lockout Time<br />
The LockMode (Max_Lockout) parameter inhibits the preempt input <strong>for</strong> the specified Lockout value (0-255 seconds) after<br />
the preempt Max Time is exceeded.<br />
8.3.2 [v61] <strong>TS2</strong> Controller screens<br />
The Programming screens <strong>for</strong> <strong>TS2</strong> controllers (Version 61) are different from above and are displayed below. In these<br />
versions recent release updates have separated the screens <strong>for</strong> the Low-priority features and the Platoon Progression entries.<br />
Low priority Preemption sub menu screen, MM3(low priority preemption number 7, 8, 9 or 10)<br />
Low Priority Screen, MM3(low priority preemption number 7, 8, 9 or 10)1<br />
Platoon Progression screen, MM3(low priority preemption number 7, 8, 9 or 10)2<br />
Naztec <strong>NTCIP</strong> <strong>Based</strong> NEMA <strong>TS2</strong> and <strong>2070</strong> Controller <strong>Manual</strong> – July 2009 Page 8-94
8.3.3 Low Priority Features in version 61<br />
LP_Type<br />
The LP_Type parameter must be set to ON to enable bus preemption or OFF to disable the preempt. The parameter may<br />
also be set to EMERG to enable a low-priority emergency vehicle preemption or T_PRMT <strong>for</strong> Transit preemption or<br />
T_PRIOR <strong>for</strong> Transit Priority.<br />
The primary difference between the ON (bus preempt) option and the EMERG (low-priority emergency vehicle) or<br />
TRANS options lies in the preempt response during coordination. A preempt 7 bus preempt will be seen the low-priority<br />
preempt which shares a preempt input with Preempt #3.<br />
Dwell Phases<br />
Whenever a 6.25 Hz oscillating signal is applied to this input, the controller will either dwell in the Bus Phases specified if<br />
these phases are active, or move immediately to the Bus Phases without violating the min times and pedestrian times of the<br />
phases currently being serviced.<br />
Coor+Preempt<br />
The Coor+Preempt feature <strong>for</strong> low-priority preemption is the same as the feature discussed in section 8.3.6 <strong>for</strong> high priority<br />
preemption. Many agencies utilize the Coor+Preempt option when coordination is interrupted frequently by preemption to<br />
minimize the transition time returning to coordination.<br />
Min / Max Times<br />
Min time guarantees a minimum service <strong>for</strong> the preempt if the priority phases are active when the preempt input is applied.<br />
The Max time is used to terminate the bus phases after the specified max time. Both values are in seconds (0 – 255).<br />
Max_Lockout<br />
The Max_Lockout parameter inhibits the preempt input <strong>for</strong> the specified value (0-255 seconds) after the preempt Max Time<br />
is exceeded.<br />
8.3.4 Platoon Progression Features<br />
Platoon Progression: The following low-priority preemption features were developed <strong>for</strong> a specific county<br />
in Cali<strong>for</strong>nia. The county is using PLC devices (programmable logic controllers) at each intersection to<br />
transmit platoon progression between signals in a peer-to-peer network. A Tx-Phase (or transmit phase) is<br />
assigned to the low-priority preempt to trigger a message relayed to the downstream signal. The received<br />
message is downstream activates a low-priority preempt using the timing parameters defined below.<br />
The four platoon progression preempts defined in this system may be inhibited by time-of-day. Each PP<br />
preempt may be assigned to a special function bits within the range of 17 – 24 (see MM->4->8 and MM->2-<br />
>9). Each PP preempt can be enabled or disabled by pattern within the action table.<br />
[v61] Plat. Rx<br />
The Rx Phase (or receiver phase) is the progression phase at the downstream signal held as a low-preemption dwell phase<br />
after a D connector input is triggered and the programmed Rx Delay period expires.<br />
[v61] Rx Delay<br />
The Rx Delay (or receiver delay) is used to delay the low-priority preempt at the downstream signal after the request is<br />
received as a D-connector input.<br />
[v61] Cond L/O<br />
Reserved<br />
[v61] Hold<br />
The Hold parameter (0-100 seconds) acts like a max timeout once the receiver phase has entered the hold state.<br />
Naztec <strong>NTCIP</strong> <strong>Based</strong> NEMA <strong>TS2</strong> and <strong>2070</strong> Controller <strong>Manual</strong> – July 2009 Page 8-95
[v61] Plat Tx<br />
The Tx Phase (or transmit phase) at the upstream signal triggers the response message sent downstream. The transmit<br />
outputs <strong>for</strong> the four priority preempts are associated with Ped Clearance outputs 1, 3, 5 and 7. An external PLC controller<br />
is used to transmit the state of these outputs to a separate PLC located at each downstream intersection in the network.<br />
[v61] TxDel<br />
The TxDel (transmit delay) parameter (0-255 sec.) is used to delays the PP sync pulse (Ped Clearance outputs 1, 3, 5 and 7)<br />
after the Tx (transmit) phase turns green.<br />
[v61] Tx.<br />
A maximum of four Tx (transmit) phases may be specified <strong>for</strong> each low-priority preempt at the upstream signal. The TxDel<br />
(transmit delay) interval begins whenever any programmed Tx phase turns green. At the end of the TxDel period, a sync<br />
pulse is generated through the Ped Clearance outputs interpreted by the PLC device.<br />
[v61] Begin<br />
This mode will direct the Low priority preemption how to move to the dwell phases. If the user selects MIN then the<br />
preemption will time any intervening phases with demand <strong>for</strong> the Minimum Green time. If the user selects SKIP then the<br />
preemption will skip directly to the dwell phases after it completes the current phase(s) timing.<br />
Naztec <strong>NTCIP</strong> <strong>Based</strong> NEMA <strong>TS2</strong> and <strong>2070</strong> Controller <strong>Manual</strong> – July 2009 Page 8-96
9.1 Status Displays (MM->7)<br />
9 Status Displays, Login & Utilities<br />
This chapter documents the Status Displays found under MM->7.<br />
Several of these displays were discussed in other sections of this<br />
manual where appropriate. For example, the Coord Status Display<br />
was discussed in depth in Chapter 6 – Coordination. Cross-references<br />
to previous sections in this manual are provided in this chapter to<br />
insure that every status display is thoroughly documented.<br />
9.1.1 Phase Timing Status Display (MM->7->1)<br />
The Phase Timing status display indicates whether the controller is<br />
running coordination, FREE or is in flash. This status display also<br />
shows which of the 16 phases are active, calls on each phase and the<br />
phase timing in each ring.<br />
The Phase Timing status screen is divided into 3 separate areas to display:<br />
• The current operation and sequence<br />
• Ring status and phase timing<br />
• Active phases and Veh / Ped calls and Veh extension <strong>for</strong> each phase<br />
Current Sequence and Operation<br />
The current sequence and phase mode is displayed<br />
in the top right corner (the default is Seq 01, STD8<br />
dual-ring). The second line will display FREE or<br />
the active Local timer if coordination is active.<br />
Ring Status and Phase Timing<br />
The left area of this status screen shows the active phase timing in each ring. The Min green, Gap,extension, Yel and Red<br />
intervals of the active phases are shown in each ring. The pedestrian intervals Walk and Pclr are displayed concurrently<br />
with the vehicle phase timing <strong>for</strong> each ring.<br />
During FREE operation, Term Gap is displayed whenever the Gap/extension timer expires and the phase gaps-out.<br />
Otherwise, the Gap,extension timer will continue to reset and until the Max1 or Max2 timer expires and the Term Max<br />
message is displayed.<br />
During coordination, Term Fof is<br />
displayed whenever a phase terminates<br />
due to a <strong>for</strong>ce-off. The example menu to<br />
the right is a "snapshot" taken of a<br />
controller during coordination with<br />
active phases 4 and 8 <strong>for</strong>ced-off. The<br />
effect of max timing can also be observed from this display during coordination. If FLOATing <strong>for</strong>ce-offs are in effect, you<br />
will see a FloatMx time down in the ring as each phase is serviced. If FIXED <strong>for</strong>ce-offs are in effect, you will see Max1 or<br />
Max2 timing corresponding with the Maximum setting in Coord Modes (MM->2->1). If FIXED is in effect and the<br />
Maximum setting is MAX_INH, you will not see the max timer count down because the max timer is inhibited and cannot<br />
terminate the phase prior to it’s <strong>for</strong>ce-off (see section 6.8).<br />
If Guaranteed Passage Time is enabled <strong>for</strong> the phase, the message LCAR is displayed while the phase times the difference<br />
between initial Gap,extension and the final extension at the time of gap-out<br />
“AdIn” or “MxIn” ring statuses will be displayed as appropriate after minimum green has expired and while added initial or<br />
max initial are timing.<br />
Naztec <strong>NTCIP</strong> <strong>Based</strong> NEMA <strong>TS2</strong> and <strong>2070</strong> Controller <strong>Manual</strong> – July 2009 Page 9-97
Active / Next Phases and Veh / Calls on Each Phase<br />
In the screen to the right, phase 4 and 8 are Active (A) and<br />
are being <strong>for</strong>ced-off to phase 1 and 5 that are Next (N).<br />
This is a STD8 controller (dual-ring 8-phase), so phases 9<br />
- 16 are Omitted as shown with the "O" symbol.<br />
Veh and Ped calls and Veh extension <strong>for</strong> all 16 phases are<br />
shown using the following symbols:<br />
. The phase is enabled, but there is no call on this phase<br />
R or r<br />
C<br />
K<br />
E<br />
P or p<br />
F<br />
Max “R”ecall or min "r"ecall has been programmed <strong>for</strong> the non-active phase<br />
A vehicle “C”all has been placed on a non-active phase<br />
A “K”eyboard call has been placed on a non-active phase. Also displayed if you make a call using<br />
the Screen Calls via MM->7->9->9 in ver 61.<br />
A vehicle is “E”xtending an active phase<br />
A “P”edestrian push-button call or a "p"ed recall has been placed on a non-active phase<br />
A “F”orce-off has been issued to terminate an active phase (under coordination)<br />
9.1.2 Coord Status Display (MM->7->2)<br />
Please refer to section 6.11 <strong>for</strong> a discussion of the Coord Status Display.<br />
9.1.3 Alarm Status Display (MM->7->5)<br />
Events and Alarms are discussed in section 4.7. The Alarm Status <strong>for</strong> alarms 1-128 are provided in this status display.<br />
Note that alarms 129-255 are reserved <strong>for</strong> the closed loop master and are documented in the Closed Loop Master <strong>Manual</strong>.<br />
9.1.4 <strong>TS2</strong> Comm Port Status (MM->7->6)<br />
The <strong>TS2</strong> Comm Port Status Display under MM->7->6 is equivalent to MM->6->7 and is documented in section 10.13.<br />
9.1.5 Reports and Buffers (MM->7->7)<br />
The Volume and Occupancy Reports and Buffers menu is equivalent to MM->5->8 and is documented in section 5.4.<br />
Naztec <strong>NTCIP</strong> <strong>Based</strong> NEMA <strong>TS2</strong> and <strong>2070</strong> Controller <strong>Manual</strong> – July 2009 Page 9-98
9.1.6 [v50/v61] MMU Status (MM->7->8)<br />
Version 61 provides a status buffer to retrieve the status reports<br />
from a conflict monitor or MMU supporting the enhanced Naztec<br />
monitor log function. The errors are logged in and displayed to the<br />
user in one of 3 ways. MM->7->8->1 displays the Fault Log, MM-<br />
>7->8->2 displays a Trace Log and MM->7->8->1 displays the<br />
Current Status. The abbreviated headings <strong>for</strong> these screens are<br />
explained below.<br />
Conf<br />
Conflict<br />
Red: F/En shows the status of the Red Enable input and indicates whether channel monitoring,<br />
other than basic Conflict monitoring, is enabled<br />
(i.e.YEL clearance, Y+R clearance, dual-indication, and field check).<br />
CLR<br />
Min Y+R Clearance Fault<br />
PORT1 Comm Port 1 failure<br />
CVM Controller Voltage Monitor<br />
Flt:Rel/Im MMU relay fault status, specifically with the IN/OUT transfer.<br />
Im is the immediate response to a fault.<br />
Diag<br />
Diagnostic<br />
24 V/1/2 24 volt 1 and 24 volt 2<br />
Inh<br />
Inhibit<br />
FLS<br />
Flash<br />
Loc<br />
Local<br />
SU<br />
Start Up<br />
9.1.7 Overlaps Status Displays (MM->7->9->1)<br />
The Overlap Status screen is equivalent to MM->5->8 and is documented in section 4.6.<br />
9.1.8 Easy Calcs (MM->7>9->2)<br />
The Easy Calcs are documented in section Chapter 6. This menu is equivalent to menu MM->2->8->2.<br />
9.1.9 Overview Status Screen (MM->7>9->5)<br />
The Overview Status Screen is documented at the end of Chapter 3.<br />
9.1.10 Phase Input / Inhibits (MM->7>9->6)<br />
The Phase Input / Inhibit Status Screen is useful to study the<br />
effect of Phase holds, omits and inhibits applied during<br />
coordination. These inhibits become active at the Veh Apply<br />
points and Ped Apply points discussed in Chapter 6.<br />
The version 61 screen is slightly different and is shown below.<br />
Particular to this screen, the Ped Inh (0 Time) are calculated<br />
inhibits that are applied if the Ped Walk and Ped Clear times are<br />
programmed to 0.<br />
The <strong>NTCIP</strong> Ped Omits are applied remotely via an <strong>NTCIP</strong><br />
communications object<br />
Naztec <strong>NTCIP</strong> <strong>Based</strong> NEMA <strong>TS2</strong> and <strong>2070</strong> Controller <strong>Manual</strong> – July 2009 Page 9-99
9.1.11 Fault Timers (MM->7>9->7)<br />
The Fault Timer Status provides status displays to the errors and<br />
detector faults specified by NEMA. A brief explanation of this<br />
screen is given below.<br />
Cycle Faults and Cycle failures occur when phases with demand are<br />
not serviced within an appropriate time. A cycle fault occurs when a<br />
phase is not serviced and coordination is active. A cycle failure<br />
occurs when a phase is not serviced during FREE operation. If a<br />
controller experiences a cycle fault (coordination active) it will kick the timer free. If the phase still isn’t serviced, then a<br />
cycle failure is declared. Note that these <strong>TS2</strong> features became defined long after Naztec had its own three-strike<br />
coordination failure feature. In order to continue to provide what our customers were already used to, we support both of<br />
these features simultaneously.<br />
To accomplish the <strong>TS2</strong> cycle fault/failure logic, a number of “cycle fault” timers are implemented. These down-timers are<br />
loaded when a phase is serviced with a value that is either entered by the user or calculated by the controller. If the<br />
controller calculates it, it provides liberal margin so that false alarms are not generated. The calculation is based upon<br />
either the cycle time or else accumulated individual phase times when operating free. If you observe the counters on the<br />
top two rows (phases 1-8 and 9-16), you will see them being pre-loaded as the phases are serviced and then count down as<br />
other phases are serviced. If they time to zero be<strong>for</strong>e being reloaded (i.e. serviced), then a fault or failure occurs.<br />
The preemption timers are Naztec’s own enhancement. The timers work similarly to the phase timers except that they<br />
represent the times expected to achieve interval states during preemption. The “seek” timers are loaded when the controller<br />
has begun moving to the appropriate interval (track clear, dwell, and return phases). Maximum seek times may be entered<br />
by the user on the Controller Parameters screen. When programming these, it is important to include any possible clearance<br />
times and then add a little margin. For times such as “seek track clear”, the margin programmed in is generally pretty<br />
small, so it is important that the user or engineer knows what the times are supposed to be. Of course, this is true of track<br />
clearance times and in general, it is important to get right. This feature is a way to double-check that the controller is<br />
clearing the track in the expected amount of time. Using the alarm feature, the customer can get notified of a problem<br />
be<strong>for</strong>e taking the added step of causing the controller to go to flash during preemption.<br />
Action to be taken upon cycle fault/failure is programmed by the “Cycl Flt Actn” parameter on the Controller Parameters<br />
screen. It can set an Alarm or else cause a controller fault and Flash the controller.<br />
9.1.12 [v50][v61] Other Inputs (MM->7>9->8)<br />
<strong>TS2</strong> versions provide an additional status display of NEMA I/O functions<br />
9.1.13 [v61] Screen Calls (MM->7>9->9)<br />
This screen provides the user a method to places temporary<br />
Phase calls, Pedestrian Calls and Preemption calls <strong>for</strong> each<br />
phase using the controller’s keyboard. Simply toggle the phase<br />
that you want called to the on state (“X”) and the call will be<br />
placed in the controller until you toggle the phase entry to the<br />
off state (“.”). Any calls that are toggled on will remain in the<br />
controller until your session is logged off. The real-time call<br />
status is also displayed on this screen. The timing status screen<br />
(MM71) will display a “K” whenever these keyboard calls<br />
are made.<br />
Naztec <strong>NTCIP</strong> <strong>Based</strong> NEMA <strong>TS2</strong> and <strong>2070</strong> Controller <strong>Manual</strong> – July 2009 Page 9-100
9.2 Login and Utilities<br />
Up to 64 separate password logins are provided to control keyboard access to the controller database. The level of security<br />
can also be assigned to each user to control the ability to edit the database, load software and assign passwords. Various<br />
utilities are also provided from this menu to load the controller software (flash the EEPROMS), initialize the controller’s<br />
database, print the database and per<strong>for</strong>m diagnostic tests that interrogate the memory, ports and hardware associated with<br />
the controller.<br />
<strong>TS2</strong> Screen<br />
9.2.1 Login Utilities (MM->8->1 & MM->8->2)<br />
<strong>2070</strong> Screen<br />
If any Access Codes are programmed under MM->8->2, the user will be required to provide a valid user number and access<br />
code to enable the keyboard. Programming all access codes under MM->8->2 to zero and setting the Level to NONE,<br />
disables all login procedures in the controller.<br />
A maximum of 64 individual users and 4-digit access codes may be<br />
programmed by a SECUR user. There<strong>for</strong>e, if access security is used,<br />
at least one access # should have SECUR Level access.<br />
The security Level (from highest to lowest) is assigned as follows:<br />
• SECURE User has full access to the database including the ability to assign passwords<br />
• SW LD User has full access to the database and the ability to run diagnostics and load the controller software.<br />
The user may not assign passwords.<br />
• DIAG User has edit access to the database plus the ability to run diagnostic utilities. The user cannot load<br />
controller software (reflash the controller) or assign security passwords<br />
• ENTRY User has edit access to the database but cannot run diagnostics, load software or assign passwords<br />
• NONE View only access to the database<br />
9.2.2 [v50/v61] Controller Print Utility (MM->8->3)<br />
This <strong>TS2</strong> utility allows the sections of the controller database to be printed through the PC/Print RS-232 port. The port<br />
settings <strong>for</strong> the printer port must agree with the settings expected by the printer and appropriate cabling provided to use this<br />
feature. The following sections of the controller database may be selected prior to printing – NONE, ALL,<br />
CONTROLLER, COORDINATION, PREEMPTS, TB COORD, DETECTORS, COMMS and VOL/OCC.<br />
Naztec <strong>NTCIP</strong> <strong>Based</strong> NEMA <strong>TS2</strong> and <strong>2070</strong> Controller <strong>Manual</strong> – July 2009 Page 9-101
9.2.3 Initialize Controller Database (MM->8->4)<br />
[v50/v61] <strong>TS2</strong> Initialization screens<br />
Initializing the controller database with Clear & Init All provides the default database and operation of the controller. The<br />
last two initialize options are primarily used <strong>for</strong> testing the integrity of the hardware.<br />
[v50/v61] Clear & Init All (MM->8->4->1)<br />
Clear & Init All should be executed whenever new<br />
controller software is loaded under MM->8->5 (discussed<br />
in the next section). The controller may be initialized to<br />
one of the following default databases:<br />
• NONE – this default database has little practical value <strong>for</strong> the end user because this option writes zero values into<br />
every field in the controller database.<br />
• DIAMOND – this default should only be used to initialize the controller to the operation defined in the Naztec<br />
Operations <strong>Manual</strong> <strong>for</strong> Texas Diamond <strong>Controllers</strong> that con<strong>for</strong>ms with the TxDOT Diamond Controller<br />
Specification.<br />
• STD-8P – this is the most appropriate default database and initializes the controller to 8 phase dual ring operation,<br />
often called quad-left operation.<br />
You must turn off the Run Timer under MM->7->1 be<strong>for</strong>e you execute Clear & Init All or an error message will be<br />
displayed telling you to turn the Run Timer OFF. Pressing the ENTR key executes the initialization.<br />
[v50/v61] Clear EEPROM (MM->8->4->2)<br />
The Clear EEPROM utility erases the EEPROM completely. A<br />
separate command is provided to erase only the initial part of<br />
EEPROM. These utilities are primarily used <strong>for</strong> hardware<br />
testing.<br />
[v60][v65] <strong>2070</strong> Initialization screens<br />
The screens <strong>for</strong> the <strong>2070</strong> are simpler but as powerful as the <strong>TS2</strong><br />
screens.<br />
[v60][v65] Initialize <strong>2070</strong> Database (MM841)<br />
Initialize Database should be executed whenever new controller software is loaded in the <strong>2070</strong> controller (discussed in the<br />
next section). The controller may be initialized to one of the following default databases:<br />
• NO ACTION: this default will ignore initialization<br />
• FULL-CLEAR: this Clear EEPROM utility erases the EEPROM completely. A separate command is provided to<br />
erase only the initial part of EEPROM. These utilities are primarily used <strong>for</strong> hardware testing.<br />
• FULL-STD8: this is the most appropriate default database and initializes the controller to 8 phase dual ring<br />
operation, often called quad-left operation<br />
• FULL-DIAMOND: this default should only be used to initialize the controller to the operation defined in the<br />
Naztec Operations <strong>Manual</strong> <strong>for</strong> Texas Diamond <strong>Controllers</strong> that con<strong>for</strong>ms with the TxDOT Diamond Controller<br />
Specification.<br />
Normally the user will choose Full-STD8 to initialize the controller and do all the I/O mapping the traditional way as<br />
outlined in Chapter 12. For those agencies that would like to utilize simple input mapping an extra step after<br />
initialization will have to be done. It is accessed through this menu and is described below.<br />
Naztec <strong>NTCIP</strong> <strong>Based</strong> NEMA <strong>TS2</strong> and <strong>2070</strong> Controller <strong>Manual</strong> – July 2009 Page 9-102
• FULL NYSDOT-0 and NYSDOT-8 These are custom modes defined by the State of New York. NYSDOT-8 is<br />
intended <strong>for</strong> testing purposes and NYSDOT-0 is intended as a template <strong>for</strong> creating new controller databases.<br />
Phase timing and channel outputs are not defined in NYSDOT-0 and all phases are disabled. The phase mode in<br />
NYSDOT-0 is STD8 and the IO Mode <strong>for</strong> the C1 connector is USER. The intent of these defaults is to require the<br />
user to program the inputs to the C1 connector from the 33.x INPUT FILE.<br />
• FULL MODE 7 This custom mode is used by Broward County <strong>for</strong> their customized cabinets.<br />
• FULL CALTRANS This custom mode is used by agencies that utilize CALTRANS 332 and 336 cabinets.<br />
9.2.4 [v50][v61] Load Software Utility (MM->8->5)<br />
This utility allows the user to “flash” a controller with a new software version provided by Naztec. Naztec is constantly<br />
improving and adding new software features that may be easily downloaded to the controller using a palm pilot or laptop<br />
device. All programming is provided through the external serial connection and does not require the case to be opened or<br />
“chips” to be pulled and reprogrammed using a prom burner. Flash proms, or EEPROMS (Electrically Erasable<br />
Programmable Read-only Memory) are used to make updating the controller software as easy as downloading the database<br />
to the controller.<br />
The utility waits <strong>for</strong> 3 minutes <strong>for</strong> the download device to<br />
initialize the download. During the download, the external<br />
device is in full control of the process and on completion will<br />
per<strong>for</strong>m checksums on the program to insure that it was<br />
installed correctly.<br />
Follow the instructions on the screen until the message “Waiting <strong>for</strong> ROM download due to keyboard command…” Then,<br />
initiate the download on the Palm Pilot or via laptop software. When the download is complete, be sure to per<strong>for</strong>m the<br />
following steps:<br />
1. Verify that the checksum (actually, a CRC) of the loaded software matches that of the specific version.<br />
This can be found by examining the software .hdr file with notepad. The checksum is the fifth item, a<br />
four digit hexadecimal number, that follows the description of the equipment the software is <strong>for</strong>. The<br />
checksum is displayed <strong>for</strong> a period of several minutes after the loading process completes. However, it<br />
can be recalculated and displayed anytime the controller is not running by accessing the ROM diagnostic<br />
(MM->8->6->2).<br />
2. Cycle power to the controller/MMU.<br />
Once the software is re-loaded, cycle power to the controller to ensure that all of RAM memory is reinitialized<br />
<strong>for</strong> the new version. This is particularly important when the software is loaded on-site at the<br />
intersection and the controller is not being swapped or removed to accomplish the update.<br />
3. Be sure to clear the Event buffer and the Alarm buffer after cycling power (step 2 above). On the 980, the<br />
Event buffer is found at MM-1-6-3 and the Alarm buffer at MM-1-6-6.<br />
4. If there are new user-programmable features in the updated software, upload the device’s database and verify<br />
that the new feature’s parameters are set to initial values. Initial values <strong>for</strong> new features normally disable the<br />
feature. Alternatively, set any new parameters to a desired value.<br />
Naztec <strong>NTCIP</strong> <strong>Based</strong> NEMA <strong>TS2</strong> and <strong>2070</strong> Controller <strong>Manual</strong> – July 2009 Page 9-103
9.2.5 [v50/v61] Self Tests (MM->8->6)<br />
These hardware tests are specific to the NEMA <strong>TS2</strong><br />
controllers. The <strong>2070</strong> hardware diagnostics are provided as a<br />
separate package named Valsuite.<br />
Several hardware tests are provided to insure the integrity of<br />
the RAM and ROM memory in the controller. All of these<br />
self-tests require that the Run Timer be turned off which<br />
insures that the controller is not currently controlling an<br />
intersection.<br />
RAM and ROM tests per<strong>for</strong>m a checksum of the controller’s memory. Com port tests may be per<strong>for</strong>med on any of the RS-<br />
232 ports available with the controller.<br />
A set of test connectors can be used to connect the outputs of<br />
the Type-2 A-B-C connectors to the inputs of the connectors.<br />
This utility activates an internal program that incrementally<br />
tests each input and output to isolate I/O chip failures in a <strong>TS2</strong><br />
type controller.<br />
Version 61 provides a keyboard test that echoes a character <strong>for</strong><br />
each keystroke pressed. This test is primarily used in reliability<br />
testing of the hardware.<br />
Version 61 provides a display test to exercise the LCD screen and<br />
test each pixel. This test may be used to insure that no area of<br />
the display has failed.<br />
Naztec <strong>NTCIP</strong> <strong>Based</strong> NEMA <strong>TS2</strong> and <strong>2070</strong> Controller <strong>Manual</strong> – July 2009 Page 9-104
10.1 Communication Menu (MM->6)<br />
MM->6 configures the controller communications ports. The following<br />
sections describe the proper setup, observation, and use of the RS-232<br />
communication ports and the Ethernet port provided with the <strong>2070</strong>.<br />
10.2 StreetWise Communications<br />
StreetWise provides either direct communication to each controller in the system<br />
(master-less), or communicates with closed loop masters that serve as<br />
communication buffers <strong>for</strong> the secondary controllers in the system.<br />
A Naztec 981 or <strong>2070</strong> master controller interconnects up to 32 secondary<br />
controllers using RS-232 modems communicating at 600 - 57.6 Kbaud. Naztec<br />
internal FSK modems can also be used to provide data communication rates up<br />
to 9600 baud over twisted pair. Full and half-duplex asynchronous<br />
communication is fully supported.<br />
10 Data Communications<br />
10.3 General Communication Parameters (MM->6->1)<br />
MM->6->1: 980 <strong>TS2</strong> Controller (v50/61)<br />
MM->6->1: 981 Master <strong>Controllers</strong> (v50/61)<br />
MM->6->1: <strong>2070</strong> Controller (v60/65)<br />
Station ID (Range 1 - 9,999 – see Note below)<br />
The Station ID is a unique identification number (or address) assigned to every master and secondary controller in the<br />
system. When StreetWise ATMS initiates a communication poll to a Station ID, all controllers on the same communication<br />
path (including the controllers in the master’s subsystem) receive the same poll request. However, the only controller<br />
responding to this request is the Station ID matching the ID contained in the poll request. This unique controller addressing<br />
provides the poll/response system typically found in point-to-point traffic control systems.<br />
Note: The Naztec DEFAULT protocol supports controller addresses in the range of 1-9,999; however, the valid range<br />
under the <strong>NTCIP</strong> protocol is 1-8192.<br />
Master Station ID (1 - 9,999)<br />
The Master Station ID is the ID of the master controller when the secondary is operating in a system under a master. Valid<br />
Master IDs are in the range of 1-9,999 under the Naztec DEFAULT protocol and 1-8192 under <strong>NTCIP</strong>.<br />
Group ID<br />
The Group ID is reserved <strong>for</strong> future under <strong>NTCIP</strong> using a broadcast message to all secondary controllers programmed with<br />
the same group address. Currently, the secondary controllers a response message is received by the central or master when<br />
a secondary controller is polled within a system. A group broadcast does not expect a reply message and provides no status<br />
indicating that the message was actually received.<br />
Naztec <strong>NTCIP</strong> <strong>Based</strong> NEMA <strong>TS2</strong> and <strong>2070</strong> Controller <strong>Manual</strong> – July 2009 Page 10-105
Fallback Time (<strong>TS2</strong> 981 DEFAULT Protocol Only)<br />
Fallback Time is defined in the Naztec Protocol as the time (in seconds) that a secondary local controller waits to receive a<br />
closed loop or pattern from the master be<strong>for</strong>e reverting to time-of-day operation. A Fallback Time of 900 seconds<br />
(equivalent to 15 minutes) is typically used <strong>for</strong> secondary controllers operating in a closed loop system. If the secondary<br />
“Closed Loop” parameter is set ON (under menu MM->2->1), the secondary must receive a closed loop pattern from the<br />
<strong>TS2</strong> 981 master within the Fallback Time to remain under closed loop control. Otherwise, if the Fallback Time expires, the<br />
secondary will revert back to the local time-of-day schedule (B-TBC)<br />
A continuous StreetWise scan (such as the “General In<strong>for</strong>mation” scan screen) will tend to lock out all polling from the<br />
master. However, the master software can interrupt a continuous StreetWise scan to pass the closed loop pattern to the<br />
secondary controllers to prevent their Fallback Times from reverting the secondary controllers to time-of-day operation.<br />
Backup Time (<strong>TS2</strong> <strong>NTCIP</strong> and <strong>2070</strong> Protocols)<br />
Backup Time is an <strong>NTCIP</strong> object used to revert a secondary controller to local time base control if system communication is<br />
lost. The Backup Time (specified in seconds) is a countdown timer that is reset by any valid poll received from a closed<br />
loop master or from the central office (StreetWise). There<strong>for</strong>e, it is possible <strong>for</strong> a secondary operating under closed loop to<br />
receive polls that set the clock or gather status or detector in<strong>for</strong>mation without receiving an updated Sys pattern.<br />
Naztec provides a separate MIB called Fallback Time in the <strong>TS2</strong> controller to insure that the secondary receives the Sys<br />
generated pattern from the closed loop master be<strong>for</strong>e the Fallback Time expires.. The <strong>2070</strong> controller uses the <strong>NTCIP</strong><br />
Backup Time to test the communications, so any poll received by the secondary resets the Backup Time.<br />
Port Mode (<strong>TS2</strong> Only)<br />
The Port Mode setting only applies to <strong>TS2</strong> controllers which still support the DEFAULT protocol Naztec developed be<strong>for</strong>e<br />
the <strong>NTCIP</strong> protocol was developed. The <strong>2070</strong> controller only supports <strong>NTCIP</strong>, so Port Mode is not needed to set the<br />
protocol <strong>for</strong> the communication port. In addition, the task of “binding” the ports in the <strong>2070</strong> is handled under MM->6->6<br />
(see section 10.10).<br />
The 980 <strong>TS2</strong> secondary controller provides a System and PC/Print port. The various modes <strong>for</strong> each port are described<br />
below:<br />
System<br />
The system port is used <strong>for</strong> communications with a master or central computer. The DEFAULT and SYS-UP<br />
settings are identical. In addition, the <strong>NTCIP</strong> mode implements the <strong>NTCIP</strong> protocol <strong>for</strong> the secondary controller.<br />
<strong>NTCIP</strong> Standard 1210 ("<strong>NTCIP</strong> Objects <strong>for</strong> Signal System Masters") is currently in working draft <strong>for</strong>m and will<br />
be incorporated when the specification is finally adopted.<br />
PC/Print Port Mode Configuration<br />
The following modes are available <strong>for</strong> the PC/Print Port:<br />
• DEFAULT - The default mode is the PC/PRINT mode<br />
• SYS-DOWN - This mode causes the port to operate as a repeater. All messages received by the System<br />
port will be re-transmitted from this port.<br />
• PC/PRINT - This mode is used <strong>for</strong> communications with a laptop PC or a printer<br />
• CMU - This mode is used <strong>for</strong> communications with a Naztec, Inc. Conflict Monitor Unit<br />
• [v61] 3418-TOD<br />
• [v61] GPS – Garmin GPS/WWV Interface<br />
[v61] Dynamic Object Persistence<br />
Naztec provides a Dynamic Object Persistence to maintain compliance with national <strong>NTCIP</strong> standards. The maximum<br />
power outage time in minutes that may occur be<strong>for</strong>e all STMP dynamic object definitions in a device shall be<br />
invalidated. If this object is set to zero then existing dynamic object definitions shall be invalidated on device<br />
power up. If this object is set to its maximum value (65535) the existing dynamic object definitions shall not be<br />
invalidated due to power outages of any duration.<br />
Naztec <strong>NTCIP</strong> <strong>Based</strong> NEMA <strong>TS2</strong> and <strong>2070</strong> Controller <strong>Manual</strong> – July 2009 Page 10-106
10.4 <strong>TS2</strong> Communications Port Parameters<br />
The <strong>TS2</strong> Communication Port Parameters are used to integrate the EIA RS-232 serial ports with external serial devices<br />
such as laptop computers, palm pilots and various types of modems used <strong>for</strong> systems communications through the<br />
SYSTEM-UP port. In addition, the <strong>TS2</strong> 981 Master provides a SYSTEM-DOWN port to establish communications with<br />
the SYSTEM-UP port of secondary controllers assigned to the master’s sub-system.<br />
Naztec provides an internal FSK modem (4800-9600 Kbaud) that is programmed as the SYSTEM-UP port in the <strong>TS2</strong> 980<br />
Secondary controller and as the SYSTEM-DOWN port in the <strong>TS2</strong> 981 Master controller. The 25-pin SYSTEM-UP port<br />
and the 9-pin FSK port on the 980 Secondary controller can be considered as the same physical port. The 25-pin<br />
SYSTEM-DOWN port and the 9-pin FSK port on the 981 Master controller can be considered as the same physical port.<br />
10.4.1 Selecting the Port (MM->6->2)<br />
The following menu selected from MM->6->2 allows the desired<br />
com port to be selected.<br />
10.4.2 Setting the Parameters (MM->6->2->1)<br />
Once the port selection is made, press ENTER. The<br />
following screen will appear:<br />
The message after the word Port will be either –<br />
SYS- (<strong>for</strong> SYSTEM), or -PC/P (<strong>for</strong> PC/PRINT).<br />
The MODE field is status only, and reflects the mode<br />
configuration programmed in the General Comm. Parameters Menu <strong>for</strong> the selected port.<br />
Enable<br />
The enable field is used to turn the port on or off. In the off position, the port is not available <strong>for</strong> dial-up communications.<br />
Modem<br />
Use this field to select the modem being used with the port. The following selections are available:<br />
• BAS-24 - Use this setting <strong>for</strong> a basic 2400 baud modem, including the Boca modem 2400.<br />
• HA-24, HA-96, HA-192, HA-288 - These selections refer to Hayes Modems. Use the selection that describes the baud<br />
rate that the modem will be operating at: 2400, 9600, 19.2k, or 28.8K baud, respectively.<br />
• USRS24, USRS96 - These selections refer to the U.S. Robotics Sportster Modems. Use USRS24 <strong>for</strong> 2400 baud<br />
operations, and USRS96 <strong>for</strong> 9600 baud.<br />
• USRC24, USRC96 - These selections refer to the U.S. Robotics Courier Modems. Use the USRC24 <strong>for</strong> 2400 baud and<br />
the USRC96 <strong>for</strong> 9600 baud operations.<br />
• PROFIL - Use this selection to enable the controller to load the setup string stored in the modem. Where modems<br />
have multiple setup strings, the first string will be loaded.<br />
Baud<br />
Use this field to select the communications data rate (baud rate). The choices are 600, 1200, 2400, 4800, 9600, 14.4K,<br />
19.2K, 28.8K, 33.6K, 38.4K, 57.6K<br />
DialTime<br />
The dial time parameter tells the controller how long to wait after dialing a phone line <strong>for</strong> a connection to be made. A value<br />
of 0 to 255 seconds may be entered. If a connection is not made within the programmed dial time, the controller will<br />
attempt the call again using the alternate telephone number.<br />
ModmTime<br />
This parameter tells the controller how often to query the modem to verify that it is still communicating. A value of 0 to<br />
255 minutes may be entered.<br />
MsgTime<br />
This parameter tells the controller how long to wait <strong>for</strong> a response to a transmitted message. A value of 0 to 9.9 seconds<br />
may be entered. If a response is not received within the programmed time, the controller will re-send the message. After<br />
three unsuccessful tries, the controller will report a message failure.<br />
Naztec <strong>NTCIP</strong> <strong>Based</strong> NEMA <strong>TS2</strong> and <strong>2070</strong> Controller <strong>Manual</strong> – July 2009 Page 10-107
Duplex<br />
The difference between FULL and HALF duplex is best explained by analogy comparing telephone communication (FULL<br />
duplex) with two-way radio communication (HALF duplex). The sender and receiver can both “talk” at the same time over<br />
telephone whereas only one party can be transmitting by radio while the other party “listens”.<br />
In a similar way, communication between a master and secondary controller is FULL duplex if both master and secondary<br />
are allowed to transmit data while the other device is also transmitting data. HALF duplex communication requires that the<br />
secondary wait until the master has finished transmitting data be<strong>for</strong>e sending data back to the master.<br />
FULL duplex communication over twisted pair interconnect requires one pair <strong>for</strong> transmit/receive between the master and<br />
secondary and a separate pair <strong>for</strong> transmit/receive between the secondary and the master controller.<br />
HALF duplex communication allows a single communication pair to share transmit and receive messages between the<br />
master and secondary controllers.<br />
Tel#1<br />
This is the primary telephone number the controller uses to establish communications.<br />
Tel#2<br />
This is the secondary telephone number the controller uses to establish communications. This number will be used if the<br />
dial time expires without a connection when attempting to connect using Tel#1. If the controller is unable to connect using<br />
Tel#2, it will try again using Tel#1.<br />
10.4.3 Example Com Parameter Settings For a 981 Master Sub-System<br />
In this example, the “System-Up” port on a 981 master is connected to StreetWise at 33.6 K baud (full duplex) and the<br />
“System-Down” port is connected to a series of secondary controllers over twisted pair using the Naztec internal FSK<br />
modem at 9600 baud (full duplex). Note in this example that the communication link from the master to central can operate<br />
at a different baud rate as the communication link from the master to the secondary controllers.<br />
The SYSTEM UP settings <strong>for</strong> the primary master are<br />
shown to the right. The recommended Msgtime <strong>for</strong> the<br />
master SYSTEM UP port is 3.0 seconds. If StreetWise<br />
does not respond within 3.0 seconds after the master<br />
initiates a message, the master will assume that<br />
StreetWise did not hear the message and will re-transmit.<br />
Enable AutoDial should be set to OFF <strong>for</strong> all port settings <strong>for</strong> closed loop operation. The AutoDial features only apply to an<br />
isolated secondary programmed to dial-up StreetWise to report alarms. In addition, “Loc Txmt Alrms” must be<br />
programmed ON in MM->1->6->7 <strong>for</strong> controller to initiate communications with a StreetWise system. If StreetWise<br />
initiates the poll to the master and secondary controllers, “Loc Txmt Alrms” under M->1->6->7 must be programmed OFF.<br />
The SYSTEM DOWN settings <strong>for</strong> the primary master<br />
are shown to the right. Msgtime <strong>for</strong> the master<br />
SYSTEM DOWN port is 1.5 seconds. If the<br />
secondary controller has not responded in 1.5 seconds<br />
after the master initiates the message, the master will<br />
assume the secondary is not responding and will retransmit.<br />
The SYSTEM UP settings <strong>for</strong> the secondary controllers<br />
are shown to the right. The recommended Msgtime <strong>for</strong><br />
the secondary SYSTEM UP port is 1.0 seconds. If the<br />
master has not responded in 1.0 seconds after the<br />
secondary initiates a message, the secondary will<br />
assume that the master did not hear the message and<br />
will re-transmit.<br />
Naztec <strong>NTCIP</strong> <strong>Based</strong> NEMA <strong>TS2</strong> and <strong>2070</strong> Controller <strong>Manual</strong> – July 2009 Page 10-108
Recommended Msgtime are listed in the table<br />
to the right <strong>for</strong> different controller types.<br />
Controller Type Communication Port Recommended<br />
MsgTime (sec.)<br />
<strong>TS2</strong>/<strong>2070</strong> Master SYSTEM UP 3.0<br />
<strong>TS2</strong>/<strong>2070</strong> Master SYSTEM DOWN 1.5<br />
<strong>TS2</strong>/<strong>2070</strong> Secondary SYSTEM UP 1.0<br />
10.5 <strong>2070</strong> Communications Port Parameters (MM->6->2)<br />
After a system reset (SYSRESET), the <strong>2070</strong> serial ports are initialized as follows. The board label and slot position of each<br />
SP port are also provided as a reference. Note that the port must be assigned to the correct slot position in the <strong>2070</strong>. Slot<br />
positions are read left to right with A1 at the far left when viewed from the back of the controller.<br />
Serial Port Board Slot Connector Default Settings When the <strong>2070</strong> is Reset<br />
SP1 <strong>2070</strong>-7A A2 C21S 1.2 Kbps, 8-bit, 1 stop, no parity, no pause, no echo<br />
SP1S <strong>2070</strong>-7B A2 TBD 1.2 Kbps, 8-bit, 1 stop, no parity, no pause, no echo<br />
SP2 <strong>2070</strong>-7A A2 C22S<br />
SP2S <strong>2070</strong>-7B A2 TBD<br />
SP3 <strong>2070</strong>-7A A1 C21S<br />
SP3S <strong>2070</strong>-2A/2B A3 C12S 614.4 Kbps<br />
SP4 FPA C50S 9.6 Kbps, 8-bit, 1 stop, no parity, no pause, XDR off, xoff<br />
SP5S <strong>2070</strong>-2A/2B A3 C12S 614.4 Kbps<br />
SP8 <strong>2070</strong>-1B A5 C13S<br />
SP8S <strong>2070</strong>-1B A5 C13S<br />
The Communications Port Parameters under menu MM->6->2<br />
(menu to the right) allow you to change the default baud rate<br />
settings and the FCM (Flow Control Mode) of the eight <strong>2070</strong> serial<br />
ports. This programming overrides the default baud rate settings<br />
shown to the right when the <strong>2070</strong> is reset.<br />
FCM<br />
Description of FCM (Flow Control Mode)<br />
0 No Flow Control Mode: The CTS and CD signals are set asserted internally, so the serial device driver<br />
can receive data at all times. Upon a write command, the serial device driver asserts RTS to start data<br />
transmission, and de-asserts RTS when data transmission is completed. When user programs issue the first<br />
RTS related command, the driver switches to <strong>Manual</strong> Flow Control Mode.<br />
1 <strong>Manual</strong> Flow Control Mode: The serial device driver transmits and receives data regardless of the RTS,<br />
CTS, and CD states. The user program has absolute control of the RTS state and can inquire of the states<br />
of CTS and CD. The states of CTS and CD are set externally by a DCE. The device driver doesn’t assert<br />
or de-assert the RTS.<br />
2 Auto-CTS Flow Control Mode: The serial device driver transmits data when CTS is asserted. The CTS<br />
state is controlled externally by a DCE. The user program has absolute control of the RTS state. The CD<br />
is set asserted internally. The device driver doesn’t assert or de-assert the RTS.<br />
3 Auto-RTS Flow Control Mode: The CTS and CD are set asserted internally. The serial device driver<br />
receives and transmits data at all times. Upon a write command, the serial device driver asserts RTS to<br />
start data transmission, and de-asserts RTS when data transmission is completed. If the user program<br />
asserts the RTS, the RTS remains to be on until user program de-asserts RTS. If user program de-asserts<br />
RTS be<strong>for</strong>e the transmitting buffer is empty, the driver holds RTS on until the transmitting buffer is<br />
empty. Parameters related to delays of the RTS turn-off after last character are user configurable.<br />
Naztec <strong>NTCIP</strong> <strong>Based</strong> NEMA <strong>TS2</strong> and <strong>2070</strong> Controller <strong>Manual</strong> – July 2009 Page 10-109
4 Fully Automatic Flow Control Mode: The serial device driver receives data when CD is asserted. Upon<br />
a write command, the serial device driver asserts RTS and wait <strong>for</strong> CTS, starts data transmission when<br />
CTS is asserted, and de-asserts RTS when data transmission is completed. Parameters related to delays of<br />
RTS turn-off after last character are user configurable. If user program asserts the RTS, RTS remains to<br />
be on until user program de-asserts RTS. If user program de-asserts RTS be<strong>for</strong>e the transmitting buffer is<br />
empty, the driver holds RTS on until the transmitting buffer is empty.<br />
5 Dynamic Flow Control Mode: The Serial device driver maintains a transmit buffer and a receive buffer<br />
with fixed sizes, controls the state of RTS and monitors the state of CTS. The transmission and reception<br />
of data are managed automatically by the serial device driver. The serial device driver transmits data when<br />
CTS is asserted. The serial device driver asserts RTS when its receiving buffer is filled below certain level<br />
(low watermark), and de-asserts RTS when its receiving buffer is filled above certain level (high<br />
watermark).<br />
6 Naztec Enhanced Flow Control Mode: This is the recommended flow control mode <strong>for</strong> all RS-232<br />
applications using the <strong>2070</strong>. This mode combines the features of modes 0 and 2 and provides a hardware<br />
RTS/CTS handshake with any device connected to the serial port. However, request-to-send and clear-tosend<br />
are controlled directly from the Naztec control program rather than through the OS-9 operating<br />
system. This method allows the Naztec control program to communicate with some devices that cannot<br />
be interfaced through OS-9.<br />
FCM definitions above were taken from Section 9.2.7.2.5, CALTRANS TEES Specification dated November 19, 1999<br />
10.6 [v61] Transfer Data Utility (MM->6->3)<br />
Menu item MM->6->3 is labeled Txfer Data (Transfer Data) in the <strong>TS2</strong> and Reserved in the <strong>2070</strong>. Neither menu item is<br />
implemented, but both are reserved <strong>for</strong> a utility that was provided under TS1 to allow data to be copied between controllers<br />
through their serial ports. Portable computers and palm pilots have made this TS1 feature obsolete.<br />
10.7 [v61][v65] Request Download (MM->6->4)<br />
The Request Download screen allows an operator in the field to request a download of the permanent file in the StreetWise<br />
database by selecting LOCAL from the menu shown in the menu to the right. In version 61 you can also select TIME to get<br />
the time and date downloaded from the central.<br />
10.8 [v61] IP Setup (<strong>TS2</strong> Ethernet Port Option) (MM->6->5)<br />
The IP Setup menu configures the two IP (Internet<br />
Protocol) ports <strong>for</strong> the version 61 controller. The IP<br />
interface PC board must be installed properly with the<br />
switch on this board set to the ON position. This<br />
enables the external RJ45 connector on the front of<br />
the controller unit (this is the connector labeled<br />
“Ethernet”). In addition, there must not be an upload-download cable installed in the System-Up port because jumpered<br />
pins 24 and 25 on this cable disable the <strong>TS2</strong> Ethernet interface. Whenever the Ethernet interface is enabled, the System Up<br />
port is disabled. Whenever the System Up port is enabled, the Ethernet interface is disabled.<br />
To enable Ethernet support, you must program the communication General Parameters under menu MM->6->1. The<br />
controller Station ID must be set to the controller address and the System port must be set to <strong>NTCIP</strong> to enable the Ethernet<br />
interface. Then, set the IP Enable option to ON under menu MM->6->5 (shown below). You must also provide separate<br />
IP addresses (Addr) and Mask settings <strong>for</strong> the Device (local controller) and Host (central system). The Bcast (Broadcast)<br />
address and GtWay (Gateway) address settings are optional, but may be required <strong>for</strong> your network configuration. Ask your<br />
network administrator or the one who configured your network to explain how these additional settings are used if you need<br />
additional in<strong>for</strong>mation.<br />
Anytime you change the IP settings from menu MM->6->5, you should toggle<br />
IP Enable OFF then ON to cause changes in the IP settings to take effect.<br />
IP parameters are transferred from the entry screen to the IP interface upon power-up and whenever the IP Interface<br />
changes from being disabled to being enabled. The IP interface is enabled only when all of the following are true:<br />
• The IP interface printed circuit board is installed in the unit<br />
• The System port under MM->6->1 is set to <strong>NTCIP</strong> mode<br />
• There is no connection to the System-Up serial port on the unit<br />
• The IP Enable parameter is set to ON.<br />
Section 9.11 provides a basic test procedure to check connectivity <strong>for</strong> a controller Ethernet interface.<br />
Naztec <strong>NTCIP</strong> <strong>Based</strong> NEMA <strong>TS2</strong> and <strong>2070</strong> Controller <strong>Manual</strong> – July 2009 Page 10-110
10.9 [v60][v65] <strong>2070</strong> IP Setup ( MM->6->5)<br />
The IP Setup menu configures the two IP (Internet Protocol) ports<br />
implemented through the controller’s Ethernet interface (<strong>2070</strong>-1B<br />
CPU Module). The IP settings are used to identify a <strong>2070</strong><br />
residing on a TCP/IP network like the Station ID is used to<br />
identify a controller residing on a serial data link<br />
The IP Address and Mask must be configured correctly <strong>for</strong> the local network. IP 1 is assigned to the local controller. IP 2<br />
(optional) if a future OS-9 address which is currently not required <strong>for</strong> system communication. The Broadcast and Gateway<br />
addresses can usually be set to 0.0.0.0 unless subnet addressing or routing is called <strong>for</strong>. Changes to IP Setup take effect<br />
when the user leaves menu MM->6->5.<br />
[v61] Version 61.x controllers have a parameter called Reset Time. This parameter can be set from 0-255 seconds with a<br />
default setting of 5 seconds. This parameter is useful if the Ethernet port “locks up”. The port will be reset if the controller<br />
drops central communications in the time-frame that the user programs<br />
10.10 [v60][v65] <strong>2070</strong> Binding (MM->6->6)<br />
The Binding menu associates the physical hardware ports of the <strong>2070</strong><br />
controller with the logical ports assigned through software. Please<br />
refer to section 14.4 if you are not familiar with the <strong>2070</strong> I/O modules.<br />
For most applications, “Software Ports” SP1 and SP2 correspond with<br />
the 9-pin serial connectors, C21S and C22S on the <strong>2070</strong>-7A card.<br />
Recall from the table in section 9.5 that the <strong>2070</strong>-7A card must reside<br />
in slot A2 to support these two ports.<br />
The FIO 20 interface supports the ATC cabinet and the <strong>2070</strong>N<br />
expansion chassis. This interface requires that “Software Port” SP5<br />
correspond with the FIO 20 interface. The hardware connector <strong>for</strong><br />
FIO 20 is identified as the C12S connector on the <strong>2070</strong>-2A and <strong>2070</strong>-<br />
2B Field I/O Modules.<br />
The FIO 20 interface must also be assigned to SP5 to interface the<br />
Naztec Test Box with the C12S connector. The Naztec Test Box<br />
essentially emulates the operation of the <strong>2070</strong>N expansion chassis.<br />
10.11 [v60][v61][v65] Basic IP Interface Connectivity Test<br />
The following guidelines should be used to test basic connectivity between a <strong>TS2</strong> or <strong>2070</strong> controller and a laptop computer.<br />
Be sure to set the <strong>TS2</strong> communications protocol under General Parameters (MM->6->1) to <strong>NTCIP</strong>. The communication<br />
protocol <strong>for</strong> the <strong>2070</strong> is <strong>NTCIP</strong> by default.<br />
The network should be properly configured by your network administrator. As a minimum, the controller settings under<br />
MM->6->5 must provide the local IP address and mask settings <strong>for</strong> the network (typically the IP 1 address <strong>for</strong> the <strong>2070</strong>).<br />
These settings are discussed in section 9.8 <strong>for</strong> the <strong>TS2</strong> Ethernet option and 9.9 <strong>for</strong> the <strong>2070</strong> controller.<br />
The first three numbers of the IP address must be shared by all devices on the network (including the central computer).<br />
The last 3-digit number must be unique <strong>for</strong> all devices on the network (similar to the unique Station ID used with serial<br />
communications). For example, the central computer might be assigned an IP address xxx.yyy.zzz.001 and the local<br />
controller xxx.yyy.zzz.002. Every device on this network would share the same “network” address xxx.yyy.zzz. However,<br />
each device, including the central computer (.001) would be required to have a unique address on the network.<br />
You can test connectivity using a “cross-over” Ethernet cable to interface the controller directly with the Ethernet port of<br />
your computer. A “cross-over” cable is similar to a null-modem cable that switches transmit and receive pairs between two<br />
RS-232 devices. You cannot directly connect the controller to a computer using the same RJ45 Ethernet cable that you use<br />
to connect to your local computer network. Your computer must also be configured with a “static” IP address instead of the<br />
“dynamic” address typically used with LAN and dial-up Internet connections. Changing your network settings is not<br />
advised unless you know what you are doing because this will disrupt your LAN and Internet connection.<br />
For this test, assume that the computer is configured with “fixed” IP address 192.168.001 and the controller is configured<br />
with 192.168.100.002 under MM->6->5. The network interface of the computer and local controller share the same Mask<br />
Naztec <strong>NTCIP</strong> <strong>Based</strong> NEMA <strong>TS2</strong> and <strong>2070</strong> Controller <strong>Manual</strong> – July 2009 Page 10-111
address 255.255.255.0. Basic connectivity of the Ethernet circuit may be confirmed by running a command line program,<br />
called Ping from Windows. Select Run from the Start Menu, enter “command” and press OK. This launches a command<br />
window where you can execute the ping command. Enter the command “ping 192.168.100.002” and press return. If the<br />
Ethernet circuit is functional, you should see a several replies from the controller each time the computer “pings” it’s local<br />
IP address. If the controller does not respond, you will see a timeout message indicating that the Ethernet interface is not<br />
connected. If this basic “ping test” passes from the StreetWise communication server, but you cannot communicate with<br />
the same controller in StreetWise, then you have an error in your com server software configuration.<br />
10.12 <strong>TS2</strong> Com Status<br />
The <strong>TS2</strong> Communication Status Screen monitors the activity of<br />
each communication port and shows transmitting (TX) or<br />
receiving (Rx) bytes.<br />
10.13 <strong>2070</strong> Com Status<br />
The <strong>TS2</strong> Communication Status Screen monitors the activity of<br />
each communication port and shows transmitting (TX) or<br />
receiving (Rx) bytes as well as an indication of com activity.<br />
10.14 <strong>TS2</strong> GPS Interface<br />
Naztec <strong>TS2</strong> controllers can be used to update the time sync from GPS receivers such at the Garmin GPS 16 (shown below).<br />
The controller date is not automatically updated, just the time sync. There<strong>for</strong>e, you must manually adjust the current date<br />
from the MM->4->1 screen or through StreetWise system.<br />
The following steps are required to setup the GPS interface.<br />
see: http://www.garmin.com/products/gps16/<br />
1) Set the com port mode (MM->6->1) to "GPS" <strong>for</strong> the com port interfaced to the GPS. Typically, you will interface the<br />
GPS with the PC/Print port and dedicate the System-Up port <strong>for</strong> system access using the DEFAULT setting. In<br />
addition, a 981 Master controller has an additional port (Aux 232) that can be used to interface the GPS<br />
For Baltimore <strong>TS2</strong> version, the 'PC/Print' port mode should be set to "GPS".<br />
2) Set the baud rate of GPS com port to "4800" under MM->6->2.<br />
For the Baltimore <strong>TS2</strong> version, the key sequence would be MM-6-2-2 to select the port parameters <strong>for</strong> the 'PC/Print<br />
Port". On this screen the baud rate may be toggled to select<br />
"4800".<br />
3) Select the GMT offset (MM-4-6) <strong>for</strong> you location based upon your<br />
time zone (EST = -5, CST = -6, PST = -8). Be sure to select the<br />
proper +/- sign.<br />
For Baltimore, the 'GMT Offset should be set to "-5”<br />
4) Resync the GPS<br />
The controller will automatically resync the time from the GPS<br />
twice per hour at approximately 13 and 43 minutes past the hour,<br />
every hour. The MM->4->9->3 screen provides the last date/time<br />
stamp when the controller attempted to communicate with the GPS device. The status also shows the time returned by<br />
the GPS and a text message indicating if the attempt was successful. The menu also allows the used to manually <strong>for</strong>ce<br />
the controller to resync the GPS. Toggle the Resync setting to "YES" and press under MM->4->9->3.<br />
Naztec <strong>NTCIP</strong> <strong>Based</strong> NEMA <strong>TS2</strong> and <strong>2070</strong> Controller <strong>Manual</strong> – July 2009 Page 10-112
The following status messages are displayed after the controller attempts to communicate with the GPS.<br />
"OK Reply" - the received message was correct and implemented<br />
"No Reply" - the controller did not receive a reply from the GPS module<br />
"No Signal" - the GPS module has not acquired a signal from the satellite<br />
"Bad Reply" - the receive message had a data error<br />
10.15 <strong>2070</strong> GPS Interface<br />
The GPS interface <strong>for</strong> the <strong>2070</strong> is identical to the operation <strong>for</strong> the <strong>TS2</strong><br />
discussed in the last section with the exception of the com port settings.<br />
The <strong>2070</strong> provides 4 hardware serial ports (SP1, SP2, SP3 and SP8)<br />
which may be assigned to the 4 logical ports (ASYNCH 1-4) under the<br />
port binding menu. The default programming assumes that SP1 and<br />
SP2 located on the <strong>2070</strong>-7A card are assigned to ASYNCH1 and<br />
ASYNCH2 respectively. SP8 is typically assigned to ASYNCH3 and<br />
dedicated <strong>for</strong> the internal hardware of the controller.<br />
In the example to the right, SP1 on a <strong>2070</strong>-7A card is assigned to the<br />
system and SP2 is assigned to the GPS unit. The baud rate of SP2 must<br />
be set to 4800 under MM->6->2 as shown below.<br />
The configuration of the GPS device <strong>for</strong> the <strong>2070</strong> is identical with the<br />
<strong>TS2</strong> discussed in the last section. You must set the GMT offset under<br />
Time Base Parameters (MM->4-6) <strong>for</strong> your time zone (EST = -5, CST<br />
= -6, PST = -8). Be sure to select the proper +/- sign. Use the MM->4-<br />
>9->3 status screen to display the last date/time stamp the controller<br />
attempted a resync with the GPS device. The MM->4->9->3 screen can<br />
also be used to manually resync the GPS unit.<br />
NOTE: If a function port is not assigned, then the GPS status screen at MM->4->9->3 displays "NO PORT" at all times.<br />
Naztec <strong>NTCIP</strong> <strong>Based</strong> NEMA <strong>TS2</strong> and <strong>2070</strong> Controller <strong>Manual</strong> – July 2009 Page 10-113
11 SDLC Programming<br />
Channel and SDLC features are programmed from MM->1->3. Refer<br />
to Chapter 2 of this manual <strong>for</strong> an overview of the differences<br />
between <strong>TS2</strong> and <strong>2070</strong> SDLC programming.<br />
The SDLC interface is a high-speed (153.6 Kbps) serial data bus that<br />
transmits Type-1 messages between the SDLC devices between the<br />
controller, terminal facility (or back-panel), detector rack and MMU. The BIU (Bus Interface Unit) is the primary SDLC<br />
device responsible <strong>for</strong> transmitting and receiving standard messages defined in the NEMA <strong>TS2</strong> specification. Any BIU<br />
enabled in the controller will immediately begin communicating through the SDLC interface as long as the Run-Timer is<br />
ON.<br />
11.1.1 Activating <strong>TS2</strong> Devices (MM->1->3->7) [v60][v61], (MM->1->3->1) [v65]<br />
Individual BIU devices are enabled by selecting an “X” under the<br />
device on this screen. The first eight BIUs support the terminal<br />
facility (cabinet) followed by eight BIUs <strong>for</strong> detection and one BIU <strong>for</strong><br />
the MMU. NEMA only defines the first four terminal facility BIUs (5-<br />
8 are reserved <strong>for</strong> future expansion). Peer-to-peer BIU functions are<br />
also reserved <strong>for</strong> future implementation. The Diag selection is<br />
reserved <strong>for</strong> manufacturer’s testing purposes.<br />
[v50][v61] The Msg 0 Enable parameter was added to provide compatibility with Autoscope vehicle detection. Turn this<br />
parameter ON if Autoscope is used in a terminal facility without a SDLC interface. This causes the controller to generate<br />
Msg 0 frames required by Autoscope if an MMU is not present in the cabinet.<br />
In later versions of v61, SDLC Msg 0 will include any remapped MMU-to-Controller channels. This allows signal output<br />
channels in the cabinet to be wired differently <strong>for</strong> the controller and the MMU, and <strong>for</strong> the field check feature to still be<br />
used.<br />
11.1.2 [v65]SDLC Parameters (MM->1->3->2)<br />
The following SDLC parameters modify the default operation of the<br />
SDLC interface <strong>for</strong> the <strong>TS2</strong> and <strong>2070</strong> controller versions.<br />
Alt T&F Biu Map<br />
The default terminal facility map provides 16 channel outputs. The Alt T&F Biu Map parameter may be set to 24 OUT<br />
CHAN to support a custom cabinet with up to 24 output channels. Setting this parameter to Single TF BIU provides 8<br />
output channels with a reduced cabinet footprint.<br />
SDLC Retry Time<br />
SDLC Retry Time (0- 255 minutes) is a countdown timer initiated by a critical SDLC fault that determines how the<br />
controller recovers from SDLC communication errors.<br />
1) If the SDLC Retry Time is zero, a critical SDLC fault is latched by the controller until AC power is cycled or<br />
the fault is cleared manually by an operator using keystrokes MM->8->7.<br />
2) If the SDLC Retry Time is not zero, a critical SDLC fault holds the controller in the fault mode until proper<br />
SDLC communication is restored. Once SDLC communication is restored, the SDLC Retry Time continues<br />
to count down and test successive faults as shown below. The first two SDLC communication faults allow the<br />
controller to recover once the communications is restored. However, if a third fault occurs be<strong>for</strong>e the SDLC<br />
Retry Time expires, a critical SDLC fault is latched by the controller until AC power is cycled or the fault is<br />
cleared manually by an operator using keystrokes MM->8->7.<br />
You can test this feature by connecting a <strong>TS2</strong> Test Box to the unitSet<br />
the SDLC Retry Time to 1 minute (MM->1->2->1). Now, manually<br />
disconnect the SDLC interface cable on the front of the unit and note<br />
that the controller registers a critical SDLC fault. If you re-insert the<br />
SDLC cable be<strong>for</strong>e the SDLC Retry Time expires, the SDLC<br />
communication will be restored. However, if you wait longer than the<br />
SDLC Retry Time or create more than two faults be<strong>for</strong>e the timer has<br />
expired, the controller will not recover and you will need to reset AC<br />
power or manually clear the fault from MM->8->7.<br />
Naztec <strong>NTCIP</strong> <strong>Based</strong> NEMA <strong>TS2</strong> and <strong>2070</strong> Controller <strong>Manual</strong> – July 2009 Page 11-114
Changing the SDLC Retry Time to 1 minute helps troubleshoot intermittent SDLC problems to verify a marginal BIU in the<br />
system. Naztec has seen cases where a BIU from a different manufacturer creates random SDLC errors that the controller<br />
traps properly as required by NEMA. This problem can sometimes be corrected by setting SDLC Retry Time to 1; however,<br />
Naztec recommends that SDLC Retry Time should be set to zero as a default to trap all SDLC errors at the first failure.<br />
<strong>TS2</strong> Detector Faults<br />
Set <strong>TS2</strong> Detector Faults to ON to allow faults reported by detector BIUs to generate detector events. Set this entry to OFF<br />
to prevent BIU generated detector faults from recording events. This parameter is useful in cases where a <strong>TS2</strong> detector rack<br />
is not fully populated with loop detectors. In such cases, this parameter may be set to OFF, thereby preventing numerous<br />
unwanted detector events from being reported upon power-up.<br />
11.1.3 [v60][v61][v65] MMU Permissives (MM->1->3->4)<br />
MMU Permissives are only required in a <strong>TS2</strong> type-1 configuration.<br />
When an MMU (Malfunction Management Unit) is present, the values<br />
programmed in this table must reflect the jumper settings on the MMU<br />
programming card or the controller will declare an MMU Permissive<br />
fault and go to flash.<br />
The screen is laid out to <strong>for</strong>m a diagonal matrix with channels 1-16<br />
assigned to the rows and columns as shown to the right. This<br />
configuration is very similar to the layout of the jumper settings of<br />
MMU programming card. Compatible (or permissive) channels are indicated by a ‘X’ at the intersection of each channel<br />
number within the matrix. Compatible channels may display simultaneous green, yellow and/or walk indications without<br />
generating an MMU conflict fault.<br />
11.1.4 [v60][v61][v65]Channel MMU Map (MM->1->3->5)<br />
The MMU Map entries are used to map each of the 16 MMU channels<br />
to the 24 output channels provided in the <strong>TS2</strong> terminal facility<br />
(cabinet). The first row correlates to MMU channels 1-8, and the<br />
second row correlates to MMU channels 9-16. A ‘0’ entry defaults to<br />
the standard one to one mapping.<br />
11.1.5 [v61] Perm Diag (MM->1->3->6)<br />
If the controller gets a MMU permissive fault as displayed on the<br />
controller overview screen, it indicates that the programmed<br />
permissives in the controller do not match the actual permissives that<br />
are in the MMU. This screen will indicate which channels do not<br />
match. In addition, some users use this screen to automatically<br />
program the permissives under MM->1->3->4 by going to the<br />
bottom of this screen and entering YES under the selection that asks<br />
Fix Permissives.<br />
11.1.6 SDLC Status Display (MM->1->3->8) [v60][v61] (MM->1->3->7) [v65]<br />
The SDLC Status Display summarizes random frame errors <strong>for</strong><br />
each BIU enabled under MM->1->3 and reports the status of each<br />
device. This display is useful to isolate a BIU failure in a <strong>TS2</strong> or<br />
<strong>2070</strong> type-1 cabinet facility after checking the Overview Status<br />
Screen discussed in Chapter 3.<br />
11.1.7 Clearing Critical SDLC Faults (MM->8->7)<br />
“Critical SDLC Faults” isolate errors defined by the NEMA <strong>TS2</strong><br />
specification. A controller fault is generated when communication is<br />
lost to an SDLC device (BIU) defined in MM->1->3->7. “Critical<br />
SDLC Faults” are cleared from menu MM->8->7 by pressing the<br />
ENTR key.<br />
Naztec <strong>NTCIP</strong> <strong>Based</strong> NEMA <strong>TS2</strong> and <strong>2070</strong> Controller <strong>Manual</strong> – July 2009 Page 11-115
12 Channel and I/O Programming<br />
12.1 Channel Assignments (MM->1->3->1)[v50][v61], (MM->1->8->1)[v65]<br />
A Channel is an output driver (or load switch) used to switch AC power to a signal display. A channel is simply an output<br />
path composed of three signals - red, yellow, and green. All of the controller's main outputs (vehicle phases, overlaps,<br />
pedestrian outputs) consist of these three signals. Channel assignment allows these outputs to be applied to any of the<br />
available load switch channels. There<strong>for</strong>e, a particular phase output or overlap output is not dedicated to a fixed channel as<br />
in the TS1 specification. This provides more flexibility to the assignment of hardware outputs.<br />
Output mapping is accomplished by selecting a source number (1-16 <strong>for</strong> phase or overlap 1-16) followed by the source type<br />
(OLP, VEH, PED). The associated output channel will then display indications based upon the state of the assigned source.<br />
The default channel assignments shown below are defaults programmed <strong>for</strong> STD8 operation <strong>for</strong> a 16 channel cabinet<br />
MM->1->8->1: Channel Assignments <strong>for</strong> Channels 1-8 (left menu) and Channels 9-16 (right menu)<br />
12.1.1 Ø/Olp# and Type<br />
The channel source (Ø/Olp#) directs one of the 16 phase or overlap outputs to each load switch channel. The Channel Type<br />
(VEH, PED or OLP) programs the channel as either a vehicle, pedestrian or overlap output. A channel may be programmed<br />
as inactive (dark) by entering a zero value <strong>for</strong> the channel source ( Ø/Olp#).<br />
Map Aux Outputs to Channel Outputs [v61]<br />
In version 61.3n or later, Naztec has enhanced the IO Mapping by allowing the user to map Auxiliary Outputs to Channel<br />
Outputs. It is enabled by selecting a “OTHER” on the Channel Type parameter. The Phase/Overlap # on the channel<br />
assignment screen selects the group of auxiliary outputs are mapped to the RED/YELLOW/GREEN of that channel. The<br />
mapping procedure is shown below:<br />
a) Set Channel Type to “OTH” (Other).<br />
b) Set the Phs/Olap # to 1, 2 or 3 to map aux outputs as follows:<br />
Phs/Olap#<br />
Maps Aux Outs to:<br />
1 Aux Outputs 1,2,3 to GRN, YEL, RED of the channel<br />
2 Aux Outputs 4,5,6 to GRN, YEL, RED of the channel<br />
3 Aux Outputs 7,8,9 to GRN, YEL, RED of the channel<br />
Any other value of the Phs/Olap# is equivalent to a zero entry and turns all three outputs of the channel off.<br />
12.1.2 Flash<br />
Automatic-Flash may be programmed from the channel settings shown in the menus above or the Phase/Overlap flash<br />
settings under MM->1->4->2. The channel Flash settings above only apply if the Flash Mode (section 4.9.1) is set to<br />
CHAN. The channel Flash settings may be set to RED or YEL to control the flashing displays when the Flash Mode is set<br />
to CHAN and Automatic Flash is driven by the channel settings.<br />
Naztec <strong>NTCIP</strong> <strong>Based</strong> NEMA <strong>TS2</strong> and <strong>2070</strong> Controller <strong>Manual</strong> – July 2009 Page 12-116
12.1.3 Alt Hz<br />
The Alternate Hertz entries assign the channel flash outputs to either the first half or second half of the one second flash<br />
duty-cycle. If Alternate Hertz is not enabled, the flash indication will be illuminated during the first half second of the flash<br />
cycle. If Alternate Hertz is enabled, the flash indication will be displayed during the second half of the one second flash<br />
duty cycle. If Alternate Hertz is enabled <strong>for</strong> the yellow flash channels and disabled <strong>for</strong> the red flash channels, this<br />
programming will create a “bobbing” effect that alternates between flashing yellow and flashing red every half second.<br />
12.1.4 Dim Parameters<br />
Dimming reduces power consumption of incandescent signal displays by trimming the AC current wave. Dimming should<br />
not be used with LED indications because cycling the LED on an off greatly reduces the life of the LED indication.<br />
Replacing incandescent lamps with LED’s is a more effective method of reducing power consumption.<br />
Dimming is activated by an external input typically grounded by a photocell device or a special function output. The menu<br />
to the right allows each phase to be dimmed independently and controls which half of the AC wave dimming is applied.<br />
Dimming should be assigned to concurrent phases in each ring to equalize the loading of the AC source and balance both<br />
halves of the AC cycle. This is typically accomplished by assigning the phases in one ring to the “+” side and the phases in<br />
the other ring to the “-“ side of the AC cycle.<br />
12.1.5 Flashing Green Clearance [v61][v65]<br />
In some countries, like Mexico, their phase sequence is GREEN, FLASHING GREEN, YELLOW, RED. The pedestrian<br />
sequence in these countries is WALK, FLASHING WALK, DON’T WALK. Due to this, they have an extra clearance<br />
interval in the phase, and they flash the “walk” instead of the “don’t walk” <strong>for</strong> the pedestrian. NEMA controller users must<br />
program each “FlshGrn” time on the channel mapping screen (MM->1->3->1) under the particular channel that you want<br />
this time applied to. Apogee Users will program the GrnFlash parameter under the Times+ screen at MM->1->1->7.<br />
The following describes the operation of the “Flash Green” parameter as it applies to each channel type.<br />
Phase Operation and Programming<br />
The ‘yellow clearance’ time must include time <strong>for</strong> both the ‘yellow’ and the ‘flashing green’ interval. If you want 10<br />
seconds of ‘flashing green’ and 5 seconds of ‘yellow’, then you must enter 15.0 seconds <strong>for</strong> the ‘yellow clearance’ in the<br />
phase times (MM111), and then enter the 10.0 seconds that you want the channel it to flash on the channel mapping<br />
screen under ‘FlshGrn’.<br />
In other words, the <strong>for</strong>mula that determines the yellow clearance time is:<br />
which means…<br />
“yel clr” = yellow interval time + green flash interval time<br />
yellow interval time = yellow clearance time – green flash time<br />
As you can see, it is possible to enter a ‘green flash time’ that would reduce the ‘yellow interval time’ down to zero, or even<br />
negative. If the ‘3 second yellow disable’ is not active, then the ‘green flash time’ will be limited such that it can not<br />
reduce the ‘yellow interval’ to less than three seconds.<br />
If the ‘disable 3 second yellow’ is active, then the yellow interval may be reduced to zero.<br />
In no case will entering a green flash time larger than the yellow clearance time allow the green flashing interval to exceed<br />
the yellow clearance time.<br />
In summary, the ‘yellow clearance’ entered in the phase times is the clearance interval regardless of other values. The<br />
‘green flash time’ simply designates what portion of the clearance time will be used to flash green.<br />
Overlap Operation and Programming<br />
To use Green Flash with overlaps, set the Parent Phs Clrncs parameter on the General Overlap Parameters screen to OFF.<br />
This will cause the controller will use the yellow clearance time programmed <strong>for</strong> the overlap Additionally, the overlap must<br />
have a yellow time entered in the overlap parameters that will be used as the clearance interval in the same manner the<br />
yellow clearance time is used with the phases. All of the same rules apply to the yellow clearance interval of an overlap as a<br />
phase in regards to ‘3 second yellow disable’.<br />
Naztec <strong>NTCIP</strong> <strong>Based</strong> NEMA <strong>TS2</strong> and <strong>2070</strong> Controller <strong>Manual</strong> – July 2009 Page 12-117
Pedestrian Operation:<br />
The green flash time acts as a flag. If there is a green flash time entered <strong>for</strong> a channel that is providing a PED output, then<br />
that output will flash walk, as opposed to flashing don’t walk during the pedestrian clearance. The amount of time has no<br />
effect on flashing walk operation. Any amount of time will cause this operation.<br />
12.2 Channel Parameters (MM->1->3->3) [v50][v61], (MM->1->8->3)[v60][v65]<br />
The Channel I/O Parameters allow the user to customize I/O assignments <strong>for</strong> <strong>TS2</strong>, <strong>2070</strong> and <strong>2070</strong>N controllers.<br />
Channel 17-24 Mapping<br />
NEMA does not define more than 16 output channels, so the DEFAULT setting defines channels 17-24. These additional<br />
outputs are provided in a Type-1 terminal facility using additional BIU devices to extend the channel outputs.<br />
D-connector Mapping<br />
D-connector Mapping defines the inputs and outputs of the D-connector <strong>for</strong> one of the following cabinet configurations.<br />
Chapter 14 lists the pin-out assignments <strong>for</strong> the D-connector <strong>for</strong> each of these settings.<br />
NONE no D-connector inputs or outputs (required <strong>for</strong> <strong>TS2</strong> Type-2 I/O Modes 0, 1, 2 or 6)<br />
If <strong>TS2</strong> I/O Mode is not Mode 0, the D-connector Mapping MUST be set to NONE.<br />
TX2-V14 pin assignment compatible with Naztec Model 900-TX2CL, version 14<br />
DIAMOND pin assignment compatible with Naztec Model 900-DIA6CL, version 6<br />
LIGHT RAIL pin assignment compatible with the light-rail definitions defined in Chapter 12<br />
12.2.1 [v60][v65] Chan+ Flash Settings (MM->1->8->4)<br />
The Chan+ settings allow the user to flash any combination of outputs<br />
<strong>for</strong> channels 1-24. In addition, the user can turn off flashing red<br />
outputs <strong>for</strong> a particular phase during all preemptions or <strong>for</strong> any overlap<br />
number.<br />
Naztec <strong>NTCIP</strong> <strong>Based</strong> NEMA <strong>TS2</strong> and <strong>2070</strong> Controller <strong>Manual</strong> – July 2009 Page 12-118
12.3 IO Parameters<br />
The IO Parameters are different <strong>for</strong> the <strong>TS2</strong> and <strong>2070</strong> versions.<br />
The <strong>TS2</strong> IO Parameters are also found at MM->1->3->3 while the<br />
<strong>2070</strong> IO Parameters are found at MM->1->8->6. The <strong>TS2</strong> IO<br />
Parameter allows the user to customize the IO Modes defined by<br />
NEMA <strong>for</strong> the ABC connectors and custom modes supported in<br />
the controller firmware. The <strong>2070</strong> IO Parameter supports custom<br />
modes <strong>for</strong> the C1 connector. In addition, the <strong>2070</strong> provide a<br />
USER mode that allows the user to redefine any input or output<br />
provided on the C1 connector.<br />
[v50][v61] <strong>TS2</strong> IO Mode<br />
The <strong>TS2</strong> IO Modes are defined by NEMA as follows:<br />
• AUTO uses the NEMA IO Mode selected by the NEMA IO Mode inputs A, B, and C on connector A to select the<br />
appropriate <strong>TS2</strong> IO mapping on NEMA controller and <strong>2070</strong> controller with NEMA interface<br />
• Mode 0 - Mode 2 correspond with the <strong>TS2</strong> IO Modes defined in <strong>TS2</strong>-1992<br />
• Modes 3-5 are reserved by NEMA <strong>for</strong> future use<br />
• Modes 6-8 are reserved <strong>for</strong> the manufacturer's use<br />
• USER mode is required to redefine the IO pins in the <strong>2070</strong> and <strong>2070</strong>N version 50 software<br />
• NONE - this is a <strong>2070</strong> specific mode that disable the IO mapping (Note that these I/O Modes <strong>for</strong> the <strong>2070</strong> are<br />
programmed under MM->1->3->6->3<br />
Note: When the <strong>TS2</strong> IO Mode is not Mode 0, the D-connector mapping (section 12.4) MUST be set to NONE.<br />
[v60][v65] C1-C11-ABC IO Mode (<strong>2070</strong> Only)<br />
This setting remaps the C1-C11 connector of the <strong>2070</strong> controller and the A-B-C connectors of the <strong>2070</strong>N controller.<br />
NONE<br />
AUTO<br />
Mode 0<br />
Mode 1<br />
Mode 2<br />
Mode 3-7<br />
USER<br />
[v61] T&F BIU Map<br />
Disables the I/O <strong>for</strong> the <strong>2070</strong> and <strong>2070</strong>N controllers<br />
Applies the I/O standard published in the CALTRANS TEES Specification<br />
Reserved<br />
Applies the New York DOT I/O mode settings<br />
Applies the Dade County, Florida I/O mode settings<br />
Reserved<br />
Applies USER I/O mapping programmed through MM->1->3->6 discussed in the next section.<br />
The Terminal and Facilities BIU inputs and Outputs can be mapped using this parameter. The mapping selections may<br />
include:<br />
DEFAULT, SOLO TF BIU1, 24 OUT CHAN, USER<br />
Please refer to Chapter 14 to see the various BIU mapping. If the user wants to modify this mapping, please program these<br />
changes at MM->1->8->9->1->9 <strong>for</strong> BIU inputs and MM->1->8->9->2->9 <strong>for</strong> BIU outputs.<br />
[v61] ALT T&F BIU Map<br />
Version 61.3n and later has modified the above Mapping to accommodate fully mappable I/O <strong>for</strong> BIU’s 1 and 2. The<br />
mapping selections include:<br />
NONE, SINGLE TF BIU, 24 OUT CHAN, IOMAP BIU 1&2<br />
Please refer to Chapter 14 to see the various BIU mapping. If the user wants to modify this mapping, please program these<br />
changes at MM->1->3->9->2 <strong>for</strong> BIU’s 1 and 2.<br />
Naztec <strong>NTCIP</strong> <strong>Based</strong> NEMA <strong>TS2</strong> and <strong>2070</strong> Controller <strong>Manual</strong> – July 2009 Page 12-119
[v61] TOD Dimming Enbl<br />
Set this to “ON” to enable TOD dimming or “OFF” to disable TOD dimming. It enables dimming on outputs. This must be<br />
active with the dimming input <strong>for</strong> dimming to be active.<br />
[v61][v65] Invert Rail Inputs<br />
A preemption input normally is open and when a contact closure is made, that input is recognized by the controller. Some<br />
railroads use a normally closed input and when it is open, that indicates that a railroad is preempting the controller.<br />
Agencies in the past had to create electrical relays to accommodate these rail preemption inputs. Setting this parameter to<br />
“ON” will eliminate the need <strong>for</strong> that additional cabinet relay wiring.<br />
[v61] Prmpt/Ext Coor Out<br />
This mode creates 7 new preempt status outputs. These outputs provide detailed status of the preempt interval and phase<br />
clearance statuses <strong>for</strong> phases moving to the next interval. In particular:<br />
1) The outputs are multiplexed onto <strong>TS2</strong> D connector output pins<br />
2) The selection 820A was added to the Ext/Preempt output paramter on the Channel Parameters screen. When<br />
selected, the Preempt Interval status is output on pins normally assigned to Special Function Outputs 5-8, two<br />
offset lines and an unassigned output.<br />
3) UCF Flash status is NOT ACTIVE when automatic flash, preempt flash, or startup flash is active.<br />
NOTE: When preempts are linked, the status operates as though it were two preempts that are linked, not as one preempt<br />
with multiple track clearance intervals.<br />
Please Refer to the 820-980 D-conn table <strong>for</strong> the assignment of these status outputs<br />
[v61] Prmpt In, Map HP->LP<br />
The valid selections are “ON” or “OFF”. When set to ON, this parameter activates Low-Priority preemptions (7-10) when<br />
the high priority inputs (3-6) are active with a continuous low input. This is used to test low priority preemption operation<br />
without the need <strong>for</strong> a pulsed input on the Preempt 3-6 input lines.<br />
[v61] EVP Ped Confirm<br />
This parameter is used <strong>for</strong> preemption confirmation lights. The selections are as follows:<br />
OFF – No preemption confirmation lights are needed<br />
ON FLASH - The pedestrian clearances outputs (Yellows) are used <strong>for</strong> Preemption confirmations in the following<br />
manner:<br />
a. If the preemption is a rail, then all the ped clear outputs (yellows) flash<br />
b. If the preemption is low priority, then all the ped clear outputs flash<br />
c. If the preemption is high priority, then all the dwell phases and the initial dwell phases <strong>for</strong> the given preempt<br />
will be solid yellow to act as confirmations, while all other ped clear outputs will flash yellow.<br />
ON DARK – This parameter works the same as ON FLASH except that the outputs are dark when they should be<br />
flashing.<br />
a. If the preemption is a rail, then all the ped clear outputs (yellows) are dark<br />
b. If the preemption is low priority, then all the ped clear outputs are dark<br />
c. If the preemption is high priority, then all the dwell phases and the initial dwell phases <strong>for</strong> the given preempt<br />
will be solid yellow to act as confirmations, while all other ped clear outputs will be dark<br />
NOTE: The EVP Ped Confirm outputs may be affected if you set a Ped output to control a Flashing Yellow Arrow overlap<br />
as discussed in the overlap section of Chapter 4.<br />
Naztec <strong>NTCIP</strong> <strong>Based</strong> NEMA <strong>TS2</strong> and <strong>2070</strong> Controller <strong>Manual</strong> – July 2009 Page 12-120
12.4 [v61] <strong>TS2</strong> I/O Mapping, Logic and Color Check (MM->1->3->9)<br />
Version 61.3n and later has added this menu to allow the user to<br />
customize I/O <strong>for</strong> BIU’s 1 and 2, do simple I/O logic as well as<br />
comparing the active channel color outputs to the status as reported by<br />
the MMU.<br />
12.4.1 [v61] <strong>TS2</strong> Programmable I/O Logic (MM->1->3->9->1)<br />
There are ten I/O logic equations supported. These are entered on the I/O<br />
Logic screen that is found at MM->1->3->9->1. Please refer to the <strong>2070</strong><br />
Programmable I/O Logic section in this chapter <strong>for</strong> further details.<br />
12.4.2 [v61] <strong>TS2</strong> Fully Mappable I/O <strong>for</strong> BIU 1 and BIU 2 (MM->1->3->9->2)<br />
The I/O Mapping screen is found by accessing MM->1->3->9->2. It has an input and output column <strong>for</strong> each BIU (BIU 1<br />
and BIU 2). The layout on the screen of the BIU Input, Output and I/O signals is as follows:<br />
Screen Row Input Group Output Group<br />
1-8 Inputs 1-8 Outputs 1-8<br />
9-12 Opto-inputs 1-4 Outputs 9-12<br />
13-15 Not used Outputs 13-15<br />
16-39 I/O 1-24 I/O 1-24<br />
Note that individual I/O lines are assigned as either an input or output, but usually not both at the same time. There<strong>for</strong>e, <strong>for</strong><br />
rows 16-39, there will be an entry in either the input column or output column, but not both.<br />
The sections below provides the dictionary of function codes and the programming <strong>for</strong> default <strong>TS2</strong> I/O assignments.<br />
To Enable the mappable I/O feature, go to the Chan, I/O Parameters screen (MM->1->3->3) and set the Alt T&F BIU Map<br />
to “IOMAP BIU 1 & 2”.<br />
Naztec <strong>NTCIP</strong> <strong>Based</strong> NEMA <strong>TS2</strong> and <strong>2070</strong> Controller <strong>Manual</strong> – July 2009 Page 12-121
[v61] <strong>TS2</strong> IO Map – Input Function Table<br />
Func Input Func Input Func Input Func Input Func Input<br />
0 Unused 50 Veh Call 50 100 Veh Chng 36 150 Ped Omit 6 200 Pre 3 In<br />
1 Veh Call 1 51 Veh Call 51 101 Veh Chng 37 151 Ped Omit 7 201 Pre 4 In<br />
2 Veh Call 2 52 Veh Call 52 102 Veh Chng 38 152 Ped Omit 8 202 Pre 5 In<br />
3 Veh Call 3 53 Veh Call 53 103 Veh Chng 39 153 Ph Omit 1 203 Pre 6 In<br />
4 Veh Call 4 54 Veh Call 54 104 Veh Chng 40 154 Ph Omit 2 204 Pre 7 In<br />
5 Veh Call 5 55 Veh Call 55 105 Veh Chng 41 155 Ph Omit 3 205 Pre 8 In<br />
6 Veh Call 6 56 Veh Call 56 106 Veh Chng 42 156 Ph Omit 4 206 CMU/MMU Flash In<br />
33x Composite Stop<br />
Time<br />
7 Veh Call 7 57 Veh Call 57 107 Veh Chng 43 157 Ph Omit 5 207<br />
8 Veh Call 8 58 Veh Call 58 108 Veh Chng 44 158 Ph Omit 6 208 Local Flash In<br />
9 Veh Call 9 59 Veh Call 59 109 Veh Chng 45 159 Ph Omit 7 209 TBC Online (Input)<br />
10 Veh Call 10 60 Veh Call 60 110 Veh Chng 46 160 Ph Omit 8 210 Dim Enable<br />
11 Veh Call 11 61 Veh Call 61 111 Veh Chng 47 161 R1 Frc Off 211 Auto Flash In<br />
12 Veh Call 12 62 Veh Call 62 112 Veh Chng 48 162 R1 Stop Tim 212 Alt Seq A<br />
13 Veh Call 13 63 Veh Call 63 113 Veh Chng 49 163 R1 Inh Max 213 Alt Seq B<br />
14 Veh Call 14 64 Veh Call 64 114 Veh Chng 50 164 R1 Red Rest 214 Alt Seq C<br />
15 Veh Call 15 65 Veh Chng 1 115 Veh Chng 51 165 R1 PedRecyc 215 Alt Seq D<br />
16 Veh Call 16 66 Veh Chng 2 116 Veh Chng 52 166 R1 Max II 216 Plan A<br />
17 Veh Call 17 67 Veh Chng 3 117 Veh Chng 53 167 R1 OmtRdClr 217 Plan B<br />
18 Veh Call 18 68 Veh Chng 4 118 Veh Chng 54 168 Non-Act I 218 Plan C<br />
19 Veh Call 19 69 Veh Chng 5 119 Veh Chng 55 169 R2 Frc Off 219 Plan D<br />
20 Veh Call 20 70 Veh Chng 6 120 Veh Chng 56 170 R2 Stop Tim 220 Addr Bit 0<br />
21 Veh Call 21 71 Veh Chng 7 121 Veh Chng 57 171 R2 Inh Max 221 Addr Bit 1<br />
22 Veh Call 22 72 Veh Chng 8 122 Veh Chng 58 172 R2 Red Rest 222 Addr Bit 2<br />
23 Veh Call 23 73 Veh Chng 9 123 Veh Chng 59 173 R2 PedRecyc 223 Addr Bit 3<br />
24 Veh Call 24 74 Veh Chng 10 124 Veh Chng 60 174 R2 Max II 224 Addr Bit 4<br />
25 Veh Call 25 75 Veh Chng 11 125 Veh Chng 61 175 R2 OmtRdClr 225 Offset 1<br />
26 Veh Call 26 76 Veh Chng 12 126 Veh Chng 62 176 Non-Act II 226 Offset 2<br />
27 Veh Call 27 77 Veh Chng 13 127 Veh Chng 63 177 Ext Start 227 Offset 3<br />
28 Veh Call 28 78 Veh Chng 14 128 Veh Chng 64 178 Int Advance 228 33x Flash Sense<br />
29 Veh Call 29 79 Veh Chng 15 129 Ped Call 1 179 Door Open 229 33x CMU Stop<br />
30 Veh Call 30 80 Veh Chng 16 130 Ped Call 2 180 Min Recall 230 GateMode0<br />
31 Veh Call 31 81 Veh Chng 17 131 Ped Call 3 181 ManCtrlEnbl 231 GateMode1<br />
32 Veh Call 32 82 Veh Chng 18 132 Ped Call 4 182 Mode Bit A 232 GateMode2<br />
33 Veh Call 33 83 Veh Chng 19 133 Ped Call 5 183 Mode Bit B 233 GateMode3<br />
34 Veh Call 34 84 Veh Chng 20 134 Ped Call 6 184 Mode Bit C 234 GateOpen1<br />
35 Veh Call 35 85 Veh Chng 21 135 Ped Call 7 185 Test A 235 GateClose1<br />
36 Veh Call 36 86 Veh Chng 22 136 Ped Call 8 186 Test B 236 GateOpen2<br />
37 Veh Call 37 87 Veh Chng 23 137 Hold 1 187 Test C 237 GateClose2<br />
38 Veh Call 38 88 Veh Chng 24 138 Hold 2 188 WalkRestMod 238 Reserved<br />
39 Veh Call 39 89 Veh Chng 25 139 Hold 3 189 Unused 239 Reserved<br />
40 Veh Call 40 90 Veh Chng 26 140 Hold 4 190 Free 240 Logic1<br />
41 Veh Call 41 91 Veh Chng 27 141 Hold 5 191 Flash In 241 Logic2<br />
42 Veh Call 42 92 Veh Chng 28 142 Hold 6 192 Alarm 1 242 Logic3<br />
43 Veh Call 43 93 Veh Chng 29 143 Hold 7 193 Alarm 2 243 Logic4<br />
44 Veh Call 44 94 Veh Chng 30 144 Hold 8 194 Alarm 3 244 Logic5<br />
45 Veh Call 45 95 Veh Chng 31 145 Ped Omit 1 195 Alarm 4 245 Logic6<br />
46 Veh Call 46 96 Veh Chng 32 146 Ped Omit 2 196 Alarm 5 246 Logic7<br />
47 Veh Call 47 97 Veh Chng 33 147 Ped Omit 3 197 Alarm 6 247 Logic8<br />
48 Veh Call 48 98 Veh Chng 34 148 Ped Omit 4 198 Pre 1 In 248 Logic9<br />
49 Veh Call 49 99 Veh Chng 35 149 Ped Omit 5 199 Pre 2 In 249 Logic10<br />
Func Input<br />
250 Reserved<br />
251 Reserved<br />
252 Reserved<br />
253 Reserved<br />
254 False<br />
255 True<br />
Naztec <strong>NTCIP</strong> <strong>Based</strong> NEMA <strong>TS2</strong> and <strong>2070</strong> Controller <strong>Manual</strong> – July 2009 Page 12-122
[v61] <strong>TS2</strong> IO Map – Output Function Table<br />
Func Output Func Output Func Output Func Output Func Output<br />
0 Unused 50 Ch2 Green 100 R2 Status A 150 Reserved 200 IO UCF Flash<br />
1 Ch1 Red 51 Ch3 Green 101 R2 Status B 151 Reserved 201 Preempt Int Stat Out 1<br />
2 Ch2 Red 52 Ch4 Green 102 R2 Status C 152 Reserved 202 Preempt Int Stat Out 2<br />
3 Ch3 Red 53 Ch5 Green 103 Special 1 153 Reserved 203 Preempt Int Stat Out 3<br />
4 Ch4 Red 54 Ch6 Green 104 Special 2 154 Reserved 204 Preempt Int Stat Out 4<br />
5 Ch5 Red 55 Ch7 Green 105 Special 3 155 Reserved 205 Preempt Int Stat Out 5<br />
6 Ch6 Red 56 Ch8 Green 106 Special 4 156 Reserved 206 Preempt Int Stat Out 6<br />
7 Ch7 Red 57 Ch9 Green 107 Special 5 157 Reserved 207 Preempt Int Stat Out 7<br />
8 Ch8 Red 58 Ch10 Green 108 Special 6 158 Reserved 208 Reserved<br />
9 Ch9 Red 59 Ch11 Green 109 Special 7 159 Reserved 209 Reserved<br />
10 Ch10 Red 60 Ch12 Green 110 Special 8 160 Reserved 210 Reserved<br />
11 Ch11 Red 61 Ch13 Green 111 Fault Mon 161 Reserved 211 Reserved<br />
12 Ch12 Red 62 Ch14 Green 112 Voltage Mon 162 Reserved 212 Reserved<br />
13 Ch13 Red 63 Ch15 Green 113 Flash Logic 163 Reserved 213 Reserved<br />
14 Ch14 Red 64 Ch16 Green 114 170 Watchdog 164 Reserved 214 Reserved<br />
15 Ch15 Red 65 Ch17 Green 115 Constant Zero 165 Reserved 215 Reserved<br />
16 Ch16 Red 66 Ch18 Green 116 Pre Stat 1 166 Reserved 216 Reserved<br />
17 Ch17 Red 67 Ch19 Green 117 Pre Stat 2 167 Reserved 217 Reserved<br />
18 Ch18 Red 68 Ch20 Green 118 Pre Stat 3 168 Reserved 218 Reserved<br />
19 Ch19 Red 69 Ch21 Green 119 Pre Stat 4 169 Reserved 219 Reserved<br />
20 Ch20 Red 70 Ch22 Green 120 Pre Stat 5 170 Reserved 220 Reserved<br />
21 Ch21 Red 71 Ch23 Green 121 Pre Stat 6 171 Reserved 221 Reserved<br />
22 Ch22 Red 72 Ch24 Green 122 TBCAux/Pre1 172 Reserved 222 Reserved<br />
23 Ch23 Red 73 Ph 1 Check 123 TBCAux/Pre2 173 Reserved 223 Reserved<br />
24 Ch24 Red 74 Ph 2 Check 124 LdSwtchFlsh 174 Reserved 224 Reserved<br />
25 Ch1 Yellow 75 Ph 3 Check 125 TBC Aux 1 175 Reserved 225 Reserved<br />
26 Ch2 Yellow 76 Ph 4 Check 126 TBC Aux 2 176 Reserved 226 Reserved<br />
27 Ch3 Yellow 77 Ph 5 Check 127 TBC Aux 3 177 Reserved 227 Reserved<br />
28 Ch4 Yellow 78 Ph 6 Check 128 Coord Active 178 Reserved 228 Reserved<br />
29 Ch5 Yellow 79 Ph 7 Check 129 Time plan A 179 Reserved 229 Reserved<br />
30 Ch6 Yellow 80 Ph 8 Check 130 Time plan B 180 Reserved 230 Logic1<br />
31 Ch7 Yellow 81 Ph 1 Next 131 Time plan C 181 Reserved 231 Logic2<br />
32 Ch8 Yellow 82 Ph 2 Next 132 Time plan D 182 Reserved 232 Logic3<br />
33 Ch9 Yellow 83 Ph 3 Next 133 Offset Out1 183 Reserved 233 Logic4<br />
34 Ch10 Yellow 84 Ph 4 Next 134 Offset Out2 184 Reserved 234 Logic5<br />
35 Ch11 Yellow 85 Ph 5 Next 135 Offset Out3 185 Reserved 235 Logic6<br />
36 Ch12 Yellow 86 Ph 6 Next 136 Auto Flash 186 Reserved 236 Logic7<br />
Preempt Actv<br />
37 Ch13 Yellow 87 Ph 7 Next 137<br />
(Composite) 187 Reserved 237 Logic8<br />
Reserved:<br />
LiteRailVeh<br />
Warning 188 Reserved 238 Logic9<br />
38 Ch14 Yellow 88 Ph 8 Next 138<br />
39 Ch15 Yellow 89 Phase 1 On 139 Reserved 189 Reserved 239 Logic10<br />
40 Ch16 Yellow 90 Phase 2 On 140 Audible Ped 2 190 Reserved 240 Logic11<br />
41 Ch17 Yellow 91 Phase 3 On 141 Audible Ped 4 191 Reserved 241 Logic12<br />
42 Ch18 Yellow 92 Phase 4 On 142 Audible Ped 6 192 Reserved 242 Logic13<br />
43 Ch19 Yellow 93 Phase 5 On 143 Audible Ped 8 193 Reserved 243 Logic14<br />
44 Ch20 Yellow 94 Phase 6 On 144 Reserved 194 Reserved 244 Logic15<br />
45 Ch21 Yellow 95 Phase 7 On 145 Reserved 195 Reserved 245 Logic16<br />
46 Ch22 Yellow 96 Phase 8 On 146 Reserved 196 Reserved 246 Logic17<br />
47 Ch23 Yellow 97 R1 Status A 147 Reserved 197 Reserved 247 Logic18<br />
48 Ch24 Yellow 98 R1 Status B 148 Reserved 198 Reserved 248 Logic19<br />
49 Ch1 Green 99 R1 Status C 149 Reserved 199 Reserved 249 Logic20<br />
Func Output<br />
250 Reserved<br />
251 Reserved<br />
252 Reserved<br />
253 Reserved<br />
254 False<br />
255 True<br />
Naztec <strong>NTCIP</strong> <strong>Based</strong> NEMA <strong>TS2</strong> and <strong>2070</strong> Controller <strong>Manual</strong> – July 2009 Page 12-123
[v61] <strong>TS2</strong> Default programming BIU 1<br />
BIU #1 BIU #1<br />
Input Assignment Output Assignment<br />
Scrn Row Group # Code Description Group # Code Description<br />
1 In 1 162 Stop Timing (Ring 1) Out 1 1 Red Out 1<br />
2 2 170 Stop Timing (Ring 2) 2 25 Yel Out 1<br />
3 3 166 Max II Selection (Ring 1) 3 49 Grn Out 1<br />
4 4 174 Max II Selection (Ring 2) 4 2 Red Out 2<br />
5 5 161 Force Off (Ring 1) 5 26 Yel Out 2<br />
6 6 169 Force Off (Ring 2) 6 50 Grn Out 2<br />
7 7 168 Call to Non-Actuated I 7 3 Red Out 3<br />
8 8 188 Walk Rest Modifier 8 27 Yel Out 3<br />
9 Opto-In 1 129 Ped Call 1 9 51 Grn Out 3<br />
10 2 130 Ped Call 2 10 4 Red Out 4<br />
11 3 131 Ped Call 3 11 28 Yel Out 4<br />
12 4 132 Ped Call 4 12 52 Grn Out 4<br />
13 Not Used 1 0 13 5 Red Out 5<br />
14 2 0 14 29 Yel Out 5<br />
15 3 0 15 53 Grn Out 5<br />
16 In/Out 1 0 Assigned as Output In/Out 1 6 Red Out 6<br />
17 2 0 Assigned as Output 2 30 Yel Out 6<br />
18 3 0 Assigned as Output 3 54 Grn Out 6<br />
19 4 0 Assigned as Output 4 7 Red Out 7<br />
20 5 0 Assigned as Output 5 31 Yel Out 7<br />
21 6 0 Assigned as Output 6 55 Grn Out 7<br />
22 7 0 Assigned as Output 7 8 Red Out 8<br />
23 8 0 Assigned as Output 8 32 Yel Out 8<br />
24 9 0 Assigned as Output 9 56 Grn Out 8<br />
25 10 0 Assigned as Output 10 125 TBC Aux Out 1<br />
26 11 0 Assigned as Output 11 126 TBC Aux Out 2<br />
27 12 0 Assigned as Output 12 116 Preempt 1 Status<br />
28 13 0 Assigned as Output 13 117 Preempt 2 Status<br />
29 14 205 Preempt In 1 14 0 Assigned as Input<br />
30 15 206 Preempt In 2 15 0 Assigned as Input<br />
31 16 185 Test Input A 16 0 Assigned as Input<br />
32 17 186 Test Input B 17 0 Assigned as Input<br />
33 18 211 Auto Flash In 18 0 Assigned as Input<br />
34 19 210 Dimming Enable 19 0 Assigned as Input<br />
35 20 181 <strong>Manual</strong> Control Enable 20 0 Assigned as Input<br />
36 21 178 Internal Advance 21 0 Assigned as Input<br />
37 22 180 Min Recall All Phases 22 0 Assigned as Input<br />
38 23 177 External Start 23 0 Assigned as Input<br />
39 24 209 TBC On-Line (In) 24 0 Assigned as Input<br />
Naztec <strong>NTCIP</strong> <strong>Based</strong> NEMA <strong>TS2</strong> and <strong>2070</strong> Controller <strong>Manual</strong> – July 2009 Page 12-124
[v61] <strong>TS2</strong> Default programming BIU 2<br />
BIU #2 BIU #2<br />
Input Assignment Output Assignment<br />
Scrn Row Group # Code Description Group # Code Description<br />
1 In 1 163 Inhibit Max Term (Ring 1) Out 1 9 Red Out 9<br />
2 2 171 Inhibit Max Term (Ring 2) 2 33 Yel Out 9<br />
3 3 208 Local Flash In 3 57 Grn Out 9<br />
4 4 206 Chan/MMU Flash In 4 10 Red Out 10<br />
5 5 197 Alarm 1 In (User alarm) 5 34 Yel Out 10<br />
6 6 198 Alarm 2 In (User alarm) 6 58 Grn Out 10<br />
7 7 190 Free 7 11 Red Out 11<br />
8 8 187 Test Input C 8 35 Yel Out 11<br />
9 Opto-In 1 133 Ped Call 5 9 59 Grn Out 11<br />
10 2 134 Ped Call 6 10 12 Red Out 12<br />
11 3 135 Ped Call 7 11 36 Yel Out 12<br />
12 4 136 Ped Call 8 12 60 Grn Out 12<br />
13 Not Used 1 13 13 Red Out 13<br />
14 2 14 37 Yel Out 13<br />
15 3 15 61 Grn Out 13<br />
16 In/Out 1 0 Assigned as Output In/Out 1 14 Red Out 14<br />
17 2 0 Assigned as Output 2 38 Yel Out 14<br />
18 3 0 Assigned as Output 3 62 Grn Out 14<br />
19 4 0 Assigned as Output 4 15 Red Out 15<br />
20 5 0 Assigned as Output 5 39 Yel Out 15<br />
21 6 0 Assigned as Output 6 63 Grn Out 15<br />
22 7 0 Assigned as Output 7 16 Red Out 16<br />
23 8 0 Assigned as Output 8 40 Yel Out 16<br />
24 9 0 Assigned as Output 9 64 Grn Out 16<br />
25 10 0 Assigned as Output 10 127 TBC Aux Out 3<br />
26 11 0 Assigned as Output 11 128 Coord Active<br />
27 12 0 Assigned as Output 12 118 Preempt Status 3<br />
28 13 0 Assigned as Output 13 119 Preempt Status 4<br />
29 14 0 Assigned as Output 14 120 Preempt Status 5<br />
30 15 0 Assigned as Output 15 121 Preempt Status 6<br />
31 16 200 Preempt In 3 16 0 Assigned as Input<br />
32 17 201 Preempt In 4 17 0 Assigned as Input<br />
33 18 202 Preempt In 5 18 0 Assigned as Input<br />
34 19 203 Preempt In 6 19 0 Assigned as Input<br />
35 20 176 Call to Non-Actuated II 20 0 Assigned as Input<br />
36 21 0 Spare 21 0 Assigned as Input<br />
37 22 0 Spare 22 0 Assigned as Input<br />
38 23 0 Spare 23 0 Assigned as Input<br />
39 24 0 Spare 24 0 Assigned as Input<br />
Naztec <strong>NTCIP</strong> <strong>Based</strong> NEMA <strong>TS2</strong> and <strong>2070</strong> Controller <strong>Manual</strong> – July 2009 Page 12-125
12.4.3 [v61] Color Check Disable (MM->1->3->9->3) and Color Check Status (MM->1->3-<br />
>9->4)<br />
The color check feature compares the active channel color outputs to<br />
the status as reported by the MMU. If these disagree <strong>for</strong> 800-900 ms,<br />
then the controller declares a “color check” fault. The feature has a<br />
global enable (Color Check) on the controller parameters screen<br />
(MM->1->2->1), at the bottom. There is a screen to disable checking<br />
<strong>for</strong> individual color outputs at MM->1->3->9->3.<br />
At MM->1->3->9->4, a status screen shows in real-time <strong>for</strong> each output the number of tenths of a second that the output<br />
disagrees with what the MMU reports. Usually, these numbers are 0.<br />
During color transitions, they can be seen to count to 1 or 2. The color<br />
check timers are paused whenever the MMU is in fault, the Local<br />
Flash or MMU Flash inputs are active, or stop-time inputs are applied.<br />
This prevents the color check fault from falsely tripping during various<br />
flashing modes (start-up, fault, or tech switch).<br />
Naztec <strong>NTCIP</strong> <strong>Based</strong> NEMA <strong>TS2</strong> and <strong>2070</strong> Controller <strong>Manual</strong> – July 2009 Page 12-126
12.5 [v60][v65] <strong>2070</strong> IO User Map (MM->1->8->9)<br />
MM->1->8->9 is used to customize the I/O pin assignments <strong>for</strong> the <strong>2070</strong> C1-<br />
C11 connector and the A-B-C connectors (<strong>2070</strong>N version).<br />
Customizing the I/O maps <strong>for</strong> the <strong>2070</strong> involves three steps:<br />
• Step 1 – Set C1-C11-ABC IO Mode to USER under menu MM->1->8->6<br />
• Step 2 - Initialize the User I/O Maps from MM->1->8->9->3<br />
(menu shown to the right)<br />
• Step 3 – Customize the I/O Maps under MM->1->2 with<br />
selection 1.Inputs and 2.Outputs<br />
Selecting 3.Init Map, from the menu above allows NEMA A-B-C, D-connector and 2A (C1) connector to be initialized<br />
with several factory default settings as shown below<br />
Initializing the <strong>2070</strong> ABC, D and 2A Connectors (MM->1->8->9->3)<br />
The ABC connector configurations <strong>for</strong> the <strong>2070</strong>N are:<br />
• NONE – A-B-C inputs and outputs deactivated<br />
• AUTO – default NEMA TS1 A-B-C I/O (Mode 0)<br />
• Mode 0–7 – Modes 0-5 (defined by NEMA) and Modes 6 and 7 (defined by the manufacturer) are listed in<br />
Chapter 14. The <strong>2070</strong> I/O mode is selected by initializing ABC from the above menu. The <strong>TS2</strong> I/O modes are<br />
specified as a Unit Parameter (see section 4.11). These modes only applies to the <strong>TS2</strong> and not to the <strong>2070</strong>.<br />
• USER – allows the user to configure each pin of the A-B-C connectors <strong>for</strong> the <strong>2070</strong>N from menu MM->1->8->9<br />
The D connector configurations <strong>for</strong> the <strong>2070</strong>N controller are:<br />
• NONE – All D-connector inputs and outputs are deactivated.<br />
• TEES – The D-connector con<strong>for</strong>ms to the TEES configuration defined in Chapter 14.<br />
• 820A-VMS – The D-connector con<strong>for</strong>ms to I/O map of the 820A controller.<br />
The 2A (C1) connector configurations are:<br />
• NONE – All C1-connector inputs and outputs are deactivated.<br />
• Mode 0 – C1 inputs and outputs con<strong>for</strong>m to the latest Caltrans / SCDOT <strong>2070</strong> TEES specification. This will be<br />
used with Model 332/336 cabinets.<br />
• Mode 1– C1 inputs and outputs con<strong>for</strong>m to 179 controller defaults defined by the New York DOT. This will be<br />
used with Model 330 cabinets.<br />
• Mode 2- Reserved<br />
• Mode 3- Reserved<br />
Naztec <strong>NTCIP</strong> <strong>Based</strong> NEMA <strong>TS2</strong> and <strong>2070</strong> Controller <strong>Manual</strong> – July 2009 Page 12-127
12.6 [v60][v65] Customizing <strong>2070</strong> Inputs (MM->1->8->9->1)<br />
After initializing the default I/O, you may customize the<br />
input maps selecting 1.Inputs from MM->1->8->9->1.<br />
Each input pin on the A-B-C connector, D-connector and<br />
2A (C1) connector may be redefined using the function<br />
numbers provided in the chart below.<br />
Func Input Func Input Func Input Func Input Func Input<br />
0 Unused 50 Veh Call 50 100 Veh Chng 36 150 Ped Omit 6 200 Pre 3 In<br />
1 Veh Call 1 51 Veh Call 51 101 Veh Chng 37 151 Ped Omit 7 201 Pre 4 In<br />
2 Veh Call 2 52 Veh Call 52 102 Veh Chng 38 152 Ped Omit 8 202 Pre 5 In<br />
3 Veh Call 3 53 Veh Call 53 103 Veh Chng 39 153 Ph Omit 1 203 Pre 6 In<br />
4 Veh Call 4 54 Veh Call 54 104 Veh Chng 40 154 Ph Omit 2 204 Pre 7 In<br />
5 Veh Call 5 55 Veh Call 55 105 Veh Chng 41 155 Ph Omit 3 205 Pre 8 In<br />
6 Veh Call 6 56 Veh Call 56 106 Veh Chng 42 156 Ph Omit 4 206 Cab Flash<br />
7 Veh Call 7 57 Veh Call 57 107 Veh Chng 43 157 Ph Omit 5 207 Comp StopTm<br />
8 Veh Call 8 58 Veh Call 58 108 Veh Chng 44 158 Ph Omit 6 208 Local Flash<br />
9 Veh Call 9 59 Veh Call 59 109 Veh Chng 45 159 Ph Omit 7 209 TBC Input<br />
10 Veh Call 10 60 Veh Call 60 110 Veh Chng 46 160 Ph Omit 8 210 Dim Enable<br />
11 Veh Call 11 61 Veh Call 61 111 Veh Chng 47 161 R1 Frc Off 211 Auto Flash<br />
12 Veh Call 12 62 Veh Call 62 112 Veh Chng 48 162 R1 Stop Tim 212 Alt Seq A<br />
13 Veh Call 13 63 Veh Call 63 113 Veh Chng 49 163 R1 Inh Max 213 Alt Seq B<br />
14 Veh Call 14 64 Veh Call 64 114 Veh Chng 50 164 R1 Red Rest 214 Alt Seq C<br />
15 Veh Call 15 65 Veh Chng 1 115 Veh Chng 51 165 R1 PedRecyc 215 Alt Seq D<br />
16 Veh Call 16 66 Veh Chng 2 116 Veh Chng 52 166 R1 Max II 216 Plan A<br />
17 Veh Call 17 67 Veh Chng 3 117 Veh Chng 53 167 R1 OmtRdClr 217 Plan B<br />
18 Veh Call 18 68 Veh Chng 4 118 Veh Chng 54 168 Non-Act I 218 Plan C<br />
19 Veh Call 19 69 Veh Chng 5 119 Veh Chng 55 169 R2 Frc Off 219 Plan D<br />
20 Veh Call 20 70 Veh Chng 6 120 Veh Chng 56 170 R2 Stop Tim 220 Addr Bit 0<br />
21 Veh Call 21 71 Veh Chng 7 121 Veh Chng 57 171 R2 Inh Max 221 Addr Bit 1<br />
22 Veh Call 22 72 Veh Chng 8 122 Veh Chng 58 172 R2 Red Rest 222 Addr Bit 2<br />
23 Veh Call 23 73 Veh Chng 9 123 Veh Chng 59 173 R2 PedRecyc 223 Addr Bit 3<br />
24 Veh Call 24 74 Veh Chng 10 124 Veh Chng 60 174 R2 Max II 224 Addr Bit 4<br />
25 Veh Call 25 75 Veh Chng 11 125 Veh Chng 61 175 R2 OmtRdClr 225 Offset 1<br />
26 Veh Call 26 76 Veh Chng 12 126 Veh Chng 62 176 Non-Act II 226 Offset 2<br />
27 Veh Call 27 77 Veh Chng 13 127 Veh Chng 63 177 Ext Start 227 Offset 3<br />
28 Veh Call 28 78 Veh Chng 14 128 Veh Chng 64 178 Int Advance 228 33x Flash Sense<br />
29 Veh Call 29 79 Veh Chng 15 129 Ped Call 1 179 IndLampCtrl 229 33x CMU Stop<br />
30 Veh Call 30 80 Veh Chng 16 130 Ped Call 2 180 Min Recall 230 GateMode0<br />
31 Veh Call 31 81 Veh Chng 17 131 Ped Call 3 181 ManCtrlEnbl 231 GateMode1<br />
32 Veh Call 32 82 Veh Chng 18 132 Ped Call 4 182 Mode Bit A 232 GateMode2<br />
33 Veh Call 33 83 Veh Chng 19 133 Ped Call 5 183 Mode Bit B 233 GateMode3<br />
34 Veh Call 34 84 Veh Chng 20 134 Ped Call 6 184 Mode Bit C 234 GateOpen1<br />
35 Veh Call 35 85 Veh Chng 21 135 Ped Call 7 185 Test A 235 GateClose1<br />
36 Veh Call 36 86 Veh Chng 22 136 Ped Call 8 186 Test B 236 GateOpen2<br />
37 Veh Call 37 87 Veh Chng 23 137 Hold 1 187 Test C 237 GateClose2<br />
38 Veh Call 38 88 Veh Chng 24 138 Hold 2 188 WalkRestMod 238 Reserved<br />
39 Veh Call 39 89 Veh Chng 25 139 Hold 3 189 Unused 239 Reserved<br />
40 Veh Call 40 90 Veh Chng 26 140 Hold 4 190 Free 240 Logic1<br />
41 Veh Call 41 91 Veh Chng 27 141 Hold 5 191 Flash In 241 Logic2<br />
42 Veh Call 42 92 Veh Chng 28 142 Hold 6 192 Alarm 1 242 Logic3<br />
43 Veh Call 43 93 Veh Chng 29 143 Hold 7 193 Alarm 2 243 Logic4<br />
44 Veh Call 44 94 Veh Chng 30 144 Hold 8 194 Alarm 3 244 Logic5<br />
45 Veh Call 45 95 Veh Chng 31 145 Ped Omit 1 195 Alarm 4 245 Logic6<br />
46 Veh Call 46 96 Veh Chng 32 146 Ped Omit 2 196 Alarm 5 246 Logic7<br />
47 Veh Call 47 97 Veh Chng 33 147 Ped Omit 3 197 Alarm 6 247 Logic8<br />
48 Veh Call 48 98 Veh Chng 34 148 Ped Omit 4 198 Pre 1 In 248 Logic9<br />
49 Veh Call 49 99 Veh Chng 35 149 Ped Omit 5 199 Pre 2 In 249 Logic10<br />
Naztec <strong>NTCIP</strong> <strong>Based</strong> NEMA <strong>TS2</strong> and <strong>2070</strong> Controller <strong>Manual</strong> – July 2009 Page 12-128
Func Input Func Input Func Input Func Input Func Input<br />
250 Reserved 260 Ped Call 13 270 Hold 15 280 Ph Omit 9 290 Reserved<br />
251 Reserved 261 Ped Call 14 271 Hold 16 281 Ph Omit 10 291 Reserved<br />
252 Reserved 262 Ped Call 15 272 Ped Omit 9 282 Ph Omit 11 292 Reserved<br />
253 Reserved 263 Ped Call 16 273 Ped Omit 10 283 Ph Omit 12 293 Reserved<br />
254 False 264 Hold 9 274 Ped Omit 11 284 Ph Omit 14 294 Reserved<br />
255 True 265 Hold 10 275 Ped Omit 12 285 Ph Omit 14 295 Reserved<br />
256 Ped Call 9 266 Hold 11 276 Ped Omit 13 286 Ph Omit 15 296 Reserved<br />
257 Ped Call 10 267 Hold 12 277 Ped Omit 14 287 Ph Omit 16 297 Reserved<br />
258 Ped Call 11 268 Hold 13 278 Ped Omit 15 288 Reserved 298 Reserved<br />
259 Ped Call 12 269 Hold 14 279 Ped Omit 16 289 Reserved 299 Reserved<br />
12.6.1 [v65] 33x Input File (MM->1->8->9->1->6)<br />
The 33.X INPUT FILE is used in conjunction with USER IO Mode to<br />
allow the user to customize the input pins of the C1.<br />
Inputs 1-64 on this menu correspond with I1-1 through I8-8<br />
DETECTOR: Indexes 1-64 assign any vehicle detector to any input pin<br />
PEDCALL: Index 1-8 assigns the input to one of the 8 Ped Detectors programmed under MM->5->4<br />
HOLD: Indexes 1-16 apply a hold on phases 1-16 if CNA operation is in effect<br />
OMIT: Indexes 1-16 apply an omit on phases 1-16<br />
PEDOMIT: Indexes 1-16 apply a ped omit on phases 1-16<br />
RING: The indexes below apply the following ring features<br />
Index Description Index Description<br />
1 R1 Frc Off 8 R1 Frc Off<br />
2 R1 Stop Time 9 R1 Stop Time<br />
3 R1 Inh Max 10 R1 Inh Max<br />
4 R1 Red Rest 11 R1 Red Rest<br />
5 R1 Ped Recycle 12 R1 Ped Recycle<br />
6 R1 Max II 13 R1 Max II<br />
7 R1 Omit Red Clearance 14 R1 Omit Red Clearance<br />
CABINET:<br />
The indexes below apply the following cabinet features<br />
Index Description Index Description<br />
1 CNA2 11 Cab Flash<br />
2 CNA1 12 33x Stop Time<br />
3 External Start 13 Local Flash<br />
4 Interval Advance 14 TBC Input<br />
5 Door Open 15 Dim Enable<br />
6 Min Recall 16 Auto Flash<br />
07 <strong>Manual</strong> Control Enable 17 33xFlash Sense<br />
8 Walk Rest Modifier 18 33xCMUStop<br />
9 Free Command 19 Unused<br />
10 Flash Input 20 Unused<br />
PREEMPT: Indexes 1-10 apply a call to preempts 1-10<br />
UNUSED: The input pin is unused<br />
Naztec <strong>NTCIP</strong> <strong>Based</strong> NEMA <strong>TS2</strong> and <strong>2070</strong> Controller <strong>Manual</strong> – July 2009 Page 12-129
[v60][v65] Customizing <strong>2070</strong> Outputs (MM->1->8->9->2)<br />
After initializing the default I/O, you may customize the output<br />
maps selecting 2.Outputs from MM->1->8->9->2. Each output<br />
pin on the A-B-C connector, D-connector and 2A (C1)<br />
connector may be redefined using the function numbers<br />
provided in the chart below.<br />
Func Output Func Output Func Output Func Output Func Output<br />
0 Unused 50 Ch2 Green 100 R2 Status A 150 Reserved 200 Reserved<br />
1 Ch1 Red 51 Ch3 Green 101 R2 Status B 151 Reserved 201 Reserved<br />
2 Ch2 Red 52 Ch4 Green 102 R2 Status C 152 Reserved 202 Reserved<br />
3 Ch3 Red 53 Ch5 Green 103 Special 1 153 Reserved 203 Reserved<br />
4 Ch4 Red 54 Ch6 Green 104 Special 2 154 Reserved 204 Reserved<br />
5 Ch5 Red 55 Ch7 Green 105 Special 3 155 Reserved 205 Reserved<br />
6 Ch6 Red 56 Ch8 Green 106 Special 4 156 Reserved 206 Reserved<br />
7 Ch7 Red 57 Ch9 Green 107 Special 5 157 Reserved 207 Reserved<br />
8 Ch8 Red 58 Ch10 Green 108 Special 6 158 Reserved 208 Reserved<br />
9 Ch9 Red 59 Ch11 Green 109 Special 7 159 Reserved 209 Reserved<br />
10 Ch10 Red 60 Ch12 Green 110 Special 8 160 Reserved 210 Reserved<br />
11 Ch11 Red 61 Ch13 Green 111 Fault Mon 161 Reserved 211 Reserved<br />
12 Ch12 Red 62 Ch14 Green 112 Voltage Mon 162 Reserved 212 Reserved<br />
13 Ch13 Red 63 Ch15 Green 113 Flash Logic 163 Reserved 213 Reserved<br />
14 Ch14 Red 64 Ch16 Green 114 Watchdog 164 Reserved 214 Reserved<br />
15 Ch15 Red 65 Ch17 Green 115 Not Used 165 Reserved 215 Reserved<br />
16 Ch16 Red 66 Ch18 Green 116 Pre Stat 1 166 Reserved 216 Reserved<br />
17 Ch17 Red 67 Ch19 Green 117 Pre Stat 2 167 Reserved 217 Reserved<br />
18 Ch18 Red 68 Ch20 Green 118 Pre Stat 3 168 Reserved 218 Reserved<br />
19 Ch19 Red 69 Ch21 Green 119 Pre Stat 4 169 Reserved 219 Reserved<br />
20 Ch20 Red 70 Ch22 Green 120 Pre Stat 5 170 Reserved 220 Reserved<br />
21 Ch21 Red 71 Ch23 Green 121 Pre Stat 6 171 Reserved 221 Reserved<br />
22 Ch22 Red 72 Ch24 Green 122 TBCAux/Pre1 172 Reserved 222 Reserved<br />
23 Ch23 Red 73 Ph 1 Check 123 TBCAux/Pre2 173 Reserved 223 Reserved<br />
24 Ch24 Red 74 Ph 2 Check 124 LdSwtchFlsh 174 Reserved 224 Reserved<br />
25 Ch1 Yellow 75 Ph 3 Check 125 TBC Aux 1 175 Reserved 225 Reserved<br />
26 Ch2 Yellow 76 Ph 4 Check 126 TBC Aux 2 176 Reserved 226 Reserved<br />
27 Ch3 Yellow 77 Ph 5 Check 127 TBC Aux 3 177 Reserved 227 Reserved<br />
28 Ch4 Yellow 78 Ph 6 Check 128 Free/Coord 178 Reserved 228 Reserved<br />
29 Ch5 Yellow 79 Ph 7 Check 129 Time plan A 179 Reserved 229 Reserved<br />
30 Ch6 Yellow 80 Ph 8 Check 130 Time plan B 180 Reserved 230 GateOpen1<br />
31 Ch7 Yellow 81 Ph 1 Next 131 Time plan C 181 Reserved 231 GateClose1<br />
32 Ch8 Yellow 82 Ph 2 Next 132 Time plan D 182 Reserved 232 GateOpen2<br />
33 Ch9 Yellow 83 Ph 3 Next 133 Offset Out1 183 Reserved 233 GateClose2<br />
34 Ch10 Yellow 84 Ph 4 Next 134 Offset Out2 184 Reserved 234 Reserved<br />
35 Ch11 Yellow 85 Ph 5 Next 135 Offset Out3 185 Reserved 235 Reserved<br />
36 Ch12 Yellow 86 Ph 6 Next 136 Auto Flash 186 Reserved 236 Reserved<br />
37 Ch13 Yellow 87 Ph 7 Next 137 PreemptActv 187 Reserved 237 Reserved<br />
38 Ch14 Yellow 88 Ph 8 Next 138 Reserved 188 Reserved 238 Reserved<br />
39 Ch15 Yellow 89 Phase 1 On 139 Reserved 189 Reserved 239 Reserved<br />
40 Ch16 Yellow 90 Phase 2 On 140 Audible Ped 2 190 Reserved 240 Logic1<br />
41 Ch17 Yellow 91 Phase 3 On 141 Audible Ped 4 191 Reserved 241 Logic2<br />
42 Ch18 Yellow 92 Phase 4 On 142 Audible Ped 6 192 Reserved 242 Logic3<br />
43 Ch19 Yellow 93 Phase 5 On 143 Audible Ped 8 193 Reserved 243 Logic4<br />
44 Ch20 Yellow 94 Phase 6 On 144 Reserved 194 Reserved 244 Logic5<br />
45 Ch21 Yellow 95 Phase 7 On 145 Reserved 195 Reserved 245 Logic6<br />
46 Ch22 Yellow 96 Phase 8 On 146 Reserved 196 Reserved 246 Logic7<br />
47 Ch23 Yellow 97 R1 Status A 147 Reserved 197 Reserved 247 Logic8<br />
48 Ch24 Yellow 98 R1 Status B 148 Reserved 198 Reserved 248 Logic9<br />
49 Ch1 Green 99 R1 Status C 149 Reserved 199 Reserved 249 Logic10<br />
Naztec <strong>NTCIP</strong> <strong>Based</strong> NEMA <strong>TS2</strong> and <strong>2070</strong> Controller <strong>Manual</strong> – July 2009 Page 12-130
Func Output Func Output Func Output Func Output Func Output<br />
250 Reserved 260 Reserved 270 Reserved 280 Reserved 290 Reserved<br />
251 Reserved 261 Reserved 271 Reserved 281 Reserved 291 Reserved<br />
252 Reserved 262 Reserved 272 Reserved 282 Reserved 292 Reserved<br />
253 Reserved 263 Reserved 273 Reserved 283 Reserved 293 Reserved<br />
254 False 264 Reserved 274 Reserved 284 Reserved 294 Reserved<br />
255 True 265 Reserved 275 Reserved 285 Reserved 295 Reserved<br />
256 Reserved 266 Reserved 276 Reserved 286 Reserved 296 Reserved<br />
257 Reserved 267 Reserved 277 Reserved 287 Reserved 297 Reserved<br />
258 Reserved 268 Reserved 278 Reserved 288 Reserved 298 Reserved<br />
259 Reserved 269 Reserved 279 Reserved 289 Reserved 299 Reserved<br />
12.7 [v60][v65] <strong>2070</strong> Programmable IO Logic (MM->1->8->7)<br />
The <strong>2070</strong> IO Logic feature allows the user to “logically” combine IO to create new inputs and outputs that extend the<br />
functionality of the controller. The following are descriptions of each field<br />
Result<br />
The user sets this field to either an I (<strong>for</strong> Input) or O<br />
(<strong>for</strong> Output). This selection determines if you are<br />
assigning the result of the statement to an input or an<br />
output.<br />
The user can optionally set a ! prior to the I or O result.<br />
The exclamation point indicates that the term is inverted<br />
during evaluation of the statement.<br />
Fcn<br />
This is the IO Function Number as described in Chapter 14 of the <strong>NTCIP</strong> Controller <strong>Training</strong> <strong>Manual</strong><br />
The version 65 software utilizes 10 Logic Functions variable numbered 240-249, where Functions 240-249 are functions<br />
"Logic 1" - "Logic 10". Whether they are denoted as input or output, they point to the same location. Think of these<br />
functions as temporary storage locations. If you want to feed the output of one statement into the next, you can make an<br />
assignment of the first statement to one of these logic variables, and they use it as a term in the next statement.<br />
Operator<br />
This is the Logical Operation (Boolean Logic). Among the choices are: AND, NAND, OR, NOR, XOR, XNOR<br />
The logic will follow the following truth tables-- Where ‘0’ represents OFF or False and “1” represents ON or True<br />
AND<br />
NAND<br />
0 0 0 0 0 1<br />
0 1 0 0 1 1<br />
1 0 0 1 0 1<br />
1 1 1 1 1 0<br />
OR<br />
NOR<br />
0 0 0 0 0 1<br />
0 1 1 0 1 0<br />
1 0 1 1 0 0<br />
1 1 1 1 1 0<br />
XOR<br />
XNOR<br />
0 0 0 0 0 1<br />
0 1 1 0 1 0<br />
1 0 1 1 0 0<br />
1 1 0 1 1 1<br />
Naztec <strong>NTCIP</strong> <strong>Based</strong> NEMA <strong>TS2</strong> and <strong>2070</strong> Controller <strong>Manual</strong> – July 2009 Page 12-131
Timer<br />
The timer can optionally be specified to SHIFT, DELAY, or EXTEND the result of the logic statement <strong>for</strong> the number of<br />
seconds specified by the user.<br />
SHF- Shift logic<br />
DLY- Delay logic<br />
EXT – Extend logic<br />
This timer operates similar to detection delay and extend.<br />
by ### - the number of seconds to SHF/DLY/EXT<br />
In summary, the logic statement is per<strong>for</strong>med from left to right. The result of each statement is accumulated. For example,<br />
"1 AND 2 AND 3" is processed as follows " (RESULT OF 1 AND 2) AND 3".<br />
12.8 [v60][v65] <strong>2070</strong> IO Viewer (MM->1->8->8)<br />
An IO Viewer provides a real-time status monitor of all available inputs and outputs to the controller.<br />
The screens will display Input functions an output functions by function number as described in section 12.5 above.<br />
Naztec <strong>NTCIP</strong> <strong>Based</strong> NEMA <strong>TS2</strong> and <strong>2070</strong> Controller <strong>Manual</strong> – July 2009 Page 12-132
13 Controller Event/Alarm Descriptions<br />
Event /<br />
Alarm #<br />
Alarm Name<br />
1 Power Up Alarm.<br />
Comments<br />
Is active when power is applied to the controller.<br />
Transitions upon power-up and power-down may be<br />
logged.<br />
2 Stop Timing Indicates that one of the stop time inputs is active.<br />
3 Cabinet Door Activation<br />
4 Coordination Failure<br />
5 External Alarm # 1<br />
This is brought into the NEMA input called "lamps"<br />
or "indicator". Naztec typically uses this input <strong>for</strong> the<br />
cabinet door switch in TS1 cabinets.<br />
This alarm indicates that coordination is failed. There<br />
are two ways in which coordination may fail: 1) The<br />
<strong>TS2</strong> method in which two cycle faults have occured<br />
during coordination, but not when coordination is<br />
inactive. 2) A servicable call has not be serviced in 3<br />
cycles. This is the traditional Naztec method, which<br />
predates the NEMA <strong>TS2</strong> method.<br />
Hardware<br />
Specific<br />
6 External Alarm # 2<br />
7 External Alarm # 3<br />
8 External Alarm # 4<br />
9 Closed Loop Disabled<br />
10 External Alarm # 5<br />
This alarm, when active, indicates that the Closedloop<br />
Enable parameter is set to OFF.<br />
11 External Alarm # 6<br />
12 <strong>Manual</strong> Control Enable Alarm active when Police Push Button is ON<br />
13<br />
Coordination Free<br />
Switch Input<br />
Alarm active when System/Free Switch is FREE<br />
14 Local Flash Input Asserted by monitor or cabinet switch when in flash<br />
SDLC or<br />
I/O Mode<br />
15<br />
CMU or MMU Flash<br />
Input<br />
16 MMU Fault<br />
17 Cycle Fault<br />
Alarm is active when the the controller receives an<br />
SDLC message from the MMU that it is in flash<br />
Indicates a Conflict Monitor Fault has occurred when<br />
CVM is NOT asserted by the controller and Stop-<br />
Time is applied.<br />
<strong>TS2</strong> Alarm. It indicates that a servicable call has not<br />
been serviced in approximately two cycle times and<br />
coordination was active at the time.<br />
SDLC or<br />
I/O Mode<br />
SDLC<br />
Naztec <strong>NTCIP</strong> <strong>Based</strong> NEMA <strong>TS2</strong> and <strong>2070</strong> Controller <strong>Manual</strong> – July 2009 Page 13-133
18 Cycle Failure<br />
19 Coordination Fault<br />
20 Controller Fault<br />
21 Detector SDLC Fault<br />
22 MMU SDLC Fault<br />
23<br />
24<br />
Terminal Facility<br />
(cabinet) SDLC Fault<br />
SDLC Response Frame<br />
Fault<br />
25 EEPROM CRC Fault<br />
<strong>TS2</strong> Alarm. It indicates that a serviceable call has not<br />
been serviced in approximately two cycle times and<br />
that coordination was not active at the time.<br />
Indicates that a cycle fault occurred during<br />
coordination.<br />
Intersection is in Flash due to a critical controller<br />
fault. This fault includes Field Check, Response<br />
Frames, Proc Diagnostics.<br />
Indicates SDLC communication with at least one of<br />
the Detector BIUs is faulted. This is a non-critical<br />
fault and will not cause the intersection to flash.<br />
SDLC communication with the MMU has<br />
experienced a Response Frame Fault. This is a<br />
critical fault and will cause the controller to flash.<br />
SDLC communication with one or more of the<br />
Terminal and Facilities BIUs is faulted. This is a<br />
critical fault and will cause the controller to Flash.<br />
Report from SDLC interface<br />
The background EEPROM diagnostic has detected an<br />
unexplained change in the CRC of the userprogrammed<br />
database.<br />
SDLC<br />
SDLC<br />
SDLC<br />
<strong>TS2</strong> SDLC<br />
26<br />
Detector Diagnostic<br />
Fault<br />
One of the controller detector diagnostics (No<br />
Activity, Max Presence or Erratic Count) has failed.<br />
27<br />
Detector Fault From<br />
SDLC<br />
28 Queue Detector alarm<br />
29 Ped Detector Fault<br />
One or more local detectors have been reported to be<br />
faulted by the Loop Amplifer and BIU. These faults<br />
include open loop, shorted loop, excessive inductance<br />
change, and watch-dog time-out.<br />
Associated with the queue detector feature. Data<br />
indicates which queue detector is generating the<br />
alarm.<br />
A ped detector is faulted due to user program limits<br />
being exceeded. These include No Activity, Max<br />
Presence and Erratic Count on screen MM->5->4.<br />
30 Coord Diagnostic Fault Active when coord diagnostic has failed<br />
31 Cabinet Flash Alarm<br />
32 Reserved<br />
Active after a delay timer expires (see MM->1->6-<br />
>7) if the monitor, or a controller fault, causes the<br />
cabinet to flash.<br />
SDLC<br />
<strong>TS2</strong> -<br />
Ver 61<br />
33 Street Lamp Failure Street Lamp Failure (Channel A)<br />
34 Street Lamp Failure Street Lamp Failure (Channel B)<br />
35-36 Reserved<br />
37 Download Request<br />
Requests Download from central system (see MM-<br />
>6->4<br />
Naztec <strong>NTCIP</strong> <strong>Based</strong> NEMA <strong>TS2</strong> and <strong>2070</strong> Controller <strong>Manual</strong> – July 2009 Page 13-134
38 Pattern Change<br />
Coordination Pattern changes are logged to the event<br />
and alarm buffers using this alarm number. The data<br />
byte stores the new pattern number.<br />
39 Reserved Apogee Reserved <strong>2070</strong><br />
40 Reserved Apogee Reserved <strong>2070</strong><br />
41 Temperature Alert #1 Temp Alert 1 – High Temp Temp Alert<br />
42 Temperature Alert #1 Temp Alert 1 – Low Temp Temp Alert<br />
43 Temperature Alert #1 Temp Alert 1 – Status Alarm Temp Alert<br />
44 Temperature Alert #2 Temp Alert 2 – High Temp Temp Alert<br />
45 Temperature Alert #2 Temp Alert 2 – Low Temp Temp Alert<br />
46 Temperature Alert #2 Temp Alert 2 – Status Alarm Temp Alert<br />
47 Coord Active Set when coordination is active (not free)<br />
48 Preempt Active Set when any preempt is active<br />
49 Preempt 1 Rail Preempt 1<br />
50 Preempt 2 Rail Preempt 2<br />
51 Preempt 3 High-Priority Preempt 3<br />
52 Preempt 4 High-Priority Preempt 4<br />
53 Preempt 5 High-Priority Preempt 5<br />
54 Preempt 6 High-Priority Preempt 6<br />
55 Preempt 7 Low-Priority or Transit Priority Preempt 7<br />
56 Preempt 8 Low-Priority or Transit Priority Preempt 8<br />
57 Preempt 9 Low-Priority or Transit Priority Preempt 9<br />
58 Preempt 10 Low-Priority or Transit Priority Preempt 10<br />
59<br />
EEPROM Compare<br />
Fault<br />
Checksum of firmware memory has changed<br />
Naztec <strong>NTCIP</strong> <strong>Based</strong> NEMA <strong>TS2</strong> and <strong>2070</strong> Controller <strong>Manual</strong> – July 2009 Page 13-135
60 Coordination Failure Alarm is ON when Coordination has failed <strong>2070</strong><br />
61 Sync Transition<br />
62-64 Reserved<br />
65-68 Reserved <strong>for</strong> Light Rail<br />
Alarm is ON when coord is active and in transition<br />
<strong>for</strong> times over 3 seconds.<br />
Alarm is OFF when coord is active and in SYNC.<br />
69-72 Reserved<br />
73 Controller Access<br />
74 User Key Login<br />
75-80 Reserved<br />
Active when a key is pressed until the Display Time<br />
expires (see Unit Paramters, MM->1->2->1)<br />
Active when user enters security key – records the<br />
User # in the data byte<br />
81 FIO Changed Status FIO Status has changed <strong>2070</strong><br />
82-86 Reserved<br />
87 External Alarm # 7 <strong>2070</strong><br />
88 External Alarm # 8 <strong>2070</strong><br />
89 External Alarm # 9 <strong>2070</strong><br />
90 External Alarm # 10 <strong>2070</strong><br />
91 External Alarm # 11 <strong>2070</strong><br />
92 External Alarm # 12 <strong>2070</strong><br />
93 External Alarm # 13 <strong>2070</strong><br />
94 External Alarm # 14 <strong>2070</strong><br />
95 External Alarm # 15 <strong>2070</strong><br />
96 External Alarm # 16 <strong>2070</strong><br />
97-128 Reserved<br />
Naztec <strong>NTCIP</strong> <strong>Based</strong> NEMA <strong>TS2</strong> and <strong>2070</strong> Controller <strong>Manual</strong> – July 2009 Page 13-136
14.1 <strong>TS2</strong> and <strong>2070</strong>(N) I/O Maps<br />
14.1.1 A-Connector - <strong>TS2</strong> (type-2) and <strong>2070</strong>N<br />
14 Hardware I/O and Interfaces<br />
Note: Refer to the <strong>TS2</strong> I/O Mode chart (section 14.1.4) to reference Inputs 1-24 and Outputs 1-24. These inputs and outputs<br />
may be reassigned using the I/O Mode setting under Unit Parameters (MM->1->2->1). Mode 0 is the default mode.<br />
Pin Function I/O Pin Function I/O<br />
A Fault Monitor O f Det Ch 1 I<br />
B +24 VDC O g Ped Det 1 I<br />
C Voltage Monitor O h Input 1 I<br />
D Ch 1 Red O I Force Off I<br />
E Ch 17 Red O j External Recall I<br />
F Ch 2 Red O k Man Control Enable I<br />
G Ch 13 Red (ø 2 Don’t Walk) O m Call to Non-Actuated I I<br />
H Ch 13 Yel (ø 2 Ped Clear) O n Test A I<br />
J Ch 13 Grn (ø 2 Walk) O p AC Line I<br />
K Det Ch 2 I q I/O Mode Bit A I<br />
L Ped Det Ch 2 I r Status Bit B (1) O<br />
M Input 2 I s Ch 1 Grn O<br />
N Stop Time (1) I t Ch 17 Grn (ø 1 Walk) O<br />
P Inh Max (1) I u Output 17 O<br />
R External Start I v Input 18 I<br />
S Internal Advance I w Omit Red Clr (1) I<br />
T Ind. Lamp Control I x Red Rest (1) I<br />
U AC Neutral I y I/O Mode Bit B I<br />
V Earth Ground I z Call to Non-Actuated II I<br />
W Logic Ground O AA Test B I<br />
X Flashing Logic O BB Walk Rest Modifier I<br />
Y Status Bit C (1) O CC Status Bit A O<br />
Z Ch 1 Yel O DD Output 1 O<br />
a Ch 17 Yel (ø 1 Ped Clear) O EE Input 9 I<br />
b Ch 2 Yel O FF Ped Recycle (1) I<br />
c Ch 2 Grn O GG Max II (1) I<br />
d Output 18 O HH I/O Mode bit C I<br />
e Output 2 O<br />
<strong>TS2</strong> (type-2) and <strong>2070</strong>N: A-Connector<br />
Naztec <strong>NTCIP</strong> <strong>Based</strong> NEMA <strong>TS2</strong> and <strong>2070</strong> Controller <strong>Manual</strong> – July 2009 Page 14-137
14.1.2 B-Connector - <strong>TS2</strong> (type-2) and <strong>2070</strong>N<br />
Note: Refer to the <strong>TS2</strong> I/O Mode chart (section 14.1.4) to reference Inputs 1-24 and Outputs 1-24. These inputs and outputs<br />
may be reassigned using the I/O Mode setting under Unit Parameters (MM->1->2->1). Mode 0 is the default mode.<br />
Pin Function I/O Pin Function I/O<br />
A Output 9 O f Output 12 O<br />
B Preempt 2 I g Input 12 I<br />
C Output 10 O h Input 4 I<br />
D Ch 3 Grn O i Input 3 I<br />
E Ch 3 Yel O j Input 19 I<br />
F Ch 3 Red O k Input 22 I<br />
G Ch 4 Red O m Input 23 I<br />
H Ch 14 Yel (ø 4 Ped Clear) O n Input 24 I<br />
J Ch 14 Red (ø 4 Don’t Walk) O p Ch 9 Yel (OL A) O<br />
K Output 20 O q Ch 9 Red (OL A) O<br />
L Det Ch 4 I r Output 19 O<br />
M Ped Det Ch 4 I s Output 3 O<br />
N Det Ch 3 I t Output 11 O<br />
P Ped Det Ch 3 I u Ch 12 Red (OL D) O<br />
R Input 11 I v Preempt 6 I<br />
S Input 10 I w Ch 12 Grn (OL D) O<br />
T Input 21 I x Input 20 I<br />
U Input 9 I y Free I<br />
V Ped Recycle (Ring 2) I z Max II select (Ring 2) I<br />
W Preempt 4 I AA CH 9 Grn (OL A) O<br />
X Preempt 5 I BB Ch 10 Yel (OL B) O<br />
Y Ch 18 Grn (ø 3 Walk) O CC Ch 10 Red (OL B) O<br />
Z Ch 18 Yel ( ø 3 Ped Clear) O DD Ch 11 Red (OL C) O<br />
a Ch 18 Red (ø 3 Don’t Walk) O EE Ch 12 Yel (OL D) O<br />
b Ch 4 Grn O FF Ch 11 Grn (OL C) O<br />
c Ch 4 Yel O GG Ch 10 Grn (OL B) O<br />
d Ch 14 Grn (ø 4 Walk) O HH Ch 11 Yel (OL C) O<br />
e Output 4 O<br />
<strong>TS2</strong> (type-2) and <strong>2070</strong>N: B-Connector<br />
Naztec <strong>NTCIP</strong> <strong>Based</strong> NEMA <strong>TS2</strong> and <strong>2070</strong> Controller <strong>Manual</strong> – July 2009 Page 14-138
14.1.3 C-Connector - <strong>TS2</strong> (type-2) and <strong>2070</strong>N<br />
Note: Refer to the <strong>TS2</strong> I/O Mode chart (section 14.1.4) to reference Inputs 1-24 and Outputs 1-24. These inputs and outputs<br />
may be reassigned using the I/O Mode setting under Unit Parameters (MM->1->2->1). Mode 0 is the default mode.<br />
Pin Function I/O Pin Function I/O<br />
A Status A Bit (2) O i Ch 5 Grn O<br />
B Status B Bit (2) O j Ch 18 Grn (ø 5 Walk) O<br />
C Ch 16 Red (ø8 Don’t Walk) O k Output 21 O<br />
D Ch 8 Red O m Input 5 I<br />
E Ch 7 Yel O n Input 13 I<br />
F Ch 7 Red O p Input 6 I<br />
G Ch 6 Red O q Input 14 I<br />
H Ch 5 Red O r Input 15 I<br />
J Ch 5 Yel O s Input 16 I<br />
K Ch 19 Yel (ø 5 Ped Clear) O t Det Ch 8 I<br />
L Ch 19 Red (ø 5 Don’t Walk) O u Red Rest (2) I<br />
M Output 13 O v Omit Red (2) I<br />
N Output 5 O w Ch 16 Yel (ø 8 Ped Clear) O<br />
P Det Ch 5 I x Ch 8 Grn O<br />
R Ped Det Ch 5 I y Ch 20 Red (ø 7 Don’t Walk) O<br />
S Det Ch 6 I z Ch 15 Red (ø 6 Don’t Walk) O<br />
T Ped Det Ch 6 I AA Ch 15 Yel (ø 6 Ped Clear) O<br />
U Ped Det Ch 7 I BB Output 22 O<br />
V Det Ch 7 I CC Output 6 O<br />
W Ped Det Ch 8 I DD Output 14 O<br />
X Input 8 I EE Input 7 I<br />
Y Force Off (2) I FF Output 24 O<br />
Z Stop Time (2) I GG Output 8 O<br />
a Inh Max (2) I HH Output 16 O<br />
b Test C I JJ Ch 20 Grn (ø 7 Walk) O<br />
c Status Bit (2) O KK Ch 20 Yel (ø 7 Ped Clear) O<br />
d Ch 8 Red O LL Ch 15 Grn (ø 6 Walk) O<br />
e Ch 8 Yel O MM Output 23 O<br />
f Ch 7 Grn O NN Output 7 O<br />
g Ch 6 Grn O PP Output 15 O<br />
h Ch 6 Yel O<br />
<strong>TS2</strong> (type-2) and <strong>2070</strong>N: C-Connector<br />
Naztec <strong>NTCIP</strong> <strong>Based</strong> NEMA <strong>TS2</strong> and <strong>2070</strong> Controller <strong>Manual</strong> – July 2009 Page 14-139
14.1.4 <strong>TS2</strong> and <strong>2070</strong>(N) - I/O Modes 0 – 3<br />
Input Mode 0 Mode 1 Mode 2 Mode 3<br />
1 Ph1 Hold Prmpt 1 Prmpt 1 Prmpt 1<br />
2 Ph2 Hold Prmpt 3 Prmpt 3 Prmpt 3<br />
3 Ph3 Hold Det Ch 9 Det Ch 9<br />
4 Ph4 Hold Det Ch 10 Det Ch 10<br />
5 Ph5 Hold Det Ch 13 Det Ch 13<br />
6 Ph6 Hold Det Ch 14 Det Ch 14<br />
7 Ph7 Hold Det Ch 15 Det Ch 15<br />
8 Ph8 Hold Det Ch 16 Det Ch 16<br />
9 Ph1 Phase Omit Det Ch 11 Det Ch 11<br />
10 Ph2 Phase Omit Det Ch 12 Det Ch 12<br />
11 Ph3 Phase Omit Timing Plan C Det Ch 17 Timing Plan C<br />
12 Ph4 Phase Omit Timing Plan D Det Ch 18 Timing Plan D<br />
13 Ph5 Phase Omit Alt Seq A Det Ch 19 Alt Seq A<br />
14 Ph6 Phase Omit Alt Seq B Det Ch 20 Alt Seq B<br />
15 Ph7 Phase Omit Alt Seq C Alarm 1 Alt Seq C<br />
16 Ph8 Phase Omit Alt Seq D Alarm 2 Alt Seq D<br />
17 Ph1 Ped Omit Dimming Enabled Dimming Enabled Dimming Enabled<br />
18 Ph2 Ped Omit Auto Flash Local Flash Status Auto Flash<br />
19 Ph3 Ped Omit Timing Plan A Addr Bit 0 Timing Plan A<br />
20 Ph4 Ped Omit Timing Plan B Addr Bit 1 Timing Plan B<br />
21 Ph5 Ped Omit Offset 1 Addr Bit 2 Offset 1<br />
22 Ph6 Ped Omit Offset 2 Addr Bit 3 Offset 2<br />
23 Ph7 Ped Omit Offset 3 Addr Bit 4 Offset 3<br />
24 Ph8 Ped Omit TBC On Line MMU Flash Status TBC On Line<br />
Output Mode 0 Mode 1 Mode 2 Mode 3<br />
1 Ph1 On Prmpt Stat 1 Prmpt Stat 1<br />
2 Ph2 On Prmpt Stat 3 Prmpt Stat 3<br />
3 Ph3 On TBC Aux 1 TBC Aux 1 TBC Aux 1<br />
4 Ph4 On TBC Aux 2 TBC Aux 2 TBC Aux 2<br />
5 Ph5 On Timing Plan A Timing Plan A Timing Plan A<br />
6 Ph6 On Timing Plan B Timing Plan B Timing Plan B<br />
7 Ph7 On Offset 1 Offset 1 Offset 1<br />
8 Ph8 On Offset 2 Offset 2 Offset 2<br />
9 Ph1 Next Prmpt Stat 2 Prmpt Stat 2<br />
10 Ph2 Next Prmpt Stat 4 Prmpt Stat 4<br />
11 Ph3 Next Prmpt Stat 5 Prmpt Stat 5<br />
12 Ph4 Next Prmpt Stat 6 Prmpt Stat 6<br />
13 Ph5 Next Offset 3 Offset 3 Offset 3<br />
14 Ph6 Next Timing Plan C Timing Plan C Timing Plan C<br />
15 Ph7 Next Timing Plan D Timing Plan D Timing Plan D<br />
16 Ph8 Next Reserved Reserved<br />
17 Ph1 Check Free/Coord Free/Coord<br />
18 Ph2 Check Auto Flash Auto Flash Auto Flash<br />
19 Ph3 Check TBC Aux 3 TBC Aux 3<br />
20 Ph4 Check Reserved Reserved<br />
21 Ph5 Check Reserved Spec Func 1<br />
22 Ph6 Check Reserved Spec Func 2<br />
23 Ph7 Check Reserved Spec Func 3<br />
24 Ph8 Check Reserved Spec Func 4<br />
<strong>TS2</strong> and <strong>2070</strong>(N) I/O Modes 0 – 3: Selected under Channel/IO Parameters (MM->1->3->3)<br />
Naztec <strong>NTCIP</strong> <strong>Based</strong> NEMA <strong>TS2</strong> and <strong>2070</strong> Controller <strong>Manual</strong> – July 2009 Page 14-140
14.1.5 <strong>TS2</strong> and <strong>2070</strong>(N) - I/O Modes 4 – 7<br />
Input Mode 4 Mode 5 Mode 6 Mode 7<br />
1 Reserved by NEMA Reserved by NEMA<br />
2 Reserved by NEMA Reserved by NEMA<br />
3 Reserved by NEMA Reserved by NEMA<br />
4 Reserved by NEMA Reserved by NEMA<br />
5 Reserved by NEMA Reserved by NEMA<br />
6 Reserved by NEMA Reserved by NEMA<br />
7 Reserved by NEMA Reserved by NEMA<br />
8 Reserved by NEMA Reserved by NEMA<br />
9 Reserved by NEMA Reserved by NEMA<br />
10 Reserved by NEMA Reserved by NEMA<br />
11 Reserved by NEMA Reserved by NEMA<br />
12 Reserved by NEMA Reserved by NEMA<br />
13 Reserved by NEMA Reserved by NEMA<br />
14 Reserved by NEMA Reserved by NEMA<br />
15 Reserved by NEMA Reserved by NEMA<br />
16 Reserved by NEMA Reserved by NEMA<br />
17 Reserved by NEMA Reserved by NEMA<br />
18 Reserved by NEMA Reserved by NEMA<br />
19 Reserved by NEMA Reserved by NEMA<br />
20 Reserved by NEMA Reserved by NEMA<br />
21 Reserved by NEMA Reserved by NEMA<br />
22 Reserved by NEMA Reserved by NEMA<br />
23 Reserved by NEMA Reserved by NEMA<br />
24 Reserved by NEMA Reserved by NEMA<br />
Output Mode 4 Mode 5 Mode 6 Mode 7<br />
1 Reserved by NEMA Reserved by NEMA<br />
2 Reserved by NEMA Reserved by NEMA<br />
3 Reserved by NEMA Reserved by NEMA<br />
4 Reserved by NEMA Reserved by NEMA<br />
5 Reserved by NEMA Reserved by NEMA<br />
6 Reserved by NEMA Reserved by NEMA<br />
7 Reserved by NEMA Reserved by NEMA<br />
8 Reserved by NEMA Reserved by NEMA<br />
9 Reserved by NEMA Reserved by NEMA<br />
10 Reserved by NEMA Reserved by NEMA<br />
11 Reserved by NEMA Reserved by NEMA<br />
12 Reserved by NEMA Reserved by NEMA<br />
13 Reserved by NEMA Reserved by NEMA<br />
14 Reserved by NEMA Reserved by NEMA<br />
15 Reserved by NEMA Reserved by NEMA<br />
16 Reserved by NEMA Reserved by NEMA<br />
17 Reserved by NEMA Reserved by NEMA<br />
18 Reserved by NEMA Reserved by NEMA<br />
19 Reserved by NEMA Reserved by NEMA<br />
20 Reserved by NEMA Reserved by NEMA<br />
21 Reserved by NEMA Reserved by NEMA<br />
22 Reserved by NEMA Reserved by NEMA<br />
23 Reserved by NEMA Reserved by NEMA<br />
24 Reserved by NEMA Reserved by NEMA<br />
Naztec <strong>NTCIP</strong> <strong>Based</strong> NEMA <strong>TS2</strong> and <strong>2070</strong> Controller <strong>Manual</strong> – July 2009 Page 14-141
14.1.6 <strong>TS2</strong> D-Connector - DIAMOND Mapping<br />
Pin Function I/O Pin Function I/O<br />
10 Special Function 2 O 9 System Detector 6 I<br />
14 Special Function 6 O 11 Free I<br />
22 Special Function 5 O 12 Not Assigned I<br />
23 Ext. Coord Active O 13 Not Assigned I<br />
24 Flash Active O 14 Not Assigned I<br />
35 Offset 1 O 15 Reserved I<br />
39* I/O Spare O 16 Reserved I<br />
42 Not Assigned O 17 N/A I<br />
43 Special Function 1 O 18 Reserved I<br />
44 Split 3, Preempt 2 O 19 Preempt 1 I<br />
45 Split 2, Preempt 1 O 20 Preempt 2 I<br />
46 Offset 4, Preempt 5 O 21 Preempt 3 I<br />
47 Offset 3, Preempt 6 O 22 Preempt 4 I<br />
48 Offset 2 O 23 Preempt 5 I<br />
49 Flash O 24 Preempt 6 I<br />
50 Cycle 3, Preempt 4 O 25 Detector 45P I<br />
51 Cycle 2, Preempt 3 O 26 Detector 25S I<br />
52 Offset 1 O 27 Detector 18P I<br />
53 +24 VDC O 28 Detector 16S I<br />
54 Logic Ground O 29 Det. Cir. 2b/1P I<br />
55 Chassis Ground O 30 Det. Cir. 2a I<br />
56 Not Assigned O 31 Det. Cir. 1b/5P I<br />
57 Not Assigned O 32 Det. Cir. 1a I<br />
33 External Alarm 1 I<br />
1 System Detector 2 I 34 External Alarm 2 I<br />
2 System Detector 7 I 35 Not Assigned I<br />
3 System Detector 8 I 36 Not Assigned I<br />
4 Flash I 37 Not Assigned I<br />
5 System Detector 3 I 38 Not Assigned I<br />
6 System Detector 4 I 39 External Alarm 3 I<br />
7 System Detector 1 I 40 External Alarm 4 I<br />
<strong>TS2</strong> D-Connector DIAMOND Mapping (provided under MM->1->3->3)<br />
Naztec <strong>NTCIP</strong> <strong>Based</strong> NEMA <strong>TS2</strong> and <strong>2070</strong> Controller <strong>Manual</strong> – July 2009 Page 14-142
14.1.7 <strong>TS2</strong> D-Connector - Texas 2, V14 (TX2-V14) Standard Mapping<br />
Pin Function I/O Pin Function I/O<br />
10 Prmpt Active O 6 Offset 3 I<br />
14 Special Function 6 O 7 Flash In I<br />
22 Special Function 5 O 8 Prmpt 5 I<br />
23 Ext. Coord Active O 9 Prmpt 3 I<br />
24 Flash Active O 11 Split 2 I<br />
35 Offset 1 O 12 Cycle 3 I<br />
39* I/O Spare O 13 Offset 1 I<br />
40 Special Function 8 O 15 Prmpt 2 I<br />
41 Special Function 7 O 16 Prmpt 1 I<br />
42 Offset 2 O 17 Veh16 I<br />
43 Offset 3 / Preempt 6 O 18 Alarm1 I<br />
44 Split 3 / Preempt 2 O 19 Split 3 I<br />
45 Special Function 1 O 20 Offset 4 I<br />
46 Special Function 3 O 21 Veh15 I<br />
47 Special Function 4/Pulse O 25 Veh14 I<br />
48 Spare 26 Alarm 3 I<br />
49 Offset 4 / Preempt 5 O 27 Alarm 4 I<br />
50 Split 2 / Preempt 1 O 28 Dimming/Alarm 5 I<br />
51 Cycle 3 / Preempt 4 O 29 Alarm 2 I<br />
52 Special Function 2 O 30 Veh13 I<br />
53 +24 VDC O 31 Veh10 I<br />
54 Logic Ground O 32 Veh11 I<br />
55 Chassis Ground O 33 Veh12 I<br />
56 Cycle 2 / Preempt 3 O 34 Prmpt 6 I<br />
1 Offset 2 I 36 Alarm 6 I<br />
2 Free I 37 Enable Prmpt I<br />
3 System/TOD Resync I 38* Spare I<br />
4 Prmpt 4 I 39* Spare I<br />
5 Cycle 2 I 57 Veh9 I<br />
<strong>TS2</strong> D-Connector TX-2 V14 Mapping (provided under MM->1->3->3)<br />
Naztec <strong>NTCIP</strong> <strong>Based</strong> NEMA <strong>TS2</strong> and <strong>2070</strong> Controller <strong>Manual</strong> – July 2009 Page 14-143
14.1.8 [v61] <strong>TS2</strong> D-Connector - Texas 2, V14 (TX2-V14) Alternate 820A Mapping<br />
The 820A function is enabled by a new selection (“820A”) of the Prmpt/ExtCoor Output parameter, which is on the<br />
Channel and I/0 Parameters entry screen. When 820A is selected, the new Preempt interval status <strong>for</strong> intervals 1-7 is output<br />
on pins 14, 22, 35, 39-42, and 48. Also, the standard Preempt Status <strong>for</strong> Preempts 1-6 is output on pins 43, 44, 49-51, and<br />
56 is output.<br />
Pin Function I/O Pin Function I/O<br />
10 Prmpt Active O 6 Offset 3 I<br />
14 Spec Func 6 / Prmpt Interval 1 O 7 Flash In I<br />
22 Spec Func 5 / Prmpt Interval 2 O 8 Prmpt 5 I<br />
23 Ext. Coord Active O 9 Prmpt 3 I<br />
24 Flash Active O 11 Split 2 I<br />
35 Offset 1 / Prmpt Interval 3 O 12 Cycle 3 I<br />
39* I/O Spare / Prmpt Interval 4 O 13 Offset 1 I<br />
40 Spec Func 8 / Prmpt Interval 5 O 15 Prmpt 2 I<br />
41 Spec Func 7 / Prmpt Interval 6 O 16 Prmpt 1 I<br />
42 Offset 2 / Prmpt Interval 7 O 17 Veh16 I<br />
43 Offset 3 / Preempt Status 6 O 18 Alarm1 I<br />
44 Split 3 / Preempt Status 2 O 19 Split 3 I<br />
45 Special Function 1 O 20 Offset 4 I<br />
46 Special Function 3 O 21 Veh15 I<br />
47 Special Function 4/Pulse O 25 Veh14 I<br />
48 UCF Soft Flash 26 Alarm 3 I<br />
49 Offset 4 / Preempt Status 5 O 27 Alarm 4 I<br />
50 Split 2 / Preempt Status 1 O 28 Dimming/Alarm 5 I<br />
51 Cycle 3 / Preempt Status 4 O 29 Alarm 2 I<br />
52 Special Function 2 O 30 Veh13 I<br />
53 +24 VDC O 31 Veh10 I<br />
54 Logic Ground O 32 Veh11 I<br />
55 Chassis Ground O 33 Veh12 I<br />
56 Cycle 2 / Preempt Status 3 O 34 Prmpt 6 I<br />
1 Offset 2 I 36 Alarm 6 I<br />
2 Free I 37 Enable Prmpt I<br />
3 System/TOD Resync I 38* Spare I<br />
4 Prmpt 4 I 39* Spare I<br />
5 Cycle 2 I 57 Veh9 I<br />
<strong>TS2</strong> D-Connector TX-2 V14 Alternate 820A Mapping (provided under MM->1->3->3)<br />
Naztec <strong>NTCIP</strong> <strong>Based</strong> NEMA <strong>TS2</strong> and <strong>2070</strong> Controller <strong>Manual</strong> – July 2009 Page 14-144
14.1.9 <strong>TS2</strong> D-Connector – 40 Detector Mapping<br />
10 Special Function 5 O Pin Function I/O<br />
10 Special Function 5 O 6 Veh Det 19 I<br />
14 Veh Det 39 I 7 Veh Det 32 I<br />
22 Veh Det 40 I 8 Preempt In 5 I<br />
23 Veh Det 29 I 9 Preempt In 3 I<br />
24 Veh Det 28 I 11 Veh Det 23 I<br />
35 Special Function 6 O 12 Veh Det 22 I<br />
39 Spare O 13 Veh Det 17 I<br />
40 Veh Det 37 I 15 Veh Det 30 I<br />
41 Veh Det 38 I 16 Preempt In 1 I<br />
42 Special Function 7 O 17 Veh Det 16 I<br />
43 Preempt 6 Out O 18 alarm 1 I<br />
44 Special Function 8 O 19 Veh Det 24 I<br />
45 Spec Func 1 O 20 Veh Det 20 I<br />
46 Special Function 3 O 21 Veh Det 15 I<br />
47 Special Function 4 O 25 Veh Det 14 I<br />
48 Aux Out 1 O 26 Veh Det 25 I<br />
49 Preempt 5 Out O 27 Veh Det 26 I<br />
50 Preempt 1 Out O 28 Veh Det 27 I<br />
51 Preempt 4 Out O 29 Alarm 2 I<br />
52 Special Function 2 O 30 Veh Det 13 I<br />
53 +24 VDC O 31 Veh Det 10 I<br />
54 Logic Ground O 32 Veh Det 11 I<br />
55 Chassis Ground O 33 Veh Det 12 I<br />
56 Preempt 3 Out O 34 Preempt In 6 I<br />
1 Veh Det 18 I 36 Veh Det 33 I<br />
2 Free Input I 37 Veh Det 34 I<br />
3 Veh Det 31 I 38 Veh Det 35 I<br />
4 Preempt In 4 I 39 Veh Det 36 I<br />
5 Veh Det 21 I 57 Veh Det 9 I<br />
<strong>TS2</strong> D-Connector 40 Detector Mapping (provided under MM->1->3->3)<br />
Naztec <strong>NTCIP</strong> <strong>Based</strong> NEMA <strong>TS2</strong> and <strong>2070</strong> Controller <strong>Manual</strong> – July 2009 Page 14-145
14.1.10 <strong>TS2</strong> D-Connector – Santa Clara County (SCC) Mapping<br />
Pin Function I/O Pin Function I/O<br />
10 Special Function 7 O 6 Platoon Rx 3 I<br />
14 Special Function 2 O 7 Spare 1 I<br />
22 Special Function 1 O 8 Preempt 6 In I<br />
23 Veh Det 24/ Bike 8 I 9 Preempt 4 In I<br />
24<br />
Veh Det 23 / Bike 7/ Alarm 8<br />
(User Alarm 4) I 11<br />
Low Priority Preempt<br />
Inhibit 3<br />
Low Priority Preempt<br />
Inhibit 2<br />
35<br />
Offset 4 Out / Preempt 5 Out<br />
O 12<br />
I<br />
39 Spare O 13 Platoon Rx 1 I<br />
40 Special Function 4 O 15 Preempt 3 In I<br />
41 Special Function 3 O 16 Preempt 1 In I<br />
42 Offset 3 Out / Preempt 6 Out O 17 Veh Det 16 I<br />
Veh Det 17 / Bike 1 /<br />
Offset 2 Out<br />
43<br />
O 18 Alarm 5 (User Alarm 1) I<br />
Low Priority Preempt<br />
Split 2 Out / Preempt 1 Out<br />
44<br />
O 19 Inhibit 4<br />
I<br />
45 Spare 2 O 20 Platoon Rx 4 I<br />
46 Spare 4 O 21 Veh Det 15 I<br />
47 Spare 5 O 25 Veh Det 14 I<br />
Veh Det 19 / Bike 3 /<br />
Special Function 8<br />
48<br />
O 26 Alarm 6 (User Alarm 2) I<br />
49 Offset 1 Out O 27 Veh Det 20 / Bike 4 I<br />
50 Split 3 Out / Preempt 2 Out O 28 Veh Det 22 / Bike 6 I<br />
51 Cycle 2 Out / Preempt 3 Out O 29 Veh Det 18 / Bike 2 I<br />
52 Spare 3 O 30 Veh Det 13 I<br />
53 +24 VDC O 31 Veh Det 10 I<br />
54 Logic Ground O 32 Veh Det 11 I<br />
55 Chassis Ground O 33 Veh Det 12 I<br />
Veh Det 21 / Bike 5 /<br />
Cycle 3 Out / Preempt 4 Out<br />
56<br />
O 34 Alarm 7 (User Alarm 3) I<br />
1 Platoon Rx 2 I 36 Special Function 5 O<br />
2 Local Flash In I 37 Special Function 6 O<br />
Det Fail / Alarm 10 (User<br />
Free Input<br />
3<br />
I 38 Alarm 5)<br />
I<br />
4 Preempt 5 In I 39 Alarm 11 (User Alarm 6) I<br />
5 Low Priority Preempt Inhibit 1 I 57 Veh Det 9 I<br />
<strong>TS2</strong> D-Connector SCC Mapping (provided under MM->1->3->3)<br />
I<br />
Naztec <strong>NTCIP</strong> <strong>Based</strong> NEMA <strong>TS2</strong> and <strong>2070</strong> Controller <strong>Manual</strong> – July 2009 Page 14-146
14.2 <strong>2070</strong> Specific I/O Maps<br />
The following maps are based on the <strong>2070</strong> hardware mapping as specified in the tables below:<br />
The following are commonly used modes standardized by a specific agency and used by multiple agencies:<br />
MODE 0:<br />
MODE 1:<br />
MODE 2:<br />
MODE 3:<br />
MODE 6:<br />
MODE 7:<br />
CALTRANS TEES Standard<br />
NY DOT Standard<br />
DADE County<br />
Plano Texas<br />
HOV Gate<br />
Broward County<br />
Naztec <strong>NTCIP</strong> <strong>Based</strong> NEMA <strong>TS2</strong> and <strong>2070</strong> Controller <strong>Manual</strong> – July 2009 Page 14-147
14.2.1 <strong>2070</strong> 2A (C1 Connector) Mapping – Caltrans TEES Option (Mode 0)<br />
* Next to the Pin Number indicates the Pin is on the C11S rather than the C1<br />
C1/C11S*<br />
Pin Source Func<br />
Output<br />
Description<br />
C1/C11S*<br />
Pin Source Func<br />
Input<br />
Description<br />
2 O1-1 14 Ch14 Red 39 I1-1 2 Veh Call 2<br />
3 O1-2 62 Ch14 Green 40 I1-2 16 Veh Call 16<br />
4 O1-3 4 Ch4 Red 41 I1-3 8 Veh Call 8<br />
5 O1-4 28 Ch4 Yellow 42 I1-4 22 Veh Call 22<br />
6 O1-5 52 Ch4 Green 43 I1-5 3 Veh Call 3<br />
7 O1-6 3 Ch3 Red 44 I1-6 17 Veh Call 17<br />
8 O1-7 27 Ch3 Yellow 45 I1-7 9 Veh Call 9<br />
9 O1-8 51 Ch3 Green 46 I1-8 23 Veh Call 23<br />
10 O2-1 13 Ch13 Red 47 I2-1 6 Veh Call 6<br />
11 O2-2 61 Ch13 Green 48 I2-2 20 Veh Call 20<br />
12 O2-3 2 Ch2 Red 49 I2-3 12 Veh Call 12<br />
13 O2-4 26 Ch2 Yellow 50 I2-4 26 Veh Call 26<br />
15 O2-5 50 Ch2 Green 51 I2-5 198 Pre 1 In<br />
16 O2-6 1 Ch1 Red 52 I2-6 199 Pre 2 In<br />
17 O2-7 25 Ch1 Yellow 53 I2-7 189 Unused<br />
18 O2-8 49 Ch1 Green 54 I2-8 189 Unused<br />
19 O3-1 16 Ch16 Red 55 I3-1 15 Veh Call 15<br />
20 O3-2 64 Ch16 Green 56 I3-2 1 Veh Call 1<br />
21 O3-3 8 Ch8 Red 57 I3-3 21 Veh Call 21<br />
22 O3-4 32 Ch8 Yellow 58 I3-4 7 Veh Call 7<br />
23 O3-5 56 Ch8 Green 59 I3-5 27 Veh Call 27<br />
24 O3-6 7 Ch7 Red 60 I3-6 13 Veh Call 13<br />
25 O3-7 31 Ch7 Yellow 61 I3-7 28 Veh Call 28<br />
26 O3-8 55 Ch7 Green 62 I3-8 14 Veh Call 14<br />
27 O4-1 15 Ch15 Red 10* I4-1 189 Unused<br />
28 O4-2 63 Ch15 Green 11* I4-2 189 Unused<br />
29 O4-3 6 Ch6 Red 12* I4-3 189 Unused<br />
30 O4-4 30 Ch6 Yellow 13* I4-4 189 Unused<br />
31 O4-5 54 Ch6 Green 63 I4-5 4 Veh Call 4<br />
32 O4-6 5 Ch5 Red 64 I4-6 18 Veh Call 18<br />
33 O4-7 29 Ch5 Yellow 65 I4-7 10 Veh Call 10<br />
34 O4-8 53 Ch5 Green 66 I4-8 24 Veh Call 24<br />
Naztec <strong>NTCIP</strong> <strong>Based</strong> NEMA <strong>TS2</strong> and <strong>2070</strong> Controller <strong>Manual</strong> – July 2009 Page 14-148
C1/C11S*<br />
Pin Source Func<br />
Output<br />
Description<br />
C1/C11S*<br />
Pin Source Func<br />
Input<br />
Description<br />
35 O5-1 37 Ch13 Yellow 67 I5-1 130 Ped Call 2<br />
36 O5-2 39 Ch15 Yellow 68 I5-2 132 Ped Call 4<br />
37 O5-3 38 Ch14 Yellow 69 I5-3 134 Ped Call 6<br />
38 O5-4 40 Ch16 Yellow 70 I5-4 136 Ped Call 8<br />
100 O5-5 42 Ch18 Yellow 71 I5-5 200 Pre 3 In<br />
101 O5-6 41 Ch17 Yellow 72 I5-6 201 Pre 4 In<br />
102 O5-7 115 Not Used 73 I5-7 202 Pre 5 In<br />
103 O5-8 114 Watchdog 74 I5-8 203 Pre 6 In<br />
83 O6-1 18 Ch18 Red 75 I6-1 189 Unused<br />
84 O6-2 66 Ch18 Green 76 I6-2 5 Veh Call 5<br />
85 O6-3 12 Ch12 Red 77 I6-3 19 Veh Call 19<br />
86 O6-4 36 Ch12 Yellow 78 I6-4 11 Veh Call 11<br />
87 O6-5 60 Ch12 Green 79 I6-5 25 Veh Call 25<br />
88 O6-6 11 Ch11 Red 80 I6-6 178 Int Advance<br />
89 O6-7 35 Ch11 Yellow 81 I6-7 208 Local Flash<br />
90 O6-8 59 Ch11 Green 82 I6-8 207 Comp StopTm<br />
91 O7-1 17 Ch17 Red 15* I7-1 189 Unused<br />
93 O7-2 65 Ch17 Green 16* I7-2 189 Unused<br />
94 O7-3 10 Ch10 Red 17* I7-3 189 Unused<br />
95 O7-4 34 Ch10 Yellow 18* I7-4 189 Unused<br />
96 O7-5 58 Ch10 Green 19* I7-5 189 Unused<br />
97 O7-6 9 Ch9 Red 20* I7-6 189 Unused<br />
98 O7-7 33 Ch9 Yellow 21* I7-7 189 Unused<br />
99 O7-8 57 Ch9 Green 22* I7-8 189 Unused<br />
1* O8-1 115 Not Used 23* I8-1 189 Unused<br />
2* O8-2 115 Not Used 24* I8-2 189 Unused<br />
3* O8-3 115 Not Used 25* I8-3 189 Unused<br />
4* O8-4 115 Not Used 26* I8-4 189 Unused<br />
5* O8-5 115 Not Used 27* I8-5 189 Unused<br />
6* O8-6 115 Not Used 28* I8-6 189 Unused<br />
7* O8-7 115 Not Used 29* I8-7 189 Unused<br />
8* O8-8 115 Not Used 30* I8-8 189 Unused<br />
<strong>2070</strong> 2A Mapping - Caltrans TEES option (MM->1->8->9)<br />
* Next to the Pin Number indicates the Pin is on the C11S rather than the C1<br />
Naztec <strong>NTCIP</strong> <strong>Based</strong> NEMA <strong>TS2</strong> and <strong>2070</strong> Controller <strong>Manual</strong> – July 2009 Page 14-149
14.2.2 <strong>2070</strong> 2A (C1 Connector) Mapping – NY DOT Mode 1<br />
C1<br />
Pin Source Func Output Description<br />
C1<br />
Pin Source Func Input Description<br />
2 O1-1 1 Ch1 Red 39 I1-1 1 Veh Call 1<br />
3 O1-2 49 Ch1 Green 40 I1-2 2 Veh Call 2<br />
4 O1-3 2 Ch2 Red 41 I1-3 3 Veh Call 3<br />
5 O1-4 26 Ch2 Yellow 42 I1-4 4 Veh Call 4<br />
6 O1-5 50 Ch2 Green 43 I1-5 5 Veh Call 5<br />
7 O1-6 3 Ch3 Red 44 I1-6 6 Veh Call 6<br />
8 O1-7 27 Ch3 Yellow 45 I1-7 7 Veh Call 7<br />
9 O1-8 51 Ch3 Green 46 I1-8 8 Veh Call 8<br />
10 O2-1 4 Ch4 Red 47 I2-1 130 Ped Call 2<br />
11 O2-2 52 Ch4 Green 48 I2-2 132 Ped Call 4<br />
12 O2-3 5 Ch5 Red 49 I2-3 134 Ped Call 6<br />
13 O2-4 29 Ch5 Yellow 50 I2-4 136 Ped Call 8<br />
15 O2-5 53 Ch5 Green 51 I2-5 189 Unused<br />
16 O2-6 6 Ch6 Red 52 I2-6 189 Unused<br />
17 O2-7 30 Ch6 Yellow 53 I2-7 189 Unused<br />
18 O2-8 54 Ch6 Green 54 I2-8 189 Unused<br />
19 O3-1 7 Ch7 Red 55 I3-1 189 Unused<br />
20 O3-2 55 Ch7 Green 56 I3-2 189 Unused<br />
21 O3-3 8 Ch8 Red 57 I3-3 189 Unused<br />
22 O3-4 32 Ch8 Yellow 58 I3-4 189 Unused<br />
23 O3-5 56 Ch8 Green 59 I3-5 189 Unused<br />
24 O3-6 9 Ch9 Red 60 I3-6 189 Unused<br />
25 O3-7 33 Ch9 Yellow 61 I3-7 189 Unused<br />
26 O3-8 57 Ch9 Green 62 I3-8 189 Unused<br />
27 O4-1 10 Ch10 Red I4-1 189 Unused<br />
28 O4-2 58 Ch10 Green I4-2 189 Unused<br />
29 O4-3 11 Ch11 Red I4-3 189 Unused<br />
30 O4-4 35 Ch11 Yellow I4-4 189 Unused<br />
31 O4-5 59 Ch11 Green 63 I4-5 189 Unused<br />
32 O4-6 12 Ch12 Red 64 I4-6 189 Unused<br />
33 O4-7 36 Ch12 Yellow 65 I4-7 229 33xCMUStop<br />
34 O4-8 60 Ch12 Green 66 I4-8 228 33xFlashSns<br />
Naztec <strong>NTCIP</strong> <strong>Based</strong> NEMA <strong>TS2</strong> and <strong>2070</strong> Controller <strong>Manual</strong> – July 2009 Page 14-150
C1<br />
Pin Source Func Output Description<br />
C1<br />
Pin Source Func Input Description<br />
35 O5-1 28 Ch4 Yellow 67 I5-1 189 Unused<br />
36 O5-2 34 Ch10 Yellow 68 I5-2 189 Unused<br />
37 O5-3 25 Ch1 Yellow 69 I5-3 189 Unused<br />
38 O5-4 31 Ch7 Yellow 70 I5-4 189 Unused<br />
100 O5-5 115 Not Used 71 I5-5 189 Unused<br />
101 O5-6 115 Not Used 72 I5-6 189 Unused<br />
102 O5-7 115 Not Used 73 I5-7 207 Comp StopTm<br />
103 O5-8 114 Watchdog 74 I5-8 208 Local Flash<br />
83 O6-1 115 Not Used 75 I6-1 130 Ped Call 2<br />
84 O6-2 115 Not Used 76 I6-2 132 Ped Call 4<br />
85 O6-3 13 Ch13 Red 77 I6-3 134 Ped Call 6<br />
86 O6-4 37 Ch13 Yellow 78 I6-4 136 Ped Call 8<br />
87 O6-5 61 Ch13 Green 79 I6-5 189 Unused<br />
88 O6-6 14 Ch14 Red 80 I6-6 189 Unused<br />
89 O6-7 38 Ch14 Yellow 81 I6-7 189 Unused<br />
90 O6-8 62 Ch14 Green 82 I6-8 189 Unused<br />
91 O7-1 115 Not Used I7-1 189 Unused<br />
93 O7-2 115 Not Used I7-2 189 Unused<br />
94 O7-3 115 Not Used I7-3 189 Unused<br />
95 O7-4 115 Not Used I7-4 189 Unused<br />
96 O7-5 115 Not Used I7-5 189 Unused<br />
97 O7-6 115 Not Used I7-6 189 Unused<br />
98 O7-7 115 Not Used I7-7 189 Unused<br />
99 O7-8 115 Not Used I7-8 189 Unused<br />
O8-1 115 Not Used I8-1 189 Unused<br />
O8-2 115 Not Used I8-2 189 Unused<br />
O8-3 115 Not Used I8-3 189 Unused<br />
O8-4 115 Not Used I8-4 189 Unused<br />
O8-5 115 Not Used I8-5 189 Unused<br />
O8-6 115 Not Used I8-6 189 Unused<br />
O8-7 115 Not Used I8-7 189 Unused<br />
O8-8 115 Not Used I8-8 189 Unused<br />
<strong>2070</strong> 2A (C1 Connector) Mapping – NY DOT Mode 1 Option (MM->1->8->9)<br />
Naztec <strong>NTCIP</strong> <strong>Based</strong> NEMA <strong>TS2</strong> and <strong>2070</strong> Controller <strong>Manual</strong> – July 2009 Page 14-151
14.2.3 <strong>2070</strong> 2A (C1 Connector) Mapping – Mode 2<br />
C1<br />
Pin Source Func Output Description<br />
C1<br />
Pin Source Func Input Description<br />
2 O1-1 14 Ch14 Red 39 I1-1 1 Veh Call 1<br />
3 O1-2 62 Ch14 Green 40 I1-2 2 Veh Call 2<br />
4 O1-3 4 Ch4 Red 41 I1-3 3 Veh Call 3<br />
5 O1-4 28 Ch4 Yellow 42 I1-4 4 Veh Call 4<br />
6 O1-5 52 Ch4 Green 43 I1-5 5 Veh Call 5<br />
7 O1-6 3 Ch3 Red 44 I1-6 6 Veh Call 6<br />
8 O1-7 27 Ch3 Yellow 45 I1-7 7 Veh Call 7<br />
9 O1-8 51 Ch3 Green 46 I1-8 8 Veh Call 8<br />
10 O2-1 13 Ch13 Red 47 I2-1 9 Veh Call 9<br />
11 O2-2 61 Ch13 Green 48 I2-2 10 Veh Call 10<br />
12 O2-3 2 Ch2 Red 49 I2-3 189 Unused<br />
13 O2-4 26 Ch2 Yellow 50 I2-4 169 R2 Frc Off<br />
15 O2-5 50 Ch2 Green 51 I2-5 198 Pre 1 In<br />
16 O2-6 1 Ch1 Red 52 I2-6 199 Pre 2 In<br />
17 O2-7 25 Ch1 Yellow 53 I2-7 227 Offset 3<br />
18 O2-8 49 Ch1 Green 54 I2-8 226 Offset 2<br />
19 O3-1 16 Ch16 Red 55 I3-1 189 Unused<br />
20 O3-2 64 Ch16 Green 56 I3-2 11 Veh Call 11<br />
21 O3-3 8 Ch8 Red 57 I3-3 12 Veh Call 12<br />
22 O3-4 32 Ch8 Yellow 58 I3-4 13 Veh Call 13<br />
23 O3-5 56 Ch8 Green 59 I3-5 14 Veh Call 14<br />
24 O3-6 7 Ch7 Red 60 I3-6 15 Veh Call 15<br />
25 O3-7 31 Ch7 Yellow 61 I3-7 16 Veh Call 16<br />
26 O3-8 55 Ch7 Green 62 I3-8 17 Veh Call 17<br />
27 O4-1 15 Ch15 Red I4-1 189 Unused<br />
28 O4-2 63 Ch15 Green I4-2 189 Unused<br />
29 O4-3 6 Ch6 Red I4-3 189 Unused<br />
30 O4-4 30 Ch6 Yellow I4-4 189 Unused<br />
31 O4-5 54 Ch6 Green 63 I4-5 18 Veh Call 18<br />
32 O4-6 5 Ch5 Red 64 I4-6 189 Unused<br />
33 O4-7 29 Ch5 Yellow 65 I4-7 179 Door Open<br />
34 O4-8 53 Ch5 Green 66 I4-8 189 Unused<br />
Naztec <strong>NTCIP</strong> <strong>Based</strong> NEMA <strong>TS2</strong> and <strong>2070</strong> Controller <strong>Manual</strong> – July 2009 Page 14-152
C1<br />
Pin Source Func Output Description<br />
C1<br />
Pin Source Func Input Description<br />
35 O5-1 115 Not Used 67 I5-1 181 Man Ctrl Enbl<br />
36 O5-2 115 Not Used 68 I5-2 189 Unused<br />
37 O5-3 115 Not Used 69 I5-3 178 Int Advance<br />
38 O5-4 103 Special 1 70 I5-4 191 Flash In<br />
100 O5-5 115 Not Used 71 I5-5 200 Pre 3 In<br />
101 O5-6 115 Not Used 72 I5-6 201 Pre 4 In<br />
102 O5-7 115 Not Used 73 I5-7 202 Pre 5 In<br />
103 O5-8 114 Watchdog 74 I5-8 203 Pre 6 In<br />
83 O6-1 115 Not Used 75 I6-1 130 Ped Call 2<br />
84 O6-2 115 Not Used 76 I6-2 134 Ped Call 6<br />
85 O6-3 12 Ch12 Red 77 I6-3 132 Ped Call 4<br />
86 O6-4 36 Ch12 Yellow 78 I6-4 136 Ped Call 8<br />
87 O6-5 60 Ch12 Green 79 I6-5 189 Unused<br />
88 O6-6 11 Ch11 Red 80 I6-6 189 Unused<br />
89 O6-7 35 Ch11 Yellow 81 I6-7 208 Local Flash<br />
90 O6-8 59 Ch11 Green 82 I6-8 207 Comp Stop Tm<br />
91 O7-1 115 Not Used I7-1 189 Unused<br />
93 O7-2 115 Not Used I7-2 189 Unused<br />
94 O7-3 10 Ch10 Red I7-3 189 Unused<br />
95 O7-4 34 Ch10 Yellow I7-4 189 Unused<br />
96 O7-5 58 Ch10 Green I7-5 189 Unused<br />
97 O7-6 9 Ch9 Red I7-6 189 Unused<br />
98 O7-7 33 Ch9 Yellow I7-7 189 Unused<br />
99 O7-8 57 Ch9 Green I7-8 189 Unused<br />
O8-1 115 Not Used I8-1 189 Unused<br />
O8-2 115 Not Used I8-2 189 Unused<br />
O8-3 115 Not Used I8-3 189 Unused<br />
O8-4 115 Not Used I8-4 189 Unused<br />
O8-5 115 Not Used I8-5 189 Unused<br />
O8-6 115 Not Used I8-6 189 Unused<br />
O8-7 115 Not Used I8-7 189 Unused<br />
O8-8 115 Not Used I8-8 189 Unused<br />
<strong>2070</strong> 2A (C1 Connector) Mapping – Mode 2 Option (MM->1->8->9)<br />
Naztec <strong>NTCIP</strong> <strong>Based</strong> NEMA <strong>TS2</strong> and <strong>2070</strong> Controller <strong>Manual</strong> – July 2009 Page 14-153
14.2.4 <strong>2070</strong> 2A (C1 Connector) Mapping – Mode 3<br />
C1<br />
Pin Source Func Output Description<br />
C1<br />
Pin Source Func Input Description<br />
2 O1-1 1 Ch1 Red 39 I1-1 1 Veh Call 1<br />
3 O1-2 49 Ch1 Green 40 I1-2 2 Veh Call 2<br />
4 O1-3 2 Ch2 Red 41 I1-3 3 Veh Call 3<br />
5 O1-4 26 Ch2 Yellow 42 I1-4 4 Veh Call 4<br />
6 O1-5 50 Ch2 Green 43 I1-5 5 Veh Call 5<br />
7 O1-6 3 Ch3 Red 44 I1-6 6 Veh Call 6<br />
8 O1-7 27 Ch3 Yellow 45 I1-7 7 Veh Call 7<br />
9 O1-8 51 Ch3 Green 46 I1-8 8 Veh Call 8<br />
10 O2-1 4 Ch4 Red 47 I2-1 9 Veh Call 9<br />
11 O2-2 52 Ch4 Green 48 I2-2 10 Veh Call 10<br />
12 O2-3 5 Ch5 Red 49 I2-3 11 Veh Call 11<br />
13 O2-4 29 Ch5 Yellow 50 I2-4 12 Veh Call 12<br />
15 O2-5 53 Ch5 Green 51 I2-5 13 Veh Call 13<br />
16 O2-6 6 Ch6 Red 52 I2-6 14 Veh Call 14<br />
17 O2-7 30 Ch6 Yellow 53 I2-7 15 Veh Call 15<br />
18 O2-8 54 Ch6 Green 54 I2-8 16 Veh Call 16<br />
19 O3-1 7 Ch7 Red 55 I3-1 130 Ped Call 2<br />
20 O3-2 55 Ch7 Green 56 I3-2 132 Ped Call 4<br />
21 O3-3 8 Ch8 Red 57 I3-3 134 Ped Call 6<br />
22 O3-4 32 Ch8 Yellow 58 I3-4 136 Ped Call 8<br />
23 O3-5 56 Ch8 Green 59 I3-5 17 Veh Call 17<br />
24 O3-6 9 Ch9 Red 60 I3-6 18 Veh Call 18<br />
25 O3-7 33 Ch9 Yellow 61 I3-7 19 Veh Call 19<br />
26 O3-8 57 Ch9 Green 62 I3-8 20 Veh Call 20<br />
27 O4-1 10 Ch10 Red I4-1 189 Unused<br />
28 O4-2 58 Ch10 Green I4-2 189 Unused<br />
29 O4-3 11 Ch11 Red I4-3 189 Unused<br />
30 O4-4 35 Ch11 Yellow I4-4 189 Unused<br />
31 O4-5 59 Ch11 Green 63 I4-5 189 Unused<br />
32 O4-6 12 Ch12 Red 64 I4-6 208 Local Flash<br />
33 O4-7 38 Ch14 Yellow 65 I4-7 229 Comp Stop Time<br />
34 O4-8 60 Ch12 Green 66 I4-8 189 Unused<br />
Naztec <strong>NTCIP</strong> <strong>Based</strong> NEMA <strong>TS2</strong> and <strong>2070</strong> Controller <strong>Manual</strong> – July 2009 Page 14-154
C1<br />
Pin Source Func Output Description<br />
C1<br />
Pin Source Func Input Description<br />
35 O5-1 28 Ch4 Yellow 67 I5-1 200 Pre 3 input<br />
36 O5-2 34 Ch10 Yellow 68 I5-2 201 Pre 4 input<br />
37 O5-3 25 Ch1 Yellow 69 I5-3 202 Pre 5 input<br />
38 O5-4 31 Ch7 Yellow 70 I5-4 203 Pre 6 input<br />
100 O5-5 40 Ch16 Yellow 71 I5-5 189 Unused<br />
101 O5-6 39 Ch15 Yellow 72 I5-6 189 Unused<br />
102 O5-7 115 Not Used 73 I5-7 189 Unused<br />
103 O5-8 114 Watchdog 74 I5-8 189 Unused<br />
83 O6-1 15 Ch15 Red 75 I6-1 189 Unused<br />
84 O6-2 63 Ch15 Green 76 I6-2 189 Unused<br />
85 O6-3 13 Ch13 Red 77 I6-3 189 Unused<br />
86 O6-4 37 Ch13 Yellow 78 I6-4 189 Unused<br />
87 O6-5 61 Ch13 Green 79 I6-5 189 Unused<br />
88 O6-6 14 Ch14 Red 80 I6-6 189 Unused<br />
89 O6-7 38 Ch14 Yellow 81 I6-7 189 Unused<br />
90 O6-8 62 Ch14 Green 82 I6-8 189 Unused<br />
91 O7-1 16 Ch16 Red I7-1 189 Unused<br />
93 O7-2 64 Ch16 Green I7-2 189 Unused<br />
94 O7-3 115 Not Used I7-3 189 Unused<br />
95 O7-4 115 Not Used I7-4 189 Unused<br />
96 O7-5 115 Not Used I7-5 189 Unused<br />
97 O7-6 115 Not Used I7-6 189 Unused<br />
98 O7-7 115 Not Used I7-7 189 Unused<br />
99 O7-8 115 Not Used I7-8 189 Unused<br />
O8-1 115 Not Used I8-1 189 Unused<br />
O8-2 115 Not Used I8-2 189 Unused<br />
O8-3 115 Not Used I8-3 189 Unused<br />
O8-4 115 Not Used I8-4 189 Unused<br />
O8-5 115 Not Used I8-5 189 Unused<br />
O8-6 115 Not Used I8-6 189 Unused<br />
O8-7 115 Not Used I8-7 189 Unused<br />
O8-8 115 Not Used I8-8 189 Unused<br />
<strong>2070</strong> 2A (C1 Connector) Mapping – Mode 3 Option (MM->1->8->9)<br />
Naztec <strong>NTCIP</strong> <strong>Based</strong> NEMA <strong>TS2</strong> and <strong>2070</strong> Controller <strong>Manual</strong> – July 2009 Page 14-155
14.2.5 <strong>2070</strong> 2A (C1 Connector) Mapping – Mode 6<br />
C1<br />
Pin Source Func Output Description<br />
C1<br />
Pin Source Func Input Description<br />
2 O1-1 115 Not Used 39 I1-1 1 Veh Call 1<br />
3 O1-2 115 Not Used 40 I1-2 3 Veh Call 3<br />
4 O1-3 115 Not Used 41 I1-3 5 Veh Call 5<br />
5 O1-4 115 Not Used 42 I1-4 6 Veh Call 6<br />
6 O1-5 115 Not Used 43 I1-5 2 Veh Call 2<br />
7 O1-6 115 Not Used 44 I1-6 4 Veh Call 4<br />
8 O1-7 115 Not Used 45 I1-7 7 Veh Call 7<br />
9 O1-8 115 Not Used 46 I1-8 8 Veh Call 8<br />
10 O2-1 115 Not Used 47 I2-1 189 Unused<br />
11 O2-2 115 Not Used 48 I2-2 189 Unused<br />
12 O2-3 232 Logic 3 49 I2-3 189 Unused<br />
13 O2-4 233 Logic 4 50 I2-4 189 Unused<br />
15 O2-5 115 Not Used 51 I2-5 189 Unused<br />
16 O2-6 230 Logic 1 52 I2-6 189 Unused<br />
17 O2-7 231 Logic 2 53 I2-7 189 Unused<br />
18 O2-8 115 Not Used 54 I2-8 189 Unused<br />
19 O3-1 115 Not Used 55 I3-1 189 Unused<br />
20 O3-2 115 Not Used 56 I3-2 189 Unused<br />
21 O3-3 115 Not Used 57 I3-3 189 Unused<br />
22 O3-4 115 Not Used 58 I3-4 189 Unused<br />
23 O3-5 115 Not Used 59 I3-5 189 Unused<br />
24 O3-6 115 Not Used 60 I3-6 189 Unused<br />
25 O3-7 115 Not Used 61 I3-7 189 Unused<br />
26 O3-8 115 Not Used 62 I3-8 189 Unused<br />
27 O4-1 115 Not Used I4-1 189 Unused<br />
28 O4-2 115 Not Used I4-2 189 Unused<br />
29 O4-3 115 Not Used I4-3 189 Unused<br />
30 O4-4 115 Not Used I4-4 189 Unused<br />
31 O4-5 115 Not Used 63 I4-5 1 Veh Call 1<br />
32 O4-6 115 Not Used 64 I4-6 3 Veh Call 3<br />
33 O4-7 115 Not Used 65 I4-7 5 Veh Call 5<br />
34 O4-8 115 Not Used 66 I4-8 6 Veh Call 6<br />
Naztec <strong>NTCIP</strong> <strong>Based</strong> NEMA <strong>TS2</strong> and <strong>2070</strong> Controller <strong>Manual</strong> – July 2009 Page 14-156
C1<br />
Pin Source Func Output Description<br />
C1<br />
Pin Source Func Input Description<br />
35 O5-1 115 Not Used 67 I5-1 234 Logic 5<br />
36 O5-2 115 Not Used 68 I5-2 230 Logic 1<br />
37 O5-3 115 Not Used 69 I5-3 235 Logic 6<br />
38 O5-4 115 Not Used 70 I5-4 231 Logic 2<br />
100 O5-5 115 Not Used 71 I5-5 236 Logic 7<br />
101 O5-6 115 Not Used 72 I5-6 232 Logic 3<br />
102 O5-7 115 Not Used 73 I5-7 237 Logic 8<br />
103 O5-8 114 Watchdog 74 I5-8 233 Logic 4<br />
83 O6-1 115 Not Used 75 I6-1 179 Door Open<br />
84 O6-2 115 Not Used 76 I6-2 2 Veh Call 2<br />
85 O6-3 115 Not Used 77 I6-3 4 Veh Call 4<br />
86 O6-4 115 Not Used 78 I6-4 7 Veh Call 7<br />
87 O6-5 115 Not Used 79 I6-5 8 Veh Call 8<br />
88 O6-6 115 Not Used 80 I6-6 189 Unused<br />
89 O6-7 115 Not Used 81 I6-7 208 Local Flash<br />
90 O6-8 115 Not Used 82 I6-8 207 Comp Stop Time<br />
91 O7-1 115 Not Used I7-1 189 Unused<br />
93 O7-2 115 Not Used I7-2 189 Unused<br />
94 O7-3 115 Not Used I7-3 189 Unused<br />
95 O7-4 115 Not Used I7-4 189 Unused<br />
96 O7-5 115 Not Used I7-5 189 Unused<br />
97 O7-6 115 Not Used I7-6 189 Unused<br />
98 O7-7 115 Not Used I7-7 189 Unused<br />
99 O7-8 115 Not Used I7-8 189 Unused<br />
O8-1 115 Not Used I8-1 189 Unused<br />
O8-2 115 Not Used I8-2 189 Unused<br />
O8-3 115 Not Used I8-3 189 Unused<br />
O8-4 115 Not Used I8-4 189 Unused<br />
O8-5 115 Not Used I8-5 189 Unused<br />
O8-6 115 Not Used I8-6 189 Unused<br />
O8-7 115 Not Used I8-7 189 Unused<br />
O8-8 115 Not Used I8-8 189 Unused<br />
<strong>2070</strong> 2A (C1 Connector) Mapping – HOV Gate Mode 6 Option (MM->1->8->9)<br />
Naztec <strong>NTCIP</strong> <strong>Based</strong> NEMA <strong>TS2</strong> and <strong>2070</strong> Controller <strong>Manual</strong> – July 2009 Page 14-157
14.2.6 <strong>2070</strong> 2A (C1 Connector) Mapping – Mode 7<br />
C1<br />
Pin Source Func Output Description<br />
C1<br />
Pin Source Func Input Description<br />
2 O1-1 14 Ch14 Red 39 I1-1 2 Veh Call 2<br />
3 O1-2 62 Ch14 Green 40 I1-2 6 Veh Call 6<br />
4 O1-3 4 Ch4 Red 41 I1-3 4 Veh Call 4<br />
5 O1-4 28 Ch4 Yellow 42 I1-4 8 Veh Call 8<br />
6 O1-5 52 Ch4 Green 43 I1-5 10 Veh Call 10<br />
7 O1-6 3 Ch3 Red 44 I1-6 12 Veh Call 12<br />
8 O1-7 27 Ch3 Yellow 45 I1-7 14 Veh Call 14<br />
9 O1-8 51 Ch3 Green 46 I1-8 16 Veh Call 16<br />
10 O2-1 13 Ch13 Red 47 I2-1 18 Veh Call 18<br />
11 O2-2 61 Ch13 Green 48 I2-2 22 Veh Call 22<br />
12 O2-3 2 Ch2 Red 49 I2-3 20 Veh Call 20<br />
13 O2-4 26 Ch2 Yellow 50 I2-4 24 Veh Call 24<br />
15 O2-5 50 Ch2 Green 51 I2-5 198 Pre 1 In<br />
16 O2-6 1 Ch1 Red 52 I2-6 199 Pre 2 In<br />
17 O2-7 25 Ch1 Yellow 53 I2-7 181 Man Ctrl Enbl<br />
18 O2-8 49 Ch1 Green 54 I2-8 205 Pre 8 In<br />
19 O3-1 16 Ch16 Red 55 I3-1 5 Veh Call 5<br />
20 O3-2 64 Ch16 Green 56 I3-2 1 Veh Call 1<br />
21 O3-3 8 Ch8 Red 57 I3-3 7 Veh Call 7<br />
22 O3-4 32 Ch8 Yellow 58 I3-4 3 Veh Call 3<br />
23 O3-5 56 Ch8 Green 59 I3-5 133 Ped Call 5<br />
24 O3-6 7 Ch7 Red 60 I3-6 129 Ped Call 1<br />
25 O3-7 31 Ch7 Yellow 61 I3-7 135 Ped Call 7<br />
26 O3-8 55 Ch7 Green 62 I3-8 131 Ped Call 3<br />
27 O4-1 15 Ch15 Red I4-1 188 Walk Rest Mod<br />
28 O4-2 63 Ch15 Green I4-2 191 Flash In<br />
29 O4-3 6 Ch6 Red I4-3 189 Unused<br />
30 O4-4 30 Ch6 Yellow I4-4 189 Unused<br />
31 O4-5 54 Ch6 Green 63 I4-5 26 Veh Call 26<br />
32 O4-6 5 Ch5 Red 64 I4-6 30 Veh Call 30<br />
33 O4-7 29 Ch5 Yellow 65 I4-7 28 Veh Call 28<br />
34 O4-8 53 Ch5 Green 66 I4-8 32 Veh Call 32<br />
Naztec <strong>NTCIP</strong> <strong>Based</strong> NEMA <strong>TS2</strong> and <strong>2070</strong> Controller <strong>Manual</strong> – July 2009 Page 14-158
C1<br />
Pin Source Func Output Description<br />
C1<br />
Pin Source Func Input Description<br />
35 O5-1 140 AudiblePed2 67 I5-1 130 Ped Call 2<br />
36 O5-2 141 AudiblePed4 68 I5-2 134 Ped Call 6<br />
37 O5-3 142 AudiblePed6 69 I5-3 132 Ped Call 4<br />
38 O5-4 143 AudiblePed8 70 I5-4 136 Ped Call 8<br />
100 O5-5 115 Not Used 71 I5-5 200 Pre 3 In<br />
101 O5-6 101 R2 Status B 72 I5-6 201 Pre 4 In<br />
102 O5-7 115 Not Used 73 I5-7 202 Pre 5 In<br />
103 O5-8 114 Watchdog 74 I5-8 203 Pre 6 In<br />
83 O6-1 115 Not Used 75 I6-1 189 Unused<br />
84 O6-2 115 Not Used 76 I6-2 34 Veh Call 34<br />
85 O6-3 12 Ch12 Red 77 I6-3 38 Veh Call 38<br />
86 O6-4 36 Ch12 Yellow 78 I6-4 36 Veh Call 36<br />
87 O6-5 60 Ch12 Green 79 I6-5 40 Veh Call 40<br />
88 O6-6 11 Ch11 Red 80 I6-6 178 Int Advance<br />
89 O6-7 35 Ch11 Yellow 81 I6-7 208 Local Flash<br />
90 O6-8 59 Ch11 Green 82 I6-8 207 Comp Stop Tm<br />
91 O7-1 115 Not Used I7-1 138 Hold 2<br />
93 O7-2 115 Not Used I7-2 140 Hold 4<br />
94 O7-3 10 Ch10 Red I7-3 142 Hold 6<br />
95 O7-4 34 Ch10 Yellow I7-4 144 Hold 8<br />
96 O7-5 58 Ch10 Green I7-5 161 R1 Frc Off<br />
97 O7-6 9 Ch9 Red I7-6 163 R1 Inh Max<br />
98 O7-7 33 Ch9 Yellow I7-7 166 R1 Max II<br />
99 O7-8 57 Ch9 Green I7-8 168 Non-Act I<br />
O8-1 103 Special 1 I8-1 169 R2 Frc Off<br />
O8-2 115 Not Used I8-2 171 R2 Inh Max<br />
O8-3 115 Not Used I8-3 174 R2 Max II<br />
O8-4 128 Free/Coord I8-4 176 Non-Act II<br />
O8-5 115 Not Used I8-5 137 Hold 1<br />
O8-6 137 PreemptActv I8-6 139 Hold 3<br />
O8-7 115 Not Used I8-7 141 Hold 5<br />
O8-8 115 Not Used I8-8 143 Hold 7<br />
<strong>2070</strong> 2A (C1 Connector) Mapping – Mode 7 Option (MM->1->8->9)<br />
Naztec <strong>NTCIP</strong> <strong>Based</strong> NEMA <strong>TS2</strong> and <strong>2070</strong> Controller <strong>Manual</strong> – July 2009 Page 14-159
14.2.7 <strong>2070</strong>(N) D-Connector – TEES Mapping<br />
Pin Function I/O Pin Function I/O<br />
A Detector 9 I i Door Ajar I<br />
B Detector 10 I j Special Function 1 I<br />
C Detector 11 I k Special Function 2 I<br />
D Detector 12 I m Special Function 3 I<br />
E Detector 13 I n Special Function 4 I<br />
F Detector 14 I p Special Function 5 I<br />
G Detector 15 I q Special Function 6 I<br />
H Detector 16 I r Special Function 7 I<br />
J Detector 17 I s Special Function 8 I<br />
K Detector 18 I t Preempt 1 In I<br />
L Detector 19 I u Preempt 2 In I<br />
M Detector 20 I v Preempt 3 In I<br />
N Detector 21 I w Preempt 4 In I<br />
P Detector 22 I x Preempt 5 In I<br />
R Detector 23 I y Preempt 6 In I<br />
S Detector 24 I z Alarm 1 Out O<br />
T Clock Update I AA Alarm 2 Out O<br />
U Hardware Control I BB Special Function 1 Out O<br />
V Cycle Advance I CC Special Function 2 O<br />
W Max 3 Selection I DD Special Function 3 O<br />
X Max 4 Selection I EE Special Function 4 O<br />
Y Free I FF Special Function 5 O<br />
Z Not assigned - GG Special Function 6 O<br />
a Not assigned - HH Special Function 7 O<br />
b Alarm 1 I JJ Special Function 8 O<br />
c Alarm 2 I KK Not assigned -<br />
d Alarm 3 I LL Detector Reset O<br />
e Alarm 4 I MM Not assigned -<br />
f Alarm 5 I NN +24VDC -<br />
g Flash In I PP <strong>2070</strong>N DC Gnd -<br />
h Conflict Monitor Status I<br />
<strong>2070</strong>(N) D-Connector – TEES Mapping<br />
Naztec <strong>NTCIP</strong> <strong>Based</strong> NEMA <strong>TS2</strong> and <strong>2070</strong> Controller <strong>Manual</strong> – July 2009 Page 14-160
14.2.8 <strong>2070</strong>(N) D-Connector – 820A-VMS Mapping<br />
Warning: Identify pin M Local Flash input) and install a 24 VDC relay to isolate the 120V signal used <strong>for</strong> the 820A flash<br />
input. Verify this AC input is not present on pin M be<strong>for</strong>e connecting the D harness to prevent damage to the <strong>2070</strong>. Failure<br />
to deactivate the 120 V flash input on pin M will void the warranty of the <strong>2070</strong>(N) expansion chassis.<br />
Pin Function I/O Pin Function I/O<br />
A N/A I i Detector 16 I<br />
B Detector 15 I j N/A -<br />
C Detector 17 I k N/A -<br />
D Detector 18 I m N/A -<br />
E Detector 19 I n N/A -<br />
F Detector 20 I p Alarm 3 I<br />
G Detector 21 I q N/A -<br />
H Detector 22 I r N/A -<br />
J Detector 23 I s N/A -<br />
K Detector 24 I t N/A -<br />
L N/A - u N/A -<br />
M!!! Local Flash In (See warning) I v N/A -<br />
N Alarm 4 I w Alarm 1 I<br />
P N/A - x N/A -<br />
R N/A - y Alarm 5 I<br />
S Detector 9 I z N/A O<br />
T Detector 10 I AA Special Function 1 Out O<br />
U Detector 11 I BB Special Function 2 Out O<br />
V Detector 12 I CC Special Function 3 Out O<br />
W Detector 13 I DD Special Function 4 Out O<br />
X Detector 14 I EE Special Function 5 Out O<br />
Y Alarm 2 I FF Special Function 6 Out O<br />
Z N/A - GG Special Function 7 Out O<br />
a Preempt 1 I HH Special Function 8 Out O<br />
b Preempt 2 I JJ N/A O<br />
c Preempt 3 I KK External 24 VDC -<br />
d Preempt 4 I LL N/A O<br />
e N/A - MM N/A -<br />
f N/A - NN N/A -<br />
g N/A - PP N/A -<br />
h N/A -<br />
<strong>2070</strong>(N) D-Connector – 820A-VMS Mapping<br />
Naztec <strong>NTCIP</strong> <strong>Based</strong> NEMA <strong>TS2</strong> and <strong>2070</strong> Controller <strong>Manual</strong> – July 2009 Page 14-161
14.3 Model 970 (C1 Connector) Mapping<br />
C1<br />
Pin Source Func Output Description<br />
C1<br />
Pin Source Func Input Description<br />
2 O1-1 14 Ch14 Red 39 I1-1 2 Veh Call 2<br />
3 O1-2 62 Ch14 Green 40 I1-2 16 Veh Call 16<br />
4 O1-3 4 Ch4 Red 41 I1-3 8 Veh Call 8<br />
5 O1-4 28 Ch4 Yellow 42 I1-4 22 Veh Call 22<br />
6 O1-5 52 Ch4 Green 43 I1-5 3 Veh Call 3<br />
7 O1-6 3 Ch3 Red 44 I1-6 17 Veh Call 17<br />
8 O1-7 27 Ch3 Yellow 45 I1-7 9 Veh Call 9<br />
9 O1-8 51 Ch3 Green 46 I1-8 23 Veh Call 23<br />
10 O2-1 13 Ch13 Red 47 I2-1 6 Veh Call 6<br />
11 O2-2 61 Ch13 Green 48 I2-2 20 Veh Call 20<br />
12 O2-3 2 Ch2 Red 49 I2-3 12 Veh Call 12<br />
13 O2-4 26 Ch2 Yellow 50 I2-4 26 Veh Call 26<br />
15 O2-5 50 Ch2 Green 51 I2-5 198 Pre 1 In<br />
16 O2-6 1 Ch1 Red 52 I2-6 199 Pre 2 In<br />
17 O2-7 25 Ch1 Yellow 53 I2-7 189 <strong>Manual</strong> Ctrl Enable<br />
18 O2-8 49 Ch1 Green 54 I2-8 189 Unused<br />
19 O3-1 16 Ch16 Red 55 I3-1 15 Veh Call 15<br />
20 O3-2 64 Ch16 Green 56 I3-2 1 Veh Call 1<br />
21 O3-3 8 Ch8 Red 57 I3-3 21 Veh Call 21<br />
22 O3-4 32 Ch8 Yellow 58 I3-4 7 Veh Call 7<br />
23 O3-5 56 Ch8 Green 59 I3-5 27 Veh Call 27<br />
24 O3-6 7 Ch7 Red 60 I3-6 13 Veh Call 13<br />
25 O3-7 31 Ch7 Yellow 61 I3-7 28 Veh Call 28<br />
26 O3-8 55 Ch7 Green 62 I3-8 14 Veh Call 14<br />
27 O4-1 15 Ch15 Red I4-1 189 Unused<br />
28 O4-2 63 Ch15 Green I4-2 189 Unused<br />
29 O4-3 6 Ch6 Red I4-3 189 Unused<br />
30 O4-4 30 Ch6 Yellow I4-4 189 Unused<br />
31 O4-5 54 Ch6 Green 63 I4-5 4 Veh Call 4<br />
32 O4-6 5 Ch5 Red 64 I4-6 18 Veh Call 18<br />
33 O4-7 29 Ch5 Yellow 65 I4-7 10 Veh Call 10<br />
34 O4-8 53 Ch5 Green 66 I4-8 24 Veh Call 24<br />
Naztec <strong>NTCIP</strong> <strong>Based</strong> NEMA <strong>TS2</strong> and <strong>2070</strong> Controller <strong>Manual</strong> – July 2009 Page 14-162
C1<br />
Pin Source Func Output Description<br />
C1<br />
Pin Source Func Input Description<br />
35 O5-1 37 Ch13 Yellow 67 I5-1 130 Ped Call 2<br />
36 O5-2 39 Ch15 Yellow 68 I5-2 134 Ped Call 6<br />
37 O5-3 38 Ch14 Yellow 69 I5-3 132 Ped Call 4<br />
38 O5-4 40 Ch16 Yellow 70 I5-4 136 Ped Call 8<br />
100 O5-5 42 Ch18 Yellow 71 I5-5 200 Pre 3 In<br />
101 O5-6 35 Ch11 Yellow 72 I5-6 201 Pre 4 In<br />
102 O5-7 115 Not Used 73 I5-7 202 Pre 5 In<br />
103 O5-8 114 Watchdog 74 I5-8 203 Pre 6 In<br />
83 O6-1 14 Ch18 Red 75 I6-1 189 Unused<br />
84 O6-2 62 Ch18 Green 76 I6-2 5 Veh Call 5<br />
85 O6-3 17 Ch17 Red 77 I6-3 19 Veh Call 19<br />
86 O6-4 41 Ch17 Yellow 78 I6-4 11 Veh Call 11<br />
87 O6-5 65 Ch17 Green 79 I6-5 25 Veh Call 25<br />
88 O6-6 12 Ch12 Red 80 I6-6 178 Int Advance<br />
89 O6-7 36 Ch12 Yellow 81 I6-7 208 Local Flash<br />
90 O6-8 60 Ch12 Green 82 I6-8 207 Comp StopTm<br />
91 O7-1 11 Ch11 Red I7-1 189 Unused<br />
93 O7-2 59 Ch11 Green I7-2 189 Unused<br />
94 O7-3 10 Ch10 Red I7-3 189 Unused<br />
95 O7-4 34 Ch10 Yellow I7-4 189 Unused<br />
96 O7-5 58 Ch10 Green I7-5 189 Unused<br />
97 O7-6 9 Ch9 Red I7-6 189 Unused<br />
98 O7-7 33 Ch9 Yellow I7-7 189 Unused<br />
99 O7-8 57 Ch9 Green I7-8 189 Unused<br />
O8-1 115 Unused I8-1 189 Unused<br />
O8-2 115 Unused I8-2 189 Unused<br />
O8-3 115 Unused I8-3 189 Unused<br />
O8-4 115 Unused I8-4 189 Unused<br />
O8-5 115 Unused I8-5 189 Unused<br />
O8-6 115 Unused I8-6 189 Unused<br />
O8-7 115 Unused I8-7 189 Unused<br />
O8-8 115 Unused I8-8 189 Unused<br />
970 C1 Connector Mapping<br />
Naztec <strong>NTCIP</strong> <strong>Based</strong> NEMA <strong>TS2</strong> and <strong>2070</strong> Controller <strong>Manual</strong> – July 2009 Page 14-163
14.4 Terminal & Facilities BIU Mapping<br />
14.4.1 Default BIU Input Map (MM->1->3->3) [v61]<br />
BIU #1<br />
Pin Fcn Description Pin Fcn Description<br />
B01 189 Unused B02 189 Unused<br />
B03 189 Unused B04 189 Unused<br />
B05 189 Unused B06 189 Unused<br />
B07 189 Unused B08 189 Unused<br />
B09 189 Unused B10 189 Unused<br />
B11 189 Unused B12 189 Unused<br />
B13 189 Unused B14 198 Pre1In<br />
B15 199 Pre 2 In B16 185 Test A<br />
B17 186 Test B B18 211 Auto Flash<br />
B19 210 Dim Enable B20 181 Man Ctrl Enbl<br />
B21 178 Int Advance B22 180 Min Recall<br />
B23 177 Ext Start B24 209 TBC Input<br />
I01 162 R1 Stop Tim I02 170 R2 Stop Tim<br />
I03 166 R1 Max II I04 174 R2 Max II<br />
I05 161 R1 Frc Off I06 169 R2 Frc Off<br />
I07 168 Non-Act I I08 188<br />
Op1 129 Ped Call 1 Op2 130 Ped Call 2<br />
Op3 131 Ped Call 3 Op4 132 Ped Call 4<br />
*** 189 Unused *** 189 Unused<br />
*** 189 Unused *** 189 Unused<br />
BIU #2<br />
Pin Fcn Description Pin Fcn Description<br />
B01 189 Unused B02 189 Unused<br />
B03 189 Unused B04 189 Unused<br />
B05 189 Unused B06 189 Unused<br />
B07 189 Unused B08 189 Unused<br />
B09 189 Unused B10 189 Unused<br />
B11 189 Unused B12 189 Unused<br />
B13 189 Unused B14 189 Unused<br />
B15 189 Unused B16 200 Pre3 In<br />
B17 201 Pre 4 In B18 202 Pre5 In<br />
B19 203 Pre 6 In B20 176 Non-Act II<br />
B21 189 Unused B22 189 Unused<br />
B23 189 Unused B24 189 Unused<br />
I01 163 R1 Inh Max I02 171 R2 Inh Max<br />
I03 208 Local Flash I04 206 Cab Flash<br />
I05 192 Alarm 1 I06 193 Alarm 2<br />
I07 190 Free I08 187 Test C<br />
Op1 133 Ped Call 5 Op2 134 Ped Call 6<br />
Op3 135 Ped Call 7 Op4 136 Ped Call 8<br />
*** 189 Unused *** 189 Unused<br />
*** 189 Unused *** 189 Unused<br />
Naztec <strong>NTCIP</strong> <strong>Based</strong> NEMA <strong>TS2</strong> and <strong>2070</strong> Controller <strong>Manual</strong> – July 2009 Page 14-164
BIU #3<br />
Pin Fcn Description Pin Fcn Description<br />
B01 189 Unused B02 189 Unused<br />
B03 189 Unused B04 189 Unused<br />
B05 189 Unused B06 189 Unused<br />
B07 164 R1RedRest B08 172 R2RedRest<br />
B09 167 R1OmtRdClr B10 175 R2OmtRdClr<br />
B11 165 R1PedRecyc B12 173 R2PedRecyc<br />
B13 212 AltSeqA B14 213 AltSeqB<br />
B15 214 AltSeqC B16 215 AltSeqD<br />
B17 153 PhOmit1 B18 154 PhOmit2<br />
B19 155 PhOmit3 B20 156 PhOmit4<br />
B21 157 PhOmit5 B22 158 PhOmit6<br />
B23 159 PhOmit7 B24 160 PhOmit8<br />
I01 137 Hold1 I02 138 Hold2<br />
I03 139 Hold3 I04 140 Hold4<br />
I05 141 Hold5 I06 142 Hold6<br />
I07 143 Hold7 I08 144 Hold8<br />
Op1 216 PlanA Op2 217 PlanB<br />
Op3 218 PlanC Op4 219 PlanD<br />
*** 189 Unused *** 189 Unused<br />
*** 189 Unused *** 189 Unused<br />
BIU #4<br />
Pin Fcn Description Pin Fcn Description<br />
B01 189 Unused B02 189 Unused<br />
B03 189 Unused B04 189 Unused<br />
B05 189 Unused B06 189 Unused<br />
B07 189 Unused B08 189 Unused<br />
B09 189 Unused B10 220 Addr Bit 0<br />
B11 221 Addr Bit 1 B12 222 Addr Bit 2<br />
B13 223 Addr Bit 3 B14 224 Addr Bit 4<br />
B15 189 Unused B16 189 Unused<br />
B17 189 Unused B18 189 Unused<br />
B19 189 Unused B20 189 Unused<br />
B21 189 Unused B22 189 Unused<br />
B23 189 Unused B24 189 Unused<br />
I01 145 Ped Omit 1 I02 146 Ped Omit 2<br />
I03 147 Ped Omit 3 I04 148 Ped Omit 4<br />
I05 149 Ped Omit 5 I06 150 Ped Omit 6<br />
I07 151 Ped Omit 7 I08 152 Ped Omit 8<br />
Op1 225 Offset 1 Op2 226 Offset 2<br />
Op3 227 Offset 3 Op4 189 Unused<br />
*** 189 Unused *** 189 Unused<br />
*** 189 Unused *** 189 Unused<br />
Naztec <strong>NTCIP</strong> <strong>Based</strong> NEMA <strong>TS2</strong> and <strong>2070</strong> Controller <strong>Manual</strong> – July 2009 Page 14-165
14.4.2 Default BIU Output Map (MM->1->3->3) [v61]<br />
BIU #1<br />
Pin Fcn Description Pin Fcn Description<br />
O01 1 Ch1 Red O02 25 Ch1 Yellow<br />
O03 49 Ch1 Green O04 2 Ch2 Red<br />
O05 26 Ch2 Yellow O06 50 Ch2 Green<br />
O07 3 Ch3 Red O08 27 Ch3 Yellow<br />
O09 51 Ch3 Green O10 4 Ch4 Red<br />
O11 28 Ch4 Yellow O12 52 Ch4 Green<br />
O13 5 Ch5 Red O14 29 Ch5 Yellow<br />
O15 53 Ch5 Green B01 6 Ch6 Red<br />
B02 30 Ch6 Yellow B03 54 Ch6 Green<br />
B04 7 Ch7 Red B05 31 Ch7 Yellow<br />
B06 55 Ch7 Green B07 8 Ch8 Red<br />
B08 32 Ch8 Yellow B09 56 Ch8 Green<br />
B10 122 TB CAux/Pre1 B11 123 TBC Aux/Pre2<br />
B12 116 Pre Stat 1 B13 117 Pre Stat 2<br />
B14 115 Not Used B15 115 Not Used<br />
B16 115 Not Used B17 115 Not Used<br />
B18 115 Not Used B19 115 Not Used<br />
B20 115 Not Used B21 115 Not Used<br />
B22 115 Not Used B23 115 Not Used<br />
B24 115 Not Used *** 115 Not Used<br />
BIU #2<br />
Pin Fcn Description Pin Fcn Description<br />
O01 9 Ch9 Red O02 33 Ch9 Yellow<br />
O03 57 Ch9 Green O04 10 Ch10 Red<br />
O05 34 Ch10 Yellow O06 58 Ch10 Green<br />
O07 11 Ch11 Red O08 35 Ch11 Yellow<br />
O09 59 Ch11 Green O10 12 Ch12 Red<br />
O11 36 Ch12 Yellow O12 60 Ch12 Green<br />
O13 13 Ch13 Red O14 37 Ch13 Yellow<br />
O15 61 Ch13 Green B01 14 Ch14 Red<br />
B02 38 Ch14 Yellow B03 62 Ch14 Green<br />
B04 15 Ch15 Red B05 39 Ch15 Yellow<br />
B06 63 Ch15 Green B07 16 Ch16 Red<br />
B08 40 Ch16 Yellow B09 64 Ch16 Green<br />
B10 127 TBC Aux 3 B11 128 Free/Coord<br />
B12 118 Pre Stat 3 B13 119 Pre Stat 4<br />
B14 120 Pre Stat 5 B15 121 Pre Stat 6<br />
B16 115 Not Used B17 115 Not Used<br />
B18 115 Not Used B19 115 Not Used<br />
B20 115 Not Used B21 115 Not Used<br />
B22 115 Not Used B23 115 Not Used<br />
B24 115 Not Used *** 115 Not Used<br />
Naztec <strong>NTCIP</strong> <strong>Based</strong> NEMA <strong>TS2</strong> and <strong>2070</strong> Controller <strong>Manual</strong> – July 2009 Page 14-166
BIU #3<br />
Pin Fcn Description Pin Fcn Description<br />
O01 129 Time plan A O02 130 Time plan B<br />
O03 131 Time plan C O04 132 Time plan D<br />
O05 133 Offset Out 1 O06 134 Offset Out 2<br />
O07 135 Offset Out 3 O08 136 Auto Flash<br />
O09 103 Special 1 O10 104 Special 2<br />
O11 105 Special 3 O12 106 Special 4<br />
O13 115 Not Used O14 115 Not Used<br />
O15 115 Not Used B01 115 Not Used<br />
B02 97 R1 Status A B03 98 R1 Status B<br />
B04 99 R1 Status C B05 100 R2 Status A<br />
B06 101 R2 Status B B07 102 R2 Status C<br />
B08 115 Not Used B09 115 Not Used<br />
B10 115 Not Used B11 115 Not Used<br />
B12 115 Not Used B13 115 Not Used<br />
B14 115 Not Used B15 115 Not Used<br />
B16 115 Not Used B17 115 Not Used<br />
B18 115 Not Used B19 115 Not Used<br />
B20 115 Not Used B21 115 Not Used<br />
B22 115 Not Used B23 115 Not Used<br />
B24 115 Not Used *** 115 Not Used<br />
BIU #4<br />
Pin Fcn Description Pin Fcn Description<br />
O01 89 Phase 1 On O02 90 Phase 2 On<br />
O03 91 Phase 3 On O04 92 Phase 4 On<br />
O05 93 Phase 5 On O06 94 Phase 6 On<br />
O07 95 Phase 7 On O08 96 Phase 8 On<br />
O09 81 Ph1 Next O10 82 Ph2 Next<br />
O11 83 Ph3 Next O12 84 Ph4 Next<br />
O13 85 Ph5 Next O14 86 Ph6 Next<br />
O15 87 Ph7 Next B01 115 Not Used<br />
B02 88 Ph8 Next B03 73 Ph1 Check<br />
B04 74 Ph2 Check B05 75 Ph3 Check<br />
B06 76 Ph4 Check B07 77 Ph5 Check<br />
B08 78 Ph6 Check B09 79 Ph7 Check<br />
B10 80 Ph8 Check B11 115 Not Used<br />
B12 115 Not Used B13 115 Not Used<br />
B14 115 Not Used B15 115 Not Used<br />
B16 115 Not Used B17 115 Not Used<br />
B18 115 Not Used B19 115 Not Used<br />
B20 115 Not Used B21 115 Not Used<br />
B22 115 Not Used B23 115 Not Used<br />
B24 115 Not Used *** 115 Not Used<br />
Naztec <strong>NTCIP</strong> <strong>Based</strong> NEMA <strong>TS2</strong> and <strong>2070</strong> Controller <strong>Manual</strong> – July 2009 Page 14-167
14.4.3 Solo TF BIU1 Input Map (Note: output map same as Default output map)<br />
BIU #1<br />
Pin Fcn Description Pin Fcn Description<br />
B01 189 Unused B02 189 Unused<br />
B03 189 Unused B04 189 Unused<br />
B05 189 Unused B06 189 Unused<br />
B07 189 Unused B08 189 Unused<br />
B09 189 Unused B10 189 Unused<br />
B11 189 Unused B12 189 Unused<br />
B13 189 Unused B14 198 Pre 1 In<br />
B15 199 Pre2 In B16 206 Cab Flash<br />
B17 191 Flash In B18 211 Auto Flash<br />
B19 210 Dim Enable B20 181 Man Ctrl Enbl<br />
B21 178 Int Advance B22 190 Free<br />
B23 177 Ext Start B24 209 TBC Input<br />
I01 162 R1 Stop Tim I02 170 R2 Stop Tim<br />
I03 192 Alarm1 I04 193 Alarm 2<br />
I05 194 Alarm3 I06 195 Alarm 4<br />
I07 168 Non Act 1 I08 188 Wlk Rst Mod<br />
Op1 129 Ped Call 1 Op2 130 Ped Call 2<br />
Op3 131 Ped Call 3 Op4 132 Ped Call 4<br />
*** 189 Unused *** 189 Unused<br />
*** 189 Unused *** 189 Unused<br />
BIU #2<br />
Pin Fcn Description Pin Fcn Description<br />
B01 189 Unused B02 189 Unused<br />
B03 189 Unused B04 189 Unused<br />
B05 189 Unused B06 189 Unused<br />
B07 189 Unused B08 189 Unused<br />
B09 189 Unused B10 189 Unused<br />
B11 189 Unused B12 189 Unused<br />
B13 189 Unused B14 189 Unused<br />
B15 189 Unused B16 200 Pre 3 In<br />
B17 201 Pre 4 In B18 202 Pre 5 In<br />
B19 203 Pre 6 In B20 176 Non-Act II<br />
B21 189 Unused B22 189 Unused<br />
B23 189 Unused B24 189 Unused<br />
I01 163 R1 Inh Max I02 171 R2 Inh Max<br />
I03 208 Local Flash I04 206 Cab Flash<br />
I05 192 Alarm 1 I06 193 Alarm 2<br />
I07 190 Free I08 187 Test C<br />
Op1 133 Ped Call 5 Op2 134 Ped Call 6<br />
Op3 135 Ped Call 7 Op4 136 Ped Call 8<br />
*** 189 Unused *** 189 Unused<br />
*** 189 Unused *** 189 Unused<br />
Naztec <strong>NTCIP</strong> <strong>Based</strong> NEMA <strong>TS2</strong> and <strong>2070</strong> Controller <strong>Manual</strong> – July 2009 Page 14-168
BIU #3<br />
Pin Fcn Description Pin Fcn Description<br />
B01 189 Unused B02 189 Unused<br />
B03 189 Unused B04 189 Unused<br />
B05 189 Unused B06 189 Unused<br />
B07 164 R1 Red Rest B08 172 R2 Red Rest<br />
B09 167 R1 Omt Rd Clr B10 175 R2 Omt Rd Clr<br />
B11 165 R1 Ped Recyc B12 173 R2 Ped Recyc<br />
B13 212 Alt Seq A B14 213 Alt Seq B<br />
B15 214 Alt Seq C B16 215 Alt Seq D<br />
B17 153 Ph Omit 1 B18 154 Ph Omit 2<br />
B19 155 Ph Omit 3 B20 156 Ph Omit 4<br />
B21 157 Ph Omit 5 B22 158 Ph Omit 6<br />
B23 159 Ph Omit 7 B24 160 Ph Omit 8<br />
I01 137 Hold 1 I02 138 Hold 2<br />
I03 139 Hold 3 I04 140 Hold 4<br />
I05 141 Hold 5 I06 142 Hold 6<br />
I07 143 Hold 7 I08 144 Hold 8<br />
Op1 216 Plan A Op2 217 PlanB<br />
Op3 218 Plan C Op4 219 PlanD<br />
*** 189 Unused *** 189 Unused<br />
*** 189 Unused *** 189 Unused<br />
BIU #4<br />
Pin Fcn Description Pin Fcn Description<br />
B01 189 Unused B02 189 Unused<br />
B03 189 Unused B04 189 Unused<br />
B05 189 Unused B06 189 Unused<br />
B07 189 Unused B08 189 Unused<br />
B09 189 Unused B10 220 Addr Bit 0<br />
B11 221 Addr Bit 1 B12 222 Addr Bit 2<br />
B13 223 Addr Bit 3 B14 224 Addr Bit 4<br />
B15 189 Unused B16 189 Unused<br />
B17 189 Unused B18 189 Unused<br />
B19 189 Unused B20 189 Unused<br />
B21 189 Unused B22 189 Unused<br />
B23 189 Unused B24 189 Unused<br />
I01 145 Ped Omit 1 I02 146 Ped Omit 2<br />
I03 147 Ped Omit 3 I04 148 Ped Omit 4<br />
I05 149 Ped Omit 5 I06 150 Ped Omit 6<br />
I07 151 Ped Omit 7 I08 152 Ped Omit 8<br />
Op1 225 Offset 1 Op2 226 Offset 2<br />
Op3 227 Offset 3 Op4 189 Unused<br />
*** 189 Unused *** 189 Unused<br />
*** 189 Unused *** 189 Unused<br />
Naztec <strong>NTCIP</strong> <strong>Based</strong> NEMA <strong>TS2</strong> and <strong>2070</strong> Controller <strong>Manual</strong> – July 2009 Page 14-169
14.4.4 24 Out Chan Output Map (output map same as Default output map)<br />
BIU #1<br />
Pin Fcn Description Pin Fcn Description<br />
O01 1 Ch1 Red O02 25 Ch1 Yellow<br />
O03 49 Ch1 Green O04 2 Ch2 Red<br />
O05 26 Ch2 Yellow O06 50 Ch2 Green<br />
O07 3 Ch3 Red O08 27 Ch3 Yellow<br />
O09 51 Ch3 Green O10 4 Ch4 Red<br />
O11 28 Ch4 Yellow O12 52 Ch4 Green<br />
O13 5 Ch5 Red O14 29 Ch5 Yellow<br />
O15 53 Ch5 Green B01 6 Ch6 Red<br />
B02 30 Ch6 Yellow B03 54 Ch6 Green<br />
B04 7 Ch7 Red B05 31 Ch7 Yellow<br />
B06 55 Ch7 Green B07 8 Ch8 Red<br />
B08 32 Ch8 Yellow B09 56 Ch8 Green<br />
B10 122 TBC Aux/Pre1 B11 123 TBC Aux/Pre2<br />
B12 116 Pre Stat 1 B13 117 Pre Stat 2<br />
B14 115 Not Used B15 115 Not Used<br />
B16 115 Not Used B17 115 Not Used<br />
B18 115 Not Used B19 115 Not Used<br />
B20 115 Not Used B21 115 Not Used<br />
B22 115 Not Used B23 115 Not Used<br />
B24 115 Not Used *** 115 Not Used<br />
BIU #2<br />
Pin Fcn Description Pin Fcn Description<br />
O01 9 Ch9 Red O02 33 Ch9 Yellow<br />
O03 57 Ch9 Green O04 10 Ch10 Red<br />
O05 34 Ch10 Yellow O06 58 Ch10 Green<br />
O07 11 Ch11 Red O08 35 Ch11 Yellow<br />
O09 59 Ch11 Green O10 12 Ch12 Red<br />
O11 36 Ch12 Yellow O12 60 Ch12 Green<br />
O13 13 Ch13 Red O14 37 Ch13 Yellow<br />
O15 61 Ch13 Green B01 14 Ch14 Red<br />
B02 38 Ch14 Yellow B03 62 Ch14 Green<br />
B04 15 Ch15 Red B05 39 Ch15 Yellow<br />
B06 63 Ch15 Green B07 16 Ch16 Red<br />
B08 40 Ch16 Yellow B09 64 Ch16 Green<br />
B10 127 TBC Aux 3 B11 128 Free/Coord<br />
B12 118 Pre Stat 3 B13 119 Pre Stat 4<br />
B14 120 Pre Stat 5 B15 121 Pre Stat 6<br />
B16 115 Not Used B17 115 Not Used<br />
B18 115 Not Used B19 115 Not Used<br />
B20 115 Not Used B21 115 Not Used<br />
B22 115 Not Used B23 115 Not Used<br />
B24 115 Not Used *** 115 Not Used<br />
Naztec <strong>NTCIP</strong> <strong>Based</strong> NEMA <strong>TS2</strong> and <strong>2070</strong> Controller <strong>Manual</strong> – July 2009 Page 14-170
BIU #3<br />
Pin Fcn Description Pin Fcn Description<br />
O01 129 Time plan A O02 130 Time plan B<br />
O03 131 Time plan C O04 132 Time plan D<br />
O05 133 Offset Out 1 O06 134 Offset Out 2<br />
O07 135 Offset Out 3 O08 136 Auto Flash<br />
O09 103 Special 1 O10 104 Special 2<br />
O11 105 Special 3 O12 106 Special 4<br />
O13 115 Not Used O14 115 Not Used<br />
O15 115 Not Used B01 115 Not Used<br />
B02 97 R1 Status A B03 98 R1 Status B<br />
B04 99 R1 Status C B05 100 R2 Status A<br />
B06 101 R2 Status B B07 102 R2 Status C<br />
B08 115 Not Used B09 115 Not Used<br />
B10 115 Not Used B11 115 Not Used<br />
B12 115 Not Used B13 115 Not Used<br />
B14 115 Not Used B15 115 Not Used<br />
B16 115 Not Used B17 115 Not Used<br />
B18 115 Not Used B19 115 Not Used<br />
B20 115 Not Used B21 115 Not Used<br />
B22 115 Not Used B23 115 Not Used<br />
B24 115 Not Used *** 115 Not Used<br />
BIU #4<br />
Pin Fcn Description Pin Fcn Description<br />
O01 17 Ch17 Red O02 41 Ch17 Yellow<br />
O03 65 Ch17 Green O04 18 Ch18 Red<br />
O05 42 Ch18 Yellow O06 66 Ch18 Green<br />
O07 19 Ch19 Red O08 43 Ch19 Yellow<br />
O09 67 Ch19 Green O10 20 Ch20 Red<br />
O11 44 Ch20 Yellow O12 68 Ch20 Green<br />
O13 21 Ch21 Red O14 45 Ch21 Yellow<br />
O15 69 Ch21 Green B01 115 Not Used<br />
B02 22 Ch22 Red B03 46 Ch22 Yellow<br />
B04 70 Ch22 Green B05 23 Ch23 Red<br />
B06 47 Ch23 Yellow B07 71 Ch23 Green<br />
B08 24 Ch24 Red B09 48 Ch24 Yellow<br />
B10 72 Ch24 Green B11 115 Not Used<br />
B12 115 Not Used B13 115 Not Used<br />
B14 115 Not Used B15 115 Not Used<br />
B16 115 Not Used B17 115 Not Used<br />
B18 115 Not Used B19 115 Not Used<br />
B20 115 Not Used B21 115 Not Used<br />
B22 115 Not Used B23 115 Not Used<br />
B24 115 Not Used *** 115 Not Used<br />
Naztec <strong>NTCIP</strong> <strong>Based</strong> NEMA <strong>TS2</strong> and <strong>2070</strong> Controller <strong>Manual</strong> – July 2009 Page 14-171
14.5 <strong>TS2</strong> and <strong>2070</strong> Communications Ports<br />
14.5.1 <strong>TS2</strong> Communication Ports<br />
System (P-A) System Up (P-A) System Down (P-B)<br />
Pin Function Pin Function<br />
Earth<br />
Signal<br />
1<br />
Ground 7 Ground<br />
2 TX 8 DCD<br />
3 RX 20 DTR<br />
4 RTS 24 Enable<br />
Logic<br />
5<br />
CTS 25 Ground<br />
Pin Function Pin Function<br />
Earth<br />
Signal<br />
1<br />
Ground 7 Ground<br />
2 TX 8 DCD<br />
3 RX 20 DTR<br />
4 RTS 24 Enable<br />
Logic<br />
5<br />
CTS 25 Ground<br />
Pin Function Pin Function<br />
1<br />
Earth<br />
Ground<br />
5 CTS<br />
2 TX 7<br />
Signal<br />
Ground<br />
3 RX 8 DCD<br />
4 RTS 20 DTR<br />
14.5.2 <strong>2070</strong> Communication Ports<br />
<strong>2070</strong>-7A (DB-9S) Async Serial Com Module <strong>2070</strong>-7B (DB-15S) High Speed Serial Com Module<br />
C21 & C22 Connector Pinouts (DB-9S)<br />
Pin Function Pin Function<br />
1 DCD 6 N/A<br />
2 RXD 7 RTS<br />
3 TXD 8 CTS<br />
4 N/A 9 N/A<br />
5 ISO DC<br />
GND<br />
C21 & C22 Connector Pinouts (DB-15S)<br />
Pin Function Pin Function<br />
1 TX DATA + 9 TX DATA -<br />
2 ISO DC GND 10 ISO DC GND<br />
3 TX CLOCK + 11 TX CLOCK -<br />
4 ISO DC GND 12 ISO DC GND<br />
5 RX DATA + 13 RX DATA -<br />
6 ISO DC GND 14 ISO DC GND<br />
7 RX CLOCK + 15 RX CLOCK -<br />
8 N/A<br />
<strong>2070</strong>-6A and 6B Async/Modem Serial Com Module<br />
C2 & C20 Connector Pin-outs<br />
Pin Function Pin Function<br />
A Audio In J RTS<br />
B Audio In K Data In<br />
C Audio Out L Data Out<br />
D ISO +5 VDC M CTS<br />
E Audio Out N ISO DC Ground<br />
F N/A P N/A<br />
H CD R N/A<br />
Naztec <strong>NTCIP</strong> <strong>Based</strong> NEMA <strong>TS2</strong> and <strong>2070</strong> Controller <strong>Manual</strong> – July 2009 Page 14-172
14.5.3 External Communication Ports Provided on the <strong>2070</strong>N Expansion Chassis<br />
The EX1 and EX2 communication ports reside on<br />
the front of the <strong>2070</strong>N expansion chassis as shown in<br />
the figure to the right.<br />
The EX1 port provides an EIA RS-232 serial port.<br />
The baud rate of the EX1 port is selected by<br />
hardware jumpers to provide 300, 1200, 2400, 4800,<br />
9600, 19,200 and 38,400 baud operation.<br />
The EX2 port is connected to a Model <strong>2070</strong>-6 Serial<br />
Comm Module in the <strong>2070</strong> unit using a 22 line HAR<br />
2 harness. This connector provides two modems or<br />
RS-232 connections from the <strong>2070</strong>-6 Serial Comm<br />
Module.<br />
The pinouts <strong>for</strong> the EX1 and EX2 ports below comply with the Caltrans TEES specification.<br />
<strong>2070</strong>N EX1 Com Port<br />
Pin Function Pin Function<br />
1 EQ Gnd 14 <strong>2070</strong>-8 DC GND<br />
2 TxD FCU 15 485 RX Data +<br />
3 RXD FCU 16 485 RX Data -<br />
4 RTS FCU 17 <strong>2070</strong>-8 DC GND<br />
5 CTS FCU 18 485 RC Clock +<br />
6 N/A 19 485 RC Clock -<br />
7 <strong>2070</strong>-8 DC GND 20<br />
8 DCD FCU 21<br />
9 <strong>2070</strong>-8 DC GND 22<br />
10 485 TX Data + 23<br />
11 485 TX Data - 24<br />
12 485 TX Clock + 25<br />
13 485 TX Clock -<br />
14.6 <strong>2070</strong> / <strong>2070</strong>N Modules<br />
<strong>2070</strong>N EX2 Com Port<br />
Pin Function Pin Function<br />
1 EQ Gnd 14 EQ Gnd<br />
2 TxD 1 15 TxD 2<br />
3 RxD 1 16 RxD 2<br />
4 RTS 1 17 RTS 2<br />
5 CTS 1 18 CTS 2<br />
6 N/A 19 N/A<br />
7 DC GND #1 20 DC GND #1<br />
8 DCD 1 21 DCD 2<br />
9 Audio In 1 22 Audio In 2<br />
10 Audio In 1 23 Audio In 2<br />
11 Audio Out 1 24 Audio Out 2<br />
12 Audio Out 1 25 Audio Out 2<br />
13 N/A<br />
The <strong>2070</strong> is supplied with either full VME support or as a VME “light” configuration. The full VME version provides<br />
dual-processor support and VME expansion while the “light” version supports a single processor to reduce unit costs. The<br />
full VME version is supplied with a <strong>2070</strong>-1A module as shown in the figure below. The VME “light” version is supplied<br />
with the <strong>2070</strong>-1B module which also provides an Ethernet port (C14S) and an additional serial port (C13S).<br />
Two field I/O modules are supported with either the full VME or VME “light” version. Both modules provide a C12S<br />
connector designed to interface the ATC cabinet. In addition to the C12S connector, the <strong>2070</strong>-2A module provides a C1S<br />
and C11s connector to interface existing 170 and 179 cabinets. The <strong>2070</strong>-2B module only provides the C12S connector to<br />
interface a <strong>2070</strong>N expansion chassis and provide NEMA I/O support.<br />
The LCD (Liquid Crystal Display) comes in 2 versions (a 4 line x 40 character display with ½” characters or an 8 line x40<br />
character display with ¼” characters). The <strong>2070</strong> may also be supplied without the LCD and keyboard to reduce costs;<br />
however, a laptop or palm pilot must be supplied <strong>for</strong> the user interface using the C60P connector.<br />
The <strong>2070</strong> modules used with these various configurations are listed below.<br />
Naztec <strong>NTCIP</strong> <strong>Based</strong> NEMA <strong>TS2</strong> and <strong>2070</strong> Controller <strong>Manual</strong> – July 2009 Page 14-173
Rear View of <strong>2070</strong> Controller – VME Version, 170 Compatible I/O, 2 Async Serial Ports and 2 Modem Ports<br />
Module<br />
#<br />
Module Description<br />
<strong>2070</strong> – 1A Full VME CPU – dual board module with VME master and slave capability<br />
<strong>2070</strong> – 1B VME “Light” CPU – single board module with Ethernet and serial port 8 support<br />
<strong>2070</strong> – 1C Future API support – processor and operating system independent<br />
<strong>2070</strong> – 2A 170/179 Compatible Field I/O Module with ATC support (C12S connector)<br />
<strong>2070</strong> – 2B ATC Compatible Field I/O Module (used to interface the <strong>2070</strong>N expansion chassis)<br />
<strong>2070</strong> – 3A Front Panel with 4 line x 40 character LCD (1/2 inch letter height) – full VME only<br />
<strong>2070</strong> – 3B Front Panel with 8 line x 40 character LCD (1/4 inch letter height)<br />
<strong>2070</strong> – 3C Front panel without LCD or keyboard<br />
<strong>2070</strong> – 4A 10 amp, +5VDC Power Supply (used with the full VME version)<br />
<strong>2070</strong> – 4B 3.5 amp, +5VDC Power Supply (used with the VME “light” version)<br />
<strong>2070</strong> – 5 VME Assembly<br />
<strong>2070</strong> – 6A Two modems and/or 1200 baud RS-232 serial ports – interfaces with either voice<br />
grade telephone or direct connection<br />
<strong>2070</strong> – 6B Two modems and/or 9600 baud RS-232 serial ports – interfaces with either voice<br />
grade telephone or direct connection<br />
<strong>2070</strong> – 6C 1 channel auto-dial and 1 channel 400 modem<br />
<strong>2070</strong> – 6D 2 channel – fiber communication<br />
<strong>2070</strong> – 7A 2 Asynch Serial RS-232 Comm Channels<br />
<strong>2070</strong> – 7B 2 Asynch Serial RS-485 Comm Channels<br />
<strong>2070</strong> – 8 NEMA expansion module used with the <strong>2070</strong>-2B module<br />
Naztec <strong>NTCIP</strong> <strong>Based</strong> NEMA <strong>TS2</strong> and <strong>2070</strong> Controller <strong>Manual</strong> – July 2009 Page 14-174
16 Phase Sequential Operation .................................. 4-30<br />
<strong>2070</strong> / <strong>2070</strong>N Modules .......................................... 14-173<br />
<strong>2070</strong> 2A (C1 Connector) Mapping – Caltrans TEES<br />
Option ................................................................ 14-148<br />
<strong>2070</strong> 2A (C1 Connector) Mapping – NY DOT<br />
Option .............. 14-150, 14-152, 14-154, 14-156, 14-158<br />
<strong>2070</strong> ABC, D and 2A Connectors ......................... 12-127<br />
<strong>2070</strong> Binding ......................................................... 10-111<br />
<strong>2070</strong> Communication Ports ................................... 14-172<br />
<strong>2070</strong>(N) D-Connector – 820A-VMS Mapping ..... 14-161<br />
<strong>2070</strong>(N) D-Connector – TEES Mapping ............... 14-160<br />
<strong>2070</strong>N Expansion Chassis ..................................... 14-173<br />
33x Input File ........................................................ 12-129<br />
A-Connector - <strong>TS2</strong> (type-2) and <strong>2070</strong>N ................ 14-137<br />
Action Table .............................................................. 7-85<br />
Added Initial ..................................................... 4-18, 4-21<br />
Advance Warning Beacon ......................................... 4-26<br />
Advanced Schedule .................................................... 7-83<br />
Alarm Functions ........................................................ 4-48<br />
Alarms ....................................................................... 4-46<br />
Alarms Buffer ............................................................ 4-47<br />
Allow
Lnk Aft Dwell ........................................................... 8-92<br />
Load Software Utility .............................................. 9-103<br />
Local Flash Start ........................................................ 4-49<br />
Local Transmit Alarms .............................................. 4-46<br />
Lock Calls ................................................................. 4-20<br />
Login ....................................................................... 9-101<br />
Long (Long-way Transition %) ................................. 6-70<br />
Low Priority Features ................................................ 8-95<br />
Low-Priority Preempts .............................................. 8-93<br />
Master Station ID .................................................. 10-105<br />
Max Cycle Tm ........................................................... 4-50<br />
Max II ........................................................................ 4-21<br />
Max-1 Green ............................................................. 4-18<br />
Max1+ ....................................................................... 4-25<br />
Max-2 Green ............................................................. 4-18<br />
Max2+ ....................................................................... 4-25<br />
Maximum Initial ........................................................ 4-18<br />
Maximum Phase Timing ........................................... 6-73<br />
Maximum Vehicle Recall .......................................... 4-20<br />
Minimum Gap Time .................................................. 4-19<br />
Minimum Green ........................................................ 4-18<br />
Minimum Vehicle Recall .......................................... 4-20<br />
MinPermV/P ............................................................. 6-72<br />
Model 970 (C1 Connector) Mapping .................... 14-162<br />
Mon/Flash Alarm Delay (31)(secs) ........................... 4-46<br />
NAND ................................................................... 12-131<br />
No Short Ø’s.............................................................. 6-71<br />
Non-Actuated 1 ......................................................... 4-21<br />
NOR ...................................................................... 12-131<br />
Offset Reference ........................................................ 6-71<br />
Omit Yel, Yel Ø ........................................................ 4-23<br />
Operator ............................................................... 12-131<br />
OR ......................................................................... 12-131<br />
OTHER .................................................................... 6-63<br />
Overlap Parameters ................................................... 4-31<br />
Overlap Plus .............................................................. 4-38<br />
Overlap Status ........................................................... 4-43<br />
Overlap Type: FAST FL ........................................... 4-35<br />
Overlap Type: Flashing Red ...................................... 4-35<br />
Overlap Type: Left Turn Permissive ......................... 4-34<br />
Overlap Type: Min Green ......................................... 4-37<br />
Overlap Type: Minus Green Yellow ......................... 4-34<br />
Overlap Type: Minus Walk ....................................... 4-37<br />
Overlap Type: Normal............................................... 4-33<br />
Overlap Type: Ped Overlap (Ped-1) .......................... 4-36<br />
Overlap Type: Right Turn ......................................... 4-36<br />
Overlap Types ........................................................... 4-33<br />
Overlaps .................................................................... 4-31<br />
Pattern Events ............................................................ 4-46<br />
Pattern Offsets ........................................................... 6-79<br />
Pattern Table ............................................................. 6-67<br />
Ped Delay .................................................................. 4-22<br />
Ped Out/Ovrlap Ø ...................................................... 4-23<br />
Ped Parameter - Call Phase ....................................... 5-57<br />
Ped Parameter - Erratic Counts ................................. 5-57<br />
Ped Parameter - Maximum Presence ......................... 5-57<br />
Ped Parameter - No Activity ..................................... 5-57<br />
PedApply Points ........................................................ 6-70<br />
PedClr Thru Yellow .................................................. 4-21<br />
Pedestrian Actuated Mode ......................................... 4-17<br />
Pedestrian Clearance ................................................. 4-18<br />
Pedestrian Parameters ................................................ 5-57<br />
Pedestrian Recall ....................................................... 4-20<br />
Perm Diag .............................................................. 11-115<br />
Permissive Periods ..................................................... 6-69<br />
phase .......................................................................... 4-15<br />
Phase Mode ............................................................... 4-49<br />
Phase Options ............................................................ 4-20<br />
Phase Options+ .......................................................... 4-21<br />
Phase Times ............................................................... 4-18<br />
Phase Timing Status .................................................. 9-97<br />
Platoon Progression ................................................... 8-95<br />
Preempt Events .......................................................... 4-46<br />
Preempt Inhibit Control ............................................. 8-92<br />
Preempt Options ........................................................ 8-89<br />
Preempt Overlaps+ .................................................... 8-91<br />
Preempt Phases .......................................................... 8-89<br />
Preempt Times ........................................................... 8-88<br />
Preempt Times+ ......................................................... 8-90<br />
Preemption ................................................................. 8-88<br />
Print Utility .............................................................. 9-101<br />
Queue Detector Programming ................................... 5-57<br />
Queue Limit ............................................................... 5-53<br />
Re-Assign User Alarm IN ......................................... 4-46<br />
Red Clearance ............................................................ 4-18<br />
Red Rest..................................................................... 4-21<br />
Red Revert ................................................................. 4-49<br />
Red Revert Time ........................................................ 4-18<br />
Reduce By ................................................................. 4-19<br />
Reservice ................................................................... 4-21<br />
Rest In Walk .............................................................. 4-21<br />
Rest-In-Walk ............................................................. 6-73<br />
Result .................................................................... 12-131<br />
Return Hold (RetHold) .............................................. 6-71<br />
Return Min/Max ........................................................ 8-92<br />
Ring Parameters+ ...................................................... 4-30<br />
Ring Sequence ........................................................... 4-27<br />
Ring Status and Phase Timing ................................... 9-97<br />
R-T,ILL ........................................................... 4-33, 4-37<br />
Run Timer ......................................................... 4-48, 4-50<br />
SDLC Faults ............................................. 11-114, 11-115<br />
SDLC Retry Time .................................................. 11-114<br />
SDLC Status Display ............................................. 11-115<br />
SHF ........................................................................ 12-132<br />
Short (Short-way Transition %) ................................. 6-70<br />
Shortway+.................................................................. 6-66<br />
SkipRed-NoCall ........................................................ 4-21<br />
Soft Vehicle Recall .................................................... 4-20<br />
Speed Detectors ......................................................... 5-61<br />
Speed Sample ............................................................ 5-60<br />
Speed Thresholds ....................................................... 5-61<br />
Split Table ................................................................. 6-67<br />
Split Table Mode Setting ........................................... 6-68<br />
Start Red Time ........................................................... 4-49<br />
Start Up Flash ............................................................ 4-49<br />
Start Up Phases .......................................................... 4-28<br />
StartYel, Next Ø ........................................................ 4-24<br />
Station ID............................................................... 10-105<br />
Status Displays .......................................................... 9-97<br />
STD8 Operation ......................................................... 4-29<br />
Stop-in Walk .............................................................. 6-64<br />
Switch Phase .............................................................. 5-53<br />
Naztec <strong>NTCIP</strong> <strong>Based</strong> NEMA <strong>TS2</strong> and <strong>2070</strong> Controller <strong>Manual</strong> – July 2009 Page 15-176
T&F BIU Map .......................................... 12-119, 12-120<br />
TBC <strong>Manual</strong> Control Screen ..................................... 7-87<br />
Test OpMode ............................................................. 6-62<br />
Time Base Scheduler ................................................. 7-83<br />
Time Base Status ....................................................... 7-86<br />
Time Be<strong>for</strong>e Reduction ............................................. 4-19<br />
Time To Reduce ........................................................ 4-19<br />
Timer .................................................................... 12-132<br />
<strong>TS2</strong> Communication Ports ....................... 14-166, 14-172<br />
<strong>TS2</strong> Default programming BIU 1 .......................... 12-124<br />
<strong>TS2</strong> Default programming BIU 2 .......................... 12-125<br />
<strong>TS2</strong> Fully Mappable I/O........................................ 12-121<br />
<strong>TS2</strong> Programmable I/O Logic ............................... 12-121<br />
Unit Parameters ......................................................... 4-49<br />
User Agreement ............................................................ 1-2<br />
VehApply Points ....................................................... 6-70<br />
Vehicle actuated ........................................................ 4-15<br />
Vehicle Detector - Erratic Counts ............................. 5-54<br />
Vehicle Detector - Fail Time ..................................... 5-54<br />
Vehicle Detector - Max Presence .............................. 5-54<br />
Vehicle Detector - No Activity.................................. 5-54<br />
Vehicle Option - Added Initial .................................. 5-55<br />
Vehicle Option - Call ................................................. 5-55<br />
Vehicle Option - Extend ............................................ 5-55<br />
Vehicle Option - Occupancy ..................................... 5-55<br />
Vehicle Option - Queue ............................................. 5-55<br />
Vehicle Option - Red Lock Calls ............................... 5-55<br />
Vehicle Option - Volume........................................... 5-55<br />
Vehicle Option - Yellow Lock Calls ......................... 5-55<br />
Vehicle Options ......................................................... 5-54<br />
Vehicle Parameters+ .................................................. 5-56<br />
Vehicle Parms+ - Delay Phases ................................. 5-56<br />
Vehicle Parms+ - Mode ............................................. 5-56<br />
Vehicle Parms+ - Occ: G Y R ................................... 5-56<br />
Vehicle Parms+ - Src ................................................. 5-57<br />
Vol/Occ Real-Time Sample ....................................... 5-60<br />
Volume Density Mode ................................................ 4-16<br />
Walk .......................................................................... 4-18<br />
Walk Recycle ............................................................. 6-65<br />
XNOR .................................................................... 12-131<br />
XOR ....................................................................... 12-131<br />
Yellow Clearance ...................................................... 4-18<br />
Yield Points ............................................................... 6-69<br />
Naztec <strong>NTCIP</strong> <strong>Based</strong> NEMA <strong>TS2</strong> and <strong>2070</strong> Controller <strong>Manual</strong> – July 2009 Page 15-177