SleepStyle HC254 Auto CPAP User Guide - Sleep Restfully, Inc.
SleepStyle HC254 Auto CPAP User Guide - Sleep Restfully, Inc.
SleepStyle HC254 Auto CPAP User Guide - Sleep Restfully, Inc.

You also want an ePaper? Increase the reach of your titles
YUMPU automatically turns print PDFs into web optimized ePapers that Google loves.
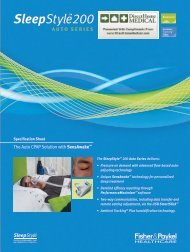
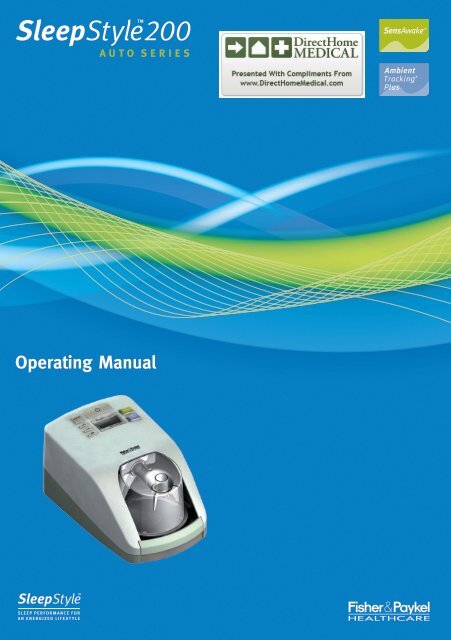
A U T O S E R I E S<br />
Operating Manual
English<br />
The <strong><strong>Sleep</strong>Style</strong> 200 <strong>Auto</strong> Series is designed<br />
for use in the home or sleep laboratory, for the<br />
treatment of Obstructive <strong>Sleep</strong> Apnea.<br />
For further assistance, please contact your local<br />
Fisher & Paykel Healthcare office – as detailed on<br />
the back cover. Please keep this manual for future<br />
reference.<br />
TABLE OF CONTENTS<br />
1. Symbol Definitions .................................................................................................................................................................... A - 2<br />
2. Intended Use ............................................................................................................................................................................. A - 2<br />
3. Warnings, Cautions, Contraindications ................................................................................................................................... A - 2<br />
4. Description of the Device ......................................................................................................................................................... A - 3<br />
4.1 Package Contents ............................................................................................................................................................... A - 3<br />
4.2 Important Parts of Your Device ......................................................................................................................................... A - 3<br />
4.3 Accessories .......................................................................................................................................................................... A - 3<br />
5. Device Technology .................................................................................................................................................................... A - 4<br />
5.1 SensAwake ....................................................................................................................................................................... A - 4<br />
5.1 AmbientTracking ® Plus .......................................................................................................................................................... A - 4<br />
6. Setup Instructions ..................................................................................................................................................................... A - 4<br />
7. Oxygen Use ............................................................................................................................................................................... A - 4<br />
8. Controls and Display ................................................................................................................................................................. A - 5<br />
8.1 Display Descriptions and Functions .................................................................................................................................. A - 5<br />
8.2 Patient Menu Summary ...................................................................................................................................................... A - 6<br />
8.3 Patient Menu - Additional Settings Summary .................................................................................................................. A - 6<br />
9. Cleaning and Maintenance ...................................................................................................................................................... A - 7<br />
10. Frequently Asked Questions .................................................................................................................................................... A - 7<br />
11. Product Specifications .............................................................................................................................................................. A - 8<br />
12. Operating Conditions ............................................................................................................................................................... A - 8<br />
13. Storage and Transport .............................................................................................................................................................. A - 8<br />
14. Troubleshooting ........................................................................................................................................................................ A - 8<br />
P L E A S E R E A D A L L I N S T R U C T I O N S B E F O R E I N I T I A L U S E<br />
Caution: USA Federal Law restricts this device for sale by or on the order of a physician.<br />
A - 1
1. SYMBOL DEFINITIONS<br />
Type BF<br />
Applied Part<br />
2. INTENDED USE<br />
ATTENTION<br />
Consult accompanying<br />
documents<br />
Drip-proof<br />
Alternating<br />
Current<br />
A - 2<br />
Class ll<br />
Double-insulated<br />
The <strong><strong>Sleep</strong>Style</strong> 200 <strong>Auto</strong> Series <strong>CPAP</strong> Humidifier is for use on adult patients for the treatment of Obstructive <strong>Sleep</strong> Apnea (OSA).<br />
The device is for use in the home or sleep laboratory.<br />
3. WARNINGS, CAUTIONS, CONTRAINDICATIONS<br />
Notes<br />
• This manual refers to the <strong><strong>Sleep</strong>Style</strong> 200 <strong>Auto</strong> Series unit as<br />
"the device".<br />
• If required to use <strong>CPAP</strong> or <strong>Auto</strong> <strong>CPAP</strong> by a referring physician<br />
you should use your device every time you sleep. Should your<br />
device stop working for any reason, contact your healthcare<br />
provider immediately.<br />
• The user of this system shall have sole responsibility and liability<br />
for any injury to persons or damage to property resulting from<br />
operation of the device which is not in accordance with the<br />
operating instructions supplied.<br />
• The device should only be used with masks, connectors and<br />
delivery tubes recommended by Fisher & Paykel Healthcare,<br />
your physician or sleep specialist.<br />
• We recommend use of Fisher & Paykel Healthcare interfaces to<br />
ensure true data accuracy.<br />
• Under normal operating conditions the air supplied by the device<br />
will not exceed 105.8ºF (41ºC).<br />
• Refer all repair and maintenance to Fisher and Paykel Healthcare.<br />
• Only insert or remove the SmartStick when the device is in<br />
standby mode or not connected to mains power.<br />
• SmartStick should only be removed when downloadable data<br />
is required by your physician or sleep specialist.<br />
• To avoid data loss do not remove the SmartStick from the<br />
device while the light is flashing.<br />
• To avoid damage and data loss, transport the SmartStick in<br />
the transportation case provided.<br />
• Use only Fisher & Paykel Healthcare-supplied SmartSticks.<br />
• Do not operate the device without the SmartStick cap secured<br />
over the SmartStick port.<br />
• Do not operate the device without the cover over the serial port<br />
adapter.<br />
WARNINGS<br />
To avoid electric shock from your device, do not:<br />
• Operate the device if the power cord or plug is damaged.<br />
• Operate the device if it has been dropped in water.<br />
• Plug the device into the power socket if it is wet.<br />
• Clean the device while connected to the power socket.<br />
• Store or use the device where it can tilt, fall or be pulled into<br />
water. If water has entered the unit enclosure, disconnect<br />
the power cord and discontinue use. Seek advice from your<br />
healthcare provider.<br />
To avoid choking or inhalation of a foreign body:<br />
• Never place any object into any opening of the tube.<br />
• Ensure the air filter is fitted during device use.<br />
To ensure optimal therapy, do not:<br />
• Insert the SmartStick into any PC that does not have<br />
PerformanceMaximizer software installed. Changing the<br />
directories on the SmartStick or attempting to view the data<br />
collected without the correct software will result in all data stored<br />
on the SmartStick being lost; therefore therapy follow-up can<br />
not be conducted.<br />
• Operate the device if dropped or damaged.<br />
• Operate the device if not working properly.<br />
• Adjust the pressure. Pressure must only be adjusted by a<br />
healthcare professional.<br />
• Operate the device if the tube has been damaged with holes,<br />
tears or kinks.<br />
• Block the exhaust flow on the interface.<br />
• Use the mask if the unit is not turned on or operating properly.<br />
Standby<br />
93/42/EEC<br />
Class IIb<br />
To avoid burns, do not:<br />
• Fill the chamber with boiling water.<br />
• Touch the exposed heater plate or chamber base.<br />
To avoid the risk of fire while using oxygen, do not:<br />
• Turn oxygen flow on when the device is not operating; this can<br />
lead to accumulation of oxygen within the device.<br />
• Locate the device in a position where ventilation around the<br />
device is restricted.<br />
• Use oxygen while smoking or in the presence of an open flame.<br />
• Use any materials which will burn in air or ignite easily at high<br />
oxygen concentration.<br />
• Keep any source of ignition by the product. To avoid ignition it is<br />
preferable to keep all sources of ignition out of the room where<br />
supplemental oxygen is being used.<br />
• Keep oxygen regulators, cylinder valves, tubing, connections<br />
and all other oxygen equipment near oil, grease or greasy<br />
substances. Spontaneous and violent ignition may occur if these<br />
substances come into contact with oxygen under pressure.<br />
Other:<br />
• Place the device on a level surface lower than head height to<br />
prevent water entering the tubing. If water does enter the tubing<br />
drain excess condensate. Water in the tubing may result in<br />
aspiration.<br />
• The device is intended to be used with <strong>CPAP</strong> masks and<br />
connectors that have exhaust flow holes to allow continuous<br />
flow of air out of the mask. When the device is turned on and<br />
operating properly new air flushes exhaled air out of the mask<br />
through the exhaust flow holes. At low <strong>CPAP</strong> pressures and in<br />
the event of power failure or machine malfunction remove the<br />
mask immediately, as flow through the mask may be insufficient<br />
to clear all exhaled gas and CO 2 rebreathing may occur which<br />
can be hazardous.<br />
• Failure to select the correct altitude level (for any given location)<br />
will have an adverse effect on delivered pressure.<br />
CAUTIONS<br />
To prevent water damage to your device:<br />
• Remove the humidification chamber from the device before filling.<br />
• Empty water from the chamber before transporting the device. If<br />
the device is required to be handled with water in the chamber,<br />
avoid tilting the device to prevent water entering its enclosure.<br />
Other:<br />
• To prevent damage to your PC, only operate the device if<br />
it is connected to a PC via an isolated serial port adapter<br />
(900HC236).<br />
• To prevent airway irritation, do not use the device when room<br />
temperature exceeds 95°F (35°C).<br />
CONTRAINDICATIONS<br />
• Research indicates the following pre-existing conditions may<br />
contraindicate the use of positive pressure for some patients:<br />
pneumothorax, bullous lung disease, pneumocephalus,<br />
cerebrospinal fluid leak, recent cranial surgery or trauma,<br />
abnormalities of the cribriform plate, pathologically low blood<br />
pressure, middle ear infections, perforated ear drum, sinusitis, or<br />
dehydration.<br />
• This auto adjusting device is not suitable for use in patients<br />
with congestive heart failure, obesity hypoventilation syndrome,<br />
central sleep apnea, respiratory failure, COPD or in patients<br />
whose upper airways are bypassed.<br />
• Please contact your physician if you have any questions<br />
concerning your therapy.
4. DESCRIPTION OF THE DEVICE<br />
4.1 Package Contents<br />
English<br />
2 x<br />
1 x<br />
1 x<br />
(<strong>HC254</strong>)<br />
4.2 Important Parts of Your Device<br />
FILTER HOLDER<br />
AIR FILTER<br />
POWER CORD<br />
1 x 1 x<br />
ON/OFF BUTTON<br />
1 x<br />
SmartStick CAP<br />
SmartStick PORT<br />
TUBE<br />
HEATER PLATE<br />
SERIAL PORT<br />
Note: For serial data<br />
communication only<br />
SmartStick<br />
DISPLAY<br />
CONNECTOR<br />
CHAMBER GUARD<br />
WATER CHAMBER<br />
WATER LEVEL LINE<br />
4.3 Accessories<br />
HC385S Standard Humidification Chamber<br />
HC355* Extended Life Humidification Chamber<br />
900HC010 Connector<br />
900HC221 Tube – To fit 22mm (0.86”) conical connector<br />
900HC240 Air Filter<br />
*Not available in all countries<br />
900HC615<br />
900HC611<br />
900HC236<br />
900HC323<br />
900HC226<br />
PerformanceMaximizer Software<br />
SmartStick<br />
Isolated Serial Adapter<br />
Serial Cable<br />
Extension Cable<br />
5. DEVICE TECHNOLOGY<br />
5.1 SensAwake<br />
The <strong><strong>Sleep</strong>Style</strong> 200 <strong>Auto</strong> Series features unique SensAwake technology. Sensitive to sleep, SensAwake technology has been<br />
designed for optimal comfort. SensAwake has the ability to differentiate between quiet comfortable breathing during sleep and<br />
anxious breathing during wake. When anxious breathing is detected the delivered pressure lowered towards the minimum set pressure<br />
thus facilitating the rapid return to sleep whilst optimizing comfort. SensAwake can be turned on or off. Refer to Section 8:<br />
"Controls and Display".<br />
5.2 AmbientTracking ® Plus<br />
AmbientTracking ® Plus automatically adjusts the heater plate in response to changes in room temperature and air leaks caused by<br />
mouth leak and/or mask leak to maximize humidity and minimize condensation.<br />
A - 3
6. SETUP INSTRUCTIONS<br />
HOW TO SET UP YOUR SYSTEM<br />
1. Remove the device from its packaging.<br />
2. Place the device on a low shelf or on the floor beside your bed,<br />
so the device is positioned below head height.<br />
3. Chamber Setup<br />
a. Remove one water chamber from the packaging.<br />
b. Remove the blue caps and discard them (Fig.1).<br />
c. Fill the chamber up to the water-filling line with distilled water only; an<br />
optional funnel is supplied for easy filling (Fig.2).<br />
Never fill the chamber while it is attached to the device.<br />
When moving your device, ensure the water chamber is empty.<br />
Machine failure due to water damage is not covered by warranty.<br />
d. To attach the water chamber to the device, press down the finger<br />
guard, line up the rear chamber hole to the <strong>CPAP</strong> outlet and slide the<br />
chamber on (Fig.3, Fig.4).<br />
e. When the chamber is fitted correctly, the finger guard will click into<br />
place.<br />
4. One end of the tube has a white plastic connector.<br />
Push this onto the outlet on top of the chamber (Fig.5).<br />
5. Connect the other end of the tube to the mask.<br />
6. Plug the device power cord into the rear of the device and into your<br />
household power socket.<br />
7. When connected to mains power the device will be in standby mode.<br />
8. The SmartStick is located at the rear of the device. Detach the cap and<br />
ensure the SmartStick is inserted in the correct orientation. The “Fisher &<br />
Paykel Healthcare” logo should be the right way up. If the label is upside<br />
down remove the SmartStick and reinsert the SmartStick in the correct<br />
orientation. The first time the SmartStick is inserted into the device a<br />
small light at the end of the SmartStick will flash. The light will remain<br />
illuminated indicating that data is being logged to the SmartStick (Fig.6).<br />
NOTE:<br />
Fig.1<br />
Fig.3<br />
Fig.5<br />
Fig.7<br />
Fig.2<br />
Fig.4<br />
Fig.6<br />
Fig.8<br />
• To download or update settings, only insert the SmartStick when the device is in standby mode or disconnected from mains<br />
power. Do not insert or remove the SmartStick while the pressure is on.<br />
• Only SmartSticks supplied by Fisher & Paykel Healthcare can be used in the device.<br />
9. Once the SmartStick is correctly inserted, secure the SmartStick CAP over the SmartStick. If the SmartStick is not<br />
being used, the CAP must still be secured in place (Fig.7).<br />
10. Activate the device by pressing the on/off button (Fig.8). Upon activation, "ON" will flash three times on the LCD display<br />
followed by a humidity setting (factory default setting - see section 8.1).<br />
11. For changing settings refer to section 8: "Controls and Display".<br />
Your device is now ready for use.<br />
7. OXYGEN USE<br />
If oxygen is required, it is recommended that supplemental oxygen be administered at the mask. Please see instructions specific to<br />
your mask type.<br />
NOTE:<br />
• At a fixed flow rate of supplemental oxygen, the inhaled oxygen concentration will vary, depending on the pressure<br />
settings, patient's breathing pattern, mask selection and leak rate.<br />
Before using oxygen with the device please see oxygen warnings in section 3.<br />
A - 4
8. CONTROLS AND DISPLAY<br />
8.1 DISPLAY DESCRIPTIONS AND FUNCTIONS<br />
NOTES:<br />
Default Display<br />
• For initial use the device will default to display<br />
humidity ( ) as per factory settings.<br />
• The cmH 2 O button can be used to change<br />
the LCD display between actual cmH 2 O and<br />
humidity setting.<br />
• When humidity is displayed the level of<br />
humidity can be changed using and<br />
buttons. <strong>Inc</strong>rease if experiencing airway<br />
dryness; decrease if experiencing excessive<br />
condensation.<br />
<<br />
<<br />
Standby<br />
Turns pressure ON/OFF<br />
cmH 2 O<br />
Changes default display<br />
cmH 2 O/<br />
Up button<br />
<strong>Inc</strong>rease setting<br />
Down button<br />
Decrease setting<br />
Mode button<br />
Step through options<br />
English<br />
KEY FUNCTION & DESCRIPTION OPERATION<br />
cmH 2 0<br />
(Pressure)<br />
<<br />
<<br />
STANDBY<br />
Switches the pressure ON & OFF<br />
cmH 2 0<br />
Changes LCD to display humidity or cmH 2 O<br />
INCREASE/DECREASE<br />
Adjusts settings up or down<br />
MODE<br />
To step through options<br />
TO START PRESSURE (pressure on)<br />
Press button briefly. "ON" will flash 3 times on the LCD, then the default will<br />
display<br />
TO STOP PRESSURE (pressure off)<br />
Remove your mask<br />
Press button briefly. "OFF" will flash 3 times on the LCD, then the device will<br />
return to standby mode and the default will display<br />
Press once to change between actual cmH 2 O and humidity<br />
Press and buttons to raise or lower settings<br />
<<br />
<<br />
Press sequentially to step through and view options available<br />
PATIENT MENU DISPLAY OPERATION<br />
For viewing settings:<br />
Humidity and Usage Data.<br />
Starting from the default display press<br />
sequentially to view<br />
NOTE: To exit menu: Wait 6 seconds for LCD<br />
to revert to default display<br />
Displays humidity setting<br />
Adjust humidity to minimize upper airway side effects from treatment.<br />
Press and to adjust humidity setting<br />
<<br />
<<br />
Apnea Hypopnea Index (AHI)*<br />
Displays the average AHI for the last treatment session<br />
System leak*<br />
Displays system leak history for the last treatment session in litres per minute<br />
(LPM). System leak is comprised of exhaust flow, mask leak and mouth leak.<br />
Exhaust flow is the expected leak at the interface exhalation port required to flush<br />
C0 2 from the mask. A reading of 60 or below indicates an acceptable level of leak<br />
Total run hours<br />
Displays the total hours the device has been run with the pressure on<br />
Average usage hours per night<br />
Displays the average number of hours per night the device has been used<br />
Check sum<br />
Allows usage to be checked<br />
PATIENT MENU - ADDITIONAL SETTINGS DISPLAY OPERATION<br />
To access additional settings:<br />
From the default display<br />
Press the button for 3 seconds<br />
To view subsequent items:<br />
Press the button<br />
NOTE: To exit menu: Wait 6 seconds for LCD<br />
to revert to default display<br />
SensAwake<br />
Displays status of SensAwake<br />
Press and buttons to change between ON and OFF<br />
<<br />
<<br />
Altitude units<br />
Displays altitude units<br />
Select “m” for meters or “ft” for feet using and buttons<br />
Altitude level<br />
Displays altitude level<br />
Press and buttons to alter altitude<br />
<<br />
<<br />
<<br />
<<br />
* Activated by your healthcare provider; if not activated, will not be displayed. Refer to your interface instructions regarding exhaust flow characteristics.<br />
A - 5
8.2 PATIENT MENU SUMMARY<br />
FROM DEFAULT DISPLAY<br />
(cmH 2 O or )<br />
PRESS MODE<br />
Apnea Hypopnea Index<br />
*<br />
System Leak* Total Run Hours Average Usage hours/night Check Sum<br />
RETURN<br />
TO<br />
DEFAULT<br />
NOTE: To exit menu, wait 6 seconds for LCD to revert to default display<br />
* Only displayed if activated by healthcare provider<br />
8.3 PATIENT MENU - ADDITIONAL SETTINGS SUMMARY<br />
FROM DEFAULT DISPLAY<br />
(cmH 2 O or )<br />
HOLD MODE FOR<br />
3 SECONDS<br />
* SensAwake Altitude Units<br />
Altitude Level<br />
RETURN<br />
TO<br />
DEFAULT<br />
<<br />
or<br />
<<br />
<<br />
or<br />
<<br />
<<br />
or<br />
<<br />
SensAwake<br />
on & off<br />
Select Altitude Units<br />
Select Altitude Level<br />
NOTE: To exit menu, wait 6 seconds for LCD to revert to default display<br />
* Feature not available in conventional <strong>CPAP</strong> mode<br />
A - 6
9. CLEANING AND MAINTENANCE<br />
1. Unplug the device from mains power.<br />
2. Wipe the exterior of the device with a clean, damp (not wet) cloth and mild dishwashing detergent.<br />
Do not use harsh abrasives or solvents, as these may damage the device.<br />
3. DAILY<br />
Clean chamber and tube.<br />
• Remove the breathing tube from the chamber and mask.<br />
• Clean the tube with warm soapy water. Rinse the tube thoroughly. Hang up the tube with the<br />
tube ends pointing to the floor to dry.<br />
• Remove the chamber by pushing down the finger guard and pulling out the chamber.<br />
• Pour out and discard the remaining water.<br />
NOTE: To completely remove water, guide residual water between vanes and shake well (Fig.1).<br />
• Clean the chamber with warm soapy water. Rinse chamber thoroughly. Dry the outside of the<br />
chamber.<br />
4. WEEKLY<br />
Thoroughly clean the chamber.<br />
• Soak the inside of the chamber for 10 minutes in a solution of one part white vinegar to two<br />
parts water. Empty the vinegar solution and rinse chamber well with water.<br />
5. Replace the air filter when it becomes significantly discolored, at least once every three months<br />
or after 1000 hours' machine running time.<br />
• Remove the filter holder from the back of the device and take out the filter.<br />
• Replace the old filter with a new filter: Ensure the vertical black line is facing towards the<br />
device (Fig.2).<br />
This device does not require routine servicing or calibration<br />
Fig.1<br />
Fig.2<br />
English<br />
10. FREQUENTLY ASKED QUESTIONS<br />
When I wake up in the morning, my nose and throat feel dry. What can I do?<br />
Try increasing your humidity setting. If this does not help, please contact your clinician for advice.<br />
How do I prevent condensation in the tubing?<br />
The humidity setting enables adjustment of humidity, so that there should be fine misting in the 6"(15cm) of the<br />
breathing tube closest to your face. If the humidity setting is too high for the conditions, condensation may occur in the<br />
breathing tube.<br />
NOTE: Using greater than 6' (183cm) of tubing will increase condensation.<br />
There are several ways to reduce condensation in the tube:<br />
i. Ensure the device is not positioned in a cool draft.<br />
ii. Decrease the humidity setting on your device slightly. Gradually decrease the setting until the condensation no<br />
longer occurs.<br />
iii. Warm the air in the room.<br />
Do I have to use distilled water with my device?<br />
The use of distilled water will maximize the life of the water chamber. Water from the faucet (even if it is passed through<br />
a filter) will often contain minerals which can damage the chamber, causing pitting in the base, corrosion and possibly<br />
leaks.<br />
When do I replace my water chamber?<br />
It is recommended that the chamber is replaced every six months or if the plastic walls of the chamber become cracked<br />
or cloudy or the chamber base becomes pitted. Regular cleaning will increase the lifespan of your chamber.<br />
(NOTE: If the chamber leaks at all, it should be replaced immediately.)<br />
Can I use my device in other countries?<br />
Yes. Simply use the appropriate electrical socket adapter and the device will automatically adapt to any voltage supply.<br />
(NOTE: When moving your device, ensure that the water chamber is empty. Machine failure due to water damage is not<br />
covered by warranty.)<br />
Can I use supplemental oxygen with my device?<br />
Yes, oxygen can be administered at the mask. Turn the device on before turning on the oxygen. Ensure that the oxygen<br />
source is turned off before turning off the device to avoid oxygen accumulating in the machine. See section 7 for more<br />
details.<br />
If I want to change my device from <strong>Auto</strong><strong>CPAP</strong> mode to <strong>CPAP</strong> mode what do I do?<br />
Please contact your healthcare provider.<br />
What masks are suitable for use with a <strong><strong>Sleep</strong>Style</strong> 200 <strong>Auto</strong> Series device?<br />
It is recommended that you use a Fisher & Paykel Healthcare mask. Consult your healthcare provider regarding mask<br />
selection.<br />
What happens to my device during power failure?<br />
Upon restoration of the power supply the device will restart in the same operation mode with the same settings.<br />
A -7
11. PRODUCT SPECIFICATIONS<br />
DIMENSIONS: 10.8" x 6.7" x 5.5"<br />
(275mm x 170mm x 140mm)<br />
WEIGHT:<br />
PERFORMANCE:<br />
Pressure Range<br />
Altitude Range<br />
Humidity<br />
Gas Temperature<br />
Noise Level<br />
4.2lbs (1.9kg)<br />
(3.0kg packaged in bag incl. accessories)<br />
4 to 20 cmH 2 O<br />
(In the unlikely event of fault conditions<br />
pressure may reach up to 30cmH 2 O)<br />
0 to 9000 ft or 0 to 3000m<br />
Max = 35mg/L at 95ºF (35ºC) at 4 cmH 2 O<br />
Typical = 23mg/L at 71.6ºF (22ºC) at 10 cmH 2 O<br />
Max = 105.8ºF (41ºC)<br />
Fisher & Paykel Healthcare Offices:<br />
INTERNATIONAL P O Box 14 348, Panmure, Auckland 1741, New Zealand Tel:+64 9 574 0100 Fax:+64 9 574 0158 Email: info@fphcare.com Website: www.fphcare.com<br />
AUSTRALIA Tel: +61 3 9879 5022 Fax: +61 3 9879 5232 AUSTRIA Tel: 0800 29 31 23 Fax: 0800 29 31 22 BENELUX Tel: +31 78 644 0924 Fax: +31 78 644 0914<br />
CHINA Tel: +86 20 3205 3486 Fax: +86 20 3205 2132 FRANCE Tel: +33 1 6446 5201 Fax: +33 1 6446 5221 GERMANY Tel: +49 7182 93777 0 Fax: +49 7182 93777 99<br />
INDIA Tel: +91 80 4123 6041 Fax: +91 80 4123 6044 IRISH REPUBLIC Tel: 1800 409 011 ITALY Tel: +39 06 7839 2939 Fax: +39 06 7814 7709<br />
JAPAN Tel: +81 3 3661 7205 Fax: +81 3 3661 7206 MIDDLE EAST Tel: +9 71 4 360 0849 Fax: +9 71 4 368 8110 NORTHERN IRELAND Tel: 0800 132 189<br />
SPAIN Tel: +34 902 013 346 Fax: +34 902 013 379 SWITZERLAND Tel: 0800 83 47 63 Fax: 0800 83 47 54 UK (EU Authorized Representative) Tel: +44 1628 626 136<br />
Fax: +44 1628 626 146 Unit 16 Cordwallis Park, Clivemont Road, Maidenhead, Berkshire SL67BU, United Kingdom USA Tel: 1800 446 3908 +1 949 453 4000<br />
Fax: +1 949 453 4001<br />
185044315 Rev A © Fisher & Paykel Healthcare Limited