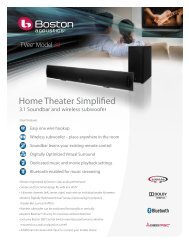
Product Manual - Boston Acoustics
Product Manual - Boston Acoustics
Product Manual - Boston Acoustics

Create successful ePaper yourself
Turn your PDF publications into a flip-book with our unique Google optimized e-Paper software.
Index<br />
Introduction Page 2<br />
Specifications Page 3<br />
Dimensions Page 4<br />
Included Parts and Accessories Page 6<br />
Tweeter Installation Page 8<br />
Axis Mount / Phase Plug Installation Page 10<br />
SPZ50 Woofer Installation Page 12<br />
SPZ60 Woofer Installation Page 13<br />
Connecting Speaker Wires to the Woofer Page 16<br />
SPZ Axis Mount Positioning Page 17<br />
Crossover Installation Page 18<br />
Crossover Configuration Page 19<br />
SPZ System Wiring (Standard) Page 20<br />
SPZ System Wiring (Bi-Amp / Bi-Wire) Page 21<br />
Contact Information Page 22<br />
1
Introduction<br />
Thank you for purchasing the <strong>Boston</strong> <strong>Acoustics</strong> SPZ component system. Nothing better describes SPZ components than<br />
best-in-class. With nearly 1-inch of peak-to-peak excursion, SPZ delivers more bass from a standard size speaker<br />
opening. Further, Our off-axis, free rotating tweeter AMD allows you to optimize the soundstage from OEM speaker<br />
locations. Component systems that combine installation flexibility with best-in-class performance are the clear choice for<br />
those who refuse to compromise the interior of their high performance vehicle. Others make claims. We deliver ours with<br />
the <strong>Boston</strong> <strong>Acoustics</strong> SPZ Reference Components.<br />
Nearly 1-inch peak-to-peak excursion from finite-element optimized rubber surround<br />
Performs as a larger diameter woofer yet drops into OEM speaker locations.<br />
Component and axis mount configurable<br />
Allows utilization of OEM speaker locations without radical customization.<br />
Free rotating axis-mount geometry acts as both a lens and tweeter baffle to allow adjustable soundstage height from a fixed mounting position<br />
Integrates woofer and tweeter as a seamless acoustic system.<br />
Compact neodymium magnet structures<br />
Deliver superb sound quality output from compact Magnetic-finite-element optimized structures.<br />
Copper-clad aluminum woofer voice coils<br />
Provides low-mass, long Xmax, and optimized DCR while maintaining power handling.<br />
150W RMS power handling<br />
Enabled by RadialVent ® cooling and TwinStage heatsink.<br />
System specific 24dB per octave crossovers with application specific filters<br />
Minimizes driver placement issues based on OEM speaker locations.<br />
2
Specifications<br />
Model: SPZ60 SPZ50<br />
Nominal Size: 6 1 ⁄2" (165mm) 5 1 ⁄4" (135mm)<br />
RMS Power Handling: 150w 150w<br />
Max Power Handling: 300w 300w<br />
Nominal System Impedance: 3Ω 3Ω<br />
Woofer Cutout Diameter: 5" (127mm) 4 3 ⁄4" (120mm)<br />
Woofer Mounting Depth: 2 11 ⁄16" (68mm) 2 9 ⁄16" (62mm)<br />
Surface Mount Tweeter Cup Cutout Diameter: 1 3 ⁄4" (45mm) 1 3 ⁄4" (45mm)<br />
Surface Mount Tweeter Cup Mounting Depth: 3<br />
⁄4" (19mm) 3<br />
⁄4" (19mm)<br />
Sensitivity (2.83v @ 1 Meter): 90dB 90dB<br />
Frequency Response (±3dB in car): 40-22kHz 50-22kHz<br />
Woofer Cone Material: Glass Fibre Composite Glass Fibre Composite<br />
Tweeter Dome Material: Hard Anodized Aluminum Alloy Hard Anodized Aluminum Alloy<br />
Crossover Filter: 24dB per Octave 24dB per Octave<br />
Tweeter Attenuation: 0dB / -2dB / -4dB 0dB / -2dB / -4dB<br />
Woofer Xmax (peak to peak): 24mm 24mm<br />
3
Dimensions<br />
SPZ60 Woofer<br />
SPZ50 Woofer<br />
3.84”<br />
97.6mm<br />
2.65”<br />
67.4mm<br />
3.62”<br />
92.1mm<br />
2.54”<br />
61.9mm<br />
1.42”<br />
36mm<br />
1.42”<br />
36mm<br />
4<br />
5.27”<br />
134mm<br />
4.69”<br />
119mm
Dimensions<br />
SPZ Crossover<br />
SPZ Tweeter<br />
4.33”<br />
110mm<br />
.71”<br />
18mm<br />
1.1”<br />
27mm<br />
1.69”<br />
43mm<br />
2.05”<br />
52mm<br />
7.75”<br />
197mm<br />
2”<br />
51mm<br />
1.5”<br />
38mm<br />
2.21”<br />
56.1mm<br />
5
SPZ60 Included Parts and Accessories:<br />
# Description Quantity<br />
1 SPZ60 Woofer 2<br />
2 Type-M1 1" Alloy Dome Tweeter 2<br />
3 SPZ60 Crossover 2<br />
4 Tweeter Grille 2<br />
5 Tweeter Axis-Mount 2<br />
6 Tweeter Flush-Mount 2<br />
7 Tweeter Angle-Mount (top) 2<br />
8 Tweeter Angle-Mount (bottom) 2<br />
9 Woofer Gasket 4<br />
10 <strong>Boston</strong> Hex Tool 1<br />
11 Woofer Grille 2<br />
12 Woofer Grille Mounting Ring 2<br />
13 Woofer Screw 6<br />
14 Thumb Screw (grille) 6<br />
15<br />
11<br />
⁄16" Socket Button Head Screw 6<br />
16 1<br />
⁄4" Socket Button Head Screw 6<br />
17 Spring Clips 4<br />
18 Terminated Tweeter Wire 2<br />
19 3<br />
⁄8" Pan Head Screw 2<br />
20 1 1 ⁄8" Socket Button Head Screw 16<br />
21 1<br />
⁄2" Self-Tapping Screw 4<br />
22 1" Self-Tapping Screw 4<br />
23 3<br />
⁄32" Hex Bit 1<br />
24 Crossover Screw (short) 4<br />
25 Crossover Screw (long) 4<br />
26 Phase Plug Cap 2<br />
27 Axis Mount / Phase Plug Screw 2<br />
28 5 x 7" (127 x 177mm) Adapter 2<br />
29 6" (160mm) Adapter 2<br />
30 6 1 ⁄2" (165mm) Adapter 2<br />
31 1<br />
⁄2" (13mm) Spacer 2<br />
19<br />
14<br />
13<br />
10<br />
16<br />
15<br />
21<br />
22<br />
4<br />
26<br />
20<br />
24<br />
12<br />
27<br />
11<br />
17<br />
25<br />
9<br />
31<br />
29<br />
30<br />
28<br />
23<br />
6
SPZ50 Included Parts and Accessories:<br />
# Description Quantity<br />
1 SPZ50 Woofer 2<br />
2 Type-M1 1" Alloy Dome Tweeter 2<br />
3 SPZ50 Crossover 2<br />
4 Tweeter Grille 2<br />
5 Tweeter Axis-Mount 2<br />
6 Tweeter Flush-Mount 2<br />
7 Tweeter Angle-Mount (top) 2<br />
8 Tweeter Angle-Mount (bottom) 2<br />
9 Woofer Gasket 4<br />
10 <strong>Boston</strong> Hex Tool 1<br />
11 Woofer Grille 2<br />
12 Woofer Grille Mounting Ring 2<br />
13 Woofer Screw 8<br />
14 Thumb Screw (grille) 8<br />
17 Spring Clips 4<br />
18 Terminated Tweeter Wire 2<br />
19 3<br />
⁄8" Pan Head Screw 2<br />
20 1 1 ⁄8" Socket Button Head Screw 16<br />
21 1<br />
⁄2" Self-Tapping Screw 4<br />
22 1" Self-Tapping Screw 4<br />
23 3<br />
⁄32" Hex Bit 1<br />
24 Crossover Screw (short) 4<br />
25 Crossover Screw (long) 4<br />
26 Phase Plug Cap 2<br />
27 Axis Mount / Phase Plug Screw 2<br />
32 5 1 ⁄4” (135mm) Adapter 2<br />
19<br />
14<br />
13<br />
10<br />
16 21 4<br />
15<br />
20<br />
22<br />
24<br />
26<br />
12<br />
27<br />
11<br />
17<br />
25<br />
9<br />
32<br />
23<br />
7
Tweeter Installation: Flush Mount<br />
6<br />
1) Drill a hole for the tweeter cup (1 3 ⁄4” / 45mm) making<br />
sure that there is adequate depth available ( 3 ⁄4” / 19mm).<br />
18<br />
6<br />
2) Connect the speaker wires to the tweeter cup .<br />
6<br />
3) Insert the tweeter cup into the mounting hole.<br />
4<br />
2<br />
17<br />
19<br />
4) Insert the retaining clips and set screw and tighten.<br />
2<br />
5) Insert the tweeter into the cup, twist clockwise to lock<br />
the tweeter into position.<br />
(Caution: Do not touch the dome of the tweeter, contact with the<br />
tweeter dome will damage the tweeter.)<br />
19<br />
17<br />
4<br />
6) Install the tweeter grille by pressing gently into place.<br />
6<br />
4<br />
4<br />
2<br />
18<br />
2<br />
19<br />
17<br />
21<br />
22<br />
8<br />
6<br />
7
Tweeter Installation: Angle Mount<br />
1) Drill a hole for the speaker wire and pre-drill for the<br />
mounting screws if necessary<br />
4<br />
2) Mount the bottom cup<br />
8<br />
to the mounting surface using<br />
22<br />
the provided screws routing the speaker wires<br />
through the center hole.<br />
2<br />
18<br />
7<br />
3) Attach the speaker wires to the top cup and mount<br />
19<br />
8<br />
21<br />
it to the bottom cup using the provided screw 17 .<br />
18<br />
4<br />
2<br />
21<br />
22<br />
2<br />
7<br />
4) Insert the tweeter into the cup , twist clockwise to<br />
lock the tweeter into position.<br />
(Caution: Do not touch the dome of the tweeter, contact 6 with the<br />
tweeter dome will damage the tweeter.)<br />
7<br />
18<br />
4<br />
5) Install the tweeter grille by pressing gently into place.<br />
4<br />
4<br />
2<br />
2<br />
21<br />
19<br />
17<br />
22<br />
18<br />
8<br />
6<br />
7<br />
9
SPZ Woofer Axis Mount Installation:<br />
5<br />
1<br />
1) Insert the axis mount into the woofer .<br />
27<br />
2) Insert and hand-tighten the retaining screw with the<br />
10<br />
provided tool .<br />
4<br />
10<br />
2<br />
5<br />
3) Insert the tweeter into the axis mount , twist<br />
2<br />
clockwise to lock the tweeter into position.<br />
(Caution: Do not touch the dome of the tweeter, contact with the<br />
tweeter dome will damage the tweeter.)<br />
2<br />
27<br />
4<br />
4) Install the tweeter grille by pressing gently into place.<br />
5<br />
1<br />
10
SPZ Woofer Phase Plug Installation:<br />
26<br />
1<br />
1) Insert the phase plug into the woofer .<br />
27<br />
2) Insert and hand-tighten the retaining screw using the<br />
10<br />
provided tool .<br />
10<br />
27<br />
26<br />
1<br />
11
SPZ50 Woofer Installation:<br />
9<br />
1) Install the gaskets on the mounting flange of the<br />
woofer<br />
1<br />
and the back side of the 5 1 ⁄4” (135mm)<br />
32<br />
adapter ring .<br />
2) Mount the speaker<br />
1<br />
into the speaker location using<br />
13<br />
the provided screws .<br />
14<br />
12<br />
5<br />
3) Position the axis mount into the desired location (if<br />
applicable), refer to page 17.<br />
Grille Installation:<br />
13<br />
11<br />
11<br />
1<br />
1) Position the grille on the woofer so it does not<br />
5<br />
physically touch the axis mount .<br />
12<br />
14<br />
2) Mount the grille ring using the four thumb screws ,<br />
hand tighten.<br />
1<br />
32<br />
9<br />
12
SPZ60 Woofer Installation with Grille:<br />
9<br />
1) Install the gaskets on the mounting flange of the<br />
woofer<br />
29<br />
ring .<br />
1<br />
and the back side of the 6” (160mm) adapter<br />
14<br />
1<br />
2) Mount the speaker into the speaker location using<br />
13<br />
the provided screws .<br />
12 1<br />
5<br />
3) Position the axis mount into the desired location (if<br />
applicable), refer to page 17.<br />
11<br />
Grille Installation:<br />
13<br />
11<br />
1<br />
1) Position the grille on the woofer so it does not<br />
5<br />
physically touch the axis mount .<br />
1<br />
12<br />
2) Mount the grille ring using the three thumb screws<br />
14<br />
, hand tighten.<br />
9<br />
29<br />
9<br />
13
SPZ60 Woofer Installation with 6 1 ⁄2” (165mm) VariMount Adapter Rings:<br />
9<br />
1) Install the gaskets on the mounting flange of the<br />
1<br />
woofer and the back side of 14the 1 ⁄2” (13mm) spacer<br />
31<br />
ring (if applicable).<br />
23<br />
1<br />
2) Mount the speaker on to the 6 1 ⁄2” (165mm)<br />
VariMount 30<br />
16<br />
plate using the provided screws . Use<br />
12<br />
16<br />
1<br />
alternative screw<br />
15<br />
if using the 1 ⁄2” (13mm) spacer ring.<br />
1<br />
3) Mount the speaker into the speaker location using<br />
11<br />
9<br />
20<br />
the provided screws .<br />
13<br />
30<br />
5<br />
4) Position the axis mount into the desired location<br />
(if applicable), refer to page 17.<br />
1<br />
9<br />
15<br />
9<br />
31<br />
29<br />
9<br />
14
SPZ60 Woofer Installation with 5 x 7” VariMount Adapter Rings:<br />
9<br />
1) Install the gaskets on the mounting flange of the<br />
woofer<br />
ring<br />
and the back side of the 1 ⁄2” (13mm) spacer<br />
(if applicable).<br />
23 23<br />
1<br />
2) Mount the speaker on to the 5 x 7” VariMount plate<br />
28<br />
15<br />
31<br />
1<br />
16<br />
using the provided 12 screw . 16 Use alternative screw<br />
16<br />
if using the 1 31<br />
⁄2” (13mm) spacer ring .<br />
1<br />
20<br />
3) Mount the speaker<br />
1<br />
into the speaker location using<br />
20<br />
the provided 11screws .<br />
4) Position the axis mount<br />
5<br />
into the desired location<br />
(if applicable), refer to page 17.<br />
1<br />
9<br />
9<br />
30<br />
1<br />
9<br />
28<br />
9<br />
15<br />
31<br />
15<br />
31<br />
29<br />
9<br />
15
Connecting Speaker Wires:<br />
1) Strip 1 ⁄4” (10mm) of shield off of the speaker wires.<br />
2) Insert the wire into the speaker terminal observing proper<br />
polarity.<br />
10<br />
10<br />
3) Hand-tighten the gold set screws using the<br />
10<br />
provided tool (2.5mm).<br />
(Note: do not overtighten the set screws.)<br />
16
SPZ Axis Mount Positioning:<br />
The axis mount on the SPZ woofer is designed so it can be positioned to<br />
properly direct the tweeter’s output towards the listening position.<br />
10<br />
1) Loosen the retaining screw located on the face of the axis mount<br />
10<br />
with the provided tool (2.5mm). Turn the screw at least three full<br />
rotations counter-clockwise.<br />
2) Position the axis mount<br />
5<br />
so that the tweeter points towards the<br />
listening area.<br />
3) Once the desired location has been chosen, tighten the screw on the<br />
axis mount.<br />
(Note: do not overtighten the set screw.)<br />
5<br />
17
Crossover Installation:<br />
24<br />
1) Remove the four screws<br />
25<br />
and located at each corner<br />
of the top panel.<br />
25<br />
2) Once the screws are removed, the cover will lift off the<br />
chassis.<br />
10<br />
24<br />
20<br />
3) Using the provided screws , secure the crossover to a<br />
solid surface.<br />
Note; Due to shock and vibration, the crossovers should not be installed<br />
in the doors of the vehicle.<br />
20<br />
18
Crossover Configuration:<br />
Axis / Comp Mount Switch:<br />
The “Axis/Comp” switch optimizes the output from the<br />
crossover for the configuration of the component system. Use<br />
the “Axis” setting if the tweeter is installed in the axis mount,<br />
use the “Comp” setting if the tweeter is installed separate<br />
from the woofer.<br />
SQ1 / SQ2 Switch:<br />
The “SQ1/SQ2” switch alters the roll-off of the SPZ woofer.<br />
Use the SQ1 position for a standard door location. Use the<br />
SQ2 setting if the SPZ woofer is used in a kick panel or small<br />
enclosure (less than 0.25 FT 3) .<br />
ATTN Switch:<br />
The “ATTN” (attenuation) switch adjusts the output of the<br />
tweeter relative to the woofer, three adjustments allow you to<br />
fine tune the output of the tweeter (0dB, -2dB, & -4dB).<br />
NORMAL / BIAMP Jumpers:<br />
If the SPZ crossover is bi-amplified or bi-wired, move the<br />
jumpers to the “BIAMP” position. Refer to the System Wiring<br />
Diagrams on page 21.<br />
19
SPZ System Wiring (Standard):<br />
Standard Wiring (Coaxial Configuration)<br />
Standard Wiring (Component Configuration)<br />
20
SPZ System Wiring (Bi-Amplification / Bi-Wiring):<br />
Bi-Amplification<br />
Bi-Wiring<br />
21
Contact Information<br />
Contacting <strong>Boston</strong><br />
For questions regarding installation or service, please contact the dealer from whom you have purchased the product<br />
or contact us directly at:<br />
<strong>Boston</strong> <strong>Acoustics</strong>, Inc.<br />
300 Jubilee Drive<br />
Peabody, MA 01960<br />
Phone #: 978-538-5000<br />
Fax #: 978-538-5100<br />
Email: support@bostona.com<br />
22<br />
AMD, TwinStage, and VariMount are trademarks and <strong>Boston</strong>, <strong>Boston</strong> <strong>Acoustics</strong>,<br />
the <strong>Boston</strong> <strong>Acoustics</strong> logo, and RadialVent are registered trademarks of <strong>Boston</strong> <strong>Acoustics</strong>, Inc.<br />
Specifications are subject to change without notice.<br />
©2006 <strong>Boston</strong> <strong>Acoustics</strong>, Inc. All rights reserved.<br />
Covered by patents issued and/or pending.
Notes:<br />
23
<strong>Boston</strong> <strong>Acoustics</strong>, Inc. 300 Jubilee Drive, Peabody, MA 01960 USA T: 978.538.5000 F: 978.538.5100 W: bostonacoustics.com<br />
042-002423-0