User Manual for Professional Firmware - Cloud
User Manual for Professional Firmware - Cloud
User Manual for Professional Firmware - Cloud

Create successful ePaper yourself
Turn your PDF publications into a flip-book with our unique Google optimized e-Paper software.
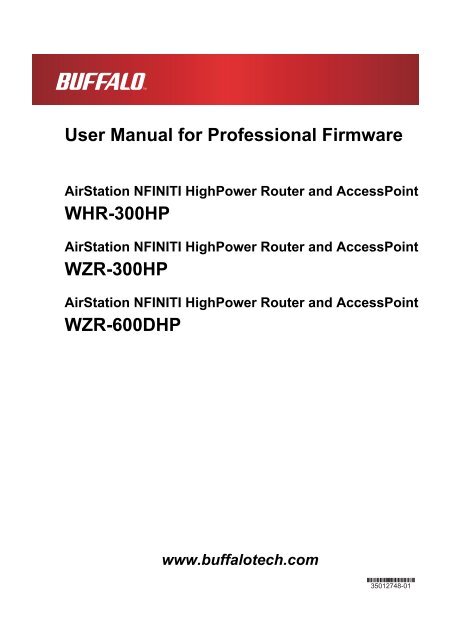
<strong>User</strong> <strong>Manual</strong> <strong>for</strong> <strong>Professional</strong> <strong>Firmware</strong><br />
AirStation NFINITI HighPower Router and AccessPoint<br />
WHR-300HP<br />
AirStation NFINITI HighPower Router and AccessPoint<br />
WZR-300HP<br />
AirStation NFINITI HighPower Router and AccessPoint<br />
WZR-600DHP<br />
www.buffalotech.com
1. Introduction 3<br />
1.1. Welcome 3<br />
1.2. Device Configuration 3<br />
1.2.1. Factory Settings 3<br />
1.2.2. Initial Operation 3<br />
2. Configuration via the Web Interface 4<br />
2.1. Preparation 4<br />
2.2. Web Interface Access 4<br />
2.3. Web Interface Structure 5<br />
2.3.1. Setup 6<br />
2.3.1.1. Basic Configuration 6<br />
2.3.1.2. Dynamic DNS (DynDNS or DDNS) 7<br />
2.3.1.3. MAC Address Cloning 7<br />
2.3.1.4. Advanced Routing 7<br />
2.3.1.5. Networking 8<br />
2.3.1.6. EoIP Tunnel (WZR series only) 8<br />
2.3.2. Wireless 8<br />
2.3.2.1. Basic Settings 8<br />
2.3.2.2. Wireless Security 10<br />
2.3.2.3. AOSS/WPS 11<br />
2.3.2.4. MAC Filter 12<br />
2.3.2.5. WDS 12<br />
2.3.3. Services 13<br />
2.3.3.1. Services 13<br />
2.3.3.2. FreeRadius (WZR series only) 13<br />
2.3.3.3. PPPoE Server 13<br />
2.3.3.4. VPN 13<br />
2.3.3.5. USB (WZR series only) 14<br />
2.3.3.6. NAS (WZR series only) 14<br />
2.3.3.7. Hotspot 15<br />
2.3.3.8. SIP Proxy (WZR series only) 15<br />
2.3.3.9. My Ad Network 15<br />
2.3.4. Security 15<br />
2.3.4.1. Firewall 15<br />
2.3.4.2. VPN Pass-through 15<br />
2.3.5. Access Restrictions 15<br />
2.3.5.1. WAN Access 15<br />
2.3.6. NAT / QoS 15<br />
2.3.6.1. Port Forwarding 15<br />
2.3.6.2. Port Range Forwarding 16<br />
2.3.6.3. Port Triggering 16<br />
2.3.6.4. UPnP 16<br />
2.3.6.5. DMZ 16<br />
2.3.6.6. QoS 16<br />
2.3.7. Administration 16<br />
2.3.7.1. Management 16<br />
2.3.7.2. Keep Alive 17<br />
2.3.7.3. Commands 17<br />
2.3.7.4. WOL 17<br />
2.3.7.5. Factory Defaults 17<br />
2.3.7.6. <strong>Firmware</strong> Upgrade 17<br />
2.3.7.7. Backup 17<br />
2.3.8. Status 17<br />
2.3.8.1. Router 17<br />
2.3.8.2. WAN 17<br />
2.3.8.3. LAN 18<br />
2.3.8.4. Wireless 18<br />
- 1 -
2.3.8.5. Bandwidth 18<br />
2.3.8.6. SysInfo 18<br />
3. Use Cases 19<br />
3.1. Access Point 19<br />
3.1.1. Access Point with NAT / DHCP 19<br />
3.1.1. Access Point attached to a network / Internet gateway 20<br />
3.2. Wireless Client 21<br />
3.3. Wireless Client Bridge 22<br />
3.4. FTP Server 23<br />
3.4.1. Examples 23<br />
3.4.2. Logging into the FTP server 25<br />
3.4.3. Common FTP commands 25<br />
3.5. Changing <strong>Firmware</strong> 26<br />
4. GPL Statement 28<br />
4.1. GNU General Public License 28<br />
4.1.1. Preamble 28<br />
4.1.2. GNU General Public License – Terms and Conditions or Copying,<br />
Distribution and Modification 29<br />
4.1.3. NO WARRANTY 32<br />
- 2 -
1. Introduction<br />
1.1. Welcome<br />
This AirStation wireless router comes with two different firmware<br />
packages. You may use either the dd-wrt-based <strong>Professional</strong> firmware or<br />
the simple <strong>User</strong>-friendly firmware. By default, the <strong>Professional</strong><br />
firmware is preinstalled <strong>for</strong> US/EU products, and the <strong>User</strong>-friendly<br />
firmware is preinstalled <strong>for</strong> Asia-Pacific products.<br />
If you're using the user-friendly firmware, please click on the link<br />
on the left side.<br />
1.2. Device Configuration<br />
From the factory, the router is configured as a network bridge. That<br />
means that all network interfaces can communicate with each other<br />
using this default bridge. The router is ready to use with a few<br />
simple adjustments.<br />
1.2.1. Factory Settings<br />
Because all interfaces are attached to the bridge by default, they all<br />
have the same IP configuration:<br />
IP address 192.168.11.1<br />
Subnet Mask 255.255.255.0<br />
DHCP server enabled<br />
DHCP-Range 192.168.11.100 - 149<br />
The default SSID settings are shown below.<br />
WHR-300HP: BUFFALO + last 6 digits of MAC address<br />
WZR-300HP: BUFFALO + last 6 digits of MAC address<br />
WZR-600DHP: For 2.4 GHz BUFFALO + last 6 digits of MAC address + "_G"<br />
For 5 GHz BUFFALO + last 6 digits of MAC address + "_A"<br />
In the default settings, the encryption system is set to WPA2-PSK/WPA-<br />
PSK (TKIP + AES), and the 8-digit unique product number is set as the<br />
encryption key.<br />
1.2.2. Initial Operation<br />
Connect your computer to the router with an Ethernet LAN cable and<br />
power the router on. It will take about 30 seconds to boot. You can<br />
then access it via telnet or web browser at the IP address<br />
192.168.11.1. The DHCP server in the router is enabled by default. If<br />
your PC’s Ethernet is configured <strong>for</strong> DHCP it should receive an IP<br />
address from the router’s DHCP server. If not, please configure the<br />
Ethernet interface with an address from the 192.168.11.x subnet.<br />
Because all relevant settings can be made using the web interface,<br />
this manual refers to configuration via the web GUI only.<br />
- 3 -
2. Configuration via the Web Interface<br />
The router contains an integrated web server that provides an easy to<br />
use web interface. It allows configuration, administration, and status<br />
checking in a simple but effective way.<br />
The web interface was successfully tested on the following browsers:<br />
- Internet Explorer 7.x and newer versions<br />
- Firefox 2.x and newer versions<br />
- Safari 2.x and newer versions<br />
2.1. Preparation<br />
Connect your PC to the router and power the router on as described in<br />
1.2.2. After the router has loaded its operating system, you can<br />
communicate with it via your LAN network interface.<br />
The easiest way to test if your PC can communicate with the router is<br />
to ping 192.168.11.1.<br />
2.2. Web Interface Access<br />
Open your web browser, and enter 192.168.11.1 into the address bar.<br />
The status page will be displayed.<br />
A screen <strong>for</strong> entering the username and password is displayed. Enter<br />
the username and password to log in.<br />
Note:<br />
The default username is "admin", and the default password is<br />
"password".<br />
After logging in, the "Setup Assistant" screen is displayed. Follow<br />
the on-screen instructions to complete the settings. For details on<br />
the Internet initial settings using "Setup Assistant", see the Quick<br />
Setup Guide provided with the product.<br />
- 4 -
2.3. Web Interface Structure<br />
- 5 -
2.3.1. Setup<br />
2.3.1.1. Basic Configuration<br />
Setup In<strong>for</strong>mation<br />
The SSID, wireless passphrase, IP address, username, and password that<br />
were set <strong>for</strong> the AirStation are displayed.<br />
Clicking [Run Initial Setup Wizard] opens the "Setup Assistant" screen.<br />
Follow the on-screen instructions to make the initial settings <strong>for</strong> the<br />
AirStation.<br />
Clicking [Print Setup Card] will print out the in<strong>for</strong>mation displayed<br />
on this screen.<br />
If multiple SSIDs <strong>for</strong> guests are set, clicking [Print Guest Card] will<br />
print out the encryption key <strong>for</strong> each SSID that is set in the<br />
AirStation.<br />
The in<strong>for</strong>mation (SSID, wireless passphrase, username, password)<br />
displayed in the Setup Card In<strong>for</strong>mation area can be edited directly by<br />
simply clicking the desired in<strong>for</strong>mation. After making any changes, be<br />
sure to click [Apply Changes] to apply the new settings to the<br />
AirStation.<br />
WAN Setup<br />
Here you’ll find the most important settings to configure your<br />
internet access and WAN port. DHCP is enabled by default, but you can<br />
also use PPPoE, PPTP, L2TP, static IP, or HeartBeat Signal. If you<br />
don’t use a password to log in to your ISP, you may need to enter<br />
“0000” <strong>for</strong> the password. Also, <strong>for</strong> some ISPs you should not enter the<br />
service name, as it will prevent establishing the connection. If you<br />
experience connection problems, then leave the service name empty.<br />
WAN Connection Type<br />
Disabled<br />
Static IP<br />
Automatic<br />
Configuration - DHCP<br />
PPPoE<br />
PPTP<br />
L2TP<br />
HeartBeat Signal<br />
3G/UMTS<br />
Description<br />
The WAN port is disabled.<br />
A static IP address will be used – enter the<br />
IP address, subnet mask, gateway, and server<br />
manually.<br />
The router obtains its WAN-side IP address<br />
from a DHCP server.<br />
Configure as PPPoE-client.<br />
Establishes connection via PPTP.<br />
Establishes connection via L2TP.<br />
If you use a HeartBeat connection, consult<br />
your ISP <strong>for</strong> setup in<strong>for</strong>mation. HeartBeat<br />
Signal is used only in Australia.<br />
Configures Internet Access via 3G/UMTS.<br />
Enable USB in the “Services” section and<br />
attach a 3g/UMTS USB stick to the router.<br />
This setting is available in AirStations sold<br />
in the European region only.<br />
- 6 -
Network Setup<br />
Network Setup configures the router’s basic settings to match the<br />
local network. By default these settings are valid <strong>for</strong> all network<br />
ports except the WAN because they are all attached to the default<br />
bridge. If ports are disassociated from the bridge they will have<br />
different settings.<br />
2.3.1.2. Dynamic DNS (DynDNS or DDNS)<br />
Dynamic DNS allows the assignment of a DNS record to a dynamically<br />
assigned WAN-side IP address. A DynDNS client updates DNS records when<br />
your WAN-side IP address changes.<br />
The router’s firmware offers presets <strong>for</strong> the most common DynDNS<br />
services plus an option to define individual settings.<br />
DynDNS Service<br />
Disabled<br />
DynDNS.org<br />
freedns.afraid.org<br />
ZoneEdit.com<br />
No-IP.com<br />
3322.org<br />
easyDNS.com<br />
TZO.com<br />
DynSIP.org<br />
Custom<br />
Description<br />
Default, no DynDNS<br />
Individual DynDNS service configuration<br />
2.3.1.3. MAC Address Cloning<br />
MAC address cloning lets you assign a different MAC address to the<br />
router than the one encoded in the hardware.<br />
2.3.1.4. Advanced Routing<br />
Operating Mode<br />
The default operating mode of the router is Gateway. Other routing<br />
protocols are available.<br />
Modus<br />
Gateway<br />
BGP<br />
Rip2 Router<br />
OSPF Router<br />
vtysh OSPF BGP RIP router<br />
OLSR Router<br />
Router<br />
Description<br />
Gateway (default)<br />
BGP Routing<br />
Rip2 Routing<br />
OSPF Router<br />
vtysh OSPF BGP RIP router<br />
OLSR Router<br />
Router<br />
- 7 -
Static Routing<br />
The Static Routing section lets you add static routes. The input<br />
parameters are equivalent to the parameters of the Linux command<br />
“route”.<br />
2.3.1.5. Networking<br />
The Networking section allows detailed network configuration.<br />
VLAN Tagging<br />
Use this option to configure VLAN tagging.<br />
Bridging<br />
By default, one bridge (br0) is defined and active. In this section<br />
you can define additional bridges and change the interface assignment<br />
according to your requirements.<br />
Bonding<br />
Bonding offers the ability to “bond” interfaces together. Bonding can<br />
be used to enhance throughput or provide failover capabilities.<br />
Port Setup<br />
The port setup section allows further configuration of the routers<br />
network interfaces. Network interfaces can be separated from the<br />
bridge and it is possible to assign separate network settings <strong>for</strong> each<br />
interface. If an interface is separated from the bridge, add routing<br />
rules to allow communication between the interface and the bridge or<br />
other unbridged interfaces.<br />
DHCPD<br />
Besides the default DHCP server, you can define additional DHCP<br />
servers.<br />
2.3.1.6. EoIP Tunnel (WZR series only)<br />
EoIP (Ethernet over IP) tunnels can transport Ethernet data packages<br />
via a tunnel over existing IP connections. You can define up to 10<br />
tunnels that can also be bonded.<br />
2.3.2. Wireless<br />
2.3.2.1. Basic Settings<br />
Each Wireless LAN interface has its own section in the wireless basic<br />
settings screen. The wireless interfaces are labelled ath0 and ath0.1<br />
– ath0.4 depending on the number of radios installed. To correctly<br />
identify the antenna connectors, please compare the MAC addresses<br />
printed on the enclosure with the addresses displayed in the web<br />
interface.<br />
Wireless Mode<br />
This parameter is used to define the operating mode of the Wireless<br />
LAN interface. You can select among the following modes:<br />
- 8 -
Modus<br />
AP<br />
Client<br />
Client-Bridge<br />
Adhoc<br />
WDS Station<br />
WDS AP<br />
Description<br />
WLAN Access Point mode (default)<br />
WLAN Client mode<br />
Client-Bridge mode allows connecting to<br />
another Wireless LAN access point and<br />
establishing a network bridge with that<br />
access point<br />
Adhoc operating mode, required <strong>for</strong> building<br />
mesh networks<br />
WDS Station is the client in a WDS-AP WDS<br />
station bridge. This is a special wireless<br />
networking mode that offers better<br />
flexibility and security than the classical<br />
MAC address based WDS.<br />
WDS AP is the AP side <strong>for</strong> WDS AP WDS<br />
Station. A WDS AP allows connections from WDS<br />
Stations and Wireless Clients.<br />
Wireless Network Mode<br />
Defines the IEEE802.11 networking mode.<br />
Mode<br />
Disabled<br />
Mixed<br />
A-Only<br />
B-Only<br />
G-Only<br />
BG-Mixed<br />
NA-Mixed<br />
NG-Mixed<br />
N-Only (5 GHz)<br />
N-Only (2.4 GHz)<br />
Description<br />
Interface is disabled<br />
2.4 GHz 802.11b / 802.11g / 802.11n mixed<br />
mode<br />
5 GHz 802.11a mode (802.11b, 802.11g, and<br />
802.11n devices cannot connect)<br />
2.4 GHz 802.11b mode (802.11a, 802.11g, and<br />
802.11n devices cannot connect)<br />
2.4 GHz 802.11g mode (802.11a, 802.11b, and<br />
802.11n devices cannot connect)<br />
2.4 GHz 802.11b & 802.11g mixed mode (802.11a<br />
and 802.11n devices cannot connect)<br />
5 GHz 802.11n & 802.11a mixed mode (802.11b<br />
and 802.11g devices cannot connect)<br />
2.4 GHz 802.11n & 802.11g mixed mode (802.11a<br />
and 802.11b devices cannot connect)<br />
5 GHZ 802.11n mode (802.11a, 802.11b, and<br />
802.11g devices cannot connect)<br />
2.4 GHZ 802.11n mode (802.11a, 802.11b, and<br />
802.11g devices cannot connect)<br />
Channel Width<br />
Some wireless network modes support wireless channel widths besides<br />
the standard 20 MHz. 802.11g & 802.11n offer the option to use 40 MHz<br />
channels <strong>for</strong> enhanced throughput. Both the AP and the client must<br />
support 40 MHz channels to use them.<br />
- 9 -
Wireless Channel (AP only)<br />
Set the desired wireless channel, or let the router choose a free<br />
channel automatically. If the router is in classic WDS (MAC address<br />
based) mode, then the wireless channel must be selected manually.<br />
Wireless Network Name (SSID)<br />
The name of the wireless network the radio transmits or connects to<br />
(depending on the wireless mode)<br />
Wireless SSID Broadcast (AP only)<br />
The name of the wireless network (SSID) may be broadcasted or not. Not<br />
broadcasting does not prevent the network from being detected by a<br />
wireless network sniffer; it just hides the name.<br />
Advanced Settings<br />
Check this box to get access to advanced wireless settings. These<br />
advanced parameters should be only modified by experienced users.<br />
2.3.2.2. Wireless Security<br />
Because wireless data packets can easily be sniffed, wireless<br />
connections require a greater level of security to ensure that data<br />
cannot be read by unauthorized users.<br />
Security Mode<br />
Mode<br />
Disabled<br />
WPA-PSK<br />
WPA-EAP (AP only)<br />
WPA2-PSK<br />
WPA2-EAP (AP only)<br />
WPA2-PSK / WPA-PSK<br />
WPA2-EAP / WPA-EAP<br />
(AP only)<br />
RADIUS<br />
WEP<br />
Description<br />
No encryption set (not recommended!)<br />
WPA encryption with a passphrase (text<br />
password)<br />
WPA encryption with Radius Client<br />
authentication according to 802.1x<br />
WPA2 encryption with a passphrase (text<br />
password)<br />
WPA2 encryption with Radius Client<br />
authentication according to 802.1x<br />
WPA & WPA2 encryption in WPA/WPA2 mixed mode<br />
with a passphrase (text password)<br />
WPA & WPA2 encryption in WPA/WPA2 mixed with<br />
Radius Client authentication according to<br />
802.1x<br />
No encryption set with Radius Client<br />
authentication (insecure; not recommended)<br />
Not supported.<br />
WEP 64 Bit / 128 Bit encryption (insecure;<br />
not recommended!)<br />
When using WEP encryption (not recommended), the user can choose<br />
between 64 bit and 128 bit keys. Keys can be entered as passphrases<br />
that are used to generate the Hex keys. Theoretically 128 bit keys<br />
offer a higher level of security but because of design flaws, that’s<br />
not the case in actual use.<br />
- 10 -
Key length<br />
64 Bit (10<br />
Hexadecimal<br />
characters)<br />
128 Bit (26<br />
Hexadecimal<br />
characters)<br />
Description<br />
Standard<br />
With WPA or WPA2 encryption, there are several encryption algorithms<br />
to choose from. AES is more secure but TKIP is more widely supported.<br />
There is also a TKIP + AES setting, but that does not offer more<br />
security than TKIP.<br />
Algorithm<br />
TKIP<br />
AES<br />
TKIP + AES<br />
Description<br />
TKIP encryption, supported by most clients<br />
devices<br />
AES encryption offers a better level of<br />
security but might not be supported by a<br />
number of client devices and requires less<br />
CPU processing power.<br />
Mixed mode – offers best compatibility but<br />
doesn’t work in all environments<br />
If RADIUS security is used, the MAC address <strong>for</strong>mat has to be set<br />
accordingly.<br />
RADIUS MAC <strong>for</strong>mat<br />
options<br />
aabbcc-ddeeff<br />
aabbccddeeff<br />
aa:bb:cc:dd:ee:ff<br />
aa-bb-cc-dd-ee-ff<br />
Description<br />
Standard<br />
2.3.2.3. AOSS/WPS<br />
AOSS (AirStation One-touch Secure Setup) is Buffalo Technology’s<br />
system to automatically connect wireless clients to an access point.<br />
Just press the button on the AirStation, then press the button <strong>for</strong> the<br />
wireless client (which might be in its software). AOSS will connect<br />
the wireless devices automatically. AOSS is recommended if all of your<br />
wireless devices support it. AOSS can only be used in AP mode.<br />
The WPS is a standard created by the Wi-Fi Alliance. There are two<br />
methods of configuration, PBC and PIN. PBC is similar to AOSS. PIN<br />
uses a unique PIN code to register the wireless client to the<br />
AirStation. If your wireless devices support it, WPS makes<br />
configuration simple and automatic.<br />
Enable AOSS<br />
Enables the AOSS Service. When disabled, AOSS cannot be used.<br />
- 11 -
Start AOSS Negotiation<br />
To initiate AOSS, either click the AOSS button in the GUI or hold down<br />
the AOSS button on the front of the router <strong>for</strong> 3 seconds.<br />
Security Modes<br />
You may choose which security modes are offered in the AOSS<br />
negotiation process. The use of WEP in general is not recommended due<br />
to security concerns.<br />
WPS Button<br />
Enables the WPS button. When disabled, WPS button cannot be used.<br />
WPS PIN<br />
Enter the PIN code printed on your client device or your client<br />
authentication application.<br />
2.3.2.4. MAC Filter<br />
The MAC Filter defines a list of client MAC addresses that are allowed<br />
to connect wirelessly. MAC addresses that aren’t on the list aren’t<br />
allowed to connect.<br />
2.3.2.5. WDS<br />
Wireless Distribution System (WDS) is a special access point mode that<br />
allows the connection of several access points to <strong>for</strong>m a combined<br />
network. Such a network can be used to extend wireless network<br />
coverage.<br />
The MAC addresses of the access points nearest to the current access<br />
point are entered as WDS nodes. Avoid creating “double” connections,<br />
i.e. A B + A B C. These modes are available to connect WDS<br />
nodes:<br />
WDS Client Mode<br />
disabled<br />
Point-to-Point<br />
LAN<br />
Description<br />
Standard<br />
Commonly used mode<br />
If WDS is enabled, then WDS NAT modes are also available.<br />
WDS NAT Mode<br />
WLAN -> WDS<br />
WDS -> WLAN<br />
Description<br />
Standard<br />
- 12 -
2.3.3. Services<br />
2.3.3.1. Services<br />
The services section allows the configuration of basic service<br />
settings. Telnet and SSH can be configured this way. Remote access<br />
options are configured in the Administration section.<br />
Available DHCP Server<br />
Domains<br />
WAN<br />
LAN / WLAN<br />
Rflow / MACupd<br />
Interface Options<br />
LAN & WLAN<br />
LAN<br />
WLAN<br />
Description<br />
Standard<br />
Description<br />
Standard<br />
2.3.3.2. FreeRadius (WZR series only)<br />
Certain applications (<strong>for</strong> example, Chillispot hotspot software)<br />
benefit from a RADIUS server <strong>for</strong> management of user credentials and<br />
settings.<br />
Server Certificate<br />
This section contains the parameters to generate the RADIUS server<br />
certificate. The certificate needs to be generated be<strong>for</strong>e clients can<br />
be configured to connect to the RADIUS server.<br />
Certificate Status<br />
Displays the server certificate creation status.<br />
Settings<br />
Choose the port that the RADIUS server uses <strong>for</strong> client communication.<br />
The default port is 1812.<br />
Clients<br />
This section is used to define RADIUS clients (required <strong>for</strong> HotSpot<br />
usage).<br />
<strong>User</strong>s<br />
Lists the users defined in the RADIUS servers. Allows creation and<br />
modification of accounts.<br />
2.3.3.3. PPPoE Server<br />
Some applications require a PPPoE server on the router, which can be<br />
configured here. The PPPoE server is disabled by default.<br />
2.3.3.4. VPN<br />
The router can also be configured as VPN server or VPN client.<br />
- 13 -
PPTP<br />
When defining the PPTP server’s IP range, avoid overlap with the range<br />
of IP addresses handed out by DHCP if DHCP is enabled. The IP range is<br />
defined using the following syntax:<br />
xxx.xxx.xxx.-<br />
<strong>for</strong> example<br />
192.168.1.20-30<br />
Enter client login data follows:<br />
* *<br />
<strong>for</strong> example<br />
testuser * test *<br />
The encryption options can be set as follows<br />
PPTP server type<br />
DD-WRT Router<br />
Windows PPTP Server<br />
Settings<br />
mppe required (Standard)<br />
mppe required,no40,no56,stateless or<br />
mppe required,no40,no56,stateful<br />
OpenVPN<br />
OpenVPN is a powerful and flexible VPN solution. OpenVPN security is<br />
based on certificates that cannot created on the router itself. Please<br />
refer to OpenVPN’s online documentation <strong>for</strong> instructions on creating<br />
certificates and configuring OpenVPN.<br />
2.3.3.5. USB (WZR series only)<br />
The router’s USB port can be used <strong>for</strong> several purposes. Here the basic<br />
and advanced USB parameters are defined. Besides enabling USB and<br />
defining the USB hardware standard to use you can also define if<br />
printer and storage support <strong>for</strong> USB shall be enabled.<br />
2.3.3.6. NAS (WZR series only)<br />
If USB hard drive support is enabled, you can start the integrated<br />
ProFTPd server to share data on an attached hard disk via FTP.<br />
The <strong>User</strong>/Password data are entered as follows:<br />
* *<br />
<strong>for</strong> example<br />
testuser * test *<br />
- 14 -
Be careful enabling anonymous login. If anonymous login is enabled,<br />
everyone accessing your network has permission to read and write data.<br />
2.3.3.7. Hotspot<br />
Most hotspot software requires a server to store user settings and<br />
login in<strong>for</strong>mation. Please note that Sputnik is a commercial hotspot<br />
service that requires an agreement with Sputnik <strong>for</strong> usage.<br />
2.3.3.8. SIP Proxy (WZR series only)<br />
This package is an implementation of the Milkfish SIP router.<br />
2.3.3.9. My Ad Network<br />
Allows the creation of an AnchorFree Hotspot that can be used to<br />
create revenue via AnchorFree.<br />
2.3.4. Security<br />
2.3.4.1. Firewall<br />
Aside from enabling and disabling the firewall, you can also set<br />
additional filters, block certain network requests <strong>for</strong> the WAN<br />
interface, and manage logs.<br />
2.3.4.2. VPN Pass-through<br />
VPN settings effect how the firewall handles IPSec, PPTP, and L2TP<br />
connections. By default, pass-through is enabled. Please note that<br />
disabling pass-through will usually prevent you from establishing VPN<br />
connections from computers located in your local network to VPN<br />
servers on the internet.<br />
2.3.5. Access Restrictions<br />
2.3.5.1. WAN Access<br />
The WAN access settings allow the definition of time and service<br />
related access rules.<br />
2.3.6. NAT / QoS<br />
2.3.6.1. Port Forwarding<br />
Port <strong>for</strong>warding allows the assigning of WAN ports to specific internal<br />
IP addresses and matching ports. Bidirectional external traffic can be<br />
<strong>for</strong>warded to specific internal devices and computers. Each port<br />
<strong>for</strong>warding entry defines a source port and a target IP address.<br />
Be<strong>for</strong>e adding or removing a port <strong>for</strong>warding entry, save all changed<br />
settings. Any changes not saved will be lost when a port <strong>for</strong>warding<br />
entry is added or deleted.<br />
- 15 -
2.3.6.2. Port Range Forwarding<br />
Port range <strong>for</strong>warding works similarly to port <strong>for</strong>warding. Unlike port<br />
<strong>for</strong>warding, instead of a single port, a range of ports is <strong>for</strong>warded to<br />
the same range of ports at the internal target IP address.<br />
2.3.6.3. Port Triggering<br />
Port triggering is a kind of port range <strong>for</strong>warding where outgoing<br />
traffic on specific ports enables previously defined port <strong>for</strong>wards <strong>for</strong><br />
the activating device. This temporarily opens required ports when<br />
specific applications are opened on computers on the LAN. This offers<br />
a greater level of security than port <strong>for</strong>warding or port range<br />
<strong>for</strong>warding because the ports are only opened when needed.<br />
2.3.6.4. UPnP<br />
UPnP allows UPnP capable applications and devices to open and close<br />
required ports automatically as needed. This is simple to use and does<br />
not require further configuration steps.<br />
2.3.6.5. DMZ<br />
A DMZ computer is a special computer in the internal network that gets<br />
all incoming traffic <strong>for</strong>warded. The task of that computer is managing<br />
this traffic. When the DMZ feature is activated the internal firewall<br />
is activated. This can pose a security issue if not handled with care.<br />
Furthermore, several services of the router, that have to be<br />
accessible from the WAN side, will not work because the associated<br />
traffic is <strong>for</strong>warded to the DMZ computer.<br />
2.3.6.6. QoS<br />
QoS (Quality of Service) is a procedure to prioritise network traffic<br />
by application. Specific services can be assigned specific bandwidth.<br />
Aside from upstream and downstream bandwidth, you can define settings<br />
<strong>for</strong> specific services and IP and MAC address ranges.<br />
2.3.7. Administration<br />
2.3.7.1. Management<br />
The Management section contains settings <strong>for</strong> remotely accessing the<br />
router and other basic settings that are usually not changed. The<br />
settings <strong>for</strong> the language used in the Web GUI are also located here.<br />
You may choose between Chinese (simplified & traditional), Croatian,<br />
Dutch, French, German, Hungarian, Italian, Japanese, Latvian, Polish,<br />
Portuguese, Romanian, Russian, Slovenian, Spanish, and Swedish. The<br />
default setting is English.<br />
Be<strong>for</strong>e using Telnet or SSH, activate the associated service(s) in this<br />
section.<br />
- 16 -
2.3.7.2. Keep Alive<br />
Keep-Alive lets you configure monitoring options that automatically<br />
reboot the router if a service malfunction causes it to fail to<br />
respond.<br />
2.3.7.3. Commands<br />
Entering Linux commands is one of the most powerful ways to access the<br />
router’s functionality. This enables you to access services and<br />
configure options that are not accessible via the Web GUI. Using shell<br />
commands can lead to unexpected results. Use them with utmost care.<br />
Aside from executing the shell commands directly you can also save<br />
custom start up and firewall scripts.<br />
2.3.7.4. WOL<br />
With Wake-on-LAN, you can send special data packets to compatible<br />
devices on your LAN, causing them to exit sleep mode.<br />
WOL data packets can be triggered manually or scheduled automatically.<br />
2.3.7.5. Factory Defaults<br />
With this feature you can reset the router’s settings to factory<br />
defaults. After a reset, the router will restart.<br />
2.3.7.6. <strong>Firmware</strong> Upgrade<br />
The firmware upgrade option can be used to install a different<br />
firmware version. When doing this you can choose if the router’s<br />
settings will be restored to factory defaults or kept.<br />
2.3.7.7. Backup<br />
You can use this feature to store your current configuration into a<br />
backup file, or to restore from a previously stored configuration.<br />
This also makes it simple to set up a number of routers with the exact<br />
same configuration.<br />
2.3.8. Status<br />
2.3.8.1. Router<br />
The status screen displays in<strong>for</strong>mation about the router, such as cpu<br />
load, memory consumption, and currently active IP connections. Status<br />
is updated automatically.<br />
2.3.8.2. WAN<br />
If the WAN interface is enabled, this screen displays WAN settings and<br />
throughput statistics.<br />
- 17 -
2.3.8.3. LAN<br />
Here you can find LAN-related in<strong>for</strong>mation like active clients and DHCP<br />
clients.<br />
2.3.8.4. Wireless<br />
The wireless LAN status screen displays the current wireless LAN<br />
interface configuration, wireless LAN clients (in AP modes), and<br />
access points (in client modes). If there’s more than one wireless LAN<br />
interface, you can switch between them via the interface pull down<br />
menu.<br />
2.3.8.5. Bandwidth<br />
Bandwidth monitoring displays real time diagrams <strong>for</strong> incoming and<br />
outgoing traffic <strong>for</strong> each network interface.<br />
2.3.8.6. SysInfo<br />
The SysInfo screen combines the most important in<strong>for</strong>mation of the<br />
other status pages. By default, the SysInfo page can be accessed from<br />
LAN devices without authentication. That can be changed in the<br />
Management section of the Administration area.<br />
- 18 -
3. Use Cases<br />
The following use cases relate to the most commonly used router<br />
configurations. The related router configuration is explained step by<br />
step.<br />
3.1. Access Point<br />
Access Point (AP, sometimes also called “Infrastructure Mode”) is the<br />
mode where the router is also the central wireless hub that connects<br />
to the LAN and provides access to wireless devices. These wireless<br />
clients of the AP can communicate with each other and with wired<br />
devices on the network such as the Internet.<br />
Connect your computer to the router as described in 2.1. and access<br />
the web interface according to 2.2.<br />
3.1.1. Access Point with NAT / DHCP<br />
Setup -> Basic Setup<br />
WAN Setup<br />
o In ”Connection Type”, choose the type of WAN connection you want<br />
to use and complete the related settings.<br />
Network Setup<br />
o Enter the desired LAN IP address <strong>for</strong> the router into “Router IP“.<br />
o Set “DHCP Type“ to “DHCP Server“ (this is the default).<br />
o “Enable“ DHCP Server (this is the default).<br />
o Adjust the DHCP address range to match your requirements.<br />
Time Settings<br />
o Choose your time zone.<br />
Click “Save“.<br />
Wireless -> Basic Settings<br />
- 19 -
Configure “Wireless Mode“ to “AP“<br />
Set your desired wireless mode in “Wireless Network Mode“. Please<br />
note that mixed modes will lead to reduced per<strong>for</strong>mance because of<br />
maintaining compatibility.<br />
Enter a name <strong>for</strong> your wireless network into “Wireless Network Name<br />
(SSID)”<br />
Click “Save“<br />
Wireless -> Wireless Security<br />
Choose and configure a security mode. Please note that WEP is<br />
insecure and should only be used if no other option is available.<br />
Click “Apply Settings“<br />
You can now connect the router to the Internet and your local network.<br />
After you successfully connect wireless devices, they will then be<br />
displayed on the “SysInfo” and “WLAN Status” pages.<br />
3.1.1. Access Point attached to a network / Internet gateway<br />
Setup -> Basic Setup<br />
WAN Setup<br />
o For “Connection Type“, choose “Disabled”.<br />
Network Setup<br />
o Enter the desired LAN-side IP address <strong>for</strong> the router into “Router<br />
IP“.<br />
o Set the “DHCP Type“ to “DHCP Server“ (this is the default).<br />
o “Disable” “DHCP Server“.<br />
Time Settings<br />
o Choose your time zone.<br />
Click “Save“.<br />
Wireless -> Basic Settings<br />
Configure “Wireless Mode“ to “AP“<br />
Choose a wireless mode in “Wireless Network Mode“. Please note that<br />
mixed modes will lead to reduced per<strong>for</strong>mance because of maintaining<br />
compatibility.<br />
Enter a name <strong>for</strong> your wireless network into “Wireless Network Name<br />
(SSID)”.<br />
Click “Save“.<br />
Wireless -> Wireless Security<br />
Choose and configure your desired security mode. Please note that<br />
WEP is insecure and should only be used if no other option is<br />
available.<br />
Click “Apply Settings“<br />
You can now connect the router to the Internet and your local network.<br />
If you’re running a DHCP server in your LAN, connected wireless<br />
devices will get their IP addresses from the server.<br />
- 20 -
3.2. Wireless Client<br />
The router can be also used as a wireless LAN client. This can be<br />
useful if you want to connect devices to your wireless LAN that do not<br />
have a wireless LAN interface. In this configuration, the wireless LAN<br />
interface acts as a wireless client. Attached wired Ethernet devices<br />
can also access the WAN through the wireless connection.<br />
Setup -> Basic Setup<br />
WAN Setup<br />
o Set “Connection Type“ to “DHCP” to have the AirStation get its IP<br />
address from a DHCP server, or to a “Static IP“ if no DHCP server<br />
is available.<br />
Network Setup<br />
o Enter the desired LAN-side IP address <strong>for</strong> the router in “Router<br />
IP“.<br />
o Set the “DHCP Type“ to “DHCP Server“ (this is the default setting).<br />
o “Enable” “DHCP Server“ (this is the default setting).<br />
o Adjust the DHCP address range to match your requirements.<br />
Time Settings<br />
o Choose your time zone.<br />
Click “Save“.<br />
Wireless -> Basic Settings<br />
Configure “Wireless Mode“ to “Client“.<br />
Configure “Wireless Network Mode” to match the capabilities of the<br />
access point you want to connect to.<br />
Enter the network name (SSID) of the AP you want to connect to into<br />
“Wireless Network Name (SSID)”.<br />
Click “Save“.<br />
- 21 -
Wireless -> Wireless Security<br />
Configure the security mode to match the security settings of the<br />
access point you want to connect to.<br />
Click “Apply Settings“.<br />
After the router reboots, please confirm that it has connected to the<br />
access point. If there is a DHCP server available on the access point<br />
side, and the router is configured to request an IP address, then it<br />
should receive an IP address <strong>for</strong> its WAN-side interface.<br />
You can now either connect wired clients to the access point or<br />
configure another wireless network interface as an access point to<br />
grant access to wireless clients.<br />
3.3. Wireless Client Bridge<br />
A wireless client bridge offers the ability to transparently integrate<br />
the router’s LAN into a different LAN that another access point is<br />
connected to. Clients connected to such a router can access devices in<br />
both LANs and vice versa. In that configuration the router’s WAN<br />
interface is disabled.<br />
Setup -> Basic Setup<br />
WAN Setup<br />
o Choose “Disabled” <strong>for</strong> “Connection Type” (this will be set<br />
automatically).<br />
Network Setup<br />
o Enter the desired LAN-side IP address <strong>for</strong> the router into “Router<br />
IP”.<br />
o “Disable“ “DHCP Server”.<br />
Time Settings<br />
o Choose your time zone.<br />
Click “Save”.<br />
- 22 -
Wireless -> Basic Settings<br />
Configure “Wireless Mode” to “Client Bridge”.<br />
Set “Wireless Network Mode” to match the access point you want to<br />
connect to.<br />
Enter the network name (SSID) of the AP you want to connect to.<br />
Click “Save”.<br />
Wireless -> Wireless Security<br />
Configure security to match the security settings of the access<br />
point you want to connect to.<br />
Click “Apply Settings”.<br />
After the router reboots, please confirm that it has connected to the<br />
access point. If there is a DHCP server available on the access point<br />
side, a pc in the router’s LAN configured to request an address from<br />
DHCP should receive an IP address.<br />
3.4. FTP Server<br />
The router can be used as an FTP server when a USB disk (such as a<br />
hard disk or flash memory device) is connected to the USB port on the<br />
rear of the router.<br />
3.4.1. Examples<br />
Services -> USB<br />
・Make the settings in the USB Support section, then click [Apply<br />
Settings].<br />
Examples:<br />
Core USB Support<br />
USB Printer<br />
Support<br />
USB Storage<br />
Support<br />
Automatic Drive<br />
Mount<br />
Run-on-mount<br />
Script Name<br />
Disk Mount Point<br />
Enabled<br />
Disabled<br />
Enabled<br />
Enabled<br />
blank<br />
/mnt<br />
- 23 -
・Connect a USB disk to the router.<br />
After a short wait, the disk in<strong>for</strong>mation is displayed in the Disk<br />
Info section.<br />
Services -> NAS<br />
・Make the settings in the ProFTPD section, and click [Apply Settings].<br />
Setting example:<br />
ProFTPD<br />
Enable<br />
Server Port 21<br />
Files Directory<br />
/mnt<br />
Allow Write<br />
Enable<br />
<strong>User</strong> Password List<br />
buffalo<br />
12345678<br />
Anonymous Login<br />
Disable<br />
(Read-only)<br />
Separate the username (example: buffalo) and password (example:<br />
12345678) with a space.<br />
- 24 -
3.4.2. Logging into the FTP server<br />
・Open a command prompt window.<br />
・Enter “ftp 192.168.11.1” to access the FTP server.<br />
・Enter the user name, and press the Enter key.<br />
・Enter the password, and press the Enter key.<br />
・When the login is successful, “ftp>” appears on the screen.<br />
・To logout, enter the “bye” command.<br />
3.4.3. Common FTP commands<br />
Command Description Entry example<br />
ftp Starts FTP ftp<br />
ls<br />
Displays a list of<br />
ls<br />
the remote<br />
directory’s files<br />
pwd<br />
Displays the<br />
pwd<br />
current directory<br />
on the remote<br />
computer<br />
cd<br />
Changes the current cd img<br />
working directory<br />
on the remote<br />
computer<br />
mkdir<br />
Creates a remote<br />
mkdir test<br />
directory<br />
rmdir<br />
Deletes a remote<br />
rmdir test<br />
directory<br />
lcd<br />
Changes the current lcd E:\test<br />
working directory<br />
on the local<br />
computer<br />
asc<br />
Switches to ASCII<br />
asc<br />
transfer mode<br />
bin<br />
Switches to binary<br />
bin<br />
transfer mode<br />
put<br />
Uploads a file to<br />
put test.pdf<br />
the remote computer<br />
mput<br />
Uploads multiple<br />
files to the remote<br />
computer<br />
mput test1.jpg<br />
test2.jpg<br />
test3.jpg<br />
get<br />
Downloads a file to get index.html<br />
mget<br />
the local computer<br />
Downloads multiple<br />
files to the local<br />
computer<br />
mget test1.jpg<br />
test2.jpg<br />
test3.jpg<br />
- 25 -
delete<br />
Deletes a file on<br />
the remote computer<br />
delete<br />
test1.jpg<br />
mdelete Deletes multiple<br />
files on the remote<br />
computer<br />
mdelete<br />
test1.jpg<br />
test2.jpg<br />
test3.jpg<br />
rename<br />
Renames a file on<br />
the remote computer<br />
rename<br />
test1.jpg<br />
new1.jpg<br />
help<br />
Displays the Help<br />
help<br />
<strong>for</strong> FTP commands<br />
bye Exits FTP bye<br />
3.5. Changing <strong>Firmware</strong><br />
To change between the professional firmware (dd-wrt) and the userfriendly<br />
firmware, follow the steps below.<br />
1. Open the configuration Interface of the AirStation.<br />
2. To replace the professional firmware with the user-friendly<br />
firmware, click [Administration] > [<strong>Firmware</strong> Upgrade].<br />
To replace the user-friendly firmware with the professional<br />
firmware, go to [Easy Setup] and click [Update AirStation <strong>Firmware</strong>].<br />
3. Click [Browse...] to select the firmware file, and click [Upgrade]<br />
or [Apply].<br />
Note:<br />
The firmware files are contained in the “<strong>Firmware</strong>” folder of the<br />
utility CD.<br />
<strong>Professional</strong> firmware (dd-wrt) update screen:<br />
- 26 -
<strong>User</strong>-friendly firmware update screen:<br />
- 27 -
4. GPL Statement<br />
The firmware that is used in this product includes software that is<br />
subject to the GNU Public Licence (GPL)/the GNU Lesser Public Licence<br />
(LGPL). To the extent that it is applicable within the context of the<br />
GPL and the LGPL, the conditions of the GPL and the LGPL, as well as<br />
the relevant source codes, are available from the manufacturer. The<br />
code underlying the GPL/LGPL <strong>for</strong> the software shall be provided,<br />
without any ensuing warranty or liability claims. Please see the<br />
conditions of the GPL/LGPL <strong>for</strong> further details.<br />
4.1. GNU General Public License<br />
Version 2, June 1991<br />
Copyright (C) 1989, 1991 Free Software Foundation, Inc. 51 Franklin<br />
Street, Fifth Floor, Boston, MA 02110-1301, USA<br />
Everyone is permitted to copy and distribute verbatim copies of this<br />
license document, but changing it is not allowed.<br />
4.1.1. Preamble<br />
The licenses <strong>for</strong> most software are designed to take away your freedom<br />
to share and change it. By contrast, the GNU General Public License<br />
is intended to guarantee your freedom to share and change free<br />
software--to make sure the software is free <strong>for</strong> all its users. This<br />
General Public License applies to most of the Free Software<br />
Foundation's software and to any other program whose authors commit to<br />
using it. (Some other Free Software Foundation software is covered by<br />
the GNU Library General Public License instead.) You can apply it to<br />
your programs, too.<br />
When we speak of free software, we are referring to freedom, not price.<br />
Our General Public Licenses are designed to make sure that you have<br />
the freedom to distribute copies of free software (and charge <strong>for</strong> this<br />
service if you wish), that you receive source code or can get it if<br />
you want it, that you can change the software or use pieces of it in<br />
new free programs; and that you know you can do these things.<br />
To protect your rights, we need to make restrictions that <strong>for</strong>bid<br />
anyone to deny you these rights or to ask you to surrender the rights.<br />
These restrictions translate to certain responsibilities <strong>for</strong> you if<br />
you distribute copies of the software, or if you modify it.<br />
For example, if you distribute copies of such a program, whether<br />
gratis or <strong>for</strong> a fee, you must give the recipients all the rights that<br />
you have. You must make sure that they, too, receive or can get the<br />
source code. And you must show them these terms so they know their<br />
rights.<br />
We protect your rights with two steps: (1) copyright the software, and<br />
(2) offer you this license which gives you legal permission to copy,<br />
distribute and/or modify the software.<br />
Also, <strong>for</strong> each author's protection and ours, we want to make certain<br />
that everyone understands that there is no warranty <strong>for</strong> this free<br />
- 28 -
software. If the software is modified by someone else and passed on,<br />
we want its recipients to know that what they have is not the original,<br />
so that any problems introduced by others will not reflect on the<br />
original authors' reputations.<br />
Finally, any free program is threatened constantly by software patents.<br />
We wish to avoid the danger that redistributors of a free program will<br />
individually obtain patent licenses, in effect making the program<br />
proprietary. To prevent this, we have made it clear that any patent<br />
must be licensed <strong>for</strong> everyone's free use or not licensed at all.<br />
The precise terms and conditions <strong>for</strong> copying, distribution and<br />
modification follow.<br />
4.1.2. GNU General Public License – Terms and Conditions or Copying,<br />
Distribution and Modification<br />
0. This License applies to any program or other work which contains a<br />
notice placed by the copyright holder saying it may be distributed<br />
under the terms of this General Public License. The "Program", below,<br />
refers to any such program or work, and a "work based on the Program"<br />
means either the Program or any derivative work under copyright law:<br />
that is to say, a work containing the Program or a portion of it,<br />
either verbatim or with modifications and/or translated into another<br />
language. (Hereinafter, translation is included without limitation in<br />
the term "modification".) Each licensee is addressed as "you".<br />
Activities other than copying, distribution and modification are not<br />
covered by this License; they are outside its scope. The act of<br />
running the Program is not restricted, and the output from the Program<br />
is covered only if its contents constitute a work based on the Program<br />
(independent of having been made by running the Program). Whether that<br />
is true depends on what the Program does.<br />
1. You may copy and distribute verbatim copies of the Program's source<br />
code as you receive it, in any medium, provided that you conspicuously<br />
and appropriately publish on each copy an appropriate copyright notice<br />
and disclaimer of warranty; keep intact all the notices that refer to<br />
this License and to the absence of any warranty; and give any other<br />
recipients of the Program a copy of this License along with the<br />
Program.<br />
You may charge a fee <strong>for</strong> the physical act of transferring a copy, and<br />
you may at your option offer warranty protection in exchange <strong>for</strong> a fee.<br />
2. You may modify your copy or copies of the Program or any portion of<br />
it, thus <strong>for</strong>ming a work based on the Program, and copy and distribute<br />
such modifications or work under the terms of Section 1 above,<br />
provided that you also meet all of these conditions:<br />
a) You must cause the modified files to carry prominent notices<br />
stating that you changed the files and the date of any change.<br />
b) You must cause any work that you distribute or publish, that in<br />
whole or in part contains or is derived from the Program or any part<br />
- 29 -
thereof, to be licensed as a whole at no charge to all third parties<br />
under the terms of this License.<br />
c) If the modified program normally reads commands interactively when<br />
run, you must cause it, when started running <strong>for</strong> such interactive use<br />
in the most ordinary way, to print or display an announcement<br />
including an appropriate copyright notice and a notice that there is<br />
no warranty (or else, saying that you provide a warranty) and that<br />
users may redistribute the program under these conditions, and telling<br />
the user how to view a copy of this License. (Exception: if the<br />
Program itself is interactive but does not normally print such an<br />
announcement, your work based on the Program is not required to print<br />
an announcement.)<br />
These requirements apply to the modified work as a whole. If<br />
identifiable sections of that work are not derived from the Program,<br />
and can be reasonably considered independent and separate works in<br />
themselves, then this License, and its terms, do not apply to those<br />
sections when you distribute them as separate works. But when you<br />
distribute the same sections as part of a whole which is a work based<br />
on the Program, the distribution of the whole must be on the terms of<br />
this License, whose permissions <strong>for</strong> other licensees extend to the<br />
entire whole, and thus to each and every part regardless of who wrote<br />
it.<br />
Thus, it is not the intent of this section to claim rights or contest<br />
your rights to work written entirely by you; rather, the intent is to<br />
exercise the right to control the distribution of derivative or<br />
collective works based on the Program.<br />
In addition, mere aggregation of another work not based on the Program<br />
with the Program (or with a work based on the Program) on a volume of<br />
a storage or distribution medium does not bring the other work under<br />
the scope of this License.<br />
3. You may copy and distribute the Program (or a work based on it,<br />
under Section 2) in object code or executable <strong>for</strong>m under the terms of<br />
Sections 1 and 2 above provided that you also do one of the following:<br />
a) Accompany it with the complete corresponding machine-readable<br />
source code, which must be distributed under the terms of Sections 1<br />
and 2 above on a medium customarily used <strong>for</strong> software interchange; or,<br />
b) Accompany it with a written offer, valid <strong>for</strong> at least three years,<br />
to give any third party, <strong>for</strong> a charge no more than your cost of<br />
physically per<strong>for</strong>ming source distribution, a complete machine-readable<br />
copy of the corresponding source code, to be distributed under the<br />
terms of Sections 1 and 2 above on a medium customarily used <strong>for</strong><br />
software interchange; or,<br />
c) Accompany it with the in<strong>for</strong>mation you received as to the offer to<br />
distribute corresponding source code. (This alternative is allowed<br />
only <strong>for</strong> non-commercial distribution and only if you received the<br />
program in object code or executable <strong>for</strong>m with such an offer, in<br />
accord with Subsection b above.)<br />
- 30 -
The source code <strong>for</strong> a work means the preferred <strong>for</strong>m of the work <strong>for</strong><br />
making modifications to it. For an executable work, complete source<br />
code means all the source code <strong>for</strong> all modules it contains, plus any<br />
associated interface definition files, plus the scripts used to<br />
control compilation and installation of the executable. However, as a<br />
special exception, the source code distributed need not include<br />
anything that is normally distributed (in either source or binary<br />
<strong>for</strong>m) with the major components (compiler, kernel, and so on) of the<br />
operating system on which the executable runs, unless that component<br />
itself accompanies the executable.<br />
If distribution of executable or object code is made by offering<br />
access to copy from a designated place, then offering equivalent<br />
access to copy the source code from the same place counts as<br />
distribution of the source code, even though third parties are not<br />
compelled to copy the source along with the object code.<br />
4. You may not copy, modify, sublicense, or distribute the Program<br />
except as expressly provided under this License. Any attempt<br />
otherwise to copy, modify, sublicense or distribute the Program is<br />
void, and will automatically terminate your rights under this License.<br />
However, parties who have received copies, or rights, from you under<br />
this License will not have their licenses terminated so long as such<br />
parties remain in full compliance.<br />
5. You are not required to accept this License, since you have not<br />
signed it. However, nothing else grants you permission to modify or<br />
distribute the Program or its derivative works. These actions are<br />
prohibited by law if you do not accept this License. There<strong>for</strong>e, by<br />
modifying or distributing the Program (or any work based on the<br />
Program), you indicate your acceptance of this License to do so, and<br />
all its terms and conditions <strong>for</strong> copying, distributing or modifying<br />
the Program or works based on it.<br />
6. Each time you redistribute the Program (or any work based on the<br />
Program), the recipient automatically receives a license from the<br />
original licensor to copy, distribute or modify the Program subject to<br />
these terms and conditions. You may not impose any further<br />
restrictions on the recipients' exercise of the rights granted herein.<br />
You are not responsible <strong>for</strong> en<strong>for</strong>cing compliance by third parties to<br />
this License.<br />
7. If, as a consequence of a court judgment or allegation of patent<br />
infringement or <strong>for</strong> any other reason (not limited to patent issues),<br />
conditions are imposed on you (whether by court order, agreement or<br />
otherwise) that contradict the conditions of this License, they do not<br />
excuse you from the conditions of this License. If you cannot<br />
distribute so as to satisfy simultaneously your obligations under this<br />
License and any other pertinent obligations, then as a consequence you<br />
may not distribute the Program at all. For example, if a patent<br />
license would not permit royalty-free redistribution of the Program by<br />
all those who receive copies directly or indirectly through you, then<br />
the only way you could satisfy both it and this License would be to<br />
refrain entirely from distribution of the Program.<br />
If any portion of this section is held invalid or unen<strong>for</strong>ceable under<br />
any particular circumstance, the balance of the section is intended to<br />
- 31 -
apply and the section as a whole is intended to apply in other<br />
circumstances.<br />
It is not the purpose of this section to induce you to infringe any<br />
patents or other property right claims or to contest validity of any<br />
such claims; this section has the sole purpose of protecting the<br />
integrity of the free software distribution system, which is<br />
implemented by public license practices. Many people have made<br />
generous contributions to the wide range of software distributed<br />
through that system in reliance on consistent application of that<br />
system; it is up to the author/donor to decide if he or she is willing<br />
to distribute software through any other system and a licensee cannot<br />
impose that choice.<br />
This section is intended to make thoroughly clear what is believed to<br />
be a consequence of the rest of this License.<br />
8. If the distribution and/or use of the Program is restricted in<br />
certain countries either by patents or by copyrighted interfaces, the<br />
original copyright holder who places the Program under this License<br />
may add an explicit geographical distribution limitation excluding<br />
those countries, so that distribution is permitted only in or among<br />
countries not thus excluded. In such case, this License incorporates<br />
the limitation as if written in the body of this License.<br />
9. The Free Software Foundation may publish revised and/or new<br />
versions of the General Public License from time to time. Such new<br />
versions will be similar in spirit to the present version, but may<br />
differ in detail to address new problems or concerns.<br />
Each version is given a distinguishing version number. If the Program<br />
specifies a version number of this License which applies to it and<br />
"any later version", you have the option of following the terms and<br />
conditions either of that version or of any later version published by<br />
the Free Software Foundation. If the Program does not specify a<br />
version number of this License, you may choose any version ever<br />
published by the Free Software Foundation.<br />
10. If you wish to incorporate parts of the Program into other free<br />
programs whose distribution conditions are different, write to the<br />
author to ask <strong>for</strong> permission. For software which is copyrighted by<br />
the Free Software Foundation, write to the Free Software Foundation;<br />
we sometimes make exceptions <strong>for</strong> this. Our decision will be guided by<br />
the two goals of preserving the free status of all derivatives of our<br />
free software and of promoting the sharing and reuse of software<br />
generally.<br />
4.1.3. NO WARRANTY<br />
11. BECAUSE THE PROGRAM IS LICENSED FREE OF CHARGE, THERE IS NO<br />
WARRANTY FOR THE PROGRAM, TO THE EXTENT PERMITTED BY APPLICABLE LAW.<br />
EXCEPT WHEN OTHERWISE STATED IN WRITING THE COPYRIGHT HOLDERS AND/OR<br />
OTHER PARTIES PROVIDE THE PROGRAM "AS IS" WITHOUT WARRANTY OF ANY KIND,<br />
EITHER EXPRESSED OR IMPLIED, INCLUDING, BUT NOT LIMITED TO, THE<br />
IMPLIED WARRANTIES OF MERCHANTABILITY AND FITNESS FOR A PARTICULAR<br />
- 32 -
PURPOSE. THE ENTIRE RISK AS TO THE QUALITY AND PERFORMANCE OF THE<br />
PROGRAM IS WITH YOU. SHOULD THE PROGRAM PROVE DEFECTIVE, YOU ASSUME<br />
THE COST OF ALL NECESSARY SERVICING, REPAIR OR CORRECTION.<br />
12. IN NO EVENT UNLESS REQUIRED BY APPLICABLE LAW OR AGREED TO IN<br />
WRITING WILL ANY COPYRIGHT HOLDER, OR ANY OTHER PARTY WHO MAY MODIFY<br />
AND/OR REDISTRIBUTE THE PROGRAM AS PERMITTED ABOVE, BE LIABLE TO YOU<br />
FOR DAMAGES, INCLUDING ANY GENERAL, SPECIAL, INCIDENTAL OR<br />
CONSEQUENTIAL DAMAGES ARISING OUT OF THE USE OR INABILITY TO USE THE<br />
PROGRAM (INCLUDING BUT NOT LIMITED TO LOSS OF DATA OR DATA BEING<br />
RENDERED INACCURATE OR LOSSES SUSTAINED BY YOU OR THIRD PARTIES OR A<br />
FAILURE OF THE PROGRAM TO OPERATE WITH ANY OTHER PROGRAMS), EVEN IF<br />
SUCH HOLDER OR OTHER PARTY HAS BEEN ADVISED OF THE POSSIBILITY OF SUCH<br />
DAMAGES.<br />
- 33 -