Rolera-XR User's Manual - QImaging
Rolera-XR User's Manual - QImaging
Rolera-XR User's Manual - QImaging

Create successful ePaper yourself
Turn your PDF publications into a flip-book with our unique Google optimized e-Paper software.
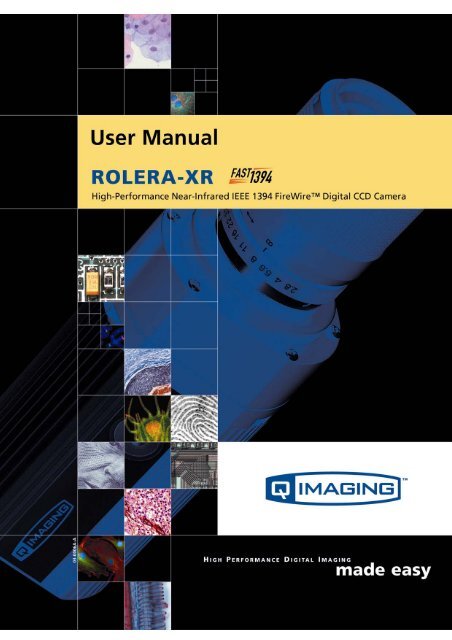
<strong>Rolera</strong>-<strong>XR</strong> User’s <strong>Manual</strong><br />
Applicability<br />
This document applies to the <strong>Rolera</strong>-<strong>XR</strong> camera. For the latest updates, please visit<br />
WWW.QIMAGING.COM.<br />
Notice of Copyright<br />
Copyright © 2003 Quantitative Imaging Corporation. All rights reserved. Unauthorized duplication of<br />
this document is prohibited.<br />
Trademarks and Proprietary Names<br />
<strong>QImaging</strong>, Retiga, and QCapture are trademarks of <strong>QImaging</strong>. Product names mentioned in this<br />
document may be trademarks or registered trademarks of <strong>QImaging</strong> or other hardware, software, or<br />
service providers and are used herein for identification purposes only. Microsoft and Windows® are<br />
registered trademarks in the U.S. and other countries of Microsoft Corporation and are used herein<br />
for identification purposes only. Apple and Macintosh® are registered in the U.S. and other<br />
countries by Apple Computer, Inc. and are used herein for identification purposes only.<br />
<strong>QImaging</strong> Corporation Address Information<br />
4401 Still Creek Drive,<br />
Suite 100, Willingdon Business Park<br />
Burnaby, BC, Canada V5C 6G9<br />
604.708.5061<br />
WWW.QIMAGING.COM<br />
<strong>QImaging</strong> Technical Support<br />
Technical support is available to all registered users of <strong>QImaging</strong> products from 9am to 5pm Pacific<br />
Standard Time.<br />
SUPPORT@QIMAGING.COM<br />
604.708.5061<br />
WWW.QIMAGING.COM/SUPPORT/CONTACT/<br />
i
<strong>Rolera</strong>-<strong>XR</strong> User’s <strong>Manual</strong> i<br />
INTRODUCTION 1<br />
Power Requirements 1<br />
Host Requirements 1<br />
IEEE 1394 (Firewire) Interface 2<br />
Cables 2<br />
Imaging Software for Your Camera 2<br />
INSTALLATION 4<br />
Step 1. Install the 1394 PCI card (Windows Users Only) 4<br />
Step 2. Install Your Imaging Software 5<br />
Step 3. Connect the <strong>Rolera</strong>-<strong>XR</strong> 5<br />
CAMERA BASICS 9<br />
Turning the Camera On and Off 9<br />
Connecting the <strong>Rolera</strong>-<strong>XR</strong> to your Optics 9<br />
Understanding the LED Indicators 10<br />
Capturing Images with the <strong>Rolera</strong>-<strong>XR</strong> 10<br />
ADVANCED CAMERA CONTROLS 11<br />
Triggering the <strong>Rolera</strong>-<strong>XR</strong> Extenally 11<br />
Gain and Offset Controls 12<br />
CARING FOR YOUR CAMERA 13<br />
TROUBLESHOOTING 14<br />
Resolving Problems with the camera 14<br />
GLOSSARY 16<br />
APPENDICES 18<br />
APPENDIX A: External Trigger Port 18<br />
ii
INTRODUCTION<br />
CHAPTER 1<br />
The <strong>QImaging</strong> <strong>Rolera</strong>-<strong>XR</strong> CCD digital camera is designed for high resolution infra-red and visible range scientific<br />
and industrila imaging applications. The <strong>Rolera</strong>-<strong>XR</strong> spectral range extends to 1000nm in the IR region.<br />
High-speed low-noise electronics provide linear digital data for rapid image capture. The Firewire IEEE1394<br />
digital interface allows ease of use and installation with a single wire requiring no framegrabber or external<br />
power supply. The <strong>Rolera</strong>-<strong>XR</strong> includes QCapture Software for Windows and Mac (R) based software systems for<br />
real time image preview and capture. A Software Development Kit (SDK) is available for interfacing with custom<br />
software..<br />
Power Requirements<br />
The <strong>Rolera</strong>-<strong>XR</strong> can be powered through a single IEEE 1394 (Firewire) cable.<br />
• Power:<br />
Cooled <strong>Rolera</strong>-<strong>XR</strong> = 13 watts<br />
Uncooled <strong>Rolera</strong>-<strong>XR</strong> = 7 watts<br />
• Input voltage range: 8 - 24 volts<br />
Host Requirements<br />
For Windows PCs:<br />
• Pentium® CPU, running at 300MHz.<br />
• 256 MB RAM.<br />
• Video card with 8 MB video memory capable of 32-bit color output.<br />
• Windows 2000, or Windows XP Professional.<br />
• If the PC is not equipped with a Firewire card, the supplied card must be installed.<br />
1
For Mac OS Computers:<br />
• PowerPC-based Macintosh with an OHCI compliant IEEE 1394 port (G4 and iMac®<br />
models).<br />
• iMac models may not provide enough power to cooled cameras. <strong>QImaging</strong>’s IEEE 1394<br />
HUB may be required to power the camera. Contact <strong>QImaging</strong> for ordering information.<br />
• Mac OS 10.2.X or higher<br />
• 256 MB+ RAM<br />
• All the G4 and iMac models are equipped with a Firewire card. The supplied IEEE 1394 PCI<br />
is not required for Mac OS computers.<br />
IEEE 1394 (Firewire) Interface<br />
The <strong>Rolera</strong>-<strong>XR</strong> is powered and controlled through an IEEE 1394 (Firewire) digital interface. A single<br />
Firewire connection from the camera to the computer allows full control of the camera and rapid<br />
image data transfer from the camera to the computer.<br />
Cables<br />
A 10-foot Firewire interface cable is included with the camera. One end of this cable connects to either<br />
of the available Firewire ports at the back of the camera; the other end of the cable plugs into your<br />
computer’s 6-pin Firewire port.<br />
Some computers have 4-pin Firewire ports. These ports may be used if they are OHCI compliant, but<br />
you will need to purchase a 4-pin to 6-pin Firewire cable from your local computer store. If you<br />
connect the <strong>Rolera</strong>-<strong>XR</strong> to a 4-pin Firewire port, you likely need to use an external power supply.<br />
What is the difference between 4-pin and 6-pin Firewire ports?<br />
Firewire cables are available in two varieties: 4-pin and 6-pin. 6-pin Firewire cables are capable of<br />
providing both power and a communication interface between the camera and computer while 4-pin<br />
cables provide only a communication interface. Some laptop computers have 6-pin Firewire jacks that<br />
do not provide power. If your computer has such a port, you will have to power your <strong>Rolera</strong>-<strong>XR</strong> by<br />
attaching an external power supply to the system.<br />
Imaging Software for Your Camera<br />
Industry Standard Imaging Applications<br />
The <strong>Rolera</strong>-<strong>XR</strong> works with industry-standard Windows and Mac OS imaging software. Please go to the<br />
following URL for an up to date listing of third party software companies that support <strong>QImaging</strong><br />
cameras. HTTP://WWW.QIMAGING.COM/PARTNERS/<br />
2
QCapture Suite Software<br />
The <strong>Rolera</strong>-<strong>XR</strong> operates on both Windows and Mac OS based systems. QCapture Suite Software for<br />
both systems is available at WWW.QIMAGING.COM. The easy-to-use QCapture software gives you<br />
complete control over the camera’s settings and image capture functions. QCapture Suite also<br />
includes a TWAIN-compliant interface that allows many Windows image-editing applications to<br />
acquire images using <strong>QImaging</strong> cameras.<br />
3
INSTALLATION<br />
CHAPTER 2<br />
IMPORTANT: Follow these steps in order to complete the installation.<br />
DO NOT CONNECT the camera until the camera driver is installed.<br />
1. Windows PC users only: Install the IEEE 1394 PCI card - only if necessary.<br />
2. Imaging Software - Install the software and drivers that your new <strong>QImaging</strong><br />
camera needs to capture images.<br />
3. <strong>Rolera</strong>-<strong>XR</strong> - Connect the camera to your computer using the supplied IEEE 1394 cable.<br />
DO NOT CONNECT the camera until you have a functioning Firewire port in<br />
your computer and the camera driver is installed.<br />
Step 1. Install the 1394 PCI card (Windows Users Only)<br />
This step is for Windows PC users only. If you are installing the <strong>Rolera</strong>-<strong>XR</strong> on a Mac OS computer,<br />
please skip to Step 2.<br />
Check your computer for an existing Firewire port:<br />
The <strong>Rolera</strong>-<strong>XR</strong> connects to your Windows PC via a Firewire port. If you already have a Firewire port,<br />
you do not have to install the IEEE 1394 PCI card. Check the connectors at the back of your PC for a<br />
port that matches the Firewire ports on your camera (Figure 1 and Figure 2).<br />
Camera<br />
Computer<br />
Figure 1— 6-pin to 6-pin Firewire (IEEE 1394) Port connection<br />
Camera<br />
Computer<br />
Figure 2— 6-pin to 4-pin Firewire (IEEE 1394) Port connection<br />
4
If your PC does not have a functioning Firewire port, you must install the IEEE 1394 PCI card that came<br />
with your camera.<br />
If necessary, install the supplied IEEE 1394 PCI card:<br />
• Shut down your computer.<br />
• Open the case, and install the supplied IEEE 1394 card into an empty PCI slot. See the user’s<br />
manual for your computer for complete instructions on installing new PCI cards.<br />
• Restart your computer. Windows should automatically install the appropriate software<br />
drivers for the card.<br />
Step 2. Install Your Imaging Software<br />
Once the IEEE 1394 card is installed in your computer, you are ready to install the Firewire drivers and<br />
imaging software. See your Imaging Software User’s Guide for complete installation instructions.<br />
Step 3. Connect the <strong>Rolera</strong>-<strong>XR</strong><br />
Once your imaging software is installed, connect your camera. There are two different types of<br />
connections. In most cases, the Firewire cable provides the necessary power required by the <strong>Rolera</strong>-<strong>XR</strong>.<br />
However, if your camera is cooled you may need to provide additional power to the camera in one of<br />
the ways listed in the following figures. Most noteably, you will need to either connect your camera<br />
with a 1394 power supply or through an IEEE 1394 HUB. Both items are available from your <strong>QImaging</strong><br />
dealer.<br />
5
Connecting the camera to a PC/MAC desktop or MAC laptop Computer<br />
Perform the following for connecting your camera.<br />
• Remove the Firewire cable from the camera box, and plug one end of the cable into one<br />
of the camera’s Firewire sockets (either socket is fine).<br />
FIREWIRE PORTS<br />
Figure 3— Camera Firewire Sockets.<br />
• Plug the other end of the cable into a Firewire port on your computer<br />
Camera<br />
Computer<br />
Figure 4— Desktop Computer Firewire Connection<br />
There are some cases when connecting to a PC or Mac desktop or Mac laptop computer where not<br />
enough power is supplied through the IEEE 1394 cable. If this is the case, you may receive an Error<br />
6
Code 28 or the software not working consistently. In this case, external power must be delivered to<br />
the camera which can be accomplished by connecting the camera via one of the following methods.<br />
• Connection of an 1394 power supply with your camera is as follows:<br />
Camera<br />
Computer<br />
110/240 VAC<br />
Figure 5— Firewire and 1394 Power Supply Connection<br />
• Connection of a 1394 IEEE HUB with your camera is as follows:<br />
Camera<br />
Computer<br />
1394 HUB<br />
110/240 VAC<br />
Figure 6— Firewire and IEEE 1394 HUB Connection<br />
Connecting the camera to a PC laptop computer<br />
There are two common connection varieties for laptop computers;<br />
1 Built-In Firewire port, or<br />
2 PCMCIA Card.<br />
1. Built-In 4-pin or 6-pin Firewire Port<br />
There are cases with PC laptops where a built-in 6-pin FireWire port is available. If this is the case<br />
with your computer, it is possible that the two power pins on the Firewire port have been<br />
disabled, allowing only data communications. If you have such a connection or if you have a<br />
built-in 4-pin connector, you will need to power the camera.<br />
If you purchased a 1394 power supply from <strong>QImaging</strong>, connect your camera as follows:<br />
7
Computer<br />
Port2<br />
Port1<br />
Camera<br />
Not<br />
Connected<br />
110/240 VAC<br />
Figure 7— Firewire and 1394 Power Supply Connection<br />
If you purchased an IEEE 1394 HUB, connect your camera as per the following figure.<br />
Camera<br />
Computer<br />
1394 HUB<br />
110/240 VAC<br />
Figure 8— Firewire and IEEE 1394 HUB Connection<br />
2. PCMCIA Card with a 4-pin/6-pin Firewire Port<br />
In some cases, laptop computers have a firewire port from a PCMCIA card. Most of these<br />
PCMCIA cards allow an external connection directly to the card. If this is the case, and the<br />
PCMCIA connector is a 6-pin connector, then you should connect the power to your PCMCIA<br />
card and connect your camera as per Figure ?. However, if you have a 4-pin PCMCIA card<br />
Firewire port, then you will need to connect your camera in the configuration of either Figure ?<br />
or Figure ?.<br />
Computer<br />
110/240 VAC<br />
Figure 9— Firewire and 6-pin IEEE 1394 PCMCIA Connection<br />
8
CAMERA BASICS<br />
CHAPTER 3<br />
The <strong>Rolera</strong>-<strong>XR</strong>’s image capture capabilities are controlled entirely by your imaging software. This<br />
chapter provides basic instructions for working with the camera itself.<br />
Turning the Camera On and Off<br />
To turn the <strong>Rolera</strong>-<strong>XR</strong> on, all you need to do is to flip the power switch to the “|” position ensuring<br />
that you have the appropriate configuration of “Step 3” in the “Introduction” section. Refer to this<br />
step for all system configurations ensuring that the FireWire cable(s) are connected as specified. If<br />
power is supplied, the GREEN LED will turn on.<br />
To turn the <strong>Rolera</strong>-<strong>XR</strong> off, all you need to do is to flip the power switch to the “O” position. This will<br />
turn your camera off. The GREEN LED will turn off.<br />
POWER SWITCH<br />
Figure 1— Power Switch on the <strong>Rolera</strong>-<strong>XR</strong><br />
Connecting the <strong>Rolera</strong>-<strong>XR</strong> to your Optics<br />
The <strong>Rolera</strong>-<strong>XR</strong> connects directly to widely available C-mount optics. C-mount optics, which are<br />
standard on most microscopes and lenses.<br />
To attach the camera to a microscope:<br />
Carefully thread the camera onto the microscope’s C-mount adapter, rotating the camera until it is<br />
mounted securely. Use the microscope controls to adjust focus.<br />
9
To attach a C-mount lens to the camera:<br />
Carefully thread the C-mount lens onto the camera’s lens ring, rotating the lens in a clockwise<br />
direction until it is mounted securely. Use the lens controls to adjust focus.<br />
To attach F-mount optics:<br />
If you have a monochrome camera and you have purchased the optional color filter, then carefully<br />
thread the color filter to the C-mount ring on the camera. The opposite end of the color filter is a<br />
female F-mount connector. Carefully connect your F-mount optics to the open connector of the color<br />
filter until it is mounted securely. Use your optics controls to adjust focus.<br />
NOTE: If you did not purchase a color filter, then you will need to purchase a C to F mount adapter<br />
to allow the connection of F-mount optics. Your camera does not need to be monochrome in this<br />
situation.<br />
Understanding the LED Indicators<br />
The LED indicators at the back of the camera give you important information about what your camera<br />
is doing:<br />
• GREEN: The green LED is the power indicator. This LED should always be lit when the<br />
camera is connected to your computer and is turned on.<br />
• RED: The red LED is the exposure/integration indicator. It flashes briefly when the CCD is<br />
exposing.<br />
• AMBER: The amber LED is the cooling indicator. It illuminates only on cooled cameras - and<br />
only when cooling is turned on. If you turn off cooling (a setting in your imaging software),<br />
the amber LED will turn off too.<br />
Capturing Images with the <strong>Rolera</strong>-<strong>XR</strong><br />
Consult your imaging application’s user’s manual for more details.<br />
10
ADVANCED CAMERA CONTROLS<br />
CHAPTER 4<br />
The <strong>Rolera</strong>-<strong>XR</strong> offers the user an advanced method of synchronizing to external events. The use of<br />
external triggering allows more advanced specialized applications of digital imaging. This section<br />
explains external triggering for the <strong>Rolera</strong>-<strong>XR</strong> as well as the operation and control of electrical gain and<br />
offset.<br />
Triggering the <strong>Rolera</strong>-<strong>XR</strong> Extenally<br />
Externally triggering the <strong>Rolera</strong>-<strong>XR</strong> provides a sophisticated method of imaging and synchronizing<br />
your camera to other parts of your system. To use this feature effectively, it is important to understand<br />
the operation and configuration of your camera.<br />
The External Trigger Port of the <strong>Rolera</strong>-<strong>XR</strong> is a 6-pin miniature circular DIN connector. This port accepts<br />
digital logic signals that are used to control the camera's integration. The External Trigger Port is<br />
optically isolated from the camera's electronics. For this reason, the user must provide power to the<br />
External Trigger Port. See Appendix A for a pinout and schematic diagram of the External Trigger Port.<br />
In externally triggered modes of operation, the user inputs a pulse on the External Trigger Port that<br />
controls the camera's integration in one of two ways depending on the triggering mode.<br />
Triggering Modes<br />
When using External Triggering,there are two different types of triggering modes: Edge High/Low and<br />
Pulse High/Low. The Edge mode allows the camera to start integrating on the rising or falling edge<br />
of the trigger pulse with the integration time controlled internally by the camera. Using this method<br />
allows you to externally trigger the camera as fast as possible, and allows you to take advantage of<br />
the simultaneous readout and exposure function.<br />
Pulse Mode allows the user to control the integration period where the time is dictated by the duration<br />
of the pulse. If “Pulse High” mode is used, then the time the pulse is high is the time of the integration<br />
period. Vice versa for “Pulse Low” mode.<br />
Connecting External Sources to the Camera<br />
Before you can begin to externally trigger your camera, you need to connect the necessary trigger<br />
signal source to the camera. To do this you need to ensure that you have a 6-pin miniature circular<br />
din cable and ensure that the pinouts are set correctly from your trigger source. Refer to Appendix A<br />
for further details on pin assignments and a diagram of the mini-din connector.<br />
There are several ways that you can provide an external pulse to the camera, one of them being via<br />
the <strong>QImaging</strong> External Trigger Board, which is available through <strong>QImaging</strong>, and another common<br />
device is a function generator. To trigger the camera, you need to provide a 5V TTL pulse though the<br />
pin stated in Appendix A.<br />
11
To ensure that you will use the external triggering mechanism correctly, it is important to ensure that<br />
the following questions have been answered when devising or architecting your system design:<br />
• Has a system design been developed that incorporates the necessary elements such as:<br />
• a Timing Diagram,<br />
• Flow of Events (e.g. a simple state diagram),<br />
• necessary components (e.g. microscope, flash lamp, shutter etc),<br />
• a software solution for extracting and/or processing your images,<br />
• External Triggering source (e.g. <strong>QImaging</strong> Trigger board, function generator etc)<br />
• Have you Determined the type of triggering mode you require for you application.<br />
• Are you sure the settings in the camera have been set correctly. For instance, are your<br />
monitoring the SYNCB output and if so have you set the correct output mode for your<br />
system?<br />
The above list should be used as a guide and should be consulted before contacting <strong>QImaging</strong><br />
Technical Support.<br />
Trigger Mode Trigger Source Exposure Control<br />
Continual Internal to Camera Internal to Camera<br />
Edge Hi/Lo External Trigger Port Internal to Camera<br />
Pulse Hi/Lo External Trigger Port Length of User Pulse<br />
Software QCAM API Trigger Event Internal to Camera<br />
Gain and Offset Controls<br />
Table 1—Trigger Sources and Integration Modes<br />
The <strong>Rolera</strong>-<strong>XR</strong>'s electrical gain and offset controls allow the user to map an image's intensities of<br />
interest to the camera's digital range. This mapping is performed in the analog domain and thus<br />
avoids the quantization errors incurred when the mapping is performed in the digital domain.<br />
Most users wish to operate the camera in a mode that maximizes dynamic range. The factory default<br />
electrical gain and offset are calibrated values that maximize the dynamic range. The electrical gain<br />
and offset can be controlled in software by the CCD Gain and Offset controls.<br />
12
CARING FOR YOUR CAMERA<br />
CHAPTER 5<br />
The <strong>Rolera</strong>-<strong>XR</strong> camera requires no regular maintenance except occasional external cleaning of the<br />
CCD window (the glass window between the camera sensor and the microscope or lens).<br />
To clean the CCD window:<br />
.<br />
CAUTION — The camera’s CCD sensor, and circuits are sensitive to static<br />
discharge. Ensure you are using a static strap or are completely<br />
grounded at all times to release any static energy before you clean the<br />
CCD window.<br />
• Use clean forced air (available at stores that sell cameras and computer cleaning supplies)<br />
to dust the CCD window.<br />
CAUTION — Do not use acetone.<br />
• If the image still appears dirty, gently wipe the face of the CCD window with a small<br />
amount of optical grade isopropyl alchohol and lens paper.<br />
• Apply forced air again to remove any loose particles<br />
13
TROUBLESHOOTING<br />
CHAPTER 6<br />
Resolving Problems with the camera<br />
The Green LED is not lit.<br />
• Check all the cable connections.<br />
• Flip the switch at the back of the camera.<br />
• If your camera is still not lit, then your camera may not be receiving the required power. If<br />
you have a 1394 Power Supply or you have an IEEE 1394 HUB, connect the camera as listed<br />
in Step 3 of the “Introduction” Section.<br />
Image occasionally goes bright on one side or stays dark on one side<br />
Turn off the overhead lights in the room. Fluorescent lights may interact with the camera to create<br />
fluctuating image brightness.<br />
Hazy image or poor contrast<br />
• If you are using the camera on a microscope, check the magnification of the microscope<br />
coupler. Consult your microscope manufacturer to find the type of coupler that works<br />
optimally with the <strong>Rolera</strong>-<strong>XR</strong> camera’s sensor.<br />
• Point the camera at something in the far distance. Loosen the set-screw of the C-mount<br />
ring (there are three: one on the side and two on the top). Adjust the C-mount ring until<br />
the image is in focus. Then tighten the set-screw so that the C-mount ring does not move.<br />
• This effect may also be caused by excessive infrared (IR) illumination. Verify that your<br />
camera or optical system is blocking the IR. Contact <strong>QImaging</strong> to order an IR filter.<br />
Images That Do Not Appear “Sharp”<br />
If the image does not seem “sharp,” check the format of the lens or the coupler being used on the<br />
microscope. <strong>Rolera</strong>-<strong>XR</strong> is equivalent to the CCD sensor and requires the appropriate lens or coupler.<br />
An incorrect coupler on the microscope will not provide the correct field of view, and will reduce the<br />
light available to the sensor.<br />
14
Unresolved Problems - Contacting <strong>QImaging</strong> Support<br />
If you are still unable to resolve your problem, contact <strong>QImaging</strong> Support for assistance in one of four<br />
ways:<br />
• Visit HTTP://WWW.QIMAGING.COM/SUPPORT/FAQ/ for a list of all frequently asked questions.<br />
Your issue may be resolved in one of these faqs.<br />
• Visit HTTP://WWW.QIMAGING.COM/SUPPORT/CONTACT/ and fill out a support form online with<br />
the details of your problem.<br />
• E-mail SUPPORT@QIMAGING.COM with complete details of your problem (including Error<br />
Message and Code if possible), camera model, computer hardware configuration, and<br />
operating system.<br />
• Call +1-604-708-5061. Try to be in front of your computer when you call.<br />
15
GLOSSARY<br />
CHAPTER 7<br />
Binning<br />
Binning is a method of increasing camera speed and sensitivity to boost low signals. Binning causes<br />
the acquired image to be brighter and smaller, but the resolution will be lower as a result. Because<br />
the image is smaller, the image transfer time is reduced significantly.<br />
When you select a binning setting in your imaging software, the camera combines data from several<br />
pixels in the camera’s CCD into a single super pixel. For example, a 2x2 bin means that 2 pixels in the<br />
horizontal direction and 2 pixels in the vertical direction are combined to form one super pixel.<br />
C-Mount<br />
A standard threaded lens mount used to attach a camera to a microscope, or a separate lens to a<br />
camera.<br />
CCD<br />
Charge Coupled Device (abbr.)<br />
CCD Gain<br />
The amount of analog signal amplification. The gain is factory-optimized for the camera’s maximum<br />
dynamic range.<br />
Charge Coupled Device<br />
The light sensitive silicon chip near the optical interface of the camera that converts light intensities<br />
into electrical signals. These are typically made up of many pixel elements whose intensities are<br />
interpreted by imaging software to display an image on the screen.<br />
Dynamic Range<br />
The ratio of the saturation level of the CCD to the readout noise of the CCD camera system. Dynamic<br />
range is a measure of the ability of the camera to capture both bright and dark features in a single<br />
image. In general, the higher the camera’s dynamic range, the more information per pixel it can<br />
capture.<br />
Exposure<br />
The amount of time that light reaches the image sensor.<br />
Field of View<br />
The area visible through the camera’s optics.<br />
Firewire<br />
16
See IEEE 1394.<br />
IEEE 1394<br />
High bandwidth (40 megabytes/second - 1394a; 80 megabytes/second - 1394b) interface for<br />
connecting digital imaging, storage, and other devices to host computers.<br />
Image Intensifier<br />
An electro-optical vacuum tube which intensifies or amplifies on low light level images.<br />
Integration<br />
The active collection of photons as done by an image sensor.<br />
Iris<br />
A diaphragm in the lens that opens or closes to set the aperture (the amount of light that passes<br />
through the lens to the CCD).<br />
ms<br />
millisecond (abbr.); unit of measure for exposure time.<br />
ns<br />
nanosecond (abbr.); unit of measure for exposure time.<br />
Offset<br />
The offset value adjusts the CCD blacklevel relative to the analog-to-digital converter zero. It is<br />
factory-optimized for the camera’s maximum dynamic range.<br />
Pixel<br />
The smallest spatial element of a digital image.<br />
s<br />
second (abbr.); unit of measure for exposure time.<br />
us<br />
microsecond (abbr.); unit of measure for exposure time.<br />
17
APPENDICES<br />
CHAPTER 8<br />
APPENDIX A: External Trigger Port<br />
The external trigger port at the rear of the camera is a 6-pin miniature circular DIN receptacle (AMP<br />
749265-1). The mating connector is a Singatron Enterprises part number 62000-6P, available<br />
fromDigikey (www.digikey.com)<br />
5 6<br />
3 4<br />
1 2<br />
Figure 1— External Trigger Port Connector<br />
The pinout for the connector is as follows<br />
Pin Number Signal Name Signal<br />
Source<br />
Description<br />
1 +5 VDC User Power for Optocoupler trigger<br />
2 Trigger (input) User Active Low Trigger Input<br />
3 SYNC-A (output) Camera Indicates CCD Read-out<br />
4 Ground User Ground Reference for Optocoupler<br />
5 SYNC-B (output) Camera Exposure or Trigger Mask<br />
6 Ground User Ground Reference for Optocoupler<br />
Table 1—Pin-out of the External Trigger Port Connector<br />
+5VDC (pin 1) and GROUND (pin 4 & pin 6) must be connected in order for SYNC-A, SYNC-B or<br />
TRIGGER to be live.<br />
18
CN8 PIN REFERENCE<br />
1 : USER VCC<br />
2 : TRIGGER (input)<br />
3 : SYNCA (output)<br />
4 : GROUND<br />
5 : SYNCB (output)<br />
6 : GROUND<br />
CN8<br />
2 1<br />
4 3<br />
6 5<br />
MINI-DIN<br />
R34<br />
357R<br />
R37<br />
357R<br />
R32 357R<br />
2<br />
U12<br />
VCC<br />
3<br />
R33 357R<br />
GND<br />
HCPL-061A<br />
C38<br />
0.1uF<br />
8<br />
7<br />
6<br />
U13<br />
VCC<br />
5<br />
GND<br />
HCPL-061A<br />
C39<br />
0.1uF<br />
8<br />
7<br />
6<br />
U14<br />
VCC<br />
5<br />
GND<br />
HCPL-061A<br />
2<br />
3<br />
2<br />
3<br />
8<br />
7<br />
6<br />
C37<br />
0.1uF<br />
5<br />
R35 237R<br />
R36 237R<br />
R38 237R<br />
R39 237R<br />
+<br />
5<br />
V<br />
R31<br />
357R<br />
TRIGGER<br />
VCC<br />
SYNCA<br />
SYNCB<br />
Figure 2— Schematic of External Trigger circuit internal to camera.<br />
19
Input Signals<br />
In order to use the External Trigger Port correctly and ensure external triggering operation for your<br />
camera, you need to supply at least 4 input signals through the mini din receptacle. Pin 1 always needs<br />
to be powered at a 5V potential, with Pins 4 and 6 always connected to ground. The input signal to<br />
begin triggering the camera is through Pin 2 and should be a 5V TTL pulse.<br />
Output Signals<br />
There are two output signals provided on the <strong>Rolera</strong>-<strong>XR</strong>, SYNC A and SYNC B.<br />
SYNC A: This signal indicates the readout time of the camera and this signal is active high. A user<br />
could monitor this signal as a means of knowing when to trigger the next frame.<br />
SYNC B: This signal has two modes of operation which can be selected in software. Refer to the<br />
QCAM SDK API documentation for further information on setting these parameters.<br />
Signal Timing<br />
Expose Mode: If this modes is selected, the signal will indicate the exposure pulse of the<br />
camera. This signal is active high and may be used to synchronize an external shuttering<br />
device.<br />
Trigger Mask: If this mode is selected, the signal will indicate the time at which another<br />
trigger signal will not be accepted by the camera. This signal is also active high.<br />
Trigger<br />
Expose<br />
Integration Time<br />
SYNC-A<br />
Readout Time<br />
Figure 3— External Trigger Signal Timing<br />
• The integration time corresponds to the length of time that the CCD has been programmed<br />
to be exposed to the image.<br />
• The readout time corresponds to the time required to readout the CCD.<br />
20