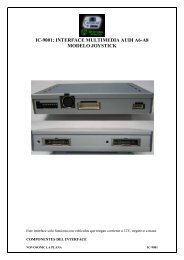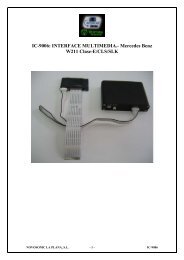
IC-9007: MULTIMEDIA INTERFACE.- Mercedes Benz C ... - Novosonic
IC-9007: MULTIMEDIA INTERFACE.- Mercedes Benz C ... - Novosonic
IC-9007: MULTIMEDIA INTERFACE.- Mercedes Benz C ... - Novosonic

You also want an ePaper? Increase the reach of your titles
YUMPU automatically turns print PDFs into web optimized ePapers that Google loves.
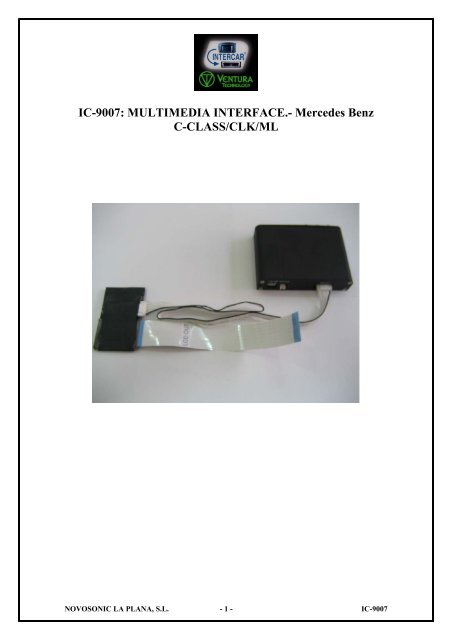
<strong>IC</strong>-<strong>9007</strong>: <strong>MULTIMEDIA</strong> <strong>INTERFACE</strong>.- <strong>Mercedes</strong> <strong>Benz</strong><br />
C-CLASS/CLK/ML<br />
NOVOSON<strong>IC</strong> LA PLANA, S.L. - 1 - <strong>IC</strong>-<strong>9007</strong>
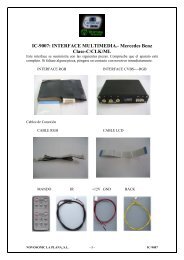
This interface is supplied with the following parts. Please check that you have received<br />
a full set. If there is any part missing, please contact us immediately.<br />
RGB <strong>INTERFACE</strong><br />
CVBS----RGB <strong>INTERFACE</strong><br />
Connection Cables<br />
RGB CABLE<br />
LCD OUT CABLE<br />
REMOTE IR +12V GND BACK<br />
Connection diagram<br />
NOVOSON<strong>IC</strong> LA PLANA, S.L. - 2 - <strong>IC</strong>-<strong>9007</strong>
+12V: RED, connect to ACC.<br />
NOVOSON<strong>IC</strong> LA PLANA, S.L. - 3 - <strong>IC</strong>-<strong>9007</strong>
GND: BLACK, connect to GROUND.<br />
BACK: YELLOW, connect to the reverse light. If there is a rear view camera connected,<br />
the image of the rear view camera will appear as soon as the reverse gear is set.<br />
NOVOSON<strong>IC</strong> LA PLANA, S.L. - 4 - <strong>IC</strong>-<strong>9007</strong>
Installation of the Interface in the OEM Monitor<br />
First of all, you will need to detach the OEM monitor. Pull it out carefully to avoid<br />
damaging it.<br />
You will see two flexible cables. To perform the installation you will need to unplug the<br />
cable connected to the monitor (cable on the right on the picture).<br />
NOVOSON<strong>IC</strong> LA PLANA, S.L. - 5 - <strong>IC</strong>-<strong>9007</strong>
Unplug the upper end of the cable. To do so, you will need to detach the front of the<br />
monitor. Connect this end to the RGB Interface (the smaller module); you must connect<br />
it on the LCD IN connector, which is located on the opposite side of the white<br />
connector.<br />
Then you will need to connect the flexible cable supplied with the Interface. Connect<br />
one end where the original cable was plugged and the other end to the RGB Interface, in<br />
the LCD OUT connection next to the white connector.<br />
The next step will be connecting the RGB cable supplied with the Interface. One end<br />
will be connected to the RGB module (on the white connector), the other end to the<br />
metal box Interface.<br />
The RGB module has a small size and, once properly isolated, can be placed inside the<br />
monitor box.<br />
NOVOSON<strong>IC</strong> LA PLANA, S.L. - 6 - <strong>IC</strong>-<strong>9007</strong>
You will need to open a small gap on the rear plate of the monitor so the GRB cable can<br />
pass through it and be connected to the Interface.<br />
Connect the other cables now (+12V, GND, BACK) as previously explained.<br />
Installation completed.<br />
Technical Support<br />
If you experience any problems while installing this device and you cannot find the<br />
solution here, please don’t hesitate to contact us:<br />
Telephone: +34 964 24 28 10 Email: comercial@novosonic.es<br />
Fax: +34 964 24 22 71 admonex@novosonic.es<br />
NOVOSON<strong>IC</strong> LA PLANA, S.L. - 7 - <strong>IC</strong>-<strong>9007</strong>