DVI, HDMI, VGA Image Recorder User Guide - VideoGhost Pro/Max
DVI, HDMI, VGA Image Recorder User Guide - VideoGhost Pro/Max
DVI, HDMI, VGA Image Recorder User Guide - VideoGhost Pro/Max

Create successful ePaper yourself
Turn your PDF publications into a flip-book with our unique Google optimized e-Paper software.
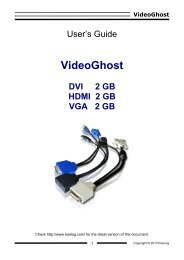
<strong>VideoGhost</strong> <strong>Pro</strong>/<strong>Max</strong><br />
<strong>User</strong>’s <strong>Guide</strong><br />
<strong>VideoGhost</strong> <strong>Pro</strong><br />
<strong>VideoGhost</strong> <strong>Max</strong><br />
<strong>DVI</strong> 2 GB<br />
<strong>HDMI</strong> 2 GB<br />
<strong>VGA</strong> 2 GB<br />
Check http://www.keelog.com/ for the latest version of this document.<br />
1<br />
Copyright © 2013 KeeLog
<strong>VideoGhost</strong> <strong>Pro</strong>/<strong>Max</strong><br />
Table of contents<br />
Table of contents .............................................................................................................. 2<br />
Getting started ................................................................................................................. 2<br />
Introduction ...................................................................................................................... 3<br />
About the product ......................................................................................................... 3<br />
Features ....................................................................................................................... 3<br />
Requirements ............................................................................................................... 4<br />
Overview of configurations ................................................................................................ 5<br />
Hardware installation ........................................................................................................ 8<br />
Device setup .................................................................................................................. 10<br />
Virtual COM mode .......................................................................................................... 13<br />
Capture mode ................................................................................................................ 17<br />
Flash Drive mode ........................................................................................................... 18<br />
Clock configuration ......................................................................................................... 20<br />
COM commands ............................................................................................................ 22<br />
Specifications ................................................................................................................. 27<br />
Troubleshooting ............................................................................................................. 29<br />
Legal disclaimer ............................................................................................................. 32<br />
Getting started<br />
New to the <strong>VideoGhost</strong> <strong>Pro</strong>/<strong>Max</strong>?<br />
Learn about the different modes first: section Overview of configurations<br />
Then install your device: sections Hardware installation and Device setup<br />
Finally, go to section Virtual COM mode, Flash Drive mode, or Capture mode,<br />
depending how you configured your device<br />
Already familiar with the <strong>VideoGhost</strong> <strong>Pro</strong>/<strong>Max</strong> frame-grabber?<br />
If you want to directly control your <strong>VideoGhost</strong> <strong>Pro</strong>/<strong>Max</strong> through Virtual COM (i.e.<br />
through the <strong>VideoGhost</strong> Control application), go to the Virtual COM mode section<br />
If you want to use your <strong>VideoGhost</strong> <strong>Pro</strong>/<strong>Max</strong> as an independent frame-grabber<br />
similar to the standard <strong>VideoGhost</strong>, go to sections Flash Drive mode and Capture<br />
mode<br />
Questions or problems?<br />
Go through the Troubleshooting section.<br />
2<br />
Copyright © 2013 KeeLog
<strong>VideoGhost</strong> <strong>Pro</strong>/<strong>Max</strong><br />
Introduction<br />
About the product<br />
The <strong>VideoGhost</strong> <strong>Pro</strong> and <strong>VideoGhost</strong> <strong>Max</strong> are intelligent hardware frame-grabbers,<br />
compatible with <strong>DVI</strong>, <strong>HDMI</strong>, and <strong>VGA</strong> signal sources such as computers and laptops. They<br />
feature a built-in JPEG compressor, and a huge 2 GB internal flash disk. Frames captured<br />
from the <strong>DVI</strong>, <strong>HDMI</strong>, or <strong>VGA</strong> bus will be compressed and stored to the built-in Flash Drive.<br />
The <strong>VideoGhost</strong> <strong>Pro</strong>/<strong>Max</strong> has a USB interface, which may be operate either as a USB Flash<br />
Drive, or as a USB Virtual COM port. The Virtual COM interface allows accessing the<br />
<strong>VideoGhost</strong> <strong>Pro</strong>/<strong>Max</strong> by a set of commands, enabling full control from an external device,<br />
such as a PC. An additional external push-button is available, accelerating switching<br />
between modes and capturing images.<br />
The <strong>VideoGhost</strong> <strong>Max</strong> also features a true hardware COM interface with a DB-9 connector.<br />
This interface enables access to the <strong>VideoGhost</strong>’s resources and functions from external<br />
devices such as <strong>Pro</strong>grammable Logic Controllers, embedded systems, microcontrollers, or<br />
computers.<br />
The <strong>VideoGhost</strong> <strong>Pro</strong> and <strong>VideoGhost</strong> <strong>Max</strong> are delivered a PC application named<br />
<strong>VideoGhost</strong> Control, demonstrating how to access all the features through Virtual COM. The<br />
software is delivered with source code in C#.<br />
Features<br />
<br />
Compatible with all <strong>DVI</strong>, <strong>VGA</strong>, and <strong>HDMI</strong> devices<br />
Supports resolutions up to Full-HD (1920 x 1080) and WUXGA (1920 x 1200)<br />
<br />
<br />
<br />
<br />
<br />
<br />
<br />
<br />
<br />
<br />
<br />
<br />
<br />
Works with computers, external laptop monitors, and other video sources<br />
No power supply necessary (power is drawn from the USB port)<br />
Built-in JPEG encoder<br />
2 Gigabytes of internal memory in all versions<br />
Built-in time-stamping module with battery (7 years lifetime guaranteed!)<br />
USB Virtual COM mode<br />
USB Flash Drive mode<br />
Capture mode with JPEG timer<br />
External push button<br />
On-demand image capture<br />
Hardware COM interface (<strong>VideoGhost</strong> <strong>Max</strong> only)<br />
PC-side software with source code<br />
Several color options available: white, black, gray, blue<br />
3<br />
Copyright © 2013 KeeLog
<strong>VideoGhost</strong> <strong>Pro</strong>/<strong>Max</strong><br />
Requirements<br />
<br />
<br />
<br />
<br />
<br />
Compatible <strong>DVI</strong> / <strong>HDMI</strong> / <strong>VGA</strong> video signal source (no HDCP encryption)<br />
Standard resolution up to 1920 x 1200 and bandwidth up to 160MHz<br />
Computer with standard USB 1.1 or 2.0 port<br />
Operating system with USB Mass-Storage (MSD) and Virtual COM (CDC) support<br />
Optionally MS Windows XP/Vista/7/8 (only for running <strong>VideoGhost</strong> Control)<br />
4<br />
Copyright © 2013 KeeLog
<strong>VideoGhost</strong> <strong>Pro</strong>/<strong>Max</strong><br />
Overview of configurations<br />
The <strong>VideoGhost</strong> <strong>Pro</strong> and <strong>VideoGhost</strong> <strong>Max</strong> can be used in a variety of hardware<br />
configurations, determined by the functionality and software configuration. Each configuration<br />
is associated with one of the three modes:<br />
Capture mode – the <strong>VideoGhost</strong> <strong>Pro</strong>/<strong>Max</strong> does not connect as a USB device, but may<br />
perform timer-triggered and push-button-triggered image captures<br />
Virtual COM mode – the <strong>VideoGhost</strong> <strong>Pro</strong>/<strong>Max</strong> connects as a USB Virtual COM device<br />
(typically used with <strong>VideoGhost</strong> Control), however may still capture images triggered<br />
by the timer, push-button, or COM command<br />
Flash Drive mode – the <strong>VideoGhost</strong> <strong>Pro</strong>/<strong>Max</strong> connects as a USB Flash Drive, and<br />
cannot capture images<br />
A list of configurations follows:<br />
Configuration 1: Capture mode with JPEG timer<br />
Video Source<br />
<strong>DVI</strong>/<strong>HDMI</strong>/<strong>VGA</strong><br />
Video Display<br />
USB (+5V)<br />
<strong>VideoGhost</strong> <strong>Pro</strong>/<strong>Max</strong><br />
Description: The <strong>VideoGhost</strong> <strong>Pro</strong>/<strong>Max</strong> will capture a screenshot at a set interval, or after<br />
pressing the push-button, and store it as a JPEG file. The device will not enumerate as a USB<br />
device, but may draw power from USB. This mode of operation is identical as the standard<br />
<strong>VideoGhost</strong>, and is the default mode for the <strong>VideoGhost</strong> <strong>Pro</strong>.<br />
Configuration 2: Flash-drive mode<br />
Video Source<br />
or<br />
computer/laptop<br />
<strong>DVI</strong>/<strong>HDMI</strong>/<strong>VGA</strong><br />
USB (MSD)<br />
<strong>VideoGhost</strong> <strong>Pro</strong>/<strong>Max</strong><br />
Video Display<br />
Description: The <strong>VideoGhost</strong> <strong>Pro</strong>/<strong>Max</strong> will connect as a 2GB Flash-drive with stored JPEG<br />
files. USB will be used to power the device. This mode may be triggered by pressing the push<br />
5<br />
Copyright © 2013 KeeLog
<strong>VideoGhost</strong> <strong>Pro</strong>/<strong>Max</strong><br />
button for 3 seconds, or by sending a command through COM. Connecting the video source<br />
and receiver is not necessary.<br />
Configuration 3: Virtual COM mode with on-demand capture and JPEG timer<br />
Video Source<br />
or<br />
computer/laptop<br />
<strong>DVI</strong>/<strong>HDMI</strong>/<strong>VGA</strong><br />
USB (CDC)<br />
<strong>VideoGhost</strong> <strong>Pro</strong>/<strong>Max</strong><br />
Video Display<br />
Video Source<br />
(optional)<br />
<strong>DVI</strong>/<strong>HDMI</strong>/<strong>VGA</strong><br />
Video Display<br />
PC or laptop<br />
USB (CDC)<br />
<strong>VideoGhost</strong> <strong>Pro</strong>/<strong>Max</strong><br />
Description: The <strong>VideoGhost</strong> <strong>Pro</strong>/<strong>Max</strong> will connect as a Virtual COM port, allowing full<br />
access through the PC application <strong>VideoGhost</strong> Control with on-demand capture. The JPEG<br />
capture timer may run in parallel. The push-button may be used to store a JPEG to the<br />
internal memory, or to transfer an image through Virtual COM. USB will be used to power the<br />
device. This mode may be set through the configuration file as the default mode of operation.<br />
Configuration 4: Capture mode with auxiliary RS-232 control and JPEG timer<br />
Video Source<br />
<strong>DVI</strong>/<strong>HDMI</strong>/<strong>VGA</strong><br />
USB (+5V)<br />
<strong>VideoGhost</strong> <strong>Max</strong><br />
Video Display<br />
Auxiliary control<br />
RS-232<br />
Description: The <strong>VideoGhost</strong> <strong>Max</strong> will capture a screenshot when triggered through the<br />
external RS-232 control, internal timer, or push-button, and store it as a JPEG file. The device<br />
will not enumerate as a USB device, but may draw power USB. This mode is only supported<br />
by the <strong>VideoGhost</strong> <strong>Max</strong>, and is its default mode of operation.<br />
6<br />
Copyright © 2013 KeeLog
<strong>VideoGhost</strong> <strong>Pro</strong>/<strong>Max</strong><br />
Configuration 5: Virtual COM mode with on-demand capture, auxiliary RS-232 control,<br />
and JPEG timer<br />
Video Source<br />
or<br />
computer/laptop<br />
<strong>DVI</strong>/<strong>HDMI</strong>/<strong>VGA</strong><br />
USB (CDC)<br />
<strong>VideoGhost</strong> <strong>Max</strong><br />
Video Display<br />
Auxiliary control<br />
RS-232<br />
Video Source<br />
(optional)<br />
<strong>DVI</strong>/<strong>HDMI</strong>/<strong>VGA</strong><br />
Video Display<br />
PC or laptop<br />
USB (CDC)<br />
<strong>VideoGhost</strong> <strong>Max</strong><br />
Auxiliary control<br />
RS-232<br />
Description: The <strong>VideoGhost</strong> <strong>Max</strong> will connect as a Virtual COM port, allowing full access<br />
through a PC application <strong>VideoGhost</strong> Control with on-demand capture. Additionally, an<br />
external RS-232 device may control the <strong>VideoGhost</strong>. USB will be used to power the device.<br />
The JPEG capture timer may run in parallel. The push-button may be used to store a JPEG to<br />
the internal memory, or to transfer an image through Virtual COM. This mode is only<br />
supported by the <strong>VideoGhost</strong> <strong>Max</strong>, and may be set through the configuration file as the<br />
default mode of operation.<br />
7<br />
Copyright © 2013 KeeLog
<strong>VideoGhost</strong> <strong>Pro</strong>/<strong>Max</strong><br />
Hardware installation<br />
Connecting the hardware is quick and easy, no software or drivers are required. First locate<br />
the source of the video signal, such as the output of the graphics card, or the TV output.<br />
<strong>DVI</strong> version <strong>HDMI</strong> version <strong>VGA</strong> version<br />
Connect the <strong>VideoGhost</strong> <strong>Pro</strong>/<strong>Max</strong> to the video source, and then connect the output device<br />
(TV or monitor) to the other end of the <strong>VideoGhost</strong> <strong>Pro</strong>/<strong>Max</strong>.<br />
<strong>DVI</strong> version <strong>HDMI</strong> version <strong>VGA</strong> version<br />
8<br />
Copyright © 2013 KeeLog
<strong>VideoGhost</strong> <strong>Pro</strong>/<strong>Max</strong><br />
Finally, connect the USB connector to a free USB port.<br />
<strong>DVI</strong> version <strong>HDMI</strong> version <strong>VGA</strong> version<br />
The USB port is used for powering the device, and for communication with the host in either<br />
Flash Drive mode or Virtual COM mode. If the device is in Capture mode (Configuration 1 or<br />
Configuration 4), then a +5V DC USB power supply may be used instead.<br />
In case of the <strong>VideoGhost</strong> <strong>Max</strong>, an auxiliary RS-232 device may be connected to the DB-9<br />
cable. Refer to section COM commands for instructions how to control the <strong>VideoGhost</strong> <strong>Max</strong><br />
from an external device.<br />
The <strong>VideoGhost</strong> <strong>Pro</strong>/<strong>Max</strong> is now ready to capture screenshots. If this is the first time the<br />
device is being used, it will default to Configuration 1 (<strong>VideoGhost</strong> <strong>Pro</strong>) or<br />
Configuration 4 (<strong>VideoGhost</strong> <strong>Max</strong>), meaning it will not show up as a USB device. Press<br />
the external push-button for 3 seconds to switch to Flash Drive mode, and configure the<br />
device through the file CONFIG.TXT (see section Device setup).<br />
9<br />
Copyright © 2013 KeeLog
<strong>VideoGhost</strong> <strong>Pro</strong>/<strong>Max</strong><br />
Device setup<br />
If your <strong>VideoGhost</strong> <strong>Pro</strong>/<strong>Max</strong> is already configured to operate in Virtual COM mode<br />
(Configurations 3 or 5), further configuration may be done using the PC application<br />
<strong>VideoGhost</strong> Control. Simply install <strong>VideoGhost</strong> Control and use it to connect and configure<br />
the device (see section Virtual COM mode).<br />
If your <strong>VideoGhost</strong> <strong>Pro</strong>/<strong>Max</strong> is<br />
configured to operate in Capture<br />
mode (Configurations 1 or 4) or Flash<br />
Drive mode (Configuration 2), it may<br />
be configured through the file<br />
CONFIG.TXT, placed in the Flash<br />
Drive root folder. This is the case<br />
for newly delivered devices. First,<br />
press the external push-button for 3<br />
seconds to switch to Flash Drive<br />
mode (Configuration 2). Then use<br />
any text editor to create or open the<br />
file CONFIG.TXT.<br />
Put the following line in the file, if you<br />
want to use the <strong>VideoGhost</strong> <strong>Pro</strong>/<strong>Max</strong> in Virtual COM mode (Configurations 3 or 5):<br />
UsbMode=Com<br />
If you want to use the device in Flash Drive<br />
mode (Configuration 2) or simply capture<br />
images without using USB (Configurations 1<br />
or 4), put the following line in CONFIG.TXT:<br />
UsbMode=Flash<br />
If you don’t need the internal JPEG capture<br />
timer, continue editing CONFIG.TXT by<br />
placing the following line in it:<br />
DisableLogging=Yes<br />
If you want to use the internal JPEG capture timer in any of the modes, place the following<br />
lines in CONFIG.TXT and modify the values accordingly:<br />
DisableLogging=No<br />
Interval=300<br />
Resize=50<br />
Timestamping=<strong>Image</strong><br />
DisableLogging allows disabling JPEG logging. Allowed values are Yes (logging disabled)<br />
and No (logging enabled). Default value is No.<br />
10<br />
Copyright © 2013 KeeLog
<strong>VideoGhost</strong> <strong>Pro</strong>/<strong>Max</strong><br />
Interval sets number of seconds between successive screenshots. Please note that<br />
compressing and saving an image takes several seconds (depending on the image size and<br />
quality), so this may become the limiting factor for low values of Interval. Default value is 300.<br />
Resize sets the resizing factor for storing screenshots. Allowed values are No (no resizing),<br />
Auto (automatic resizing factor based on image size), 75 (75%), 67 (67%), 50 (50%), 33<br />
(33%), and 25 (25%). Default value is No.<br />
Timestamping configures the built-in time- and date-stamping module. Allowed values are<br />
Yes (timestamping active, but limited to updating the modification time and date of JPEG<br />
files), <strong>Image</strong> (timestamps burned into JPEG image content), and No (timestamping disabled).<br />
Default is <strong>Image</strong>.<br />
When finished editing CONFIG.TXT, save the file in the root folder of the Flash Drive, and<br />
safely remove the drive. The new configuration will be loaded on next power-up.<br />
The configuration file CONFIG.TXT may contain several parameters, fully configuring how the<br />
<strong>VideoGhost</strong> <strong>Pro</strong>/<strong>Max</strong> operates. A full list of available parameters with descriptions is available<br />
below.<br />
Basic parameter list<br />
Parameter Values Example Description<br />
UsbMode<br />
Interval<br />
Resize<br />
Timestamping<br />
Quality<br />
DisableLogging<br />
Flash (default)<br />
Com<br />
Screenshot interval in<br />
seconds (default 300)<br />
No (default)<br />
Auto<br />
75<br />
67<br />
50<br />
33<br />
25<br />
Yes<br />
<strong>Image</strong> (default)<br />
No<br />
JPEG compression<br />
quality (default 7)<br />
Yes<br />
No (default)<br />
UsbMode=Com<br />
Interval=200<br />
Resize=50<br />
Timestamping=Yes<br />
Quality=5<br />
DisableLogging=Yes<br />
Mode of USB operation. Flash will<br />
force the device to connect as a Mass<br />
Storage device. Com will force the<br />
device to connect as a Virtual COM<br />
device.<br />
Number of seconds between<br />
successive screenshots.<br />
Resizing factor for storing screenshots<br />
in percent. Auto will choose an optimal<br />
resizing factor based on the image<br />
size.<br />
Time-stamping disable flag.<br />
Quality factor for JPEG compression<br />
from 1 to 10.<br />
Screenshot logging disable flag.<br />
11<br />
Copyright © 2013 KeeLog
<strong>VideoGhost</strong> <strong>Pro</strong>/<strong>Max</strong><br />
Advanced parameter list (use only when you know what you’re doing!)<br />
Parameter Values Example Description<br />
Encryption<br />
Brightness<br />
ForceWidth<br />
ForceHeight<br />
TopMargin<br />
LeftMargin<br />
RightFrame<br />
BottomFrame<br />
ShiftX<br />
ShiftY<br />
EnableSerial<br />
BaudRate<br />
Yes<br />
No (default)<br />
Brightness<br />
(default 0)<br />
factor<br />
<strong>Image</strong> width in pixels<br />
(defaults to resolution X)<br />
<strong>Image</strong> height in pixels<br />
(defaults to resolution Y)<br />
Top margin in pixels<br />
(default 0 or table value)<br />
Left margin in pixels<br />
(default 0 or table value)<br />
Right frame in pixels<br />
(default 0 or table value)<br />
Bottom frame in pixels<br />
(default 0 or table value)<br />
Horizontal shift value<br />
(default 0 or table value)<br />
Vertical shift value<br />
(default 0 or table value)<br />
Yes (default)<br />
No<br />
Baud rate value in bits<br />
per second (default<br />
115200)<br />
Encryption=No<br />
Brightness=50<br />
ForceWidth=1024<br />
ForceWidth=768<br />
TopMargin=10<br />
LeftMargin=5<br />
RightFrame=20<br />
BottomFrame=15<br />
ShiftX=-10<br />
ShiftY=-5<br />
EnableSerial=No<br />
BaudRate=9600<br />
Flash Drive encryption setting<br />
(caution: changing this value will reformat<br />
the Flash Drive).<br />
The factor to add to the standard<br />
image brightness from 0 to 150<br />
If this parameter is present, it will<br />
force the width of the captured image<br />
regardless of the current resolution.<br />
If this parameter is present, it will<br />
force the height of the captured image<br />
regardless of the current resolution.<br />
If this parameter is present, it will cut<br />
out the top part of the captured<br />
image. It is used primarily in the <strong>VGA</strong><br />
version, for filtering out the useful part<br />
of the signal.<br />
If this parameter is present, it will cut<br />
out the left part of the captured image.<br />
It is used primarily in the <strong>VGA</strong><br />
version, for filtering out the useful part<br />
of the signal.<br />
If this parameter is present, it will add<br />
a frame on the right side of the<br />
captured image. It is used primarily in<br />
the <strong>VGA</strong> version, for filtering out the<br />
useful part of the signal.<br />
If this parameter is present, it will add<br />
a frame at the bottom of the captured<br />
image. It is used primarily in the <strong>VGA</strong><br />
version, for filtering out the useful part<br />
of the signal.<br />
If this parameter is present, it will shift<br />
the image horizontally within the<br />
bounds given by LeftMargin and<br />
RightFrame. It is used primarily in the<br />
<strong>VGA</strong> version, for filtering out the<br />
useful part of the signal.<br />
If this parameter is present, it will shift<br />
the image vertically within the bounds<br />
given by TopMargin and<br />
BottomFrame. It is used primarily in<br />
the <strong>VGA</strong> version, for filtering out the<br />
useful part of the signal.<br />
Hardware COM enable flag. Available<br />
in <strong>VideoGhost</strong> <strong>Max</strong> only.<br />
Hardware COM interface baud rate in<br />
bits per second. The range is 300 to<br />
115200. Available in the <strong>VideoGhost</strong><br />
<strong>Max</strong> only.<br />
12<br />
Copyright © 2013 KeeLog
<strong>VideoGhost</strong> <strong>Pro</strong>/<strong>Max</strong><br />
Virtual COM mode<br />
The primary purpose of Virtual COM mode<br />
(Configurations 3 or 5) is to perform on-demand<br />
image capture, access recorded JPEG images, and<br />
configure the device.<br />
Before connecting the device, make sure you have<br />
installed the <strong>VideoGhost</strong> Control application,<br />
delivered with your device. The latest version is<br />
always available under the following URL:<br />
http://www.keelog.com/download.html<br />
<strong>VideoGhost</strong> Control is also available with source<br />
code in C# on the CD-ROM delivered with the<br />
device.<br />
If you want to reconfigure your<br />
<strong>VideoGhost</strong> <strong>Pro</strong>/<strong>Max</strong> to Virtual COM<br />
mode (Configurations 3 or 5) from<br />
Capture Mode (Configurations 1 or 4)<br />
or Flash Drive Mode (Configuration<br />
2), follow the procedure presented in<br />
section Device setup. This involves<br />
switching to Flash Drive mode<br />
(Configuration 2) by pressing the<br />
push-button for 3 seconds and<br />
placing the line UsbMode=Com in the<br />
configuration file CONFIG.TXT.<br />
Installing <strong>VideoGhost</strong> Control is a straightforward<br />
process, simply follow the wizard’s dialog windows.<br />
Next, connect the <strong>VideoGhost</strong> <strong>Pro</strong>/<strong>Max</strong> to a USB<br />
port. When connected to a USB port, the<br />
<strong>VideoGhost</strong> <strong>Pro</strong>/<strong>Max</strong> will attempt to enumerate as a<br />
Virtual COM device (Communications Device Class).<br />
Most operating systems contain built-in drivers.<br />
Some operating systems, such as Windows<br />
XP/Vista/7/8, will require confirming the driver’s<br />
publisher (select Install the driver software anyway).<br />
If the operating system has any difficulties finding<br />
the correct INF file, select it manually from the Driver folder in the <strong>VideoGhost</strong> Control install<br />
folder. This is usually:<br />
13<br />
Copyright © 2013 KeeLog
<strong>VideoGhost</strong> <strong>Pro</strong>/<strong>Max</strong><br />
C:\<strong>Pro</strong>gram Files\<strong>VideoGhost</strong> Control\Driver\<br />
or<br />
C:\<strong>Pro</strong>gram Files (x86)\<strong>VideoGhost</strong> Control\Driver\<br />
After successfully installing the device driver, launch <strong>VideoGhost</strong> Control. Connect to the<br />
<strong>VideoGhost</strong> <strong>Pro</strong>/<strong>Max</strong> using the first icon in the toolbar. This will scan all COM ports, searching<br />
for a compatible <strong>VideoGhost</strong> device.<br />
Once connected, the software will display a list of images in the list on the left panel. The<br />
panel has two sections:<br />
<br />
Local <strong>Image</strong>s<br />
This section will contain a list of BMP images captured using <strong>VideoGhost</strong> Control<br />
(Snapshot feature). The images are stored on the computer’s hard drive. The<br />
folder will default to My Pictures\<strong>VideoGhost</strong> Control, however can be configured in<br />
the application’s options. Clicking on an image from the list will display the image in<br />
the right panel.<br />
<br />
Remote <strong>Image</strong>s<br />
This section will contain a list of JPEG images archived on the <strong>VideoGhost</strong>’s<br />
internal Flash Drive. Clicking on an image from the list will initiate a file transfer<br />
from the device, and then the image will be displayed in the right panel.<br />
One of the primary features of <strong>VideoGhost</strong> Control is taking a snapshot. This can be initialized<br />
using the Device->Take a Snapshot option, by clicking the second icon in the toolbar, or<br />
pressing CTRL+T. The device will capture an image from the <strong>DVI</strong>/<strong>HDMI</strong>/<strong>VGA</strong> interface, and<br />
transfer it through Virtual COM to <strong>VideoGhost</strong> Control. The image will then be immediately<br />
displayed, archived on the computer’s hard drive, and listed in the Local <strong>Image</strong>s section.<br />
14<br />
Copyright © 2013 KeeLog
<strong>VideoGhost</strong> <strong>Pro</strong>/<strong>Max</strong><br />
<strong>VideoGhost</strong> Control allows configuring the <strong>VideoGhost</strong> <strong>Pro</strong>/<strong>Max</strong><br />
through the Device Configuration dialog window (Device-<br />
>Device Configuration…). The device configuration can be<br />
written based on the selected options in the dialog window<br />
(Write to Device), or the dialog window may synchronized with<br />
the current device settings (Read from Device). If the Load<br />
default configuration option is checked, the default settings will<br />
be read from CONFIG.TXT instead of the current runtime<br />
settings. If the Store as default configuration option is checked,<br />
the transmitted settings will also be stored to CONFIG.TXT as<br />
default, loaded upon next power-up.<br />
An important setting is Switch to Flash-drive mode (on next<br />
power-up). This will set the UsbMode=Flash setting in<br />
CONFIG.TXT, thus switching to Capture mode (and Flash Drive<br />
mode). Upon next power-up, <strong>VideoGhost</strong> Control will not be<br />
able to connect to the device, unless configured back to Virtual<br />
COM mode.<br />
<strong>VideoGhost</strong> Control also contains several application-level Device<br />
setup available from File->Application Preferences…<br />
Finally, <strong>VideoGhost</strong> Control contains several image handling<br />
features, such as panning, zooming, deleting, copying, displaying<br />
properties, and several more. The application is relatively selfexplanatory<br />
in this aspect.<br />
Virtual COM mode is in fact a low-level communication interface,<br />
which is wrapped into a Graphical <strong>User</strong> Interface by <strong>VideoGhost</strong><br />
Control. The application sends simple COM commands, which are<br />
interpreted by the <strong>VideoGhost</strong> <strong>Pro</strong>/<strong>Max</strong>. Any of these commands<br />
can be sent by any other application capable of communicating<br />
with a serial device, such as Hyper-Terminal. See section COM<br />
commands for a complete list of available commands.<br />
An important feature in Virtual COM mode is the external push-button. This button has two<br />
functions:<br />
<br />
<br />
Short press – on-demand JPEG capture to Flash<br />
Drive. Compressing and storing the full image<br />
may take several seconds.<br />
Long press (> 3 seconds) – on-demand image<br />
transfer through Virtual COM. A receiver<br />
application, such as <strong>VideoGhost</strong> Control, must be<br />
connected to the device.<br />
The internal JPEG timer is fully operational in Virtual COM mode, just as in Capture mode.<br />
The timer may be configured directly through the configuration file CONFIG.TXT in Flash<br />
15<br />
Copyright © 2013 KeeLog
<strong>VideoGhost</strong> <strong>Pro</strong>/<strong>Max</strong><br />
Drive mode (see section Device setup for more information), or indirectly using <strong>VideoGhost</strong><br />
Control.<br />
16<br />
Copyright © 2013 KeeLog
<strong>VideoGhost</strong> <strong>Pro</strong>/<strong>Max</strong><br />
Capture mode<br />
Capture mode (Configurations 1 or 4) is a standalone<br />
mode that does not require a USB host. Its<br />
primary purpose is to let the <strong>VideoGhost</strong> <strong>Pro</strong>/<strong>Max</strong><br />
run as an automated frame-grabber. A USB<br />
connection can be provided solely for the purpose<br />
of powering the device (but an external +5V DC<br />
power supply can be used as well).<br />
Capture mode is the default mode after startup<br />
(Configurations 1, 2, or 4). The <strong>VideoGhost</strong> <strong>Pro</strong>/<strong>Max</strong><br />
will not enumerate as a USB device, however it may<br />
capture images when triggered by the push button,<br />
or internal JPEG timer. The button has two<br />
functions:<br />
If you want to reconfigure your<br />
<strong>VideoGhost</strong> <strong>Pro</strong>/<strong>Max</strong> from Virtual<br />
COM mode (Configurations 3 or 5) to<br />
Capture mode, simply use the<br />
configuration option in the<br />
<strong>VideoGhost</strong> Control application<br />
(Device->Device Configuration…-<br />
>Switch to Flash-drive mode (on next<br />
power-up) and click Write to Device).<br />
<br />
<br />
Short press – on-demand JPEG capture to the<br />
internal memory. Compressing and storing the full<br />
image may take several seconds.<br />
Long press (> 3 seconds) – switch to Flash Drive<br />
mode (Configuration 2). A USB host with Mass<br />
Storage Device support must be connected.<br />
The internal JPEG timer is responsible for periodic captures from the <strong>DVI</strong>/<strong>HDMI</strong>/<strong>VGA</strong><br />
interface. The timer is configured through the configuration file CONFIG.TXT (see section<br />
Device setup for more information). Recorded images can later be viewed in Flash Drive<br />
mode (see section Flash Drive mode for more information).<br />
17<br />
Copyright © 2013 KeeLog
<strong>VideoGhost</strong> <strong>Pro</strong>/<strong>Max</strong><br />
Flash Drive mode<br />
The primary purpose of Flash Drive mode is to<br />
access recorded JPEG images. Flash Drive<br />
mode can also be used to configure the<br />
<strong>VideoGhost</strong> <strong>Pro</strong>/<strong>Max</strong> in Configurations 1, 2, or 4<br />
(see section Device setup for more information).<br />
If your <strong>VideoGhost</strong> <strong>Pro</strong>/<strong>Max</strong> is configured to<br />
operate in Configurations 1, 2, or 4<br />
(UsbMode=Flash), press the external push-button<br />
for 3 seconds to enable Flash Drive mode.<br />
If you want to reconfigure your<br />
<strong>VideoGhost</strong> <strong>Pro</strong>/<strong>Max</strong> from Virtual COM<br />
mode (Modes 3 or 5) to Flash Drive mode,<br />
simply use the configuration option in the<br />
<strong>VideoGhost</strong> Control application (Device-<br />
>Device Configuration…->Switch to Flashdrive<br />
mode (on next power-up) and click<br />
Write to Device). On the next startup,<br />
press the push-button for 3 seconds to<br />
switch to Flash Drive mode.<br />
After a few<br />
seconds, the<br />
device will automatically get detected as a Mass Storage<br />
Device. The operating system will use the standard built-in<br />
mass storage driver (MS Windows 7 in the following examples).<br />
Note: During the first switch to Flash Drive mode, the operating system can ask for drivers. In<br />
such case choose automatic driver installation (usually default option).<br />
The Flash Drive will contain the captured screenshots as JPEG files, grouped in folders<br />
named 001, 002, etc. Depending on the device configuration, the images may have burned-in<br />
time- and date-stamps. Use any image-viewing software to browse the JPEG files, such as<br />
the default Windows Photo Viewer.<br />
18<br />
Copyright © 2013 KeeLog
<strong>VideoGhost</strong> <strong>Pro</strong>/<strong>Max</strong><br />
Switching back to capture mode can be achieved by pressing the external push-button for 3<br />
seconds, or by a safe software removal of the flash disk. Use the systems standard disk<br />
removal procedure. For MS Windows, left-click on the Safe Removal icon in the system tray<br />
and select the appropriate drive. Then reconnect the <strong>VideoGhost</strong> <strong>Pro</strong>/<strong>Max</strong> to the USB port.<br />
19<br />
Copyright © 2013 KeeLog
<strong>VideoGhost</strong> <strong>Pro</strong>/<strong>Max</strong><br />
Clock configuration<br />
It is necessary to configure the built-in clock module for<br />
getting correct date and time-stamps. The procedure is<br />
different for Virtual COM mode and Flash Drive mode. In<br />
Virtual COM mode, simply start <strong>VideoGhost</strong> Control,<br />
connect to the device, and select Device->Device<br />
Configuration…->Clock Settings… and write the correct<br />
time and date to the device. The settings will get stored to<br />
the internal real-time clock powered by an internal battery,<br />
meaning they will be preserved and updated even if the<br />
<strong>VideoGhost</strong> <strong>Pro</strong>/<strong>Max</strong> is not powered.<br />
Alternatively, the internal clock may be configured in Flash<br />
Drive mode. If the <strong>VideoGhost</strong> <strong>Pro</strong>/<strong>Max</strong> is in Capture mode,<br />
switch to Flash Drive mode by pressing the external push<br />
button for at least 3 seconds. Then a text file named<br />
TIME.TXT should be prepared with the following format:<br />
Year=2010<br />
Month=4<br />
Day=1<br />
Hour=12<br />
Minute=34<br />
Second=56<br />
Format=PM<br />
The fields should contain the current time and date. The field Format allows distinguishing<br />
between A.M., P.M., and 24-hour time (use the value AM, PM, or 24). After the file has been<br />
prepared, switch to Flash Drive mode and copy the file TIME.TXT to the root folder of the<br />
flash disk.<br />
20<br />
Copyright © 2013 KeeLog
<strong>VideoGhost</strong> <strong>Pro</strong>/<strong>Max</strong><br />
After copying the file, safely remove the Flash Drive. The new clock configuration will be<br />
loaded during the next power-up.<br />
The clock configuration file must be named TIME.TXT and must be placed in the root folder.<br />
Variable and value strings are case insensitive, however they must match the options listed<br />
below.<br />
Year sets the clock year value. Valid range is from 2000 to 2099.<br />
Month sets the clock month value. Valid range is from 1 (January) to 12 (December).<br />
Day sets the clock day value. Valid range is from 1 to 31. If the specified day exceeds<br />
the maximum number of days in the specified month, the next valid day value will be<br />
chosen.<br />
Hour sets the clock hour value. Valid range is from 1 to 12 for 12-hour time<br />
(A.M./P.M.), and 0 to 23 for 24-hour time.<br />
Minute sets the clock minute value. Valid range is from 0 to 59.<br />
Second sets the clock second value. Valid range is from 0 to 59.<br />
Format sets the time format. Valid values are AM, PM, and 24. If AM is chosen, the 12-<br />
hour format is selected and the specified hour is treated as before noon. If PM is<br />
chosen, the 12-hour format is selected and the specified hour is treated as after noon.<br />
If 24 is chosen, the 24-hour format is selected and the specified hour is treated as 24-<br />
hour format.<br />
Sample TIME.TXT for 12-hour time:<br />
Year=2010<br />
Month=10<br />
Day=25<br />
Hour=5<br />
Minute=51<br />
Second=43<br />
Format=PM<br />
Sample TIME.TXT for 24-hour time:<br />
Year=2010<br />
Month=10<br />
Day=25<br />
Hour=17<br />
Minute=51<br />
Second=43<br />
Format=24<br />
21<br />
Copyright © 2013 KeeLog
COM commands<br />
The <strong>VideoGhost</strong> <strong>Pro</strong>/<strong>Max</strong> can be controlled<br />
through Virtual COM or hardware COM with a set<br />
of commands, offering the following functionality:<br />
capture and transfer an image on-demand<br />
from the <strong>DVI</strong>/<strong>HDMI</strong>/<strong>VGA</strong> interface<br />
capture and store an image on-demand<br />
from the <strong>DVI</strong>/<strong>HDMI</strong>/<strong>VGA</strong> interface<br />
read, write, and store the device<br />
configuration<br />
retrieve an archived JPEG image and<br />
JPEG image counter<br />
read and write time/date configuration<br />
retrieve device information (VID/PID)<br />
reset the device<br />
<strong>VideoGhost</strong> <strong>Pro</strong>/<strong>Max</strong><br />
Each command can be sent through the Virtual<br />
COM interface, or through the hardware COM<br />
interface in case of the <strong>VideoGhost</strong> <strong>Max</strong>. For<br />
using the hardware COM interface, connect a serial device to the cable with the DB-9F<br />
connector. The standard RS-232 pin-out should be used, with +/-12V logic levels. The<br />
transmission speed should be set to 115200 bps, 8 data bits, no parity bit, 1 stop bit, no<br />
handshaking. The baud rate may be reconfigured through the file CONFIG.TXT, or using<br />
<strong>VideoGhost</strong> Control. Other RS-232 parameters are fixed.<br />
The <strong>VideoGhost</strong> <strong>Pro</strong>/<strong>Max</strong> will always respond using the same interface as was used to send<br />
the command. A command sent through Virtual COM will result in a response through Virtual<br />
COM. A command sent through hardware COM will result in a response through hardware<br />
COM. The only exception to this rule is the CAPTURE command, which always results in a<br />
response through the Virtual COM interface. This is due to the relatively low speed of the<br />
hardware COM interface, and time it would take to send an image as the response.<br />
A full list of COM commands follows:<br />
If you want to use the <strong>VideoGhost</strong> <strong>Max</strong><br />
with the hardware COM interface,<br />
configure the serial controller to the<br />
following parameters:<br />
115200 bps<br />
8 data bits<br />
no parity bit<br />
1 stop bit<br />
no handshaking<br />
Connect the serial device to the DB-9F<br />
connector on the <strong>VideoGhost</strong> <strong>Max</strong>.<br />
The baud rate may be changed by the<br />
parameter BaudRate in CONFIG.TXT in<br />
Flash Drive mode, or through <strong>VideoGhost</strong><br />
Control in Virtual COM mode.<br />
Command<br />
contents<br />
Command<br />
length in<br />
bytes<br />
Response<br />
contents<br />
Response<br />
length in bytes<br />
Description<br />
CAPTURE 8<br />
Captured image in<br />
BMP format (16-bit per<br />
pixel, format 5.6.5)<br />
followed by EOF<br />
character (1Ah)<br />
54 (header size) +<br />
<strong>Image</strong> width x<br />
<strong>Image</strong> height + 1<br />
(EOF)<br />
Initializes a screen capture from the <strong>DVI</strong>/<strong>HDMI</strong>/<strong>VGA</strong><br />
interface. The image is sent in the 16-bit BMP<br />
format (5.6.5), followed by a single EOF character.<br />
The response is always sent through the Virtual<br />
COM interface.<br />
STORE 5 No response 0<br />
Initializes a screen capture from the <strong>DVI</strong>/<strong>HDMI</strong>/<strong>VGA</strong><br />
interface, and stores the image to the internal flash<br />
drive in the JPEG format. This operation can take<br />
several seconds, depending on the screen<br />
22<br />
Copyright © 2013 KeeLog
<strong>VideoGhost</strong> <strong>Pro</strong>/<strong>Max</strong><br />
resolution and contents.<br />
GET VID 7 19AEh 2 Returns the USB VID word.<br />
GET PID 7 2347h 2 Returns the USB PID word.<br />
GET COUNT 9<br />
JPEG image counter<br />
value in decimal format<br />
Number of digits in<br />
JPEG counter<br />
Every time a JPEG image is stored to the internal<br />
flash drive, the JPEG image counter value is<br />
increased. This value is useful for requesting<br />
images through Virtual COM just by supplying the<br />
image number.<br />
GET CONFIG 10<br />
Current configuration in<br />
text file format (one<br />
parameter per line)<br />
followed by EOF<br />
character (1Ah)<br />
File size + 1 (EOF)<br />
Returns the current device configuration in text file<br />
format identical to that of CONFIG.TXT. Each line<br />
contains a parameter-value pair separated by the<br />
equals sign. Line separator is CR/LF.<br />
GET DEFAULT 11<br />
Default configuration in<br />
text file format (one<br />
parameter per line)<br />
followed by EOF<br />
character (1Ah)<br />
File size + 1 (EOF)<br />
Returns the default device configuration from<br />
CONFIG.TXT in text file format. Each line contains<br />
a parameter-value pair separated by the equals<br />
sign. Line separator is CR/LF.<br />
GET TIME 8<br />
Current time and date<br />
in text file format (one<br />
parameter per line)<br />
followed by EOF<br />
character (1Ah)<br />
File size + 1 (EOF)<br />
Returns the current device time and date in text file<br />
format identical to that of TIME.TXT. Each line<br />
contains a parameter-value pair separated by the<br />
equals sign. Line separator is CR/LF.<br />
GET PIC<br />
9 + <strong>Image</strong><br />
number digit<br />
count<br />
Stored image in JPEG<br />
format followed by EOF<br />
character (1Ah)<br />
File size + 1 (EOF)<br />
Returns a stored JPEG file from the flash drive<br />
given by image number. The GET PIC command<br />
should be followed by the image number in decimal<br />
format. The image number should not exceed the<br />
JPEG image counter available by using the GET<br />
COUNT command.<br />
Example: GET PIC547<br />
SET CONFIG<br />
12 + File<br />
size digit<br />
count + File<br />
size<br />
No response 0<br />
Sets the current device configuration. The<br />
command should be proceeded by the expected<br />
configuration file size in decimal format, and then<br />
by the configuration file. The configuration should<br />
be sent in text file format identical to that of<br />
CONFIG.TXT. Each line contains a parametervalue<br />
pair separated by the equals sign. Line<br />
separator is CR/LF.<br />
Example:<br />
SET CONFIG23Quality=5CRLFInterval=200<br />
SET DEFAULT<br />
13 + File<br />
size digit<br />
count + File<br />
size<br />
No response 0<br />
Sets the default device configuration by writing<br />
CONFIG.TXT. The command should be proceeded<br />
by the expected configuration file size in decimal<br />
format, and then by the configuration file. The<br />
configuration should be sent in text file format<br />
identical to that of CONFIG.TXT. Each line contains<br />
a parameter-value pair separated by the equals<br />
sign. Line separator is CR/LF.<br />
Example:<br />
23<br />
Copyright © 2013 KeeLog
<strong>VideoGhost</strong> <strong>Pro</strong>/<strong>Max</strong><br />
SET DEFAULT24UsbMode=ComCRLFInterval=50<br />
SET TIME<br />
12 + File<br />
size digit<br />
count + File<br />
size<br />
No response 0<br />
Sets the current device time. The command should<br />
be preceded by the expected time configuration file<br />
size in decimal format, and then by the time<br />
configuration file. The time configuration should be<br />
sent in text file format identical to that of TIME.TXT.<br />
Each line contains a parameter-value pair<br />
separated by the equals sign. Line separator is<br />
CR/LF.<br />
Example:<br />
SET TIME26Hour=8CRLFMinute=4CRLFSecond=9<br />
RESET 5 No response 0<br />
Resets the device. This command is useful when<br />
reconfiguring the device mode from Virtual COM<br />
mode to Capture mode or Flash Drive mode using<br />
the SET DEFAULT command. The changes will<br />
take effect on the next power-up of the device.<br />
The COM command interface is heavily used by <strong>VideoGhost</strong> Control, available for the<br />
Windows family of operating systems. However, COM commands can be sent by any RS-232<br />
enabled device such as a microcontroller, embedded system, or computer running any serial<br />
terminal software. The examples below demonstrate using Ubuntu with the Virtual COM<br />
interface.<br />
24<br />
Copyright © 2013 KeeLog
<strong>VideoGhost</strong> <strong>Pro</strong>/<strong>Max</strong><br />
Notes on installing the <strong>VideoGhost</strong> <strong>Pro</strong>/<strong>Max</strong> in Virtual COM mode in Linux/Ubuntu:<br />
1. Login with administrator rights and update the kernel:<br />
# sudo apt-get install linux-image-generic linux-headers-generic<br />
On 64 bits version install 32 bits libraries:<br />
# sudo apt-get install ia32-libs<br />
2. Unload the usbserial module if it is already running:<br />
#sudo rmmod usbserial<br />
3. Load the usbserial kernel module<br />
#sudo modprobe usbserial vendor=0x19ae product=0x2347<br />
4. Connect the board<br />
5. Verify that the USB connection is established:<br />
#lsusb<br />
The <strong>VideoGhost</strong> <strong>Pro</strong>/<strong>Max</strong> should be visible as:<br />
Bus 004 Device 002: ID 19ae:2347<br />
Bus 001 Device 001: ID 1d6b:0002 Linux Foundation 2.0 root hub<br />
25<br />
Copyright © 2013 KeeLog
<strong>VideoGhost</strong> <strong>Pro</strong>/<strong>Max</strong><br />
Bus 002 Device 001: ID 1d6b:0001 Linux Foundation 1.1 root hub<br />
Bus 003 Device 001: ID 1d6b:0001 Linux Foundation 1.1 root hub<br />
Bus 004 Device 001: ID 1d6b:0001 Linux Foundation 1.1 root hub<br />
Bus 005 Device 001: ID 1d6b:0001 Linux Foundation 1.1 root hub<br />
6. Find out which USB connection is established:<br />
#dmesg<br />
This should show a result similar to that below:<br />
[194.936026] usb 4-1: new full-speed USB device number 2 using<br />
uhci_hcd<br />
[195.117216] usb 4-1: New USB device found, idVendor=19ae,<br />
id<strong>Pro</strong>duct=2347<br />
[195.117224] usb 4-1: New USB device strings: Mfr=1, <strong>Pro</strong>duct=2,<br />
SerialNumber=3<br />
[195.117230] usb 4-1: <strong>Pro</strong>duct: USB to Serial<br />
[195.117235] usb 4-1: Manufacturer: KeeLog<br />
[195.117238] usb 4-1: SerialNumber: 0123456789AF<br />
[195.244776] cdc_acm 4-1:1.0: This device cannot do calls on its own.<br />
It is not a modem.<br />
[195.244895] cdc_acm 4-1:1.0: ttyACM0: USB ACM device<br />
[195.248266] usbcore: registered new interface driver cdc_acm<br />
[195.248275] cdc_acm: USB Abstract Control Model driver for USB<br />
modems and ISDN adapters<br />
7. Create a symlink on /dev/ttyACM0:<br />
# sudo ln -s /dev/ttyACM0 /dev/ttyUSB0<br />
It is now possible to access /dev/ttyUSB0 from any terminal application.<br />
26<br />
Copyright © 2013 KeeLog
<strong>VideoGhost</strong> <strong>Pro</strong>/<strong>Max</strong><br />
Specifications<br />
<strong>VideoGhost</strong><br />
<strong>Pro</strong>/<strong>Max</strong> <strong>DVI</strong><br />
<strong>VideoGhost</strong><br />
<strong>Pro</strong>/<strong>Max</strong> <strong>HDMI</strong><br />
<strong>VideoGhost</strong><br />
<strong>Pro</strong>/<strong>Max</strong> <strong>VGA</strong><br />
Power supply 4.5 V – 5.5 V DC 4.5 V – 5.5 V DC 4.5 V – 5.5 V DC<br />
<strong>Max</strong>. power<br />
consumption<br />
250 mA (1.3 W) 250 mA (1.3 W) 250 mA (1.3 W)<br />
Memory capacity 2 GB 2 GB 2 GB<br />
Data retention 100 years 100 years 100 years<br />
Interface support<br />
<strong>Max</strong>. video<br />
bandwidth<br />
<strong>DVI</strong>-compatible<br />
video source,<br />
USB 1.1 or 2.0 with<br />
MSD/CDC support<br />
<strong>HDMI</strong>-compatible<br />
video source,<br />
USB 1.1 or 2.0 with<br />
MSD/CDC support<br />
160 MHz 160 MHz 160 MHz<br />
<strong>VGA</strong>-compatible<br />
video source,<br />
USB 1.1 or 2.0 with<br />
MSD/CDC support<br />
<strong>Max</strong>. video resolution 1920 x 1200 1920 x 1200 1920 x 1200 1<br />
Typical JPEG encoding time in seconds 2 :<br />
Frame<br />
size<br />
50%<br />
Resize<br />
Quality = 3 Quality = 5 Quality = 7<br />
Auto<br />
Resize<br />
No<br />
Resize<br />
50%<br />
Resize<br />
Auto<br />
Resize<br />
No<br />
Resize<br />
50%<br />
Resize<br />
Auto<br />
Resize<br />
No<br />
Resize<br />
640x480 5 9 9 5 10 10 5 10 10<br />
800x600 5 13 13 6 14 14 7 15 15<br />
1024x768 8 18 20 9 21 21 8 23 23<br />
1280x720 8 15 23 10 16 23 9 16 25<br />
1440x900 9 18 30 10 19 31 10 20 32<br />
1280x1024 10 19 30 11 20 31 12 20 30<br />
1680x1050 11 20 36 12 21 37 13 22 38<br />
1600x1200 14 21 43 16 24 44 15 25 45<br />
1920x1080 14 14 45 15 15 46 16 16 50<br />
1 Limited to standard resolution and refresh rate combinations.<br />
2 Encoding times may vary depending on image contents.<br />
27<br />
Copyright © 2013 KeeLog
<strong>VideoGhost</strong> <strong>Pro</strong>/<strong>Max</strong><br />
The <strong>VGA</strong> version supports the most common resolution and refresh-rate combinations:<br />
50 Hz 56 Hz 60 Hz 70 Hz 72 Hz 75 Hz 85 Hz 100 Hz 120 Hz<br />
640x480 X X X X X<br />
800x600 X X X X X X<br />
1024x768 X X X X X X<br />
1152x864 X X X X X<br />
1280x720 X X X<br />
1280x768 X X<br />
1280x800<br />
X<br />
1280x960 X X X X<br />
1280x1024 X X X X<br />
1360x768 X X X<br />
1440x900 X X<br />
1600x900 X X X<br />
1600x1200 X X X X<br />
1680x1050 X X X<br />
1920x1080 X X<br />
1920x1200 X X<br />
All KeeLog products come with 1 year warranty against manufacturer defects. Defect<br />
products must be shipped by the customer. All warranty repairs and delivery to the customer<br />
will be paid by the manufacturer.<br />
28<br />
Copyright © 2013 KeeLog
<strong>VideoGhost</strong> <strong>Pro</strong>/<strong>Max</strong><br />
Troubleshooting<br />
The <strong>VideoGhost</strong> <strong>Pro</strong>/<strong>Max</strong> will not work in the following cases:<br />
1. Internal laptop screens<br />
2. Devices protected with HDCP, such as most Blu-ray players<br />
3. No USB port for powering the device<br />
4. Non-conformant <strong>DVI</strong>/<strong>HDMI</strong>/<strong>VGA</strong> interfaces<br />
No video signal at the monitor or TV<br />
Please check the following:<br />
1. Is the <strong>VideoGhost</strong> <strong>Pro</strong>/<strong>Max</strong> connected firmly to the signal source, such as the graphics<br />
card?<br />
2. Is the monitor/TV connected firmly to the <strong>VideoGhost</strong> <strong>Pro</strong>/<strong>Max</strong>?<br />
3. Is the USB cable connected? If not, is the device powered from an alternate source?<br />
The <strong>VideoGhost</strong> <strong>Pro</strong>/<strong>Max</strong> does not switch to Flash Drive mode<br />
Please check the following:<br />
1. Are pressing the external push-button for at least 3 seconds?<br />
2. Does the operating system support removable USB flash disks?<br />
3. Have you checked the drive list?<br />
4. Have you tried on a different USB port?<br />
5. Have you checked on a different computer?<br />
The <strong>VideoGhost</strong> <strong>Pro</strong>/<strong>Max</strong> does show up as a Virtual COM device<br />
Please check the following:<br />
1. Have you configured the device to Virtual COM mode? Refer to the Device setup<br />
section for detailed instructions.<br />
2. Does the operating system support Virtual COM devices (CDC support)?<br />
3. Have you installed the INF drive file? Refer to the Virtual COM mode section for<br />
detailed instructions.<br />
4. Have you tried on a different USB port?<br />
5. Have you checked on a different computer?<br />
<strong>VideoGhost</strong> Control cannot connect to the device (“Device not found!” error)<br />
The <strong>VideoGhost</strong> <strong>Pro</strong>/<strong>Max</strong> has probably not enumerated properly as Virtual Com device.<br />
Please check the following:<br />
1. Have you configured the device to Virtual COM mode? Refer to the Device setup<br />
section for detailed instructions.<br />
2. Does the operating system support Virtual COM devices (CDC support)?<br />
29<br />
Copyright © 2013 KeeLog
<strong>VideoGhost</strong> <strong>Pro</strong>/<strong>Max</strong><br />
3. Have you installed the INF drive file? Refer to the Virtual COM mode section for<br />
detailed instructions.<br />
4. Have you tried on a different USB port?<br />
5. Have you checked on a different computer?<br />
<strong>VideoGhost</strong> Control cannot capture or transfer images (“No data received on port”<br />
error)<br />
First, check if the <strong>VideoGhost</strong> <strong>Pro</strong>/<strong>Max</strong> is still connected. Click the Connect to device icon in<br />
the toolbar to disconnect and reconnect. If the device has connection problems, refer to the<br />
previous questions and answers. If you are attempting to do an on-demand screen capture,<br />
the problem has most likely to do with the <strong>DVI</strong>/<strong>HDMI</strong>/<strong>VGA</strong> interface. Check if the video source<br />
and receiver is connected, and check different screen resolutions. If you are attempting to<br />
transfer an archived JPEG image, most likely the image has been deleted, or is corrupt. You<br />
can fix this by adjusting the JPEG image counter. Refer to the next question in such case.<br />
<strong>VideoGhost</strong> Control displays an invalid list of JPEG files<br />
<strong>VideoGhost</strong> Control displays a list of JPEG files based solely on the JPEG image counter<br />
(always from 001 to the current counter value). Most likely some archived JPEG files have<br />
been deleted, however <strong>VideoGhost</strong> Control does not know about this. This can be fixed by<br />
manually setting a new JPEG image counter value. To do this, switch to Flash Drive mode,<br />
and create a file named COUNTER.TXT in the Flash Drive root folder. Put the string<br />
Counter=N in the file, where N is the new image counter value. This value will be loaded on<br />
next power-up.<br />
I can’t find any screenshots after switching to Flash Drive mode<br />
Please check the following:<br />
1. Have you powered the device from the USB port while recording?<br />
2. Have you checked in the subdirectories, such as 001, 002, etc.?<br />
3. Did you properly configure the device through CONFIG.TXT?<br />
4. Have you checked with a different screen resolution?<br />
The screenshots show no contents, just noise<br />
You are probably trying to acquire a HDCP-protected video signal, such as a Blu-ray or DVD<br />
player. The <strong>VideoGhost</strong> <strong>Pro</strong>/<strong>Max</strong> is not a device intended for breaking the HDCP copyright<br />
protection.<br />
30<br />
Copyright © 2013 KeeLog
<strong>VideoGhost</strong> <strong>Pro</strong>/<strong>Max</strong><br />
<strong>Pro</strong>blems with time-stamps<br />
Set the correct time by creating a clock configuration file TIME.TXT (Flash Drive mode), or by<br />
using <strong>VideoGhost</strong> Control (Virtual COM mode). Make sure you have not disabled timestamping.<br />
Refer to the Clock configuration section for detailed instructions.<br />
Screenshots are not logged as fast as I would like<br />
Change the Interval parameter in CONFIG.TXT to a smaller number. If this doesn’t help, it<br />
means that the JPEG compression time is the limiting factor. Reduce the image size by<br />
reducing the Quality parameter in CONFIG.TXT. Finally, change the Resize parameter to 50,<br />
33, or 25.<br />
I’ve checked everything, nothing helps!<br />
If you are still experiencing problems, please do the following:<br />
1. Check if the problem appears with a different screen resolution.<br />
2. Check if the problem appears on a different computer or video source.<br />
3. Check if the problem appears using a different USB port.<br />
4. Contact the dealer you have purchased the device from. Please supply all necessary<br />
information (hardware type, model and manufacturer, OS type and version, and a short<br />
description of the problem).<br />
31<br />
Copyright © 2013 KeeLog
<strong>VideoGhost</strong> <strong>Pro</strong>/<strong>Max</strong><br />
Legal disclaimer<br />
KeeLog does not take responsibility for any damage, harm or legal actions caused by misuse<br />
of its products. The user should follow the guidelines contained in this document, otherwise<br />
no liability will be assumed. It is the user's responsibility to obey all effective laws in his/her<br />
country, which may prohibit usage of KeeLog products. Please also consider, that not<br />
knowing the law does not allow to not obeying it. A good example is the U.S. Department of<br />
Justice Letter on Keystroke Monitoring and Login Banners, according to which a clear notice<br />
should be displayed, warning that user keystrokes may be logged. Please check with your<br />
legal representative for logging requirements in your country.<br />
For more information on KeeLog products,<br />
visit our website:<br />
http://www.keelog.com/<br />
You should not use this device to intercept<br />
data you are not authorized to possess,<br />
especially passwords, banking data,<br />
confidential correspondence etc. Most<br />
countries recognize this as a crime. Please<br />
consult a legal representative for logging<br />
requirements in your country.<br />
32<br />
Copyright © 2013 KeeLog
<strong>VideoGhost</strong> <strong>Pro</strong>/<strong>Max</strong><br />
Notes:<br />
European Office<br />
KeeLog<br />
Lekcyjna 42<br />
PL 51-169 Wroclaw<br />
Poland<br />
U.S. Office<br />
Aqua Electronics Inc.<br />
1550 Louis Ave.<br />
Elk Grove Village, IL. 60007<br />
U.S.A<br />
http://www.keelog.com/<br />
keelog@keelog.com<br />
Copyright © 2004-2013. All rights reserved.<br />
RoHS<br />
33<br />
Copyright © 2013 KeeLog