Guide to Solvent Cementing PVC and CPVC Plastic ... - Glynwed Asia
Guide to Solvent Cementing PVC and CPVC Plastic ... - Glynwed Asia
Guide to Solvent Cementing PVC and CPVC Plastic ... - Glynwed Asia
You also want an ePaper? Increase the reach of your titles
YUMPU automatically turns print PDFs into web optimized ePapers that Google loves.
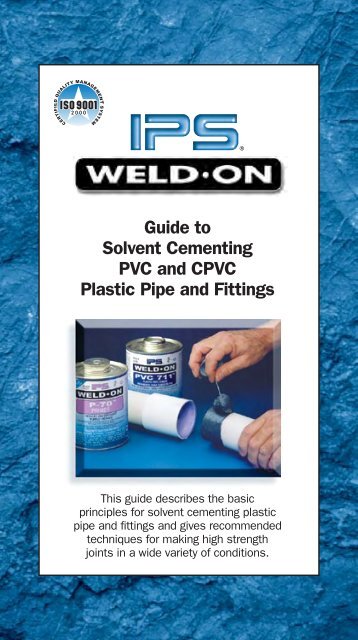
<strong>Guide</strong> <strong>to</strong><br />
<strong>Solvent</strong> <strong>Cementing</strong><br />
<strong>PVC</strong> <strong>and</strong> C<strong>PVC</strong><br />
<strong>Plastic</strong> Pipe <strong>and</strong> Fittings<br />
This guide describes the basic<br />
principles for solvent cementing plastic<br />
pipe <strong>and</strong> fittings <strong>and</strong> gives recommended<br />
techniques for making high strength<br />
joints in a wide variety of conditions.
Corporation was the first company<br />
<strong>to</strong> produce reliable solvent cements for use with<br />
<strong>PVC</strong>, C<strong>PVC</strong> <strong>and</strong> ABS pipe <strong>and</strong> fittings.<br />
Each Weld-On formulation has been developed for a specific<br />
application <strong>and</strong> is subject <strong>to</strong> the strictest quality control program<br />
in the industry. This program guarantees the most consistent <strong>and</strong><br />
highest quality solvent cements commercially available.<br />
IPS solvent cements, primers <strong>and</strong> accessories are shipped<br />
worldwide <strong>to</strong> cus<strong>to</strong>mers in such diverse fields as construction,<br />
agriculture, swimming pools <strong>and</strong> spas, au<strong>to</strong>motive, aerospace<br />
<strong>and</strong> general manufacturing.<br />
Our products are intended for use by skilled individuals at their<br />
own risk. When you use Weld-On products, rest assured you are<br />
using the highest quality products commercially available, so<br />
insist on Weld-On!<br />
The solvent cemented connection in thermoplastic pipe <strong>and</strong><br />
fittings is the last vital link in a plastic pipe installation. It<br />
can mean the success or failure of the system as a whole.<br />
Accordingly, it requires the same professional care <strong>and</strong> attention<br />
that is given <strong>to</strong> other components of the system.<br />
We feel that if the basic principles involved are explained,<br />
known <strong>and</strong> unders<strong>to</strong>od, a better underst<strong>and</strong>ing would be<br />
gained as <strong>to</strong> what techniques are necessary <strong>to</strong> suit particular<br />
applications, temperature conditions <strong>and</strong> variations in sizes of<br />
pipe <strong>and</strong> fittings.<br />
This guide was developed <strong>to</strong> aid the installer in the proper<br />
techniques needed for the joining of plastic pipe <strong>and</strong> fittings.<br />
The suggestions <strong>and</strong> data in this guide are based on information<br />
we believe <strong>to</strong> be reliable. Installers should verify for themselves<br />
that they can make satisfac<strong>to</strong>ry joints under varying conditions.<br />
Also, it is recommended that installers receive personal<br />
instruction from trained instruc<strong>to</strong>rs or competent, experienced<br />
installers. Contact us or your supplier for additional information<br />
or instruction.<br />
If you have any questions on the material in this guide<br />
or need further assistance, please give us a call.<br />
Our <strong>to</strong>ll free number is 800-421-2677.
TABLE OF CONTENTS<br />
BASIC PRINCIPLES OF SOLVENT CEMENTING 3<br />
SOLVENT CEMENTING WITH PRIMER 5<br />
SOLVENT CEMENTING WITHOUT PRIMER 10<br />
JOINING LARGE DIAMETER PIPE<br />
AND FITTINGS 12<br />
CHEMICAL APPLICATIONS 14<br />
REPAIRS 14<br />
JOINING IN HOT WEATHER 15<br />
JOINING IN COLD WEATHER 16<br />
HELPFUL HINTS 17<br />
SAFETY 18<br />
STORAGE AND HANDLING 20<br />
LISTINGS, STANDARDS,<br />
LITERATURE, DVDs/CDs 20<br />
SELECTION GUIDE 21<br />
SET, CURE TIMES AND USAGE TABLE 22
BASIC PRINCIPLES OF SOLVENT CEMENTING<br />
To make consistently good joints, the following points should be<br />
clearly unders<strong>to</strong>od.<br />
I. The joining surfaces must be softened <strong>and</strong> made semifluid.<br />
2. Sufficient cement must be applied <strong>to</strong> fill gap between pipe<br />
<strong>and</strong> fitting.<br />
3. Assembly of pipe <strong>and</strong> fittings must be made while the surfaces<br />
are still wet <strong>and</strong> cement is still fluid.<br />
4. Joint strength develops as the cement dries. In the tight part of<br />
the joint the surfaces will tend <strong>to</strong> fuse <strong>to</strong>gether; in the loose part,<br />
the cement will bond <strong>to</strong> both surfaces.<br />
These areas must be softened <strong>and</strong> penetrated.<br />
Penetration <strong>and</strong> softening can be achieved by the cement itself, by<br />
using a suitable primer or by the use of both primer <strong>and</strong> cement.<br />
For certain materials <strong>and</strong> in certain situations, it is necessary <strong>to</strong> use<br />
a primer. A suitable primer will usually penetrate <strong>and</strong> soften the<br />
surfaces more quickly than cement alone. Additionally, the use of a<br />
primer can provide a safety fac<strong>to</strong>r for the installer, for he can know<br />
under various temperature conditions when sufficient softening<br />
has been achieved. For example, in cold weather more time <strong>and</strong><br />
additional applications may be required.
Sufficient cement <strong>to</strong> fill the loose part of the joint must be applied.<br />
Besides filling the gap, adequate cement layers will penetrate the<br />
surfaces <strong>and</strong> also remain wet until the joint is assembled. Prove<br />
this for yourself. Apply on the <strong>to</strong>p surface of a piece of pipe two<br />
separate layers of cement.<br />
First apply a heavy layer of cement; then along side it, apply a thin<br />
brushed out layer. Test the layers every 15 seconds or so by a gentle<br />
tap with your finger. You<br />
will note that the thin<br />
layer becomes tacky<br />
<strong>and</strong> then dries quickly<br />
(probably within 15<br />
seconds); the heavy<br />
layer will remain wet<br />
much longer. A few<br />
minutes after applying<br />
these layers check for<br />
penetration. Scrape the<br />
surface of both with a<br />
knife. The thin layer will<br />
have achieved little or no penetration; the<br />
heavy one will have achieved much more penetration.<br />
If the cement coatings on the pipe <strong>and</strong> fittings are wet <strong>and</strong> fluid<br />
when assembly takes place, they will tend <strong>to</strong> flow <strong>to</strong>gether <strong>and</strong><br />
become one cement layer. Also, if the cement is wet, the surfaces<br />
beneath them will still be soft <strong>and</strong> these softened surfaces in the<br />
tight part of the joint will tend <strong>to</strong> fuse <strong>to</strong>gether. As the solvent<br />
dissipates, the cement layer <strong>and</strong> the softened surfaces will harden<br />
with a corresponding increase in joint strength. A good joint will take<br />
the required working pressure long before the joint is fully dry <strong>and</strong><br />
final joint strength is obtained. In the tight (fused) part of the joint,<br />
strength will develop more quickly than in the looser (bonded) part<br />
of the joint. Information about the development of bond strength of<br />
solvent cemented joints is available in this manual (page 22).
SOLVENT CEMENTING WITH PRIMER<br />
1. Assemble proper materials for the job (proper primer, cement, if<br />
necessary - cleaner, <strong>and</strong> applica<strong>to</strong>r for the size of pipe <strong>and</strong> fittings<br />
<strong>to</strong> be assembled).<br />
2. Pipe must be cut as square<br />
as possible. Use a miter box<br />
saw or power saw. Check<br />
the end of the pipe with a<br />
square <strong>to</strong> make sure it has<br />
been cut squarely. A diagonal<br />
cut reduces bonding area in<br />
the most effective <strong>and</strong> critical<br />
part of the joint.<br />
3. <strong>Plastic</strong> tubing cutters may also be<br />
used for cutting plastic pipe; however,<br />
some produce a raised bead at the end<br />
of the pipe. This bead must be removed<br />
with a file or deburring <strong>to</strong>ol, as it will<br />
scrape the cement away when pipe is<br />
inserted in<strong>to</strong> the fitting.<br />
4. Remove inside diameter burrs or<br />
raised beads with an internal deburring<br />
<strong>to</strong>ol or knife. Remove the burrs or<br />
raised beads on the outside diameter<br />
of the pipe by using a file<br />
or external deburring <strong>to</strong>ol<br />
that will produce a 3 /32”,<br />
10-15° chamfer (bevel).<br />
Burrs can scrape channels<br />
in<strong>to</strong> pre-softened surfaces or<br />
create hang-ups across the<br />
inside fitting diameter.<br />
5. With a clean-dry rag,<br />
remove any dirt, grease,<br />
shavings or moisture from<br />
the inside <strong>and</strong> outside of the<br />
pipe <strong>and</strong> fitting. A thorough<br />
wipe is usually sufficient.<br />
(Moisture will retard cure<br />
<strong>and</strong> dirt, grease, or any<br />
foreign material can<br />
prevent proper fusion).
6. Check pipe <strong>and</strong> fittings for dry fit before cementing. For proper<br />
interference fit, fitting should go over end of pipe easily but become<br />
tight about 1 /3 <strong>to</strong> 2 /3 of the way on. Too tight a fit is not desirable;<br />
you must be able <strong>to</strong> fully bot<strong>to</strong>m the pipe in the socket during<br />
assembly. If the pipe <strong>and</strong> fittings are not out of round, a satisfac<strong>to</strong>ry<br />
joint can be made if there is a “net” fit, that is, the pipe bot<strong>to</strong>ms in<br />
the fitting socket with no interference, but without slop. A quick, dry<br />
fit “slop” test: Hold a short length of pipe vertically with a fitting<br />
“bot<strong>to</strong>med” on the pipe. If the fitting falls off the end of the pipe,<br />
do not start assembly. Contact your pipe or fitting supplier. Measure<br />
the fitting socket length <strong>and</strong> mark this distance on the pipe OD <strong>to</strong><br />
insure the fitting has been<br />
fully inserted, add a couple<br />
inches <strong>to</strong> this distance <strong>and</strong><br />
make a second check mark<br />
on the pipe, as the primer<br />
<strong>and</strong> cement will remove<br />
the first mark. All pipe <strong>and</strong><br />
fittings must conform <strong>to</strong><br />
ASTM or other recognized<br />
product st<strong>and</strong>ards.<br />
7. Use the right applica<strong>to</strong>r<br />
for the size of pipe or<br />
fittings being joined. The<br />
applica<strong>to</strong>r size should be<br />
approximately 1 /2 the pipe<br />
diameter. It is important<br />
that a satisfac<strong>to</strong>ry size<br />
applica<strong>to</strong>r be used <strong>to</strong> help<br />
ensure that sufficient layers<br />
of cement are applied.<br />
8. Priming; the purpose of<br />
a primer is <strong>to</strong> penetrate<br />
<strong>and</strong> soften the surfaces<br />
so they can fuse <strong>to</strong>gether.<br />
The proper use of a primer<br />
<strong>and</strong> checking its softening<br />
capability provides<br />
assurance that the surfaces<br />
are prepared for fusion in a<br />
wide variety of conditions. Check the penetration or softening on a<br />
piece of scrap pipe before you start the installation or if the weather<br />
changes during the day.
Using a knife or other sharp object, drag the edge over the coated<br />
surface. Proper penetration has been made if you can scratch or<br />
scrape a few thous<strong>and</strong>ths of the primed surface away. Because<br />
weather conditions do affect priming <strong>and</strong> cementing action,<br />
repeated applications <strong>to</strong> both surfaces may be necessary. In cold<br />
weather more time is required for proper penetration.<br />
Note:Without hesitation, complete steps 9 through 16.<br />
For pipe diameters of 6” <strong>and</strong> larger, the size of the joining crew<br />
should be increased (see page 13).<br />
9. Using the correct applica<strong>to</strong>r (as outlined in step #7), aggressively<br />
apply the primer in<strong>to</strong> fitting socket, keeping the surface <strong>and</strong><br />
applica<strong>to</strong>r wet until<br />
the surface has<br />
been softened. More<br />
applications may<br />
be needed for hard<br />
surfaces <strong>and</strong> cold<br />
weather conditions.<br />
Re-dip the applica<strong>to</strong>r<br />
in primer as required.<br />
When the surface is<br />
primed, remove any<br />
puddles of primer<br />
from the socket.<br />
10. Next,<br />
aggressively apply<br />
the primer <strong>to</strong> the end<br />
of the pipe <strong>to</strong> a point<br />
1 /2” beyond<br />
the depth of the<br />
fitting socket.<br />
11. Apply a second<br />
application of primer<br />
<strong>to</strong> the fitting socket.<br />
Do not allow primer<br />
<strong>to</strong> run down the<br />
inside of the fitting<br />
or pipe.<br />
12. With the proper size <strong>and</strong> type of applica<strong>to</strong>r, while surfaces are<br />
still wet, immediately apply the appropriate Weld-On cement.
Please Note: The adding of primers, cleaners or other thinners <strong>to</strong><br />
thin the viscosity of solvent cement is not recommended.<br />
13. <strong>Cementing</strong>: (Stir or<br />
shake the cement before<br />
using.) Aggressively<br />
apply a full, even layer of<br />
cement <strong>to</strong> the pipe-end<br />
equal <strong>to</strong> the depth of<br />
the fitting socket – do<br />
not brush it out <strong>to</strong> a thin<br />
paint type layer, as this<br />
will dry <strong>to</strong>o quickly.<br />
14. Aggressively apply a<br />
medium layer of cement<br />
in<strong>to</strong> the fitting socket;<br />
avoid puddling cement in<br />
the socket. On bell-end<br />
pipe do not coat beyond<br />
the socket depth or allow<br />
cement <strong>to</strong> run down in<strong>to</strong><br />
the pipe beyond the bell.<br />
15. Apply a second, full<br />
even layer of cement<br />
on the pipe. Most joint<br />
failures are caused by<br />
insufficient application<br />
of cement.<br />
16. Immediately, while cement is still wet, assemble the pipe <strong>and</strong><br />
fittings. If not completely wet, recoat parts before assembly. If<br />
cement coatings have hardened, cut pipe, dispose of fitting <strong>and</strong> start<br />
over. Do not assemble<br />
partially cured surfaces.<br />
While inserting, twist 1 /8<br />
<strong>to</strong> 1 /4 turn until reaching<br />
pipe s<strong>to</strong>p. Do not<br />
continue <strong>to</strong> rotate after<br />
the pipe has reached the<br />
socket bot<strong>to</strong>m.
17. Hold the pipe <strong>and</strong><br />
fitting <strong>to</strong>gether for a<br />
minimum of 30 seconds<br />
<strong>to</strong> eliminate movement<br />
or pushout.<br />
18. After assembly, a joint should have a ring or bead of cement<br />
completely around the juncture of the pipe <strong>and</strong> fitting. If voids<br />
(gaps) in this ring are present, sufficient cement was not applied<br />
<strong>and</strong> the joint may be defective.<br />
19. Using a rag, remove the excess cement from the pipe <strong>and</strong><br />
fitting, including the ring or bead around the socket entrance, as it<br />
will needlessly soften the pipe <strong>and</strong> fitting, <strong>and</strong> does not add <strong>to</strong> joint<br />
strength. Excess cement around the socket entrance will also extend<br />
the cure time. Avoid disturbing or moving the joint.<br />
20. H<strong>and</strong>le newly assembled joints carefully until initial set has<br />
taken place. Follow IPS Weld-On set <strong>and</strong> cure times before h<strong>and</strong>ling<br />
or hydro-testing piping system (for set <strong>and</strong> cure times refer <strong>to</strong><br />
page 22).
SOLVENT CEMENTING WITHOUT PRIMER<br />
If local codes permit, successful joints can be made without a<br />
primer using cement alone, but extra care must be given <strong>to</strong> the<br />
installation. It is important that a good interference fit exists<br />
between the pipe <strong>and</strong> fittings. It is for this reason we recommend<br />
that joints being made without a primer be limited <strong>to</strong> systems 2”<br />
<strong>and</strong> smaller for pressure applications (water systems only) or 6”<br />
<strong>and</strong> smaller for DWV or non-pressure applications. (Check local<br />
code requirements.)<br />
Extra care must also be given in applying the cements <strong>to</strong> make sure<br />
proper penetration <strong>and</strong> softening of the pipe <strong>and</strong> fitting surfaces is<br />
achieved.<br />
BEFORE CEMENTING<br />
1. Review all directions on the cement container label or the<br />
st<strong>and</strong>ard practice for making solvent cemented joints (ASTM D-2855).<br />
2. Assemble proper materials for the job (proper cement, if<br />
necessary - cleaner, <strong>and</strong> applica<strong>to</strong>r for the size of pipe <strong>and</strong> fittings<br />
<strong>to</strong> be assembled).<br />
3. Pipe must be cut as square as possible . Use a miter box saw or<br />
power saw. Check the end of the pipe with a square <strong>to</strong> make sure it<br />
has been cut squarely. A diagonal cut reduces bonding area in the<br />
most effective <strong>and</strong> critical part of the joint.<br />
4. <strong>Plastic</strong> tubing cutters may also be used for cutting plastic pipe;<br />
however, some produce a raised bead at the end of the pipe. This<br />
bead must be removed with a file or deburring <strong>to</strong>ol, as it will scrape<br />
the cement away when pipe is inserted in<strong>to</strong> the fitting.<br />
5. Remove inside diameter burrs or raised beads with an internal<br />
deburring <strong>to</strong>ol or knife. Remove the burrs or raised beads on the<br />
outside diameter of the pipe by using a file or external deburring<br />
<strong>to</strong>ol that will produce a 3 /32”, 10-15° chamfer (bevel). Burrs can<br />
scrape channels in<strong>to</strong> pre-softened surfaces or create hang-ups<br />
across the inside fitting diameter.<br />
6. With a clean-dry rag, remove any dirt, grease, shavings or<br />
moisture from the inside <strong>and</strong> outside the pipe <strong>and</strong> fitting. A<br />
thorough wipe is usually sufficient. (Moisture will retard cure <strong>and</strong><br />
dirt, grease, or any foreign material can prevent proper fusion).<br />
7. Check pipe <strong>and</strong> fittings for dry fit before cementing. For proper<br />
interference fit, fitting should go over end of pipe easily but become<br />
tight about 1 /3 <strong>to</strong> 2 /3 of the way on. Too tight a fit is not desirable;<br />
10
11<br />
you must be able <strong>to</strong> fully bot<strong>to</strong>m the pipe in the socket during<br />
assembly. If the pipe <strong>and</strong> fittings are not out of round, a satisfac<strong>to</strong>ry<br />
joint can be made if there is a “net” fit, that is, the pipe bot<strong>to</strong>ms in<br />
the fitting socket with no interference, but without slop. A quick, dry<br />
fit “slop” test: Hold a short length of pipe vertically with a fitting<br />
“bot<strong>to</strong>med” on the pipe. If the fitting falls off the end of the pipe,<br />
do not start assembly. Contact your pipe or fitting supplier. (A good<br />
interference fit is desired for a one-step application.) Measure the<br />
fitting socket length <strong>and</strong> mark this distance on the pipe O.D. <strong>to</strong><br />
insure the fitting had been fully inserted, add a couple inches <strong>to</strong> this<br />
distance <strong>and</strong> make a second check mark on the pipe, as the primer<br />
<strong>and</strong> cement will remove the first mark. All pipe <strong>and</strong> fittings must<br />
conform <strong>to</strong> ASTM or other recognized product st<strong>and</strong>ards.<br />
8. Check for penetration <strong>and</strong> softening of the pipe’s surface. Take<br />
a scrap piece of the pipe you will be using <strong>and</strong> make a normal<br />
application of the cement. Then immediately, using a knife or other<br />
sharp object, try <strong>to</strong> scratch or scrape a few thous<strong>and</strong>ths of the<br />
surface away. If you are able <strong>to</strong> do so, proceed with installation. If<br />
not, try making a more aggressive application of the cement on the<br />
scrap piece of pipe <strong>and</strong> check for penetrations noted above. If you<br />
still are unable <strong>to</strong> achieve penetration or softening of the pipe’s<br />
surface, you may want <strong>to</strong> consider the use of a primer.<br />
9. Use the right applica<strong>to</strong>r for the size of pipe or fittings being<br />
joined. The applica<strong>to</strong>r size should be approximately 1 /2 the pipe<br />
diameter. It is important that a satisfac<strong>to</strong>ry size applica<strong>to</strong>r be used<br />
<strong>to</strong> help ensure that sufficient layers of cement are applied.<br />
Please Note:The adding of primers, cleaners or other thinners <strong>to</strong><br />
thin the viscosity of solvent cement is not recommended.<br />
Without hesitation, complete steps 10 through 16.<br />
For pipe diameters of 6” <strong>and</strong> larger, the size of the joining crew<br />
should be increased (see page 13).<br />
10. <strong>Cementing</strong>: (Stir or shake the cement before using.)<br />
Aggressively apply a full, even layer of cement <strong>to</strong> the pipe-end equal<br />
<strong>to</strong> the depth of the fitting socket - do not brush it out <strong>to</strong> a thin paint<br />
type layer, as this will dry <strong>to</strong>o quickly.<br />
11. Aggressively apply a medium layer of cement in<strong>to</strong> the fitting<br />
socket; avoid puddling cement in the socket. On bell-end pipe do<br />
not coat beyond the socket depth or allow cement <strong>to</strong> run down in<strong>to</strong><br />
the pipe beyond the bell.<br />
12. Apply a second full, even layer of cement on the pipe. Most joint<br />
failures are caused by insufficient application of cement.
13. Immediately, while cement is still wet, assemble the pipe <strong>and</strong><br />
fittings. If not completely wet, recoat parts before assembly. If<br />
cement coatings have hardened, cut pipe, dispose of fitting <strong>and</strong><br />
start over. Do not assemble partially cured surfaces. While inserting,<br />
twist 1 /8 <strong>to</strong> 1 /4 turn until reaching pipe s<strong>to</strong>p. Do not continue <strong>to</strong><br />
rotate after the pipe has reached the socket bot<strong>to</strong>m.<br />
14. Hold the pipe <strong>and</strong> fitting <strong>to</strong>gether for a minimum of 30 seconds<br />
<strong>to</strong> eliminate movement or pushout.<br />
15. After assembly, a joint should have a ring or bead of cement<br />
completely around the juncture of the pipe <strong>and</strong> fitting. If voids<br />
(gaps) in this ring are present, sufficient cement was not applied<br />
<strong>and</strong> the joint may be defective.<br />
16. Using a rag, remove the excess cement from the pipe <strong>and</strong><br />
fitting, including the ring or bead around the socket entrance, as it<br />
will needlessly soften the pipe <strong>and</strong> fitting, <strong>and</strong> does not add <strong>to</strong> joint<br />
strength. Excess cement around the socket entrance will also extend<br />
the cure time. Avoid disturbing or moving the joint.<br />
17. H<strong>and</strong>le newly assembled joints carefully until initial set has<br />
taken place. Follow IPS Weld-On set <strong>and</strong> cure times before h<strong>and</strong>ling<br />
or hydro-testing piping system (for set <strong>and</strong> cure times, refer <strong>to</strong><br />
page 22).<br />
JOINING LARGE DIAMETER PIPE AND FITTINGS<br />
(6” Diameter <strong>and</strong> Larger)<br />
As pipe diameter increases, so does the difficulty in installing it. The<br />
professional installer should be able <strong>to</strong> successfully assemble large<br />
diameter pipe <strong>and</strong> fittings by following the IPS Weld-On <strong>Solvent</strong><br />
<strong>Cementing</strong> with Primer instructions listed in the beginning of this<br />
guide along with the following additional recommendations.<br />
1. Use of proper size applica<strong>to</strong>rs is even more necessary <strong>to</strong> insure<br />
enough cement is applied <strong>to</strong> fill the larger gap that exists between<br />
the pipe <strong>and</strong> fittings.<br />
2. Of equal importance is the use of the applicable cement for<br />
the size of pipe <strong>and</strong> fittings being installed. We recommend the<br />
following:<br />
up <strong>to</strong> 12” <strong>PVC</strong> Sch 40 or Sch 80 - Weld-On #717, #711,<br />
#2711, #2717<br />
up <strong>to</strong> 30” <strong>PVC</strong> Sch 40 or Sch 80 - Weld-On #719, #2719<br />
up <strong>to</strong> 12” C<strong>PVC</strong> - Weld-On #714, #2714, #724<br />
up <strong>to</strong> 24” C<strong>PVC</strong> Duct - Weld-On #729<br />
12
3. End of pipe must be cut square <strong>and</strong><br />
chamfered (beveled). (See pho<strong>to</strong> at right.)<br />
4. Increase size of joining crew:<br />
6”- 8”: 2-3 people per joint<br />
10”- 30”: 3-4 people per joint<br />
It is important in large diameter joining<br />
that the primer <strong>and</strong> cement be applied<br />
simultaneously <strong>to</strong> the pipe <strong>and</strong> fittings.<br />
5. Make sure <strong>to</strong> apply a second,<br />
full layer of cement <strong>to</strong> the pipe.<br />
6. Because of the short sockets in<br />
many large diameter fittings, IT IS VERY<br />
IMPORTANT TO HAVE PIPE BOTTOMED<br />
INTO THE FITTING. Large diameter pipe<br />
is heavy <strong>and</strong> can develop significant<br />
resistance during insertion, before<br />
reaching socket bot<strong>to</strong>m. It is for this<br />
reason that we recommend above 4”<br />
diameter the use of a pipe-puller such<br />
as the one pictured. (Available at IPS<br />
Weld-On).<br />
7. Large diameter pipe <strong>and</strong> fittings require longer set <strong>and</strong> cure times.<br />
*(In cold weather, a heat blanket may be used <strong>to</strong> speed up the<br />
set <strong>and</strong> cure times.)<br />
8. Prefabricate as many joints as possible.<br />
9. If pipe is <strong>to</strong> be buried, make as many joints as possible above<br />
ground, then after joints have cured, carefully lower in<strong>to</strong> trench.<br />
10. Never bury empty cans, brushes, or anything else containing<br />
wet cement, primer, or cleaner next <strong>to</strong> the pipe.<br />
* Contact the IPS Technical Service Department for further<br />
information: 800-421-2677.<br />
13
CHEMICAL APPLICATIONS<br />
Installations of plastic pipe <strong>and</strong> fittings for chemical applications<br />
requires a higher degree of skill than other installations; joint<br />
failures in these systems could be life threatening. It is for this<br />
reason we recommend the following tips for these applications.<br />
Tips for Installation:<br />
1. Installers should attend an IPS Weld-On Installation Seminar.<br />
2. Allow at least two <strong>to</strong> three times the normal set <strong>and</strong> cure times<br />
on page 22.<br />
3. Flush system before putting in<strong>to</strong> operation.<br />
4. Installers should use extra care during assembly <strong>to</strong> insure<br />
proper installation of system.<br />
5. Make sure the proper cement for the specific application is used.<br />
6. If there is any doubt about compatibility of materials<br />
(pipe, fittings or cement) with chemicals in system,<br />
manufacturers of materials should be contacted.<br />
REPAIRS<br />
For over forty years, we have been manufacturing solvent cements<br />
<strong>and</strong> have had the opportunity <strong>to</strong> evaluate numerous joint failures,<br />
visit many job sites <strong>and</strong> witness numerous attempts at repairing<br />
leaking joints (most do not work).<br />
Taking in<strong>to</strong> consideration the cost of materials, time involved <strong>and</strong><br />
labor costs, in most cases the installer is better off cutting out the<br />
defective joint, replacing it with new materials <strong>and</strong> taking greater<br />
care in the joining process.<br />
If the joint cannot be cut out, the following repair has been<br />
found <strong>to</strong> be somewhat successful.<br />
This repair is for leaks only, not cases where pipe<br />
has separated from fitting:<br />
1. Clean area around leak - area must be free from soil,<br />
grease or chemical residue.<br />
2. Shut-off source of leak - area must be dry.<br />
3. Use Weld-On #810 or #811 <strong>and</strong> fiberglass cloth. Mix #810 or #811.<br />
4. Apply #810 or #811 <strong>to</strong> area of leak; cover area with fiberglass<br />
cloth. Then cover complete area with second application of #810<br />
or #811. This is not a guaranteed fix, but one that has proven <strong>to</strong> be<br />
very successful in most applications.<br />
14
JOINING PLASTIC PIPE IN HOT WEATHER<br />
There are many occasions when solvent cementing plastic pipe at<br />
95°F (38°C) temperatures <strong>and</strong> above cannot be avoided. If special<br />
precautions are taken, problems can be avoided.<br />
<strong>Solvent</strong> cements for plastic pipe contain high strength solvents<br />
which evaporate faster at elevated temperatures. This is especially<br />
true when there is a hot wind blowing. If the pipe is s<strong>to</strong>red in direct<br />
sunlight, the pipe surface temperatures may be from 20°F <strong>to</strong> 30°F<br />
(10°C <strong>to</strong> 15°C) higher than the ambient temperature. <strong>Solvent</strong>s<br />
attack these hot surfaces faster <strong>and</strong> deeper, especially inside a<br />
joint. Therefore, it is very important <strong>to</strong> avoid puddling the cement<br />
inside the fitting socket <strong>and</strong> <strong>to</strong> wipe off any excess cement outside<br />
the joint.<br />
By following our st<strong>and</strong>ard instructions <strong>and</strong> using a little extra care,<br />
as outlined below, successful solvent cemented joints can be made<br />
in even the most extreme hot weather conditions.<br />
Tips <strong>to</strong> Follow when <strong>Solvent</strong> <strong>Cementing</strong> in High<br />
Temperatures:<br />
1. S<strong>to</strong>re solvent cements <strong>and</strong> primers in a cool or shaded area<br />
prior <strong>to</strong> use.<br />
2. If possible, s<strong>to</strong>re fittings <strong>and</strong> pipe or at least the ends <strong>to</strong> be<br />
solvent welded, in a shady area before cementing.<br />
3. Cool the surfaces <strong>to</strong> be joined by wiping with a damp rag. Make<br />
sure that surface is dry prior <strong>to</strong> applying solvent cement.<br />
4. Try <strong>to</strong> do the solvent cementing during the cooler morning hours.<br />
5. Make sure that both surfaces <strong>to</strong> be joined are still wet with<br />
cement when putting them <strong>to</strong>gether. With large diameter pipe,<br />
more people on the crew may be necessary.<br />
6. Using a primer <strong>and</strong> a heavier, high viscosity cement will<br />
provide a little more working time. Vigorously shake or stir the<br />
cement before using.<br />
As you know, during hot weather there can be a greater<br />
expansion-contraction fac<strong>to</strong>r. We suggest you follow the advice of<br />
the pipe manufacturer regarding this condition. Anchored, <strong>and</strong> final<br />
connections should be made during the cooler hours of the day.<br />
By using Weld-On products as recommended <strong>and</strong> by following<br />
these hot weather tips, making strong, leakproof joints even during<br />
very hot weather conditions can be achieved.<br />
15
JOINING PLASTIC PIPE AND<br />
FITTINGS IN COLD WEATHER<br />
Working in freezing temperatures is never easy. But sometimes the<br />
job is necessary. If that unavoidable job includes solvent cementing<br />
plastic pipe, you can do it successfully with IPS Weld-On <strong>Solvent</strong><br />
Cements.<br />
By following our st<strong>and</strong>ard instructions <strong>and</strong> using a little extra care<br />
as outlined below, successful solvent cemented joints can be made<br />
at temperatures even as low as -15°F (-26°C). In cold weather,<br />
solvents penetrate <strong>and</strong> soften the plastic pipe <strong>and</strong> fitting surfaces<br />
more slowly than in warm weather. Also the plastic is more resistant<br />
<strong>to</strong> solvent attack. Therefore it becomes even more important <strong>to</strong><br />
presoften surfaces with an aggressive primer. And, because of<br />
slower evaporation, a longer cure time is necessary. Our cure<br />
schedules allow a margin for safety, but for colder weather more<br />
time should be allowed.<br />
Tips <strong>to</strong> Follow in <strong>Solvent</strong> <strong>Cementing</strong> during Cold<br />
Weather:<br />
1. Prefabricate as much of the system as is possible in a heated<br />
work area.<br />
2. S<strong>to</strong>re cements <strong>and</strong> primers in a warmer area when not in use <strong>and</strong><br />
make sure they remain fluid. If possible, s<strong>to</strong>re the fittings & valves<br />
the same way.<br />
3. Take special care <strong>to</strong> remove moisture including ice <strong>and</strong> snow<br />
from the surfaces <strong>to</strong> be joined, especially from around the ends<br />
of the pipe.<br />
4. Use the most aggressive Weld-On Primer available <strong>to</strong> soften the<br />
joining surfaces before applying cement. More than one application<br />
may be necessary.<br />
5. Vigorously shake or stir cement before using. Allow a longer cure<br />
period before the system is tested <strong>and</strong> used.<br />
*A heat blanket may be used <strong>to</strong> speed up the set <strong>and</strong> cure times.<br />
6. Read <strong>and</strong> follow all of our directions carefully before installation.<br />
All Weld-On cements are formulated <strong>to</strong> have well balanced<br />
drying characteristics <strong>and</strong> <strong>to</strong> have good stability in subfreezing<br />
temperatures.<br />
For all practical purposes, good solvent cemented joints can be made<br />
in very cold conditions with proper care <strong>and</strong> a little common sense.<br />
*Contact the IPS Technical Service Department for additional<br />
information: 800-421-2677.<br />
16
17<br />
HELPFUL HINTS<br />
We are all aware that a properly cemented joint is a most critical<br />
part of the installation of plastic pipe <strong>and</strong> fittings. And no matter<br />
how many times we join pipe <strong>and</strong> fittings, it’s very easy <strong>to</strong> overlook<br />
something. So, we just want <strong>to</strong> remind you of a few things you may<br />
already know.<br />
1. Have you reviewed all of the instructions on the cement<br />
container label or in ASTM D-2855?<br />
2. Are you using the proper cement for the job... for the type <strong>and</strong><br />
size of pipe <strong>and</strong> correct fittings being joined?<br />
3. Do you need <strong>to</strong> take special precautions because of unusual<br />
weather conditions?<br />
4. Do you have sufficient manpower? Do you need more help <strong>to</strong><br />
maintain proper alignment <strong>and</strong> <strong>to</strong> bot<strong>to</strong>m pipe in fitting?<br />
5. Do you have the proper <strong>to</strong>ols, applica<strong>to</strong>rs <strong>and</strong> sufficient<br />
quantities of Weld-On cements <strong>and</strong> primer <strong>and</strong> is cement in good<br />
condition?<br />
Please Note:The adding of primers, cleaners or other thinners <strong>to</strong><br />
thin the viscosity of solvent cement is not recommended.<br />
6. Remember, primer is NOT <strong>to</strong> be used on ABS pipe or fittings.<br />
7. Be sure <strong>to</strong> use a large enough applica<strong>to</strong>r <strong>to</strong> quickly spread<br />
cement generously on pipe <strong>and</strong> fittings. Then assemble immediately.<br />
8. Avoid puddling excess primer <strong>and</strong> cement inside the fitting<br />
socket, especially on thin wall, bell-end <strong>PVC</strong> pipe <strong>and</strong> ABS in any<br />
schedule.<br />
9. Do NOT allow primer or cement <strong>to</strong> run through a valve-socket<br />
in<strong>to</strong> the valve body. The solvents can cause damage <strong>to</strong> interior valve<br />
components <strong>and</strong> cause valve malfunction.<br />
10. Be aware at all times of good safety practices. <strong>Solvent</strong> cements<br />
for pipe <strong>and</strong> fittings are flammable, so there should be no smoking<br />
or other sources of heat, spark or flame in working or s<strong>to</strong>rage<br />
areas. Be sure <strong>to</strong> work only in a well ventilated space <strong>and</strong> avoid<br />
unnecessary skin contact with all solvents. More detailed safety<br />
information is available from us.<br />
11. Take advantage of our free literature on joining techniques.<br />
We offer DVDs/CDs on joining <strong>PVC</strong> & C<strong>PVC</strong> pipe <strong>and</strong> fittings, a<br />
car<strong>to</strong>on booklet illustrating joining <strong>and</strong> installation methods <strong>and</strong><br />
individual bulletins. We also offer joining seminars <strong>and</strong> job site<br />
training. Call the IPS Technical Service Department for more details.<br />
12. Finally, we remind you <strong>to</strong> INSIST ON WELD-ON!
For over 40 years, millions of solvent<br />
cemented joints have been made with<br />
CAUTION<br />
only rare cases of mishap. However, since<br />
flammable <strong>and</strong> <strong>to</strong>xic solvents are part of<br />
these products, appropriate safety precautions should be used.<br />
All solvent cements <strong>and</strong> primers for plastic pipe are flammable<br />
<strong>and</strong> should not be used or s<strong>to</strong>red near heat, spark, open flame <strong>and</strong><br />
other sources of ignition. Vapors may ignite explosively. <strong>Solvent</strong><br />
cement vapors are heavier than air <strong>and</strong> may travel <strong>to</strong> source(s)<br />
of ignition at or near ground or lower level(s) <strong>and</strong> flash back.<br />
Keep container closed when not in use <strong>and</strong> covered as much<br />
as possible when in use. Avoid breathing of vapors. Use only in<br />
well-ventilated area. If confined or partially enclosed, use forced<br />
ventilation. When necessary, use local exhaust ventilation <strong>to</strong><br />
remove harmful airborne contaminants from employee breathing<br />
zone <strong>and</strong> <strong>to</strong> keep contaminates below 25 ppm TWA. Atmospheric<br />
levels must be maintained below established exposure limits<br />
contained in Section II of the Material Safety Data Sheet (MSDS).<br />
If airborne concentrations exceed those limits, use of a NIOSH<br />
approved organic vapor cartridge respira<strong>to</strong>r with full face-piece is<br />
recommended. The effectiveness of an air-purifying respira<strong>to</strong>r is<br />
limited. Use it only for a single short-term exposure. For emergency<br />
<strong>and</strong> other conditions where short-term exposure guidelines may<br />
be exceeded, use an approved positive pressure self-contained<br />
breathing apparatus.<br />
Do not smoke, eat or drink while working with this product. Avoid<br />
contact with skin, eyes <strong>and</strong> clothing. Wash clothing if contaminated<br />
<strong>and</strong> before reuse. May cause eye injury. Protective equipment such<br />
as gloves, goggles <strong>and</strong> impervious apron should be used. Keep out<br />
of reach of children. Do not take internally. Carefully read Material<br />
Safety Data Sheet <strong>and</strong> follow all precautions. Do not use this<br />
product for other than intended use.<br />
FIRST AID<br />
Inhalation: If ill effects occur from inhalation, remove <strong>to</strong> fresh air. If<br />
not breathing, give artificial respiration. If breathing is difficult, give<br />
oxygen. Call a physician.<br />
Eye Contact: Flush abundantly with flowing water for 15 minutes<br />
<strong>and</strong> call a physician.<br />
Skin Contact:Wash skin with plenty of soap <strong>and</strong> water for at least<br />
15 minutes. If irritation develops, get medical attention.<br />
Ingestion:If swallowed, give 1 <strong>to</strong> 2 glasses of water or milk,<br />
DO NOT INDUCE VOMITING. Contact physician immediately.<br />
18
SPECIAL PRECAUTIONS<br />
IPS WELD-ON SOLVENT CEMENTS MUST NEVER BE USED IN A <strong>PVC</strong><br />
OR C<strong>PVC</strong> SYSTEM USING OR BEING TESTED BY COMPRESSED AIR<br />
OR GASES! NOTE: Pressurized (compressed) air or other compressed<br />
gases contain large amounts of s<strong>to</strong>red energy which present serious<br />
safety hazards should a system fail for any reason.<br />
Do not use any type of dry granular calcium hypochlorite as<br />
a disinfecting material for water purification in potable water<br />
piping systems. The introduction of granules or pellets of calcium<br />
hypochlorite with <strong>PVC</strong> <strong>and</strong> C<strong>PVC</strong> solvent cements <strong>and</strong> primers<br />
(including their vapors) may result in a violent chemical reaction if a<br />
water solution is not used. It is advisable <strong>to</strong> purify lines by pumping<br />
chlorinated water in<strong>to</strong> the piping system-this solution will be<br />
nonvolatile. Furthermore, dry granular calcium should not be s<strong>to</strong>red<br />
or used near solvent cements <strong>and</strong> primers. All systems should be<br />
flushed before start-up <strong>to</strong> remove excess fumes from piping system.<br />
New or repaired potable water systems shall be purged of<br />
deleterious matter <strong>and</strong> disinfected prior <strong>to</strong> utilization. The method<br />
<strong>to</strong> be followed shall be that prescribed by the health authority<br />
having jurisdiction or, in the absence of a prescribed method, the<br />
procedure described in either AWWA C651 or AWWA C652.<br />
USE CAUTION WITH WELDING TORCHES<br />
At construction sites where plastic pipe is being installed or has<br />
recently been solvent welded, extreme caution should be taken<br />
when using welding <strong>to</strong>rches or other equipment where sparks may<br />
be involved. Flammable vapors from cemented joints sometimes<br />
linger within or around a piping system for some time.<br />
Special care must be taken when using a welding <strong>to</strong>rch in<br />
these installations:<br />
A. Well casing, eleva<strong>to</strong>r shafts <strong>and</strong> other confined areas.<br />
B. Installing pumps in irrigation water lines.<br />
C. <strong>Plastic</strong> pipe systems in industrial plant areas with little<br />
or no air circulation.<br />
In all cases, solvent vapors must be removed by air circulation,<br />
purging, or other means prior <strong>to</strong> the use of welding <strong>to</strong>rches,<br />
or other spark or flame generating equipment or procedures.<br />
19
STORAGE AND HANDLING<br />
S<strong>to</strong>re in the shade between 40°F <strong>and</strong> 110°F (5°C <strong>and</strong> 44°C) or as<br />
specified on label. Keep away from heat, spark, open flame <strong>and</strong> other<br />
sources of ignition. Keep container closed when not in use. If the<br />
unopened container is subjected <strong>to</strong> freezing, it may become extremely<br />
thick or jelled. This cement can be placed in a warm area, where after<br />
a period of time, it will return <strong>to</strong> its original, usable condition. But<br />
such is not the case when jelling has taken place because of actual<br />
solvent loss – for example, when the container was left open <strong>to</strong>o long<br />
during use or not properly sealed after use. Cement in this condition<br />
should not be used <strong>and</strong> should be properly discarded.<br />
IPS Weld-On solvent cements are formulated <strong>to</strong> be used “as<br />
received” in original containers. Adding thinners or primers <strong>to</strong> change<br />
viscosity is not recommended. If the cement is found <strong>to</strong> be jelly-like<br />
<strong>and</strong> not free flowing, it should not be used. Containers of cement<br />
should be shaken or stirred before using. Do not shake primers.<br />
LISTING ORGANIZATIONS<br />
IPS Weld-On products are manufactured <strong>and</strong><br />
inspected <strong>to</strong> the national st<strong>and</strong>ards listed below.<br />
IAPMO, CSA, NSF, ASTM St<strong>and</strong>ards<br />
F-656 Primers<br />
D-2235 ABS <strong>Solvent</strong> Cements<br />
D-2846 C<strong>PVC</strong> <strong>Solvent</strong> Cements<br />
F-493 C<strong>PVC</strong> <strong>Solvent</strong> Cements<br />
D-2564 <strong>PVC</strong> <strong>Solvent</strong> Cements<br />
D-3138 Transition Cements<br />
Other IPS Weld-On Installation Information Includes:<br />
DVDs/CDs - Available in English or Spanish<br />
Car<strong>to</strong>on Books - Available in English or Spanish<br />
Basic Principles Bulletin<br />
General Safety Bulletin<br />
Helpful Hints Bulletin<br />
Cold Weather Installation Bulletin<br />
Hot Weather Installation Bulletin<br />
Job Site Training<br />
WARNING - IPS Weld-On products must never<br />
be used in a <strong>PVC</strong> or C<strong>PVC</strong> system using or being<br />
tested by compressed air or gases.<br />
20
Nominal<br />
Pipe Size<br />
in.<br />
mm.<br />
1/2 3/4 1 1 1 /4 1 1 /2 2 2 1 /2 3 4 6 8 10 12 14 24 30<br />
15 20 25 32 40 50 65 80 100 150 200 250 300 350 600 750<br />
21<br />
Multi-<br />
Purpose Primers<br />
Extra<br />
<strong>PVC</strong> C<strong>PVC</strong> ABS<br />
SpecialtyCements<br />
Heavy<br />
Body<br />
HeavyBody<br />
MediumBody<br />
RegularBody<br />
Nominal<br />
Pipe Size<br />
P75<br />
P70<br />
P68<br />
796**<br />
794**<br />
2794**<br />
793**<br />
790*<br />
2790*<br />
773<br />
2773<br />
771<br />
2771<br />
All Weather<br />
Flow†ª<br />
Guard Gold<br />
Flow†ª<br />
Guard<br />
Gold<br />
729<br />
724<br />
714<br />
2714<br />
713<br />
795<br />
2795<br />
747 †<br />
2747 †<br />
737 †<br />
2737 †<br />
735 †<br />
2735 †<br />
727 †<br />
725 †<br />
2725 †<br />
719<br />
2719<br />
717 §<br />
2717 §<br />
711<br />
2711<br />
721 †<br />
2721 †<br />
705 †<br />
2705 †<br />
704 †<br />
2704 †<br />
710<br />
702<br />
700<br />
2700<br />
in.<br />
mm.<br />
***CTS<br />
***CTS<br />
***CTS<br />
*<strong>PVC</strong>,C<strong>PVC</strong>,ABS<strong>and</strong>Styrene<br />
**ABS<strong>to</strong><strong>PVC</strong><br />
***CopperTubeSize<br />
ªFlowGuardGold ® isaregistered<br />
trademarkofNoveon,Inc.<br />
†Canbeusedwithouta<br />
primerwithfittingshaving<br />
aninterferencefit(unless<br />
requiredbylocalcode).<br />
Schedule 40<br />
Schedule 80<br />
§ non-pressure<br />
onlyup<strong>to</strong>18”<br />
1/2 3/4 1 1 1 /4 1 1 /2 2 2 1 /2 3 4 6 8 10 12 14 24 30<br />
15 20 25 32 40 50 65 80 100 150 200 250 300 350 600 750
Average Initial Set Schedule <br />
For WELD-ON <strong>PVC</strong> / C<strong>PVC</strong> <strong>Solvent</strong> Cements**<br />
Temperature<br />
Range<br />
Pipe Sizes<br />
/2” <strong>to</strong> 1 1 /4”<br />
Pipe Sizes<br />
1 1 /2” <strong>to</strong> 2”<br />
Pipe Sizes<br />
2 1 /2” <strong>to</strong> 8”<br />
Pipe Sizes<br />
10” <strong>to</strong> 15”<br />
Pipe Sizes<br />
15”+<br />
60°-100°F 2 minutes 5 minutes 30 minutes 2 hours 4 hours<br />
40°-60°F 5 minutes 10 minutes 2 hours 8 hours 16 hours<br />
0°-40°F 10 minutes 15 minutes 12 hours 24 hours 48 hours<br />
Note - Initial set schedule is the necessary time <strong>to</strong> allow before the<br />
joint can be carefully h<strong>and</strong>led. In damp or humid weather allow 50%<br />
more set time.<br />
Relative<br />
Humidity<br />
60% or Less<br />
Temperature<br />
range during<br />
assembly <strong>and</strong><br />
cure periods<br />
Average Joint Cure Schedule <br />
For WELD-ON <strong>PVC</strong> / C<strong>PVC</strong> <strong>Solvent</strong> Cements**<br />
Cure Time<br />
Pipe Sizes<br />
1 /2” <strong>to</strong> 1 1 /4”<br />
above<br />
up <strong>to</strong> 160 psi<br />
160 <strong>to</strong> 370<br />
psi psi<br />
Cure Time<br />
Pipe Sizes<br />
1 1 /2” <strong>to</strong> 2”<br />
up <strong>to</strong><br />
160<br />
psi<br />
above<br />
160 psi<br />
<strong>to</strong> 315<br />
psi<br />
Cure Time<br />
Pipe Sizes<br />
2 1 /2” <strong>to</strong> 8”<br />
up <strong>to</strong><br />
160<br />
psi<br />
above<br />
160 psi<br />
<strong>to</strong> 315<br />
psi<br />
Cure Time<br />
Pipe Sizes<br />
10” <strong>to</strong> 15”<br />
up <strong>to</strong><br />
100 psi<br />
Cure Time<br />
Pipe Sizes<br />
15”+<br />
up <strong>to</strong><br />
100 psi<br />
60°-100°F 15 min 6 hrs 30 min 12 hrs 1 1 /2 hrs 24 hrs 48 hrs 72 hrs<br />
40°-60°F 20 min 12 hrs 45 min 24 hrs 4 hrs 48 hrs 96 hrs 6 days<br />
0°-40°F 30 min 48 hrs 1 hour 96 hrs 72 hrs 8 days 8 days 14 days<br />
Note - Joint cure schedule is the necessary time <strong>to</strong> allow before pressurizing<br />
system. In damp or humid weather allow 50% more cure time.<br />
**These figures are estimates based on our labora<strong>to</strong>ry tests; extended set<br />
<strong>and</strong> cure times are required for chemical applications. Due <strong>to</strong> the many<br />
variables in the field, these figures should be used as a general guide only.<br />
Average Number of Joints/Qt. of WELD-ON Cement*<br />
Pipe Diameter 1 /2” 3 /4” 1” 1 /2” 2” 3” 4” 6” 8” 10” 12” 15” 18”<br />
Number of Joints 300 200 125 90 60 40 30 10 5 2-3 1-2 3 /4 1 /2<br />
*For Primer: Double the number of joints shown for cement.<br />
These figures are estimates based on our labora<strong>to</strong>ry tests. Due <strong>to</strong> the<br />
many variables in the field, these figures should be used as a general<br />
guide only. Note: 1 Joint = 1 Socket<br />
Fahrenheit <strong>to</strong> Celsius Conversion Chart<br />
web site: www.ipscorp.com<br />
22
Warehouse/Sales/Marketing<br />
455 W. Vic<strong>to</strong>ria Street<br />
Comp<strong>to</strong>n, CA 90220 U.S.A.<br />
Tel: (310) 898-3300<br />
Toll Free: (800) 421-2677<br />
Fax: (310) 898-3390<br />
Warehouse Only:<br />
600 Ellis Road<br />
Durham, NC 27703 U.S.A.<br />
202 Industrial Park Lane<br />
Collierville, TN 38027 U.S.A.<br />
Tel: (901) 853-5001<br />
Toll Free: (800) 888-8312<br />
Fax: (901) 853-5008<br />
E-Mail: info@ipscorp.com<br />
Web site: www.ipscorp.com<br />
WELD-ON Products Distributed by:<br />
© IPS 02/06 VPD


