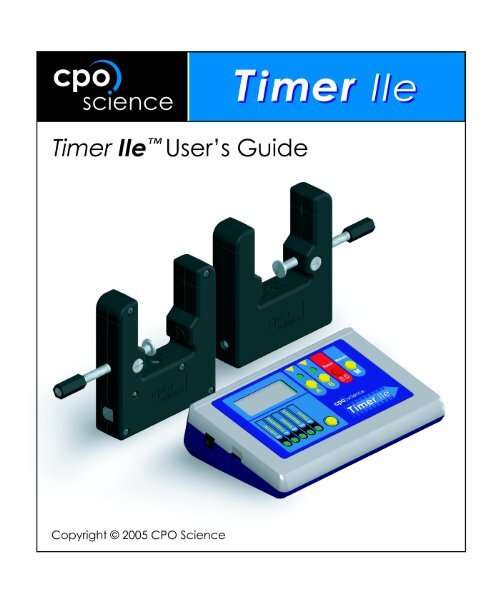
Timer II Instruction Manual - CPO Science
Timer II Instruction Manual - CPO Science
Timer II Instruction Manual - CPO Science

Create successful ePaper yourself
Turn your PDF publications into a flip-book with our unique Google optimized e-Paper software.
<strong>Timer</strong> designed by:<br />
Dr. Thomas C. Hsu<br />
Thomas S. Narro<br />
David Zucker<br />
Darren Garnier<br />
4/05<br />
Copyright © 2005 <strong>CPO</strong> <strong>Science</strong>
Table of Contents<br />
Introduction . . . . . . . . . . . . . . . . . . . . . . . . . . . . . . . . . . . . . . . . . . . . . . . . . . . . . . . . 1<br />
What’s New? . . . . . . . . . . . . . . . . . . . . . . . . . . . . . . . . . . . . . . . . . . . . . . . . . . . . . . . . . . . 1<br />
Kit Contents . . . . . . . . . . . . . . . . . . . . . . . . . . . . . . . . . . . . . . . . . . . . . . . . . . . . . . . . 2<br />
Using the <strong>Timer</strong> . . . . . . . . . . . . . . . . . . . . . . . . . . . . . . . . . . . . . . . . . . . . . . . . . . . . 3<br />
Warnings and Precautions . . . . . . . . . . . . . . . . . . . . . . . . . . . . . . . . . . . . . . . . . . . . . . . . . 3<br />
The Photogate . . . . . . . . . . . . . . . . . . . . . . . . . . . . . . . . . . . . . . . . . . . . . . . . . . . . . . . . . . 6<br />
Stopwatch Mode . . . . . . . . . . . . . . . . . . . . . . . . . . . . . . . . . . . . . . . . . . . . . . . . . . . . . . . . 7<br />
Interval Mode . . . . . . . . . . . . . . . . . . . . . . . . . . . . . . . . . . . . . . . . . . . . . . . . . . . . . . . . . . . 8<br />
Measuring Speed and Acceleration . . . . . . . . . . . . . . . . . . . . . . . . . . . . . . . . . . . . . . . . . 10<br />
Measuring Frequency . . . . . . . . . . . . . . . . . . . . . . . . . . . . . . . . . . . . . . . . . . . . . . . . . . . . 11<br />
Measuring Period . . . . . . . . . . . . . . . . . . . . . . . . . . . . . . . . . . . . . . . . . . . . . . . . . . . . . . . 12<br />
Using Count . . . . . . . . . . . . . . . . . . . . . . . . . . . . . . . . . . . . . . . . . . . . . . . . . . . . . . . . . . . 12<br />
Advanced Functions: The Memory Button . . . . . . . . . . . . . . . . . . . . . . . . . . . . . . . . . . . 13<br />
Advanced Functions: Timing Multiple A to B Events . . . . . . . . . . . . . . . . . . . . . . . . . . . 13<br />
Technical Information . . . . . . . . . . . . . . . . . . . . . . . . . . . . . . . . . . . . . . . . . . . . . . . 14<br />
Power Sources . . . . . . . . . . . . . . . . . . . . . . . . . . . . . . . . . . . . . . . . . . . . . . . . . . . . . . . . . 15<br />
Troubleshooting . . . . . . . . . . . . . . . . . . . . . . . . . . . . . . . . . . . . . . . . . . . . . . . . . . . . . . . . 15<br />
Technical Details: The Error Display . . . . . . . . . . . . . . . . . . . . . . . . . . . . . . . . . . . . . . . 16<br />
Software Updates and Website Information . . . . . . . . . . . . . . . . . . . . . . . . . . . . . . . . . 16
Chapter 1: Introduction<br />
Making accurate measurements is the key to many good experiments. The <strong>CPO</strong><br />
<strong>Science</strong> <strong>Timer</strong> <strong>II</strong>e uses a precision quartz crystal to make time measurements accurate<br />
to within 0.0001 seconds and frequency measurements accurate to 0.1 Hertz.<br />
The two photogates (included) allow the <strong>Timer</strong> to be started and stopped by anything<br />
that breaks the light beams.<br />
This booklet will show you how to use the <strong>Timer</strong> to measure speed, acceleration,<br />
the period of a pendulum, the frequency of sound, and many other quantities.<br />
What’s New?<br />
The <strong>Timer</strong> <strong>II</strong>e (enhanced) and the new photogates feature several improvements<br />
over the <strong>Timer</strong> <strong>II</strong> kit.<br />
The tilted, console-style case makes reading the display much easier and the metal<br />
stand allows a variety of positioning options. The robust, internal electronics have<br />
not changed.<br />
The new photogates feature a rubberized texture for easy, comfortable use and<br />
advanced electronics to improve accuracy and reliability.<br />
1
Chapter 2: Kit Contents<br />
The <strong>Timer</strong> <strong>II</strong>e comes with everything you need to perform accurate experiments.<br />
You should have received the following parts. Replacement parts can be ordered<br />
using the part numbers given.<br />
Table 1: What’s in the case?<br />
Quantity Description Part Number<br />
1 <strong>CPO</strong> <strong>Science</strong> <strong>Timer</strong> <strong>II</strong>e 892-1000<br />
2 <strong>CPO</strong> <strong>Science</strong> Photogate 392-1100<br />
1 Wall Mount Power Supply 692-4001<br />
2 Phone cord (1 red, 1 blue) 392-1106, 392-1105<br />
1 <strong>Timer</strong> <strong>II</strong>e User’s Guide 692-8101<br />
1 Storage Case (optional) 692-6501<br />
1 9 Volt Battery (not included) N/A<br />
TIMER USER’S GUIDE<br />
2
Chapter 3: Using the <strong>Timer</strong><br />
Warnings and Precautions<br />
Please make note of the following warnings and precautions:<br />
WARNING: Do not plug any lines from the telephone system in to<br />
the inputs. Telephone rings (also present in modems) generate<br />
large voltages that can damage or destroy the <strong>Timer</strong>.<br />
IMPORTANT: Use only the 9V power supply that has the <strong>CPO</strong><br />
<strong>Science</strong> name/logo on it with the <strong>Timer</strong>. Using another supply can<br />
damage the <strong>Timer</strong> or photogates and void your warranty.<br />
Inputs A and B are for connecting the photogates or the <strong>CPO</strong> <strong>Science</strong> Sound &<br />
Waves machine. DO NOT plug telephone equipment, modems or anything else<br />
into the inputs, or you risk damaging the <strong>Timer</strong> and/or the telephone equipment.<br />
3
Replacing the 9 V Battery<br />
Open the battery compartment by gently pulling<br />
back on the latch and removing the compartment<br />
door. Remove the old battery. Clip in the fresh<br />
9 V battery and place it inside the battery compartment,<br />
then replace the battery door.<br />
If the battery door is difficult to close, do not<br />
force it. Check that the battery, clip, and wires<br />
are seated properly inside the compartment and<br />
try again.<br />
Using the <strong>Timer</strong> with two photogates can run down the battery quickly. Use the<br />
9 V power supply instead.<br />
The Console<br />
The five buttons control the <strong>Timer</strong> and the lights tell you what the <strong>Timer</strong> is<br />
measuring and displaying, and its units.<br />
Pressing the mode switching button will change the mode from one of the five<br />
modes to the next one, moving left to right and stepping once for each time the button<br />
is pressed. The order is: Interval-Frequency-Period-Stopwatch-Count. After<br />
Count, the mode cycles back to Interval.<br />
TIMER USER’S GUIDE<br />
4
Table 2: <strong>Timer</strong> Buttons and Indicators<br />
Feature<br />
Mode Button:<br />
Mode Lights:<br />
“A” Button:<br />
“A” Light:<br />
“B” Button:<br />
“B” Light<br />
The Reset (0.0) Button:<br />
The Memory (M) Button:<br />
Function<br />
The mode button switches the <strong>Timer</strong><br />
between its five different functions (or<br />
modes).<br />
The five lights tell you which function the<br />
<strong>Timer</strong> is in.<br />
The “A” button switches the “A” light on<br />
and off, and starts and stops the<br />
stopwatch.<br />
The “A” light indicates what the <strong>Timer</strong> is<br />
displaying or doing relative to input A.<br />
The “B” button switches the “B” light on<br />
and off.<br />
The “B” light indicates what the <strong>Timer</strong> is<br />
displaying or doing relative to input B.<br />
The reset button initializes the <strong>Timer</strong> back<br />
to zero, or begins a new measurement. It<br />
also erases any value in memory.<br />
The memory button allows you to display<br />
the previous time interval measurements<br />
in interval mode.<br />
5
The Photogate<br />
The photogate uses an invisible beam of infra-red light to start and stop the <strong>Timer</strong>.<br />
The photogates connect to inputs A and B with two telephone cords. When the<br />
photogate is working properly, the status light will be lit when the <strong>Timer</strong> is turned<br />
on. If there is nothing obstructing the light beam, the status light will be green. The<br />
status light changes to red when you interrupt the light beam. The <strong>Timer</strong> can work<br />
with either one or two photogates connected.<br />
For convenience we refer to the<br />
photogate plugged into input A<br />
as photogate A. and the one connected<br />
to input B as photogate B.<br />
It does not matter which color<br />
wire you use. The wires are electrically<br />
identical and the different<br />
colors allow you to indentify<br />
quickly which is photogate A<br />
and which is photogate B.<br />
The versatile C-clamp design<br />
allows the photogates to be used<br />
on many different experiments.<br />
TIMER USER’S GUIDE<br />
6
Overtightening the thumbscrew can flex the photogate body enough that<br />
the light emitter and reciever twist out of alignment, causing the photogate<br />
to malfunction. Loosening the screw will fix the problem.<br />
ONLY TIGHTEN THE THUMBSCREW GENTLY.<br />
The photogates connect with ordinary telephone cords. You can get replacements<br />
(or longer ones) from almost any hardware or office supply store.<br />
Computer data cables have the same (RJ-11) connectors and look like<br />
telephone cords but are wired differently inside.<br />
USING A DATA CABLE WILL DAMAGE THE PHOTOGATES.<br />
Stopwatch Mode<br />
The Stopwatch function is the simplest of the different modes. In Stopwatch mode<br />
the <strong>Timer</strong> measures in seconds and is accurate to one hundredth (0.01) of a second<br />
from 0.01 to 59.99 seconds. After one minute the display switches to minutes:seconds<br />
format and the display is accurate to whole seconds. The stopwatch can measure<br />
times up to 199 minutes and 59 seconds (199:59)<br />
The diagram below shows the steps to using the stopwatch mode..<br />
7
Interval Mode<br />
In Interval mode, the <strong>Timer</strong> uses one or two photogates to electronically start and<br />
stop up to three stopwatches.<br />
The time measurements are much more precise because the light beam can<br />
respond much faster than your finger. Using the photogates, the <strong>Timer</strong> can measure<br />
to one ten-thousandth (0.0001) of a second. The pictures below show how the two<br />
photogates can be connected and how the lights control the display of time measurements<br />
made with the three stopwatches.<br />
TIMER USER’S GUIDE<br />
8
Interval Mode Behaves like Three Stopwatches<br />
The <strong>Timer</strong> in interval mode works like it has three stopwatches.<br />
Stopwatch A starts when the light beam is broken in photogate A and stops when<br />
the light beam is unbroken again. Stopwatch A measures the time interval during<br />
which the light beam is broken in photogate A.<br />
Stopwatch B starts when the light beam is broken in photogate B and stops when<br />
the beam is unbroken. Stopwatch B measures the time interval during which the<br />
light beam is broken in photogate B.<br />
Stopwatch AB is controlled by both photogates. Breaking the beam in photogate A<br />
starts the stopwatch and breaking the beam in photogate B stops it. Stopwatch AB<br />
measures the time interval between photogate A and photogate B.<br />
The <strong>Timer</strong> can use all three stopwatches simultaneously, allowing you to measure<br />
up to three time intervals at once. The lights (and buttons) allow you to choose<br />
which of the three stopwatches to show on the display.<br />
The A and B lights do not have to be on for the <strong>Timer</strong> to record<br />
measurements.<br />
The (A) and (B) lights and the (A) and (B) buttons control how the <strong>Timer</strong> displays<br />
the results from the three different stopwatches you can use. The buttons toggle the<br />
lights on and off. The lights tell you which of the three stopwatches is being displayed.<br />
Try It With One Photogate<br />
Connect a photogate to the input jack (socket) behind the<br />
(A) button using one of the telephone cords. You should<br />
see the status light on the photogate come on. Put the<br />
<strong>Timer</strong> into Interval mode by pressing the mode button<br />
until the Interval light comes on. Push the (A) button to<br />
turn on the (A) light. When the (A) light is on, the display<br />
shows measurements made with the photogate connected<br />
to input A.<br />
9
Put your finger across the light beam and watch what happens to the display. The<br />
display should start counting as soon as your finger breaks the beam and should<br />
stop as soon as you finger is removed from the beam. Once your finger is removed<br />
the display shows the time during which the beam was broken.<br />
Note that when you break the light beam of the photogate with your finger the status<br />
light changes from green to red. When you remove your finger, the status light<br />
changes back to green.<br />
Try It With Two Photogates<br />
With both photogates connected you can measure the time it takes to pass between<br />
photogates A and B. The following demonstration shows how.<br />
Set the <strong>Timer</strong> to Interval mode with two<br />
photogates connected. Use the A and B buttons<br />
to turn both the A and B lights on.<br />
Press reset to clear the <strong>Timer</strong> (be sure the<br />
light beams are not blocked when pressing<br />
reset).<br />
Pass your finger through photogate A first,<br />
then B. The display should start counting<br />
up the moment you break the beam in photogate A and stop when you break the<br />
beam in photogate B.<br />
Measuring Speed and Acceleration<br />
The <strong>Timer</strong> can be used in Interval mode to measure the speed of objects of a<br />
known size, such as a marble or a car with a “flag.” Ensure the full diameter of the<br />
ball or full width of the flag passes through the light beam.<br />
In the case of the car: as the front edge of the flag breaks the light beam, the <strong>Timer</strong><br />
begins the stopwatch for that photogate. The stopwatch is halted when the flag<br />
exits the beam. The average speed through the photogate can be calculated:<br />
distan<br />
ce<br />
speed = ---------------------<br />
time<br />
TIMER USER’S GUIDE<br />
10
In this situation, the distance traveled is equal to the width of the flag, and the time<br />
is measured by the <strong>Timer</strong>. Just divide the width of the flag by the time recorded by<br />
the <strong>Timer</strong> for that photogate to get the speed. Don’t forget to keep track of units.<br />
Acceleration<br />
To measure the acceleration of an object you can use two photogates.<br />
∆speed speed<br />
acceleration ------------------<br />
B – speed A<br />
= = -----------------------------------------<br />
time time<br />
The change in speed can be found by calculating the speed of the object at each<br />
photogate (as shown above) and taking the difference. The time between photogates<br />
is recorded by the <strong>Timer</strong> in Stopwatch AB. Remember to keep track of units.<br />
Measuring Frequency<br />
The <strong>Timer</strong> can measure the frequency of anything that breaks the light beams in<br />
the photogates regularly, or the frequency of signals applied to the inputs, such as<br />
from the Sound and Waves machine. The highest frequency that can be measured<br />
is 19,999 Hz and the lowest is 0.1 Hz. For very low frequencies (
Some other uses for frequency mode<br />
Frequency mode can be used to measure:<br />
• the angular speed of a rotating gear<br />
• the frequency of a vibrating string<br />
• the RPM of the <strong>CPO</strong> <strong>Science</strong> Electric Motor or Ripcord Generator<br />
Measuring Period<br />
The <strong>Timer</strong> can measure the period of signals which are connected to the inputs.<br />
The photogates can provide the signals (such as with the Pendulum) or the Sound<br />
and Waves experiment can provide the signals.<br />
The <strong>Timer</strong> measures period in seconds and can measure the period of the signal in<br />
input A or the period of the signal in input B.<br />
Period Updates Every Other Cycle<br />
You will notice that the period only updates every third time the Pendulum crosses<br />
the light beam. This is because the <strong>Timer</strong> averages over two periods before updating<br />
the display. The averaging technique corrects for errors that occur when the<br />
photogate is not placed at the exact center of the swing.<br />
A Pendulum Crosses Twice Per Cycle<br />
You will also notice that the <strong>Timer</strong> measures the half period of the Pendulum. This<br />
is because the pendulum breaks the light beam twice per cycle. The <strong>Timer</strong> does not<br />
know it is “seeing” a pendulum; all it knows is the period of the breaking of the<br />
light beam.<br />
Using Count<br />
The <strong>Timer</strong> has a counting feature that counts whenever anything breaks the light<br />
beam, or sends a signal. There are two independent counters: A and B. The<br />
counters can each count up to 19,999. The Reset button has a double action for<br />
count mode. Pressing Reset once causes the counter to stop counting and freezes<br />
the display. This is useful for counting things within a fixed time interval. Pressing<br />
Reset again will reset the counter back to zero.<br />
TIMER USER’S GUIDE<br />
12
Advanced Functions: The Memory Button<br />
You may have noticed that you do not have to press RESET to start a new time<br />
measurement. The <strong>Timer</strong> automatically resets each stopwatch as soon as something<br />
breaks the light beam again. If you do not press RESET, the <strong>Timer</strong> remembers<br />
the last time measurement for each of the three stopwatches (A, B, AB).<br />
Holding down the memory button lets you see the last values.<br />
Make two successive measurements of the time through photogate A and then look<br />
at both. Holding down the memory button with the A light on shows the last value<br />
for the time through photogate A. Holding down the memory button with the B<br />
light on shows the last value for the time through photogate B. Holding down the<br />
memory button with both A and B lights on shows the last value for the time from<br />
photogate A to photogate B.<br />
Advanced Functions: Timing Multiple A to B Events<br />
The <strong>Timer</strong> can keep track of elapsed time from photogate A to photogate B where<br />
there may be multiple passes through photogate B. As long as there has been no<br />
reset, the A-to-B stopwatch will show the time between the last break of photogate<br />
A and the last break of photogate B. This means you can break photogate B multiple<br />
times and get increasing elapsed times between A and B. The analogy with a<br />
marathon race illustrates how this property of the <strong>Timer</strong> is useful. Everyone starts<br />
through photogate A at the same time. The <strong>Timer</strong> displays each individual runner’s<br />
time as they pass through photogate B.<br />
13
Chapter 4: Technical Information<br />
The <strong>CPO</strong> <strong>Science</strong> <strong>Timer</strong> has the following technical specifications:<br />
Time reference:<br />
Input voltage:<br />
Power source<br />
Sensor Inputs:<br />
Interval:<br />
Frequency:<br />
Period:<br />
Stopwatch:<br />
Count:<br />
FCC Compliance:<br />
20 MHz quartz crystal, 0.4 microsecond internal<br />
resolution, 0.0001 second display resolution<br />
9 V DC/500 mA minimum (center tip positive)<br />
Supplied 9 V DC power supply or 9 V battery<br />
Two TTL falling edge triggered inputs using RJ-11<br />
connectors<br />
Gate A, Gate B, and Interval A-to-B photogate timing<br />
with 0.0001 second resolution, three independent<br />
memories, and 19,999 second range<br />
Dual channel plus frequency differences (A, B, A-B,<br />
B-A) to 19,999 Hz with 0.1 Hz resolution<br />
Dual channel (A or B) period measurement to<br />
19,999 seconds with bi-period averaging<br />
0.01 second resolution to 59.99 seconds and 1 second<br />
resolution to 199 minutes, 59 seconds (199:59)<br />
Dual channel (A or B) counters to 19,999 each<br />
channel<br />
This equipment has been tested and found to comply with the<br />
limits for a class A digital device, persuant to part 15 of the<br />
FCC rules. These rules are designed to provide reasonable protection<br />
against harmful interference when the equipment is<br />
operated in a commercial environment. The equipment generages<br />
and uses radio frequency energy and, if not installed and<br />
used in accordance with the instruction manual, may cause<br />
harmful interference to radio communications.<br />
TIMER USER’S GUIDE<br />
14
Power Sources<br />
Using two photogates drains batteries quickly; two photogates in continuous use<br />
can drain a 9 V battery in just a few hours. It is better to use the AC adapter if you<br />
are using both photogates.<br />
The first sign of a low battery is that the photogates will not work properly.<br />
If the battery is low, the status light will not come back on after the light beam is<br />
unbroken. Either replace the battery with a fresh one or switch to using the AC<br />
adapter.<br />
Troubleshooting<br />
Table 3: Troubleshooting the <strong>Timer</strong><br />
Symptom<br />
Nothing happens<br />
when you slide the<br />
switch to the “On”<br />
position<br />
What to Do<br />
Move the switch back and forth a few times.<br />
If you are using the battery, try using the AC adapter -<br />
you may need to replace the battery.<br />
If you are using the power supply, try using a battery -<br />
the outlet may not be working.<br />
Try the power supply from another <strong>Timer</strong> unit.<br />
An error is displayed<br />
when using<br />
photogates<br />
Press Reset after making sure all the light beams are<br />
unbroken and the status light is green for each photogate.<br />
Check the battery - a weak battery can cause errors.<br />
Sometimes bright lights or sunlight can trigger the<br />
detector. Try shading the photogate with your hand or<br />
repositioning it.<br />
15
Technical Details: The Error Display<br />
The error display is how the <strong>Timer</strong> signals that there has been a measurement fault.<br />
Different causes can create measurement faults in each of the five modes. In<br />
almost every case pressing RESET (with all light beams unbroken) will fix the<br />
problem. Sometimes new batteries are needed. In very few cases the measurement<br />
capacity of the <strong>Timer</strong> has been exceeded.<br />
A disconnected photogate or low batteries are the most common faults. The <strong>Timer</strong><br />
senses whether a photogate is connected by the presence of a light beam signal<br />
whenever the RESET button is pressed. Pressing RESET with the light beam<br />
blocked will cause a fault. The fault can be corrected by pressing RESET again<br />
with the light beam unblocked. It is possible (but highly unlikely) that the time<br />
interval exceeded the maximum of 19,999 seconds (5 hours, 33 minutes).<br />
Frequency measurements are good up to 19,999 Hz. Higher frequencies will either<br />
generate an error (HI-F) or result in an erratic measurement.<br />
Period measurements are limited to 19,999 seconds, after which the <strong>Timer</strong> will<br />
generate an error.<br />
Stopwatch measurements are limited to 199 minutes and 59 seconds. Longer time<br />
intervals will result in an error.<br />
The counter can only count up to 19,999, after which the <strong>Timer</strong> will give an error.<br />
Software Updates and Website Information<br />
You can find more information, such as answers to frequently asked questions and<br />
updates to documentation for the <strong>CPO</strong> <strong>Science</strong> <strong>Timer</strong> at the <strong>CPO</strong> <strong>Science</strong> Support<br />
website:<br />
http://support.cpo.com/<br />
You can also sign up at the website to receive email when updates become<br />
available.<br />
TIMER USER’S GUIDE<br />
16
Warranty Information<br />
<strong>CPO</strong> <strong>Science</strong> warranties this instrument against defects in materials and<br />
workmanship for a period of one year. Repair and/or replacement parts can<br />
be obtained from <strong>CPO</strong> <strong>Science</strong> by sending the damaged or defective parts to:<br />
<strong>CPO</strong> <strong>Science</strong><br />
26 Howley Street, 3rd Floor<br />
Peabody, MA 01960<br />
1-866-588-6951<br />
support.cpo.com