2008 All Rear Shocks Owners Manual - Manitou
2008 All Rear Shocks Owners Manual - Manitou
2008 All Rear Shocks Owners Manual - Manitou

You also want an ePaper? Increase the reach of your titles
YUMPU automatically turns print PDFs into web optimized ePapers that Google loves.
P/N 042135
• ENGLISH<br />
MANITOU REAR SHOCKS<br />
This manual is designed as a comprehensive guide for all <strong>2008</strong> <strong>Manitou</strong> rear<br />
shock models, including REVOX, EVOLVER, SWINGER AIR, SWINGER COIL,<br />
METEL, S-TYPE, and RADIUM. This manual can also be downloaded from<br />
www.HBsuspension.com.<br />
Aftermarket <strong>Manitou</strong> air rear shocks come fully assembled and ready to be mated<br />
with appropriate hardware and installed onto your bicycle. Aftermarket coil rear<br />
shocks come as a shock body; a coil spring, and appropriate mounting hardware<br />
will be required for installation.<br />
SPECIAL MOUNTING HARDWARE AND A SPECIFIC<br />
REAR SHOCK LENGTH IS NEEDED FOR EACH BICYCLE.<br />
CONSULT MANITOU’S WEBSITE AT WWW.HBSUSPENSION.COM OR VISIT YOUR<br />
LOCAL BIKE SHOP TO ENSURE YOUR REAR SHOCK IS COMPATIBLE WITH YOUR<br />
FRAME. ALSO, ALWAYS REFER TO YOUR BICYCLE FRAME MANUFACTURER’S<br />
RECOMMENDATIONS FOR APPROPRIATE TORQUE SPECIFICATIONS OF YOUR<br />
MOUNTING HARDWARE. FAILURE TO DO SO CAN RESULT IN A FRAME OR REAR<br />
SHOCK FAILURE DURING RIDING WHICH CAN RESULT IN LOSS OF CONTROL<br />
AND SERIOUS INJURY.<br />
GENERAL CONSUMER SAFETY INFORMATION<br />
BICYCLING IS A HAZARDOUS ACTIVITY THAT REQUIRES THAT THE RIDER STAY<br />
IN CONTROL OF HIS OR HER BICYCLE AT ALL TIMES. ANY FALL FROM YOUR<br />
BICYCLE CAN RESULT IN SERIOUS INJURY OR EVEN DEATH. READING THIS<br />
MANUAL ENTIRELY AND PROPERLY MAINTAINING YOUR BICYCLE AND REAR<br />
SHOCK WILL REDUCE THE POSSIBILITY OF INJURY OR POSSIBLE DEATH.<br />
PRIOR TO EVERY RIDE, YOU SHOULD CLOSELY EXAMINE YOUR REAR SHOCK<br />
(AFTER CLEANING) IN BRIGHT SUNLIGHT TO ENSURE THAT NO DAMAGE HAS<br />
OCCURRED DURING THE COURSE OF RIDING, TRANSPORTING OR AFTER A<br />
FALL. PAY PARTICULAR ATTENTION TO THE SCHRADER VALVES, ADJUSTMENT<br />
KNOBS, AND "STRESS POINTS" (SUCH AS WELDS, SEAMS, HOLES AND POINTS<br />
OF CONTACT WITH OTHER PARTS ETC.) DO NOT RIDE YOUR BICYCLE IF THE<br />
REAR SHOCK SHOWS ANY SIGNS OF BENDING, LEAKING, CRACKING,<br />
CREAKING, SQUEAKING, CLUNKING OR ANY OTHER UNFAMILIAR NOISES, OR<br />
IF IT IS MISSING ANY OF THE ORIGINALLY SUPPLIED COMPONENTS. CONTACT<br />
YOUR DEALER IF YOU HAVE ANY QUESTIONS CONCERNING THE FUNCTION,<br />
INTEGRITY OR CONDITION OF YOUR REAR SHOCK. ANY MODIFICATIONS NOT<br />
AUTHORIZED IN THIS MANUAL SHOULD BE CONSIDERED UNSAFE.<br />
HB SUSPENSION RECOMMENDS RETURNING YOUR REAR SHOCK TO<br />
HB SUSPENSION AFTER EVERY 150 HOURS OF RIDE TIME FOR A THOROUGH<br />
INSPECTION AND UPDATE. TAKE YOUR REAR SHOCK TO A MANITOU<br />
AUTHORIZED DEALER WHO CAN ARRANGE FOR SHIPMENT TO HB SUSPENSION.<br />
ALL SHOCK CONTENTS ARE UNDER HIGH PRESSURE.<br />
NEVER DISASSEMBLE YOUR REAR SHOCK. DOING SO<br />
WILL RESULT IN SERIOUS INJURY OR DEATH.<br />
IF YOUR REAR SHOCK EVER LOSES OIL, AIR<br />
PRESSURE, OR BEGINS TO MAKE NOISE, STOP RIDING<br />
THE REAR SHOCK AND HAVE IT INSPECTED BY AN AUTHORIZED MANITOU<br />
DEALER OR SERVICE CENTER.<br />
RIDING YOUR BICYCLE WITH IMPROPER REAR SHOCK<br />
PRESSURE CAN RESULT IN LOSS OF CONTROL AND<br />
POSSIBLE SERIOUS INJURY OR DEATH.<br />
S-TYPE SPV, EVOLVER ISX-1 SPV, ISX-4 SPV, and ISX-6 SPV rear shocks<br />
depend on the SPV air pressure (pressure in the red Schrader valve) to create<br />
damping and function properly. The air pressure range is 100-200 psi (6.9-13.8<br />
bar). Pressure within this range must be checked and maintained before each<br />
ride. Use of the rear shock with improper air pressure can cause a total loss of<br />
damping and malfunction of the rear shock.<br />
SWINGER X3 and X4 SPV shocks, with external SPV platform adjustment, are<br />
nitrogen charged at the factory. Altering the charge on the SWINGER AIR X3<br />
should only be done by a <strong>Manitou</strong> Authorized Dealer or Service Center.<br />
CHECK FRAME AND SEAT POST FOR REAR SHOCK<br />
CLEARANCE.<br />
When the rear shock compresses, its position within the frame will change.<br />
Always check for adequate clearance between the rear shock and frame/seat<br />
post through the entire stroke/motion of the rear shock. BEFORE RIDING, fit<br />
check the rear shock’s compatibility with your frame by depressurizing the<br />
main air spring [of air sprung rear shocks] or by removing the spring [of coil<br />
sprung rear shocks] and then slowly stroking through the travel of the bike with<br />
the rear shock mounted to check for adequate clearance. If any part of the rear<br />
shock contacts the frame at any point in the travel DO NOT RIDE. The rear<br />
shock will not fit your frame. Be careful not to lower the seat post below the<br />
bottom of the seat tube. It is the responsibility of the user to check for<br />
adequate clearance between the rear shock and frame/seat post for the entire<br />
stroke/motion of the rear shock. If your bicycle offers multiple rear shock<br />
mounting options, it is the user’s responsibility to make sure that any mounting<br />
options also offer adequate clearance between the rear shock and<br />
frame/rocker/seat post.<br />
“DOWNHILL”, “FREESTYLE”<br />
OR COMPETITIVE RIDING<br />
TO RIDE DOWNHILL AT HIGH SPEED OR IN COMPETITION IS TO VOLUNTARILY<br />
ASSUME A VERY HIGH RISK, AND DOWNHILL OR FREESTYLE RIDING CAN<br />
LEAD TO SERIOUS ACCIDENTS. SPEEDS “DOWNHILLING” CAN REACH SPEEDS<br />
SEEN ON MOTORCYCLES WITH SIMILAR HAZARDS AND RISKS. WEAR<br />
APPROPRIATE SAFETY GEAR, INCLUDING A FULL FACE HELMET, FULL FINGER<br />
GLOVES AND BODY ARMOR. HAVE YOUR BICYCLE INSPECTED BY A QUALIFIED<br />
MECHANIC BEFORE EVERY EVENT AND BE SURE IT IS IN PERFECT WORKING<br />
CONDITION. ROUTINE AND THOROUGH MAINTENANCE IS EVEN MORE<br />
CRITICAL THAN WITH A BIKE NOT USED FOR DOWNHILLING OR FREESTYLE<br />
RIDING. CONSULT WITH EXPERT RIDERS AND RACE OFFICIALS ON<br />
CONDITIONS AND EQUIPMENT ADVISABLE AT THE SITE WHERE YOU PLAN TO<br />
RIDE DOWNHILL OR FREESTYLE. SUSPENSION AND DISK BRAKES MAY<br />
INCREASE THE HANDLING CAPABILITIES AND COMFORT OF YOUR BICYCLE<br />
AND MAY ALLOW YOU TO RIDE FASTER, BUT DO NOT CONFUSE THE ENHANCED<br />
CAPABILITIES OF A SUSPENSION BIKE WITH DISK BRAKES WITH YOUR OWN<br />
CAPABILITIES. INCREASING YOUR SKILL WILL TAKE TIME AND PRACTICE.<br />
PROCEED CAREFULLY UNTIL YOU ARE SURE YOU ARE COMPETENT TO HANDLE<br />
THE FULL CAPABILITIES OF YOUR BIKE. WHILE THE RUGGED APPEARANCE OF<br />
MOUNTAIN BIKES AND THESE DISK BRAKES MIGHT SUGGEST THEY ARE<br />
INDESTRUCTIBLE, THEY ARE NOT. CERTAINLY THEY ARE TOUGH AND STURDY.<br />
DOWNHILL OR FREESTYLE RIDING OR RACING PLACES EXTREME STRESS ON<br />
BICYCLES AND THEIR COMPONENTS (LIKE IT DOES RIDERS). REPEATED USE<br />
OF A REAR SHOCK IN DOWNHILL RIDING MAY RESULT IN SUDDEN OR<br />
PREMATURE FAILURE OF A BICYCLE OR COMPONENT RESULTING IN SEVERE<br />
INJURIES. IF YOU PARTICIPATE IN THESE TYPES OF EVENTS, THE LIFETIME OF<br />
THE PRODUCT MAY BE SIGNIFICANTLY SHORTENED DEPENDING UPON THE<br />
LEVEL AND AMOUNT OF RACING. THE “NORMAL WEAR” OF A COMPONENT<br />
MAY DIFFER GREATLY BETWEEN COMPETITIVE AND NON-COMPETITIVE USES,<br />
WHICH IS WHY PROFESSIONAL LEVEL RIDERS OFTEN USE NEW BIKES AND<br />
COMPONENTS EACH SEASON AS WELL AS HAVE THEIR BIKES SERVICED BY<br />
PROFESSIONAL MECHANICS.<br />
REDUCED REAR SHOCK LIFE<br />
THE LIFE OF THIS REAR SHOCK WILL BE REDUCED IF (1) YOU USE IT MORE<br />
THAN THE AVERAGE USER, (2) YOU ARE HEAVIER THAN THE AVERAGE RIDER,<br />
(3) THE TERRAIN YOU RIDE ON IS ROUGHER THAN AVERAGE, (4) YOU TEND TO<br />
BE HARDER ON COMPONENTS THAN THE AVERAGE RIDER, (5) IT IS INSTALLED<br />
OR MAINTAINED IMPROPERLY, (6) IT MUST ENDURE MORE ADVERSE<br />
ENVIRONMENTAL CONDITIONS THAN THE AVERAGE REAR SHOCK (I.E. SWEAT,<br />
CORROSIVE MUD, SALTY BEACH AIR ETC.), AND/OR (7) YOU DAMAGE IT IN A<br />
CRASH, JUMP OR THROUGH OTHER ABUSE. THE MORE FACTORS YOU MEET,<br />
THE MORE ITS LIFE WILL BE REDUCED, HOWEVER IT IS IMPOSSIBLE TO SAY<br />
HOW MUCH.<br />
5
MANITOU DAMPING SYSTEMS AND ADJUSTMENTS<br />
INTRINSIC DAMPING: REVOX, SWINGER and EVOLVER<br />
Designed to provide a high degree of bump sensitivity and wide range of<br />
adjustment, speed sensitive Intrinsic damping is a must-have for long travel<br />
suspension bikes. <strong>All</strong> Intrinsic shocks feature externally adjustable bottoming with<br />
the No Tools volume adjustment. Higher-end Intrinsic shocks feature high- and<br />
low-speed compression damping adjustments (located inside the piggyback<br />
reservoir) as well. SWINGER COIL X6, REVOX and EVOLVER ISX-6 have the added<br />
feature external adjustment of the high- and low-speed compression damping<br />
circuit. The red knob controls low-speed compression and the black knob controls<br />
high-speed compression.<br />
Low-Speed Compression Damping Adjustment – This adjustment<br />
controls low-velocity rear shock compressions and general ride firmness, and adds<br />
additional chassis-stability platform to the bike. Lighter (counterclockwise)<br />
adjustment provides a more supple/active ride but less chassis stability. Firmer<br />
(clockwise) adjustments provide a less supple/active ride but greater chassis<br />
stability platform.<br />
High-Speed Compression Damping Adjustment – This adjustment<br />
controls high velocity rear shock compressions and the response to sharp edge<br />
bumps and big hit conditions. The faster the rear shock is compressing, the more<br />
impact this adjuster has.<br />
NOTE: Over-turning the high- and low-speed pressure adjustment screws IN<br />
EITHER DIRECTION will damage the adjusters and valves. ONLY turn these adjuster<br />
screws until you feel resistance and then STOP.<br />
NO TOOLS VOLUME ADJUSTMENT: REVOX, SWINGER COIL and<br />
EVOLVER SHOCKS<br />
Air volume settings control the position sensitive compression damping feature of<br />
the rear shock. The No Tools volume adjuster is located on the end of the<br />
piggyback reservoir. The volume adjuster controls the rear shock’s bottoming<br />
resistance by varying the rise in compression force during the last 50% of the rear<br />
shock stroke. The No Tools volume adjuster has four numbered settings with<br />
different volumes. The #1 position has the largest volume, so this is the least<br />
progressive of all of the settings. The #4 position corresponds to the most<br />
progressive feel. When making air pressure adjustments on the reservoir, the<br />
volume adjuster should be set to the #1 position.<br />
TOOLED AIR VOLUME ADJUSTMENT: SWINGER AIR X4,<br />
SWINGER COIL X3<br />
This feature functions in a manner similar to the No Tools volume adjuster, but<br />
uses a 16 mm socket for adjustment. We recommend using the SPV Volume<br />
Adjustment Tool (part # 85-3007) to make this adjustment. Different from the No<br />
Tools volume adjuster, the air pressure should be reset any time a tooled volume<br />
adjustment is made.<br />
NO TOOLS SPV PLATFORM ADJUSTMENT: SWINGER AIR SHOCKS<br />
For <strong>2008</strong>, SWINGER AIR shocks feature an external adjustment for platform that<br />
does not require a pump or pressure adjustment. Located on the air canister end<br />
of the shock is a gun-metal gray knob that can be turned clockwise to increase<br />
platform. There are four distinct clicks that alter platform in approximately equal<br />
increments. SWINGER AIR shocks with external platform adjustment come fully<br />
charged at the factory, but an Authorized Dealer or Service Center can change the<br />
shock charge if higher or lower platform starting points are necessary.<br />
SPV DAMPING: EVOLVER SPV, SWINGER COIL SPV,<br />
and S-TYPE SPV REAR SHOCKS<br />
SPV damping creates an efficient platform to eliminate excessive movement<br />
(bobbing) from low resonance forces such as pedaling. To adjust platform, first set<br />
the pressure in the SPV chamber to roughly 75 psi (5 bar) BEFORE MAKING ANY<br />
SAG ADJUSTMENTS. Only after proper sag has been set should you then fine-tune<br />
your SPV pressure adjustment. Changing SPV pressure alters your platform<br />
threshold. Higher SPV pressures will provide a firmer platform for firmer pedaling,<br />
firmer ride control and a higher blow-off threshold. Likewise, decreasing pressure<br />
in the SPV chamber decreases platform.<br />
The SPV air pressure range for above shocks is 50-175 psi (3.5-12 bar). See<br />
“PRESSURE RANGES AND PRESSURIZING TIPS” for more information.<br />
NEVER USE A PRESSURE BELOW OR ABOVE THIS<br />
RECOMMENDED PRESSURE RANGE. SEE WARNING<br />
ABOVE.<br />
PLATFORM PLUS DAMPING: RADIUM R and METEL<br />
Designed to eliminate excessive movement while pedaling, this shim-based<br />
platform system is factory set on most models. Piggyback models like the METEL<br />
RPA feature an external Platform Plus adjuster located on the reservoir (small red<br />
adjuster). Turning the Platform Plus adjuster clockwise will increase platform<br />
threshold on the shocks. Turning the adjustment screw counterclockwise results in<br />
less platform. NOTE: Do not over-tighten or back out this screw beyond its<br />
stopping point. Doing so will damage the shock and void your warranty.<br />
LOCKOUT ADJUSTMENT<br />
The S-TYPE MRD, S-TYPE SRL, and RADIUM RL rear shocks feature a red lockout<br />
lever. Turning the lever counterclockwise will close the compression circuit to keep<br />
the rear shock from moving while climbing or riding on smooth surfaces.<br />
<strong>Manitou</strong>’s lockout system is a “soft lockout” meaning that even with the lockout<br />
on, the rear shock will compress when it encounters larger bump forces.<br />
For information and setup advice on remote lockout systems, please consult the<br />
“Service Guides” section of the HBsuspension.com website.<br />
REBOUND DAMPING ADJUSTMENT<br />
Rebound damping controls the return rate of the rear shock after it has been<br />
compressed to absorb a bump. Rebound on all <strong>Manitou</strong> rear shocks is adjusted<br />
with the blue knob. As a general rule, rebound that is adjusted for an overly fast<br />
rate will exhibit a springy ride that may cause excessive pedaling movement and<br />
kick up the rear end on multiple bumps and big hits. Rebound that is adjusted for<br />
an overly slow rate will exhibit a “packing” of the rear wheel that is identified by a<br />
low ride height, stiff feeling on multiple bumps and the rear wheel drifting to one<br />
side on stutter (braking) bumps. A good rebound starting point is to set the rear<br />
shock to achieve a return movement that is just short of “snapping back”.<br />
SPRING PRELOAD AND SAG ADJUSTMENTS:<br />
COIL REAR SHOCKS<br />
Spring preload adjustments are done with the spring preload adjustment ring.<br />
Adjust the spring preload adjuster up or down to achieve the desired amount of<br />
sag. Never exceed 8 mm/0.325" of preload on the coil spring. Always make sure<br />
that you have a minimum of 1 mm of preload on the spring. If you reach the<br />
maximum spring preload (8 mm) and the sag is too much, you’ll need to go to the<br />
next higher spring rate. If you reach the minimum amount of spring preload (1 mm)<br />
and there is not enough sag, you’ll need to go to the next lightest spring rate.<br />
Springs with varying, non-stock spring rates are available from HB Suspension for<br />
a fee. Part numbers, spring rates and travel are stamped on the outside of the<br />
spring coils. Coil spring part numbers are listed at the back of this manual.<br />
PRESSURE RANGES AND PRESSURIZING TIPS<br />
Maximum air shock main spring air pressure: 300 psi or 21 bar. Use <strong>Manitou</strong> air<br />
spring rear shock pump, part #85-4162, or similar rear shock pump that will<br />
deliver up to 300 psi (21 bar).<br />
Minimum-Maximum SPV pressure: 50-175 psi (3.5-12 bar) for all SPV shocks<br />
except SWINGER AIR X3 and SWINGER AIR X4. For the SWINGER AIR X3 and<br />
SWINGER AIR X4 pressures should be 100-175 psi (6.9-12 bar). Never use a<br />
pressure below or above this recommended pressure range. Use <strong>Manitou</strong> SPV<br />
pump, part #85-4163, or similar pump that will deliver up to 175 psi (12 bar).<br />
6
To adjust air pressure in the main air spring, remove the air cap from the Schrader<br />
valve located above the large air canister and attach a shock pump. You can<br />
damage the pump by turning it on too far, so as soon as the gauge registers<br />
pressure, turn 1/2 turn more and pump to a higher pressure or release air to a<br />
lower pressure as desired.<br />
The slight hiss you hear when unscrewing the pump is primarily the air left in the<br />
pump and will affect your pressure setting in the rear shock very little. [NOTE:<br />
larger hisses (leaking air) may be the result of a loose Schrader valve core.]<br />
If the rear shock does not dampen properly after pressurizing, the air pressure was<br />
lost during pump removal as a result of a worn or malfunctioning pump fitting o-<br />
ring or the Schrader valve core may need to be tightened.<br />
After removing the pump, be sure to reinstall the Schrader valve cap.<br />
ADJUSTING SAG<br />
The recommended amount of sag for your riding style can be found below.<br />
RECOMMENDED SAG SETTINGS<br />
Cross country<br />
Freeriding<br />
Downhill<br />
25-30% Sag<br />
30-40% Sag<br />
30-45% Sag<br />
1. Measure the distance between the centers of the rear shock mounting bolts<br />
(eye-to-eye length of your rear shock) and record this measurement.<br />
2. Sit on the bike in a normal riding position near a wall to steady yourself.<br />
Without bouncing on the saddle or pedals, distribute your weight on the<br />
saddle and pedals in a normal riding position while holding the handlebars.<br />
Have someone measure the new distance between the two points described<br />
above and record it.<br />
3. Check this measurement against the chart below and determine the sag for<br />
you rear shock.<br />
4. Adjust the coil spring preload adjuster or add/decrease air pressure in the<br />
main air spring (on the fatter “can” side of air rear shocks) to achieve the<br />
desired amount of sag. Coil rear shocks may require a heavier or lighter spring<br />
(see spring part numbers at the end of the manual) that can be purchased to<br />
achieve the proper range of sag.<br />
SAG ADJUSTMENT SETTINGS<br />
<strong>Rear</strong><br />
Eye-to-Eye Measurement with Sag<br />
Static Shock<br />
Eye-to-Eye Travel 25% sag 30% sag 35% sag 40% sag 45% sag<br />
152 32 144 142 141 139 137<br />
165 38 155 153 152 149 147<br />
190 50 177 175 172 170 167<br />
200 50 187 185 182 180 177<br />
200 56 186 183 180 178 175<br />
215 63 199 196 193 189 186<br />
222 70 204 201 197 194 190<br />
230 70 212 209 205 202 198<br />
240 76 221 217 213 209 205<br />
267 89 244 240 235 231 226<br />
INSTALLING AND REMOVING COIL SPRINGS<br />
The following steps should be followed to remove and install the coil spring on<br />
REVOX, SWINGER COIL and METEL rear shocks.<br />
REMOVING THE SPRING<br />
1. Turn the blue rebound knob all the way in (clockwise) for maximum clearance<br />
with the spring. Make sure to note the set location by counting the clicks to<br />
full close. The blue rebound adjuster knob is not removable and doing so<br />
will void the warranty of your rear shock.<br />
2. Loosen the preload adjuster ring until the spring retainer clip can be removed<br />
from the rear shock.<br />
3. Remove the retainer clip.<br />
4. Slide the spring off of the rear shock.<br />
NOTE: If the spring will not clear the mounting hardware, the hardware must be<br />
removed and re-installed after the new spring is installed. Care should be taken<br />
when removing or installing the mounting hardware as to not damage the bushing<br />
or eye.<br />
INSTALLING THE SPRING<br />
1. Turn the blue rebound knob all the way in (clockwise) for maximum clearance<br />
with the spring. Make sure to note the set location by counting the clicks to<br />
full close. The blue rebound adjuster knob is not removable and doing so<br />
will void the warranty of your rear shock.<br />
2. Slide the spring onto the rear shock.<br />
3. Install the spring retainer clip by sliding it between the top of the spring and<br />
the non-shock body side eyelet head.<br />
4. Tighten the preload adjuster ring until 1 mm of spring preload (compression)<br />
is achieved. Make sure the spring retainer clip is flush with the top of the<br />
spring and the eyelet head.<br />
5. Re-install the mounting hardware.<br />
6. Adjust the spring preload according to the spring preload and sag adjustment<br />
sections of this manual.<br />
NON-WARRANTY MAINTENANCE SCHEDULE<br />
NEW REAR SHOCK<br />
• Check /set rear shock sag/preload.<br />
• Check main spring air pressure.<br />
• Check SPV air pressure (where applicable).<br />
• Check mounting hardware torque.<br />
EVERY RIDE<br />
• Check main and SPV air pressure (where applicable).<br />
• Make sure coil rear shocks are preloaded properly.<br />
EVERY 8 HOURS<br />
• Check /set rear shock sag and preload.<br />
• Check mounting hardware torque.<br />
• Check the mounting hardware. To see if replacement is necessary, lift up on the<br />
bike’s seat post to feel for play. Any kind of a clunk that feels similar to a loose<br />
headset may require replacement of your rear shock hardware. For replacement,<br />
visit your Authorized <strong>Manitou</strong> Dealer or contact HB Suspension directly. Contact<br />
information is located at the end of this document.<br />
AFTER EVERY 150 HOURS OF USE<br />
• Send rear shock to service center for oil change and inspection.<br />
CONTENTS UNDER HIGH PRESSURE. NEVER<br />
DISASSEMBLE YOUR REAR SHOCK. DOING SO WILL<br />
RESULT IN SERIOUS INJURY.<br />
IF YOUR REAR SHOCK EVER LOSES OIL, AIR<br />
PRESSURE, OR BEGINS TO MAKE NOISE, STOP RIDING<br />
THE REAR SHOCK AND HAVE THE REAR SHOCK INSPECTED BY AN AUTHORIZED<br />
MANITOU DEALER/SERVICE CENTER OR CONTACT HB SUSPENSION<br />
AT (888) 686-3472.<br />
Periodically you must service and clean the area below the air canister. Follow the<br />
recommended service schedule listed below, but a good rule of thumb is if the rear<br />
shock begins to make a wheezing sound on compression, it is time to service the<br />
air canister. For detailed service kit instructions please visit www.HBsuspension.com.<br />
SERVICE SCHEDULE<br />
Suggested Service for <strong>Manitou</strong> <strong>Rear</strong> <strong>Shocks</strong><br />
Normal Conditions – Short/Infrequent Rides<br />
• Clean rear shock body after every ride.<br />
• Clean and re-grease air canister every 3 months (air shocks only).<br />
• Send to service center for oil change and inspection after every 150 hours of use.<br />
7
Normal Conditions – Long/Frequent Rides<br />
• Clean rear shock body after every ride.<br />
• Clean and re-grease air canister every 2 months (air shocks only).<br />
• Send to service center for oil change and inspection after every 150 hours of use.<br />
Severe Conditions (mud, rain, snow, extreme dust) –<br />
Short/Infrequent Rides<br />
• Clean rear shock body after every ride.<br />
• Clean and re-grease air canister every 2 months (air shocks only).<br />
• Send to service center for oil change and inspection after every 150 hours of use.<br />
Severe Conditions (mud, rain, snow, extreme dust) –<br />
Long/Frequent Rides<br />
• Clean rear shock body after every ride.<br />
• Clean and re-grease air canister every month (air shocks only).<br />
• Send to service center for oil change and inspection after every 150 hours of use.<br />
For updates and tuning information, visit our website at www.HBsuspension.com.<br />
For new hardware, contact HB Suspension at (888) 686-3472 or order from the<br />
website at www.HBsuspension.com.<br />
SPV SET-UP QUICK REFERENCE GUIDE - <strong>2008</strong><br />
THIS QUICK REFERENCE GUIDE IS TO BE USED AFTER<br />
YOU HAVE COMPLETELY READ THE OWNER’S MANUAL.<br />
COIL AND AIR SHOCK INITIAL SET UP<br />
1<br />
2<br />
3<br />
4<br />
5<br />
6<br />
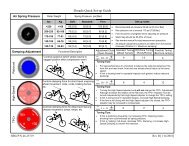
SET SPV PRESSURE:<br />
Range should be between 50-175 psi. Pressure should be between 50-70% of body weight. More pressure will<br />
create more compression damping, hold the bike up more and pedal better. Less pressure will create less<br />
compression damping, allow more sag, be more responsive and supple. Always set the No Tools volume adjuster<br />
to “1” before making pressure adjustments. Note: SWINGER AIR shocks with external platform adjustment come<br />
fully charged at the factory so no initial pressure adjustment is needed.<br />
SET SPV VOLUME:<br />
You should begin with the 16 mm adjuster completely backed out or with the No Tools volume adjuster set to “1.”<br />
Turning the volume adjuster inwards (or to a higher number in the case of No Tools volume adjustment) will<br />
create a more progressive damping effect making the suspension firmer from the middle to bottom out. Turning<br />
the volume adjuster outwards (or to a lower number in the case of No Tools volume adjustment) will make the<br />
rear shock more linear in compression damping and be a softer finish.<br />
ADJUST SAG:<br />
Sag is the amount the shock compresses under normal body weight. Recommendations:<br />
Cross country: 25-30% Sag<br />
Freeriding: 30-40% Sag<br />
Downhill: 30-45% Sag<br />
REBOUND DAMPING:<br />
Turn the blue knob located on the eyelet mount clockwise to increase rebound damping.<br />
LOW-SPEED COMPRESSION DAMPING (EVOLVER ISX-6, SWINGER X6, AND<br />
REVOX ISX ONLY):<br />
Turn in the red adjustment knob to increase chassis stability (also may decrease supple feel of shock).<br />
HIGH-SPEED COMPRESSION DAMPING (EVOLVER ISX-6, SWINGER X6, AND<br />
REVOX ISX ONLY):<br />
Turn in the black adjustment knob to increase high-speed bottoming resistance.<br />
NOTE: On EVOLVER ISX-6, SWINGER X6, and REVOX ISX, please make sure that the two compression adjuster<br />
knobs on the reservoir are fully open when setting the shock pressure and volume. You can turn them after you<br />
set up the pressure and volume adjuster to achieve more compression damping.<br />
8
COIL SPRING PART NUMBERS<br />
COIL SPRING KIT<br />
Eye-to-Eye X Travel Rate Part #<br />
165 X 38 (6.5" X 1.5") 250 85-6660<br />
165 X 38 (6.5" X 1.5") 300 85-6661<br />
165 X 38 (6.5" X 1.5") 350 85-6662<br />
165 X 38 (6.5" X 1.5") 400 85-6663<br />
165 X 38 (6.5" X 1.5") 450 85-6664<br />
165 X 38 (6.5" X 1.5") 500 85-6665<br />
165 X 38 (6.5" X 1.5") 550 85-6666<br />
165 X 38 (6.5" X 1.5") 600 85-6667<br />
165 X 38 (6.5" X 1.5") 650 85-6668<br />
165 X 38 (6.5" X 1.5") 700 85-6669<br />
165 X 38 (6.5" X 1.5") 750 85-6670<br />
190 or 200 X 50 (7.5" or 7.875" X 2.0") 250 85-6185<br />
190 or 200 X 50 (7.5" or 7.875" X 2.0") 300 85-5431<br />
190 or 200 X 50 (7.5" or 7.875" X 2.0") 350 85-6111<br />
190 or 200 X 50 (7.5" or 7.875" X 2.0") 400 85-6112<br />
190 or 200 X 50 (7.5" or 7.875" X 2.0") 450 85-6113<br />
190 or 200 X 50 (7.5" or 7.875" X 2.0") 500 85-6114<br />
190 or 200 X 50 (7.5" or 7.875" X 2.0") 550 85-6136<br />
190 or 200 X 50 (7.5" or 7.875" X 2.0") 600 85-6671<br />
190 or 200 X 50 (7.5" or 7.875" X 2.0") 650 85-6672<br />
190 or 200 X 50 (7.5" or 7.875" X 2.0") 700 85-6673<br />
190 or 200 X 50 (7.5" or 7.875" X 2.0") 750 85-6674<br />
200 X 57 (7.875" X 2.25") 250 85-6700<br />
200 X 57 (7.875" X 2.25") 300 85-6701<br />
200 X 57 (7.875" X 2.25") 350 85-6702<br />
200 X 57 (7.875" X 2.25") 400 85-6703<br />
200 X 57 (7.875" X 2.25") 450 85-6704<br />
200 X 57 (7.875" X 2.25") 500 85-6705<br />
200 X 57 (7.875" X 2.25") 550 85-6706<br />
200 X 57 (7.875" X 2.25") 600 85-6707<br />
200 X 57 (7.875" X 2.25") 650 85-6708<br />
200 X 57 (7.875" X 2.25") 700 85-6709<br />
200 X 57 (7.875" X 2.25") 750 85-6710<br />
215 X 63 (8.5" X 2.5") 250 85-6186<br />
215 X 63 (8.5" X 2.5") 300 85-6187<br />
215 X 63 (8.5" X 2.5") 350 85-6188<br />
COIL SPRING PART NUMBERS (continued)<br />
COIL SPRING KIT<br />
Eye-to-Eye X Travel Rate Part #<br />
215 X 63 (8.5" X 2.5") 400 85-6189<br />
215 X 63 (8.5" X 2.5") 450 85-6190<br />
215 X 63 (8.5" X 2.5") 500 85-6191<br />
215 X 63 (8.5" X 2.5") 550 85-6192<br />
215 X 63 (8.5" X 2.5") 600 85-6675<br />
215 X 63 (8.5" X 2.5") 650 85-6676<br />
215 X 63 (8.5" X 2.5") 700 85-6677<br />
215 X 63 (8.5" X 2.5") 750 85-6678<br />
222 or 230 X 70 (8.75" or 9.0" X 2.75") 250 85-6193<br />
222 or 230 X 70 (8.75" or 9.0" X 2.75") 300 85-6137<br />
222 or 230 X 70 (8.75" or 9.0" X 2.75") 350 85-6117<br />
222 or 230 X 70 (8.75" or 9.0" X 2.75") 400 85-6118<br />
222 or 230 X 70 (8.75" or 9.0" X 2.75") 450 85-6119<br />
222 or 230 X 70 (8.75" or 9.0" X 2.75") 500 85-6120<br />
230 X 70 (9.0" X 2.75") 550 85-5432<br />
230 X 70 (9.0" X 2.75") 600 85-6679<br />
230 X 70 (9.0" X 2.75") 650 85-6680<br />
230 X 70 (9.0" X 2.75") 700 85-6681<br />
230 X 70 (9.0" X 2.75") 750 85-6682<br />
240 X 76 (9.5" X 3.0") 250 85-6194<br />
240 X 76 (9.5" X 3.0") 300 85-6195<br />
240 X 76 (9.5" X 3.0") 350 85-6196<br />
240 X 76 (9.5" X 3.0") 400 85-6197<br />
240 X 76 (9.5" X 3.0") 450 85-6198<br />
240 X 76 (9.5" X 3.0") 500 85-6199<br />
240 X 76 (9.5" X 3.0") 550 85-6201<br />
240 X 76 (9.5" X 3.0") 600 85-4460<br />
240 X 76 (9.5" X 3.0") 650 85-6683<br />
240 X 76 (9.5" X 3.0") 700 85-6684<br />
240 X 76 (9.5" X 3.0") 750 85-6685<br />
267 X 90 (10.5" X 3.5") 250 85-6850<br />
267 X 90 (10.5" X 3.5") 300 85-6851<br />
267 X 90 (10.5" X 3.5") 350 85-6852<br />
267 X 90 (10.5" X 3.5") 400 85-6853<br />
267 X 90 (10.5" X 3.5") 450 85-6854<br />
9
WORLDWIDE LIMITED WARRANTY<br />
HB Suspension (producer/manufacturer) warrants to the original retail purchaser<br />
(“you”) that the HB Suspension product for which they received this warranty is<br />
free from defects in material and workmanship for ONE year (two years in<br />
European Union countries) from the date of original retail purchase. This warranty<br />
is not transferable to a subsequent purchaser. HB Suspension’s sole obligation<br />
under this warranty is to repair or replace the product, at HB Suspension’s option.<br />
HB Suspension must be notified in writing of any claim under this warranty within<br />
60 days of any claimed lack of conformity of the product.<br />
Warranty Limitations<br />
The duration of any implied warranty or condition, of merchantability, fitness for a<br />
particular purpose, or otherwise, on this product shall be limited to the duration<br />
of the express warranty set forth above. In no event shall HB Suspension be liable<br />
for any loss, inconvenience or damage, whether direct, incidental, consequential or<br />
otherwise, resulting from breach of any express or implied warranty or condition,<br />
of merchantability, fitness for a particular purpose, or otherwise with respect to<br />
this product, except as set forth herein. Some states or countries do not allow<br />
limitation on how long an implied warranty lasts and some do not allow<br />
exclusions or limitations of incidental or consequential damages, so the above<br />
limitations or exclusions may not apply to you. This warranty gives you specific<br />
legal rights, and you may also have other rights, which may vary, from location to<br />
location. This warranty will be interpreted pursuant to the laws of the United<br />
States. The original English language version/meaning of this warranty controls<br />
over all translations and HB Suspension is not responsible for any errors in<br />
translation of this warranty or any product instructions. This warranty is not<br />
intended to confer any additional legal, jurisdictional or warranty rights to you<br />
other that those set forth herein or required by law. If any portion of this warranty<br />
is held to be invalid or unenforceable for any reason, such finding will not<br />
invalidate any other provision. For products purchased in countries other than the<br />
United States please contact HB Suspension’s authorized distributor or retailer in<br />
that respective country.<br />
Warranty Service Options<br />
To obtain service under this warranty you must:<br />
Bring or send your HB Suspension product, together with this warranty, the retail<br />
seller’s original receipt or other satisfactory proof of the date of purchase to the<br />
retailer where you purchased the item or another authorized HB Suspension<br />
retailer, or authorized HB Suspension distributor.<br />
Any postage, insurance or other shipping costs incurred in sending your<br />
HB Suspension product for service is your responsibility. HB Suspension will not<br />
be responsible for products lost or damaged in shipping.<br />
For products purchased in countries other than the United States please contact<br />
HB Suspension’s authorized distributor or retailer in the country where the<br />
product was purchased. They can be found on our website at<br />
www.HBsuspension.com.<br />
Warranty Exclusions<br />
Retailers and sellers of HB Suspension’s products are not authorized to modify<br />
this warranty in any way. It is your responsibility to regularly examine the product<br />
to determine the need for normal service or replacement. This warranty does not<br />
cover the following:<br />
• Products that have been modified, neglected or poorly maintained, used for<br />
commercial purposes, misused or abused or involved in accidents.<br />
• Damage occurring during shipment of the products (such claims must be<br />
presented directly to the shipper).<br />
• Products whose serial number has been altered, defaced or removed.<br />
• Damage to products resulting from improper assembly or repair, the use or<br />
installation of parts or accessories not compatible with the original intended use<br />
of the product, or the failure to follow the product warnings and usage<br />
instructions.<br />
• Damage or deterioration to the surface finish, paint, aesthetics or appearance of<br />
the product.<br />
• The labor required to remove and/or re-fit and re-adjust the item covered by this<br />
warranty.<br />
• Normal wear to the product.<br />
• Any products for which the consumer does not follow the warranty procedures<br />
outlined above.<br />
For the current version of this warranty please visit our website at<br />
www.HBsuspension.com.<br />
10
REAR SHOCK SETUP<br />
INSTRUCTIONS<br />
Please select your shock and then use the<br />
appropriate setup sequence as outlined below.<br />
Use the tuning tips for your specific shock to<br />
achieve the optimal performance for your shock.<br />
NOTE: You should allow for a minimum of onehour<br />
break-in period prior to determining your<br />
preferred settings.<br />
S-TYPE MRD, S-TYPE SRL AND<br />
RADIUM<br />
1. Set sag.<br />
2. Set rebound adjustment.<br />
3. Review lockout instructions (S-TYPE MRD,<br />
S-TYPE SRL, RADIUM RL).<br />
METEL<br />
1. Set sag.<br />
2. Set rebound adjustment.<br />
3. Adjust Platform Plus external adjustment<br />
screw to preference (RPA models).<br />
S-TYPE SR-SPV, ALL EVOLVER SPV,<br />
AND ALL SWINGER COIL SPV<br />
1. Set SPV pressure in red Schrader valve to<br />
75 psi (5 bar).<br />
2. Set sag.<br />
3. Adjust SPV pressure to set the platform to<br />
your preference.<br />
4. Set rebound adjustment.<br />
5. Set bottoming resistance:<br />
a. Rotate SPV No-Tools volume adjuster to<br />
one of its 4 positions to obtain desired<br />
“ramp up.” “1” is the most linear, “4” is<br />
the most progressive.<br />
b. Screw in tooled SPV volume adjuster to<br />
obtain desired “ramp up” (SWINGER<br />
COIL X3 model only).<br />
ALL SWINGER AIR<br />
1. Set sag.<br />
2. Adjust external SPV platform adjustment<br />
knob (four clicks from soft to firm,<br />
clockwise increases firmness).<br />
3. Set rebound adjustment.<br />
4. Screw in tooled SPV volume adjuster to<br />
obtain desired “ramp up” (X4 model only).<br />
REVOX, EVOLVER ISX-1, ISX-4 AND<br />
ISX-6, AND SWINGER COIL<br />
1. Set sag.<br />
2. Set rebound adjustment.<br />
3. Fine tune high- and low-speed compression<br />
adjustments located on your reservoir<br />
bridge (EVOLVER ISX-6, SWINGER COIL X6<br />
and REVOX).<br />
4. Rotate SPV No-Tools volume adjuster to one<br />
of its 4 positions to obtain desired “ramp<br />
up.” “1” is the most linear, “4” is the most<br />
progressive setting. (REVOX, EVOLVER<br />
ISX-4, ISX-6, and SWINGER COIL)<br />
EINSTELLANWEISUNGEN FÜR<br />
HINTERE STOSSDÄMPFER<br />
Das jeweilige Stoßdämpfermodell bestimmen<br />
und den entsprechenden Einstellablauf wie unten<br />
angegeben ausführen. Die Tipps für die<br />
Feineinstellung des jeweiligen Stoßdämpfers<br />
verwenden, um die optimale Funktion des<br />
Stoßdämpfers zu gewährleisten.<br />
HINWEIS: Die Bestimmung der individuell<br />
bevorzugten Einstellungen sollte erst nach<br />
mindestens einer Stunde Einlaufzeit erfolgen.<br />
S-TYPE MRD, S-TYPE SRL UND<br />
RADIUM<br />
1. Negativfederweg einstellen.<br />
2. Zugstufe einstellen.<br />
3. Einstellung der Verriegelungsfunktion<br />
überprüfen (S-TYPE MRD, S-TYPE SRL,<br />
RADIUM RL).<br />
METEL<br />
1. Negativfederweg einstellen.<br />
2. Zugstufe einstellen.<br />
3. Externe Platform Plus Stellschraube auf<br />
Wunsch einstellen (RPA-Modelle).<br />
S-TYPE SR-SPV, ALLE EVOLVER SPV<br />
UND ALLE SWINGER COIL SPV<br />
1. SPV-Druck im roten Schrader-Ventil auf<br />
5 bar (75 psi) einstellen.<br />
2. Negativfederweg einstellen.<br />
3. SPV-Druck für Plattform auf gewünschten<br />
Wert einstellen.<br />
4. Zugstufe einstellen.<br />
5. Durchschlagwiderstand einstellen.<br />
a. Werkzeuglosen SPV-Volumeneinsteller in<br />
eine der 4 Positionen drehen, um die<br />
gewünschte progressivere Federrate zu<br />
erhalten. „1“ ist die linearste und „4“ die<br />
progressivste Einstellung.<br />
b. SPV-Volumeneinstellwerkzeug<br />
einschrauben, um die gewünschte<br />
progressivere Federrate zu erhalten (nur<br />
Modell SWINGER COIL X3).<br />
ALLE SWINGER AIR<br />
1. Negativfederweg einstellen.<br />
2. Externen SPV-Plattform-Einstellknopf<br />
drehen (vier Klicke von weich bis hart,<br />
Drehung im Uhrzeigersinn erhöht die<br />
Härte).<br />
3. Zugstufe einstellen.<br />
4. SPV-Volumeneinstellwerkzeug<br />
einschrauben, um die gewünschte<br />
progressivere Federrate zu erhalten (nur<br />
Modell X4).<br />
REVOX, EVOLVER ISX-1, ISX-4 UND<br />
ISX-6 UND SWINGER COIL<br />
1. Negativfederweg einstellen.<br />
2. Zugstufe einstellen.<br />
3. Druckstufendämpfung im hohen und<br />
niedrigen Geschwindigkeitsbereich mit<br />
Einstellern an der Reservoirbrücke fein<br />
einstellen (EVOLVER ISX-6, SWINGER COIL<br />
X6 und REVOX).<br />
4. Werkzeuglosen SPV-Volumeneinsteller in<br />
eine der 4 Positionen drehen, um die<br />
gewünschte progressivere Federrate zu<br />
erhalten. „1“ ist die linearste und „4“ die<br />
progressivste Einstellung. (REVOX,<br />
EVOLVER ISX-4, ISX-6 und SWINGER<br />
COIL).<br />
INSTRUCCIONES DE REGULACIÓN<br />
INICIAL DE AMORTIGUADORES<br />
POSTERIORES<br />
Elija su amortiguador y luego siga la secuencia<br />
apropiada de regulación inicial, como se define a<br />
continuación. Siga los consejos de puesta a punto<br />
de su amortiguador específico para obtener el<br />
rendimiento óptimo de su amortiguador.<br />
NOTA: Debe conducir su bicicleta durante al menos<br />
una hora antes de determinar sus graduaciones de<br />
preferencia.<br />
S-TYPE MRD, S-TYPE SRL Y RADIUM<br />
1. Establezca la compresión estática.<br />
2. Establezca la regulación de rebote.<br />
3. Revise las instrucciones de bloqueo<br />
(S-TYPE MRD, S-TYPE SRL, RADIUM RL).<br />
METEL<br />
1. Establezca la compresión estática.<br />
2. Establezca la regulación de rebote.<br />
3. Haga ajustes con el tornillo de regulación<br />
externo Platform Plus según su preferencia<br />
(modelos RPA).<br />
S-TYPE SR-SPV, TODOS LOS<br />
MODELOS EVOLVER SPV, Y TODOS<br />
LOS MODELOS HELICOIDALES<br />
SWINGER COIL SPV<br />
1. Establezca la presión SPV en la válvula<br />
Schrader roja a 5 barias (75 psi).<br />
2. Establezca la compresión estática.<br />
3. Regule la presión SPV para establecer la<br />
plataforma según su preferencia.<br />
4. Establezca la regulación de rebote.<br />
5. Establezca la resistencia de llegar a fondo:<br />
a. Gire el regulador de volumen sin necesidad<br />
de herramientas SPV a una de sus 4<br />
posiciones hasta obtener el “ascenso”<br />
deseado. “1” es el más lineal, “4” es el más<br />
progresivo.<br />
b. Haga girar el regulador de volumen<br />
mecanizado SPV hacia dentro para obtener<br />
el “ascenso” deseado (sólo en el modelo<br />
helicoidal SWINGER COIL X3).<br />
TODOS LOS MODELOS NEUMÁTICOS<br />
SWINGER AIR<br />
1. Establezca la compresión estática.<br />
2. Haga ajustes con el botón de regulación<br />
externa de plataforma SPV (cuatro clics de<br />
suave a firme, hacia la derecha aumenta la<br />
firmeza).<br />
3. Establezca la regulación de rebote.<br />
4. Haga girar el regulador de volumen<br />
mecanizado SPV hacia dentro para obtener el<br />
“ascenso” deseado (sólo en el modelo X4).<br />
REVOX, EVOLVER ISX-1, ISX-4 Y<br />
ISX-6, Y HELICOIDAL SWINGER COIL<br />
1. Establezca la compresión estática.<br />
2. Establezca la regulación de rebote.<br />
3. Haga ajustes de precisión de los reguladores<br />
de compresión a alta y baja velocidad, que<br />
están ubicados en el puente del depósito<br />
(EVOLVER ISX-6, HELICOIDAL SWINGER COIL<br />
X6 y REVOX).<br />
4. Gire el regulador de volumen sin necesidad de<br />
herramientas SPV a una de sus 4 posiciones<br />
hasta obtener el “ascenso” deseado. “1” es el<br />
más lineal, “4” es el más progresivo (REVOX,<br />
EVOLVER ISX-4, ISX-6, y HELICOIDAL<br />
SWINGER COIL).<br />
65
HB Suspension, LLC<br />
5800 W Donges Bay Rd<br />
Mequon, WI 53092<br />
1.888.MTN.DISC (1.888.686.3472)<br />
Fax: (262) 512.4219<br />
Email: hayestech@hayesbrake.com<br />
www.hbsuspension.com<br />
© HB Suspension, LLC 2007