User Guide English (up to Leaf Capture 11.4.5) - Mamiya
User Guide English (up to Leaf Capture 11.4.5) - Mamiya
User Guide English (up to Leaf Capture 11.4.5) - Mamiya

Create successful ePaper yourself
Turn your PDF publications into a flip-book with our unique Google optimized e-Paper software.
Copyrights<br />
Trademarks<br />
FCC Compliance<br />
Equipment Recycling<br />
© <strong>Leaf</strong> Imaging Ltd., 2009. All rights reserved.<br />
This document is also distributed in Adobe Systems Incorporated's PDF<br />
(Portable Document Format). You may reproduce the document from the PDF<br />
file for internal use. Copies produced from the PDF file must be reproduced in<br />
whole.<br />
Adobe, Acrobat, Adobe Illustra<strong>to</strong>r, Distiller, Pho<strong>to</strong>shop, PostScript, and<br />
PageMaker are trademarks of Adobe Systems Incorporated.<br />
Apple, AppleShare, AppleTalk, iMac, ImageWriter, LaserWriter, Mac OS, Power<br />
Macin<strong>to</strong>sh, and TrueType are registered trademarks of Apple Computer, Inc.<br />
Macin<strong>to</strong>sh is a trademark of Apple Computer, Inc., registered in the U.S.A. and<br />
other countries.<br />
Any <strong>Leaf</strong> Imaging Ltd. equipment referred <strong>to</strong> in this document has been tested<br />
and found <strong>to</strong> comply with the limits for a Class A digital device, pursuant <strong>to</strong> part<br />
15 of the FCC Rules. These limits are designed <strong>to</strong> provide reasonable protection<br />
against harmful interference when the equipment is operated in a commercial<br />
environment. This equipment generates, uses, and can radiate radio frequency<br />
energy and, if not installed and used in accordance with the instruction manual,<br />
may cause harmful interference <strong>to</strong> radio communications.<br />
Operation of this equipment in a residential area is likely <strong>to</strong> cause harmful<br />
interference in which case the user wil be required <strong>to</strong> correct the interference at<br />
his own expense.<br />
Canada<br />
This Class A digital apparatus complies with Canadian ICES-003.<br />
Cet appareil num?rique de la classe A est conforme ? la norme NMB-003 du<br />
Canada.<br />
EN 55022 Warning<br />
This is a Class A product. In a domestic environment it may cause radio<br />
interference, in which case the user may<br />
be required <strong>to</strong> take adequate measures.<br />
In the European Union, this symbol indicates that when the last user<br />
wishes <strong>to</strong> discard this product, it must be sent <strong>to</strong> appropriate facilities<br />
for recovery and recycling.<br />
This electronic information product complies with Standard SJ/T<br />
11363 - 2006 of the Electronics Industry of the People's Republic of<br />
China.
Limitation of Liability<br />
The product, software or services are being provided on an "as is" and "as available" basis.<br />
Except as may be stated specifically in your contract, <strong>Leaf</strong> Imaging Ltd. expressly<br />
disclaims all warranties of any kind, whether express or implied, including, but not limited<br />
<strong>to</strong>, any implied warranties of merchantability, fitness for a particular purpose and noninfringement.<br />
You understand and agree that, except as may be stated specifically in your contract, <strong>Leaf</strong><br />
Imaging Ltd. shall not be liable for any direct, indirect, incidental, special, consequential<br />
or exemplary damages, including but not limited <strong>to</strong>, damages for loss of profits, goodwill,<br />
use, data or other intangible losses (even if <strong>Leaf</strong> Imaging Ltd. has been advised of the<br />
possibility of such damages), resulting from: (i) the use or the inability <strong>to</strong> use the product<br />
or software; (ii) the cost of procurement of substitute goods and services resulting from<br />
any products, goods, data, software, information or services purchased; (iii) unauthorized<br />
access <strong>to</strong> or alteration of your products, software or data; (iv) statements or conduct of any<br />
third party; (v) any other matter relating <strong>to</strong> the product, software, or services.<br />
The text and drawings herein are for illustration and reference only. The specifications on<br />
which they are based are subject <strong>to</strong> change. <strong>Leaf</strong> Imaging Ltd. may, at any time and<br />
without notice, make changes <strong>to</strong> this document. <strong>Leaf</strong> Imaging Ltd. assumes no liability for<br />
technical or edi<strong>to</strong>rial errors or omissions made herein, and shall not be liable for<br />
incidental, consequential, indirect, or special damages, including, without limitation, loss<br />
of use, loss or alteration of data, delays, or lost profits or savings arising from the use of<br />
this document.<br />
http://www.leaf-pho<strong>to</strong>graphy.com<br />
Copyright © 2009 <strong>Leaf</strong> Imaging Ltd. All rights reserved.<br />
(Internal 853-00991E Rev A) Revised 27 Oc<strong>to</strong>ber 2009
Contents<br />
................................................................................................................................................................ 1<br />
1 Introduction 1<br />
Overview .................................................................................................................................................. 2<br />
Using the Stylus........................................................................................................................................ 4<br />
The Basic Steps......................................................................................................................................... 5<br />
2 Getting Started 7<br />
Turning on the <strong>Leaf</strong> Aptus-II Digital Camera Back ..................................................................................... 8<br />
Compact Flash Card and Battery........................................................................................................ 8<br />
Tethered Mode.................................................................................................................................. 9<br />
Turning off the <strong>Leaf</strong> Aptus-II Digital Camera Back..................................................................................... 9<br />
Preparing a Compact Flash Card for Shoot ............................................................................................. 10<br />
Formatting in Mac OS X................................................................................................................... 10<br />
Formatting in Windows ................................................................................................................... 12<br />
Inserting a Compact Flash Card .............................................................................................................. 14<br />
Removing a Compact Flash Card ............................................................................................................ 15<br />
3 Preparing <strong>to</strong> Shoot 17<br />
Changing the Interface language............................................................................................................ 18<br />
Setting the Date and Time ..................................................................................................................... 19<br />
Viewing and Defining Camera Settings................................................................................................... 20<br />
Creating a Folder.................................................................................................................................... 21<br />
Selecting a Folder for Your Shot ............................................................................................................. 22<br />
Assigning a Base Name <strong>to</strong> a Shot............................................................................................................ 23<br />
Adding Notes and Copyright Information <strong>to</strong> Your Shots ......................................................................... 24<br />
4 Taking a Shot 25<br />
Taking a Shot ......................................................................................................................................... 26<br />
5 Evaluating Your Shot 27<br />
Checking the Exposure ........................................................................................................................... 28<br />
Checking Exposure with the His<strong>to</strong>gram............................................................................................28<br />
Checking Exposure with the Picker Tool........................................................................................... 29<br />
Checking Exposure with the Overexposure and Underexposure Alarms............................................ 30<br />
Checking Focus ...................................................................................................................................... 31<br />
Setting the Gray Balance ........................................................................................................................ 32<br />
Checking Composition Using the Grid .................................................................................................... 33<br />
Moving the Grid Lines...................................................................................................................... 33
4 <strong>Leaf</strong> Aptus <strong>User</strong> <strong>Guide</strong><br />
Changing the Color of the Grid Lines............................................................................................... 34<br />
Setting Grid Attributes ..................................................................................................................... 34<br />
Browsing Through Your Images .............................................................................................................. 35<br />
Deleting Shots in Shoot View.................................................................................................................. 35<br />
Flagging and Annotating in Shoot View.................................................................................................. 36<br />
Viewing Information About Your Shot .................................................................................................... 37<br />
6 Editing Your Images 39<br />
Edit View ................................................................................................................................................ 40<br />
Accessing Edit View from Shoot View .............................................................................................. 40<br />
Browsing Through Your Images .............................................................................................................. 41<br />
Selecting a View for Your Images ........................................................................................................... 41<br />
Viewing Information and EXIF Data......................................................................................................... 42<br />
Viewing Information Using the <strong>User</strong> But<strong>to</strong>n ............................................................................................ 43<br />
Selecting Multiple Images ....................................................................................................................... 44<br />
Flagging, Annotating, and Deleting in Edit View ..................................................................................... 44<br />
Sorting Your Images ............................................................................................................................... 45<br />
Selecting a Folder ................................................................................................................................... 46<br />
Moving Your Images............................................................................................................................... 47<br />
Opening Images in Shoot View ............................................................................................................... 48<br />
7 Adjusting Settings for a Shoot 49<br />
Shooting Without Overlays ..................................................................................................................... 50<br />
Working in Full-Screen View ................................................................................................................... 51<br />
Setting Grid Attributes............................................................................................................................ 52<br />
Using the Crop Mask .............................................................................................................................. 53<br />
Adjusting the Transparency of the Crop Mask......................................................................................... 54<br />
Adjusting the Transparency of the His<strong>to</strong>gram and Info Bar...................................................................... 55<br />
Setting the Exposure Alarm..................................................................................................................... 56<br />
Resetting the File Name Counter............................................................................................................. 57<br />
8 Defining the Camera Back Settings 59<br />
Formatting the Compact Flash Card in Portable Mode ............................................................................ 60<br />
Configuring the <strong>User</strong> But<strong>to</strong>n................................................................................................................... 62<br />
Configuring the <strong>User</strong> But<strong>to</strong>n for Shoot View .................................................................................... 62<br />
Configuring the <strong>User</strong> But<strong>to</strong>n for Edit View .......................................................................................63<br />
Configuring a Long Press of the <strong>User</strong> But<strong>to</strong>n.................................................................................... 64<br />
Aligning the Touch Screen ...................................................................................................................... 65<br />
Turning Off the Backlight........................................................................................................................ 66<br />
Turning On the Backlight ........................................................................................................................ 67<br />
Setting the Volume for the Camera Back Sounds .................................................................................... 68<br />
Setting the Owner Information ............................................................................................................... 69<br />
Res<strong>to</strong>ring Fac<strong>to</strong>ry Settings....................................................................................................................... 70<br />
Viewing the <strong>Leaf</strong> Aptus-II Version Information......................................................................................... 71
Introduction<br />
Overview.....................................................................................................................2<br />
Using the Stylus ....................................................................................................... 4<br />
The Basic Steps.........................................................................................................5
2 Chapter 1 – Introduction<br />
Overview<br />
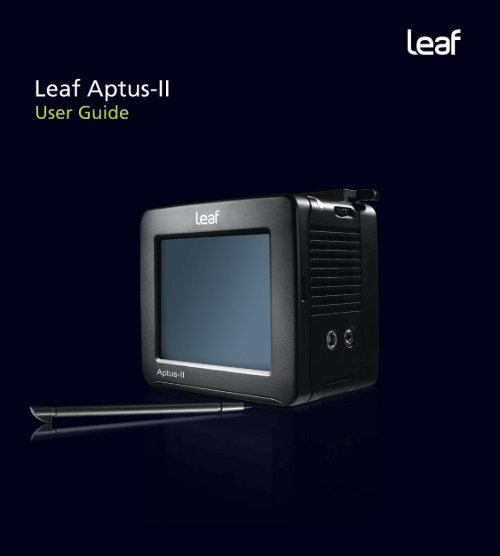
The <strong>Leaf</strong>® Aptus digital camera back is the world’s first camera back that<br />
includes a built-in (6×7 cm) LCD screen and an innovative graphic user<br />
interface. An integrated battery and compact flash (CF) s<strong>to</strong>rage card<br />
facilitate shooting. New hardware offers continuous non-s<strong>to</strong>p shooting and<br />
a faster capture rate. These shooting capabilities, combined with large<br />
s<strong>to</strong>rage options, give professionals the flexibility <strong>to</strong> meet the most<br />
demanding shooting situations. A new raw HDR format that uses lossless<br />
compression <strong>to</strong> reduce file size and a completely new <strong>Leaf</strong> <strong>Capture</strong><br />
application enhance workflow and teamwork both on location and in the<br />
studio.<br />
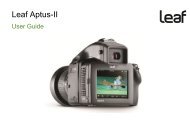
This user guide explains how <strong>to</strong> set <strong>up</strong> the camera back for first-time use,<br />
take a shot, evaluate it, and edit it.<br />
The following picture shows the <strong>Leaf</strong> Aptus-II digital camera back opening<br />
screen and menu but<strong>to</strong>ns:<br />
Current user-but<strong>to</strong>n action<br />
Camera settings<br />
Current user-but<strong>to</strong>n action<br />
Number of images in the<br />
current folder or on the disk<br />
Remaining battery power<br />
Shoot view Edit view Set<strong>up</strong> menu
Overview 3<br />
The following picture shows the location of the <strong>Leaf</strong> Aptus-II digital camera back<br />
controls and stylus:<br />
On/Off but<strong>to</strong>n<br />
<strong>User</strong> but<strong>to</strong>n<br />
Stylus
4 Chapter 1 – Introduction<br />
Using the Stylus<br />
The <strong>Leaf</strong> Aptus-II digital camera back is s<strong>up</strong>plied with a stylus. Use the stylus <strong>to</strong> tap<br />
the <strong>to</strong>uch screen.<br />
To remove the stylus for use, slide it out of the slot located at the <strong>to</strong>p of the <strong>Leaf</strong><br />
Aptus-II digital camera back.
The Basic Steps 5<br />
The Basic Steps<br />
Follow these steps <strong>to</strong> shoot and edit your images:<br />
Prepare <strong>to</strong> shoot.<br />
View the camera<br />
settings.<br />
Take and evaluate<br />
a shot.<br />
Edit your images.<br />
Turn on your camera and camera back,<br />
and perform some basic steps before<br />
taking your first shot.<br />
View the predefined camera settings,<br />
choose another setting, or make changes<br />
<strong>to</strong> specific camera settings.<br />
Take a shot. Check the exposure, focus,<br />
and composition of your shot, and set<br />
the gray balance for future shots.<br />
Organize your images using the <strong>Leaf</strong><br />
Aptus-II digital camera back editing<br />
<strong>to</strong>ols.
Getting Started<br />
Turning on the <strong>Leaf</strong> Aptus-II Digital Camera Back.......................................... 8<br />
Turning off the <strong>Leaf</strong> Aptus-II Digital Camera Back ......................................... 9<br />
Preparing a Compact Flash Card for Shoot......................................................10<br />
Inserting a Compact Flash Card .........................................................................14<br />
Removing a Compact Flash Card .......................................................................15
8 Chapter 2 – Getting Started<br />
Turning on the <strong>Leaf</strong> Aptus-II Digital Camera Back<br />
The procedure for turning on your <strong>Leaf</strong> Aptus-II digital camera back depends on<br />
whether you use a compact flash card and battery, use a digital magazine, or work in<br />
tethered mode.<br />
Compact Flash Card and Battery<br />
To turn on your <strong>Leaf</strong> Aptus-II digital camera back when using a compact flash card and<br />
battery:<br />
1. Ensure that the battery is charged. For more information, see the Installation<br />
<strong>Guide</strong>.<br />
2. If this is the first time that you are using the compact flash card with your <strong>Leaf</strong><br />
Aptus-II digital camera back, you should format the card. For detailed<br />
instructions on formatting the compact flash card, see Preparing a Compact<br />
Flash Card for Shoot on page 10.<br />
3. Insert the compact flash card. For more information, see Inserting a Compact<br />
Flash Card on page 14.<br />
4. Press and hold the On/Off but<strong>to</strong>n on the camera back until the orange light<br />
turns on, and then release the On/Off but<strong>to</strong>n.<br />
The light turns green and a beep sounds <strong>to</strong> indicate that the camera is ready for<br />
you <strong>to</strong> shoot.<br />
5. Verify that the Ready <strong>to</strong> Shoot message appears on the <strong>to</strong>uch screen.<br />
Ready <strong>to</strong> Shoot
Turning off the <strong>Leaf</strong> Aptus-II Digital Camera Back 9<br />
Tethered Mode<br />
To turn on your <strong>Leaf</strong> Aptus-II digital camera back when working in tethered mode:<br />
1. Plug the FireWire cable in<strong>to</strong> the camera back and the computer.<br />
If there is a compact flash in the camera back, the compact flash icon appears on<br />
the desk<strong>to</strong>p.<br />
2. Turn on the camera.<br />
For more information, see the <strong>Leaf</strong> Aptus-II Installation <strong>Guide</strong>.<br />
Turning off the <strong>Leaf</strong> Aptus-II Digital Camera Back<br />
Turn the <strong>Leaf</strong> Aptus-II digital camera back off in one of the following ways:<br />
When using a compact flash and battery:<br />
• Press and hold the On/Off but<strong>to</strong>n until the light turns orange. If you changed a<br />
setting in the Set<strong>up</strong> menu, the camera saves the new setting and then shuts<br />
down.<br />
When using a digital magazine:<br />
Ø Press the On/Off but<strong>to</strong>n.<br />
When working in tethered mode:<br />
Do one of the following:<br />
• If you are using a compact flash card, on the desk<strong>to</strong>p, right-click the compact<br />
flash card and select Move <strong>to</strong> Trash (Apple® Mac OS® X operating system) or<br />
Eject (Microsoft® Windows® operating system), and then unplug the FireWire<br />
cable.<br />
• If you are not using a compact flash card, unplug the FireWire cable.
10 Chapter 2 – Getting Started<br />
Preparing a Compact Flash Card for Shoot<br />
Format a compact flash card in the following circumstances:<br />
• If the compact flash card is new.<br />
• If you have used the compact flash card on a non-<strong>Leaf</strong> digital camera back.<br />
You can format the card on a computer running either Mac OS or Windows. When<br />
formatting the compact flash card, you can use either a card reader, or the <strong>Leaf</strong><br />
Aptus-II digital camera back <strong>to</strong> read the card.<br />
Notes:<br />
• If you use the <strong>Leaf</strong> Aptus-II digital camera back as a card reader, we recommend<br />
that you use a computer running Mac OS X.<br />
• Formatting the compact flash card erases all data on the card.<br />
If you have been using the compact flash card with your Aptus-II and wish <strong>to</strong> erase<br />
all the data on the card, perform a quick format. For more information, see<br />
Formatting the Compact Flash Card in Portable Mode on page 60.<br />
Formatting in Mac OS X<br />
1. Insert the compact flash card in<strong>to</strong> the card reader or the <strong>Leaf</strong> Aptus-II digital<br />
camera back.<br />
2. On the desk<strong>to</strong>p, double-click the system disk.<br />
3. Select Applications > Utilities > Disk Utility.<br />
4. On the left panel of the Disk Utility dialog box, select the removable disk that<br />
you want <strong>to</strong> format.
Preparing a Compact Flash Card for Shoot 11<br />
5. Click the Erase tab.<br />
6. In the Volume Format box, select MS-DOS (FAT32).<br />
7. In the Name box, type LEAF-CF.<br />
8. Click Erase.
12 Chapter 2 – Getting Started<br />
9. In the confirmation message that appears, click Erase.<br />
Formatting is complete when the progress bar disappears from view, the Volume<br />
Format box shows Mac OS Extended (journaled), and the Name box shows Untitled.<br />
10. On the desk<strong>to</strong>p, select the LEAF-CF volume.<br />
11. Select File > Get Info.<br />
12. In the <strong>Leaf</strong>-CF Info window, ensure that Format shows Macin<strong>to</strong>sh PC Exchange<br />
(MS-DOS).<br />
13. Close the Disk Utility application.<br />
14. Drag the LEAF-CF volume <strong>to</strong> Trash.<br />
Formatting in Windows<br />
1. Insert the compact flash card in a card reader.<br />
2. On the desk<strong>to</strong>p, click My Computer.
Preparing a Compact Flash Card for Shoot 13<br />
3. Right-click Removable Disk, and from the menu, select Format.<br />
4. In the Format dialog box, in the File System box, select FAT32.<br />
5. In the Volume label box, type LEAF-CF.<br />
6. Click Start.<br />
7. When the format procedure is complete, go <strong>to</strong> the desk<strong>to</strong>p and click My<br />
Computer.<br />
8. Right-click Removable Disk, and from the menu, select Eject.
14 Chapter 2 – Getting Started<br />
Inserting a Compact Flash Card<br />
If this is the first time that you are using the compact flash card with your <strong>Leaf</strong><br />
Aptus-II digital camera back, you should first format the card. For more information,<br />
see Preparing a Compact Flash Card for Shoot on page 10.<br />
1. Open the compact<br />
flash card door.<br />
Compact flash<br />
card door<br />
2. Insert the compact<br />
flash card.<br />
Compact flash card
Removing a Compact Flash Card 15<br />
Removing a Compact Flash Card<br />
1. Open the compact<br />
flash card door, and<br />
then press the<br />
Release but<strong>to</strong>n.<br />
Release but<strong>to</strong>n<br />
2. Remove the compact flash card.
16 Chapter 2 – Getting Started
Preparing <strong>to</strong> Shoot<br />
Changing the Interface language........................................................................18<br />
Setting the Date and Time....................................................................................19<br />
Viewing and Defining Camera Settings...........................................................20<br />
Creating a Folder ....................................................................................................21<br />
Selecting a Folder for Your Shot......................................................................... 22<br />
Assigning a Base Name <strong>to</strong> a Shot ..................................................................... 23<br />
Adding Notes and Copyright Information <strong>to</strong> Your Shots ............................ 24
18 Chapter 3 – Preparing <strong>to</strong> Shoot<br />
Changing the Interface language<br />
1. Scroll down, and<br />
then tap Interface<br />
Language.<br />
2. Tap the desired<br />
language.
Setting the Date and Time 19<br />
Setting the Date and Time<br />
1. Scroll down, and<br />
then tap Date and<br />
Time.<br />
2. Using the virtual<br />
keypad, tap the<br />
date and time<br />
values, and then<br />
tap ok.<br />
Note: You need <strong>to</strong> set the date and time only once. If the time-zone that you<br />
work in changes, reset the date and time accordingly.<br />
To take a shot now, skip <strong>to</strong> the section Taking a Shot on page 26.<br />
To view and cus<strong>to</strong>mize your camera settings, go <strong>to</strong> the next section.
20 Chapter 3 – Preparing <strong>to</strong> Shoot<br />
Viewing and Defining Camera Settings<br />
The selected<br />
camera setting.<br />
To view and select<br />
other predefined<br />
camera settings,<br />
tap presets.<br />
1. View the current<br />
settings by<br />
scrolling <strong>up</strong> and<br />
down.<br />
2. If necessary, change the camera setting or an individual setting. The<br />
camera settings specified here are applied <strong>to</strong> all future shots.<br />
To change a camera setting:<br />
Tap the relevant setting, and from the menu that appears, select an<br />
option.
Creating a Folder 21<br />
Creating a Folder<br />
Your shots are au<strong>to</strong>matically saved in the s<strong>to</strong>rage unit connected <strong>to</strong> your<br />
camera: digital magazine (<strong>Leaf</strong> DM) or compact flash (CF). To enhance<br />
organization, you can create folders for s<strong>to</strong>ring your shots.<br />
1. Tap Shots Folder.<br />
2. Tap down.<br />
3. Tap new.<br />
4. Using the virtual<br />
keypad, tap the<br />
name of the<br />
folder, and then<br />
tap OK.<br />
To create a<br />
subfolder, tap the<br />
new folder, tap<br />
open, and then tap<br />
new.
22 Chapter 3 – Preparing <strong>to</strong> Shoot<br />
Selecting a Folder for Your Shot<br />
Select the folder <strong>to</strong> save your shots in,<br />
Tap a folder, and<br />
then tap choose.
Assigning a Base Name <strong>to</strong> a Shot 23<br />
Assigning a Base Name <strong>to</strong> a Shot<br />
You can define a base name for your shots. The <strong>Leaf</strong> Aptus digital camera<br />
back applies this name <strong>to</strong> all shots, adding a number in sequence each time,<br />
until you define a new base name.<br />
1. Tap File name.<br />
2. Using the virtual<br />
keypad, enter a<br />
base name for the<br />
shot, and then tap<br />
ok.
24 Chapter 3 – Preparing <strong>to</strong> Shoot<br />
Adding Notes and Copyright Information <strong>to</strong> Your Shots<br />
1. Scroll down, and<br />
then tap the Info<br />
but<strong>to</strong>n.<br />
2. Click in either the<br />
Description or<br />
Copyright Notice<br />
area.<br />
3. Use the virtual<br />
keypad <strong>to</strong> enter<br />
the desired<br />
information, and<br />
then tap ok.
Taking a Shot<br />
Taking a Shot........................................................................................................... 26
26 Chapter 4 – Taking a Shot<br />
Taking a Shot<br />
Take a shot.<br />
Note: To guard against accidental taps <strong>to</strong> the screen, you can “lock” it. For<br />
more information, see Configuring a Long Press of the <strong>User</strong> But<strong>to</strong>n on page 64.
Evaluating Your Shot<br />
Checking the Exposure ........................................................................................28<br />
Checking Focus ....................................................................................................... 31<br />
Setting the Gray Balance ..................................................................................... 32<br />
Checking Composition Using the Grid ............................................................ 33<br />
Browsing Through Your Images......................................................................... 35<br />
Flagging and Annotating in Shoot View .......................................................... 36<br />
Viewing Information About Your Shot............................................................. 37
28 Chapter 5—Evaluating Your Shot<br />
Checking the Exposure<br />
Check the exposure of your shot in the following ways:<br />
• Examine the his<strong>to</strong>gram exposure data.<br />
• Use the picker <strong>to</strong>ol <strong>to</strong> view the exposure data for a specific spot on the image.<br />
• Use the exposure alarms <strong>to</strong> view the overexposed and underexposed areas of<br />
the image.<br />
Tips<br />
• Press the user but<strong>to</strong>n <strong>to</strong> view the his<strong>to</strong>gram, the exposure alarms and additional<br />
shot information when in Shoot view. To specify what appears when you press<br />
the user but<strong>to</strong>n, see Formatting the Compact Flash Card in Portable Mode on<br />
page 60.<br />
• To maximize the display size of your shot, double-tap the image.<br />
Checking Exposure with the His<strong>to</strong>gram<br />
1. Tap his<strong>to</strong>g.<br />
2. Examine the his<strong>to</strong>gram <strong>to</strong> check that most of the<br />
exposure data lies within the exposure limits. Exposure<br />
data that lies within the limits is shown in white.<br />
Overexposed and underexposed data is shown in gray.
Checking the Exposure 29<br />
Checking Exposure with the Picker Tool<br />
1. Tap his<strong>to</strong>g <strong>to</strong> open<br />
the his<strong>to</strong>gram.<br />
2. Tap , and then tap a spot on the image. The spot that<br />
you tap is marked by a magenta circle. A magenta line<br />
on the his<strong>to</strong>gram indicates the exposure data related <strong>to</strong><br />
the spot.<br />
Tap <strong>to</strong> enlarge the<br />
his<strong>to</strong>gram.<br />
The exposure meter,<br />
, shows the overall<br />
exposure in f-s<strong>to</strong>ps.<br />
Note: To remove the spot from the image, tap<br />
and then tap outside the image area.<br />
on the his<strong>to</strong>gram,
30 Chapter 5—Evaluating Your Shot<br />
Checking Exposure with the Overexposure and Underexposure Alarms<br />
1. Tap over.<br />
A flashing mask<br />
covers the<br />
overexposed and<br />
underexposed<br />
areas of the image.<br />
Note: It is possible <strong>to</strong> configure which exposure areas appear, overexposed or<br />
underexposed. For more information, see Setting the Exposure Alarm on<br />
page 56.
Checking Focus 31<br />
Checking Focus<br />
1. Tap zoom.<br />
2. To magnify the image area 100% (1:1), tap a desired point on the<br />
image.<br />
3. To Increase or<br />
reduce the<br />
magnification, tap<br />
either in or out,<br />
and then tap the<br />
image.<br />
Each tap on the image changes the magnification by a fixed percentage.<br />
4. To pan the image,<br />
tap the arrows.<br />
5. To revert <strong>to</strong> a view of the entire image, tap fit.
32 Chapter 5—Evaluating Your Shot<br />
Setting the Gray Balance<br />
To set the gray balance for future shots:<br />
1. Do one of the following:<br />
• Include a gray card in your shot.<br />
• Ensure that there is a neutral gray area in your shot.<br />
2. Tap gray.<br />
3. Tap the gray card<br />
or on a gray area<br />
in the image.<br />
4. Tap OK <strong>to</strong> use the new gray balance setting, or tap<br />
cancel.<br />
Note: If your gray card is not large enough in full-screen view, use the zoom<br />
<strong>to</strong>ol <strong>to</strong> enlarge your picture before setting the gray balance.
Checking Composition Using the Grid 33<br />
Checking Composition Using the Grid<br />
Place a grid on your shot as an aid for composition and alignment of an image.<br />
This task is performed in Shoot view.<br />
1. Tap more and then tap grid.<br />
The grid appears over the image.<br />
2. Evaluate the composition.<br />
Moving the Grid Lines<br />
Move the grid lines <strong>to</strong> help you align your composition.<br />
This task is performed in Shoot view.<br />
1. Tap more.<br />
2. Tap gridset.<br />
3. Tap the line you want <strong>to</strong><br />
move.<br />
The selected line is<br />
highlighted.<br />
4. Use the arrows <strong>to</strong> move<br />
the grid lines as desired.
34 Chapter 5—Evaluating Your Shot<br />
• The longer arrows<br />
move the grid lines<br />
10 pixels at a time.<br />
• The shorter arrows<br />
move the grid lines 1<br />
pixel at a time.<br />
Changing the Color of the Grid Lines<br />
Change the grid line color according <strong>to</strong> your preference.<br />
This task is performed in Shoot view.<br />
1. Tap more.<br />
2. Tap gridset.<br />
3. Tap color.<br />
The color of the grid<br />
lines changes.<br />
4. To cycle through <strong>to</strong><br />
view additional<br />
colors, continue <strong>to</strong><br />
tap color.<br />
Setting Grid Attributes<br />
Select the number of grid lines and the line type.<br />
This task is performed in Set<strong>up</strong> view.<br />
1. Tap Shoot View Opetions.<br />
2. Tap Grid Setting.<br />
3. Set the grid attributes.<br />
• To set the number of grid lines, tap Horizontal Grid Lines and Vertical Grid<br />
Lines, and tap the desired number of lines.<br />
• To set the number of line type, tap Line Type and select the desired line<br />
type.
Browsing Through Your Images 35<br />
Browsing Through Your Images<br />
Do one of the following:<br />
• Tap more and then<br />
tap the prev and<br />
next but<strong>to</strong>ns.<br />
• Roll the user but<strong>to</strong>n<br />
back or forwards.<br />
Deleting Shots in Shoot View<br />
To delete shots in Shoot view:<br />
1. Tap the image and<br />
hold until the flag,<br />
grid, note and<br />
delete but<strong>to</strong>ns<br />
appear.<br />
2. Tap delete <strong>to</strong> delete the image.
36 Chapter 5—Evaluating Your Shot<br />
Flagging and Annotating in Shoot View<br />
While you are shooting, you can flag your image or add a note, as desired. You can<br />
then see the flag or note on the image in Edit view and in the image information.<br />
1. Tap the image and<br />
hold until the flag,<br />
note and delete<br />
but<strong>to</strong>ns appear.<br />
2. Do one of the following:<br />
• Tap flag <strong>to</strong> flag the image.<br />
• Tap note <strong>to</strong> add a comment about the image.
Viewing Information About Your Shot 37<br />
Viewing Information About Your Shot<br />
Tap info.<br />
The image<br />
information and<br />
EXIF data appear on<br />
the image.
38 Chapter 5—Evaluating Your Shot
Editing Your Images<br />
Edit View................................................................................................................. 40<br />
Browsing Through Your Images..........................................................................41<br />
Viewing Information and EXIF Data .................................................................42<br />
Viewing Information Using the <strong>User</strong> But<strong>to</strong>n ..................................................43<br />
Selecting Multiple Images...................................................................................44<br />
Flagging, Annotating, and Deleting in Edit View...........................................44<br />
Selecting a Folder ..................................................................................................46<br />
Moving Your Images.............................................................................................47<br />
Opening Images in Shoot View..........................................................................48
40 Chapter 6 – Editing Your Images<br />
Edit View<br />
Use Edit view <strong>to</strong>:<br />
• Display your images in various view modes<br />
• Browse through your images<br />
• Flag, annotate, and delete single or multiple images<br />
• Move images from one folder <strong>to</strong> another<br />
Accessing Edit View from Shoot View<br />
If you are in Shoot view, you can access Edit view directly without returning <strong>to</strong> the<br />
main menu.<br />
In Shoot view, tap<br />
edit.<br />
You are now in Edit view.
Browsing Through Your Images 41<br />
Browsing Through Your Images<br />
To browse through your images, do one of the following:<br />
• Tap prev and next.<br />
• Use the scroll bar.<br />
• Roll the user<br />
but<strong>to</strong>n back or<br />
forward.<br />
As you move from one<br />
image <strong>to</strong> the next, the<br />
image is au<strong>to</strong>matically<br />
selected.<br />
Selecting a View for Your Images<br />
1. Tap more.<br />
2. Tap view, and<br />
select a view.
42 Chapter 6 – Editing Your Images<br />
Viewing Information and EXIF Data<br />
1. Tap more, and tap<br />
an image.<br />
2. Tap view, and<br />
select a single<br />
view.<br />
Information saved<br />
with the image and<br />
the EXIF data<br />
appears beside the<br />
image.
Viewing Information Using the <strong>User</strong> But<strong>to</strong>n 43<br />
Viewing Information Using the <strong>User</strong> But<strong>to</strong>n<br />
To show/hide information using the user but<strong>to</strong>n:<br />
Press the user<br />
but<strong>to</strong>n.
44 Chapter 6 – Editing Your Images<br />
Selecting Multiple Images<br />
1. In Edit view, tap an<br />
image and hold<br />
your stylus on it<br />
until the Multi<br />
but<strong>to</strong>n appears on<br />
the image.<br />
2. Tap the Multi but<strong>to</strong>n, and then tap the images that you<br />
want <strong>to</strong> select.<br />
Flagging, Annotating, and Deleting in Edit View<br />
Tap the image, and<br />
then tap flag, note,<br />
or delete.<br />
Note: If you select multiple images, the action is performed on all the selected<br />
images.
Sorting Your Images 45<br />
Sorting Your Images<br />
1. Tap more.<br />
2. Tap sort, and<br />
select the desired<br />
sort method (by<br />
name, time or<br />
flag).
46 Chapter 6 – Editing Your Images<br />
Selecting a Folder<br />
1. Tap more.<br />
2. Tap folder.<br />
Shots folder<br />
3. Tap on the desired<br />
folder, and tap<br />
choose.<br />
Note: The Shots folder always appears at the <strong>to</strong>p of the folder list.
Moving Your Images 47<br />
Moving Your Images<br />
1. Tap an image and<br />
hold your stylus on<br />
it until the Move<br />
but<strong>to</strong>n appears on<br />
the screen.<br />
2. Tap Move.<br />
3. Tap the desired<br />
destination folder.<br />
4. Tap Move.
48 Chapter 6 – Editing Your Images<br />
Opening Images in Shoot View<br />
If you want <strong>to</strong> view your images at full-screen size, you can open individual images<br />
in Shoot view. This is useful for checking focus or composition.<br />
To open a specific image in Shoot view:<br />
Do one of the<br />
following:<br />
<br />
<br />
Tap the image<br />
and then tap<br />
shoot.<br />
Double-tap the<br />
image.
Adjusting Settings for a<br />
Shoot<br />
Shooting Without Overlays ...............................................................................50<br />
Working in Full-Screen View .............................................................................. 51<br />
Setting Grid Attributes ........................................................................................ 52<br />
Using the Crop Mask ........................................................................................... 53<br />
Adjusting the Transparency of the Crop Mask .............................................54<br />
Adjusting the Transparency of the His<strong>to</strong>gram and Info Bar ...................... 55<br />
Setting the Exposure Alarm ...............................................................................56<br />
Resetting the File Name Counter ..................................................................... 57
50 Chapter 7 – Adjusting Settings for a Shoot<br />
Shooting Without Overlays<br />
After you take each shot, indica<strong>to</strong>rs and information about the shot appear as an<br />
overlay. Clear the overlays if you do not want this information <strong>to</strong> appear while you<br />
are shooting.<br />
1. Tap Shoot View<br />
Options.<br />
2. Tap On Shoot.<br />
3. On the Clear<br />
overlays bar, tap<br />
Yes.
Working in Full-Screen View 51<br />
Working in Full-Screen View<br />
If desired, hide the menu but<strong>to</strong>ns and view your shots full-screen while you work.<br />
1. Tap Shoot View<br />
Options.<br />
2. Tap On Shoot.<br />
3. On the Maximize<br />
image bar, tap Yes.<br />
To view the menu but<strong>to</strong>ns when working in full-screen view, tap the image.
52 Chapter 7 – Adjusting Settings for a Shoot<br />
Setting Grid Attributes<br />
To set the number of lines and line attributes for the grid:<br />
1. Tap Shoot View<br />
Options.<br />
2. Tap Grid Setting.<br />
The grid options<br />
appear.<br />
• To set the number of horizontal or vertical grid lines, tap Horizontal Grid<br />
Lines/Vertical Grid Lines and tap the desired number of lines.<br />
• To set the line type, tap Line Type and select the desired line type.
Using the Crop Mask 53<br />
Using the Crop Mask<br />
You can show or hide the crop mask as you shoot.<br />
1. Tap Shoot View<br />
Options.<br />
2. In the Crop<br />
Masking bar, do<br />
one of the<br />
following:<br />
<br />
<br />
To view the<br />
crop mask, tap<br />
On.<br />
To hide the crop<br />
mask, tap Off.
54 Chapter 7 – Adjusting Settings for a Shoot<br />
Adjusting the Transparency of the Crop Mask<br />
1. Tap Shoot View<br />
Options.<br />
2. Tap Crop Mask<br />
Transparency.<br />
3. Tap the desired<br />
intensity, where<br />
0% is opaque and<br />
100% is<br />
completely<br />
transparent.
Adjusting the Transparency of the His<strong>to</strong>gram and Info Bar 55<br />
Adjusting the Transparency of the His<strong>to</strong>gram and Info Bar<br />
1. Tap Shoot View<br />
Options.<br />
2. Tap His<strong>to</strong>gram/<br />
Info<br />
Transparency.<br />
3. Tap the desired<br />
intensity, where<br />
0% is opaque<br />
and 100% is<br />
completely<br />
transparent.
56 Chapter 7 – Adjusting Settings for a Shoot<br />
Setting the Exposure Alarm<br />
Set the exposure alarm <strong>to</strong> show underexposed areas, overexposed areas, or both.<br />
1. Tap Shoot View<br />
Options.<br />
2. Tap Exposure<br />
Alarm.<br />
3. Tap the desired<br />
setting.
Resetting the File Name Counter 57<br />
Resetting the File Name Counter<br />
<strong>Leaf</strong> Aptus-II adds a number in sequence <strong>to</strong> the base name that you define each<br />
time you take a shot. You can reset the counter <strong>to</strong> zero at any time.<br />
1. Tap File name.<br />
2. Tap reset.
58 Chapter 7 – Adjusting Settings for a Shoot
Defining the Camera Back<br />
Settings<br />
Formatting the Compact Flash Card in Portable Mode ..............................60<br />
Configuring the <strong>User</strong> But<strong>to</strong>n ..............................................................................62<br />
Aligning the Touch Screen .................................................................................65<br />
Turning Off the Backlight ....................................................................................66<br />
Turning On the Backlight .................................................................................... 67<br />
Setting the Volume for the Camera Back Sounds ........................................68<br />
Setting the Owner Information .........................................................................69<br />
Res<strong>to</strong>ring Fac<strong>to</strong>ry Settings .................................................................................70<br />
Viewing the <strong>Leaf</strong> Aptus-II Version Information .............................................71
60 Chapter 8 – Defining the Camera Back Settings<br />
Formatting the Compact Flash Card in Portable Mode<br />
Use this procedure <strong>to</strong> perform a quick format of your compact flash card. Quick<br />
format is useful in the following circumstances:<br />
• If you wish <strong>to</strong> erase all the data on the card<br />
• If the card is not performing as expected, for example, you cannot save pictures<br />
on the card, saving on the card takes a long time, or if you receive error<br />
messages concerning the card<br />
If the compact flash card is new, or if you have used the compact flash card on a non-<br />
<strong>Leaf</strong> digital camera back, do not perform a quick format. Perform the procedure<br />
detailed in Preparing a Compact Flash Card for Shoot on page 10.<br />
Note: Formatting the compact flash card erases all data on the card.<br />
1. Tap Quick Format.<br />
2. Tap the disk that<br />
you want <strong>to</strong><br />
format, and then<br />
tap choose.
Formatting the Compact Flash Card in Portable Mode 61<br />
3. Tap ok.
62 Chapter 8 – Defining the Camera Back Settings<br />
Configuring the <strong>User</strong> But<strong>to</strong>n<br />
Configure the user but<strong>to</strong>n for viewing indica<strong>to</strong>rs or flagging images in Shoot<br />
view, and for flagging or deleting images in Edit view.<br />
Configuring the <strong>User</strong> But<strong>to</strong>n for Shoot View<br />
1. Tap <strong>User</strong> But<strong>to</strong>n.<br />
2. Tap Shoot view.<br />
3. In the Action bar,<br />
select Indica<strong>to</strong>rs<br />
or Flag.<br />
4. If you selected<br />
Indica<strong>to</strong>rs in step<br />
3, tap Actions<br />
Settings and<br />
select the desired<br />
indica<strong>to</strong>rs.
Configuring the <strong>User</strong> But<strong>to</strong>n 63<br />
Configuring the <strong>User</strong> But<strong>to</strong>n for Edit View<br />
To configure the user but<strong>to</strong>n for flagging or deleting images:<br />
1. Tap <strong>User</strong> But<strong>to</strong>n.<br />
2. Tap Edit view.<br />
3. Tap Flag or<br />
Delete.
64 Chapter 8 – Defining the Camera Back Settings<br />
Configuring a Long Press of the <strong>User</strong> But<strong>to</strong>n<br />
You can set the user but<strong>to</strong>n so that a long press can either lock or unlock the <strong>to</strong>uch<br />
screen, or turn the display on or off.<br />
1. Tap <strong>User</strong> But<strong>to</strong>n.<br />
2. Tap Long Press.<br />
3. Select the desired<br />
option.
Aligning the Touch Screen 65<br />
Aligning the Touch Screen<br />
1. Tap Display.<br />
2. Tap Align Touch<br />
Screen.<br />
3. Follow the instructions on the screen.
66 Chapter 8 – Defining the Camera Back Settings<br />
Turning Off the Backlight<br />
1. Tap Display.<br />
2. Tap Backlight Off<br />
After.<br />
3. Tap a power<br />
source.<br />
4. Tap the desired<br />
time.
Turning On the Backlight 67<br />
Turning On the Backlight<br />
1. Tap Display.<br />
2. Tap Backlight On<br />
After.<br />
3. Select the desired<br />
option.
68 Chapter 8 – Defining the Camera Back Settings<br />
Setting the Volume for the Camera Back Sounds<br />
1. Tap Sounds.<br />
2. Tap the desired<br />
option and set the<br />
volume as desired.
Setting the Owner Information 69<br />
Setting the Owner Information<br />
1. Tap Owner<br />
Information.<br />
2. Tap the relevant<br />
area.<br />
3. Use the virtual<br />
keypad <strong>to</strong> enter<br />
the desired<br />
information, and<br />
tap ok.
70 Chapter 8 – Defining the Camera Back Settings<br />
Res<strong>to</strong>ring Fac<strong>to</strong>ry Settings<br />
1. Tap Res<strong>to</strong>re<br />
Fac<strong>to</strong>ry Settings.<br />
2. Tap ok.
Viewing the <strong>Leaf</strong> Aptus-II Version Information 71<br />
Viewing the <strong>Leaf</strong> Aptus-II Version Information<br />
Tap About.<br />
The <strong>Leaf</strong> Aptus-II<br />
About screen displays<br />
the <strong>Leaf</strong> Aptus-II<br />
version information.
72 Chapter 8 – Defining the Camera Back Settings