Trash Into Treasure - Artist's Network
Trash Into Treasure - Artist's Network
Trash Into Treasure - Artist's Network

Create successful ePaper yourself
Turn your PDF publications into a flip-book with our unique Google optimized e-Paper software.
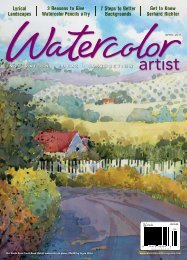
creativity<br />
workshop<br />
by nancy m. grigsby<br />
<strong>Trash</strong> <strong>Into</strong> <strong>Treasure</strong><br />
Transform a simple beginning into a watermedia masterpiece<br />
by incorporating found objects.<br />
Scavenger Hunt Painted Bandit<br />
(acrylic and mixed media on paper, 14x18)<br />
includes old bus tokens; an ad from an old<br />
newspaper; an old salt-cellar spoon; a<br />
face bead, which was a gift from a jewelrymaking<br />
friend; leftover pieces of watercolor<br />
paper; a stock photo from a store-bought<br />
picture frame with the edges singed; and<br />
old acrylic paint peeled from a palette.<br />
As artists today, we have a vast<br />
array of materials available to<br />
us: paints in tubes, bottles or pans;<br />
numerous brushes and palette<br />
knives; papers, canvas, boards;<br />
sealers, mediums, gels, paint additives<br />
and extenders. The local<br />
artists’ supply shop is the equivalent<br />
of a candy store for artists<br />
who like to experiment.<br />
Unfortunately, the cost of our<br />
adventures in candyland can be<br />
quite high. That is, unless we’re willing<br />
to look elsewhere for materials:<br />
in specific, our own trash cans.<br />
Upcycle for Art<br />
Thanks in part to a modern concern<br />
for recycling, garbage now<br />
serves as a reasonable, cost-free<br />
12 www.watercolorartistmagazine.com
Gorgeous Garbage In A Man of His Word (acrylic and mixed media on wood, 16x16), I combined<br />
scrap pieces of slate tile; a broken carpenter’s rule; an old saw blade and nails; an old key; image transfers;<br />
and wood-grain stamping. Note the background shapes shaded to create depth and dimension.<br />
alternative for sourcing art materials.<br />
There are many artists who<br />
repurpose trash, turning it into<br />
three-dimensional treasures such<br />
as clocks or other decorative pieces<br />
of art, but just because painters<br />
work in a two-dimensional world<br />
doesn’t mean we can’t get trashy<br />
too. Garbage, for lack of a better<br />
word, can turn a simple beginning<br />
into a watermedia masterpiece.<br />
Useful materials you may find in<br />
your own trash include newspapers,<br />
magazines, old hardware, kitchen<br />
gadgets, beachcombing finds, packing<br />
materials and more. You can<br />
even make use of dried acrylic paint<br />
peeled from your palette or repurpose<br />
a watercolor painting on<br />
YUPO that didn’t quite work out.<br />
All of these items have served as<br />
inspiration in my own work.<br />
While I work mainly in acrylics,<br />
the techniques I use for re-purposing<br />
trash will also work with watercolor<br />
paintings, as long as you seal any<br />
layer of paint with a spray sealant<br />
such as Krylon Workable Fixative<br />
to keep the painting from bleeding<br />
as you apply subsequent layers and<br />
add your found materials.<br />
Build a Fresh Start<br />
Once you’ve completed a successful<br />
hunting and gathering mission, it’s<br />
time to think about what process<br />
will best suit the materials you’ve<br />
salvaged. There are many options,<br />
of course, but here’s a basic plan<br />
to get you started.<br />
Step One: I generally begin by<br />
choosing a foundation. I like using<br />
scraps of matboard, which is a<br />
leftover itself often destined for<br />
try this<br />
at home<br />
Choose some “repurposed”<br />
items and an appropriately<br />
sturdy foundation. Use a few<br />
of the techniques described here<br />
to create your own masterpiece.<br />
Send a JPEG (with a resolution<br />
of 72 dpi) of your painting to us<br />
at wcamag@fwmedia.com with<br />
“Creativity Workshop” in the<br />
subject line and tell us about<br />
your process. The “editor’s<br />
choice” will receive a six-month<br />
subscription to Artists<strong>Network</strong>.tv<br />
online video workshops, plus<br />
$50 worth of North Light fine art<br />
books. The deadline for entry<br />
is August 15, 2011.<br />
the recycle bin. I apply gesso on<br />
both sides for stability. You can<br />
also use anything from a stretched<br />
canvas to a piece of primed wood<br />
to accommodate heavier items<br />
such as utensils or pieces of rock.<br />
I sometimes paint both sides of a<br />
sheet of 300-lb. watercolor paper<br />
with gesso to create a surface<br />
sturdy enough to support heavier<br />
embellishments.<br />
Step Two: I often begin painting<br />
by applying hard molding paste<br />
with a palette knife, either randomly<br />
or by spreading it through<br />
Watercolor Artist | August 2011 13
Everyday to Extraordinary The Elements (acrylic and mixed media<br />
on canvas, 12x6) includes beach stones; tree bark sealed in self-leveling<br />
clear tar gel; tinted scraps of fibrous paper; paint peeled from a palette;<br />
and an image transfer.<br />
an inexpensive plastic stencil,<br />
to create an initial texture. I also<br />
sometimes use the kind of weathered<br />
crackle glaze you can find in the<br />
paint department of your local hardware<br />
store. Subsequent paint layers<br />
will crack, creating an aged appearance<br />
that looks great with “trash.”<br />
I find that this<br />
glaze works best<br />
with fluid acrylics.<br />
Step Three: I try<br />
to choose colors<br />
that will compliment<br />
the feel of<br />
my selected “trash”<br />
and begin by applying<br />
colors randomly<br />
on my surface,<br />
lifting paint in<br />
selected areas. Your<br />
approach at this<br />
point should be<br />
intuitive. Create<br />
shapes and variety<br />
with the paint<br />
and don’t forget<br />
to have fun.<br />
Step Four:<br />
When your painting<br />
is dry (and<br />
sealed, if using<br />
watercolor), start<br />
thinking about<br />
composition and arrange your<br />
“garbage” until you achieve a balanced<br />
composition. For adhering<br />
heavy or bulky objects, use hard<br />
molding paste applied with a<br />
palette knife directly on the back<br />
of the object. This dries white, so<br />
avoid letting it ooze out and show.<br />
View selections from former Creativity Workshop<br />
activities at www.artistsnetwork.com/creativityworkshop.<br />
For scraps of paper and other<br />
light materials, use an acrylic<br />
medium (in either gloss or matte<br />
finish, although matte will dull<br />
your colors slightly) applied with a<br />
brush, like decoupage. Paint a layer<br />
directly on your surface, stick your<br />
“garbage” down and go over it with<br />
another layer of medium.<br />
To use watercolor painted on<br />
YUPO, spray the painting with<br />
workable fixative and allow it to<br />
dry. With a brush, apply a somewhat<br />
thick layer of acrylic soft<br />
gel. Allow it to dry overnight. You<br />
can then peel the gel off the YUPO,<br />
bringing the watercolor with it,<br />
creating a skin that can be adhered<br />
to your “garbage” painting.<br />
Step Five: To bring the painting<br />
together, I look for shapes within my<br />
background. I use dark watercolor<br />
pencil or fluid acrylic paint and create<br />
a lined edge around the shapes<br />
I want to define. I immediately<br />
soften one edge to create a shadow<br />
and give the shapes dimension and<br />
depth. Once everything’s dry, I seal<br />
the entire painting with two or three<br />
coats of acrylic medium.<br />
There’s nothing stopping you<br />
from turning everyday objects into<br />
beautiful works of art, so what are<br />
you waiting for? Go ahead and get<br />
a little trashy. You won’t be sorry<br />
you did.<br />
NANCY M. GRIGSBY (http://nmgrigsby<br />
studios.fineartstudioonline.com) is an artist<br />
living in Birch Bay, Washington.<br />
14 www.watercolorartistmagazine.com
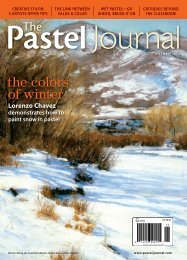
46 www.watercolorartistmagazine.com
Waxing<br />
Artistic<br />
Energize your paintings<br />
by combining the techniques of batik and watercolor.<br />
By Kathie George<br />
Ihad always enjoyed creating batik techniques<br />
on fabric, but when my daughter<br />
was born years ago, I found that the process<br />
was too time-consuming and involved<br />
too many chemicals. It was by accident that<br />
I tried achieving the same effect using rice<br />
paper and watercolor in my studio, but from<br />
my very first piece, I knew I was in love.<br />
With batik, wax is used as a resist—and<br />
if you’ve ever used masking fluid on watercolor<br />
paper, you understand how a resist<br />
works. Essentially, the wax blocks the areas<br />
that aren’t intended to receive paint. The<br />
materials I use are very simple: rice paper,<br />
watercolor and melted paraffin wax. This<br />
process isn’t an exact science, so be prepared<br />
for mistakes such as unintentional drips of<br />
wax and oozing color. Believe it or not, these<br />
accidents actually add to the look of the<br />
piece. Even if you’re not sure you placed the<br />
wax where you intended, you’ll be pleasantly<br />
surprised at the final results.<br />
House Wares I grabbed a few items from around the<br />
house for the setup in Cat’s Eye View (watercolor and batik<br />
on paper, 28x22), which includes a wonderful batiked<br />
sarong from Bali underneath.<br />
Preparation<br />
Although many papers can be used, Awagami<br />
Ginwashi is my favorite and it comes in large<br />
sheets, approximately 25x37 inches. The first<br />
step is to cut the paper to the size you need.<br />
Or, if you prefer a deckled edge, “draw” a line<br />
of water with a wet brush. Use only a bit of<br />
water—just enough to wet a thin line. Then<br />
tear along this line with your fingers—presto!<br />
Deckled edge.<br />
Prepare your sketch on white paper and<br />
place it under the transparent rice paper. Use<br />
a permanent, waterproof ink pen, such as a<br />
Pigma Micron 05, to trace the design onto the<br />
smooth side of the rice paper.<br />
Melt the paraffin wax in a device with a temperature<br />
control. An electric frying pan works<br />
well, as do small wax/glue pots (see the photo<br />
of my work area on page 49) that automatically<br />
heat to the desired temperature without worry.<br />
Melt the wax slowly in a well-ventilated area to<br />
200 to 225 degrees Fahrenheit—otherwise the<br />
wax could catch fire. Note: The wax shouldn’t<br />
smoke. Next, place a piece of waxed paper<br />
beneath the rice paper to keep it from sticking<br />
to your work surface, and leave it in place<br />
throughout the entire waxing process.<br />
Watercolor Artist | August 2011 47
Wax On<br />
Through teaching workshops, I’ve found that<br />
understanding how to use wax as a resist<br />
is the most challenging part for students.<br />
To help, I initially supply them with “waxing<br />
diagrams” that show exactly where to place<br />
the wax. I used five layers of wax to create<br />
Sunny Bouquet (on page 51); the diagrams<br />
included with each step of the demo show<br />
the wax applications I planned for that painting.<br />
After you get a few pieces under your<br />
belt, you’ll no longer need the diagrams.<br />
To wax, simply dip an old brush into the<br />
hot wax and spread it onto the paper (you can’t<br />
clean wax out of the brushes, but you can reuse<br />
them for other batik paintings). Be careful:<br />
If you get too much wax on the brush, it will<br />
surge outward onto the paper. Start with just<br />
a bit until you get the hang of it. If it drips,<br />
don’t worry; the drips add to the effect. In fact,<br />
you may find yourself adding some spatter<br />
on your own because you like the effect. Leave<br />
the brush in the hot wax between layers so<br />
that it will always be ready to go.<br />
Old World Texture Towns rich in history are perfect<br />
subjects for batik paintings such as Slice of Italy—Gelato<br />
(above; watercolor and batik on paper, 22x15), with their<br />
varied surfaces and stages of aging.<br />
Batik in Bloom Batik isn’t an exact science. Color will<br />
run and wax will ooze. When it does, as it did for me in<br />
Orchid (at right; watercolor and batik on paper, 24x18), just<br />
concentrate on a wide value range and keep working.<br />
48 www.watercolorartistmagazine.com
supply list<br />
Oriental Paper<br />
Awagami Ginwashi rice paper is my<br />
favorite, but many others will work.<br />
Each one will give the painting<br />
a different look.<br />
Watercolors<br />
I use Winsor & Newton and Holbein.<br />
Wax Brushes<br />
Designate brushes that you’ll use only<br />
in wax. I prefer inexpensive natural<br />
hair brushes, such as camel or squirrel<br />
mix: a 1 1 ⁄2-inch flat, a No. 8 round and<br />
a smaller No. 3 round with long fibers.<br />
Beware of using brushes that are too<br />
tiny—they rarely carry enough wax<br />
and the wax will cool before you can<br />
apply it to the paper. In general, you’ll<br />
find that the bristles get stiff when the<br />
wax cools, but they soften up again<br />
when dipped into hot wax.<br />
Watercolor Brushes<br />
Use your regular watercolor brushes<br />
for applying paint. I typically use only<br />
three: a 1 1 ⁄2-inch flat (Loew Cornell<br />
4550), a 1-inch flat (Simply Simmons)<br />
and a 1 ⁄2-inch flat.<br />
Miscellaneous Supplies<br />
• Old electric frying pan with temperature<br />
control or a wax/glue pot (made to heat<br />
wax to safe temperatures)<br />
• Permanent, waterproof pen, such<br />
as a Pigma Micron 05<br />
• Iron<br />
• Paraffin wax (also used for canning;<br />
can be found in most any grocery store)<br />
• Newspapers<br />
• Waxed paper<br />
• Freezer paper<br />
• Cretacolor Pastel Pencils can be helpful<br />
Added Value In batik, the wider the range of values you have<br />
the better. Even when I mistakenly apply a wash that doesn’t<br />
work, as I did in Slice of Italy—Cinque Terre (watercolor and batik<br />
on paper, 20x10), I always save a bit with a spattering of wax—<br />
it gives the piece an extra value.<br />
Watercolor Artist | August 2011 49
atik technique in action<br />
Follow along as I demonstrate my process, taking note<br />
of my waxing diagrams, which indicate the placement for<br />
my five layers of wax. The wax should go onto the paper<br />
smooth and clear. To better see what you’re waxing,<br />
place a dark piece of paper underneath your rice paper.<br />
In batik, you work from light to dark. So, the areas<br />
that remain white are always the first places to be waxed.<br />
After that, each layer of wax is simply saving the next<br />
lightest value of color. As you near the end it gets difficult<br />
to tell what’s waxed and what isn’t, but keep working.<br />
step 1<br />
step 2<br />
Draw your image onto the Awagami Ginwashi rice paper<br />
using a Pigma Micron 05 pen. Wax the areas that you<br />
want to save with white (see the wax diagram at left),<br />
then wash on the very lightest color value, in this case<br />
new gamboge, over the flowers.<br />
As the colors dry, wax more areas you want to save. The<br />
waxed areas resist any additional colors that are added.<br />
Apply another wash of watercolor, only slightly darker than<br />
the first. This time around, wash a light value onto the table<br />
area, the leaves, and another layer over the flower petals.<br />
step 3<br />
step 4<br />
Continue to paint medium value washes onto the leaves,<br />
pot and flower centers. Notice how my color ran from one<br />
object to another.<br />
Apply darker washes onto the leaves, pot and flower<br />
centers. As long as the edges of color are softened, color<br />
runs only enhance the look of the piece.<br />
50 www.watercolorartistmagazine.com
step 5<br />
Sunny Bouquet (watercolor batik on paper, 24x18)<br />
The finished batik has mystery, movement,<br />
texture and, best of all, a special energy that<br />
only this process can produce.<br />
In this step you can use dark washes. Everything<br />
should be waxed now except for tiny places<br />
where you’ll want the darkest darks to go. That’s<br />
why this wash is the most important; it adds<br />
depth and separates one object from another.<br />
Find a step-by-step demo of Kathie George’s<br />
painting, Tuscan Window (on page 53), at<br />
www.artistsnetwork.com/kathie-georgewatercolor-batik.<br />
Watercolor Artist | August 2011 51
Crinkled Cactus You can see where I crumpled up my rice<br />
paper in Blue Cactus (watercolor and batik on paper, 15x16),<br />
which added texture to an already prickly subject.<br />
Crumple It Up<br />
When you’re finished applying layers of wax<br />
and color washes, let the paper dry. Then cover<br />
the entire front of the paper with another coat<br />
of wax to be sure you’ve hit every area at least<br />
once. When this layer of wax has cooled, peel<br />
the rice paper from the waxed paper. Then<br />
gently crinkle the rice paper into a ball. Small<br />
cracks may form in the wax.<br />
Flatten the paper, being careful not to<br />
brush or shake off loose pieces of wax, then<br />
apply one more wash over the paper using any<br />
color mix from your palette. Some of the wash<br />
may go through the cracks, but most will bead<br />
up on the surface of the wax. Without waiting<br />
for the paint to dry, coat the entire front with<br />
wax one final time, going right over the wet<br />
beads of color and sealing them into the wax.<br />
Add Color<br />
The wax dries almost instantly, so the rice<br />
paper will be ready to paint right away.<br />
Because the paper is transparent, it’s helpful<br />
to place it onto a white surface while painting.<br />
A piece of freezer paper (shiny side up) works<br />
well for this. Just use your regular watercolor<br />
brushes for the washes.<br />
Pick up only a small amount of paint—rice<br />
paper has no sizing, so the less paint in your<br />
brush the more control you’ll have. Sometimes<br />
the paint will run no matter what you do. Don’t<br />
worry; instead, expect for it to happen. As the<br />
paint moves outward, avoid a hard edge by<br />
taking extra water in your brush and softening<br />
the edge, then quickly and gently blot with<br />
a paper towel to absorb extra water.<br />
It’s important to let the paper dry thoroughly<br />
before applying more wax. If you apply<br />
wax to wet or damp paper it won’t be able to<br />
soak into the paper fibers. You can use a hair<br />
dryer to speed the drying time, but be careful<br />
not to melt the wax. If you do happen to melt<br />
the wax and it spreads, that’s OK. You can<br />
add paint where you need it later, after you’ve<br />
removed the wax. Many times I just hang<br />
a piece over the back of my chair and go do<br />
some laundry. When I come back, it’s dry.<br />
Wax Off<br />
Lay out several sheets of newspaper and place<br />
your batik on top. Make a “batik sandwich”<br />
by laying about three more sheets of newspaper<br />
on top of your piece. This will be enough<br />
newspaper to allow the heat to penetrate but<br />
still soak up plenty of wax. Using an iron set<br />
to hot (the cotton setting), press the pile. The<br />
heat will melt the wax and the newspaper will<br />
soak it up. When the newspapers become fairly<br />
saturated—you’ll see the wax bleed through—<br />
replace them with fresh papers above and<br />
below, and continue. Repeat this process three<br />
or four times until the newspapers remain<br />
clean and all the wax has been removed.<br />
Finishing Touches<br />
Two things work well for adding color to any<br />
areas that might need it. First, try painting it.<br />
Painting on rice paper after the wax has been<br />
removed will feel completely different. Because<br />
a tiny bit of wax remains on the surface, you’ll<br />
have to coax the paint into the paper by wiggling<br />
your brush and “tickling” the paint into<br />
the paper, but once you’ve done so, the color<br />
will stay where you place it. For small touches<br />
of opaque color, or when outlining is needed,<br />
pastel pencils are fun and easy. Finally, mount<br />
the batik on a piece of white or off-white matboard<br />
using double-sided or linen tape. I often<br />
float it so that the deckled edges show.<br />
52 www.watercolorartistmagazine.com
Beckoning I painted Tuscan Window (watercolor and batik on paper, 16x12) after a trip to Italy, where every place you look<br />
something beckons to be painted. Rustic buildings particularly lend themselves to this technique.<br />
Watercolor Artist | August 2011 53
Did you enjoy<br />
thESE ARTICLES?<br />
Order the entire issue, available in print or<br />
digital format, at northlightshop.com.<br />
Get the best<br />
art instruction all year long!<br />
Subscribe to The Artist’s<br />
Magazine for one year<br />
for $21—a savings of<br />
63% off the newsstand price!<br />
As a Bonus, get another<br />
great art magazine<br />
at a discounted price:<br />
• one year of Watercolor Artist<br />
for just $10 more—a savings of<br />
72% off the newsstand price!<br />
• OR one year of The Pastel Journal<br />
for just $16 more—a savings<br />
of 65% off the newsstand price!<br />
Subscribe today at http://<br />
artpubs.artistsmagazine.com.<br />
All media, collage<br />
and illustration<br />
www.artistsmagazine.com<br />
Watercolor, acrylic and<br />
mixed watermedia<br />
www.watercolorartist<br />
magazine.com<br />
Pastel and pastel<br />
mixed media<br />
www.pasteljournal.com
Ideas. Instruction. Inspiration.<br />
The Artist’s Magazine<br />
Watercolor Artist<br />
The Pastel Journal<br />
Visit www.artistsnetwork.com/<br />
magazines to subscribe to the best<br />
in art instruction magazines.<br />
Receive a FREE downloadable issue of The Artist’s Magazine when you sign up<br />
for our free newsletter at www.artistsnetwork.com/newsletter_thanks<br />
Find these and other best-selling North Light fine art<br />
books & DVDs at www.northlightshop.com<br />
Check out our great online communities at<br />
www.wetcanvas.com and www.artistsnetwork.com
Top resources for artists<br />
Make money selling your art!<br />
ArtistsMarketOnline.com gives you the resources to make<br />
it possible.<br />
3 Features over 2,000 listings of where to sell your art<br />
– updated weekly<br />
3 Track your submissions and manage your contacts<br />
3 Advice and inspiration from experts and so much more<br />
Join us now for as little as $1.67 a month!<br />
Where & how to sell what you create.<br />
Building<br />
Art Careers<br />
for Over<br />
35 Years!<br />
Try it FREE for a week!<br />
Visit ArtistsMarketOnline.com for more information.<br />
Brought to you by the Publishers of North Light Books & The Artist’s Magazine<br />
Learn from the best artists<br />
with video workshops in your home!<br />
Front row instruction,<br />
anytime you want!<br />
3 Subscriptions now available by medium<br />
3 Over 80 workshops to choose from<br />
3 Features a variety of media & skill levels<br />
3 Convenient – watch what you want, when you want<br />
3 Preview every video free – before you buy<br />
3 New videos added every week<br />
Dozens of Popular Artists including Richard<br />
McKinley, Lee Hammond, Nancy Reyner, Charles Reid<br />
and so many more!<br />
Visit www.artistsnetwork.tv for the best art instruction videos.<br />
Painting Oil Portraits in<br />
Warm Light<br />
with Chris Saper<br />
From the Publishers of North Light Books<br />
north light<br />
B r i n g i n g A r t t o L i f e