Polytek catalog - Sculpture Workshop
Polytek catalog - Sculpture Workshop
Polytek catalog - Sculpture Workshop

Create successful ePaper yourself
Turn your PDF publications into a flip-book with our unique Google optimized e-Paper software.
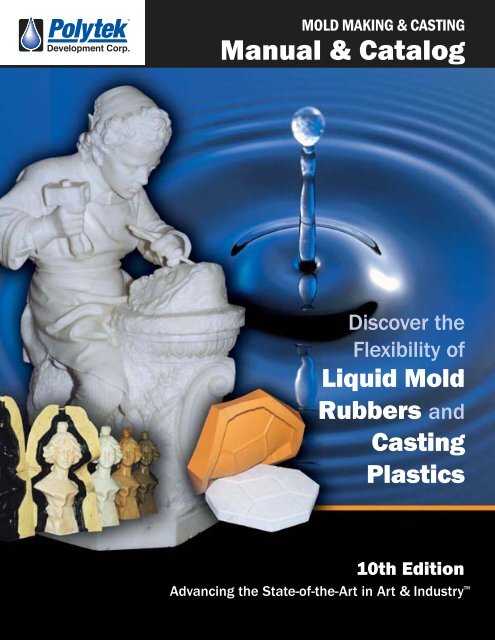
MOLD MAKING & CASTING<br />
Manual & Catalog<br />
Discover the<br />
Flexibility of<br />
Liquid Mold<br />
Rubbers and<br />
Casting<br />
Plastics<br />
10th Edition<br />
Advancing the State-of-the-Art in Art & Industry TM
WELCOME!<br />
Welcome to the 10th Edition of <strong>Polytek</strong> ® Development Corp.’s<br />
MOLD MAKING & CASTING MANUAL & CATALOG. We wrote this<br />
manual to help you use the many products and materials <strong>Polytek</strong><br />
offers to their maximum benefit.<br />
Mold making and casting are not easy. In fact, making molds and<br />
castings is a full-time career for many skilled craftsmen.<br />
An important part of a master mold maker's expertise is developing<br />
a “feel” for the way each different molding and casting material<br />
behaves. Developing this “feel” for each material and learning<br />
to anticipate and avoid common problems takes a great deal<br />
of practice with a variety of materials. Consequently, it is difficult<br />
for anyone to try a new technique or use a new material the first<br />
time and achieve perfect results. Thus, the old adage, "Practice<br />
makes perfect."<br />
<strong>Polytek</strong> has formulated a range of materials to help you achieve<br />
your molding and casting objectives, and we are constantly working<br />
to invent new products to make your job easier.<br />
As good as any material may be, however, the skill of the user is<br />
equally important in achieving the objective. When you use a<br />
material for the first time, we ask that you start small and simple<br />
to get a “feel” for the material before going on to larger projects.<br />
Our goal is to continue to produce dependable,<br />
quality materials and present their<br />
basic methods of use. The rest is up to you.<br />
We depend on your success and want to<br />
help whenever possible.<br />
Thank you for your patronage.<br />
Sincerely,<br />
Bob LeCompte<br />
Chairman<br />
POLYTEK’S LOCATION<br />
CUSTOMER SERVICE<br />
When you call <strong>Polytek</strong>, you can speak to a member of our customer<br />
service team (Joe, Stan, Wendy, Dave, Laurie, Jill, Mary, Larry and<br />
Bill). They all have hands-on experience and the knowledge and ability<br />
to satisfy your needs quickly. Whether you’re new to mold making<br />
and need help getting started or an expert mold maker looking for<br />
a fresh perspective, we welcome your questions. We know that our<br />
continued success is based on the quality of our products and service<br />
and the word of mouth of satisfied customers.<br />
MOLD RUBBERS & CASTING PLASTICS<br />
<strong>Polytek</strong> offers the most complete line of mold making and casting<br />
materials available anywhere. For mold making, <strong>Polytek</strong> produces<br />
polyurethane and silicone liquid rubbers in many hardnesses<br />
as well as latex, alginate and wax. For casting, <strong>Polytek</strong><br />
manufactures rigid and flexible polyurethane plastics and foams<br />
and castable epoxies. <strong>Polytek</strong> is a one-stop source for mold making<br />
needs: we offer a full line of accessories including release<br />
agents, training DVDs, scales and more. If we don’t have what you<br />
need, call us -- we can develop custom formulas within weeks.<br />
SEMINAR & WORKSHOP<br />
Our state-of-the-art facility is located at 55 Hilton Street, Easton,<br />
PA -- just off I-78, Exit 75. You can see us from the highway!<br />
Stop in! We use our 5,000-ft 2 mezzanine for product demonstrations,<br />
trials, and seminars. Take time to enjoy nearby historic<br />
Delaware River inns and attractions. We’re only 90 minutes to<br />
New York City and Philadelphia.<br />
<strong>Polytek</strong> offers a popular, two-day seminar and workshop titled<br />
“Mold Making and Casting Methods and Materials.” The first<br />
day begins with a comprehensive presentation and demonstration<br />
of mold making techniques and materials. Later in the day the<br />
workshop portion gets started. Attendees are encouraged to bring<br />
a small, simple model. <strong>Polytek</strong>’s expert technicians review each<br />
model and discuss mold making options with the group. Then<br />
each attendee gets hands-on experience using <strong>Polytek</strong>’s products<br />
to make a mold and casting of their model. Enrollment is limited<br />
to 20, meaning that each attendee gets plenty of one-on-one guidance<br />
from <strong>Polytek</strong>’s staff. The seminars are conducted in<br />
<strong>Polytek</strong>’s well-equipped, 5,000-ft 2 mold making and casting shop<br />
in Easton, PA. The cost is $400 for the seminar and workshop<br />
(includes materials) or $200 for the first day only (with no handson<br />
use of materials). Call for seminar dates. Enroll early!<br />
Seminars fill fast!<br />
(610)559-8620 • (800)858-5990
CREATIVITY WITH CHEMISTRY<br />
The remarkable, life-size Carrara<br />
marble sculpture by E. Zocchi of a<br />
young, enthusiastic Michelangelo<br />
carving a gargoyle depicts four of<br />
our favorite things ... art ...<br />
creativity ... enthusiasm ... and<br />
gargoyles!<br />
Use <strong>Polytek</strong> products creatively<br />
and enthusiastically for a variety<br />
of projects -- from creating fine art<br />
to producing functional pieces for<br />
home and industry. Mold making<br />
and casting are truly CREATIVITY<br />
WITH CHEMISTRY. The use of<br />
<strong>Polytek</strong> materials is limited only<br />
by the imagination -- may yours<br />
be limitless.<br />
Mold Making Methods . . . . . . . . . . . . . . . . .2<br />
1Mold Making & Casting Materials<br />
Types of Flexible Molds & Castings<br />
Mold Making & Casting Procedures<br />
Applications<br />
Polyurethane RTV Mold Rubbers . . . . . . .32<br />
2Poly 74, Poly 75 & Poly 77 Series Rubbers<br />
Polygel ® Brushable/Sprayable Rubbers<br />
Poly 81-Series Rubbers<br />
Poly-Fast 72-40 & Poly GlassRub Rubbers<br />
Silicone RTV Mold Rubbers . . . . . . . . . . . .40<br />
3TinSil ® 70 Series Silicone Rubbers<br />
PlatSil ® 71 Series Silicone Rubbers<br />
PlatSil ® 73 Series Silicone Rubbers<br />
PlatSil ® Gel 10 Silicone Rubber<br />
Mold Making<br />
Methods<br />
Polyurethane<br />
Mold Rubber<br />
Silicone<br />
Mold Rubber<br />
CONTACT INFORMATION<br />
www.polytek.com<br />
BY PHONE<br />
(800) 858-5990<br />
(610) 559-8620<br />
Monday to Friday<br />
8:30 a.m. - 5:00 p.m.<br />
BY MAIL<br />
<strong>Polytek</strong><br />
55 Hilton St.<br />
Easton, PA 18042<br />
ONLINE<br />
sales@polytek.com<br />
www.polytek.com<br />
Secure credit card transactions<br />
BY FAX<br />
(610) 559-8626<br />
24 hours a day<br />
Casting Plastics/Resins . . . . . . . . . . . . . . .46<br />
4EasyFlo & Poly 15 Series Plastics<br />
Poly-Optic ® 14 Series Clear Casting Resins<br />
PolyFoam, LiteCast, Plasti-Flex & Polygels ®<br />
Epoxy Resins & Curatives<br />
Specialty Molding/Casting Materials . . . . .57<br />
5Latex Rubber Products<br />
Poly Wax 15<br />
Poly Skin-Wax<br />
Hydrogel ® N Mold Compound<br />
Accessories . . . . . . . . . . . . . . . . . . . . . . . . .61<br />
6Pol-Ease ® Releases<br />
PolyFiber, Bronze and Other Fillers<br />
Safety Equipment<br />
Mixers, Scales, Books, DVDs & More<br />
DISCLAIMER: The information in this <strong>catalog</strong> and otherwise<br />
provided by <strong>Polytek</strong> ® is considered accurate. However, no warranty<br />
is expressed or implied regarding the accuracy of the data, the<br />
results to be obtained by the use thereof, or that any such use will<br />
not infringe any patent. Before using, the user shall determine the<br />
suitability of the product for the intended use and user assumes all<br />
risk and liability whatsoever in connection therewith.<br />
© 2007 by <strong>Polytek</strong> Development Corp. All rights reserved. This<br />
manual may not be copied, in whole or in part, without written<br />
consent of <strong>Polytek</strong> Development Corp.<br />
Casting Plastics<br />
Speciality<br />
Materials<br />
Accessories<br />
1
1 Mold Making Methods<br />
Mold Making<br />
Methods<br />
GETTING STARTED<br />
When making a flexible mold of an object in order to cast<br />
reproductions, you are faced with many choices of mold making<br />
and casting materials and methods -- it can be bewildering at<br />
first glance. In order to succeed, you must consider many factors<br />
before you start a project. Here are a few things to think about:<br />
• What is the model made of?<br />
• Does the shape of the model present mold making or<br />
demolding challenges?<br />
• What will the casting be made of?<br />
• How many castings do you envision making?<br />
• How much money do you plan to spend?<br />
• How much time do you have to complete the project?<br />
Think ahead. You need to plan your project from start to finish<br />
before you begin. Read the “Methods” sections entirely so that<br />
you understand all of the factors that need to be considered<br />
during the planning stage of your project.<br />
To have a successful mold making experience,<br />
PLEASE ...<br />
• Study. Read as much "how-to" literature as<br />
possible. Watch instructional DVDs and<br />
videos (see p. 63).<br />
• Start Small. Make a small, simple mold and<br />
casting before attempting an important<br />
piece. Get a feel for the materials without<br />
costly mistakes. Experiment with small Trial<br />
Units (see p. 65).<br />
• Ask Questions. It’s difficult to tell you how<br />
to make molds and castings over the phone,<br />
but we’ll try! Please call <strong>Polytek</strong> Customer<br />
Service with questions.<br />
MOLD MAKING & CASTING MATERIALS<br />
<strong>Polytek</strong> Development Corp. produces nearly all types of flexible<br />
mold materials commonly used today as well as many casting<br />
materials. Before beginning a mold making project, you must<br />
understand the advantages and disadvantages of various mold<br />
making and casting materials. At the same time, you must<br />
consider the type of mold you envision, because that too will<br />
play a factor in selecting appropriate mold making and casting<br />
materials. For information about types of flexible molds, refer to<br />
pp. 7-9.<br />
Flexible mold materials range from simple, one-part latex (the<br />
natural product of the rubber tree), Hydrogel ® N (alginate, a<br />
powder to which water is added), and Skin-Wax (which is<br />
melted for use), to the higher performance two-part polyurethane<br />
and silicone mold rubbers. <strong>Polytek</strong>’s two-part systems consist of<br />
two liquids that after mixing together react to form rubber. These<br />
systems cure at room temperature and, therefore, are are referred<br />
to as room temperature vulcanizing (RTV).<br />
Each mold making and casting compound is unique and may<br />
require special handling that differs from similar products.<br />
Spend time learning the special requirements of every new<br />
product and making a small test mix before using the product on<br />
a larger scale to avoid loss of valuable time and materials.<br />
Mold making and casting materials must be selected concurrently.<br />
This is because some casting resins work well only in<br />
certain mold materials (and vice versa). If you have a specific<br />
casting material in mind, then you select a mold material that<br />
works well with that casting material. Most often you can find<br />
mold and casting materials that work well together and satisfy<br />
all of of your project requirements. The illustration below helps<br />
to demonstrate this point.<br />
Casting<br />
Wax<br />
Concrete<br />
Mold Material<br />
All (except Skin-Wax)<br />
Polyurethane<br />
Selecting proper mold making<br />
and casting materials for the job<br />
at hand is the 1 st step to<br />
success!<br />
Plaster<br />
Epoxy<br />
Polyurethane<br />
Polyester<br />
Acrylic<br />
Metal (low-melting)<br />
All (usually polyurethane)<br />
Polyurethane or silicone<br />
Silicone or polyurethane<br />
Silicone or polyurethane<br />
Silicone or polyurethane<br />
Silicone or polyurethane<br />
2<br />
(610)559-8620 • (800)858-5990
Mold Making Methods 1<br />
SELECTING A MOLD MAKING MATERIAL<br />
To select the best mold making material for your project, consider<br />
several factors: model composition, shape and size; mold type;<br />
cost; and timing. First, familiarize yourself with the common<br />
types of flexible mold making materials and the advantages and<br />
disadvantages of each. After you have learned about the various<br />
mold materials, take into account the characteristics of your model<br />
and the mold making challenges it presents.<br />
The tables below highlight advantages, disadvantages, uses and<br />
methods of application for various one- and two-part mold<br />
materials.<br />
One-part mold materials usually<br />
present more disadvantages than<br />
two-part materials.<br />
<strong>Polytek</strong>’s two-part materials are<br />
tough, long-lasting, easy-to-use<br />
mold rubbers.<br />
Mold Making<br />
Methods<br />
One-Part Mold Compounds<br />
Type Advantages Disadvantages Uses Methods<br />
Alginate<br />
Hydrogel ® N<br />
• Safe for body contact • Very limited life; dries out<br />
• Gets model wet<br />
• Body molds<br />
• Single-use molds<br />
• Pour<br />
• Layup<br />
Wax<br />
Poly Skin-Wax<br />
• Safe for body contact<br />
• Low cost<br />
• Fast set<br />
• Reusable<br />
• Low strength<br />
• Limited use<br />
• Must melt prior to use<br />
• Body molds<br />
• Single-use molds<br />
• Brush-on<br />
• Dip<br />
Latex<br />
Poly Latex 60<br />
Poly Latex False Face<br />
• High strength • Not dimensionally stable<br />
• Takes days or weeks to<br />
make mold<br />
• Oils can soften and<br />
destroy molds<br />
• Blanket molds only with<br />
shell required<br />
• Concrete<br />
• Plaster statuary<br />
• Limited resins<br />
• Brush-on<br />
• Spray<br />
• Dip<br />
Two-Part Mold Rubbers<br />
Type Advantages Disadvantages Uses Methods<br />
Polyurethanes<br />
• Moderate to low cost<br />
Polygel ®<br />
Poly 74, 75, & 77 Series • High strength<br />
Poly 81 Series<br />
Poly 72-40 Series<br />
• Many versatile varieties<br />
• Requires careful<br />
release agent<br />
• May be moisture<br />
sensitive<br />
• All materials<br />
except molten<br />
metals<br />
• Pour<br />
• Brush-on<br />
• Spray<br />
Tin Silicones<br />
TinSil ® 70 Series<br />
• No release agent<br />
needed<br />
• High strength<br />
• Excellent chemical<br />
resistance<br />
• Higher cost<br />
• Shrinks up to 1% on<br />
curing<br />
• Limited cured storage<br />
life<br />
• All materials<br />
(especially resins<br />
and lowtemperature<br />
melting metals)<br />
• Pour<br />
• Brush-on<br />
• Spray<br />
Platinum Silicones<br />
PlatSil ® 71 Series<br />
PlatSil ® 73 Series<br />
PlatSil ® Gel-10<br />
• No release agent<br />
needed<br />
• No shrink on cure<br />
• Good cured storage life<br />
• High strength<br />
• Excellent chemical<br />
resistance<br />
• Higher cost<br />
• Cure inhibited by some<br />
surfaces<br />
• All material • Pour<br />
• Brush-on<br />
• Spray<br />
www.polytek.com<br />
3
1 Mold Making Methods<br />
Mold Making<br />
Methods<br />
Model Composition<br />
A model’s composition or surface coating may restrict you to<br />
certain mold making materials. Certain mold materials do not<br />
cure properly over some model materials (i.e., platinum-cured<br />
silicones do not cure on sulfur-containing clay models).<br />
Sometimes, if the model’s composition presents a problem, it<br />
can be overcome by carefully sealing the model (see p. 11).<br />
Thoroughly review product technical bulletins to be sure that<br />
there are no compatibility issues between your model and the<br />
mold material you’ve selected. If your model is delicate or<br />
valuable, it is best to try the selected mold material on a small<br />
hidden area before you jump into mold making. Fragile models<br />
can be damaged in the mold making process. The resulting<br />
mold, however, can be used to make a reproduction out of a<br />
more durable material. [Note: If the model is a human body,<br />
there are obvious safety issues. Consider Hydrogel Mold<br />
Compound or Poly Skin Wax (see pp. 59-60).]<br />
Model Shape and Size<br />
The size, shape, and even location of your model may limit you<br />
to certain mold making materials and types of molds (i.e., a<br />
model with deep undercuts does not lend itself to a simple box<br />
mold). If you are restricted to a certain type of mold, then your<br />
choices of mold materials may be limited.<br />
Cost<br />
Both the volume of material needed and the price per unit<br />
volume must be considered in calculating project cost. The<br />
quantity of mold making material needed is dictated largely by<br />
the type of mold you choose to make -- a large model may<br />
mandate a brush-on mold since any other type of mold would<br />
require too much material. The quantity of material needed can<br />
be calculated by estimating the volume of mold making material<br />
needed (in cubic inches) and dividing by the specific volume<br />
(cubic inches per pound) of the material (see box to the right).<br />
To determine project costs more accurately, one also needs to<br />
consider the time it takes to make the mold (see below).<br />
Time Considerations<br />
Timing plays an important role in the selection of a mold<br />
making material. With some materials a mold can be completed<br />
in an afternoon (i.e., accelerated silicone and polyurethane mold<br />
rubbers), while with others, it can take weeks (i.e., latex rubber).<br />
To learn more about demold times, read the technical bulletins<br />
for individual products. Remember, the fastest material or<br />
method may not be the least expensive.<br />
Consider how long you intend to use and keep the mold. Some<br />
materials are only suitable for one casting (i.e., Hydrogel), while<br />
others will hold up for hundreds of castings (silicones and most<br />
polyurethanes). Also, consider “library life:” how long you<br />
expect the mold to remain useful after sitting on a shelf. Most<br />
properly cured rubber molds are useable for many years, but<br />
some degrade within 2 to 4 years (i.e., Poly 72-40 and TinSil<br />
rubbers). For molds with long library life, use polyurethane<br />
rubbers (except Poly 72-40) or PlatSil silicone rubbers.<br />
$<br />
Cost per cubic inch is your real cost --<br />
price per pound can be misleading.<br />
When using mold making or casting materials you are usually<br />
filling a given space. The lower the cost per cubic inch of<br />
material, the lower the cost of filling the space. “Specific<br />
Volume,” expressed in cubic inches per pound (in 3 /lb), is the<br />
key to calculating the real cost of a mold making and casting<br />
material.<br />
Some rubbers and plastics that have a low price per pound<br />
contain dense fillers such as powdered marble or silica. These<br />
fillers typically reduce the price per pound, but raise the price<br />
per cubic inch. Simple calculations reveal the real cost of your<br />
material in terms of cents per cubic inch.<br />
Poly 74 Series Rubbers (see p. 34) are low density and<br />
contain no heavy fillers. They yield 27.5 in 3 /lb. Poly-Fast 72-<br />
40, a dense rubber, contains fillers and yields only 20 in 3 /lb --<br />
nearly 1/3 less rubber volume per pound!<br />
For example:<br />
• An 80-lb trial unit of Poly 74-30 costs $336 or $4.20/lb<br />
($336/80 lb). Dividing $4.20/lb by 27.5 in 3 /lb yields a<br />
cost of $0.15 per in 3 .<br />
• A 49.5-lb trial unit of Poly-Fast 72-40 costs $194 or<br />
$3.92/lb ($194/49.5 lb). Dividing $3.92/lb by 20 in 3 /lb<br />
yields a cost of $0.20 per in 3 .<br />
Poly 74-30 = $0.15 per in 3<br />
Poly-Fast 72-40 = $0.20 per in 3<br />
At first glance it appears that Poly 74-30 is the more<br />
expensive product; however, to fill a given space, using Poly<br />
74-30 actually costs nearly 25% less than higher density<br />
Poly-Fast 72-40 rubber. The photo below shows the dramatic<br />
density difference between these rubbers.<br />
4<br />
(610)559-8620 • (800)858-5990
Mold Making Methods 1<br />
SELECTING A CASTING MATERIAL<br />
To select the best casting material for your project, you must<br />
consider several factors: mold composition and construction,<br />
required characteristics of the casting (i.e., weight, durability),<br />
cost, and timing.<br />
First, it is a good idea to familiarize yourself with the common<br />
casting materials and understand the general advantages and<br />
disadvantages of each. The most common and least expensive<br />
casting materials are gypsum plasters and cements, both of<br />
which are available in many formulas for various end uses.<br />
Waxes are castable, of course, but uses are limited by low<br />
hardness and high shrinkage. Low melting metals can be cast in<br />
heat resistant silicone molds. Epoxy and polyurethane systems<br />
are versatile and durable casting materials. Polyester resin is<br />
quite low in cost, especially if low cost fillers like sand,<br />
limestone or wood flour are added.<br />
The table below presents common casting materials suitable for<br />
use in molds made from <strong>Polytek</strong> flexible mold products.<br />
Mold Composition<br />
A mold’s composition may restrict you to certain casting<br />
materials. In a few cases, casting materials may rapidly degrade<br />
or even destroy the mold (i.e., exothermic epoxy resins will melt<br />
a wax mold). Carefully review product technical bulletins to be<br />
sure that there are no compatibility issues between your mold<br />
and the casting material.<br />
Mold Material<br />
Casting Material<br />
Skin-Wax Low-exotherm materials --<br />
polyurethane and silicone<br />
rubbers and select resins<br />
Hydrogel<br />
Latex<br />
Polyurethane<br />
Silicone<br />
Materials that are not<br />
moisture sensitive -- wax,<br />
plaster, silicones and<br />
select resins<br />
Concrete, plaster and<br />
select resins<br />
Most casting materials are<br />
acceptable, except metals<br />
All casting materials are<br />
acceptable<br />
Molds made from <strong>Polytek</strong> products are non-porous and casting<br />
materials used in the molds should "cure" or set chemically. In<br />
most cases, air drying materials are not suitable since the rubber<br />
prevents them from drying except from the back. Water clay,<br />
paper-mache, and latex are often not suitable casting materials.<br />
The illustration above provides a general guideline regarding<br />
suitability of casting materials depending on mold composition.<br />
Mold Making<br />
Methods<br />
Casting Material Advantages Disadvantages End Uses<br />
Wax • Easy demold • Fragile<br />
• High shrinkage<br />
• Foundries<br />
• Candles<br />
• Resculpting<br />
Vinyl • One-part liquid • Requires high heat to use • Prototypes<br />
• Parts<br />
Gypsum Plaster • Fast<br />
• Yields good quality<br />
• Indoors only<br />
• Brittle<br />
• Most indoor objects<br />
• Moulding<br />
Concrete/<br />
Specialty Concrete<br />
• Acceptable for outdoor use • Heavy<br />
• Rough surface<br />
• Slow set<br />
Design Cast and Forton® MG • Acceptable for outdoor use • Higher cost<br />
Acrylic Resin • Clear • Expensive<br />
• Difficult to use<br />
• Strong odor<br />
Polyester Resin • Inexpensive • Flammable<br />
• Strong odor<br />
Epoxy Resin • Moderate price • Health hazards<br />
• Limited mass<br />
Polyurethane Resin/Foam • Moderate price<br />
• Moisture sensitive<br />
• Easy to use<br />
• Very versatile<br />
• Statuary (indoor &<br />
outdoor)<br />
• Architectural<br />
ornaments<br />
• Many diverse uses<br />
(painting may be<br />
needed for outdoor<br />
use)<br />
www.polytek.com<br />
5
1 Mold Making Methods<br />
Mold Making<br />
Methods<br />
Weight of the Casting<br />
Casting materials have different densities that affect the weight<br />
and feel of the final casting. For example, plaster and concrete<br />
are heavy, while resins are lighter. The weight of a casting can<br />
often be controlled by adding fillers to the casting material.<br />
Also, you can create a lighter, hollow casting, by using a "plug"<br />
to prevent casting material from filling the entire mold, or by<br />
laying up into or rotating a mold so casting material cures in a<br />
thin shell on the mold surface. These techniques are discussed<br />
on p. 10.<br />
Exterior Durability of the Casting<br />
Materials such as cement are fine for both indoor and outdoor<br />
environments, whereas most other casting materials need to be<br />
painted or sealed for outdoor use. Exterior castings are subject to<br />
elements such as UV light from the sun, rain, and freezing and<br />
thawing. Concrete and polyester resin castings are fine for<br />
interior and exterior uses. Polyurethanes, however, must be<br />
painted or sealed prior to being placed outdoors in order to avoid<br />
yellowing and chalking of the bare plastic, which occurs over<br />
time. Fillers, pigments and Poly UV Additive can be added to<br />
improve exterior performance (see p. 61 for information on Poly<br />
UV Additive).<br />
Cost<br />
Both the quantity of material needed and the price per cubic inch<br />
must be considered in calculating project cost. The<br />
quantity/weight of casting material needed is dictated by the<br />
volume of material needed (in cubic inches) divided by the<br />
specific volume (cubic inches per pound) of the casting material.<br />
Here is a general idea about the relative costs of casting<br />
materials.<br />
COST<br />
High Cost<br />
Medium Cost<br />
Low Cost<br />
Unfilled polyurethanes and epoxies<br />
Filled resins, speciality concretes<br />
(i.e., Forton ® MG)<br />
Concrete, plaster, wax, filled<br />
polyester<br />
Obviously, to determine true project cost one needs to consider<br />
the time it takes to make the casting (see below).<br />
“Exotherm” of Casting Material<br />
Exotherm is the heat of reaction produced as a resin or rubber<br />
cures. Polyurethane rubbers generally have very little<br />
measurable exotherm. Poly 74-55 in a large mass may rise<br />
just a few degrees above the temperature of the Parts A and B<br />
before mixing. Epoxies, on the other hand, are much more<br />
exothermic and, if poured in too large a mass for the heat to<br />
dissipate, may get so hot that they boil and burst into flames.<br />
Therefore, casting epoxies in large masses is dangerous and<br />
must be avoided.<br />
Consider exothermic heat when selecting casting resins. If the<br />
casting is so thin that exothermic heat is easily dissipated into<br />
the mold, the resin will be slow to cure, but there will be no<br />
thermal shrinkage caused by gelling while hot then cooling.<br />
Slow curing in these cases can be overcome by using warm<br />
molds or using a faster curing system. Massive castings tend<br />
to build heat in the center of thicker sections and sometimes<br />
thinner sections of the same casting remain cooler. If the<br />
temperature difference is too great, distorted parts or shrink<br />
marks may be evident. Often, warm molds can help overcome<br />
this problem as can addition of fillers or use of slower curing<br />
systems. High curing temperatures shorten rubber mold life,<br />
so proper selection of casting systems results in best economy<br />
and longest mold life.<br />
To reduce costs and cast larger masses,<br />
ADD FILLERS to polyurethanes & epoxies.<br />
Many fillers are suitable to add to liquid plastics to reduce<br />
costs and help dissipate exotherm, which can cause shrinkage<br />
and limit the size of the mass that can be cast at once. Heavy<br />
fillers absorb more exothermic heat, but result in a heavy<br />
casting. Lightweight fillers can make the casting lighter than<br />
wood so it will float and carve easily. Some fillers such as<br />
wood powder and nut shell flours may contain moisture and<br />
cause foaming of the plastic or other problems. Dry fillers that<br />
stir easily into the mixed resin are best. The cost per cubic<br />
inch of resin displaced is the real cost of these fillers. For<br />
example, some typical costs per cubic inch follow:<br />
Time Considerations<br />
Timing plays an important role in the selection of casting<br />
material. With some materials, a finished casting can be made in<br />
minutes (i.e., EasyFlo 60 Plastic); while with others, it can take<br />
days (i.e., concrete). The fastest material or method often is not<br />
the least expensive.<br />
TIME<br />
Slow<br />
Medium<br />
Fast<br />
Concrete<br />
Plaster, wax, thin resins<br />
Polyurethane and polyester resins<br />
Filler $/lb Density (g/cc) $/in 3<br />
Dry Sand $0.05 2.75 0.005<br />
Bronze Powder 5.00 8.85 1.590<br />
Ground Limestone 0.15 2.70 0.015<br />
Extendospheres CG 0.50 0.70 0.013<br />
Q-Cel 2116 or 3M C/15 6.00 0.10 0.022<br />
Adding an equal volume of low cost filler to a Poly Plastic<br />
can cut the cost of the casting nearly in half! For example, one<br />
cubic inch of resin at $0.14 plus an equal volume of filler at<br />
$0.015 yields approximately two cubic inches costing $0.155<br />
or about $0.07 per cubic inch for the mix.<br />
6<br />
(610)559-8620 • (800)858-5990
Mold Making Methods 1<br />
TYPES OF FLEXIBLE MOLDS<br />
There are two basic types of flexible rubber molds: block molds<br />
and blanket molds. Within these two basic types, there are<br />
numerous variations differing in both construction and<br />
complexity.<br />
Mold Making<br />
Methods<br />
BLOCK MOLDS<br />
Block molds are typically made by placing the model into a<br />
containment area (i.e., mold box) and pouring liquid rubber over<br />
the model. After curing, the rubber is removed from the model<br />
and the result is a single-piece, poured block mold. This is the<br />
simplest type of mold. Single-piece, poured block molds are best<br />
for models with a relatively flat base or back and no sharp<br />
undercuts that prevent the rubber from demolding from the<br />
model. This type of mold would be used for reproduction of a<br />
wall plaque.<br />
For a model with undercuts (i.e., the chin of a cherub’s face) a<br />
softer rubber can be used or the mold may need to be cut to<br />
allow for removal of the model and castings: this is referred to<br />
as a split block mold. In some cases, the block mold may need to<br />
be cut into or poured in several pieces to allow for removal of<br />
the model and then carefully reassembled prior to casting: this is<br />
referred to as a multi-piece block mold.<br />
Sometimes, multi-piece block molds are made in sections, by<br />
pouring on one surface at a time, allowing to cure, then pouring<br />
on the adjoining surface against the previous pour. This<br />
technique is necessary when the model has details on all sides<br />
(i.e., does not have a flat base or back).<br />
Poured molds are sometimes free standing if the rubber is thick<br />
enough to hold its shape, but often a box or rigid shell is used<br />
with the mold to maintain its shape. Generally, the box or shell<br />
(“mother mold”) must be separate from the rubber mold in order<br />
to allow the mold to flex for removal of the model or casting.<br />
Various molds and castings of ornate architectural elements<br />
and decor.<br />
Poured mold materials generally pick up detail with fewer<br />
entrapped air bubbles than materials that are applied by brush or<br />
spray, except where bubbles on the surface of the rising liquid<br />
are trapped under a ledge such as under the chin of a head<br />
model. Tilting the mold box while pouring is a useful technique<br />
for preventing air entrapment. If this does not help, a brush-on<br />
mold, or pouring one section at a time may be advised.<br />
For diagrams depicting the procedures to make a single-piece<br />
poured block mold, a split single-piece poured block mold, and<br />
a multi-piece poured block mold, see pp. 17-18.<br />
A note on the terminology: Since a block mold is often made in<br />
box shape, it is sometimes called a box mold. However, this type<br />
of mold can be made in any appropriate containment area (i.e., a<br />
cylinder such as a piece of PVC pipe). Also, block molds are<br />
sometimes referred to as poured molds since this is the method<br />
used to make them.<br />
Mold Complexity<br />
Complexity<br />
Multi-Piece Poured Blanket Mold<br />
Poured Blanket Mold<br />
Sprayed Blanket Mold<br />
Brushed Blanket Mold<br />
Multi-Piece Block Mold<br />
Contributing<br />
Factors:<br />
Size<br />
Location<br />
Shape<br />
Time<br />
Materials<br />
Single-Piece Block Mold<br />
Two-piece block mold<br />
www.polytek.com<br />
7
1 Mold Making Methods<br />
Mold Making<br />
Methods<br />
BLANKET MOLDS<br />
As the name implies, blanket molds resemble a thin blanket<br />
carefully placed around the model. Blanket molds are made by<br />
either brushing or spraying the flexible mold material onto the<br />
model or pouring the mold material into a pre-constructed shell<br />
around the model. With a few mold materials (i.e, latex, wax), it<br />
is possible to make a blanket mold by dipping the model into the<br />
liquid material. Blanket molds are generally ¼- to ½-inch thick.<br />
To hold a blanket mold in its proper shape after the cured rubber<br />
is removed from the model and during the casting process, a<br />
rigid or firm mold shell (“mother mold”) is required.<br />
Blanket molds are often mandated by the size and/or location of<br />
the model. Since blanket molds consume far less rubber than a<br />
conventional block mold, they are preferred for large or<br />
irregularly shaped models. Typically mold rubber is sprayed or<br />
brushed on large models. Often, blanket molds are the only<br />
choice for large, immovable models (i.e., large gargoyle high on<br />
a building facade).<br />
With some models, blanket molds can be made in one piece and<br />
lifted or peeled off the model and subsequent castings like a<br />
sock; this is sometimes called a “glove mold.” A bas relief or a<br />
figure with a pyramid shape (the bottom wider than the top) lend<br />
themselves to one-piece molds. Molds that are to be turned back<br />
on themselves and peeled off must be kept thin, usually less than<br />
1/8-inch thick, to minimize stress and possible tearing of the<br />
rubber. As the mold is peeled off, it may need to be lubricated<br />
with silicone release or soapy water on the outside surface to<br />
allow it to slide easily against itself.<br />
For many types of models, the blanket mold must have a split<br />
down one side to allow for easy removal of the model and to<br />
reduce the chance of tearing the mold. The rubber at the end of<br />
the seam may be reinforced with fabric at the top where a tear<br />
may be likely to develop in the mold.<br />
For complex models, blanket molds can be made in two or more<br />
pieces. Shims or flanges are used to create seams or “parting<br />
lines” where required on blanket molds and their shells. A split<br />
blanket mold can be made by affixing a thin shim of aluminum<br />
flashing, cardboard or stiff plastic film to the model projecting<br />
several inches, applying release, and brushing/spraying the<br />
rubber up against the shim. The shim should have keys or<br />
indentations to allow the rubber flanges of each mold section to<br />
THIXOTROPY:<br />
The key to successful brush-on molds.<br />
Thix.ot.ro.py \thik-`so-tr -pe\ n [fr. Gk thixis<br />
act of touching]: the property of various gels<br />
becoming more fluid when disturbed (as by<br />
mixing) -- thixotropic adj<br />
(Webster’s Ninth New Collegiate Dictionary)<br />
e<br />
One-piece, Polygel ® brushed blanket mold.<br />
lock together to maintain position with respect to one another<br />
and to the shell.<br />
With the development of self-thickening and “thixotropic” (see<br />
definition below) mold materials, making brush-on and sprayed<br />
blanket molds has become routine. Not only do brush-on and<br />
spray molds use less rubber, but they are generally faster to<br />
make than poured blanket molds and offer the moldmaker visual<br />
control of rubber placement.<br />
In the past, blanket molds were often made by dipping the model<br />
into or brushing on latex. Since each layer of latex must dry<br />
overnight before the next layer can be applied, building up an<br />
adequate thickness of latex for a useable mold can take weeks.<br />
Trying to brush-on a pourable liquid without thickening usually<br />
produces less than satisfactory results since the the liquid flows<br />
off vertical surfaces. In order to make molds faster, moldmakers<br />
add fillers to pourable mold rubbers in order to thicken the<br />
uncured mix to a consistency that can be applied by brush. For<br />
example, Poly 74-30 Liquid Mold Rubber can be mixed with<br />
fumed silica (i.e, Cab-O-Sil ® ) to make brush-on blanket molds<br />
(see photograph on p. 21). Many customers use this method<br />
because it allows them to thicken the rubber to the exact<br />
consistency that is desired and is the most economical method of<br />
making brush-on molds. For more information regarding<br />
thickening of liquid mold rubbers, refer to the product<br />
descriptions (see pp. 34-45) or call <strong>Polytek</strong> Customer Service.<br />
In 1992, <strong>Polytek</strong> received a patent for the Polygel ® technology,<br />
which enables the mixed Parts A and B liquids to immediately<br />
react to form a gel with a consistency perfect for brush-on<br />
application. Polygel 35, 40 and 50 Liquid Mold Rubbers are<br />
ideal for brushing on a properly prepared model right after Parts<br />
A and B are mixed. In addition, certain Polygel products have<br />
been specially formulated for spray application (Polygel Spray<br />
35, Polygel Spray 50 and Quick Spray 50). See pp. 36-37 for<br />
information on Polygel products.<br />
Whether using liquid rubber thickened with Cab-O-Sil or the<br />
advanced Polygel products, a most important characteristic of<br />
the mixed mold material for brush-on or spray application is<br />
“thixotropy” (see box). To make a brush-on or spray-on blanket<br />
mold, the rubber must be thick enough to not sag after<br />
8<br />
(610)559-8620 • (800)858-5990
Mold Making Methods 1<br />
Both brush-on and spray blanket<br />
molds are most easily made with<br />
Polygel ® Liquid Mold Rubbers.<br />
application on the model, but also must be more fluid when it is<br />
mixed or moved around the model surface with a brush. Polygel<br />
products are thixotropic: they are thick enough to resist sagging<br />
when applied to a vertical surface, but are fluid when mixed and<br />
moved around the model surface. Basically, the more energy you<br />
put into a thixotropic material, the lower the viscosity -- the<br />
faster you stir it the more fluid it seems. A good liquid rubber for<br />
brush-on molds must become thixotropic shortly after Parts A<br />
and B are mixed together -- that’s Polygel.<br />
For diagrams depicting the procedures to make a single-piece<br />
blanket mold, a split single-piece blanket mold, and a multipiece<br />
blanket mold, see pp. 18-23.<br />
MOLD SHELLS (AKA “MOTHER MOLDS”)<br />
A mold shell, also known as a “mother mold,” is not a<br />
production mold but rather a shell that is required to hold the<br />
flexible rubber mold in its proper shape. The shell and mold are<br />
used on the production line. Mother molds are sometimes used<br />
with block molds and are nearly always used with flexible<br />
blanket molds. Mother molds can be made of plaster, plaster and<br />
hemp, polyester resin and fiberglass, urethane foam, or one of<br />
<strong>Polytek</strong>’s firm liquid rubbers or rigid liquid plastics. Poly 15<br />
Series Liquid Plastics (15-6, 1511 and 1512X) and Polygel<br />
Plastic-75 make tough, durable, lightweight mold shells in a<br />
matter of minutes! For more information on 15-Series Liquid<br />
Plastics see p. 49; for Polygel Plastic-75, see p. 55.<br />
The mother mold is usually made over and is removable from<br />
the rubber production mold. Care must be taken so that a rigid<br />
shell does not lock onto undercuts in the block or blanket mold.<br />
All such undercuts must be eliminated or the shell must be made<br />
in multiple pieces to work around them. In certain situations, a<br />
firm but flexible mother mold can offer a good solution to<br />
undercuts. A flexible mother mold, such as one made of Poly<br />
74-30 Mold Rubber, can be pulled off simple undercuts. You<br />
may use a little more rubber, but you can save lots of labor.<br />
Mother molds are often two or more pieces even when the mold<br />
is one piece. The shell for a split mold would part along the line<br />
of the split in the mold. Parting lines for shells can be<br />
established using plasticene strips applied to the cured rubber,<br />
building up the shell against one side of the strip, removing the<br />
strip, applying release and building the other half of the shell.<br />
When complete, the sections of the shell press the flanges of the<br />
rubber together like a gasket, keeping the parting line tight and<br />
inconspicuous. If a brush-on mold is large, the rubber should<br />
have projecting keys or<br />
rubber “snaps,” on its flange<br />
and back so that the mold<br />
locks into the shell to<br />
prevent flopping out of<br />
position. [Tip: Buttons of<br />
rubber, cast in advance in<br />
plastic pill holders, can be<br />
bonded onto the last coat of<br />
the mold rubber so that the<br />
shell is formed around them<br />
holding the mold in position<br />
in the shell.]<br />
In the case of a poured<br />
blanket mold, the mother<br />
mold is typically made<br />
before the rubber mold is<br />
made. After the mother mold<br />
is cured, it is positioned over<br />
the model and the liquid<br />
mold rubber is poured into<br />
Polygel ® rubber mold and resin<br />
shell made of Poly 15-6 Liquid<br />
Plastic thickened with Poly Fiber.<br />
the void between the mother mold and model to make the<br />
blanket mold. For more on this technique, see pp. 22-23.<br />
A mother mold can last indefinitely and can help prolong the life<br />
of a mold since a rubber mold stored in its shell can maintain<br />
exact dimensions. The mold in its shell will last many years if it<br />
is stored in a cool, dry area out of sunlight. Still, when the<br />
rubber fails (as all flexible molds eventually do) the shell is<br />
simply repositioned over the model and a new mold is poured,<br />
ready for use the next day.<br />
These three photos<br />
illustrate the construction of<br />
a poured blanket mold.<br />
First, the model, a gargoyle<br />
face, is covered with clay.<br />
Next, a rigid, plastic mold<br />
shell (i.e., Poly 1512X, see<br />
p. 49) is constructed over<br />
the clay blanket. After the<br />
plastic cures, it is removed<br />
and the clay is removed<br />
from the model. Then the<br />
plastic shell is repositioned<br />
over the model and liquid<br />
rubber (i.e., PlatSil ® 71-11,<br />
see p. 43) is poured through<br />
an opening in the shell and<br />
covers the model. Once the<br />
rubber cures, the model is<br />
removed and the mold is<br />
ready to use. Cast away!<br />
Mold Making<br />
Methods<br />
www.polytek.com<br />
9
1 Mold Making Methods<br />
Mold Making<br />
Methods<br />
TYPES OF CASTINGS<br />
There are numerous types of castings and casting methods.<br />
Castings vary by the type of material that they are made of (see<br />
p. 2), and by the method employed to make them. The table<br />
below summarizes the most common casting methods along<br />
with the advantages and disadvantages inherent in each<br />
technique and the products for which one might use each<br />
method.<br />
The photo to the right shows numerous castings made from<br />
various <strong>Polytek</strong> casting plastics.<br />
Casting Method Advantages Disadvantages End Uses<br />
Solid Pour<br />
Material is poured into the mold<br />
resulting in a solid casting.<br />
Gel Coat and Layup<br />
A thin surface coat is applied and<br />
subsequent layers of reinforcing<br />
material like fiberglass mat and<br />
resin are built up to a thin, strong<br />
laminate.<br />
Slush Cast<br />
Material is manually rotated in the<br />
mold creating a thin layer resulting<br />
in a lightweight hollow casting.<br />
Rotational Cast<br />
A closed mold is rotated by<br />
machine as a small amount of<br />
material coats the surface and sets,<br />
resulting in a hollow, lightweight<br />
casting.<br />
Injection<br />
Liquid is forced into the mold<br />
under pressure.<br />
Fast Heavy Small objects<br />
Possible high cost<br />
Industrial tools<br />
Lightweight Time consuming Rigid molds<br />
Less material used<br />
Mold shells<br />
High quality surface<br />
Large objects<br />
Bonded bronze<br />
Lightweight Time consuming Art objects<br />
Less material used<br />
Bonded bronze<br />
Fast Need a machine Larger statuary<br />
Easy<br />
Hollow parts<br />
Lightweight<br />
Six-sided parts<br />
Quality parts Requires setup time Manufactured parts<br />
Often need a machine<br />
Vacuum and Pressure<br />
Bubbles are eliminated, resulting<br />
in perfect, high detail parts. Used<br />
in conjunction with solid pour.<br />
Direct Layup/Spray - No Mold<br />
Material is spread over a screen<br />
armature. Surface detail is sculpted into<br />
the wet material or plastic hardcoat<br />
sprayed over carved foam substrate.<br />
Quality parts Requires setup time Prototypes<br />
Need vacuum pump/pressure pot Figurines<br />
Lightweight Time consuming Amusement/theme parks<br />
Less material used<br />
Sculpted rocks<br />
10<br />
(610)559-8620 • (800)858-5990
Mold Making Methods 1<br />
MOLD MAKING PROCEDURES<br />
This section guides you from model preparation through<br />
finishing your casting. The directions provided here are general<br />
in order to be helpful regardless of what mold making and<br />
casting materials you choose and what type of mold or casting<br />
you’re making. The following sections are presented in the order<br />
that your project should proceed. Diagrams that depict<br />
procedures for making a few different types of molds are<br />
presented after the complete text description (see pp. 17-23).<br />
SAFETY FIRST!<br />
Before you even open your containers of mold making or<br />
casting materials, understand the hazards of the materials that<br />
you’ll be working with.<br />
• Read material safety data sheets (MSDSs) and<br />
product labels - MSDSs are sent with every <strong>Polytek</strong><br />
product and contain very important safety information.<br />
Also, <strong>Polytek</strong> product labels have hazard warnings and<br />
precautionary statements. Read the MSDS and labels<br />
carefully so that you can use <strong>Polytek</strong> products safely. If you<br />
do not receive MSDSs with your shipment, call <strong>Polytek</strong><br />
Customer Service and they will promptly get them to you.<br />
• Understand health hazards - Some uncured <strong>Polytek</strong><br />
products can cause skin, eye and respiratory irritation if<br />
improperly handled. Also, a few uncured products can<br />
cause dermal and respiratory sensitization (i.e., allergic<br />
reactions) in sensitive individuals. Avoid skin and eye<br />
contact and breathing vapors from uncured materials. Do<br />
NOT use <strong>Polytek</strong> products where food or prolonged body<br />
contact may occur.<br />
• Use personal protective equipment (PPE) and<br />
engineering controls - Follow recommendations on<br />
product MSDSs for use of PPE such as gloves, dust masks,<br />
safety glasses or goggles, aprons, and, in limited cases, airpurifying<br />
respirators with organic vapor cartridges. Use<br />
products in areas with adequate ventilation such as a large<br />
open room with air circulation.<br />
READ DIRECTIONS<br />
All too often, projects are spoiled because, in enthusiasm for<br />
completing a project, important directions are not followed.<br />
Before starting your project, read product technical bulletins and<br />
label directions thoroughly. Call <strong>Polytek</strong> Customer Service if<br />
you have any questions.<br />
MODEL PREPARATION<br />
Porous models, such as wood, plaster, stone, pottery or<br />
masonry, must be sealed, then coated with a release<br />
agent such as Pol-Ease ® 2300 Release Agent or PolyCoat.<br />
Sealing prevents rubber or resin from penetrating pores in the<br />
model surface. Several coats of paste wax, allowed to dry and<br />
polished or melted paraffin, petroleum jelly, lacquer, shellac,<br />
If you don’t follow directions ...<br />
there is a lot that can go wrong ...<br />
• Improper Mix Ratio - Slow, non-curing or<br />
soft material can result if two-part materials are<br />
not weighed or measured accurately. Always use<br />
an accurate scale (see accessories, p. 63). Do<br />
calculations carefully and double check the mix<br />
ratio listed on labels and product literature.<br />
• Release Agent or Sealer - Incorrectly<br />
applied or missing, or use of the wrong sealer or<br />
release can result is sticking or damage to the<br />
mold/casting. If you’re not sure that you’ve<br />
properly sealed/released a model, make a test<br />
cure. Too much release agent can cause pinhole<br />
surface defects or bubbles in the mold and/or<br />
casting.<br />
• Low Temperatures or Demolding Too<br />
Soon - Deformed parts can result. Fluctuating<br />
temperatures during curing can cause bubbles and<br />
dimensional changes.<br />
• Leaking Mold, Boxes or Shells - Your pour<br />
can spill, wasting material and time. Use<br />
mechanical fasteners and hold downs and be sure<br />
that seams are tight and sealed.<br />
• Material Hardens Before It’s In Place -<br />
Avoid delays once material is mixed. Watch a clock!<br />
• Unmixed Material - Streaks of uncured or<br />
soft areas and/or gas bubbles can develop several<br />
weeks after curing if Parts A and B are not<br />
thoroughly mixed. Poorly mixed material is often<br />
from the sides and bottom of the mixing container.<br />
• Incorrect Material Selected - Choosing<br />
the wrong material can result in sticking or<br />
damage such as staining or softening a model,<br />
mold or casting.<br />
• Material Not Stirred Before Use - Some<br />
components (Part A or B) must be stirred before<br />
use. If the component is not carefully stirred<br />
before mixing with its counterpart, soft cures or<br />
bubbles can result.<br />
• Contaminated Material - Moisture or<br />
other foreign contaminants can spoil the cure of<br />
materials. Freshly opened containers and clean<br />
tools are important.<br />
Mold Making<br />
Methods<br />
www.polytek.com<br />
11
Mold Making<br />
Methods<br />
12<br />
1 Mold Making Methods<br />
Important Terms<br />
Cure time is often longer than demold time, sometimes even<br />
though a product feels cured and can be demolded, curing may<br />
continue for up to a week.<br />
Demold time is the soonest a cured product can be removed<br />
from the mold if it has been at recommended temperature.<br />
Demolding castings as soon as possible helps to extend mold<br />
life. Thin castings may require more time in the mold before<br />
demolding.<br />
Density is the weight of material that fills a given space. Water<br />
has a density of 1.0 g/cc and a pound of water takes up 27.5<br />
cubic inches. Thus a pound of material with a density of 2 g/cc<br />
will only fill half the space or 13.75 cubic inches. When buying<br />
mold rubber or casting resin you must consider the price per<br />
volume, as the price per pound can be misleading. (See box on<br />
“Cost per cubic inch,” p. 4.)<br />
Elongation, reported in percent, is the length the material<br />
stretches before breaking.<br />
Hardness is measured with a Durometer. It pushes a needlelike<br />
probe into the rubber as it is pressed against it. The<br />
farther the needle penetrates into the sample the lower the<br />
reading. The Shore A scale is used for rubbers and the Shore D<br />
scale is used for plastics. Both scales go from 0 to 100. A<br />
rubber with a Shore A hardness of 0 is like warm chewing gum.<br />
Shore A10 to 20 is about as soft as any mold rubbers can be.<br />
Shore A50 rubber is like a car tire. Above A80, rubbers feel<br />
more like a plastic and may measure on the low end of the<br />
Shore D scale. Shore D90 is about as hard as plastics get.<br />
Pour time, working time, pot life or gel time give you an idea<br />
how much time you’ll have to work with a material from the time<br />
mixing begins until it gels. Most materials should be in place<br />
well before the end of this time to allow good flow into detail<br />
and for air bubbles to rise and break.<br />
Rheology describes how a liquid flows. A liquid is Newtonian if it<br />
flows and levels, even if very slowly. Pourable mold rubbers<br />
should be Newtonian. Brush-on mold rubbers may be<br />
thixotropic, that is they flow when brushed/troweled, but when<br />
undisturbed they stay where they are placed (see box on p. 8).<br />
Shrinkage is a reduction in size, which occurs with some<br />
plastics during cure or some rubbers after prolonged use.<br />
Casting materials draw oily materials out of the rubber causing<br />
it to shrink. Products that develop heat during cure shrink as<br />
they cool. The degree of shrinkage increases with the<br />
temperature increase during cure. Some plastics get warmer in<br />
the center than against the cool mold surface and tend to<br />
cause the still liquid resin against the mold to sink. (See box on<br />
“Exotherm,” p. 6.) <strong>Polytek</strong> products that stay cool during cure<br />
do not shrink while curing.<br />
Tear strength is reported as the force needed to tear a split<br />
one-inch long in a piece of material. Higher elongation rubbers<br />
generally have a higher perceived tear strength.<br />
Tensile strength is the force required to break a piece of<br />
material when pulled. It is reported in pounds required to break<br />
a one-inch square specimen of material.<br />
Viscosity, reported in centipoise (cP), describes if a liquid is<br />
thick or thin. Water is low viscosity (1 cP), while pancake syrup<br />
is higher (1000 cP), and honey is even higher (10,000 cP).<br />
Temperature affects viscosity -- the lower the temperature,<br />
the higher the viscosity. For best flow into detail, <strong>Polytek</strong><br />
materials should be at least room temperature.<br />
paint, PVA (polyvinyl alcohol solution), and potters’ soap on<br />
plaster all work well for certain surfaces and mold rubber or<br />
resin combinations. Some rubbers (i.e., Poly-Fast 72-40) contain<br />
materials that dissolve or soften lacquer and paints. For them,<br />
wax or shellac are often used as sealers. Polyurethanes bond<br />
tenaciously to shellac, however, so if shellac is used as the<br />
sealer, release agent must be very carefully applied over it.<br />
Bare plaster is best sealed with potters’ soap (or Murphy’s Oil<br />
Soap) lathered into the damp surface of the plaster with a soft<br />
brush, rinsed and repeated several times, then polished with a<br />
soft brush or cloth. Only use soap on plaster, it is not suitable for<br />
sealing with other materials. If the plaster is dry, it should be wet<br />
for several seconds under running water prior to soaping.<br />
Moist water clay, another special case, can be sealed and<br />
released with Pol-Ease 2350 Release Agent or by spraying on a<br />
10% solution of petroleum jelly in mineral spirits, made by<br />
warming and melting the petroleum jelly and stirring in mineral<br />
spirits. [Note: Use extreme caution since mineral spirits is highly<br />
flammable.] Then apply the solution using a plant spray bottle,<br />
brush out and allow to dry. This prepares the water clay for<br />
contact with most mold rubbers. If the water clay is completely<br />
dry, it should be sealed and coated with release as for terra cotta.<br />
Pol-Ease 2300 Release Agent must be applied to nearly<br />
every surface before pouring or applying liquid rubber (except<br />
silicones) or resin. It should be sprayed evenly and then gently<br />
brushed out with a dry brush to pick up any excess and to spread<br />
the release over any spots missed by the spray. The brush should<br />
be wiped with a paper towel periodically to prevent too heavy a<br />
coating being left on the surface. Too much release can cause<br />
pinhole defects in the surface of the liquid material poured<br />
against it. The coating of release should be allowed to dry for<br />
about 15 minutes prior to pouring. Silicone-based release agents<br />
like Pol-Ease 2300 may interfere with the cure of silicone mold<br />
materials. When pouring silicones, use Pol-Ease 2350 on<br />
surfaces that the liquid silicone will contact. Consider PolyCoat<br />
as a semi-permanent, dry sealer and release when using<br />
polyurethane rubbers.<br />
If you have any question about the compatibility<br />
between the rubber and the prepared model surface,<br />
perform a test cure on an identical surface to determine that<br />
complete curing and good release are obtained. Some materials<br />
such as sulfur-containing modeling clays and wood knots, inhibit<br />
curing of some rubbers and plastics.<br />
Securely fasten and seal side boards or shells to the<br />
base to prevent leakage. Seal and apply release on all side<br />
boards and shell interiors. Petroleum jelly is excellent for most<br />
non-critical surfaces like these, unless the material gets warm<br />
enough during cure to melt the petroleum jelly. Pol-Ease 2300<br />
Release Agent is more heat resistant, but is not self-sealing, so<br />
surfaces must first be well sealed.<br />
Porous models must be vented from beneath to prevent<br />
trapped air from forming bubbles in the rubber. A hole at least<br />
¼-inch in diameter should be drilled through the base board into<br />
the porous model. The base of the model must be sealed around<br />
the perimeter with Poly Plasticene or glue to prevent liquid<br />
rubber from leaking under the model and through the vent hole.<br />
(610)559-8620 • (800)858-5990
Mold Making Methods 1<br />
MIXING THE MOLD RUBBER<br />
Have all materials at room temperature (75°F) before<br />
mixing. It can take 24 hours for a 5-gal pail of material to warm<br />
up to room temperature in the winter.<br />
Have all materials and equipment clean and ready.<br />
Time is critical to success. You do not want to go searching for<br />
tools after you have mixed Parts A and B.<br />
Stir individual components before use if recommended.<br />
Some materials separate and will not cure properly if separated<br />
material is used.<br />
Weigh and measure accurately. Mix Ratios Vary! Check<br />
the mix ratios for the specific product you are using. For liquid<br />
rubbers, most mix ratios are expressed by weight. Carefully<br />
weigh Parts A and B in proper ratio. Weighing components on<br />
an accurate scale is a must. Only materials with a mix ratio of<br />
1:1 by volume can be measured by volume. <strong>Polytek</strong> does not<br />
recommend trying to measure any other mix ratio by volume.<br />
Close containers tightly after use. Most materials are<br />
usable at least six months to a year after shipment if unopened.<br />
Uncured polyurethanes, epoxies and some silicones react with<br />
atmospheric moisture and, therefore, should be used up as soon<br />
as possible after opening. Before resealing, Poly Purge Dry Gas<br />
Blanket (see p. 63) can be sprayed into open containers to<br />
displace moist air and extend storage life.<br />
Time your actions with a clock. Start timing when you start<br />
mixing. Try to have material poured and in place before half of<br />
the working time has elapsed so there is plenty of time for<br />
bubbles to rise away from the mold surface.<br />
Mix well, but avoid whipping air into the mix. Scrape the<br />
sides and bottom of the mixing container thoroughly several<br />
times while mixing. A Poly Paddle is invaluable for good<br />
mixing. Sometimes, to insure that no unmixed material is<br />
clinging to the sides or bottom, the mix can be poured into a<br />
clean container and mixed again for 1 to 2 minutes before<br />
pouring. For large mixes (i.e., >30 lb), a Jiffy Mixer (see p. 62)<br />
on a variable speed drill can be helpful, but care must be taken<br />
not to whip air into the mix or scrape the jiffy mixer blade<br />
against sides and bottom of the container.<br />
Avoid being rushed. Careful<br />
planning allows for a deliberate<br />
pace without making mistakes.<br />
Before starting to mix rubber, have all materials at hand<br />
and at room temperature (75°F).<br />
A Poly Paddle is an<br />
excellent tool for handmixing<br />
liquid rubber without<br />
introducing excess air into<br />
the mix. Scrape the sides<br />
and bottom of the mixing<br />
container thoroughly<br />
several times while mixing.<br />
Carefully Adhere to Mix Ratios!<br />
The chemistry of polyurethanes,<br />
silicones, and epoxies must add up.<br />
Unlike polyester resins, the recommended mix ratio<br />
of polyurethanes, silicones, and epoxies cannot be<br />
varied without causing changes in the physical<br />
properties of the cured material. This is because to<br />
cure 100 reactive groups of Part A, 100 reactive<br />
groups of Part B are needed. If 100 reactive groups<br />
of A weigh two pounds and 100 of B weigh one<br />
pound, then the mix ratio must be two A to one B<br />
(2A:1B), by weight.<br />
Generally, if excess B is used the cured plastic will<br />
be softer. If excess A is used the plastic will be<br />
harder. But off-ratio mixes can cause other<br />
problems, such as no cure at all, dimensional<br />
instability, or short storage life of the cured rubber.<br />
Mold Making<br />
Methods<br />
www.polytek.com<br />
13
1 Mold Making Methods<br />
Mold Making<br />
Methods<br />
APPLYING THE MOLD RUBBER<br />
Most often liquid mold rubber is poured over the model surface.<br />
With the development of Polygel products, however, applying<br />
liquid mold rubber to the model surface by brushing or spraying<br />
is becoming increasingly common. No matter how the liquid<br />
rubber is applied, one key is to avoid air entrapment. For poured<br />
molds, the liquid rubber should be poured in a steady stream<br />
into one corner of the mold box, allowing the liquid to flow over<br />
the model surface pushing air out ahead of it. In some cases,<br />
where there is exceptionally fine detail, some moldmakers feel<br />
that applying a small amount of mixed rubber to the surface and<br />
brushing or blowing it into the detail with low pressure air<br />
before pouring the bulk of the mix helps to ensure that the liquid<br />
pushes all the air out of the crevices. Caution must be taken that<br />
brushing does not actually push the liquid through the film of<br />
release agent on the surface, causing sticking, or that release<br />
does not float to the top of the brushed liquid, preventing<br />
Mold rubbers are typically applied<br />
to a model by pouring, brushing,<br />
or spraying. Liquid mold rubbers<br />
with thixotropic properties are<br />
ideal for brush and spray<br />
application. Think Polygel ® .<br />
How Much Liquid Rubber Do You Need?<br />
Poured Block Mold - Box Shape<br />
1. Calculate the volume of the box in cubic inches (in 3 ).<br />
V = l x w x h where: l = Length<br />
w = Width<br />
h = Height<br />
e.g., 10 in x 5 in x 5 in = 250 in 3<br />
2. Estimate the volume of the model.<br />
e.g., 8 in x 3 in x 3 in = 72 in 3<br />
3. Subtract the estimated volume of the model from the<br />
volume of the box.<br />
e.g., 250 in 3 - 72 in 3 = 178 in 3<br />
4. Use specific volume data (refer to Technical Bulletin for<br />
specific product) to convert the volume to quantity of<br />
liquid rubber needed in pounds.<br />
e.g., Using specific volume of Poly 74-30 Liquid Rubber<br />
(27.5 in 3 /lb):<br />
178 in 3 ÷ 27.5 in 3 /lb = 6.5 lb Rubber<br />
Poured Block Mold - Cylinder Shape<br />
1. Calculate the volume of the cylinder.<br />
V= π x r 2 x h where: π = 3.14<br />
r = Radius (½ diameter)<br />
h = Height<br />
e.g., Using a 10-in tall section of 5-in diameter PVC pipe:<br />
3.14 x (2.5 in x 2.5 in) x 10 in = 196 in 3<br />
2. Estimate the volume of the model.<br />
e.g., 8 in x 3 in x 3 in = 72 in 3<br />
3. Subtract the estimated volume of the model from the<br />
volume of the cylinder.<br />
e.g., 196 in 3 - 72 in 3 = 124 in 3<br />
4. Use specific volume data to convert the volume to quantity<br />
of liquid rubber needed in pounds.<br />
e.g., Using the specific volume of Poly 74-30 Liquid Rubber of<br />
27.5 in 3 /lb:<br />
124 in 3 ÷ 27.5 in 3 /lb = 4.5 lb Rubber<br />
Note: For the hypothetical model above, far less liquid rubber is needed for the cylindrical mold. Choose your containment area carefully.<br />
Brushed/Sprayed Blanket Mold<br />
1. Estimate the surface area of the model. Depending on the<br />
complexity of the model, this can be difficult and it may be<br />
necessary to consider a model in sections and add up all surface<br />
areas. If the model is basically rectangular, use the surface area<br />
equation for a rectangle; if cylindrical use the surface area<br />
equation for a cylinder (A = 2πr 2 + 2πrh).<br />
2. Multiply the surface area by the thickness of the blanket mold<br />
(usually 0.25 in to 0.38 in) to determine the volume of liquid<br />
rubber needed.<br />
3. Use specific volume data to convert the volume to quantity of<br />
liquid rubber needed in pounds<br />
Poured Blanket Mold<br />
Poured blanket molds are usually made by covering a model with clay,<br />
making a shell, removing the clay, and filling the area once filled by<br />
clay with liquid rubber. Therefore, the volume of clay equals the<br />
volume of liquid rubber needed. Using the weight of the clay, calculate<br />
its volume by multiplying by its specific volume. Divide the volume of<br />
clay by the specific volume of the liquid rubber to get the weight of<br />
rubber needed.<br />
e.g., If a 2-lb block of clay was removed from the model:<br />
2 lb x 18.4in 3 /lb = 36.8 in 3 clay<br />
36.8 in 3 x ÷ 27.5 in 3 /lb * = 1.3 lb Poly 74-30 Rubber<br />
* Specific volume of Poly 74-30 Liquid Rubber<br />
14<br />
(610)559-8620 • (800)858-5990
Mold Making Methods 1<br />
adhesion between the poured material and the brushed material.<br />
For more information on applying liquid mold rubber by brush<br />
or spray, refer to Polygel product information (see pp. 36-37).<br />
If a super smooth mold back is desired, a light spray of Pol-Ease<br />
2300 Release Agent on the top surface of the liquid just before it<br />
gels breaks most of the surface bubbles.<br />
CURING THE MOLD<br />
Cure at the same warm temperature that all your materials were<br />
when mixed. Temperatures below 65°F lengthen the time<br />
required for proper curing and may spoil the cure of some<br />
materials. Placing the poured mold or casting in a warmer area<br />
than the materials were when they were poured, can cause<br />
problems because changing temperatures while the material is<br />
setting can cause bubbles or distortion.<br />
Check product technical bulletin for proper cure time. Demold<br />
carefully as the material is still more tender than it will be a few<br />
days later. Bending or forcing a material while it is still only<br />
90% cured can cause distortion that may not recover.<br />
USING THE MOLD<br />
More rubber molds fail due to poor handling than by wearing<br />
out. Proper design, careful handling and attention to detail<br />
prolong mold life.<br />
When casting plaster, wet the rubber mold with Pol-Ease Mold<br />
Rinse or a 1% detergent (e.g., Ivory Liquid) solution in water<br />
before pouring the plaster. Wet the mold by dipping or spraying.<br />
Pour the plaster on the wet surface. [Note: Detergent is<br />
chemically different from soap. Do not use soap -- Ivory Liquid<br />
is a detergent.]<br />
When casting plastics in polyurethane or silicone molds, first<br />
coat the mold with a release such as Pol-Ease 2300 Release<br />
Agent. Release agent is not always needed in silicone molds.<br />
Spray a light even coat of Pol-Ease 2300 on the mold surface<br />
and then carefully brush the surface with a clean, dry brush to<br />
pick up any excess and cover any missed spots.<br />
PVA is a barrier to migration of plasticizers and chemical attack<br />
by harsh casting resins. Poly-Fast 72-40 rubbers contain<br />
plasticizers that can soften resin surfaces producing soft or<br />
sticky castings. If resins are to be cast in 72-40 molds, first coat<br />
the mold surface with PVA and allow to dry, then lightly spray<br />
with an even coat of Pol-Ease 2300. This surface treatment<br />
often acts as a barrier to the plasticizers. PVA can be washed off<br />
castings with soapy water. PVA also prolongs the life of<br />
polyurethane molds when casting polyester resins.<br />
For long mold life, avoid exposing rubber molds to strong<br />
solvents, oils or cleaners. Sprayed release agents reduce solvent<br />
exposure as compared to brush application.<br />
STORING THE MOLD<br />
Proper storage of molds cannot be overemphasized and is the<br />
key to extended “library life” -- the time that a mold remains<br />
useful after storage. Some rubber molds, if stored properly, can<br />
have a library life of ten years or more.<br />
Store molds in their original, undistorted shape. Molds should<br />
be left in the mother mold, mold box or on a surface that causes<br />
the least distortion possible. If rubber is left in a distorted shape<br />
for any length of time it can take a permanent set and may never<br />
recover to its original shape.<br />
If a blanket mold is stored in a mother mold/shell made of<br />
porous material, such as bare plaster, the shell surface that<br />
contacts the mold must be sealed (e.g., with shellac). Sealing the<br />
shell prevents it from absorbing oils from the mold rubber<br />
which, in turn, can cause mold distortion.<br />
Do not allow molds made of one type of rubber to remain in<br />
contact with molds of other rubbers as migration of oils or<br />
plasticizers from one to another can cause swelling, shrinkage,<br />
or distortion.<br />
Poly-Fast 72-40 molds may soften over a period of 2-4 years.<br />
TinSil silicone molds may embrittle (i.e., lose tear strength and<br />
elongation) over a similar period. These mold materials should<br />
not be selected if long library life is required.<br />
Molds should be stored in a cool, dry area and out of the<br />
sunlight, which can degrade the surface.<br />
Colors for <strong>Polytek</strong> Products<br />
This blanket mold of a<br />
baluster is stored<br />
properly in its mold<br />
shell. The thin mold of<br />
PlatSil ® 73-45 is<br />
supported by a firm<br />
shell made from Poly<br />
75-80 Liquid Rubber.<br />
Most <strong>Polytek</strong> Liquid Rubbers & Plastics can be colored with<br />
the use of proper dyes or pigments. PolyColors, reactive liquid<br />
dyes available from <strong>Polytek</strong> in red, green, yellow, blue, brown<br />
and black, can be used in most <strong>Polytek</strong> polyurethane<br />
products. In addition, PolyColors can be added to certain<br />
silicones in small concentrations. Polyurethane rubbers and<br />
plastic can be lightly tinted or made vibrant and dark in color<br />
by using PolyColors up to 3% by weight of the total liquid mix.<br />
PolyColor Brown is excellent for creating a base color when<br />
making cold cast bronze parts. PolyColor Black can be used<br />
to make even the whitest plastics true black. Since PolyColors<br />
are dyes, not pigments, they mix in easily and do not settle in<br />
the liquid rubber or plastic when properly mixed. Use<br />
PolyColors individually or in combination to make any color<br />
imaginable. For product information, see p. 61.<br />
Mold Making<br />
Methods<br />
www.polytek.com<br />
15
1 Mold Making Methods<br />
Mold Making<br />
Methods<br />
CASTING & FINISHING<br />
For simple solid casts, the flexible mold and shell (if required)<br />
are positioned so the opening is level and release agent, barrier<br />
coat or rinse is applied, if necessary. The casting material is<br />
poured right to the top edge, vibrated if necessary and allowed to<br />
cure. Most casts should be removed as soon as they are<br />
adequately set, since longer residence times can damage some<br />
mold materials.<br />
Use of vacuum or pressure (see box below), brushing, spraying<br />
or heated molds are all helpful techniques to eliminate bubbles<br />
and achieve perfect casts of highly detailed parts, but simple<br />
pours are often adequate.<br />
Trim and touch up, is easiest while the casting is warm and is<br />
best done just after demolding. Remove release agent prior to<br />
painting by detergent washing. If a prime coat is desired on the<br />
cast part, a barrier coat can be sprayed on the mold before<br />
casting. Paint enhances and protects plastic castings and is<br />
necessary for best exterior durability.<br />
CLEANUP<br />
Tools should be wiped clean with paper towels before the rubber<br />
cures. Casting plastics are extremely difficult to remove from<br />
tools once cured. Be sure to clean tools as soon as possible.<br />
Denatured ethanol is a good cleaning solvent, but it must be<br />
handled with extreme caution owing to its flammability and<br />
health hazards. Work surfaces can be waxed or coated with Pol-<br />
Ease 2300 Release Agent so cured rubber and plastic can be<br />
removed.<br />
VACUUM & PRESSURE CASTING<br />
Perfect Castings Made Easily!<br />
Although many excellent bubble-free molds and castings are<br />
made with <strong>Polytek</strong> rubbers and resins every day, trapped air<br />
bubbles create the most common defects. Proper use of<br />
vacuum or pressure can eliminate bubbles from some kinds of<br />
castings and molds and is often cheaper and easier than you<br />
might think. The following applies only to non-porous molds<br />
and models -- porous materials such as wood and plaster do<br />
not lend themselves to use of vacuum and pressure.<br />
Vacuum<br />
Using vacuum to pull air bubbles out of mixed liquid rubber or<br />
resin can often be very helpful. Place the container of mixed<br />
liquid rubber or resin in a vacuum chamber and draw about 28<br />
inches mercury so that the largest air bubbles rise to the<br />
surface. You must perform degassing while the mix is still<br />
liquid. Do not attempt to “vacuum degas” <strong>Polytek</strong> rubbers or<br />
resins with short work times -- this can result in creating more<br />
bubbles. Some liquids rise 2 to 3 times their original volume<br />
during degassing, so use a container with adequate head<br />
space. Once degassed, the liquid should be poured carefully so<br />
that air is not reintroduced into the mix.<br />
Simple vacuum chambers can be constructed from pressure<br />
pots as well as from sturdy commercial cooking pots. It’s best<br />
to have a transparent cover. Vacuum pumps can be purchased<br />
from laboratory equipment dealers. A vacuum pump that is too<br />
small with insufficient capacity can be a frustration. You may<br />
find your material gelling before it is free of bubbles. Buy a<br />
large enough vacuum pump that will get down to maximum<br />
vacuum quickly so you can degas and pour before your mixed<br />
material thickens or gels. A Welch Model 1397 can often be<br />
purchased from equipment dealers for ~$3,000 new or ~$1,500<br />
used. It pulls 17.7 CFM and works well with a 40-quart pot.<br />
An alternative to a traditional vacuum pump is a venturi vacuum<br />
pump from Vaccon Vacuum Products. This device is attached to<br />
a vacuum chamber and an air compressor. The high volume air<br />
from the compressor flows past the double venturi, creating a<br />
negative pressure area, which in turn evacuates the chamber. For<br />
some applications, the venturi pump is a less expensive and<br />
effective option. For more information, go to www.vaccon.com.<br />
Pressure<br />
Using pressure to eliminate bubbles can be even more useful.<br />
The process is like reversing the opening of a bottle of soda.<br />
When pressure is applied to liquid rubber or resin, small<br />
bubbles are forced into solution and disappear. To accomplish<br />
pressure casting, pour the resin or rubber and place the whole<br />
mold in a pressure pot before the material begins to set. Fasten<br />
the lid and pressurize to ~60 psi with compressed air or<br />
nitrogen. Allow the cure to take place under pressure. You will<br />
be amazed with the results.<br />
Inexpensive pressure pots typically used by spray painters are<br />
available from paint supply stores and industrial supply houses<br />
such as Grainger.<br />
Caution: Vacuum and pressure systems can be dangerous. If<br />
you have any questions about the construction or operation of<br />
your vacuum or pressure system, consult a qualified engineer.<br />
Never use glass parts<br />
unless they are<br />
certified for the<br />
purpose.<br />
Welch Model 1397 vacuum pump with<br />
a 40 quart pot and lid made with<br />
Poly-Optic ® 1410 Clear Casting Resin.<br />
16<br />
(610)559-8620 • (800)858-5990
Mold Making Methods 1<br />
POURED MOLDS<br />
One-Piece Block Mold<br />
To make a poured block mold the model must be securely<br />
fastened (e.g., screwed or glued) to a base board. Kitchen<br />
countertop sink cut outs make excellent base boards. If the<br />
model is porous, a vent hole should be drilled through the<br />
baseboard to the model to allow air to escape. Sides of the mold<br />
containment area must be positioned and sealed to the base<br />
board (e.g., with plasticene or hot melt glue) so that liquid<br />
rubber cannot leak out. If the mold will be used without being<br />
placed in a box for support, then be sure to position the sides far<br />
enough from the model such that the rubber mold will be thick<br />
enough that it will not deform when it is full of casting material (at<br />
least 0.5-inch thick). Sometimes a strap is placed around the finished<br />
mold box to ensure that it all holds together. Once the model and the<br />
Screw model to base<br />
Poured mold rubber<br />
Sealed and released model<br />
Vent hole<br />
base and sides of the box are properly sealed and released, slowly<br />
pour liquid rubber directing the flow to the bottom of the box and<br />
being careful not to trap air bubbles as the liquid rises. The rubber<br />
should be at least 0.5 inches above the highest point on the model<br />
(mark the mold box before you start pouring liquid rubber).<br />
Mold Making<br />
Methods<br />
Cut Block Mold<br />
A block mold can be cut when cured to make a split or multipiece<br />
mold. With some models, the mold must be cut to allow<br />
for removal of the model. Sometimes the cut is simply a single<br />
slit up one side of the mold, while in other cases a single-piece<br />
block mold can be cut into multiple pieces to create a complex<br />
multi-piece mold. In either case, after the model is removed, the<br />
mold is reassembled by carefully lining up the seams and<br />
usually returned to its box to hold it together before casting<br />
material is poured into the mold.<br />
For a successful cut block mold, the key is in the cutting. First,<br />
select a rubber with an appropriate hardness for cutting (i.e.,<br />
Poly 74-30, soft Shore A30). Next, carefully evaluate where the<br />
cut(s) will be made (i.e., possibly up the back of the head, not on<br />
the face) and how many cuts are required. The cutting locations<br />
should be decided before the mold rubber is poured, marked on<br />
the mold box and then transferred to the cured rubber mold. To<br />
cut the mold, use a mold key knife (see p. 62), which has a sharp<br />
blade with a groove that creates a tongue and groove effect in<br />
the cut rubber. This makes reassembling the mold with the<br />
seams properly aligned possible. Vents and pour holes can be cut<br />
or drilled into the cured rubber, or can be formed with rods or<br />
plasticene prior to pouring the rubber. When casting, cut block<br />
molds are reassembled and typically placed back into the<br />
containment area with the pour hole at the top for filling with<br />
casting material.<br />
Sometimes, block molds poured as one piece are the fastest to<br />
make even for oddly shaped models; but they require more<br />
liquid rubber than blanket molds. Making quality, multi-piece<br />
block molds requires considerable practice and expertise.<br />
Split Block Mold<br />
Rubber<br />
www.polytek.com<br />
Model<br />
Mold<br />
Strap<br />
This head mold is<br />
cut from a cylinder of<br />
cured rubber. The<br />
containment area is<br />
a piece of PVC pipe<br />
sealed to a baseboard<br />
with plasticene<br />
or hot-melt glue.<br />
After the rubber<br />
cures, the pipe is<br />
removed from the<br />
base and cut with a<br />
saw to remove the<br />
mold. The rubber is<br />
cut with a mold key knife in a predetermined location to make a<br />
slit that allows for removal of the model. To avoid damaging the<br />
model, the first cut should not go completely though to the<br />
model, but rather the final cut through is made with a razor.<br />
When casting, the seam is carefully realigned and the mold is<br />
strapped together. The mold is inverted and casting material is<br />
poured into the opening.<br />
Multi-Piece Block Mold<br />
Chunk cut out to<br />
remove ears<br />
Chunk cut out to<br />
release front end<br />
Vent<br />
Plug cut out from between legs<br />
Split to remove tail<br />
This horse mold is cut from a single block of mold rubber. After<br />
pouring, curing and cutting the mold, it is reassembled and<br />
placed back into the mold box upside down for casting. Casting<br />
material is poured through the feet. As an alternative, the mold<br />
of the horse model could be made as a blanket mold poured into<br />
a pre-constructed shell -- this would mean easier cutting of the<br />
thinner blanket mold and using less mold rubber.<br />
17
1 Mold Making Methods<br />
Mold Making<br />
Methods<br />
POURED MOLDS (CONT’D)<br />
Block Mold Poured in Two Pieces<br />
A block mold can be made by pouring two pieces of the mold<br />
separately. First, one portion of the model is embedded in clay<br />
up to the desired parting line. Then liquid rubber is poured over<br />
the properly prepared, exposed portion of the model (1). After<br />
the rubber cures, the clay is removed and release agent is applied<br />
to the other side of the model and the cured rubber surrounding<br />
it. Rubber is then poured over the second half of the model (2).<br />
Once cured, a pour hole is cut through the rubber mold and, if<br />
necessary, vent holes are drilled through high spots in the mold<br />
to eliminate the possibility of trapped air bubbles. The mold is<br />
repositioned in its box and is ready for casting (3).<br />
1<br />
First pour<br />
3<br />
mold rubber<br />
clay<br />
vent pour hole vent<br />
2<br />
Ready for second pour<br />
Mold ready for<br />
casting<br />
positioning key<br />
mold rubber<br />
BLANKET MOLDS<br />
Poured Blanket Mold<br />
Generally, to make a poured blanket mold, the model is covered<br />
with clay and the mold shell is built over the clay-covered<br />
model, then the clay is removed and the liquid mold rubber is<br />
poured in the void left by the clay.<br />
First the model must be properly prepared (e.g., sealed and<br />
released) and mounted. Then the model is covered with plastic<br />
wrap to protect it before the clay is applied. The clay blanket is<br />
formed around the model and must fill-in any undercuts so that<br />
the mold shell cannot lock to the rubber mold. Since the shell is<br />
often made in two (or more) pieces, the clay is formed with<br />
protruding flanges, which act as parting lines for the shell. In<br />
fact, since the rubber replicates the clay blanket exactly, parting<br />
or cut lines should be delineated in the clay for transfer to the<br />
rubber. Sometimes “snaps” are placed along the clay blanket so<br />
that the rubber mold will “snap” into position in the mold shell.<br />
Cover the model with clay, then build the mold shell.<br />
The shell is made overtop of the clay usually by brushing on<br />
liquid plastic. Plastic mold shells are lightweight and durable<br />
and are typically made of Polygel Plastic or another liquid<br />
plastic (e.g., 15-6 or 1512X) thickened with an additive (e.g.,<br />
Poly Fiber, see p. 61). The first section of the mold shell is built<br />
up against the clay flange. When the first section of shell is hard,<br />
the clay flange is removed, wax and then release is applied to<br />
the edge of the first shell section and the second section is built<br />
against the first section for a perfect keyed fit of the shell<br />
sections.<br />
To make the rubber mold, the clay and plastic wrap is removed<br />
from the model and then rubber is poured into the shell filling<br />
the void left behind. The rubber mold can be poured in one piece<br />
and cut with a mold key knife after curing. Or, for a two-piece<br />
mold, half of the clay is removed and rubber is poured in the<br />
void along half of the model. After the rubber cures, clay on the<br />
other half is removed, release is applied to the model and cured<br />
rubber, and liquid rubber is poured into the void along the<br />
second half of the model (see story with photos on pp. 22-23).<br />
Then pour liquid rubber into the shell.<br />
Shell<br />
(1st half)<br />
Clay<br />
Clay flange<br />
with groove<br />
Snaps<br />
Shell<br />
Clay plug<br />
to make<br />
pour hole<br />
in shell<br />
Liquid rubber<br />
Mold strap<br />
Shell parting line<br />
Vent<br />
Model<br />
Vent<br />
The prepared model is protected with a covering of plastic wrap<br />
and then a clay blanket (~0.5-inch thick) is built over the model.<br />
The shell is made over the clay by brushing on liquid plastic. The<br />
shell plastic is first applied to one half and cured. Then the clay<br />
flanges are removed and release agent is applied to the exposed<br />
plastic and the second half of the shell is built up to the first half.<br />
After the clay is removed, liquid rubber is poured into the void.<br />
When making a one-piece or cut mold, all of the clay is removed<br />
and the entire space is filled with rubber. If necessary, the cured<br />
rubber is cut to remove the model.<br />
18<br />
(610)559-8620 • (800)858-5990
Mold Making Methods 1<br />
Brush-On Blanket Mold<br />
A brush-on blanket mold is made first, then the shell is made<br />
over top of the cured mold for support. Some one-piece blanket<br />
molds are simply peeled off a low-relief or pyramid-shaped<br />
model (“sock” mold). But, often it is necessary to create a seam<br />
or cut a split in the mold to allow for removal of the model and<br />
castings. To create a parting line in the blanket mold, thin shims<br />
(e.g, aluminum flashing or stiff plastic sheet) are positioned on<br />
and securely fastened to the model. In lieu of shims, rubber can<br />
be brushed thick enough in areas so that the cured rubber can be<br />
cut to permit demolding. This technique is helpful for masters<br />
with “through holes” that can lock the rubber mold to the master<br />
(see pp. 20-21).<br />
If needed to prevent trapping air bubbles during casting, vents<br />
are formed in the mold by neatly fastening thin straws or rods to<br />
the model. Remember, neater fastening means less cleanup of<br />
the casting. After the model, shims and vents are coated with<br />
release, liquid rubber is brushed on.<br />
Sometimes with large models, it’s a good idea to create “snaps”<br />
or keys on the rubber mold to hold the mold in place in its shell.<br />
The shell may need to be more than one piece in order to allow<br />
removal from the rubber blanket mold. There can be no undercuts<br />
Dealing with Undercuts<br />
When making a brush-on blanket<br />
mold, all undercuts in the model<br />
must be eliminated before the mold<br />
shell is made. Typically, undercuts<br />
are filled with mold rubber or another<br />
filler material -- even air. Sometimes<br />
the filler must be compressible so that<br />
the mold can be removed from the<br />
model. A hollow bladder can be<br />
formed by bridging the undercut area<br />
with a piece of plastic wrap pressed into the previous layer of<br />
rubber. Then another coat of rubber can be brushed overtop of<br />
the plastic wrap. If more support is needed. the undercut can be<br />
filled with a material such as soft foam then covered with liquid<br />
rubber.<br />
In lieu of filling undercuts, a flexible mold shell can be built<br />
instead of the standard rigid mold shell. A flexible mold shell<br />
(e.g., made of Poly 74-30 rubber) can be removed from simple<br />
undercuts in the blanket mold and can sometimes alleviate the<br />
Rigid shell<br />
Flexible 74-30<br />
mother mold<br />
Brush-on<br />
mold<br />
Brushed-on rubber<br />
Model<br />
Filled<br />
space<br />
need for a multi-piece shell.<br />
A soft, polyurethane rubber<br />
(e.g., Poly 74-30) can be<br />
poured over a release<br />
coated blanket mold<br />
enclosed in a simple box or<br />
rigid mold. Although this<br />
option may be more<br />
expensive since it uses<br />
more rubber, it can save on<br />
labor.<br />
in the rubber mold that can lock the shell onto the rubber when<br />
there is a casting/model inside the mold (see box).<br />
The parting line for the rigid shell is defined with a clay (i.e., Poly<br />
Plasticene) flange applied over the mold. A groove or depressions<br />
should be made in the clay where it contacts the shell material to<br />
create good locking and positioning of the shell halves. The mold<br />
shell is built one section at a time against the release coated rubber<br />
mold and clay flange. When one section of the shell is complete,<br />
the clay is removed, Vaseline or butcher’s wax is applied to the<br />
exposed shell followed by a release agent, and the next shell<br />
section is built against the first. The two halves of the shell<br />
compress the rubber flanges along the mold opening together<br />
making a good seal so that liquid casting material cannot leak out.<br />
First, the model is prepared for making the blanket<br />
mold. Then thixotropic mold rubber is brushed on.<br />
Shims<br />
Vent<br />
The model is prepared (i.e.,<br />
sealed and released) and<br />
securely mounted to a base.<br />
A vent is drilled through the<br />
base to release air trapped<br />
in the model. Thin shims are<br />
placed along the model and<br />
in spaces formed under the<br />
legs and arms. The shims<br />
form a parting line in the<br />
brush-on rubber blanket<br />
mold. Once the shims are<br />
secure, the rubber is<br />
brushed on in several coats<br />
to ¼- to ½-inch thick.<br />
After the rubber cures, the rubber-coated model is<br />
prepared for construction of the mold shell.<br />
Clay Flange<br />
Snaps<br />
Rubber-Covered<br />
Model<br />
A clay flange is formed<br />
around the model to define<br />
the parting line of the rigid<br />
mold shell. Depressions are<br />
made in the clay that will<br />
form “snaps” in the mold<br />
shell to help properly lock<br />
the mold shell halves<br />
together. In addition, rubber<br />
snaps can be placed on the<br />
rubber mold so that the mold<br />
snaps to the mold shell. The<br />
first half of the rigid mold<br />
shell is built up to the clay<br />
flange. Then, the clay is<br />
removed and the second half<br />
of the shell is constructed.<br />
When complete, the two<br />
halves of the shell compress the rubber along the mold opening<br />
to make for a good seal along the mold opening.<br />
Mold Making<br />
Methods<br />
www.polytek.com<br />
19
Mold Making<br />
Methods<br />
1 Mold Making Methods<br />
Procedures - Brush-On Mold<br />
Making a Brush-On Blanket Mold with a Plastic Shell<br />
The following example details the procedures involved in<br />
making a brushed mold. The rubber that has been chosen is<br />
Poly 74-20, a soft, stretchy, 1A:2B by weight mix ratio,<br />
polyurethane liquid mold rubber. Of course, there are many<br />
variations to this technique and several choices of rubbers. We<br />
could have chosen to make a one-piece brushed mold with<br />
shims similar to what is shown on page 19. We just as easily<br />
could have made a two-piece mold where we need no cuts to<br />
remove two separate halves of the rubber mold.<br />
This example specifically demonstrates how to create a onepiece<br />
brushed mold without shims, which requires cutting a<br />
seam in the rubber to remove the master and subsequent<br />
castings. The master, shown in Photo 1, is made of a nonporous,<br />
polyurethane plastic, EasyFlo 60. As with all sealed,<br />
non-porous masters, they must be sprayed with a silicone<br />
release such as Pol-Ease ® 2300 Release Agent (when using<br />
polyurethane liquid rubber) and brushed with a clean, dry brush<br />
to insure uniform distribution of the release. Care is taken not to<br />
spray too much release since brush marks can be left behind and<br />
picked up in the finished mold. Also, excess release can be<br />
accidentally pushed around when brushing liquid rubber<br />
resulting in delamination between coats or unwanted surface<br />
texture.<br />
In order to make the mixed Poly 74-20 liquid rubber thixotropic<br />
so it clings to vertical surfaces, Poly Fiber II or Cab-O-Sil ®<br />
must be added. In this example, Cab-O-Sil is added in small<br />
amounts (Photo 2) and the liquid is carefully folded over to wet<br />
the powder (so it doesn't come out of the cup), then it is<br />
whipped into the rubber to a creamy, uniform consistency. Only<br />
a slight amount of thickening is desired in the first coat of<br />
rubber so all surface detail is captured without trapping bubbles<br />
at the mold surface. Photo 3 shows a thin, first coat of lightly<br />
thickened Poly 74-20/Cab-O-Sil being applied with a China<br />
bristle brush. After the first layer of rubber gels enough to be<br />
undisturbed by the next coat (~45 min - faster with Part 74 Part<br />
X), a second coat of slightly thicker (a little more Cab-O-Sil<br />
used) 74-20 is brushed over the first coat (Photo 4) and allowed<br />
to gel. Before Cab-O-Sil is put into the rubber to create the mix<br />
used for the third layer, a little unthickened Poly 74-20 is<br />
poured into a PlatSil ® 71-20 silicone mold to make long 1-inch<br />
by 1-inch strips (Photo 5) for creating a thick rubber flange that<br />
will be placed into the freshly gelled third coat of rubber to<br />
define the location of the seam line. Notice that this model has<br />
several "through holes" (between the arms and the legs) that<br />
need to be filled completely with liquid rubber to provide a<br />
thick enough section of rubber which will be cut when cured to<br />
remove the original. This third layer is done with an even more<br />
thixotropic, non-sag mix of 74-20 and Cab-O-Sil (Photo 6).<br />
When this layer is<br />
complete, the freshly<br />
gelled strip of Poly 74-20<br />
rubber is removed from<br />
the 71-20 silicone mold<br />
and positioned against<br />
the mold where the seam<br />
line will be cut once the<br />
mold cures (Photo 7).<br />
A final coat of lightly<br />
thickened rubber is<br />
applied after the prior<br />
coat gels to seal in the<br />
seam line strip and to<br />
make a smooth outer<br />
coating, which makes the rubber mold more attractive and fit<br />
better into its rigid support shell (Photo 8). Once the rubber<br />
mold cures (overnight, or later that day if 74 Part X accelerator<br />
is used), it is trimmed at the base and a clay wall is built up to a<br />
line that will define the parting line of the two shell sections<br />
(Photo 9). Since the shell will be rigid, there can be no<br />
undercuts that will lock it onto the rubber mold. More<br />
complicated models may require more shell sections to insure<br />
that they can be easily removed. Notice the keys/grooves in the<br />
clay wall that will insure proper registration of the shell halves.<br />
Butcher's wax is brushed over the rubber mold, allowed to dry<br />
for 10 minutes, then sprayed with a coat of Pol-Ease 2300<br />
Release Agent.<br />
To make the shell, Poly 1512X Polyurethane Liquid Plastic is<br />
mixed together (1A:1B), then Poly Fiber thickener is added to<br />
make it thixotropic (Photo 10). Poly Fiber is added until the<br />
resulting mix clings to the side of the mixing container. The<br />
thickened 1512X is applied ~¼-inch thick and allowed to cure<br />
~60 min (Photos 11). The clay wall is removed, butcher's wax<br />
and Pol-Ease 2300 applied to the other side of the mold and<br />
against the first shell section and the above procedure with<br />
1512X is repeated. The completed shell is drilled, bolted and<br />
edges sanded for easier handling (Photo 12).<br />
When the shell is removed, a mold key knife is used to cut a<br />
notch in the rubber the length of the seam from head to toe. A<br />
sharp scalpel is then used to cut the rest of the way to the<br />
master. As the rubber is peeled open, cuts are made between<br />
the legs and arms as needed to remove the original. Cutting in<br />
these areas is done using a series of short, jagged, zig-zag cuts<br />
in order to create a series of tiny keys that keep the seam<br />
registration exact (see photo above). The finished mold and<br />
shell are now ready for production!<br />
20<br />
(610)559-8620 • (800)858-5990
Mold Making Methods 1<br />
Procedures - Brush-On Mold<br />
Mold Making<br />
Methods<br />
Photo 1 Photo 2 Photo 3 Photo 4<br />
Photo 5 Photo 6 Photo 7 Photo 8<br />
Photo 9 Photo 10 Photo 11 Photo 12<br />
www.polytek.com<br />
21
Mold Making<br />
Methods<br />
1 Mold Making Methods<br />
Procedures - Poured Blanket Mold<br />
Making a Two-Piece Poured Blanket Mold in a Plastic Shell<br />
This page details the step-by-step production of a flexible rubber<br />
mold and plastic mother mold of the 19-inch-tall, 19th-century<br />
marble statue entitled Ice Skater by Gori Nello.<br />
Deciding on the Type of Mold<br />
Openings under the arms and legs presented typical difficulties<br />
that influenced the selection of the type of mold to be<br />
constructed. The moldmaker decided on a blanket mold, poured<br />
in two halves into a constructed shell, because pouring yields<br />
better detail with less trapped surface bubbles. A poured mold<br />
also eliminates undercuts more easily than a brush-on mold. A<br />
double pour, with carefully selected parting lines, eliminates the<br />
need for shims (see p. 18), which would leave flashing to be<br />
chased, and cutting, which would be required with a single-pour<br />
mold and could scratch the valuable sculpture.<br />
Selecting the Materials<br />
Poly 74-30, a two-part, 1:1 mix polyurethane liquid rubber, was<br />
used for the mold since it is low cost, easy to mix and pour,<br />
flexible (Shore A30), and has good longevity. Poly 74-30 molds<br />
work well for casting plaster, cement, wax or resins.<br />
The mold shell was made with Poly 15-6, a 1:1 mix liquid<br />
plastic with a 5- to 7-minute working time. The plastic shell is<br />
lightweight and durable. [Note: Alternative materials for making<br />
mold shells are plaster reinforced with hemp or burlap, Polygel ®<br />
Plastic-75, or Poly 1512X with Poly Fiber II. The larger the<br />
shell, the more important it is to use lightweight shell materials.]<br />
Preparing the Statue<br />
First, the marble statue was fastened to the base with Polypoxy ®<br />
Quick Stick Adhesive. The base was formica-coated particle<br />
board from a countertop sink cut-out. To protect the marble from<br />
the oils of the release agent, a thin layer of PVA (polyvinyl<br />
alcohol) solution was brushed directly on the marble. (PVA<br />
solution washes off with warm water.) After the PVA dried, a<br />
liberal coat of release agent was sprayed over the model and<br />
brushed out with a dry brush to pick up any excess and to work<br />
release into any areas missed by the spray (Photo 1).<br />
Building the Mother Mold<br />
Next, the statue was wrapped in plastic wrap to keep it clean<br />
(Photo 2). Then, a ¼-inch blanket of Poly Plasticene (oil-based<br />
clay) was hand pressed onto the plastic wrap. To make the clay<br />
uniform thickness, warm Poly Plasticene (~130°F) was placed<br />
between 2 equal height wood strips and rolled flat using a PVC<br />
pipe. The height of the wood strips (¼- to ½-inch) determines<br />
the thickness of the clay blanket. All undercuts were filled with<br />
Poly Plasticene so the shell could be easily removed.<br />
Shims of thin aluminum flashing were placed in the clay to<br />
create parting lines for the shell (Photo 3). These are the only<br />
shims needed with the double pour process to make this mold. A<br />
channel was built around the edge of the clay to cause the rubber<br />
mold to lock into the shell.<br />
To build the shell for the<br />
first half of the mold, Poly<br />
Fiber was stirred into mixed<br />
Poly 15-6 Liquid Plastic<br />
until it was the consistency<br />
of cake frosting. Then, the<br />
thickened resin was laid on<br />
the first half of the clay in a<br />
manner similar to icing a<br />
cake. [Note: When making<br />
larger shells, multiple mixes<br />
of resin and Poly Fiber can<br />
be patched against each<br />
other to cover the entire<br />
surface.] After the first half<br />
of the shell cured (~4 hours),<br />
the aluminum shims were<br />
The original marble and plaster<br />
and plastic reproductions made in<br />
the Poly 74-30 blanket mold.<br />
removed and paste wax (i.e., Butcher’s Wax) and then release<br />
agent were applied to the first half of the shell (Photo 4). The<br />
second half of the shell was built against the first half in the<br />
same manner (Photo 5).<br />
Pouring the Rubber<br />
One-half of the plastic shell was removed along with the clay<br />
blanket beneath that half of the shell. Keys (tongue-and-groove<br />
impressions) on the second half of the clay were made in order<br />
for the two halves of the rubber mold to “key” or lock together<br />
(Photo 6). Vent holes were drilled in the shell with a ¼-inch drill<br />
at each high point where air would be trapped (Photo 7). The<br />
shell was thoroughly coated with release agent, replaced and<br />
positioned for pouring the rubber. Poly 74-30 was mixed and<br />
poured into the space within the shell where the first half of the<br />
clay had been. When pouring the rubber, the model was at the<br />
bottom of the cavity so the air bubbles would rise away from the<br />
model surface. As liquid rubber appeared at the vent holes, they<br />
were plugged with plasticene clay (Photo 8).<br />
After the rubber cured overnight, the shell and clay on the<br />
second half was removed and release agent applied to the model<br />
and the face of the cured rubber parting line (Photo 9). The shell<br />
was reassembled and rubber was poured into the shell to cover<br />
the model’s second half.<br />
After the rubber cured, the shell halves were separated by<br />
tapping wood wedges into the seam, gradually forcing open the<br />
shell to reveal the complete mold (Photos 10 and 11).<br />
The Casting<br />
Plaster was poured into the mold to clean and check the mold.<br />
Finally, release agent was applied, brushed out and the mold was<br />
properly positioned in its shell. Poly 15-3X, a mineral-filled,<br />
fast-setting polyurethane casting resin, was poured into the mold<br />
(Photo 12). The final casting was demolded in less than an hour.<br />
The excellent reproductions are shown with the original above.<br />
22<br />
(610)559-8620 • (800)858-5990
Mold Making Methods 1<br />
Procedures - Poured Blanket Mold<br />
Mold Making<br />
Methods<br />
Photo 1 Photo 2 Photo 3 Photo 4<br />
Photo 5 Photo 6 Photo 7 Photo 8<br />
Photo 9 Photo 10 Photo 11 Photo 12<br />
www.polytek.com<br />
23
1 Mold Making Methods<br />
Mold Making<br />
Methods<br />
Applications - <strong>Sculpture</strong> & Foundries<br />
Poly 74-30 Liquid Rubber thickened with Cab-O-Sil ® -- Sculptor Bill Hopen<br />
Bill Hopen, Hopen Studio in Sutton,<br />
WV, uses Poly 74-30 thickened<br />
with Cab-O-Sil ® to make a brushon<br />
mold of his clay “St. Joseph the<br />
Worker.” Three to four layers of mixed<br />
Poly 74-30 are applied at 60- to 90-<br />
minute intervals. The first layer contains<br />
little or no Cab-O-Sil so that air bubbles<br />
are minimized and fine details are<br />
reproduced. More Cab-O-Sil is added to<br />
subsequent layers for faster build up of<br />
the ¼- to ½-inch mold. Twenty-four<br />
hours after the final layer, Hopen builds a<br />
rigid mold shell. The great flexibility of<br />
rubber molds allows for easy demolding<br />
of delicate wax castings. The long mold<br />
life of Poly 74-30 has enabled Hopen<br />
Studio to continue producing castings 10<br />
years after some molds were made. These<br />
molds are made much more quickly than<br />
latex molds and at a fraction of the cost of<br />
silicone molds. Bill says “I’ve tried them<br />
all; <strong>Polytek</strong> Mold Rubber is the best.” For<br />
sculpture by Hopen call (304)765-5611.<br />
Architectural Restoration<br />
THR Cast Stone and GFRC of Brooklyn, NY, has restored<br />
many of the most architecturally significant buildings in<br />
New York City. Whether the medium is brownstone,<br />
limestone, terra-cotta, plaster, or stone, the artists, moldmakers,<br />
and casters at THR have reproduced and restored it to match its<br />
original beauty. Newly cast parts made from cast stone, glassfiber-reinforced<br />
concrete (GFRC), or glass-fiber-reinforced<br />
gypsum (GRG) appear original in every way. THR has used<br />
<strong>Polytek</strong> products to recreate ornamental architectural elements<br />
in theaters such as Lyric and Ed Sullivan, museums such as the<br />
Metropolitan, and hotels like the Plaza and Ansonia, as well as<br />
churches, schools, and private residences. THR prefers Polygel ®<br />
rubbers (see p. 36) for brush-on or sprayed molds that are<br />
created on-site from an element before it is removed from the<br />
building. For work back at the shop, THR often opts for Poly<br />
74-45. Once a mold of the original is made, a casting is taken<br />
and the artists meticulously recreate any eroded or missing<br />
detail, based on other parts of the original still in good shape,<br />
historical photographs, etc. Once the master is completed, a<br />
mold and perfect reproductions are cast. Since many<br />
architectural features repeat on a building, a mold such as this<br />
may be used again & again -- no problem for high-performance<br />
rubbers from <strong>Polytek</strong>.<br />
THR Gives New York City A Facelift with <strong>Polytek</strong> Rubbers<br />
The Ansonia Hotel in Manhattan is just one of the strikingly<br />
ornate buildings that THR has restored. Above, Philip Gallagher<br />
of THR displays a Poly 74-45 mold that was used to recreate<br />
aging architectural brackets from a 13th-floor balcony of the<br />
Ansonia Hotel. Cast GFRC replacement brackets in the<br />
background await installation.<br />
24<br />
(610)559-8620 • (800)858-5990
Mold Making Methods 1<br />
Applications - Home Decor<br />
Mold Making<br />
Methods<br />
A decorative drapery rod end was cast using EasyFlo 60<br />
Liquid Plastic (see p. 48), a super low viscosity polyurethane<br />
product, filled with bronze powder to create this faux metal<br />
part. The two-piece poured block mold registers nicely due to<br />
keys/snaps, which keep the mold aligned properly during the<br />
casting process. A PlatSil ® or TinSil ® silicone mold could easily<br />
produce many dozen resin castings or more without the need<br />
for release agent.<br />
A Poly 15-6 plastic column capital is demolded from a TinSil ®<br />
70-11 silicone rubber mold. This rubber is very soft (Shore<br />
A10) and stretchy eliminating the need for seams in the mold<br />
to remove cast parts. The shell was made using Poly LiteCast,<br />
a very low density, pourable polyurethane plastic to reduce the<br />
weight of the shell for easier handling. The column posthole<br />
was made by inserting a plastic pipe as a plug in the 70-11<br />
mold prior to casting.<br />
Props, Displays & Special Effects<br />
PlatSil Gel-10 was used by Gordon<br />
Smith of FXSmith in Toronto,<br />
Canada to make hundreds of<br />
silicone prosthetic appliances, which<br />
became the scales worn by<br />
Mystique in the blockbuster movie<br />
X-Men. Smith modified PlatSil Gel-<br />
10, a versatile 1:1 mix silicone, so<br />
that it was self-sticking using<br />
<strong>Polytek</strong>'s PlatSil Deadener. This<br />
allowed the scales to be removed<br />
and reapplied for each filming<br />
session without adhesives.<br />
A PlatSil ® 71-20 silicone rubber<br />
mold was made from a gigantic<br />
fossilized shark tooth to make a<br />
museum display item. This twopiece<br />
poured block mold is<br />
keyed extremely well with snaps<br />
and a tongue-and-groove<br />
channel to keep the flashing to a minimum. The casting was<br />
made using EasyFlo 120 with 3% PolyColor Black. The liquid<br />
plastic was poured into one half of the mold, then the mold was<br />
closed and supported between two small pieces of plywood<br />
with rubber bands, and slush-cast by hand to produce a super<br />
part in 15 minutes.<br />
Tom Kipp of Studio<br />
One/Mannetron is shown<br />
with a hollow, rotocast<br />
polyester alien that was<br />
used as a prop in the<br />
movie The Roswell<br />
Incident. The casting<br />
was made in a two-piece<br />
brushed-on Polygel ® 40<br />
mold. Rotocasting<br />
equipment made by<br />
Mannetron was used to<br />
create several dozen alien<br />
figures. Polyvinyl alcohol<br />
was used as a barrier<br />
coat and the mold was<br />
washed in a warm<br />
detergent - water solution<br />
after several castings to<br />
remove styrene buildup in<br />
the mold, which could<br />
eventually damage the<br />
mold. This process helped prolong the mold life so that after<br />
several dozen castings the mold still looked like new!<br />
www.polytek.com<br />
25
Mold Making<br />
Methods<br />
1 Mold Making Methods<br />
Applications - Concrete<br />
Flexible formliners of every<br />
size and design are routinely<br />
created using Poly 74, 75<br />
and 77-Series Polyurethane<br />
Liquid Rubbers. These Poly<br />
rubbers are tough and<br />
abrasion resistant making<br />
them ideal for the rigors of<br />
repeatedly casting large<br />
concrete parts and panels.<br />
These formliners can be<br />
made to reproduce any<br />
surface texture or design<br />
and can be bonded to<br />
plywood or attached to rigid<br />
supports for precast or castin-place<br />
applications.<br />
Cast veneer stones are made by pouring concrete into rubber<br />
gang molds such as this one made from Poly 74-44 polyurethane<br />
rubber. Individual stones can be cast simultaneously into multicavity<br />
molds then applied to a wall to give the look and feel of real<br />
stone. Flexible formliners/molds can be made of entire wall<br />
sections for extremely large projects.<br />
Poly 75 and 81<br />
Series Polyurethane<br />
Liquid Rubbers are<br />
used to make<br />
concrete stamping<br />
tools and texturing<br />
skins. These<br />
stamping tools are<br />
made by pouring<br />
rubber about ¾-inch<br />
thick onto a pattern<br />
that mimics the<br />
design that will be<br />
imprinted to the<br />
concrete. Patterns<br />
such as slate, brick,<br />
irregular flagstone or any custom design including leaves, fossils<br />
and much more turns otherwise boring, flat,concrete pathways,<br />
driveways and patios into beautifully colored and textured<br />
surfaces.<br />
Poly 74-45, a<br />
popular 1:1 mix,<br />
polyurethane liquid<br />
rubber, was used to<br />
make a paver mold.<br />
Pavers cast from<br />
molds made from<br />
liquid rubbers have<br />
much better, life-like<br />
surface detail than<br />
those made from<br />
rigid molds owing to<br />
the fact that the<br />
liquid rubber flows<br />
readily into all<br />
available detail on the master before curing. Hundreds to<br />
thousands of concrete parts can be cast from a single mold<br />
depending upon surface texture, proper selection of mold rubber<br />
and release agent, and careful demolding.<br />
Polygel ® Spray 35 was used to make a mold of this architectural<br />
element. The casting was made from glass fiber reinforced<br />
concrete (GFRC). The Polygel mold was created using a lowcost<br />
(~$4,000) machine designed to automatically meter/mix and<br />
spray the liquid rubber at a 1:1 ratio. The resulting mold is thin<br />
(~3/8-inch thick) so it is very economical and easy to peel away<br />
from complex shapes. Polygel rubber can be brushed for smaller<br />
jobs or sprayed when larger surface area molds are needed.<br />
This mold was sprayed in one continuous process, which took<br />
less than 20 minutes to complete! Polygel Spray 35 cures<br />
enough in 6-8 hours to allow a shell to be applied in the same<br />
day.<br />
26<br />
(610)559-8620 • (800)858-5990
Mold Making Methods 1<br />
A decorative<br />
concrete<br />
panel was<br />
cast as part of<br />
a building<br />
restoration<br />
project by<br />
THR Cast<br />
Stone and<br />
GFRC of<br />
Brooklyn, NY.<br />
A Poly 74-45<br />
mold is shown<br />
being<br />
carefully demolded. The thin poured blanket mold was supported<br />
by a GFRC shell and wood-framed box displayed in the<br />
background.<br />
Highway<br />
sound<br />
barriers are<br />
becoming<br />
more popular<br />
to keep traffic<br />
noise from<br />
residential<br />
areas. Poly 75<br />
Series<br />
rubbers were<br />
used to make<br />
flexible<br />
formliners with wildlife images to enhance the visual appeal of<br />
the standard ribbed wall panel design. Formliner designs<br />
incorporating rock, slate, brick, fossil, wood-texture and other<br />
architectural and artistic designs are becoming more common as<br />
architects realize the endless possibilities available when flexible<br />
molds are used.<br />
Polygel ® Spray 50<br />
was sprayed onto<br />
this larger-than-life<br />
head to make a<br />
thin, yet durable,<br />
mold. With the<br />
right equipment,<br />
this type of mold<br />
can be made<br />
anywhere -- even<br />
several stories<br />
above street level.<br />
Applications - Concrete<br />
An article in Handy<br />
Magazine described<br />
how to use Poly 75-<br />
80 Liquid Rubber to<br />
make thin, low-cost<br />
texturing skins to<br />
impart a slate<br />
appearance to flat<br />
concrete. These<br />
texturing skins were<br />
made by pouring<br />
Poly 75-80 over real<br />
pieces of slate<br />
(properly sealed and<br />
released). Once the<br />
first pour gelled, a<br />
second pour was<br />
made with slightly<br />
less rubber so it<br />
didn't quite flow to<br />
the edge of the<br />
previous pour. Even less rubber was used for the third pour done<br />
to make a texturing skin that was thicker in the middle with<br />
tapered edges. This allowed the thin cured rubber mats to be<br />
overlapped at the edges to make a seamless pattern in the<br />
concrete. A thin Poly 75-80 tool is shown being removed from the<br />
freshly textured surface. With the use of concrete colors and<br />
stains the results are stunning!<br />
A Poly Latex 60<br />
mold was made to<br />
reproduce this<br />
concrete angel. The<br />
mother mold (rigid<br />
shell) was made<br />
from Poly 15-6<br />
Liquid Plastic<br />
thickened with Poly<br />
Fiber to make it<br />
brushable. The thin<br />
blanket mold could<br />
also have been made using Polygel ® 35 or Polygel 40, highperformance<br />
two part brushable rubbers. Latex rubber is a onepart<br />
mold material, but 15-30 coats of rubber applied over<br />
several days are required to complete the mold. A Polygel mold<br />
can be made in a matter of hours! This Angel blanket mold is a<br />
one-piece glove mold with no seams, whereas the rigid shell is<br />
made in several sections to accommodate numerous undercuts.<br />
If you can pour concrete,<br />
you can pour liquid rubber!<br />
Mold Making<br />
Methods<br />
www.polytek.com<br />
27
Mold Making<br />
Methods<br />
1 Mold Making Methods<br />
Applications - Prototyping & Model Making<br />
Prototype Parts of All Kinds Made with <strong>Polytek</strong> Liquid Rubbers & Plastics<br />
Larami Limited, headquartered in Mt. Laurel,<br />
NJ, is the originator and manufacturer of the<br />
internationally-recognized Super Soaker ® toy<br />
water guns. With engineering and prototype<br />
model development facilities in Whitehouse<br />
Station, NJ, Larami Limited has been using<br />
<strong>Polytek</strong>’s mold rubbers, such as PlatSil ® RTV<br />
Silicones, and casting plastics, such as Poly<br />
15-3X, Poly 1512 and Poly-Optic ® 1410, very<br />
successfully to create their new products.<br />
Producing the Prototype<br />
Many different techniques involving numerous<br />
<strong>Polytek</strong> products are employed in the<br />
production of a unique model or prototype part<br />
such as the Super Soaker. Master models can<br />
be carved from wood, sculpted from clay,<br />
machined from polyurethane board, wood or<br />
plaster using CNC equipment, or created from<br />
a liquid photopolymer using a stereolithography<br />
process.<br />
As with any mold making process, it is<br />
important to determine the most appropriate<br />
combination of mold making and casting<br />
materials for the project at hand. If wax<br />
castings are to be made (say for a lost wax<br />
process as is used for making many metal<br />
prototype parts), then a polyurethane mold<br />
rubber such as Poly 74-30 or Poly 74-45 (see<br />
p. 34) may be the best choice as they are most<br />
PlatSil ® 71 and 73 Series mold rubbers<br />
are widely used for model making and<br />
prototyping. This two-piece block mold<br />
made of PlatSil 71-35 is used to reproduce<br />
a thin-walled car model. Prototypers cast<br />
dimensionally accurate parts fast using<br />
EasyFlo 60 Liquid Plastic (see p. 48).<br />
cost-effective and release waxes nicely.<br />
Many times plastic parts are the desired end<br />
result, as in the case of a Super Soaker.<br />
PlatSil ® and TinSil ® RTV Silicone Rubbers<br />
(see pp. 40-45) are the best choice for casting<br />
polyurethane plastic prototypes. These highperformance<br />
silicone rubbers offer the best<br />
mold life and resistance to damage from<br />
repeated casting with chemically aggressive<br />
liquid polyurethane resins. TinSil 70-25 and<br />
70-39 are popular silicone rubbers for<br />
modelmakers since they are lower-cost, tincatalyzed<br />
systems and have hardnesses that<br />
makes difficult parts easy to demold. When<br />
using any tin-catalyzed silicone rubber, be sure<br />
to perform a test cure to insure the alcohol<br />
released during the rubber’s cure does not<br />
interfere with the cure of the polyurethane<br />
plastic. If alcohol on the mold surface poses a<br />
problem, heating the mold to 200°F for several<br />
hours can assist alcohol removal.<br />
Any PlatSil rubbers can be used for casting<br />
polyurethane plastics. PlatSil 71-20 is an easy<br />
1:1 mix, Shore A20 rubber with a super low<br />
viscosity and 4-hour demold. For applications<br />
requiring firmer rubber, PlatSil 71-35, 73-45,<br />
or 73-60 provide excellent tear and suitable<br />
hardnesses. When pouring any one of the<br />
TinSil or PlatSil rubbers over a model, Pol-<br />
Ease ® 2350 Release Agent (non-silicone)<br />
should be evaluated as a release.<br />
Poly Plastics Have Thermoplastic Feel<br />
The Poly 15-Series products (see p. 49) offer<br />
many types and speeds of cure for almost<br />
every application. Poly 1512 and 1512X are<br />
most popular for prototypers interested in a<br />
tough, high-performance product with a<br />
thermoplastic feel. It has a 1:1 mix, can be<br />
easily colored with PolyColors, has low<br />
viscosity, a fast (5 min) or slow (20 min)<br />
potlife, and very impressive physical<br />
properties when cured. It is non-brittle in thin<br />
sections and has a high tensile strength. It can<br />
be sanded, carved, machined or painted as<br />
needed. Other 15-Series plastics can be used<br />
for lower (Poly LiteCast , page 54) or higher<br />
density (Poly 15-3X) parts. Poly 15-8 is also<br />
available for modelmakers interested in<br />
making heat-resistant tools for vacuumforming<br />
applications. For rapid-casting<br />
applications of complex parts requiring a resin<br />
Larami Ltd., originator of the Super<br />
Soaker ® , uses <strong>Polytek</strong>’s rubber and plastic<br />
products to make molds and castings for<br />
various prototyping projects.<br />
with a super-low mixed viscosity, try<br />
EasyFlo 60 Liquid Plastic (see p. 48).<br />
Rotational Casting<br />
An additional use of <strong>Polytek</strong> fast casting<br />
plastics at Larami was to rotationally cast the<br />
large pressure tank prototype for the Super<br />
Soaker squirt gun by rotating the hollow tank<br />
mold with a small amount of a Poly Plastic<br />
such as Poly 15-3X coating all surfaces as it<br />
set. Poly 15-3X sets in about 15 minutes at<br />
room temperature, but the silicone rubber<br />
mold was heated to hasten the set and<br />
demolding time of the Poly 15-3X resin. All<br />
Poly 15 Series resins can also be accelerated<br />
with a few drops of Poly 15 Part X<br />
Accelerator. See pages 46-56 for more<br />
information on <strong>Polytek</strong>’s Liquid Plastics and<br />
page 64 for more on rotocasting.<br />
Water-Clear Poly-Optic ® 1410<br />
Another <strong>Polytek</strong> polyurethane plastic used by<br />
Larami is Poly-Optic 1410, a water-clear, low<br />
viscosity resin, which can be used for<br />
transparent parts such as face shields, toy-auto<br />
windshields, windows, headlights and eyes.<br />
Pressure casting can help<br />
prototypes and model<br />
makers create perfect,<br />
bubble-free castings.<br />
See page 16.<br />
28<br />
(610)559-8620 • (800)858-5990
Mold Making Methods 1<br />
Brush-On Polygel ® Molds Used to Cast Polyester/Fiberglass Capitals<br />
Russ Veder, of American Architectural Art, chose Polygel rubbers because<br />
of their ability to be brushed on easily and capture incredible detail. Edon<br />
moldmakers Matt Axel and Bob Mathias agreed, "Polygel was the best mold<br />
rubber we ever used. After casting 10 large fiberglass parts, the mold was<br />
in such good condition, we could have made 50 more."<br />
Applications - Cast Polyester/Fiberglass Parts<br />
Restoration of the Widener Building in Philadelphia<br />
began in the summer of 1990, by Russ Veder, an<br />
expert in architectural restoration and principal of<br />
American Architectural Art. This project required<br />
making detailed flexible rubber molds of the<br />
building's ornate Corinthian column capitals, which<br />
measure 8 feet by 7 feet with deep 24-inch undercuts.<br />
Russ, with subcontractor, Edon Corp., resculpted a<br />
fiberglass duplicate of the aged capital to bring it<br />
back to its original design. The duplicate was used as<br />
a working model to make a Polygel mold that<br />
ultimately produced the 10 fiberglass capitals needed<br />
for the restoration. Fabric reinforcement was pressed<br />
into the wet rubber where needed and soft, flexible<br />
foam was pressed into the undercuts to allow the<br />
shell to be removed more easily. A final coat of<br />
Polygel 40 was used to cover the fabric and foam. A<br />
fiberglass shell was made the following day. Cast<br />
fiberglass/ polyester resin parts were sprayed into the<br />
Polygel mold that was coated with a polyvinyl<br />
alcohol (PVA) barrier coat to protect the mold from<br />
the harsh effects of the polyester resin.<br />
Mold Making<br />
Methods<br />
Poly Latex for Polyester Fiberglass Parts -- Capitol Displays<br />
Poly Latex 60 was brushed on a sculpted resin model to produce this large<br />
blanket mold for a decorative architectural part.<br />
Tony Lorino, Capitol Displays of Nashville, TN,<br />
uses Poly Latex 60 molds to produce polyester and<br />
fiberglass copies of original sculpted models. Poly<br />
Latex 60 is the rubber of choice because of it’s<br />
durability and ease of application. Being a single<br />
component material, Poly Latex 60 is brushed on<br />
without the limitation of a pot life. Ten to twenty<br />
coats are applied, two per day, to build up proper<br />
mold thickness. Gauze is often incorporated into the<br />
latex to lend additional strength to large molds.<br />
Lorino then builds a rigid polyester and fiberglass<br />
mold shell over the latex mold to maintain the shape<br />
of the mold during casting. Poly 15-6 and Poly<br />
Fiber, or Polygel ® Plastic-75 should also be<br />
considered for this application. The end result is a<br />
lightweight, high tear strength mold with good<br />
resistance to the swelling caused by polyester resin.<br />
Poly Latex 60 molds allow Capitol Displays to<br />
produce detailed parts with undercuts that would be<br />
impossible with rigid molds.<br />
www.polytek.com<br />
29
Mold Making<br />
Methods<br />
1 Mold Making Methods<br />
Applications - Foam Parts & Shells<br />
Poly 15-3X, 1:1 mix<br />
polyurethane plastic, was<br />
rotocast to create a thin,<br />
lightweight, hollow casting.<br />
After the 15-3X gelled in ~5<br />
minutes, Poly 15-6<br />
polyurethane plastic with 3%<br />
(by weight) Part 15F Foamer<br />
was poured into the hollow<br />
15-3X shell while still in the mold. The 15-6/Part F open-cell<br />
foam expanded to fill the cavity giving the hollow casting support<br />
without adding much cost or weight.<br />
PolyFoam R-5, a 1:1 by<br />
volume rigid foam, was used<br />
to create a very lightweight<br />
mold shell to support this<br />
brushed blanket mold of Poly<br />
74-29 polyurethane rubber.<br />
The shell was made by<br />
pouring liquid PolyFoam R-5<br />
into an unsealed wooden box built around the cured rubber mold<br />
that was covered with butcher's wax for release. When the foam<br />
expanded, it adhered to the box and conformed to the shape of<br />
the rubber mold. A little foam goes a long way!<br />
Hollow Lightweight Castings<br />
PolyFoam R-8, a 1:1 by<br />
volume, closed-cell foam,<br />
makes strong, lightweight<br />
castings quickly. PolyFoam is<br />
mixed and poured into a<br />
TinSil ® or PlatSil ® silicone<br />
rubber mold, which is covered<br />
with a lid to pack the foam to a<br />
higher density for good mold<br />
fill, thicker skin, and better<br />
surface detail. About 20<br />
minutes later, parts such as<br />
this plaque or pot can be<br />
removed from the mold. A barrier coat, such as Barrier PF, can<br />
be applied to the mold to prolong mold life and provide<br />
primed/painted parts upon demold.<br />
PolyFoam R-5 and R-8<br />
can be used to easily<br />
create parts such as<br />
these plaques. Since<br />
the foams are selfskinning,<br />
the plaques<br />
have all the detail of the<br />
original.<br />
Poly 1512X, a 1:1 mix,<br />
pourable, high strength,<br />
polyurethane liquid plastic<br />
was mixed with PolyFiber<br />
thickener to turn the<br />
pourable plastic into a<br />
non-sag, thixotropic mix<br />
that was laid up by hand<br />
into a Polygel ® mold of a boulder. A thin face coat followed by a<br />
thicker backup coat were applied to create a total thickness of<br />
approximately ¼ inch. Very little material was needed, so the<br />
resulting casting was lightweight and low cost. A similar hollow<br />
casting could have been made using polyester resin and<br />
fiberglass or glass-fiber reinforced concrete.<br />
This 10-inch tall head was rotocast using<br />
just a few pounds of EasyFlo 120, a 1:1<br />
by volume mix, polyurethane plastic that<br />
is designed for rotocasting (see<br />
equipment on p. 63) and slush casting,<br />
which is done by hand. If poured solid,<br />
this casting would weigh and cost much,<br />
much more. EasyFlo 120 captures all<br />
the detail without thin spots or bubbles.<br />
A poured blanket mold made of Poly 74-20 polyurethane rubber<br />
was made from a chainsaw-carved wooden bear to create<br />
lightweight duplicates. Notice the thickened seam line in the<br />
back of the mold that was cut with a mold key knife to permit<br />
easy demolding and minimal seam cleanup. Since this mold is<br />
larger, "snaps" or "buttons" were made in the clay blanket which<br />
ultimately became part of the rubber mold so the mold would not<br />
flop away from the shell while being rotated in the rotocasting<br />
machine.<br />
30<br />
(610)559-8620 • (800)858-5990
This 12-inch tall<br />
sculpture of a<br />
mother and child<br />
was created by Mary<br />
Smith of Leesport,<br />
PA, and was molded<br />
at a <strong>Polytek</strong> Seminar<br />
& <strong>Workshop</strong> using<br />
PlatSil ® 71-10 Liquid<br />
Silicone Rubber. The<br />
sculpture was<br />
disassembled into<br />
two pieces so that<br />
the child could be<br />
molded separately<br />
from the mother. The<br />
cold-cast bronze<br />
figurines were made<br />
by slushing a thin coating of Poly 1512X mixed with bronze<br />
powder around the surface of the mold until it gelled. Then a<br />
dense, low-cost polyurethane plastic (Poly 15-3X) was used as a<br />
backfill to simulate the weight of a real bronze casting. The<br />
resulting figurines were glued together using EpoxyBond<br />
adhesive and felt was applied to the bottom. Faux bronze at its<br />
best!<br />
Mold Making Methods 1<br />
Applications - Statuary & Figurines<br />
These frogs were cast in a<br />
TinSil ® 70-25 silicone mold.<br />
Each cold cast bronze was<br />
made from EasyFlo 60<br />
Plastic with bronze (mix ratio<br />
1A:1B:2 bronze, by volume)<br />
and finished with a different<br />
patina for a unique look.<br />
A poured blanket mold was made using PlatSil ® 71-20 Liquid<br />
Silicone Rubber, a unique, 1:1 mix, 4-hour-cure system, which<br />
can be used to cast any medium. This gargoyle could now be<br />
cast in plaster,<br />
concrete or any<br />
pourable plastic<br />
using this PlatSil<br />
mold. This blanket<br />
mold was poured in<br />
a single piece, then<br />
cut, using a mold<br />
key knife, up both<br />
sides to create a<br />
mold which opens<br />
like a book.<br />
Mold Making<br />
Methods<br />
The use of <strong>Polytek</strong>’s liquid mold rubbers<br />
and casting plastics is not just limited to<br />
the applications described on the past<br />
several pages!<br />
• Candle makers<br />
• Soap manufacturers<br />
• Jewelers<br />
• Taxidermists<br />
• Forensic scientists<br />
• Hobbyists of all kinds<br />
• Inventors<br />
• & many others<br />
Use <strong>Polytek</strong> products to make their<br />
creations.<br />
& More!<br />
If you have an application you don’t see<br />
here, call <strong>Polytek</strong> Customer Service for<br />
assistance.<br />
The use of <strong>Polytek</strong> materials is limited<br />
only by the imagination -- may yours be<br />
limitless.<br />
www.polytek.com<br />
31
2 Polyurethane RTV Mold Rubbers<br />
Polyurethane RTV Liquid Mold Rubbers<br />
Polyurethane<br />
Mold Rubber<br />
<strong>Polytek</strong> offers several Polyurethane RTV Liquid Mold Rubbers<br />
each formulated to meet various customer applications. <strong>Polytek</strong>’s<br />
polyurethane mold rubbers consist of a Part A and a Part B that,<br />
after mixing, cure at room temperature to flexible, high-strength,<br />
mold rubbers. Polyurethane rubbers make durable, easy releasing<br />
molds for casting plasters and waxes without release agents, but<br />
when used with proper release agents are also excellent for casting<br />
concrete, epoxy, polyester, urethane and acrylic.<br />
For many <strong>Polytek</strong> polyurethane mold rubbers, the last two digits<br />
in the product name indicate the approximate Shore A hardness<br />
of the cured rubber. <strong>Polytek</strong> polyurethane mold rubbers range in<br />
hardness from a very soft A20 to a very firm D45.<br />
MODEL PREPARATION<br />
Porous models, such as wood, plaster, stone, pottery or masonry,<br />
must be sealed, then coated with a release agent. Multiple coats<br />
of paste wax dried and buffed will seal most surfaces. Potters<br />
soap can be used as a sealer for plaster. Lacquer, paint, PVA,<br />
PolyCoat and Pol-Ease ® 2350 also work well as sealers for many<br />
surfaces. Models made of sulfur-containing modeling clay (i.e.,<br />
Roma Plastilina) should be sealed with shellac. [CAUTION:<br />
When shellac is used as the sealer, it must be thoroughly coated<br />
with release agent because polyurethane rubbers bond tenaciously<br />
to shellac. In fact, uncoated shellac may be used to bond<br />
polyurethanes to certain surfaces (i.e., plaster).]<br />
Non-porous models (i.e., metals, plasticene, wax, glazed ceramics,<br />
fiberglass, and polyurethanes) and sealed porous models<br />
should be coated with a release agent such as Pol-Ease 2300.<br />
If there is any question about the compatibility between the liquid<br />
mold rubber and the prepared model surface, perform a test<br />
cure on an identical surface to determine that complete curing and<br />
good release is obtained.<br />
Porous models must be vented from beneath to prevent trapped<br />
air from forming bubbles in the rubber (see p. 12).<br />
POLYURETHANE MOLD RUBBERS:<br />
AT A GLANCE<br />
Poly 74 & 75 Series - Flexible, high-strength mold rubbers<br />
for making tough, durable molds. <strong>Polytek</strong>’s easiestto-use<br />
and best-selling mold rubbers!<br />
Polygel ® Series - Thicken immediately upon mixing<br />
components making these products exceptional for<br />
making brush-on or sprayed blanket molds.<br />
Poly 77 Series - High elongation mold rubber for maximum<br />
mold life in high volume applications.<br />
Poly 81 Series - Firm rubber for making durable molds,<br />
forms or industrial parts.<br />
Poly 72-40 Series- Flexible rubber that performs well<br />
for casting wax and plaster.<br />
Poly GlassRub- Clear, flexible rubber for making cut<br />
molds or casting clear or colored art/decor objects.<br />
MIXING AND CURING<br />
Before mixing rubber, be sure that both Parts A and B are at room<br />
temperature and that all tools and models are ready to go! Check<br />
product labels or technical bulletins to determine working time<br />
for the product -- some products set fast -- meaning that you must<br />
work quickly.<br />
Many Polyurethane Part Bs require stirring before use. If there is<br />
a “Stir Before Use” label on the container -- be sure to do so.<br />
Mix Ratios Vary! Check the mix ratios for the specific product<br />
you are using. For polyurethane rubbers, most mix ratios are<br />
expressed by weight. Carefully weigh Parts A and B in proper<br />
ratio. [Note: Polygel products can be mixed 1:1 by weight or volume.<br />
See p. 36.]<br />
Weigh Part B (usually the lower viscosity component) into a<br />
clean metal or plastic mixing container. Then weigh the appropriate<br />
amount of Part A into the same container. Mix thoroughly.<br />
Hand mixing with a Poly Paddle (see p. 62) is best to avoid mixing<br />
air into the rubber. While mixing, scrape the sides and bottom<br />
several times to insure thorough mixing. Pour the rubber as soon<br />
after mixing as possible for best flow and air bubble release.<br />
Vacuum degassing or pressure curing helps to provide bubble<br />
free molds, but is usually not necessary.<br />
Allow the rubber to cure at room temperature, 77°F (25°C). Heat<br />
accelerates the cure - low temperatures slow the cure. Avoid curing<br />
in areas where the temperature is below 60°F (15°C).<br />
Check product labels or technical bulletins to determine appropriate<br />
cure times. For most polyurethane products, final cure<br />
properties are obtained in about seven days, but most molds may<br />
be used with care after curing for 24 to 48 hours.<br />
USING THE MOLD<br />
Usually no release agent is necessary when casting plaster or<br />
molten wax in polyurethane molds. When casting with plaster,<br />
sponge, dip, or spray the mold with Pol-Ease Mold Rinse and then<br />
pour plaster on the wet mold to reduce air bubbles in the plaster<br />
and aid release. When casting resin, spray the mold with Pol-Ease<br />
2300 Release Agent. For casting concrete, use an appropriate<br />
form release such as Pol-Ease 2650 or 2601 Release Agent.<br />
Exposure to solvent-containing form releases should be kept to a<br />
minimum to reduce likelihood of mold distortion due to shrinkage<br />
or swelling.<br />
After repeated casting with certain resins, plaster and concrete,<br />
molds may shrink or swell since these materials can either extract<br />
oils from the mold or force chemicals into the rubber matrix. The<br />
proper selection of release agent and/or barrier coat can minimize<br />
this effect. If shrinkage becomes evident, a light application of<br />
32<br />
(610)559-8620 • (800)858-5990
Polyurethane RTV Mold Rubbers 2<br />
Pol-Ease Mold Dressing can help to restore the mold to its original<br />
dimensions. For more information on the use of Pol-Ease<br />
Mold Dressing, call <strong>Polytek</strong> Customer Service.<br />
ADDITIVES<br />
<strong>Polytek</strong> offers various additives that can be used to vary the properties<br />
of the cured and uncured polyurethanes.<br />
• Softener - For the Poly 74, 75 and 77 Series RTV Liquid<br />
Mold Rubbers, add Poly 74/75 Part C Softener for a lower<br />
viscosity mix and a softer cured rubber. Poly 74/75 Part C<br />
Softener may be added to most other <strong>Polytek</strong> polyurethane<br />
mold rubbers except Poly 72-40.<br />
• Accelerator - For Poly 74, 75 and 77 Series RTV Liquid<br />
Mold Rubbers, Poly 74/75 Part X can be added to accelerate<br />
the cure. Poly 74/75 Part X may accelerate other <strong>Polytek</strong><br />
polyurethane mold rubbers. Test on a small scale first.<br />
• Thickeners - Poly Fiber II is a fine fiber that is used to thicken<br />
polyurethane rubbers and plastics to a thixotropic consistency<br />
for brushed rubber molds and plastic shells. Cab-O-<br />
Sil ® Fumed Silica is both a thickener and thixotropic agent.<br />
Add Poly Fiber II or Cab-O-Sil to mixed Parts A and B in<br />
order to form a gel appropriate for application by brush or<br />
trowel. Cab-O-Sil is only appropriate for use with certain liquid<br />
mold rubber products.<br />
• UV Stabilizer - Poly UV Additive can be added to mixed<br />
Parts A and B to improve UV resistance of cured <strong>Polytek</strong><br />
mold rubbers. At 0.5% of the total weight of the liquid mix,<br />
UV Additive reduces characteristic surface degradation<br />
caused by sunlight and other UV sources.<br />
• Colors - Polyurethanes can be tinted to various colors by<br />
adding small amounts of PolyColors (see p. 61).<br />
To learn more about additives, refer to product technical bulletins<br />
or call <strong>Polytek</strong> Customer Service. Additives and accessories for<br />
polyurethane mold rubbers are listed in the box to the right.<br />
CLEAN UP<br />
Tools should be wiped clean before the rubber cures. Denatured<br />
ethanol is a good cleaning solvent, but it must be handled with<br />
extreme caution owing to its flammability and health hazards.<br />
Work surfaces can be waxed or coated with Pol-Ease 2300<br />
Release Agent so cured rubber can be removed.<br />
SAFETY<br />
Before use, read product labels and Material Safety Data Sheets.<br />
Follow safety precautions and directions. Contact with uncured<br />
products may cause eye, skin and/or respiratory irritation and dermal<br />
and/or respiratory sensitization. Avoid contact with skin and<br />
eyes. If skin contact occurs, remove with waterless hand cleaner<br />
or alcohol then soap and water. In case of eye contact, flush with<br />
water for 15 minutes and call a physician. Use only with adequate<br />
ventilation. Do not use polyurethane products where food or body<br />
contact may occur. Polyurethanes burn readily when ignited.<br />
STORAGE LIFE<br />
At least six months in unopened containers stored at room temperature<br />
(60-90°F). Parts A and B react with atmospheric moisture<br />
www.polytek.com<br />
Molds and castings made from <strong>Polytek</strong> polyurethane products.<br />
ADDITIVES & ACCESSORIES<br />
Poly 74 Part C Softener<br />
1 pint (1 lb), 1 gal (8 lb), 5 gal (40 lb)<br />
Poly 74/75 Part X Accelerator<br />
1 pint (1 lb), 1 gal (8 lb)<br />
Pol-Ease ® 2300 Release Agent<br />
12-oz. can, case of 12 cans<br />
Pol-Ease ® 2450 Release Agent<br />
1 qt (2 lb), 5 gal (40 lb)<br />
Pol-Ease ® 2500 Release Agent<br />
12-oz. can, case of 12 cans<br />
Pol-Ease ® 2601 Release Agent<br />
1 qt (2 lb), 5 gal (40 lb), Drum (450 lb)<br />
Pol-Ease ® 2650 Release Agent<br />
1 qt (1.5 lb), 5 gal (35 lb), Drum (375 lb)<br />
Pol-Ease ® Mold Rinse or Mold Dressing<br />
5 gal (40 lb)<br />
Poly PVA Solution (Green or Clear)<br />
1 qt (2 lb), 5 gal (40 lb)<br />
PolyCoat<br />
1 qt (1.5 lb), 1 gal<br />
Poly Purge Aerosol Dry Gas<br />
10-oz can, Case of 12 cans<br />
Cab-O-Sil ® /Fumed Silica<br />
5 gal, 1 bag (10 lb)<br />
Poly Fiber II<br />
5-gal pail (~3 lb), bag (10 lb)<br />
and, therefore, should be used up as soon as possible after opening.<br />
After opening, spray Poly Purge Dry Gas Blanket into containers<br />
before resealing to displace moist air and extend storage life.<br />
Polyurethane rubber molds can last many years if stored in their<br />
proper shape in a cool, dry location out of direct sunlight.<br />
Polyurethane<br />
Mold Rubber<br />
33
2 Polyurethane RTV Mold Rubbers<br />
Poly 74 and 75 Series RTV Liquid Rubbers<br />
Polyurethane<br />
Mold Rubber<br />
DESCRIPTION: Poly 74 and 75 Series Liquid Rubbers consist<br />
of Part A and Part B that, after mixing, cure overnight at room<br />
temperature to flexible, high-strength, mold rubbers. Poly 74 and<br />
75 Series Rubbers make durable, easy releasing molds for casting<br />
plasters and waxes without release agents, but when used with<br />
proper release agents are also excellent for casting concrete,<br />
epoxy, polyester, urethane and acrylic.<br />
MODEL PREPARATION: See p. 32.<br />
MIXING AND CURING: See p. 32.<br />
USING THE MOLD: See p. 32.<br />
ADDITIVES: For general guidelines see p. 33.<br />
Softener - For the Poly 74 and 75 Series RTV Liquid Mold<br />
Rubbers, Poly 74/75 Part C Softener can be added to the uncured<br />
products for a lower viscosity mix and a softer cured rubber.<br />
When Part C is used, cure time is longer and there is some loss of<br />
strength in the rubber and increased tendency to shrink after<br />
repeated castings. To soften Poly 74-30 to a Shore A15, mix<br />
1A:1B:1C, by weight. The quantity of Part C required to soften<br />
other products varies and should be determined through experimentation.<br />
Accelerator - For the Poly 74 and 75 Series RTV Liquid Mold<br />
Rubbers, Poly 74/75 Part X can be added to accelerate the cure.<br />
Part X is most useful when making brush-on molds with 74-<br />
Series rubbers to decrease the time needed between coats. By<br />
adding 3% Part X (by weight of the total mix) to 74-30 or 74-29,<br />
FEATURES<br />
• Easy-to-use formulations<br />
• Flexible, strong mold rubbers<br />
• Reproduce fine details<br />
• Make tough, long-lasting molds and parts<br />
the working time is reduced to approximately 8 minutes -- in the<br />
time it takes to mix the next batch, the previous brushed layer<br />
gels enough to apply the next coat. Demolding is possible in as<br />
little as 4 hours after the final layer is applied. Rapid curing with<br />
Part X allows a firm, yet flexible shell or mother mold to be made<br />
in the same day. For example, by adding 1% Part X (by weight<br />
of total mix) to Poly 75-80, the working time is reduced to<br />
approximately 10 minutes and demolding is possible in as little<br />
as 6 hours.<br />
Exercise caution when using Part X for poured molds since the<br />
rapid onset of gelling may trap air bubbles on or near the surface<br />
of the master.<br />
Poly 74/75 Part X affects each product differently. Before use,<br />
testing to determine the best amount of Part X to use is advised.<br />
CLEAN UP: See p. 33.<br />
SAFETY: See p. 33.<br />
POLY 74 SERIES PHYSICAL PROPERTIES<br />
74-20 74-29 74-30 74-40 74-44 74-45 74-55<br />
(74-29 White) (74-30 Clear)<br />
Mix Ratio, By Weight 1A:2B 1A:1B 1A:1B 2A:1B 2A:1B 1A:1B 4A:1B<br />
Hardness, Shore A 20 30 30 40 45 45 55<br />
Pour Time (min) 30 30 30 20 20 30 15<br />
Cured Color* Yellow Black Varies Varies Gray Yellow Clr Yellow<br />
(White) (Clear/Amber)<br />
Mixed Viscosity (cP) 800 2,800 2,000 3,400 3,500 2,500 4,000<br />
Specific Volume (in 3 /lb) 27.5 27.5 27.5 27.5 27.5 27.5 27.5<br />
POLY 75 SERIES PHYSICAL PROPERTIES<br />
75-59 75-60 75-65 75-70 75-75 75-79 75-80 75-90<br />
Mix Ratio, By Weight 1A:1B 1A:1B 1A:1B 1A:1B 2A:1B 2A:1B 2A:1B 2A:1B<br />
Hardness, Shore A 60 60 65 70 75 80 80 90<br />
Pour Time (min) 10 10 35 40 20 20 45 10-15<br />
Cured Color Amber Amber Yellow/Amber Gray Amber Yellow Yellow/Amber Tan/Brown<br />
Mixed Viscosity (cP) 2,500 1,200 3,000 3000 4,000 2,000 5,000 6,000<br />
Specific Volume, in 3 /lb 27 27 27 27 26 26 26 26<br />
* Some Part Bs darken with age, but cured rubber properties are not affected.<br />
34<br />
(610)559-8620 • (800)858-5990
Polyurethane RTV Mold Rubbers 2<br />
Moldmaker Chan<br />
Oeur (looking at<br />
camera) demolds a<br />
Poly 74-30 brushed<br />
mold from one of six<br />
panels created by<br />
artist Kate Burke for<br />
the Minnesota<br />
Veteran’s Home.<br />
They sprayed the<br />
model with Pol-Ease ®<br />
2300 Release Agent,<br />
so the separation<br />
was perfectly clean<br />
and trouble-free.<br />
Poly 74-20 offers the most<br />
remarkable combination of<br />
tear strength and softness.<br />
With tear strength similar to<br />
harder rubbers, Poly 74-20<br />
pulls away from detail and<br />
undercuts with no trouble at<br />
all. Poly 74-20 is great for<br />
casting concrete, plaster<br />
wax and resins.<br />
A satisfied seminar<br />
attendee displays her<br />
cold cast bronze pot<br />
demolded from a twopiece,<br />
poured block mold<br />
made from Poly 74-20.<br />
The keys, which register<br />
the top and bottom<br />
halves of the mold,<br />
worked perfectly to create<br />
a thin, uniform wall<br />
thickness on the cast<br />
part.<br />
Poly 74-40 was used to make<br />
a poured blanket mold of this<br />
shelf bracket. The bracket was<br />
rotocast using Poly 15-3X<br />
polyurethane to make a hollow<br />
part that was then backfilled<br />
with Poly 15-6 and Part 15F<br />
Foamer to give it strength<br />
while keeping it lightweight<br />
and low cost.<br />
Polyurethane<br />
Mold Rubber<br />
74- & 75-Series Packaging<br />
Product<br />
(Mix Ratio)<br />
Unit Weight<br />
(lb)<br />
Unit Components<br />
Part A (lb) Part B (lb) Part A (volume) Part B (volume)<br />
Poly 74-20<br />
Mix Ratio: 1A:2B<br />
6<br />
24<br />
120<br />
1,350<br />
2.0<br />
8.0<br />
40.0<br />
450<br />
4.0<br />
16.0<br />
80.0<br />
900<br />
1 qt<br />
1 gal<br />
5 gal<br />
55 gal<br />
2 x 1 qt<br />
2 x 1 gal<br />
2 x 5 gal<br />
22 x 5 gal/2 x 55 gal<br />
Poly 74-29, 74-30, 74-30 Clear, 74-45<br />
Poly 75-59, 75-60, 75-70<br />
Mix Ratio: 1A:1B<br />
4<br />
16<br />
80<br />
900<br />
2.0<br />
8.0<br />
40.0<br />
450<br />
2.0<br />
8.0<br />
40.0<br />
450<br />
1 qt<br />
1 gal<br />
5 gal<br />
55 gal<br />
1 qt<br />
1 gal<br />
5 gal<br />
55 gal/11 x 5 gal<br />
Poly 74-40, 74-44<br />
Poly 75-75, 75-79, 75-80, 75-90<br />
Mix Ratio: 2A:1B<br />
6<br />
24<br />
120<br />
675<br />
1,350<br />
4.0<br />
16.0<br />
80.0<br />
450<br />
900<br />
2.0<br />
8.0<br />
40.0<br />
225<br />
450<br />
2 x 1 qt<br />
2 x 1 gal<br />
2 x 5 gal<br />
55 gal<br />
2 x 55 gal<br />
1 qt<br />
1 gal<br />
5 gal<br />
6 x 5 gal<br />
55 gal<br />
Poly 74-55<br />
Mix Ratio: 4A:1B<br />
5<br />
20<br />
40<br />
100<br />
562.5<br />
4.0<br />
16.0<br />
32.0<br />
80.0<br />
450<br />
1.0<br />
4.0<br />
8.0<br />
20.0<br />
112.5<br />
2 x 1 qt<br />
2 x 1 gal<br />
5 gal<br />
2 x 5 gal<br />
55 gal<br />
1 pt<br />
2 x 1 qt<br />
1 gal<br />
5 gal<br />
3 x 5 gal<br />
www.polytek.com<br />
35
2 Polyurethane RTV Mold Rubbers<br />
Polygel ®<br />
Brushable/Sprayable Mold Rubber<br />
U.S. Patent # 5,128,433<br />
Polyurethane<br />
Mold Rubber<br />
USES: Polygel ® Mold Rubbers are without equal for brushed or<br />
sprayed blanket molds. Polygel Plastics produce strong, lightweight<br />
mold shells (see p. 46). Polygel products are ideal for<br />
molds and shells built up with a brush or spatula on vertical or<br />
overhead surfaces. Evaluate Polygel Mold Rubbers for casting<br />
plaster, cement and waxes, as well as for limited casting with<br />
polyester, epoxy and polyurethane resins. Sprayable Polygel<br />
products are ideal for large surface area applications where brushing<br />
may be impractical. Polygel products bond well to many surfaces<br />
and should be evaluated as adhesives and sealants.<br />
DESCRIPTION: Polygel products consist of liquid Parts A and<br />
B, that after mixing 1:1 by weight or volume, immediately selfthicken<br />
to a brushable or trowellable consistency. As the liquid<br />
components of Polygel Mold Rubbers are mixed together, the<br />
product changes color and thickens to a buttery, non-sag paste<br />
with a working time of 1 to 20 minutes (depending on the specific<br />
Polygel product used). A mold can be built up in 2 to 3 coats,<br />
applied about 1 hour apart. Polygel Spray 35, Spray 50 and Quick<br />
Spray 50 can be sprayed continuously until the desired mold<br />
thickness is achieved. Polygel rubbers cure overnight at room<br />
temperature to flexible, tough rubbers. Polygel Spray 35 and<br />
Quick Spray 50 cure in 4-6 hours.<br />
MODEL PREPARATION: See p. 32.<br />
MIXING AND CURING: See p. 32.<br />
FEATURES<br />
• Easy -- 1:1 mix by weight or volume<br />
• Excellent for brush-on and spray applications<br />
• Fast -- one-day molds<br />
• Tough and strong<br />
• Color-coded mix indication<br />
• Molds have long library life<br />
• Good flow into fine detail<br />
• Good dimensional stability<br />
BRUSH-ON MOLDS WITH POLYGEL RUBBER: When<br />
brushing Polygel rubber, allow the first coat to gel enough so that<br />
the second coat will not disturb it (usually about 1 hour is adequate,<br />
30 minutes for Polygel 35), then apply a second coat being<br />
careful to cover any thin spots in the first coat. Do not allow prior<br />
layers to cure completely before applying subsequent coats.<br />
Sprayed molds should be made in one continuous application<br />
without the need for individual layers. Ideally, a blanket mold<br />
should be at least 1/8-inch thick but not more than 3/8-inch, since<br />
too thick a layer of rubber causes difficulty turning a mold back<br />
on itself during demolding. Allow to cure at room temperature<br />
prior to demolding or building the mold shell. Strength continues<br />
to develop for several days.<br />
36<br />
Polygel Product Options<br />
Polygel ® 35 - Softest, most elastic, brushable Polygel rubber.<br />
Cures to Shore A35 hardness in 4-6 hours.<br />
Polygel ® Spray 35 - Sprayable version of Polygel 35<br />
designed for use with meter-mix spray equipment.<br />
Polygel ® 40 - The lowest viscosity mix for best air bubble<br />
release and easiest brushing. Cures to a Shore A40 hardness.<br />
Polygel ® 50 - A thicker mix that cures to a tough Shore A50<br />
hardness. Polygel 50 is a great adhesive for repairing<br />
polyurethane molds and bonding molds to backing material<br />
such as plywood.<br />
Polygel ® Spray 50 - Designed for spray mold applications<br />
using meter-mix spray equipment.<br />
Polygel ® Quick Spray 50 - A fast, sprayable mold rubber<br />
with a 1-minute working time and a 4 to 6-hour cure.<br />
Polygel ® Plastic-75 - See p. 55.<br />
Polygel ® Shell - See p. 55.<br />
REINFORCING BRUSH-ON MOLDS: Rubber molds can be<br />
reinforced with Tietex ® Fabric (see Accessories), which is strong<br />
and wets out better than other fabrics. Tietex can be laminated at<br />
the top of a seam or strips can be laid around the perimeter of a<br />
mold to prevent tearing. The fabric can be embedded in the second<br />
or third coat of rubber while tacky and covered with a subsequent<br />
coat, which should be as fluid as possible for best penetra-<br />
Polygel ® Mold Rubbers are specifically designed for brush-on<br />
and spray application. After Parts A+B are mixed, they form a<br />
thixotropic gel that clings to vertical and overhang surfaces after<br />
application.<br />
(610)559-8620 • (800)858-5990
Polyurethane RTV Mold Rubbers 2<br />
Polygel ® Spray 50 is<br />
applied to a monumental<br />
sculpture with<br />
the VS-3000 Polygel<br />
Sprayer (see p. 64).<br />
Using the sprayer, the<br />
entire mold was made<br />
in a continuous<br />
sprayed piece. The<br />
gel emitting from the<br />
sprayer is non-sag<br />
and, therefore, stays<br />
where it is applied,<br />
but can be moved<br />
around with a brush if<br />
necessary.<br />
tion of the cloth. If the fabric is too close to the model surface, the<br />
weave pattern may show through to the face of the mold.<br />
NOTE ON LAYERING DIFFERENT POLYGEL RUBBERS:<br />
Typically, brush-on molds should be completed with one rubber.<br />
For example, if the face coat is brushed with Polygel 40, then all<br />
subsequent coats should be with Polygel 40. In some cases, the<br />
initial coat can be brushed with lower viscosity Polygel 35 or 40<br />
for better detail and the second (usually final) coat with thicker<br />
Polygel 50 to speed the mold making process. This technique is<br />
acceptable for molds that do not require long-term storage or use.<br />
When layering different products, oils can transfer from one rubber<br />
to another causing warping or curling of the mold. In extreme<br />
cases, a mold can distort enough that it will not fit properly into<br />
its shell.<br />
THICKER MIXES FOR FILLING UNDERCUTS: Polygel<br />
Mold Rubbers can be made even thicker by stirring Poly Fiber II<br />
or Cab-O-Sil ® into the mixed Parts A and B.<br />
USING THE MOLD: See p. 32. If a Polygel rubber mold is to<br />
be turned inside out like a sock, the outside surface must be lubricated<br />
with soapy water or petroleum jelly so that it slides over<br />
itself easily. The shell or mother mold can be made of Polygel<br />
Plastics, plaster, polyester resin and fiberglass, or Poly 15-6 or<br />
1512X resin filled with Poly Fiber or fiberglass (see p. 61). If the<br />
shell is built with Polygel Plastics or other resin, the rubber must<br />
be thoroughly coated with paste wax then Pol-Ease 2300 Release<br />
Agent to prevent the plastic from sticking to the rubber. A plaster<br />
shell must be sealed with potter’s soap, shellac, lacquer or wax to<br />
prevent mold distortion during storage or use.<br />
CLEAN UP: See p. 33.<br />
SAFETY: See p. 33. When spraying Polygel products, use adequate<br />
ventilation and personal protective equipment (i.e., respirators,<br />
gloves, coveralls).<br />
www.polytek.com<br />
Products<br />
Polygel 35<br />
Polygel 40<br />
Polygel 50<br />
POLYGEL MOLD RUBBER PACKAGING<br />
Polygel Spray 35<br />
Polygel Spray 50<br />
Polygel Quick Spray 50<br />
A large, flexible<br />
rubber dome<br />
mold was made<br />
quickly using<br />
Polygel ® Spray<br />
50 for the<br />
restoration of<br />
the St. Joseph<br />
County<br />
Courthouse in<br />
Southbend, IN.<br />
Using Polygel ®<br />
Spray 50 a mold<br />
was made of<br />
this this large<br />
cornice bracket.<br />
This Polygel ®<br />
mold was used<br />
to rotocast hollow<br />
plaster<br />
columns used<br />
routinely for<br />
home and office<br />
decor.<br />
Unit Weight (A+B)<br />
4 lb<br />
16 lb<br />
80 lb<br />
900 lb<br />
80 lb<br />
900 lb<br />
Polyurethane<br />
Mold Rubber<br />
37
2 Polyurethane RTV Mold Rubbers<br />
Poly 77 Series RTV Liquid Rubbers<br />
Polyurethane<br />
Mold Rubber<br />
DESCRIPTION: Poly 77 Series RTV Liquid Rubbers consist of<br />
a liquid Part A and Part B that, after mixing, cure at room temperature<br />
to economical, flexible mold rubbers. Consider these<br />
products for casting plasters, cements and waxes. Resins can also<br />
be cast with proper release agents. The Poly 77 Series has been<br />
formulated to provide excellent abrasion and tear resistance for<br />
maximum mold life and performance. The high elongation characteristic<br />
of these rubbers enables easier demolding and reduces<br />
mold damage when used in demanding casting applications.<br />
MODEL PREPARATION: See p. 32.<br />
MIXING AND CURING: See p. 32.<br />
USING THE MOLD: See p. 32.<br />
CLEAN UP & SAFETY: See p. 33.<br />
FEATURES<br />
• High-performance, high-elongation rubbers<br />
• Hardnesses ranging from Shore A50 to A65<br />
• Easy-to-use formulations with 1:1 mix ratios<br />
• Easy demolding without damaging molds<br />
• Make tough, long-lasting molds<br />
PACKAGING<br />
Poly 77-50 and Poly 77-65<br />
Mix Ratio: 1A:1B (By Weight)<br />
PHYSICAL PROPERTIES<br />
77-50 77-65<br />
Mix Ratio, By Weight 1A:1B 1A:1B<br />
Hardness, Shore A 50 65<br />
Unit Weight<br />
(lb)<br />
Part A<br />
(lb)<br />
Unit Components<br />
Part B<br />
(lb)<br />
Part A<br />
(Volume)<br />
Part B<br />
(Volume)<br />
Pour Time(min) 15 15<br />
Color Tan Tan<br />
Mixed Viscosity (cP) 1,200 1,600<br />
Specific Volume (in 3 /lb) 27.5 27.5<br />
4.0<br />
16.0<br />
80.0<br />
900<br />
2.0<br />
8.0<br />
40.0<br />
450<br />
2.0<br />
8.0<br />
40.0<br />
450<br />
1 qt<br />
1 gal<br />
5 gal<br />
55 gal<br />
1 qt<br />
1 gal<br />
5 gal<br />
55 gal<br />
Poly 81 Series RTV Liquid Rubbers<br />
DESCRIPTION: Use Poly 81 Series rubbers to make firm<br />
molds, mold facings, stamping tools, industrial parts, rollers, gaskets,<br />
mold shells, bumpers or pads. Poly 81 Series rubbers consist<br />
of liquid Part A and Part B that, after mixing, cure at room<br />
temperature to tough, durable rubbers. They offer low sensitivity<br />
to moisture, and low viscosity for easy vacuuming, if necessary.<br />
MODEL PREPARATION: See p. 32.<br />
MIXING AND CURING: See p. 32. Parts A and B are clear liquids.<br />
The color of Part B may vary, but it has no effect on cured<br />
rubber properties.<br />
USING THE MOLD: See p. 32.<br />
CLEAN UP & SAFETY: See p. 33.<br />
FEATURES<br />
• Firm rubbers ranging from Shore A90 to D45<br />
• Easy-to-use formulations<br />
• Reproduce fine details<br />
• Make tough, long-lasting molds, tools and parts<br />
PACKAGING<br />
Poly 81-Series<br />
PHYSICAL PROPERTIES<br />
81-90 81-D45<br />
Product<br />
(Mix Ratio)<br />
Unit<br />
Weight (lb)<br />
Component Weight (lb)<br />
Part A<br />
Part B<br />
Mix Ratio, By Weight 100A:40B 100A:20B<br />
Hardness (Shore A/D) A90 D45<br />
Pour Time (min) 23 19<br />
Demold Time (hr) 16 16<br />
Color Yellow Varies<br />
Mixed Viscosity (cP) 2,000 1,600<br />
Specific Volume (in 3 /lb) 26.6 26.4<br />
Poly 81-90<br />
(100A:40B)<br />
Poly 81-D45<br />
(100A:20B)<br />
11.2<br />
56.0<br />
280<br />
630<br />
9.6<br />
48.0<br />
192<br />
540<br />
8.0<br />
40.0<br />
200<br />
450<br />
8.0<br />
40.0<br />
160<br />
450<br />
3.2<br />
16.0<br />
80.0<br />
180<br />
1.6<br />
8.0<br />
32.0<br />
90.0<br />
38<br />
(610)559-8620 • (800)858-5990
Polyurethane RTV Mold Rubbers 2<br />
Poly 72-40 Series RTV Liquid Rubbers<br />
DESCRIPTION: Poly 72-40 systems consist of liquid Part A and<br />
Part B that, after mixing in correct ratio, cure at room temperature<br />
to versatile mold rubbers. They may be poured or thickened and<br />
applied by trowel or brush, to make flexible molds. These molds<br />
are typically used for making wax castings in foundry applications.<br />
MODEL PREPARATION: See p. 32. CAUTION: Poly 72-40<br />
systems may be subject to cure inhibition by certain contaminants<br />
and may stick to some surfaces. See Technical Bulletin for details.<br />
MIXING AND CURING: See p. 32. See Technical Bulletin for<br />
details regarding mixing, curing and use of additives to thicken for<br />
brush-on application (e.g., fumed silica, Poly Fiber II, and Part D).<br />
USING THE MOLD: See p. 32 and Technical Bulletin.<br />
SOFTER MOLDS: Add Part C Softener to Part B before mixing<br />
with Part A. Consult Technical Bulletin for details.<br />
STORAGE: Poly 72-40 rubber remains usable for at least 6<br />
months from the date of shipment in unopened containers, stored in<br />
a cool, dry location. Cured molds slowly soften with age. Adequate<br />
mixing of components in the proper mix ratio contributes to long<br />
mold life as will storage of molds in a dark, cool, dry area. With<br />
proper care, Poly 72-40 molds should not soften appreciably for 2-<br />
4 years. Molds should be discarded before they become too soft to<br />
handle. Do not store molds outdoors, as exposure to sunlight and<br />
excessive humidity will cause rapid deterioration of the rubber.<br />
PHYSICAL PROPERTIES<br />
Mix Ratio, By Weight<br />
1A:10B<br />
Hardness, Shore A 40<br />
Pour Time (min) 30<br />
Cured Color<br />
Ivory<br />
Mixed Viscosity (cP) 4,000<br />
Specific Volume (in 3 /lb) 20<br />
Shrinkage Upon Cure<br />
Nil<br />
Unit Weight<br />
(lb)<br />
9.9<br />
49.5<br />
495<br />
PACKAGING<br />
Poly-Fast 72-40 and Poly 72-40 MF<br />
Mix Ratio 1A:10B (By Weight)<br />
Part A<br />
(lb)<br />
0.9<br />
4.5<br />
45.0<br />
Unit Components<br />
Part B<br />
(lb)<br />
9.0<br />
45.0<br />
450<br />
Part A<br />
(Volume)<br />
1 pt<br />
½ gal<br />
5 gal<br />
Part B<br />
(Volume)<br />
1 gal<br />
5 gal<br />
55 gal<br />
Polyurethane<br />
Mold Rubber<br />
Poly GlassRub 50 RTV Liquid Rubber consists of two parts (A &<br />
B) that, after mixing, cure at room temperature to a flexible, clear<br />
rubber. Poly GlassRub 50 is designed for making clear molds that<br />
can be easily cut away from original objects with less chance of<br />
damage and better seam positioning since objects are visible<br />
through the rubber. Additionally, clear rubber castings or objects<br />
encapsulated in the clear rubber can make interesting original art<br />
or displays. Cured GlassRub may yellow slightly over time or following<br />
UV exposure. PolyColors can be added to the liquid rubber<br />
to make a tinted or colored, yet still clear, rubber. The smallest addition<br />
of a PolyColor virtually eliminates post-cure yellowing.<br />
For more information, consult the GlassRub Technical Bulletin.<br />
PHYSICAL PROPERTIES<br />
Poly GlassRub Liquid Rubber<br />
Mix Ratio, By Weight or Volume<br />
1A:1B<br />
Hardness, Shore A 45-50<br />
Pour Time, 1-lb mix (min) 45<br />
Demold Time (hr) 16<br />
Specific Gravity 1.0<br />
Color, Cured<br />
Glass Like/Blue-Clear*<br />
Viscosity, 2.5 min after mix (cP) 1000<br />
Specific Volume(in 3 /lb) 27.5<br />
* Upon exposure to UV light (i.e., fluorescent light or sunlight), cured<br />
rubber may yellow with age.<br />
FEATURES<br />
• Glass-like appearance (clear, pale blue)<br />
• Reproduces fine detail<br />
• Easy-to-use formulation -- 1A to 1B mix ratio<br />
• Low viscosity mix with excellent bubble-release<br />
• Long working time<br />
Unit Weight<br />
GlassRub 50 Liquid Rubber Packaging<br />
1A:1B Mix Ratio<br />
Weight<br />
Volume<br />
A (lb) B (lb) A B<br />
4 lb 2 2 1 qt 1 qt<br />
16 lb 8 8 1 gal 1 gal<br />
80 lb 40 40 5 gal 5 gal<br />
900 lb 450 450 55 gal 55 gal<br />
www.polytek.com<br />
39
3 Silicone RTV Mold Rubbers<br />
Poly-Sil ®<br />
Silicone RTV Liquid Mold Rubbers<br />
Silicone<br />
Mold Rubber<br />
The Poly-Sil ® Silicone RTV Liquid Mold Rubbers each consist<br />
of a Part A and Part B, which, after mixing, cure at room<br />
temperature to flexible, high-strength, mold rubbers. Poly-Sil<br />
Mold Rubbers make molds that are easy releasing and stable at<br />
higher temperatures. They are excellent for casting plasters,<br />
waxes, cements, low melting metals and many resins such as<br />
epoxies, polyesters, urethanes and acrylics.<br />
As with other <strong>Polytek</strong> elastomers, the last two digits in the<br />
product name indicate the approximate Shore A hardness of the<br />
cured rubber. Poly-Sil rubbers range in hardness from a very soft<br />
A10 to a firm A60.<br />
MODEL PREPARATION<br />
Porous models such as wood or plaster should be sealed to<br />
prevent penetration of the rubber into the pores of the material.<br />
Wax, petroleum jelly, lacquer, paint and most other coatings are<br />
suitable sealers. Materials that will contact the rubber can be<br />
sprayed or coated with a light coat of Pol-Ease ® 2350, which<br />
functions as a sealer and release agent. Allow the Pol-Ease 2350<br />
to dry before applying liquid rubber. Silicone-based release<br />
agents (i.e., Pol-Ease ® 2300) are not to be used on surfaces that<br />
contact liquid Poly-Sil ® rubbers since inhibition and/or adhesion<br />
may occur. In addition, modeling clays containing sulfur may<br />
inhibit curing. In every case where there is any question about<br />
the compatibility between the rubber and the prepared model<br />
surface, a test cure should be made on an identical surface to<br />
determine that complete curing and good release are obtained.<br />
Poly-Sil rubbers may bond to cured silicone rubbers unless a<br />
parting agent is used.<br />
Porous models must be vented from beneath to prevent trapped<br />
air from forming bubbles in the rubber (see p. 12).<br />
MIXING AND CURING<br />
Before mixing rubber, be sure that both Parts A and B are at<br />
room temperature and that all tools and models are ready to go!<br />
Check product labels or technical bulletins to determine working<br />
time for the product -- some products set fast -- meaning that<br />
you must work quickly.<br />
Many Poly-Sil Part As require stirring before use. If there is a<br />
“Stir Before Use” label on the container -- be sure to do so.<br />
Molds made from highperformance<br />
Poly-Sil ®<br />
rubbers are best for casting<br />
harsh resins. This gargoyle<br />
blanket mold made of soft<br />
PlatSil ® 71-11 easily pulls<br />
off the cast resin part. The<br />
smooth, release-free<br />
demold of silicone is<br />
especially welcome on<br />
highly detailed parts.<br />
POLY-SIL ® MOLD RUBBERS: AT A GLANCE<br />
TinSil ® 70 Series - Tin-catalyzed silicone systems that<br />
cure to tough, high-performance rubbers with easy<br />
release properties and resistance to high temperatures.<br />
Great for casting polyester resin.<br />
PlatSil ® 71 Series - High-tear strength, platinum-cured<br />
silicone systems with hardness up to A40. Excellent for<br />
casting polyurethane resins and dimensionally accurate<br />
prototype parts.<br />
PlatSil ® 73 Series - High-tear strength, tough, platinumcured<br />
silicone systems with hardness up to A60.<br />
Excellent for casting polyurethane foams and<br />
dimensionally accurate prototype parts.<br />
PlatSil ® Gel 10 - A soft, translucent rubber for delicate<br />
casting projects and special effects applications.<br />
Mix Ratios Vary! Check the mix ratios for the specific product<br />
you are using. For Poly-Sil rubbers, most mix ratios are<br />
expressed by weight. Carefully weigh Parts A and B in proper<br />
ratio. Accurate weighing is essential to obtain optimum physical<br />
properties from the cured rubber. Weigh Part B into a clean<br />
metal or plastic mixing container. Then weigh the appropriate<br />
amount of Part A into the same container. Mix thoroughly,<br />
scraping sides and bottom of the container. Hand mixing with a<br />
Poly Paddle (see p. 62) is best to avoid mixing air into the rubber.<br />
To ensure a bubble-free mold, deaerate the liquid rubber under<br />
vacuum at 28-29 inches mercury until the mass of rubber rises<br />
and then collapses. Deaerate for an additional 2 minutes. For<br />
vacuuming, use a mixing container 3 to 4 times larger than the<br />
volume of rubber. Pour the rubber as soon after mixing as possible<br />
for best flow and air bubble release.<br />
If reinforcement of the rubber is needed (i.e., in thin blanket<br />
molds), place stretchy, open mesh nylon or dacron cloth into the<br />
uncured rubber. Be sure that the fabric is not too close to the<br />
mold surface or the weave of the cloth may show through to the<br />
face of the mold.<br />
Check product labels or technical bulletins to determine cure<br />
times. To reach full hardness in the specified demold time,<br />
temperature should be above 77°F (25°C). At lower temperatures,<br />
more time may be needed to reach full hardness. Curing below<br />
65°F (18°C) is not recommended. For most Poly-Sil products,<br />
final cure properties are obtained in about seven days, but most<br />
molds may be used with care after curing for 24 to 48 hours.<br />
USING THE MOLD<br />
No release agent is necessary for casting most materials in Poly-<br />
Sil molds. For longer mold life, however, a barrier coat or release<br />
agent (i.e., Pol-Ease ® 2300) is recommended when casting epoxy,<br />
40<br />
(610)559-8620 • (800)858-5990
Silicone RTV Mold Rubbers 3<br />
polyurethane or polyester resins. Most Poly-Sil molds can be<br />
stored for years, but tin-catalyzed silicone molds eventually<br />
deteriorate and lose their elasticity.<br />
ADDITIVES & ACCESSORIES<br />
<strong>Polytek</strong> offers various additives that can be used to vary the<br />
properties of the cured and uncured Poly-Sil rubbers.<br />
• Thinner/Softener - Very low viscosity 50 cSt Silicone Fluid<br />
can be added sparingly to the mixed rubber to thin the mix<br />
with some loss of strength, hardness and cure speed. More<br />
than 10% fluid addition may exude from the cured rubber.<br />
• Accelerator - A specially formulated accelerator can be<br />
added to most Poly-Sil products to reduce the cure time.<br />
• Thickener - Specially formulated chemical thickeners can<br />
be added to most Poly-Sil products to make the liquid<br />
rubber thicker (i.e., for brush-on application). Cab-O-Sil ®<br />
Fumed Silica, which is both a thickener and thixotropic<br />
agent, can also be added to mixed Parts A and B in order to<br />
form a gel appropriate for application by brush or trowel.<br />
• Colors - Certain Poly-Sil rubbers can be tinted to various<br />
shades by adding small amounts of colors.<br />
• Barrier Coat - A barrier coat (i.e., Barrier PF) is a fast<br />
drying, lacquer-like primer that is sprayed into a silicone<br />
mold and allowed to dry prior to pouring plastic. The<br />
plastic cures against the barrier coat and comes out on the<br />
plastic casting resulting in a pre-primed part. Using a<br />
barrier coat may extend mold life.<br />
To learn more about additives, refer to product technical<br />
bulletins or call <strong>Polytek</strong> Customer Service. See additives and<br />
accessories for Poly-Sil products in the box to the right.<br />
CLEAN UP<br />
Tools should be wiped clean before the rubber cures. Denatured<br />
ethanol is a good cleaning solvent, but it must be handled with<br />
extreme caution owing to its flammability and health hazards.<br />
SAFETY<br />
Before use, read product labels and Material Safety Data Sheets.<br />
Follow safety precautions and directions. Contact with uncured<br />
products may cause eye, skin and/or respiratory irritation. Avoid<br />
contact with skin and eyes. If skin contact occurs, remove with<br />
waterless hand cleaner or alcohol then soap and water. In case of<br />
eye contact, flush with water for 15 minutes and call a<br />
physician. Use only with adequate ventilation. Poly-Sil products<br />
are not to be used where food or body contact may occur.<br />
STORAGE LIFE<br />
At least six months in unopened containers stored at room<br />
temperature (60-90°F).<br />
TINSIL & PLATSIL ACCESSORIES<br />
Pol-Ease ® 2300 Release Agent<br />
12-oz can, case of 12 cans<br />
Pol-Ease ® 2350 Release Agent<br />
1 qt (1.5 lb), 5 gal (26 lb)<br />
Pol-Ease ® 2500 Release Agent<br />
12-oz can, case of 12 cans<br />
Silicone Fluid 50 cSt Grade<br />
For Thinning Poly-Sil ® Rubbers<br />
1 qt (2 lb), 1 gal (8 lb), 5 gal (40 lb)<br />
TinSil ® FastCat<br />
4 oz, 1 pt (1 lb), 1 gal (8 lb)<br />
TinThix<br />
4 oz, 1 pt (1 lb)<br />
PlatSil ® 71/73X Accelerator<br />
4 oz, 1 pt (1 lb), 1 gal (8 lb)<br />
PlatSil ® 71R Retarder<br />
4 oz, 1 pt (1 lb), 1 gal (8 lb), 5 gal (40 lb)<br />
PlatThix<br />
4 oz, 1 pt (1 lb)<br />
Barrier PF<br />
1 qt (1.5 lb), 5 gal (35 lb)<br />
Cab-O-Sil ® /Fumed Silica<br />
5 gal, 1 bag (10 lb)<br />
Smith’s Theatrical Prosthetic Deadener<br />
1 qt (2 lb), 1 gal (8 lb), 5 gal (40 lb)<br />
Silicone<br />
Mold Rubber<br />
CAUTION! -- Certain chemicals cause cure<br />
inhibition in silicone rubbers. Beware of amines,<br />
polyesters and tin compounds with PlatSil<br />
systems. Sulfur compounds can affect both<br />
PlatSil and TinSil systems. Perform a test cure!<br />
Poly-Sil ® rubber blanket molds reproduce the fine details of models<br />
and are soft and tough enough to easily pull off complex castings.<br />
Usually, the more intricate the model/casting, the softer the mold<br />
rubber selected. This very ornate column capital was easily cast<br />
in TinSil ® 70-11. The gargoyle mold was made using PlatSil ® 71-<br />
20. The large, multi-piece, Ronald McDonald ® mold was made<br />
using TinSil ® 70-30 to cast numerous polyester resin parts.<br />
www.polytek.com<br />
41
3 Silicone RTV Mold Rubbers<br />
TinSil ®<br />
70 Series<br />
Silicone<br />
Mold Rubber<br />
DESCRIPTION: TinSil ® 70 Series RTV Silicone Rubbers are<br />
condensation-cure, tin-catalyzed, flexible mold rubbers. TinSil<br />
products consist of a liquid Part B base and Part A accelerator,<br />
which, after mixing at the proper ratio by weight, cure at room<br />
temperature to rubber with a tough, knotty tear property. TinSil<br />
molds have easy release properties and are resistant to high<br />
temperatures. TinSil molds are excellent for casting polyesters,<br />
epoxy and polyurethane resins; waxes and many other materials.<br />
Choose the appropriate hardness of rubber for your application.<br />
• TinSil 70-11, 70-20 and Gel-10 are soft and, therefore, best<br />
for delicate castings. Gel-10 is translucent and especially<br />
useful for animatronics and special effects.<br />
• TinSil 70-25 and 70-30 are <strong>Polytek</strong>’s most popular and<br />
versatile, mid-range hardness, silicone rubbers.<br />
• TinSil Spray-25 is sprayable or brushable and can be<br />
applied by hand or sprayed with a low-cost Plas-Pak spray<br />
gun or more sophisicated 1A:10B silicone spray equipment.<br />
Spray 25 is great for large scale blanket molds!<br />
• TinSil 70-39 is firm with excellent tear properties making it<br />
popular for casting polyurethane foams and plastic prototypes.<br />
• TinSil 70-60 is stable at higher temperatures making it<br />
suitable for casting low melting metals. TinSil 70-60 has<br />
limited tear strength because of its hardness.<br />
MODEL PREPARATION: See p. 40.<br />
MIXING AND CURING: See p. 40. CAUTION! TinSil products<br />
release alcohol while curing, which results in slight shrinkage of<br />
the rubber (up to 1%) and can inhibit the surface cure of some<br />
polyurethanes. If shrinkage cannot be tolerated, consider PlatSil<br />
rubbers. Before casting polyurethanes in a TinSil mold, evaporate<br />
alcohol by letting the mold sit in a warm location for 24 hours or<br />
by baking the mold for 4 hours at ~200°F.<br />
USING THE MOLD: See p. 40. [Note: Molds made with excess<br />
catalyst may be subject to faster degradation on aging.]<br />
ACCELERATING CURE SPEED: Use TinSil FastCat in place<br />
of any TinSil Part A in order to accelerate cure and shorten<br />
demold time. FastCat can be used in a range of 2-6 parts per 100<br />
parts B; see product technical bulletin for details. Use of FastCat<br />
can shorten the library life of cured TinSil rubber.<br />
THICKENING FOR BRUSH ON: Add TinThix liquid<br />
thickener or Cab-O-Sil ® to liquid TinSil rubbers for brushing on<br />
a blanket mold. TinThix can be mixed into the Part B (before<br />
mixing with Part A) to achieve varying levels of thixotropy.<br />
ACCESSORIES: See box on p. 41.<br />
SAFETY: See p. 41.<br />
TinSil Physical Properties<br />
70-11 & Gel-10 70-20 70-25 Spray-25 70-30 70-39 70-60<br />
Mix Ratio (By Weight) 1A:10B 1A:10B 1A:10B 1A:10B 2A:100B 1A:10B 5A:100B<br />
Hardness, Shore A 10 20 25 25 30 40 60<br />
Pour Time (min) 45 60 60 30 60 45 30<br />
Demold Time @ 77°F (hr) 16 16 16 16-24 24 16 24<br />
Color Blue (70-11) Blue Blue Translucent Beige Blue Red<br />
Transluscent (Gel-10)<br />
Mixed Viscosity (cP) 10,000 10,000 14,000 Thixotropic 26,000 25,000 17,000<br />
Specific Volume (in 3 /lb) 25.3 25.3 25.3 25.3 25.3 21.7 18<br />
Specific Gravity 1.1 1.1 1.1 1.1 1.1 1.27 1.5<br />
Shrinkage Upon Cure (%) ~0.3 ~0.3 ~0.3 ~0.3 ~0.3 ~0.3 ~0.8<br />
TinSil Product<br />
Gel-10, 70-11, 70-20, 70-25, Spray<br />
25 and 70-39<br />
Mix Ratio 1A:10B<br />
70-30<br />
Mix Ratio 2A:100B<br />
70-60<br />
Mix Ratio 5A:100B<br />
TinSil Packaging<br />
Unit Sizes (lb) Part A (lb) Part B (lb)<br />
1.0<br />
2.0 (Spray 25 Cartridge)<br />
9.0<br />
44.0<br />
495<br />
1.02<br />
8.3<br />
40.8<br />
448.8<br />
1.05<br />
8.4<br />
42.0<br />
0.1<br />
0.2<br />
0.9<br />
4.0<br />
45.0<br />
0.02<br />
0.2<br />
0.8<br />
8.8<br />
0.05<br />
0.4<br />
2.0<br />
0.9<br />
1.8<br />
8.1<br />
40.0<br />
450<br />
1.0<br />
8.1<br />
40.0<br />
440<br />
1.0<br />
8.0<br />
40.0<br />
42<br />
(610)559-8620 • (800)858-5990
Silicone RTV Mold Rubbers 3<br />
PlatSil ®<br />
71 Series<br />
DESCRIPTION: PlatSil ® 71 Series RTV Silicone Rubbers are<br />
two-component, addition-cure, platinum-catalyzed, flexible mold<br />
compounds. The 71 Series products exhibit a tough, knotty tear,<br />
making them especially valuable to the mold making industry.<br />
They are excellent mold materials for casting polyester, epoxy<br />
and polyurethane resins, as well as for waxes and many other<br />
materials. PlatSil 71 Series products offer advantages over tincatalyzed<br />
systems in certain applications because on curing they<br />
don’t shrink and don’t produce alcohol (like tin-catalyzed<br />
silicones), which can inhibit polyurethane castings.<br />
MODEL PREPARATION: See p. 40.<br />
MIXING & CURING: See p. 40.<br />
USING THE MOLD: See p. 40.<br />
ACCELERATING CURE SPEED: Accelerate the cure with heat<br />
or the addition of PlatSil 71/73X. Mix 71/73X with Part B prior<br />
to adding Part A. Weigh and add Part A to the accelerated Part B<br />
mixture and mix thoroughly. Pour over a properly prepared<br />
model as soon after mixing as possible. The addition of 1 part<br />
71/73X per 100 parts of Part B decreases the gel time to ~1/3 the<br />
normal gel time. The addition of 2 parts decreases the normal gel<br />
time to ~1/4. The addition of 3 parts decreases the normal gel<br />
time to ~1/6. Experimentation on a small scale is recommended<br />
before making a larger mix.<br />
FEATURES<br />
• Easy mix ratios; some 1:1 mixes available<br />
• Cure at room temperature or accelerate with heat<br />
• Easy release properties -- save on release agents<br />
• High tear strength -- fewer prematurely torn molds<br />
• Good chemical resistance for longer mold life<br />
• Low/zero shrinkage for dimensional reproduction<br />
• Range of hardnesses from A10 to A40<br />
RETARDING CURE SPEED: PlatSil 71R added to PlatSil<br />
Part A prior to mixing with Part B slows the cure yielding longer<br />
working time and longer demold time. Adding ~1% of 71R to<br />
the total mixed weight of PlatSil A+B roughly doubles the<br />
working time. Adding ~2% of 71R triples working time. Do not<br />
use more than 4% as the system may not cure at all.<br />
THICKENING FOR BRUSH ON: For brushing on skin mold,<br />
thicken PlatSil 71 Series rubbers with PlatThix or Cab-O-Sil.<br />
When brushing PlatSil 71-11 or 71-20, apply subsequent coats to<br />
the previous layer within one hour to obtain best adhesion.<br />
ACCESSORIES: See box on p. 41.<br />
SAFETY: See p. 41.<br />
Silicone<br />
Mold Rubber<br />
PHYSICAL PROPERTIES<br />
71-10 71-11 71-20 71-30 71-35 71-40<br />
Mix Ratio (By Weight) 1A:10B 1A:1B 1A:1B 1A:10B 1A:10B 1A:5B<br />
Hardness, Shore A 10 10 20 30 35 40<br />
Pour Time (min) 5 20 25 60 60 60<br />
Demold Time (hr) @ 77°F 0.5 4 4 24 24 24<br />
Color Pink Blue Green Lt. Purple Lt.Green Blue Hazy transparent<br />
Mixed Viscosity (cP) 3,500 6,000 12,000 25,000 25,000 25,000<br />
Specific Volume (in 3 /lb) 26 24.7 24.7 24.7 24.7 25<br />
Specific Gravity 1.06 1.12 1.12 1.12 1.12 1.10<br />
Shrinkage Upon Cure Nil Nil Nil Nil Nil Nil<br />
PACKAGING<br />
Product Unit Weight Size Net Weight (lb)<br />
(lb) A B A B<br />
PlatSil ® 71-11, 71-20 2.0 1 pt 1 pt 1.0 1.0<br />
Mix Ratio 1A:1B 16.0 1 gal 1 gal 8.0 8.0<br />
80 5 gal 5 gal 40.0 40.0<br />
PlatSil ® 71-10, 71-30, 71-35 1.0 4 oz 1 pt 0.1 0.9<br />
Mix Ratio 1A:10B 9.0 1 pt 1 gal 0.9 8.1<br />
44.0 ½ gal 5 gal 4.0 40.0<br />
495 6 gal 55 gal 45.0 450<br />
PlatSil ® 71-40 9.8 1 qt 1 gal 1.7 8.1<br />
Mix Ratio 1A:5B 48.0 1 gal 5 gal 8.0 40<br />
528 2 x 6 gal 55 gal 88 440<br />
www.polytek.com<br />
43
3 Silicone RTV Mold Rubbers<br />
PlatSil ®<br />
73 Series<br />
Silicone<br />
Mold Rubber<br />
DESCRIPTION: PlatSil ® 73 Series RTV Silicone Rubbers are<br />
two-component, high-tear strength, flexible mold compounds.<br />
The 73 Series rubbers are excellent mold materials for many<br />
casting materials including polyester, epoxy and polyurethane<br />
resins. PlatSil 73 Series silicones are addition-cure, platinumcatalyzed<br />
systems and offer advantages over tin-catalyzed<br />
systems in certain applications because on curing they don’t<br />
shrink, they don’t produce alcohol, which can inhibit urethane<br />
castings, and their cure can be heat accelerated.<br />
MODEL PREPARATION: See p. 40.<br />
MIXING & CURING: See p. 40.<br />
USING THE MOLD: See p. 40.<br />
ACCELERATING CURE SPEED: Accelerate the cure with<br />
heat or the addition of PlatSil 71/73X. Weigh and add 71/73X to<br />
Part B and mix. Weigh and add Part A to the accelerated Part B<br />
mixture and mix thoroughly. Pour over a properly prepared<br />
model as soon after mixing as possible. Demold when tack free.<br />
The addition of 1 part 71/73X per 100 parts of Part B decreases<br />
the gel time to ~35 min. The addition of 2 parts decreases the gel<br />
time to ~30 min. The addition of 3 parts decreases the gel time to<br />
~25 min. The addition of 71/73X softens the cured rubber<br />
slightly. Remember, heat accelerates the cure; low temperatures<br />
slow the cure.<br />
FEATURES<br />
• Low viscosity for excellent detail reproduction and<br />
easy degassing.<br />
• Easy 10A:100B mix ratio -- can use with<br />
dispensing machines<br />
• Cure at room temperature or accelerate with heat<br />
• Easy release properties -- save on release agents<br />
• High tear strength -- fewer prematurely torn molds<br />
• Good chemical resistance for longer mold life<br />
• Low/zero shrinkage for better dimensional<br />
reproduction<br />
• Range of hardnesses from A30 to A60<br />
THICKENING FOR BRUSH ON: PlatSil 73 Series rubbers can<br />
be thickened with PlatThix liquid thickener or with Cab-O-Sil ®<br />
for brushing on a blanket mold.<br />
ACCESSORIES: See box on p. 41.<br />
SAFETY: See p. 41.<br />
PHYSICAL PROPERTIES<br />
73-29 73-45 73-60<br />
Mix Ratio, By Weight 10A:100B 10A:100B 10A:100B<br />
Hardness, Shore A 30 45 60<br />
Pour Time (min) 45 60 45<br />
Demold Time @ 77 o F (hr) 16 16 16<br />
Color White Green Blue<br />
Mixed Viscosity (cP) 15,000 35,000 40,000<br />
Specific Volume (in 3 /lb) 25.0 21.3 21.3<br />
Specific Gravity 1.10 1.30 1.30<br />
Shrinkage Upon Cure Nil Nil Nil<br />
PACKAGING<br />
PlatSil ® 73-29, 73-45, 73-60<br />
Mix Ratio 10A:100B<br />
Unit Weight<br />
Components<br />
(lb) Size Net Weight (lb)<br />
A B A B<br />
1.0 4 oz 1 pt 0.1 0.9<br />
9.0 1 pt 1 gal 0.9 8.1<br />
44.0 0.5 gal 5 gal 4.0 40.0<br />
495 (73-29) 6 gal 55 gal 45.0 450<br />
550 6 gal 55 gal 50.0 500<br />
44<br />
(610)559-8620 • (800)858-5990
PlatSil ® Gel-10<br />
Silicone RTV Mold Rubbers 3<br />
DESCRIPTION: Platil ® Gel-10, a translucent, soft rubber, is an<br />
excellent mold material for delicate casting projects and creating<br />
special effects. Gel-10 is a two-part, addition cure, liquid silicone<br />
system with an easy 1:1 mix ratio. After mixing Parts A and B,<br />
Gel-10 cures within 30 minutes at room temperature to a soft,<br />
tough rubber. Gel-10 does not shrink on curing.<br />
For special effects, soften PlatSil Gel-10 by adding Smith’s<br />
Theatrical Prosthetic Deadener. “Deadened” PlatSil Gel-10 is<br />
excellent for creating skins and self-sticking appliances.<br />
MODEL PREPARATION: See p. 40.<br />
MIXING AND CURING: See p. 40. Normal mixes gel in<br />
approximately 6 minutes at room temperature; faster if warm,<br />
slower if cold. Immediately place the mix over the model or in<br />
the mold. There is not normally adequate time for vacuum<br />
(unless retarder is used), but pressure casting may be useful to<br />
eliminate bubbles.<br />
Contamination with soaps, amines, sulfur, tin compounds and<br />
some RTV Silicone Rubbers may inhibit surface cure.<br />
USING THE MOLD: For best results, allow PlatSil Gel-10 to<br />
cure for at least 1 hour before use. No release agent is necessary<br />
for casting most materials in properly cured PlatSil Gel-10. For<br />
longer mold life, however, use a barrier coat or release agent<br />
when casting epoxy, polyurethane or polyester resins.<br />
ACCELERATING CURE SPEED:Mix PlatSil 71/73X into<br />
Part B prior to adding Part A to accelerate gel time and cure. See<br />
product technical bulletin for details.<br />
RETARDING CURE SPEED: Add PlatSil 71R to Part A prior<br />
to mixing with Part B to slow the cure for longer working time<br />
and demold time. Add 71R at 1% of the weight of total mix<br />
(A+B) to double the working time. Add up to 5% for a 60-<br />
minute work time with 120-minute demold time.<br />
THICKENING FOR BRUSH ON: Thicken with TinThix liquid<br />
thickener or with Cab-O-Sil ® for brush-on application. Add 1%<br />
TinThix to the total mix weight for a light-bodied, non-sag gel.<br />
SMITH’S THEATRICAL PROSTHETIC DEADENER: Add<br />
up to 250% of Smith’s Deadener to the total Gel-10 mix weight<br />
(A+B) to create super soft, gel-like, self-sticking prosthetics or<br />
gel-filled appliances. If applied behind a casting of straight<br />
PHYSICAL PROPERTIES<br />
Mix ratio, by weight<br />
1A:1B<br />
Hardness, Shore A 10 + 2<br />
Pour time, minimum<br />
6 min<br />
Demold time @ 25°C (77°F)<br />
30 min<br />
Color<br />
Colorless<br />
Viscosity, mixed<br />
15,000 cP<br />
Specific volume (in 3 /lb) 25<br />
Specific gravity @ 25°C (77°F) 1.10<br />
Shrinkage upon cure<br />
Nil<br />
www.polytek.com<br />
FEATURES<br />
• Soft (~A10), translucent, silicone rubber<br />
• Easy 1:1 mix ratio<br />
• Fast 30-minute demold with 6-minute work time<br />
• PlatSil ® 71R Retarder slows the cure<br />
• PlatSil ® 71/73X Accelerator speeds the cure<br />
• PlatThix thickens the mix to a brushable paste<br />
• Bonds to Poly Plastics<br />
PlatSil Gel-10, the underlying gel can mimic the slow stretch and<br />
recovery properties of human tissue. Pigments can be added to<br />
PlatSil Gel-10 and/or Deadener to achieve any color needed.<br />
The term “deadener” was coined by Gordon Smith of FXSmith, who<br />
developed this additive. Deadened Gel-10 does not have the springy,<br />
snappy feel typical of silicone rubber, but rather resembles the feel of<br />
human tissue. Go to www.fxsmith.com for more information.<br />
BONDING TO PLASTICS: PlatSil Gel-10 bonds to clean,<br />
cured Poly 15 Series plastics that are less than 24-hours old. See<br />
product technical bulletin for details.<br />
ACCESSORIES: See box on p. 41.<br />
SAFETY: See p. 41.<br />
Unit Weight<br />
PACKAGING<br />
Mix Ratio: 1A:1B (By Volume)<br />
David Gavin and<br />
colleagues from Arran<br />
Studios in Cork, Ireland,<br />
proudly display their<br />
Velociraptor casting made<br />
with life-like PlatSil ® Gel-10<br />
skin.<br />
PlatSil ® Gel-10 makes<br />
great animatronic skins.<br />
The product can be<br />
softened with the addition<br />
of Silicone Fluid and<br />
colored to make the look<br />
and feel just right.<br />
Containers<br />
(lb) Size Net Weight (lb)<br />
A B A B<br />
2.0 1 pt 1 pt 1.0 1.0<br />
16.0 1 gal 1 gal 8.0 8.0<br />
80.0 5 gal 5 gal 40.0 40.0<br />
Silicone<br />
Mold Rubber<br />
45
4 Casting Plastics/Resins<br />
Casting & Mold Shell Plastics<br />
Casting Plastics<br />
<strong>Polytek</strong> liquid plastics are two-part systems that can be used to<br />
cast decorative objects, parts, tools, and patterns as well as to create<br />
lightweight mold shells to support brushed or sprayed blanket<br />
molds. <strong>Polytek</strong> plastics can mimic materials of nearly any density<br />
and appearance including lightweight foams, thermoplastics,<br />
glass, wood, stone and metals. The products can be poured, layed<br />
up or sprayed to accommodate any size casting or object. Varying<br />
viscosities, pot-lives, cure times and physical properties allow the<br />
user to choose a plastic tailored to their particular needs. The versatility<br />
of <strong>Polytek</strong> Plastics is unlimited.<br />
MOLD PREPARATION<br />
Before pouring or applying liquid casting plastics, be sure that the<br />
surface is properly prepared in order to prevent the plastic from<br />
sticking or foaming. Polyethylene and silicone rubber molds, such<br />
as TinSil ® and PlatSil ® products, do not require a release agent, but<br />
a barrier coat may be helpful. Latex, polyurethane rubber or metal<br />
molds must be dry and require a coat of Pol-Ease ® 2300 Release<br />
Agent. A trial casting or application should be made to avoid damaging<br />
a valuable mold and/or wasting liquid plastic.<br />
When using Poly Plastics to create lightweight mold shells, prepare<br />
the rubber mold surface as described on p. 20. Poly 15-6,<br />
1511 and Poly 1512X can be mixed with Poly Fiber to thicken the<br />
pourable plastics to a thixotropic consistency that can be applied<br />
to vertical and horizontal surfaces like frosting a cake. This<br />
process is described in more detail on p. 22.<br />
MIXING<br />
Before mixing resins, be sure that both Parts A and B are at room<br />
temperature and that all tools and molds are ready to go! Use<br />
metal or plastic mixing vessels (i.e., polyethylene pail) and spatulas<br />
to avoid introducing moisture. Check product labels or technical<br />
bulletins to determine working time for the product -- some<br />
products set fast -- meaning that you must work quickly. Some<br />
<strong>Polytek</strong> plastics require stirring before use. If there is a “Stir<br />
Before Use” label on the container -- be sure to do so.<br />
Mix Ratios Vary! Check the mix ratios for the specific product<br />
you are using. Carefully weigh/measure Parts A and B in proper<br />
ratio. Accurate weighing/measuring is essential to obtain optimum<br />
physical properties from the cured plastic. Weigh/measure<br />
Part B into a clean metal or plastic mixing container. Then<br />
weigh/measure the appropriate amount of Part A into the same<br />
container. Mix thoroughly, scraping sides and bottom of the container.<br />
Hand mixing with a Poly Paddle (see p. 62) is best to avoid<br />
mixing air into the plastic. Pour mix into mold cavity or apply to<br />
surface as soon after mixing as possible.<br />
Once the containers of Parts A and B are opened, they should be<br />
used completely or resealed tightly as atmospheric moisture can<br />
react with the Part A or may cause foaming of the plastic. Poly<br />
Purge , a dry gas product, can be sprayed into opened containers<br />
of liquid plastics to lengthen shelf life once opened.<br />
POLYTEK PLASTICS: AT A GLANCE<br />
EasyFlo Series - Low viscosity, 1:1 mix by volume,<br />
fast-setting plastics. <strong>Polytek</strong>’s easiest-to-use and bestselling<br />
plastics!<br />
Poly 15-Series - Strong plastics with varying densities:<br />
some are like thermoplastics, others like stone.<br />
Poly PT Series - Strong, fast-curing, flame-retardant<br />
plastics for prototyping and model making. Also available<br />
in low-viscosity, fast-curing rubber formulations.<br />
Request Technical Bulletin for details.<br />
Poly-Optic ® 14 Series - Water clear, non-yellowing casting<br />
resins for speciality applications demanding clear,<br />
bubble-free castings.<br />
PolyFoam Series - Low viscosity, 1:1 mix ratio, fastsetting<br />
rigid and flexible foams.<br />
Poly LiteCast - Easy, 1:1 mix ratio plastic with a woodlike<br />
density.<br />
Poly Plasti-Flex - Innovative flexible plastic for architectural<br />
moldings that bend, props and more.<br />
Polygel ® Plastic-75 - Thickens to a paste upon mixing<br />
and cures in 2-4 hours. Makes great mold shells fast.<br />
Polygel ® Shell - A sprayable plastic for creating mold<br />
shells, sprayed-up castings or surface hardcoats.<br />
Polypoxy ® Resins & Poly Cures - Epoxy systems for<br />
creating various castings including decorative bonded<br />
bronzes and tools that can withstand high heat.<br />
CURING<br />
Castings should be allowed to remain in the mold until thoroughly<br />
cured. Parts demolded too soon may be subject to deformation.<br />
Use of pre-warmed molds will hasten curing. Mold shells should<br />
not be demolded until fully cured to prevent distortion or warping.<br />
Check product labels or technical bulletins to determine appropriate<br />
demold times. To reach full hardness in the specified demold<br />
time, temperature should be above 77°F (25°C). At lower temperatures,<br />
more time may be needed to reach full hardness. Curing<br />
below 65°F (18°C) is not recommended. For most <strong>Polytek</strong> plastics,<br />
final cure properties are obtained in within 7 days.<br />
ADDITIVES & ACCESSORIES<br />
<strong>Polytek</strong> offers various additives and accessories that can be used<br />
to vary the properties of the cured plastics and/or make using the<br />
plastics easier.<br />
• Accelerator/Retarder - Specially formulated chemical accelerators<br />
or retarders can be added to <strong>Polytek</strong> liquid plastics to<br />
vary the cure time.<br />
• Fillers - Dry fillers or metal powders can be added to <strong>Polytek</strong><br />
liquid plastics to vary the density and look of the cured pieces.<br />
Also, fillers can be added to make the liquid plastic thicker<br />
(i.e., for brush-on or trowel application).<br />
46<br />
(610)559-8620 • (800)858-5990
• Foamer - A chemical foamer can be added to some liquid<br />
plastics to turn them into foams.<br />
• Colors - PolyColors can be added to liquid plastics (see p. 61).<br />
• Barrier Coat - A barrier coat (i.e., Barrier PF) is a fast drying,<br />
lacquer-like primer that is sprayed into a silicone mold and<br />
allowed to dry prior to pouring plastic. The plastic cures<br />
against the barrier coat and comes out on the plastic casting<br />
resulting in a primed part. Using a barrier coat often extends<br />
mold life.<br />
To learn more about additives, refer to product-specific technical<br />
bulletins or call <strong>Polytek</strong> Customer Service. Additives and accessories<br />
for <strong>Polytek</strong> plastics are listed in the box to the right.<br />
FINISHING<br />
Many cured plastics yellow slightly and chalk when exposed to<br />
sunlight and, therefore, should be painted or sealed for exterior<br />
use. If they are to be painted or coated, adhesion of the coating<br />
should be checked carefully over a period of time to determine<br />
that it is satisfactory for the intended use. If all mold release is<br />
removed by detergent washing, most oil paints work well.<br />
Castings can be drilled, sanded and machined.<br />
CLEAN UP<br />
Tools should be scraped clean before the plastic is hard.<br />
Denatured ethanol is a good cleaning solvent, but it must be handled<br />
with extreme caution owing to its flammability and health<br />
hazards. Work surfaces can be waxed or coated with Pol-Ease<br />
2300 Release Agent so cured rubber can be removed.<br />
SAFETY<br />
Before use, read product labels and Material Safety Data Sheets.<br />
Follow safety precautions and directions. Contact with uncured<br />
products may cause eye, skin and/or respiratory irritation. Avoid<br />
contact with skin and eyes. If skin contact occurs, remove with<br />
waterless hand cleaner or alcohol then soap and water. In case of<br />
OTHER SUPPLIERS FOR FILLERS<br />
3M - Lightweight fillers, Glass Bubbles<br />
(800) 541-6752<br />
Ball Consulting ltd - Brass, copper and silver powders<br />
(800) 225-2673<br />
Imerys Inc. (formerly Georgia Marble Co.) - Marble powders<br />
(888) 277-9636<br />
Mahogany Co. - Various fillers<br />
(609) 625-8101<br />
PQ Corp. - Lightweight fillers, Extendospheres, Q-cells<br />
(800) 252-0039<br />
The R.J. Marshall Co. - Aluminum Tihydrate, OnyxFill, etc.<br />
(248) 353-4100<br />
Trelleborg Fillite Inc. - Hollow ceramic microspheres<br />
(770) 729-8030<br />
Casting Plastics/Resins 4<br />
eye contact, flush with water for 15 minutes and call a physician.<br />
Use only with adequate ventilation. <strong>Polytek</strong> plastics are not to be<br />
used where food or body contact may occur. Plastics burn readily<br />
when ignited. Care should be taken with sanding dust and other<br />
easily ignitable forms of these products.<br />
STORAGE LIFE<br />
<strong>Polytek</strong> liquid plastics can be stored for at least six months in<br />
unopened containers stored at room temperature (60-90°F). Cured<br />
plastics will last indefinitely, but may discolor as noted above.<br />
In order to maintain dimensions, Poly Plastic mold shells must be<br />
stored in temperatures
4 Casting Plastics/Resins<br />
Casting Plastics<br />
EasyFlo Series Liquid Plastics<br />
DESCRIPTION: EasyFlo Liquid Plastics are excellent for casting<br />
decorative objects, production parts, tools, models, duplicate<br />
masters and more. EasyFlo systems consist of two parts (A and B)<br />
that, after mixing, quickly cure to tough polyurethane plastics.<br />
Since Parts A and B are super- low viscosity liquids, they are easy<br />
to mix, provide excellent detail penetration, and make bubble-free<br />
castings without vacuum degassing or pressure casting techniques.<br />
Rapid demold times make EasyFlo ideal for high-volume, fastcast<br />
applications. Choose the EasyFlo Liquid Plastic that’s best for<br />
your application:<br />
• EasyFlo 60 pours like water, so making bubble free parts is<br />
easy and fast (2-min working time, 10-min demold).<br />
• EasyFlo 95 is useful when longer working time (5 min) is<br />
needed to complete a pour. For thin parts, demold time is<br />
longer and molds may need to be preheated (100-120°F) to<br />
reduce surface bubbles and speed demold.<br />
• EasyFlo 120 is best for rotocasting or slush casting to create<br />
hollow parts. Hollow parts are nearly unbreakable!<br />
• EasyFlo Clear cures to a pale amber color. Add PolyColors to<br />
make transparent, colored castings. It’s excellent in applications<br />
using fillers intended for visual appeal (e.g., bronze). Heated<br />
molds and pressure casting techniques are recommended.<br />
MOLD PREPARATION: See p. 46.<br />
MIXING: Measure equal volumes of A and B into a mixing container<br />
such as a polyethylene pail. Mix immediately and thoroughly<br />
for one minute. See p. 46 for more information.<br />
PHYSICAL PROPERTIES<br />
EasyFlo Product 60 95 120 Clear<br />
Mix Ratio, By Volume 1A:1B 1A:1B 1A:1B 1A:1B<br />
Mix Ratio, By Weight 100A:90B 100A:90B 100A:90B 100A:90B<br />
Hardness, Shore D 65 65 65 72<br />
Pour Time (min; 1-lb mix) 2-2.5 5 2-2.5 2-2.5<br />
Demold Time (min) 15-30 20-60 15-30 15-30<br />
Specific Gravity 1.03 1.03 1.03 1.03<br />
Cured Color White Off White White Amber<br />
Initial Mixed Viscosity (cP) 60 95 120 110<br />
Specific Volume (in 3 /lb) 26.9 26.9 26.9 26.9<br />
Maximum Exotherm (°F) 230 206 200 208<br />
PACKAGING<br />
Product(s) Part A (lb) Part B (lb) Unit<br />
EasyFlo 60, 95,<br />
120, & Clear<br />
1 qt (2.0)<br />
1 gal (8.0)<br />
5 gal (40.0)<br />
55 gal (450)<br />
1 qt (1.8)<br />
1 gal (7.2)<br />
5 gal (36.0)<br />
55 gal (405)<br />
3.8 lb<br />
15.2 lb<br />
76.0 lb<br />
855 lb<br />
FEATURES<br />
• Easy 1:1 mix ratio by volume<br />
• Extremely low viscosity -- pours like water<br />
• Sets fast with rapid demold<br />
• Reproduces finest details<br />
• Tough, non-brittle formula<br />
• Excellent bubble release without vacuum or pressure<br />
• Readily accepts high filler levels<br />
• Low odor<br />
CURING: See p. 46.<br />
ADDITIVES: Various fillers (bronze powder, microballoons, calcium<br />
carbonate, sand, granite, etc.) can be added as desired. Fillers<br />
must be thoroughly dried before mixing with resin.<br />
PolyColors (see p. 61) can be added to EasyFlo Part B before mixing<br />
with Part A to create plastic of any color desired.<br />
FINISHING: See p. 47.<br />
CLEAN UP: See p. 47.<br />
SAFETY: See p. 47.<br />
These bronze castings were<br />
created quickly and easily by<br />
mixing bronze powder with<br />
EasyFlo 60 Liquid Plastic.<br />
Large castings such as this<br />
10-inch tall Zeus head can be<br />
rotocast with EasyFlo 120 to<br />
create hollow parts weighing a<br />
fraction of the weight of solid<br />
castings.<br />
Note on Cold-Cast Bronze<br />
Bronze and other metal powders are rather expensive; but only a thin<br />
coating of resin mixed with bronze need be brushed or slush-cast<br />
against the face of the mold. Estimate the volume of liquid resin and<br />
bronze required by considering the surface area to be covered by the<br />
thinnest possible layer. If needed, multiple mixes can be made and<br />
patched one against the other before they fully cure. The recipe for<br />
the EasyFlo 60/bronze powder mix is as follows. Mix 1 part (by volume)<br />
EasyFlo 60 A with 1 part (by volume) EasyFlo 60 B and blend<br />
for a few seconds. Then add 2 parts (by volume) bronze powder to<br />
the mixed EasyFlo and mix well to wet the powder. This mix will be<br />
thick and may not flow into all the mold detail, so brushing may be<br />
needed. Once the face of the mold is evenly coated with a thin layer<br />
of resin/bronze it can be back-filled with a heavy, solid pour resin<br />
such as 15-3X. 15-3X resin will make it "feel" like bronze without<br />
the cost of filling the entire space with expensive bronze powder.<br />
Once cured, the casting can be removed and burnished with 0000<br />
steel wool. Apply a patina by spraying green and black oil-based<br />
paint and wiping with mineral spirits or use a cold chemical patina<br />
such as Super Antik 40. The results can be amazing!<br />
48<br />
(610)559-8620 • (800)858-5990
Poly 15 Series Liquid Plastics<br />
Casting Plastics/Resins 4<br />
DESCRIPTION: Poly 15 Series Liquid Plastics are excellent for<br />
casting decorative fixtures, production parts, tools, models, patterns,<br />
duplicate masters, mold shells and more. Poly 15-6, 1510,<br />
1511, 1512 and 1512X Plastics have the feel and density of wood<br />
or thermoplastics. Poly 15-3 and 15-3X Plastics resemble stone.<br />
Poly 15-8 is an aluminum-filled system that is ideal for applications<br />
where heat resistance and thermal conductivity are required<br />
(i.e., vacuum forming). Poly 15-6, 1511 and 1512X can be mixed<br />
with Poly Fiber II to create tough, lightweight mold shells. With<br />
proper equipment and acceleration, Poly 1512 can be sprayed for<br />
hardcoating or to make sprayed-up castings. If water-clear, non-yellowing<br />
plastics are needed, consider Poly-Optic ® products (p. 51).<br />
MOLD PREPARATION: See p. 46.<br />
MIXING: See p. 46.<br />
CURING: See p. 46.<br />
ADDITIVES: Part 15X Catalyst increases the speed of curing (see<br />
box on next page). Stir Part X into Part B before adding Part A. A<br />
few drops in a 1-lb mix speeds the cure significantly. Exotherm<br />
(heat of reaction; see p. 6) and thus shrinkage may be increased.<br />
Experiment to determine the best amount of Part X to use, but<br />
never use more than 1% Part X of the total weight of the mix or<br />
the final physical properties may be affected.<br />
Part 15F Foamer can be added to Poly 15-6 and 1510 to create<br />
rigid, open-cell foams with densities as low as 6 lb/ft 3 . Part F<br />
Foamer should be stirred into the Part B before adding Part A.<br />
Experiment to determine the best amount of Part F for the application<br />
at hand, but never use more than 3% Part F of the total<br />
weight of the mix or the final physical properties may be affected.<br />
For self-skinning foams, consider PolyFoam products (see p. 53).<br />
If a paste-like consistency is needed for application, add Poly<br />
Fiber II to thicken the mix<br />
FEATURES<br />
• Easy -- 1:1 mix ratio formulations<br />
• Reproduces fine details<br />
• Can be machined, drilled, sanded<br />
• Tough and hard, but not brittle<br />
• Lightweight for mold shells<br />
• Low shrinkage upon cure<br />
• Air bubbles rise and break<br />
• Long working time or instant set with 15X<br />
• Low odor formula<br />
• Castable in large masses<br />
• Sprayable for hardcoating<br />
Add fillers as needed to vary the density and appearance of the<br />
cured plastic. Microballoons can be added to create a wood-like,<br />
density. Other fillers include metal (e.g., bronze) or stone (e.g.,<br />
calcium carbonate) powders. Add fillers after Parts A and B are<br />
mixed. Fillers must be thoroughly dried before mixing with resin.<br />
PolyColors (see p. 61) can be added to some 15 Series Part Bs<br />
before mixing with Part A to create colored plastics.<br />
FINISHING: See p. 47.<br />
STORAGE: In order to maintain dimensions, Poly Plastic mold<br />
shells must be stored in temperatures
4 Casting Plastics/Resins<br />
<strong>Polytek</strong> ® is proud to share<br />
its hometown, Easton, PA,<br />
with Crayola Inc. The larger-than-life<br />
crayons falling<br />
from the roof of the<br />
Crayola Factory Visitors<br />
Center were cast in Poly<br />
15-6 Liquid Plastic.<br />
Poly 15 Series Liquid Plastics reproduce the finest detail. Fillers<br />
can be added to Poly 15 Series Liquid Plastics to create castings<br />
with varying looks and densities.<br />
Effect of 15X Addition on Pot-Life and Demold Times<br />
% 15X Pre-<br />
Mixed with B<br />
Pot-Life<br />
(1-lb Mass)<br />
Demold Time<br />
(¼-in casting)<br />
Shore D<br />
@ Demold<br />
Shore D<br />
@ 24 hr<br />
Casting Plastics<br />
0.00 26 min 225 min 45-55 76<br />
0.10 8 min 16 min 38-55 76<br />
0.25 3 min 8 min 38-55 76<br />
0.50 1.75 min 6 min 38-55 76<br />
Note on Spraying Poly 1512X Plastic<br />
Poly 1512X accelerated with Poly 74/75 Part X can be sprayed<br />
using low cost spray equipment, such as Plas-Pak guns, or more<br />
sophisticated spray systems. The amount of 74/75 X required varies<br />
depending on temperature. Adding 1.35 g of 74/75 Part X to 1 lb of<br />
1512X Part B yields a 10 second working time sprayable plastic.<br />
Experiment to determine the amount of 74/75 X needed. Only spray<br />
in well ventilated areas such as a spray booth. For more information<br />
on Plas-Pak spray equipment, see p. 64.<br />
Mother Earth Float in Macy’s 74th Annual Thanksgiving Day<br />
Parade was hard-coated with Poly 1512X Liquid Plastic to create<br />
a tough, paintable surface. The float, sponsored by Maytag<br />
Neptune Washer, was built at Macy’s Parade Studio.<br />
15 Series Product<br />
Poly 15-3, 15-3X<br />
Mix Ratio 1A:1B<br />
Poly 15-6, 1510, 1511, 1512, 1512X<br />
Mix Ratio 1A:1B<br />
Poly 15-8<br />
Mix Ratio 26A:100B<br />
Packaging<br />
Unit Sizes (lb) Part A (lb) Part B (lb)<br />
5.0<br />
20.0<br />
100<br />
4.0<br />
16.0<br />
80.0<br />
900<br />
3.2<br />
12.0<br />
48.5<br />
1 qt (2.5)<br />
1 gal (10)<br />
5 gal (50)<br />
1 qt (2.0)<br />
1 gal (8.0)<br />
5 gal (40.0)<br />
55 gal (450)<br />
1 pt (0.7)<br />
1 qt (2.5)<br />
1 gal (10.0)<br />
1 qt (2.5)<br />
1 gal (10)<br />
5 gal (50)<br />
1 qt (2.0)<br />
1 gal (8.0)<br />
5 gal (40.0)<br />
11 x 5 gal (450)<br />
55 gal (450) 1510 only!<br />
1 qt (2.5)<br />
1 gal (9.6)<br />
5 gal (38.0)<br />
50<br />
(610)559-8620 • (800)858-5990
Poly-Optic ®<br />
DESCRIPTION: Poly-Optic ® 14 Series Casting Resins are twocomponent,<br />
polyurethane systems that were formulated specifically<br />
for applications where optical clarity is a must. Use Poly-Optic<br />
plastics for casting decorative objects, production parts, models<br />
and more. Castings are clear like water; however, PolyColor dyes<br />
can be added to obtain clear, colored castings. Poly-Optic systems,<br />
with their low viscosities and long pot-lives, provide for easy mixing,<br />
excellent detail penetration and easy degassing resulting in<br />
bubble-free castings when vacuum or pressure casting techniques<br />
are employed.<br />
Poly-Optic ® 1410 cures to a hard plastic that is virtually<br />
unbreakable. Cure 1410 at room temperature and, for optimum<br />
physical properties, post cure at 150°F.<br />
Poly-Optic ® 1411 is an easy 1A:1B, by volume system that cures<br />
quickly to a super-strong, hard plastic. Poly-Optic 1411 develops<br />
hardness and can be demolded more quickly than 1410. It also has<br />
a higher heat deflection temperature, which is useful in certain<br />
prototyping applications.<br />
Poly-Optic ® 1420 cures to a tough, impact- and heat-resistant<br />
plastic that can be polished and machined. For strong plastic, heat<br />
cure 1420 at 150-180°F. For brittle, glass-like castings, cure at<br />
room temperature.<br />
Poly-Optic ® 14-70 is a firm rubber. Blend 1410 and 14-70 to<br />
achieve any hardness between Shore D85 and Shore A70. (See<br />
table on next page.)<br />
MOLD PREPARATION: Poly-Optic products reproduce minute<br />
detail from a mold or pattern but may stick or foam when poured<br />
on improperly prepared surfaces. A trial casting on a surface finish<br />
similar to the final mold should be made to avoid damaging a<br />
valuable mold. Polyethylene and silicone rubber molds, such as<br />
PlatSil ® 71and 73 Series products, do not require a release agent.<br />
[CAUTION: Condensation-cure silicones (i.e., TinSil ® 70 Series)<br />
are not recommended for casting Poly-Optic since residual alcohol<br />
may inhibit the cure or result in hazy castings.] Latex,<br />
polyurethane or metal molds must be dry and require a coat of a<br />
suitable release agent, such as Pol-Ease ® 2300 Release Agent. For<br />
optically clear castings, use highly polished masters to create<br />
molds with excellent surface quality.<br />
Casting Plastics/Resins 4<br />
14 Series Clear Casting Resins<br />
PHYSICAL PROPERTIES<br />
FEATURES<br />
• Crystal clear, like water<br />
• Low viscosity for easy pouring<br />
• Reproduces fine detail<br />
• Can be machined, drilled and sanded<br />
• Long working time<br />
• Low shrinkage upon cure<br />
MIXING: See p. 46 for information on proper mixing.<br />
VACUUM DEGASSING OR PRESSURE CASTING: For<br />
bubble-free Poly-Optic castings, vacuum degassing or pressure<br />
casting must be employed. See page 16 for more information on<br />
vacuum and pressure. A light spray of Pol-Ease 2300 or quickly<br />
passing the flame of a torch over the back of the casting helps<br />
break any bubbles on the back of the pour.<br />
CURING: Poly-Optic 1410, 1411 and 14-70 cure at room temperature.<br />
For castings less than 0.25-inch thick, 1411 is recommended<br />
because it can be demolded more quickly in thin sections.<br />
For thinner castings, or when using Poly-Optic 1410 for thin parts,<br />
add Part 14X Catalyst or heat cure (8 hr at 140-150°F). Castings<br />
greater than 0.5-in thick do not require heat or 14X, but the addition<br />
or use of either will speed up the curing process considerably.<br />
Poly-Optic 1420 cures in 8 hours at 150°F, or 16 hours for optimum<br />
physical properties. If cured at a higher temperatures, parts<br />
may be demolded sooner (e.g., 30 min at 180°F depending on size.<br />
For brittle, glass-like parts, cure 1420 at room temperature.<br />
Wash mold release from surfaces prior to painting or bonding.<br />
ACCELERATING CURE SPEED: Mix Poly-Optic 14X<br />
Catalyst into Part B prior to adding Part A to accelerate the gel and<br />
cure time for Poly-Optic resins. 14X is recommended for castings<br />
less than 0.5-in thick. For best results, mix Parts A and B, degas if<br />
required, then add 14X and degas again if necessary. Adding 0.5%<br />
14X to the total mix weight speeds the cure significantly. For<br />
example, 0.5g 14X in a 100g mix of Poly-Optic 1410 halves the<br />
Poly-Optic ® Product 1410 1411 1420 14-70<br />
Mix Ratio 3A:2B, by weight 1A:1B, by volume 2A:1B, by weight 4A:5B, by weight<br />
Hardness (Shore A or D) D80 D80 D85 A70<br />
Pour time (min), 2-lb mix 15 9 15 15<br />
Maximum exotherm, 2-lb mass 265°F (129°C) 228°F (109°C) 311°F (155°C) 190°F (88°C)<br />
Demold time (hr)* 2 (1-in thick)* 0.5 (.5-in thick) 8 @150°F/0.5 @175°F 24-48<br />
Specific gravity 1.07 1.07 1.05 1.06<br />
Viscosity, 2 min after mixed (cP) 700 600 250 340<br />
Specific Volume, in 3 /lb 27.5 27.5 27.5 27.5<br />
* Demold time varies with thickness of casting and the amount of Part 14X Catalyst added.<br />
Casting Plastics<br />
www.polytek.com<br />
51
4 Casting Plastics/Resins<br />
Casting Plastics<br />
pour and cure time. Exotherm (heat of reaction; see p. 6) and thus<br />
shrinkage on cooling is also increased. Experiment to determine<br />
the best amount of 14X to use, but do not use more than 1% 14X<br />
because final physical properties may be affected.<br />
RETARDING CURE SPEED: Poly-Optic 14R Retarder slows<br />
the cure of Poly-Optic systems. Slowing the cure also reduces<br />
exothermic heating that can cause distortion, waviness and shrinkage<br />
especially in castings >0.5-inch thick. Add 1.5% 14R to the<br />
total mix weight of Poly-Optic 1410 to increase pot-life from 15<br />
minutes to 70 minutes. Add 1% 14R to 1411 to double the working<br />
time from 9 to 18 minutes. Depending on the size and mass of<br />
the part, post curing Poly-Optic 14-70 and 1410 parts in the mold<br />
at a minimum of 140°F for 12 to 16 hours may be necessary. The<br />
extended pot-life creates a lower exotherm upon curing, allowing<br />
larger castings to be made without distortion. Never use more than<br />
4% since the system may not cure properly. See table to right<br />
regarding 14R addition to 1410.<br />
COLORS: Add PolyColors (see p. 61) to 14 Series Part B before<br />
mixing with Part A to create clear plastics of any color.<br />
EXTERIOR USES: Although Poly-Optic 1410, 1411 and 1420<br />
are non-yellowing formulas, they are not recommended for longterm<br />
exterior use. Poly UV Additive can be added to improve<br />
durability for exterior applications. Add 1% UV Additive to the<br />
total mix weight of Poly-Optic to reduce the onset of chalking and<br />
pitting of the outside surface for ~2 years. Add 3% Poly UV<br />
Additive to achieve good exterior stability beyond 5 years.<br />
CLEAN UP: See p. 47.<br />
SAFETY: See p. 47.<br />
STORAGE LIFE: Poly-Optic liquids can be stored for at least 6<br />
months in unopened containers stored at room temperature. Poly-<br />
Optic Part As may crystallize slightly or become viscous during<br />
storage. If crystallization occurs warm the container to 100-120°F<br />
until crystals dissipate. Cool to room temperature before use.<br />
Product<br />
PACKAGING<br />
Unit Weight (lb)<br />
Poly-Optic ® 1410 10.0<br />
Mix Ratio 3A:2B 60.0<br />
Poly-Optic ® 1411 3.8<br />
Mix Ratio 1A:1B (By Volume) 15.2<br />
76.0<br />
Poly-Optic ® 1420 6.0<br />
Mix Ratio 2A:1B 24.0<br />
120.0<br />
Poly-Optic ® 14-70 14.4<br />
Mix Ratio 4A:5B 72.0<br />
Poly-Optic ® 1410 Gel Times with 14R Addition<br />
Weigh, add and mix 14R into 1410B. Weigh and add 1410A,<br />
plus one additional part A for every part of 14R used in the<br />
14R/1410B premix. Mix well. Pour into prepared mold. Degas<br />
or pressure cast for bubble-free castings.<br />
1410Part A 100 100.5 101 101.5<br />
1410Part B 66.6 66.6 66.6 66.6<br />
14R 0 0.5 1.0 1.5<br />
Gel Time<br />
(min)<br />
15 21 40 72<br />
Blending Poly-Optic ® 1410 and 14-70* for Various<br />
Hardnesses<br />
The clarity of Poly-Optic ®<br />
1410 is remarkable. This<br />
amazing negative sculpture<br />
comes to life with<br />
overhead lighting.<br />
1410 Part A 100 100 100 100 100<br />
1410 Part B 52 42 33 23 13<br />
14-70 Part B 25 44 62 82 100<br />
Shore A<br />
Hardness<br />
NA NA 95 88 75<br />
Poly-Optic ® 1410 Liquid<br />
Plastic was poured into<br />
a cylindrical mold to<br />
form a rod, which was<br />
softened in hot water<br />
and coiled around a<br />
mandrel. Once cooled, it<br />
holds its shape to form a<br />
tough, spring-like coil.<br />
Shore D<br />
Hardness<br />
87 77 60 37 25<br />
* Note: Premix Poly-Optic 1410 and 14-70 Part Bs prior to mixing<br />
with Part A. Poly-Optic 1410 and 14-70 Part As are the<br />
same; therefore, premixing Part As is not necessary.<br />
52<br />
(610)559-8620 • (800)858-5990
Casting Plastics/Resins 4<br />
PolyFoam Series Casting Foams<br />
DESCRIPTION: PolyFoam Series Casting Foams consist of liquid<br />
Parts A and B that, after mixing, form self-skinning foams.<br />
PolyFoam can be used to cast rigid or flexible objects with densities<br />
in the range of 3-20 lb/ft 3 . Considered PolyFoam for production<br />
of decorative objects, lightweight mold shells, production<br />
parts, tools, models, patterns, fixtures, duplicate masters and general<br />
tooling use. PolyFoam systems do not contain toluene diisocyanate,<br />
MOCA, heavy metals or HCFCs, and are practically<br />
odorless. PolyFoam R-2, R-5 and R-8 are rigid foams. PolyFoam<br />
F-5 is flexible for casting soft parts.<br />
MOLD PREPARATION: See p. 46. Be sure that rubber molds<br />
used with PolyFoam are stiff enough so as not to distort when subjected<br />
to packing pressures. Use a suitable barrier coat such as<br />
Barrier PF to extend mold life when using rigid foams. If Barrier<br />
PF is used, apply Pol-Ease ® PF Release Agent to the mold prior to<br />
applying Barrier PF.<br />
MIXING: See p. 46 for general guidelines. Combine Parts A and<br />
B and mix immediately with a Turbo mixer or other high speed<br />
mixer for 30 seconds. Pour mix into cavity as quickly as possible<br />
since foaming starts immediately. If too much time elapses, the<br />
foam will rise in the mixing container and the mix may be lost.<br />
Once containers of Parts A and B are opened, they should be used<br />
or resealed tightly as atmospheric moisture contamination may<br />
degrade product integrity causing excess foaming, pressure build<br />
up and poor cure properties. To improve shelf stability of the liquid<br />
products, use Poly Purge to displace moist air in opened A and<br />
B containers before resealing.<br />
CURING: Packing PolyFoams to a minimum of 2-3 lb/ft 3 above<br />
their free-rise density is recommended to achieve good surface<br />
detail and mold fill. A lid with small vents to allow air to escape<br />
as foam rises should be firmly clamped in place prior to rise. Once<br />
foam begins rising, avoid stirring or other movement that will<br />
cause cells to collapse. Castings should be allowed to remain in<br />
the mold until thoroughly cured. Parts demolded too soon may be<br />
subject to deformation. For best casting results, the mold should<br />
be warmed to between 75°F and 85°F prior to casting the first part.<br />
Once a mold is heated and cycled, it will maintain heat for continued<br />
production.<br />
FINISHING: See p. 47 for general guidelines. When casting rigid<br />
foams, the use of an appropriate primer/barrier coat, such as<br />
FEATURES<br />
• Easy 1:1 mix ratios<br />
• Self-skinning foams<br />
• Rigid and flexible foams<br />
• Densities range from 3 to 20 lb/ft 3<br />
POLYFOAM PHYSICAL PROPERTIES<br />
Mix Ratio<br />
(By Weight or Volume)<br />
R-2 R-5/R-8 F-5<br />
1A:1B 1A:1B 1A:1B<br />
Mix Viscosity (cP) 500 1100 1400<br />
Cream Time (sec) 30 45 45<br />
Rise Time (min) 3 2 3-5<br />
Tack-Free Time (min) 10 3 25<br />
Demold Time (min) 30 10-15 30-60<br />
Free-Rise Density (lb/ft 3 ) 2.5<br />
5 (R-5)<br />
8 (R-8)<br />
5<br />
Molded Density (lb/ft 3 ) 4-8 8-20 8-15<br />
Note on PolyFoam Compaction Calculation:<br />
Using the desired density or compaction in pounds per<br />
cubic foot (lb/ft 3 ), divide that number by 1728 cubic inches<br />
(in 3 ). The result will be a decimal “factor” (0.004576 or similar).<br />
Then multiply the volume of the space you want to fill<br />
with foam (in in 3 ) by the “factor.” The result equals the<br />
pounds of PolyFoam liquid to prepare.<br />
Barrier PF, sprayed and allowed to dry in the mold before casting<br />
will result in a pre-primed part upon demolding.<br />
CLEAN UP & SAFETY: See p. 47.<br />
Casting Plastics<br />
POLYFOAM PACKAGING<br />
Unit Weight (lb)<br />
Part A (lb)<br />
Components<br />
Part B (lb)<br />
PolyFoam R-2, R-5, R-8 and F-5<br />
Mix Ratio 1A:1B<br />
(By Weight or Volume)<br />
4.0<br />
16.0<br />
80.0<br />
900<br />
1 qt (2.0)<br />
1 gal (8.0)<br />
5 gal (40.0)<br />
55 gal (450)<br />
1 qt (2.0)<br />
1 gal (8.0)<br />
5 gal (40.0)<br />
55 gal (450)<br />
www.polytek.com<br />
53
Casting Plastics<br />
4 Casting Plastics/Resins<br />
Poly LiteCast Liquid Plastic<br />
DESCRIPTION: Poly LiteCast Liquid Plastic has a wood-like<br />
density and can be used to produce decorative objects, tools, models,<br />
patterns, fixtures and duplicate masters. Poly LiteCast reproduces<br />
fine details from molds and can be drilled, sanded and<br />
machined.<br />
MOLD PREPARATION: See p. 46.<br />
MIXING AND CURING: See p. 46. [Note: Stir both Parts A and<br />
B before use since the filler in Poly LiteCast rises to the top.]<br />
ADDITIVES: To accelerate the cure, add Part 15X Catalyst. A<br />
few drops of Part 15X added to one-pound of mixed Parts A and<br />
B speeds the cure significantly. When using Part 15X, exotherm<br />
(heat of reaction) increases and can result in shrinkage of the cast<br />
part. Experiment to determine the right amount of Part 15X to use<br />
but never use more than 1% of the total weight of the mix or the<br />
final physical properties may be affected.<br />
If a paste-like consistency is needed for brush-on or trowel application,<br />
add Poly Fiber or Cab-O-Sil ® to thicken the mix.<br />
PolyColors (see p. 61) can be added LiteCast Part B before mixing<br />
with Part A to create plastic of any color.<br />
CLEAN UP: See p. 47.<br />
SAFETY: See p. 47.<br />
FEATURES<br />
• Wood-like density<br />
• Easy 1:1 mix ratio by weight or volume<br />
• Safe and easy to machine, contains no silica<br />
• Tough and hard, but not brittle<br />
PHYSICAL PROPERTIES<br />
Mix Ratio, By Weight or Volume<br />
1A:1B<br />
Hardness, Shore D 55<br />
Pour Time, 1 lb. mix (min) 5<br />
Demold Time (hr) (varies with 15X) 1<br />
Viscosity, 2 min after mix (cP) 2,480<br />
Specific Volume (in 3 /lb) 35<br />
Unit Weight<br />
PACKAGING<br />
Containers<br />
(lb) Size Net Weight (lb)<br />
A B A B<br />
3 1 qt 1 qt 1.5 1.5<br />
12 1 gal 1 gal 6.0 6.0<br />
60 5 gal 5 gal 30.0 30.0<br />
Poly Plasti-Flex Liquid Plastic<br />
DESCRIPTION: Poly Plasti-Flex Liquid Plastic is flexible<br />
making it ideal for casting decorative trim and molding that needs<br />
to be mounted on a curved or uneven surface. Plasti-Flex can also<br />
be used to make special effects castings and props and impactresistant<br />
forms, tools and parts. Plasti-Flex has a wood-like density<br />
and can be drilled, sanded, nailed and screwed.<br />
MOLD PREPARATION: See p. 46.<br />
MIXING AND CURING: See p. 46.<br />
ADDITIVES: PolyColors (see p. 61) can be added Poly Plasti-<br />
Flex Part B before mixing with Part A to create plastic of any color.<br />
CLEAN UP & SAFETY: See p. 47.<br />
PACKAGING<br />
Unit Weight<br />
Containers<br />
(lb) Size Net Weight (lb)<br />
A B A B<br />
8.1 1 qt 1 gal 2.1 6.0<br />
38.5 1 gal 5 gal 10.0 28.5<br />
192.5 5 gal 5 x 5 gal 50.0 142.5<br />
FEATURES<br />
• FLEXIBLE!<br />
• Wood-like density<br />
• Safe and easy to machine, drill or sand (no silica)<br />
PHYSICAL PROPERTIES<br />
Mix Ratio, By Weight or Volume<br />
35A:100B<br />
Hardness, Shore A 90<br />
Pour Time, 1 lb. mix (min) 3<br />
Demold Time (min) ~15<br />
Viscosity, 2 min after mix (cP) 3,000<br />
Specific Volume(in 3 /lb) 34<br />
Poly Plasti-Flex architectural<br />
trim casting. The casting,<br />
which is held in a curved<br />
position, can be easily<br />
mounted on a curved surface.<br />
54<br />
(610)559-8620 • (800)858-5990
Polygel ® Liquid Plastics<br />
U.S. Patent # 5,128,433<br />
Casting Plastics/Resins 4<br />
DESCRIPTION: Polygel ® Plastics produce strong, light-weight<br />
mold shells and are ideal for shells built up with a brush or spatula<br />
on vertical or overhead surfaces. Sprayable Polygel Shell is<br />
ideal for large surface area applications where brushing may be<br />
impractical. Polygel products consist of liquid Parts A and B, that<br />
after mixing 1:1 by weight or volume, immediately self-thicken.<br />
MIXING & CURING: See p. 46 for general guidelines.<br />
For Polygel Plastic-75, mixing of Parts A and B should be rapid<br />
and thorough. Most mixing should be completed within ten seconds<br />
or so before gelling begins and while the mix is still liquid<br />
to minimize air entrapment. Mix only enough that can be applied<br />
during the working time. Polygel Plastic-75 generates heat when<br />
mixed, so use rubberized cotton gloves to ease handling of the hot<br />
container. Once mixed, dumping the thickened mix on the surface<br />
to be coated and quickly spreading into a thin layer will cool the<br />
mass and extend working time by a minute or two. Do not try to<br />
demold Polygel Plastic-75 until adequate cure time has elapsed as<br />
it may be somewhat brittle.<br />
Polygel Shell Plastic is a rapid-setting liquid plastic designed for<br />
spray applications. Hand mixing is not recommended. When<br />
meter-mixed and sprayed 1:1 by volume, Polygel Shell gels several<br />
seconds after contacting the surface being covered, then<br />
remains in a workable grease-like state for 1 minute. Shells or<br />
castings can be demolded in 2 hours depending upon thickness<br />
and ambient temperature. Thicknesses ½-inch are not recommended as shrinkage can occur upon curing<br />
and cooling. For additional strength, lay fiberglass strand or<br />
mat while applying Polygel Shell. For very large shell sections,<br />
supporting structures such as boards or metal rods can be attached<br />
to prevent warping or damage during use.<br />
STORAGE: In order to maintain dimensions, Poly Plastic mold<br />
shells must be stored in temperatures
4 Casting Plastics/Resins<br />
Polypoxy ®<br />
Resins<br />
Casting Plastics<br />
DESCRIPTION: Polypoxy ® Resins and Poly Cure Hardeners are<br />
liquids that, after mixing in proper ratio, cure at room temperature<br />
to high-strength plastics. Resins can be cured with various curatives<br />
enabling users to select the best system for a particular use.<br />
The mix ratio for each curing agent and resin blend varies. For<br />
best results, carefully weigh the components.<br />
Polypoxy ® 1010 is a clear resin for use with fast Poly Cure 1212<br />
for small castings such as bonded bronze or with fiberglass or<br />
fillers for lay-up and mother molds. Use with Poly Cure 1220 for<br />
decoupage clear coatings, glass bonding and many other uses<br />
where a nearly colorless, clear, low viscosity resin is required.<br />
Polypoxy ® 1030 is an aluminum- and mineral-filled resin for<br />
lay-up or small castings when cured with Poly Cure 1212. For<br />
larger vacuum forming molds and other tooling uses, cure with<br />
Poly Cure 1230. Parts made with Polypoxy 1030 can be machined,<br />
drilled and burnished with steel wool to a pewter finish.<br />
SURFACE PREPARATION: Polypoxy Resins are adhesives<br />
and bond to many surfaces. If adhesion is not desired, surfaces<br />
must be made non-porous with a suitable sealer, such as wax,<br />
PVA, lacquer or other coatings. The surfaces must then be coated<br />
with a release agent such as Pol-Ease 2300. Poly 74 Series rubber<br />
molds require only a light, thorough coating of Pol-Ease 2300 for<br />
excellent release of epoxy castings. Perform a small test cure.<br />
MIXING: Polypoxy and Poly Cure must be mixed in the ratios<br />
shown below. Mix ratios are by weight except for Polypoxy 1010<br />
and Cure 1220, which can be mixed 1:1 by volume. Polypoxy and<br />
Cure must be thoroughly mixed and poured as soon as possible<br />
after mixing to ensure low viscosity and good flow. Watch a clock<br />
to avoid being caught with unused, cured material.<br />
HEAT RESISTANT CASTINGS: Polypoxy 1030 offers good<br />
heat resistance. Call <strong>Polytek</strong> for more information.<br />
CLEAN UP: See p. 47.<br />
SAFETY: Before use, read product labels and Material Safety<br />
Data Sheets. Follow safety precautions and directions. Poly Cure<br />
Hardeners cause severe eye and skin burns. Do not get in eyes or<br />
on skin. WARNING: The epoxy cure reaction is very exothermic<br />
(see p. 6). Do not cast large masses -- doing so can result in a fire!<br />
APPLICATIONS<br />
Polypoxy ® 1010 + Poly Cure 1212<br />
Bonded bronze<br />
Polypoxy ® 1010 + Poly Cure 1220<br />
Decoupage coatings and glass bonding<br />
Polypoxy ® 1030 + Poly Cure 1212<br />
Small castings and tooling applications<br />
Polypoxy ® 1030 + Poly Cure 1230<br />
Larger vacuum molds<br />
PACKAGING<br />
Product Unit Weight (lb) Container<br />
Polypoxy 1010 2.0 1 qt<br />
9.0 1 gal<br />
45.0 5 gal<br />
Polypoxy 1030 3.0 1 qt<br />
12.0 1 gal<br />
60.0 5 gal<br />
Poly Cure1212 0.25 4 oz<br />
2.0 1 qt<br />
Poly Cure 1220 0.25 4 oz<br />
2.0 1 qt<br />
8.0 1 gal<br />
40.0 6 gal<br />
Poly Cure 1230 0.25 4 oz<br />
2.0 1 qt<br />
8.0 1 gal<br />
PHYSICAL PROPERTIES<br />
Polypoxy + Poly Cure 1010 + 1212 1010 + 1220 1030 + 1212 1030 + 1230<br />
Parts Cure per 100 of Polypoxy 15 85 (1:1 by vol) 6 15<br />
Mixed Viscosity(cP) 3,000 3,000 10,000 5,000<br />
Pour Time, 150 g mix @ 77°F (min) 25 30 30 120<br />
Demold Time @ 77°F (hr) 4–8 48 24 24<br />
Maximum Casting Thickness (in) 0.5 1.5 3.0 8.0<br />
Shore D Hardness 95 80 98 95<br />
Specific Gravity 1.13 1.07 1.70 1.70<br />
Specific Volume (in 3 /lb) 24.5 26.0 16.3 16.3<br />
Density (lb/in 3 ) 0.0408 0.0386 0.0614 0.0614<br />
56<br />
(610)559-8620 • (800)858-5990
Speciality Materials 5<br />
Speciality Mold Making & Casting Materials<br />
This section describes a few speciality mold making and casting<br />
materials offered by <strong>Polytek</strong>. These materials can be used in<br />
conjunction with <strong>Polytek</strong>’s traditional mold rubber and casting<br />
plastic products, enabling users to tackle virtually any mold<br />
making and casting challenge.<br />
Latex - Tough, one-part brushable, castable rubbers<br />
Wax - Castable, carvable version; skin-safe version,<br />
acceptable for body molds<br />
Hydrogel - Safe for skin contact for body molds & life casting<br />
Poly Latex 60<br />
DESCRIPTION: Poly Latex 60 is a one-part, brush-on liquid<br />
that, after multiple coats, builds up to form a tough rubber blanket<br />
mold. Use Poly Latex 60 molds for casting plaster, concrete and<br />
limited casting with some resins.<br />
Poly Latex 60 has better tear strength than synthetic rubbers and<br />
is sometimes preferred for molds that are peeled off the casting<br />
like a sock. However, two-part, synthetic rubbers like Polygel ®<br />
products can be brushed on to final thickness in an afternoon and<br />
should be considered as a latex alternative (see p. 36).<br />
MODEL PREPARATION: The model should be free of oil,<br />
grease and dirt. Wood, oil-based clay, stone and glazed ceramics<br />
generally do not require any sealer. Plaster, unglazed ceramics,<br />
copper containing metals, water clay and cement should be sealed<br />
with shellac. Models made of other materials should be patch tested<br />
by applying a coat or two of latex to a small area. If the latex<br />
turns dark or sticks after drying, a sealer should be applied.<br />
Models with sharp edges or points may yield a better mold if the<br />
points are dulled slightly by sanding prior to sealing. Firmly<br />
mount the model on a suitable base board (i.e., plywood or a sink<br />
cutout available from kitchen counter shops). Drill a hole through<br />
the base board to allow air to escape from within the model so that<br />
trapped air does not cause defects in the mold.<br />
APPLYING & CURING: Brush a thin coat of latex on the<br />
model. Be careful not to puddle the latex. A gentle stream of air<br />
can help to blow latex into the finest detail and break any bubbles.<br />
Let each coat dry for 4 to 16 hours in a warm, ventilated room.<br />
Drying time depends on temperature and humidity. Warm, dry air<br />
is necessary for fast drying. When dry, the latex loses its milky<br />
appearance, and becomes slightly transparent and amber in color.<br />
Apply the next coat as soon as the first coat is dry. Apply 6 to 30<br />
coats depending on the desired mold thickness. Molds are typically<br />
1/16- to 1/8-inch thick. For large, flat models, apply latex in a<br />
checkerboard pattern, alternating squares between coats. Since<br />
there is some shrinkage on drying, the patchwork method reduces<br />
stress and warping of the latex as it dries.<br />
Latex can be thickened with ground cork, sawdust or Cab-O-Sil ®<br />
in order to fill undercuts. Thickeners must be completely wet out<br />
with latex and applied to the outside surface of the mold. The<br />
thickened latex must be allowed to dry completely as wet spots<br />
trapped in the latex can cause delamination of the mold.<br />
If needed, reinforce latex molds by placing fabric (e.g., muslin,<br />
burlap, polyester) into a coat of wet latex and then saturate with latex.<br />
Allow the fabric coat to dry completely before applying more latex.<br />
FEATURES<br />
• Brush-on liquid<br />
• Great for casting highly ornamental plaster and concrete<br />
• One part, no mixing or weighing needed<br />
• Tougher than any other mold rubber<br />
For spray application with a cup gun, mix 1 part Poly Latex 60<br />
with 1 part Poly Latex N. Poly Latex N is available in the same<br />
package sizes as Poly Latex 60.<br />
Before removing from the model, the latex must be thoroughly<br />
dry or heat cured. Heat in a warm oven at 110-150°F for 6 to 8<br />
hours to ensure a complete cure. If heat curing is not feasible,<br />
place the mold in a warm area for a week to strengthen the rubber.<br />
Clean up wet latex with soap and water. Dried latex can be softened<br />
with waterless hand cleaner and washed away.<br />
USING THE MOLD: Avoid exposing the mold to oils, grease or<br />
solvents. Molds can be washed with soap and water. Before casting<br />
plaster or cement, wet the mold with a 1% solution of detergent in<br />
water to aid air bubble release from the mold surface. Usually, no<br />
other release is necessary. For resin casting, a release agent such as<br />
Pol-Ease ® 2300 or PVA is needed. Most resins shorten the life of a<br />
latex mold -- Polygel ® or Poly-Sil ® rubber molds may last longer.<br />
SAFETY: Before use, read product label and Material Safety<br />
Data Sheet. WARNING! Latex products contain ammonia and<br />
causes eye and skin irritation. Avoid skin and eye contact. Use<br />
with adequate ventilation. In case of contact, flush eyes with plenty<br />
of water for 15 minutes and seek medical attention. Remove<br />
from skin and clothing with soap and water.<br />
STORAGE LIFE: At least 3 months in unopened containers<br />
stored at room temperature (50-70°F). Tightly reseal opened containers.<br />
As latex ages beyond 3 months, it will not cure to as supple<br />
a rubber and shrinkage on drying may increase and toughness<br />
of the mold will decrease. Exposure to temperatures below 40°F<br />
and above 80°F may damage latex, causing irreversible coagulation.<br />
DO NOT ALLOW TO FREEZE.<br />
Unit Weight (lb)<br />
PACKAGING<br />
Container<br />
2.0 1 qt<br />
8.0 1 gal<br />
40.0 5 gal<br />
400 55 gal<br />
Speciality<br />
Materials<br />
www.polytek.com<br />
57
5 Speciality Materials<br />
Poly Latex False Face Compound<br />
DESCRIPTION: Poly Latex False Face Compound is a one-part<br />
pourable liquid that, when poured into a dry, unsealed gypsum<br />
mold, cures to a high-strength, flexible casting rubber. False Face<br />
was formulated to produce flexible hollow parts for uses such as<br />
novelty masks, flexible sculpture and animatronic applications.<br />
MODEL PREPARATION: To cure properly, this product must<br />
be cast into dry, unsealed, porous plaster molds. The user must<br />
determine the suitability of other porous mold materials.<br />
MIXING AND CURING: Shake or stir Latex False Face before<br />
use. Pour into a prepared gypsum mold. Tilting or lightly vibrating<br />
the mold may help eliminate bubbles if the mold contains<br />
complex undercuts or deep details. For a thin skin, pour the excess<br />
latex back into the container immediately. For a thicker skin,<br />
allow the latex to stay in the mold longer before pouring off<br />
excess. A standing time of 15 minutes yields a 3/32-inch thickness<br />
in a dry No. 1 Pottery Plaster mold. Denser plasters are not as<br />
Latex False Face molds can be made<br />
by dipping a dry, porous plaster model<br />
into False Face. The longer the model is<br />
submerged, the thicker the mold. This<br />
technique is only suitable for models<br />
with a shape that won’t trap air when<br />
placed upside down in the False Face<br />
liquid.<br />
FEATURES<br />
• Easy one-part rubber—no mixing or weighing<br />
• Tougher than any other mold rubber<br />
• Good reproduction of fine detail<br />
• Forms hollow castings without roto-molding<br />
absorbent and thicknesses build slower. Allow False Face to dry<br />
in the mold for 24 hours at room temperature. Elevated temperatures<br />
accelerate drying time.<br />
Clean up wet latex with soap and water. Dried latex can be softened<br />
with waterless hand cleaner and washed away.<br />
USING THE CASTING: Lightly dust the inside of the casting<br />
with talc in order to prevent the dry rubber from sticking to itself.<br />
Avoid exposing the casting to oils, greases or solvents. Castings<br />
should be stored out of direct sunlight.<br />
SAFETY & STORAGE: Same as Poly Latex 60 (see p. 57).<br />
PACKAGING<br />
Unit Weight<br />
Container<br />
2.0 1 qt<br />
8.0 1 gal<br />
40.0 5 gal<br />
Poly Wax 15<br />
Speciality<br />
Materials<br />
DESCRIPTION: Poly Wax 15 is a white, hard, low shrinkage,<br />
mineral-filled wax, which can be cast and carved. When cast, it<br />
replicates the mold surface in detail and finish. Tool cuts are<br />
smooth and lustrous. Dull surfaces can be hand polished with a<br />
soft cloth to a satin luster.<br />
MELTING AND CASTING: Poly Wax 15 softens below 130°F<br />
and is quite fluid at 160°F. Viscosity decreases rapidly as temperature<br />
is increased. At 200°F, components of the wax separate<br />
slightly. Mix the melted wax thoroughly before pouring.<br />
Complete mixing is quick and easy to determine visually -- mixed<br />
liquid wax is uniformly colored with no streaks. Use a nonporous,<br />
heat resistant stirrer such as a metal spatula. Pour temperatures<br />
are typically 210°F-280°F; however, the ideal temperature<br />
is dependent on the mold size, shape and material. Poly Wax 15<br />
holds temperature for a long time, so large or multiple molds can<br />
be filled in a single pour. When slush molding, excessively high<br />
temperatures will cause remelting of layers already laid down and<br />
PHYSICAL PROPERTIES<br />
Softening point 126°F<br />
Use temperature 210 - 280°F<br />
Viscosity @ 100°C (212°F) 116 cP<br />
Density (in 3 /lb) @ 25°C (77°F) 19.5<br />
@ 100°C (212°F) 21.6<br />
FEATURES<br />
• Ideal for prototypes<br />
• Cast carving blanks from rubber molds of rough originals<br />
• Suitable for master models<br />
• Smooth and lustrous surfaces<br />
significantly prolong the procedure. Casting temperatures that are<br />
too low will result in surface bubbles and “knit” marks because<br />
the wax solidifies too rapidly on the mold surface.<br />
Poly Wax 15 can be poured in Poly 74 Series, Poly-Fast 72-40,<br />
Poly-Sil ® , Polygel ® or Hydrogel ® molds. Latex will be softened<br />
by continual pours of Poly Wax 15. Most heat resistant resins and<br />
metal molds are also suitable; however, a small trial casting is<br />
always recommended to be sure castings release satisfactorily<br />
and do not damage the mold material.<br />
SAFETY: Before use, read product labels and Material Safety<br />
Safety Sheets. Hot wax can cause severe burns and ignites easily.<br />
Avoid skin contact. Do not heat with an open flame. Do not heat<br />
above 280°F since vapors can ignite.<br />
STORAGE LIFE: At least 12 months from date of shipment.<br />
PACKAGING<br />
Poly Wax 15 is available in 5-lb blocks<br />
58<br />
(610)559-8620 • (800)858-5990
Poly Skin-Wax<br />
Speciality Materials 5<br />
DESCRIPTION: Poly Skin-Wax is a liquid at temperatures as<br />
low as 125°F and it is somewhat elastic after solidifying. It can be<br />
applied to models using dip or brush-on techniques. Poly Skin-<br />
Wax has been formulated with non-toxic materials and is safe for<br />
skin contact provided temperature is carefully controlled.<br />
MODEL PREPARATION: When making a mold of a body part,<br />
coat skin and hair with baby oil before applying Skin-Wax. Molds<br />
can only be made of body parts that are covered with short and<br />
light hair -- do NOT attempt to make molds from hairy areas. For<br />
most other non-porous models, Poly Skin-Wax is self releasing<br />
and, therefore, no release agent is needed. Make a small test mold<br />
on a surface identical to the model to determine that release properties<br />
and hardening of Skin-Wax is suitable.<br />
PROCEDURE: Use a therapeutic paraffin bath, available from<br />
medical supply stores, to melt Poly Skin-Wax. A crock pot can be<br />
used to melt Skin-Wax; however, extreme caution must be exercised<br />
to ensure that the wax is not overheated. To melt Poly Skin-<br />
Wax, heat to 160-180°F. Skin-Wax must be cooled to 125-135°F<br />
before contact with skin! Even this temperature may cause discomfort<br />
in some individuals. Do not use Skin-Wax on sensitive<br />
areas such as the face. The wax must be just hot enough to produce<br />
good results; a few degrees hotter can cause considerable<br />
discomfort. Test judiciously on small areas.<br />
Stir Skin-Wax often during melting and use since temperature<br />
variations in an unstirred bath can result in solidified wax in one<br />
area of the bath while another area heats enough to cause burns.<br />
Monitor temperature in several places in the bath (i.e., near walls,<br />
center and at several depths). Use an accurate thermometer.<br />
Apply Skin-Wax by dipping the model, brushing on or slowly<br />
pouring over the model surface. For rapid cooling, immerse the<br />
wax-coated model in cool water between coats. Skin-Wax can be<br />
reinforced by laying fabric such as cheese cloth onto the previous<br />
coat and then applying wax to saturate the fabric.<br />
Although some flexibility remains in Poly Skin-Wax at room temperature,<br />
if flexibility is needed to remove the model, it is best to<br />
remove it as soon as the wax cools into the elastic (temporarily<br />
deformable) state. For model shapes that do not allow removal<br />
with the mold intact, the mold may be carefully cut and later<br />
rejoined using a warm metal spatula or by “welding” with molten<br />
wax. Small air vents punctured in the mold using a pin or wire<br />
may help release the mold from the model; for example, in casting<br />
a hand, pinholes at the end of each finger facilitate removal of<br />
the hand. Holes can be sealed later with a dab of molten wax.<br />
PHYSICAL PROPERTIES<br />
Softening Temperature 125°F<br />
Use Temperature<br />
125-180°F<br />
Viscosity @ 180°F<br />
190 cP<br />
Specific Volume (in 3 /lb) @ 77°F 31<br />
@ 180°F 34<br />
FEATURES<br />
• Safe for skin contact<br />
• One-part mold making compound<br />
• No mixing -- simply melt and use<br />
• Fast -- make a mold in 5 to 10 minutes<br />
• Easily repaired with a dab of warm wax<br />
• Flexible when warm<br />
• Self releasing from most surfaces<br />
• Reusable<br />
SAFETY: Before use, read product labels and Material Safety<br />
Safety Sheets. Follow safety precautions and directions. Do not<br />
heat with open flame. Do not heat above 280°F since vapors can<br />
ignite. Use with adequate ventilation. Do not use in the presence<br />
of sparks or open flame. Exercise extreme caution when applying<br />
Poly Skin-Wax to the skin. While Poly Skin-Wax is safe for skin<br />
contact, it is not recommended that repeated castings be made<br />
over a short period as the hot wax tends to remove skin oils and<br />
can cause irritation. For skin applications, avoid reusing wax that<br />
may have absorbed irritating substances from casting materials.<br />
STORAGE LIFE: At least 12 months from date of shipment.<br />
PACKAGING<br />
Poly Skin-Wax is available in 5-lb blocks<br />
The hand is dipped into melted Poly<br />
Skin-Wax (125°F) then into cold water to<br />
harden the wax. Over the next few minutes<br />
the process is repeated 2 or 3<br />
times to buildup mold thickness. After<br />
the wax is hardened, the mold is slipped<br />
off the hand and is ready for casting.<br />
Plaster, cement, rubber or plastic can be<br />
poured into the hand mold. Be careful<br />
not to use a casting material that generates<br />
significant heat upon cure. The wax is removed from the<br />
casting and can be melted for reuse. That casting is detailed --<br />
fingerprints and all!<br />
Speciality<br />
Materials<br />
www.polytek.com<br />
59
5 Speciality Materials<br />
Hydrogel ®<br />
N Mold Compound<br />
Speciality<br />
Materials<br />
DESCRIPTION: Hydrogel ® N is a white powder that after mixing<br />
with water cures in about 5 minutes to a moist, rubbery material.<br />
Use Hydrogel N to make quick, single-use molds, especially<br />
when skin contact is required. Plaster, wax, and certain EasyFlo<br />
Plastics can be cast into Hydrogel N molds.<br />
MODEL PREPARATION: Hydrogel N can be poured on most<br />
surfaces with minimal preparation, but perform a small test cure<br />
to be sure that Hydrogel N releases cleanly and does not damage<br />
water sensitive surfaces. Use a thin coat of petroleum jelly or Pol-<br />
Ease ® 2300 Release Agent to seal questionable surfaces.<br />
MIXING AND CURING: Weigh or measure proper amounts of<br />
Hydrogel N powder and room temperature water. The mix ratio is<br />
3 parts water to 1 part Hydrogel N, by weight, or approximately 1<br />
water to 1¼ Hydrogel N, by volume. Mix together rapidly to a<br />
creamy consistency, but avoid whipping in air. For best results,<br />
use a Turbo Mixer (see p. 62) on a variable speed drill. Add powder<br />
or water as needed to thicken or thin the mix. Working time is<br />
about 5 minutes, but can be extended using Retarder Solution (see<br />
table below). Apply the creamy mix to the model surface with a<br />
flowing motion, pushing air ahead of the mix. Demold with care<br />
2 to 3 minutes after the mix has gelled.<br />
To make a large blanket mold, make and apply a series of mixes<br />
within 5 minutes of one another. Hydrogel N bonds to itself if the<br />
previous mix is not completely gelled. To help a new mix bond to<br />
already gelled Hydrogel N, wipe the gelled material with a saturated<br />
solution of water and baking soda (sodium bicarbonate).<br />
Add food color to the bonding solution so that you know where it<br />
has been applied. Continue layering Hydrogel N as needed to<br />
make a ~3/8-inch-thick blanket mold. In the final layer of wet<br />
Hydrogel N, press “teased” cotton (cotton rolls, available at any<br />
pharmacy) evenly over the entire mold surface and allow to gel.<br />
Remove excess cotton by pulling gently, leaving a thin layer of<br />
exposed fibers. As soon as Hydrogel N is firm, mix and apply a<br />
plaster mold shell using bandages, cheesecloth, or hemp embedded<br />
in the plaster. The exposed cotton fibers in the mold will bond<br />
to the plaster shell helping to keep the mold attached. When the<br />
FEATURES<br />
• Non-toxic-- Safe for body casts<br />
• Easy to use: just add water and mix<br />
• Good reproduction of fine detail<br />
• Early strength for fast demold<br />
• Variable working time<br />
• Low cost<br />
Hands up and on<br />
the table! With the<br />
use of Hydrogel ® N,<br />
these children each<br />
made a plaster cast<br />
of their own hand at<br />
a Vacation Bible<br />
School craft session.<br />
Molds for 35<br />
hands were made in<br />
less than 2 hours!<br />
plaster shell is set, remove the Hydrogel N mold/plaster shell. For<br />
best dimensional stability, make a positive casting immediately.<br />
USING THE MOLD: Plaster or waxes below 212°F may be<br />
poured in Hydrogel N molds. For best results use the mold when<br />
it is as fresh as possible, since Hydrogel N molds shrink as they<br />
dry. Molds can be kept useable in plastic bags or sealed containers<br />
for up to a few days. Molds should then be discarded<br />
SAFETY: Before use, read product label and Material Safety<br />
Data Sheet. Follow safety precautions and directions. Handle<br />
Hydrogel N carefully to avoid dust generation. Wear a dust mask.<br />
Avoid eye contact. Hydrogel N is not for human consumption or<br />
use against mucous membranes. Keep skin contact as brief as possible.<br />
Prior to placing Hydrogel N on hair, hair should be slicked<br />
down with petroleum jelly or cholesterol hair conditioning cream.<br />
STORAGE LIFE: At least six months in unopened containers.<br />
LIQUID RETARDER (OPTIONAL)<br />
% Retarder Approximate<br />
in Water<br />
Working Time<br />
0 5 min<br />
3 7 min<br />
6 8 min<br />
9 10 min<br />
PACKAGING<br />
Hiram Ball, of Ball Consulting Ltd., demonstrates making a livebody<br />
mold using Hydrogel ® N. The safe-for-skin-contact alginate<br />
yields excellent mold impressions if wax or plaster is cast right<br />
after demolding.<br />
Product<br />
Hydrogel ® N<br />
Retarder Solution<br />
Volume<br />
1 qt<br />
1 gal<br />
5 gal<br />
1 qt<br />
60<br />
(610)559-8620 • (800)858-5990
Accessories 6<br />
MATERIALS<br />
RELEASE AGENTS<br />
HEMP - Long, natural<br />
fiber that has been the<br />
traditional reinforcement<br />
for plaster mother molds.<br />
Available in convenient<br />
10-lb bundles or<br />
economical ~40-lb bales.<br />
POLY FIBER II - Add to<br />
liquid rubbers to thicken<br />
for brush-on application<br />
or plastics for mold<br />
shells or layup castings.<br />
Add to resin (up to 5%<br />
total weight) to produce<br />
thin gels to thick pastes.<br />
(5-gal pail or 10 lb bag)<br />
TIETEX ® FABRIC -<br />
Strong, conformable<br />
reinforcing fabric that<br />
wets out very well.<br />
Small pieces can be<br />
laminated in at the top<br />
of a seam in brushed or<br />
sprayed molds to<br />
prevent tearing. A sheet<br />
can be laid into the back of an open poured<br />
mold to increase durability. Use as bridging<br />
material for spanning undercuts in sprayed or<br />
brushed molds.<br />
10-ft sheet (40-in wide)<br />
324-ft roll (40-in wide)<br />
FIBERGLASS MAT - Non-woven, 1.5 oz per sq.<br />
ft., chopped strand mat for reinforcing <strong>Polytek</strong><br />
resins. 3 square yards<br />
POLYPLASTICENE - Non-hardening, sulfur-free<br />
modeling clay. Non-toxic and odorless, with a<br />
smooth, firm consistency for sculpting. Also<br />
makes great reusable caulk for mold boxes.<br />
1-lb block or 50-lb box.<br />
FUMED SILICA/CAB-O-SIL ® - Add to mixed<br />
liquid rubbers and plastics to make thicker and<br />
thixotropic mixes for brush-on application.<br />
5-gal pail<br />
10-lb bag<br />
Cab-O-Sil is a registered trademark of the Cabot<br />
Corp., Tuscola, IL<br />
BRONZE POWDER - Use with unfilled resins<br />
for "cold-cast bronze." One part bronze<br />
powder to one part EasyFlo (by volume)<br />
makes beautiful castings!<br />
2-lb can<br />
10-lb can<br />
110-lb can<br />
POL-EASE ® MOLD RINSE - Liquid concentrate<br />
reduces surface air bubbles on plaster castings<br />
made in <strong>Polytek</strong> rubber molds. Dip or spray<br />
mold with 1 part Pol-Ease Mold Rinse diluted<br />
with 10 parts water. Molds should be wet<br />
when plaster is poured. 5 gal (40 lb)<br />
POL-EASE ® MOLD DRESSING - Protects and<br />
rejuvenates Poly Rubber molds that have been<br />
exposed to harsh conditions created by the use<br />
of solvents and petroleum oils contained in<br />
certain form releases and casting resins. 5 gal<br />
(40 lb) or 55 gal (450 lb).<br />
POLYCOLORS - NEW! Dyes for coloring<br />
<strong>Polytek</strong>’s polyurethane<br />
rubbers and plastics.<br />
Available in red, blue,<br />
green, yellow, brown and<br />
black. 0.25-lb bottle or 1.0-lb bottle.<br />
UV ADDITIVE - For Improved Exterior<br />
Exposure - Thoroughly stir this liquid additive<br />
into polyurethane liquid rubber to improve<br />
exterior durability; greatly reducing<br />
characteristic surface degradation caused by<br />
sunlight or other UV light sources. Add 0.5%<br />
of the total weight of liquid mix prior to curing.<br />
4-oz bottle or 1-pint bottle (1 lb).<br />
POTTERS SOAP - Use to seal plaster models.<br />
Plaster should be damp when soaped.<br />
Available as a concentrate from Crystal Inc,<br />
Philadelphia, PA, (215) 368-1661.<br />
ADHESIVES<br />
POLYPOXY ® QUICK STICK<br />
ADHESIVE - Two-part epoxy<br />
adhesive with a 1:1 mix ratio<br />
by weight or volume. Bonds<br />
quickly to most clean, dry<br />
surfaces. Sets in 3-5 minutes.<br />
2-lb kit<br />
POLYBOND - A polyurethane adhesive that’s<br />
great for repairing torn molds. PolyBond has<br />
1A:3B mix ratio (by weight), a ~3 minute<br />
working time and a ~15 minute cure.<br />
2-lb kit<br />
EPOXYBOND - A low viscosity, epoxy<br />
adhesive, which deeply penetrates porous<br />
surfaces creating an excellent bond. It has an<br />
easy 1A:1B mix ratio (by volume), a long<br />
working time (120 min.), and overnight cure.<br />
2-lb kit<br />
POL-EASE ® 2300 RELEASE<br />
AGENT - A blend of silicone oils<br />
and resins in a convenient aerosol<br />
spray. Pol-Ease ® 2300 is an<br />
effective release for use with most<br />
<strong>Polytek</strong> products. Use a soft brush<br />
to distribute evenly.<br />
12-oz can or Case of 12 cans<br />
POL-EASE ® 2500 RELEASE<br />
AGENT - An aerosol spray release<br />
agent that can be easily washed<br />
off cast parts for easy finishing.<br />
Spray a thin mist over mold<br />
surface, then brush gently for<br />
uniform coverage.<br />
12-oz can or Case of 12 cans<br />
POL-EASE ® 2350 RELEASE AGENT - Mineral<br />
spirits solution for use with RTV liquid silicone<br />
rubbers. Can be brushed or sprayed. Use of a<br />
soft brush to spread the release agent evenly to<br />
improve results. 1 qt (1.5 lb) or 5 gal (26 lb)<br />
POL-EASE ® 2450 RELEASE AGENT - A fast drying,<br />
silicone-based release, which can be brushed or<br />
sprayed. Flammable! 1 qt (1.5 lb) or 5 gal (30 lb)<br />
POL-EASE ® 2601 RELEASE AGENT - Water-based<br />
emulsion of silicone oils and resins. Spray<br />
with the Sure Shot Mini Atomizer for an<br />
economical alternative to aerosol release<br />
agents. After spraying, distribute evenly with a<br />
soft brush. 1 qt, 5 gal (40 lb) or 55 gal (450 lb)<br />
POL-EASE ® 2650 RELEASE AGENT - A high<br />
performance, silicone-free, release agent for use<br />
in polyurethane molds when casting concrete or<br />
plaster. 1 qt (1.5 lb) or 5 gal (35 lb)<br />
POLY PVA SOLUTION - Water soluble coating<br />
for use as a barrier coat on certain rubber<br />
molds (i.e, Poly-Fast 72-40) to allow resins to<br />
cure without sticky surfaces. While Poly 74,<br />
70 and 71 Series molds do not cause sticky<br />
surfaces on resin castings, PVA may be used<br />
as a barrier coat to prevent resin attack on the<br />
mold. Can be used as a removable sealer for<br />
porous surfaces alone or in conjunction with<br />
paste wax. The green film of PVA washes off<br />
with water. (Specify Clear or Green) 1 qt (2.0<br />
lb) or 5 gal (35 lb)<br />
POLYCOAT - A semi-permanent sealer and<br />
release agent that can be sprayed or brushed<br />
onto a model when using liquid polyurethanes.<br />
In most cases no additional release is needed to<br />
demold the polyurethane rubber. 1 qt or 1 gal<br />
SURE SHOT MINI ATOMIZER -Use with Pol-<br />
Ease ® 2601, 2350 and 2450 Release Agents.<br />
Mini Atomizer (7-oz capacity)<br />
Accessories<br />
www.polytek.com<br />
61
6 Accessories<br />
MIXING EQUIPMENT<br />
BRUSHES<br />
SAFETY<br />
Accessories<br />
POLY PADDLE -<br />
The 16-inch<br />
Poly Paddle<br />
allows complete<br />
mixing of material by thoroughly scraping the<br />
sides and bottom of rounded or straight sided<br />
mixing containers.<br />
SPATULAS -<br />
Top quality, all<br />
purpose spatula<br />
with a<br />
comfortable,<br />
cushion-grip,<br />
vinyl handle is unbreakable, and heat and<br />
chemical resistant. The stainless steel blade is<br />
semi-flexible for durability and easy mixing.<br />
The mirror finish wipes clean easily. Available<br />
in two sizes for most small mixing needs.<br />
4-in Blade Spatula<br />
6-in Blade Spatula<br />
JIFFY MIXERS -<br />
Heavy-duty,<br />
efficient,<br />
commercial<br />
mixer, specially<br />
designed for<br />
tough-to-mix, viscous materials. Mixes<br />
quickly and thoroughly without splashing or<br />
whipping air into the mix. The patented<br />
protective-ring design prevents puncture or<br />
damage to the mixing container. Made entirely<br />
of stainless steel 304 for maximum durability.<br />
Jiffy mixers fit all ¼- to ¾-inch chucked<br />
power tools. Tools with 450-700 rpm give the<br />
best mixing results.<br />
Jiffy Mixer, 1 gal<br />
Jiffy Mixer, 5 gal<br />
TURBO MIXERS -<br />
Ingenious,<br />
patented, high<br />
efficiency<br />
mixers fit any<br />
power drill with<br />
½-inch chuck and mix more efficiently than a<br />
Jiffy Mixer. Must be kept free of built up<br />
material. It’s worth the price!<br />
Turbo Mixer, ½-gal<br />
Turbo Mixer, 1-2 gal<br />
Turbo Mixer, 3-10 gal<br />
Turbo Mixer, 11-55 gal<br />
TONGUE DEPRESSORS - Made<br />
of straight-grained white birch<br />
for consistent quality.<br />
Convenient, low cost mixing<br />
tools for test cures or small<br />
quantity mixes.<br />
6-in length, box of 500<br />
ACID BRUSHES - Tinhandle,<br />
disposable ½-inch<br />
wide brushes with 100%<br />
horsehair bristles.<br />
Excellent for making small<br />
brush-on molds. Bundle of<br />
30 or Box of 1 gross (144)<br />
CHINA BRISTLE BRUSHES<br />
- Wooden handle chip<br />
brushes. 100% China<br />
Bristle available in 1-<br />
inch and 2- inch width.<br />
Use to apply brush-on<br />
molds or release agent. 1-in Brush, bundle of<br />
10; or 2-in Brush, bundle of 10<br />
MOLD BOX<br />
MOLD BOX -<br />
Adjustable to any<br />
size up to 24-in x<br />
24-in x 6-in. The<br />
base is smooth,<br />
plastic faced<br />
particle board. This mold box provides a quick<br />
way to pour a rubber mold. (C-clamps not<br />
included.)<br />
MOLD-KEY KNIFE<br />
mold registration easy.<br />
MOLD-KEY KNIFE<br />
- NEW! Use this<br />
unique notched<br />
knife to cut<br />
tongue-and-groove<br />
seams in molds.<br />
Makes proper<br />
BANDS & STRAPS<br />
RUBBER BANDS - Top<br />
quality ¾-inch wide<br />
rubber bands made of<br />
long lasting, heavy duty<br />
natural rubber. Secures<br />
mold shell pieces<br />
firmly together. 4-in<br />
Bands, 1-lb box 8-in Bands, 1-lb box<br />
NYLON MESH MOLD<br />
STRAPS - One-inch wide<br />
nylon straps are<br />
adjustable to 8 ft in<br />
length. They tighten as<br />
the buckle locks to<br />
ensure a snug fit. Sold singly or bag of 12<br />
NITRILE GLOVES -<br />
Disposable, powder-free, 4-<br />
mil nitrile gloves offer<br />
comfort, dexterity and a<br />
broad range of chemical<br />
resistance. These gloves<br />
offer protection against intermittent contact<br />
with nearly all <strong>Polytek</strong> products. Contain no<br />
natural rubber proteins. 100 per box, Size L<br />
SAFETY GLASSES - With a<br />
sleek wrap-around<br />
polycarbonate lens, Uvex<br />
Bandido ® safety glass<br />
offers excellent eye protection, comfort and<br />
sporty styling. Meets ANSI Z87.1-1989<br />
Standard. Made in USA. 1 pair (one size)<br />
PROTECTIVE COVERALL -<br />
Kappler NexGen coveralls<br />
are made of a micro-porous<br />
fabric that is aerosol and<br />
liquid proof. Disposable,<br />
but durable enough to be<br />
reworn. Large size and<br />
light weight allows<br />
mobility. The perfect<br />
cover-up for quick, dirty<br />
jobs. Coverall, Size L<br />
SOLVENT DISPENSING CAN<br />
- Plunger can for<br />
dispensing flammable<br />
liquid features brass flame<br />
arrestor screens and pump<br />
assembly. Simply press a<br />
cloth or wiper on the<br />
plunger to moisten. Two-quart capacity.<br />
Although we don’t offer a full line of<br />
safety supplies, we’ll help you get what<br />
you need to work safely! Call <strong>Polytek</strong> and<br />
ask for our safety specialist.<br />
PAILS/OPENER<br />
PAILS FOR MIXING - High density<br />
polyethylene pails with handles, both 1-gal<br />
and 5-gal sizes are now available in cartons.<br />
These are the same pails that <strong>Polytek</strong> uses for<br />
its products. They are excellent for mixing<br />
Parts A & B and often the cured residue can be<br />
stripped out, leaving a clean pail ready for<br />
reuse. Lids can be ordered separately.<br />
1-gal Pails (Box of 10)<br />
5-gal Pails (Box of 5)<br />
PAIL OPENER - “Pail Pal” pail opener designed<br />
to open and close most plastic pails with ease.<br />
Constructed of rugged cast aluminum.<br />
62<br />
(610)559-8620 • (800)858-5990
Accessories 6<br />
SCALES<br />
DVDS/VIDEOS<br />
BOOKS<br />
OHAUS CS-2000 PORTABLE SCALE - The ideal<br />
scale for users who need a<br />
scale in a variety of<br />
locations during the work<br />
day. Battery operated with<br />
an automatic shut-off<br />
switch. The CS-2000 has a<br />
capacity of 2000 grams (~5<br />
lb) and readability to 1<br />
gram. The digital display reads in grams or<br />
pounds and ounces. The scale offers simple<br />
operation with a full capacity tare. The CS-<br />
2000 has an easy-to-clean weighing surface.<br />
The AC adapter is sold separately.<br />
OHAUS ES50R ELECTRONIC BENCH SCALE -<br />
This all-purpose,<br />
rugged bench scale<br />
is equipped with a<br />
large, stainless steel<br />
weighing pan to<br />
withstand heavy<br />
industrial use. The<br />
ES50R has a 110-lb capacity, a digital display<br />
readable to 0.05 lb and a full capacity tare.<br />
Can be used with the AC adapter (included) or<br />
batteries for portability. An automatic shut-off<br />
circuit extends battery life.<br />
OHAUS 760-00 TRIPLE-BEAM BALANCE -<br />
Quality, mechanical<br />
balance<br />
with readability<br />
to 0.1 gram and<br />
weighing<br />
capacity to 2610<br />
grams (5+ lb) makes this balance more than<br />
adequate for weighing small quantities.<br />
Weight set included.<br />
OTHER ACCESSORIES<br />
POLY PURGE DRY GAS<br />
BLANKET - Blast Poly<br />
Purge into an open<br />
container just before<br />
resealing the lid to displace<br />
moist air and extend the life<br />
of polyurethane liquids. Poly<br />
Purge is heavier than air<br />
and is non-flammable and<br />
non-ozone depleting. It is packaged in an<br />
aerosol can with a special nozzle extension<br />
useful for directing the gas into the desired<br />
space. 10-oz can or Case of 12 cans<br />
<strong>Polytek</strong> offers DVDs and video tapes to help<br />
customers better understand mold making<br />
materials and processes.<br />
POLYTEK MOLDMAKING DVD<br />
Watch step-by-step demonstrations showing<br />
how to make a<br />
poured block mold;<br />
brushed blanket mold<br />
with plastic shell;<br />
and a poured blanket<br />
mold with a plastic<br />
shell. See how to use<br />
<strong>Polytek</strong> polyurethane<br />
and silicone rubbers<br />
and plastics. Only<br />
$5.95!<br />
POLYTEK BODY CASTING AND SPECIAL<br />
EFFECTS SEMINAR/WORKSHOP<br />
Body & Face Casting with Hydrogel ®<br />
Alginate, 115 min.<br />
BALL CONSULTING LTD.<br />
MOLD MAKING AND CASTING<br />
A practical how-to video showing the making<br />
of a poured mold, a brush-on mold and a<br />
poured blanket mold. Casting of Forton ® MG<br />
with a metal powder filled face mix and a<br />
glass fiber reinforce back-up. Covers patinas<br />
and other finishing techniques. Use of Forton ®<br />
MG to spray-up a large, rigid column mold<br />
and rigid carrier molds also shown. Approx.<br />
40-min.<br />
SUCCESS WITH FULL BODY MOLDS AND<br />
FORTON ® CASTINGS<br />
The definitive video on full-body molding.<br />
This Mark Prent video also includes useful<br />
information on casting with Forton ® MG.<br />
Approx. 70 min.<br />
BETTER ONE-PIECE HEAD MOLDS FROM LIFE<br />
Master sculptor Mark Prent takes you step-bystep<br />
through every detail of using alginate<br />
mold compounds to make head molds of live<br />
models (i.e., Hydrogel ® N). Approx. 75 min.<br />
THE USER’S GUIDE TO REDUCIT ®<br />
RUBBER MOLDS, AND INNOVATIVE PLASTIC<br />
SUPPORT STRUCTURES<br />
Mark Prent uses <strong>Polytek</strong> Mold Rubbers and<br />
alginate compounds to reduce a life size<br />
sculpture to ¼-scale in two steps. This video<br />
offers the solution to an age old problem while<br />
maintaining every detail of the original.<br />
Approx. 60 min.<br />
METHODS FOR<br />
MODERN SCULPTORS<br />
By Ronald D. Young<br />
& Robert A. Fennell<br />
Published in 1980, this<br />
is still one of the best<br />
general texts on the<br />
subject, including a<br />
very good chapter on<br />
mold making. (292 pp)<br />
POLYTEK CURED SAMPLE STRIPS<br />
Two pages of cured sample strips of most<br />
<strong>Polytek</strong> rubbers and resins in a 3-ring binder.<br />
A handy reference when selecting a material<br />
for a particular job.<br />
ROTATIONAL CASTING<br />
Rotational casting involves rotating a closed<br />
mold while a liquid casting material flows over<br />
the inner surface of the mold. The liquid clings<br />
to the mold surface just enough to create a thin<br />
layer of cured material, which creates a hollow<br />
casting. Rotational casting is an efficient<br />
method of creating large, lightweight pieces<br />
such as mannequins and figurines. Fast-setting<br />
liquids are used so that pieces can be produced<br />
with short cycle times.<br />
The 2 machines pictured below are at our PA<br />
facility and are available for demos and test runs.<br />
Small machines cost<br />
~$5,000 and can support<br />
mold loads of ~ 200 lb.<br />
Table-top versions are<br />
available. Large<br />
machines can carry<br />
many molds and cost ~<br />
$12,000.<br />
Accessories<br />
www.polytek.com<br />
63
6 Accessories<br />
DRUM HANDLING PRODUCTS<br />
POLYGEL ® SPRAYER<br />
<strong>Polytek</strong> offers numerous products to make<br />
handling drums easier and safer. A few items<br />
are shown below. Call <strong>Polytek</strong> for pricing and<br />
details.<br />
Oil-Gate Valve<br />
for 2-inch Bung<br />
Drum Bung<br />
Wrench,<br />
Standard Bronze<br />
Drum Deheader<br />
Drierite<br />
Cartridge<br />
Meters, mixes and sprays select Polygel ®<br />
rubbers and plastics. Makes superior quality<br />
molds and shells much faster than hand<br />
application using self thickening Polygel ®<br />
rubbers and plastics.<br />
METER MIX EQUIPMENT<br />
Accessories<br />
Drum Cradle<br />
Drum Hand<br />
Truck<br />
Hand Truck<br />
DRYING CARTRIDGE PROTECTS PRODUCT<br />
INTEGRITY - Drums of Polyurethane products<br />
(both Parts A & B) benefit from use of Drierite<br />
Dessicant Cartridges. The cartridge is screwed<br />
into the small bung with an adapter so that air<br />
entering the drum during dispensing is dry.<br />
Protects product integrity. Drierite Cartridges<br />
have a window to view color change to<br />
determine when cartridge is spent.<br />
Drierite Cartridge and Adapter sold separately.<br />
Poly 74-55 drum<br />
unit ready for<br />
use with valve,<br />
cradle and<br />
Drierite<br />
cartridge.<br />
Meter mix and dispensing equipment<br />
automatically measures, mixes, pumps or<br />
sprays <strong>Polytek</strong> liquid rubbers and plastics. For<br />
recommendations on this type of equipment,<br />
call <strong>Polytek</strong> Customer Service at 800-858-5990.<br />
PORTABLE SPRAY SYSTEMS<br />
Certain <strong>Polytek</strong> polyurethane and silicone<br />
liquid mold rubbers and plastics ( e.g.,<br />
Polygel ®<br />
rubbers & plastics, accelerated<br />
1512X polyurethane plastic & TinSil ®<br />
Spray<br />
25) can be inexpensively meter mixed and<br />
sprayed using sprayer assemblies and<br />
accessories from Plas-Pak Industries. Two gun<br />
assemblies are available - a 1:1 mix system for<br />
polyurethane rubbers and plastics and a 1:10<br />
sprayer for TinSil ®<br />
Spray 25. Both sprayers<br />
are available from <strong>Polytek</strong> and come equipped<br />
with a pressure regulator kit and a<br />
Mixer/Spray Gun Assembly. You need to<br />
supply the air compressor. Empty cartridge<br />
assemblies (one tube for Part A and one for<br />
Part B are molded into one piece for<br />
convenience) and static mixers are sold<br />
separately. Cartridge assemblies may be<br />
reused when handled carefully or disposed if<br />
cleanup is impractical. Static mixers are<br />
disposable and should not be reused.<br />
Pallet Truck<br />
With this handy spray system you can<br />
complete a mold in a one-application session.<br />
For larger volume applications, <strong>Polytek</strong><br />
products can be purchased in totes. <strong>Polytek</strong> also<br />
offers accessories for handling and dispensing<br />
products from totes. Call <strong>Polytek</strong> for details.<br />
For recommendations on this type of<br />
equipment, call <strong>Polytek</strong> Customer Service at<br />
800-858-5990.<br />
64<br />
(610)559-8620 • (800)858-5990
Accessories 6<br />
TRIAL UNIT ORDER POLICY<br />
GLOSSARY<br />
See for yourself! Try Our Introductory Offer.<br />
To encourage you to evaluate our products, <strong>Polytek</strong> will ship you the trial unit(s)<br />
freight paid (except for hazardous material fees, if any) in the contiguous 48<br />
States at special low prices. Only one trial unit shipment of each product per<br />
customer. Subsequent orders are at list price. Directions and MSDSs are sent with<br />
trial units. All trial unit orders must be prepaid.<br />
Freight is free for accessories shipped with a trial unit, up to the value of the trial<br />
unit. Call for details.<br />
TRY YOUR LOCAL DISTRIBUTOR FIRST<br />
<strong>Polytek</strong> has stocking distributors worldwide; more every day. Call <strong>Polytek</strong> to learn<br />
the name and location of the distributor in your area.<br />
NOTES & POLICIES<br />
Prices are per unit, including both A & B. (Except one-part materials and certain epoxies.)<br />
Terms are 1% 10 days, net 30 days for accounts with approved credit.<br />
Orders prepaid with credit card, money order or wire transfer will usually be shipped<br />
the next day providing items are in stock.<br />
Orders prepaid with check are subject to delayed shipment until the check clears.<br />
No COD Shipments.<br />
Prices do not include state and local taxes.<br />
State tax exemption certificate required for PA customers.<br />
Prices are subject to change without notice.<br />
Prices are FOB Easton, PA.<br />
Freight will be prepaid on shipments valued over $4,000 for delivery in the contiguous<br />
48 States.<br />
Minimum order $40; also applies to trial units.<br />
Any single pint size bottle of Silicone Part A is the full 1-lb kit price for that product.<br />
Any ½-gal size bottle of Silicone Part A is the full gallon-size kit price for that product.<br />
Minimum charge for any small container is $5.<br />
All video and book sales are final. No returns or refunds.<br />
Returns must be pre-approved and a 20% stocking charge is charged on all returns.<br />
Return Check charge is $25.<br />
TRADEMARKS<br />
<strong>Polytek</strong> ® , Polygel ® , Polypoxy ® , Poly-Optic ® , Poly-Sil ® , FormRub ® , Hydrogel ® ,<br />
PlatSil ® , TinSil ® and Pol-Ease ® are registered trademarks of <strong>Polytek</strong> Development<br />
Corp., Easton, PA 18042 USA. Registration is pending for EasyFlo, PolyFoam, Poly<br />
LiteCast, EpoxyBond, Poly Purge and PolyBond.<br />
Cab-O-Sil ® , Tietex ® and Forton ® are marks of their respective manufacturers.<br />
Blanket Mold: A thin blanket-like rubber<br />
mold, usually ¼- to ½-inch thick. A rigid<br />
shell (mother mold) is required to hold<br />
the floppy blanket mold in perfect shape.<br />
Chasing: The process of cleaning<br />
unwanted material (flashing) from a<br />
casting.<br />
Flashing: 1. Unwanted fin-like<br />
projections of casting materials that have<br />
flowed into mold vents and parting lines.<br />
2. Thin aluminum sheet used to divide<br />
mold sections.<br />
Inhibition: Failure of a compound to<br />
cure against a surface within the<br />
recommended cure time. The surface in<br />
contact with the pattern remains gummy<br />
or uncured. Inhibition is most likely to<br />
occur in addition-cure (PlatSil ® ) silicone<br />
systems.<br />
Keys: Tongue-and-groove, or button-like<br />
impressions to align mold or shell<br />
sections.<br />
Mother Mold (Mold Shell): The rigid<br />
shell over a flexible mold that holds the<br />
flexible mold in the desired configuration.<br />
Model: The original shape over which a<br />
mold is made.<br />
Parting Line: The line where sections of<br />
a mold or mold shell divide.<br />
Release Agent: A coating applied to<br />
prevent liquid rubbers and resins from<br />
sticking to surfaces.<br />
Resin: A liquid that can be cured to a<br />
solid plastic.<br />
RTV: Room temperature vulcanizing.<br />
Shims: thin strips of material used to<br />
form parting lines.<br />
Undercuts: A configuration such as an<br />
overhang between two mated surfaces,<br />
such as a mold and model, that tends to<br />
prevent them from separating when<br />
pulled apart. Flexible mold materials<br />
allow molds to be made with limited<br />
undercuts because the flexible mold<br />
material bends as the part is demolded.<br />
Accessories<br />
www.polytek.com<br />
65
Polyurethane RTV Mold Rubbers . . . . . .32-39<br />
Poly 74, Poly 75 & Poly 77 Series Rubbers<br />
Our Most Popular Mold Rubbers! With hardnesses that range from a soft,<br />
stretchy Shore A~20 to a very firm Shore A~90, these rubbers find innumerable<br />
uses as tough, long-lasting mold rubbers or for making rubber<br />
parts, forms or stamps. Many of these systems have 1:1 mix ratios and<br />
all are easily mixed by hand or can be machine dispensed because of<br />
their low viscosities and other user-friendly characteristics. These<br />
polyurethane rubbers are designed for casting concrete, plaster, wax, and<br />
resins/foams with the use of appropriate release agents. Poly 74-20 has<br />
been designed for high-volume concrete casting where the highest level<br />
of elasticity and performance is required. Poly 74-30 is ideal for wax<br />
casting in foundry applications. Firmer versions of the 74, 75 and 77<br />
Series rubbers are recommended for casting plaster and concrete as well<br />
and are chosen based on hardness and other specific physical properties<br />
needed depending upon the size, shape and nature of the master being<br />
duplicated or part being cast. Consult <strong>Polytek</strong>'s technical support staff for<br />
assistance in choosing the right rubber for your application!<br />
Polygel ® Brushable/Sprayable Rubbers - Patented Polygel mold rubbers<br />
are 1:1 mix liquids that thicken upon mixing Parts A and B to a<br />
brushable or sprayable viscosity. Polygel 50 can be applied about ¼-inch<br />
thick while Polygel 35 & 40 are thinner for best detail penetration. With<br />
Polygel Spray 35 & 50, you can make a large mold in an afternoon and<br />
cure it overnight.<br />
Poly GlassRub - GlassRub 50 is a clear, pale-blue, glass like rubber for<br />
casting flexible art objects or for cut molds.<br />
Poly-Fast 72-40 Series Rubbers - These fast-setting rubbers (8-hr<br />
demold) can have varied hardnesses by changing mix ratio or adding Part<br />
C. Can be thickened for brush-on molds with Cab-O-Sil ® or Part D.<br />
Poly 81 Series Rubbers - High-performance, RTV, elastomers for parts,<br />
tools and molds. Low moisture sensitivity. Hardnesses of D45 and A90.<br />
Casting Plastics/Resins . . . . . . . . . . . . . .46-56<br />
EasyFlo Series Plastics - Easy 1:1 by volume mix ratio, odorless,<br />
resins cure to a white or clear plastic in minutes. EasyFlo 60, 95, 120 &<br />
Clear are super low viscosity, fast casting plastics: great for rotocasting<br />
and bubble-free parts. Also used for making cold-cast bonded bronzes.<br />
Poly 15 Series Casting Resins - Filled Poly 15-3 and faster 15-3X are<br />
excellent for casting parts, molds and tools. Poly 15-6, 1511 and 1512X<br />
make strong, lightweight mold shells. Poly 1510, 1511, 1512 and 1512X<br />
are water thin, with a great thermoplastic feel for prototypes. Poly 15-8<br />
is aluminum-filled for applications demanding heat-resistance.<br />
Poly-Optic ® 14 Series Crystal Clear Casting Resins - Poly-Optic 1410<br />
and 1411 are non-yellowing, Shore D85 plastics. Poly-Optic1420 must<br />
be heat cured and is buffable. Poly-Optic 14-70 is a clear rubber with a<br />
Shore A70.<br />
Poly Lite Cast - Has a wood-like feel and can be carved, cut, sanded and<br />
drilled.<br />
Poly Plasti-Flex - A flexible plastic for decorative trims and castings.<br />
Polygel ® Plastic-75 & Polygel ® Shell - Easy, 1:1 mix ratio, use these<br />
resins for making mold shells fast.<br />
PolyFoams - Cast these easy (1A:1B) rigid & flexible foams in closed<br />
molds packed to 4-20 lb/ft 3 densities to produce parts replicating wood,<br />
terra-cotta, stone, etc. Use in PlatSil or TinSil molds.<br />
Liquid Rubbers & Plastics<br />
for Mold Making & Casting<br />
Silicone RTV Mold Rubbers . . . . . . . . . .40-45<br />
TinSil ® 70 Series Silicone Rubbers - Many products, from soft A10 to<br />
firm A60 hardness. Best for casting resins and 70-60 is acceptable for<br />
casting low melting metals. Consider TinSil 70 Series systems for best<br />
economy.<br />
PlatSil ® 71 & 73 Series Silicone Rubbers - Consider platinum-cured<br />
PlatSil 71 & 73 Series for highest performance. Several easy-to-use, 1:1<br />
mix ratio systems with 4-hour demolds are available.<br />
PlatSil ® Gel-10 Silicone Rubber - Translucent, soft silicone for delicate<br />
casting projects and special effects. Use to make simulated skins and<br />
prosthetic appliances that can be applied directly to an actor or for aniimatronic<br />
effects.<br />
Specialty Molding/Casting Materials . . .57-60<br />
Latex Rubber Products - Poly Latex 60 is a one-part, thickened, natural<br />
latex for brush-on molds that are strong and durable. When thinned<br />
with Poly Latex N, Latex 60 can be sprayed using an inexpensive cup<br />
gun. Poly Latex False Face Compound is a one-part, high strength, casting<br />
rubber for novelty masks, flexible sculpture and animatronics. False<br />
Face can also be used for dipped molds.<br />
Poly Wax 15 and Poly Skin-Wax - Poly Skin-Wax has a very low melting<br />
point with good toughness after cooling for making molds of hands,<br />
feet and delicate objects with limited undercuts. Poly Wax 15 is mineral<br />
filled for casting in most rubber molds to make recarvable models.<br />
Hydrogel ® N Mold Compound - Mix this powder with water to make a<br />
rubbery mold in minutes. Yields excellent mold impressions if plaster or<br />
wax is cast right after setting. Safe for body contact.<br />
Epoxy Resins and Curatives - Polypoxy ® 1010 is a general-use, low<br />
viscosity, epoxy resin. Mix with Poly Cure 1212 and bronze or other<br />
metal powders for production of cold-cast bonded bronze in rubber<br />
molds. Call for information about other epoxy systems.<br />
Accessories . . . . . . . . . . . . . . . . . . . . . . .61-64<br />
<strong>Polytek</strong> offers many accessories so you can obtain all your mold-making<br />
supplies from a single source!<br />
Pol-Ease ® Release Agents - Aerosol Pol-Ease 2300 & 2500 and waterbased<br />
Pol-Ease 2601 allow for easy release of rubbers from models and<br />
resins from molds. Pol-Ease 2650 is best for high volume concrete and<br />
plaster applications.<br />
Poly Adhesives & Bonding Agents - PolyBond is a flexible, high performance,<br />
polyurethane adhesive for many applications. EpoxyBond &<br />
Quick Stick are epoxy systems for similar rigid bonding applications.<br />
PolyFiber, Bronze and Other Fillers<br />
Safety Equipment - <strong>Polytek</strong> sells gloves, coveralls, solvent cans and<br />
more. Work safe!<br />
Mixers, Scales, Books and Videos & Other Equipment<br />
Our latest training DVD demonstrates various mold making techniques<br />
and is only $5.95! <strong>Polytek</strong> can suggest rotocast machines and meter-mix<br />
pumps/sprayers to dispense liquid rubbers & plastics to meet your particular<br />
requirements. Please call to let us help!<br />
See Our Low Cost Trial Unit Order Policy - p. 65