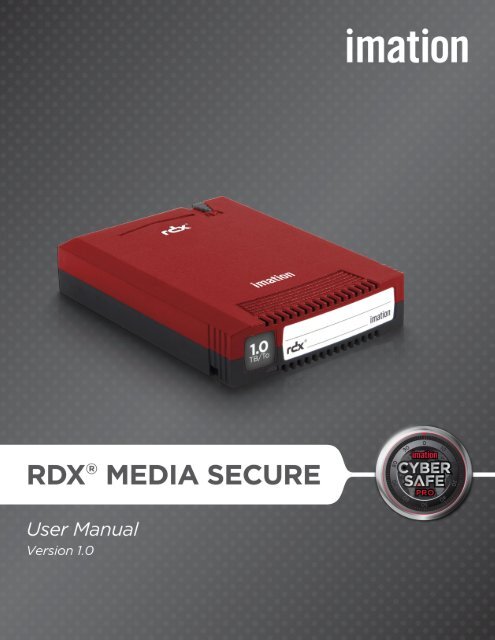
Imation RDX Media Secure User Manual
Imation RDX Media Secure User Manual
Imation RDX Media Secure User Manual
Create successful ePaper yourself
Turn your PDF publications into a flip-book with our unique Google optimized e-Paper software.
Copyright<br />
© <strong>Imation</strong> Corp. All rights reserved. This item and the information contained herein<br />
are the property of <strong>Imation</strong>.<br />
No part of this document may be reproduced, transmitted, transcribed, stored in a<br />
retrieval system, or translated into any language or computer language in any form<br />
or by any means, electronic, mechanical, magnetic, optical, manual, or otherwise,<br />
without the express written consent of <strong>Imation</strong>.<br />
Limitations<br />
<strong>Imation</strong> makes no representation or warranties with respect to the contents of this<br />
document and specifically disclaims any implied warranties of merchantability or<br />
fitness for any particular purpose.<br />
Further, <strong>Imation</strong> reserves the right to revise this publication without obligation of<br />
<strong>Imation</strong> to notify any person or organization of such revision or changes.<br />
Trademark Notices<br />
<strong>Imation</strong> and the <strong>Imation</strong> logo are trademarks of <strong>Imation</strong> Corp.<br />
<strong>RDX</strong> is a registered trademark of Tandberg Data ASA.<br />
All other trademarks are the property of their respective owners.
Revision History<br />
Date <strong>Manual</strong> Version Description<br />
5/2012 1.0 Initial development for <strong>RDX</strong>®<br />
<strong>Media</strong> <strong>Secure</strong> Client, version<br />
2.1
Introduction<br />
Scope<br />
This document provides information about installing, operating, and troubleshooting<br />
the <strong>RDX</strong>® <strong>Media</strong> <strong>Secure</strong> cartridge product. It is intended for system administrators<br />
and users who need information on the <strong>RDX</strong> <strong>Media</strong> <strong>Secure</strong> cartridge product.<br />
Contact <strong>Imation</strong><br />
<strong>Imation</strong> Corp.<br />
One <strong>Imation</strong> Way<br />
Oakdale, MN 55128<br />
USA<br />
Tel. (800) 351-8186<br />
Technical Support<br />
techsupport@imation.com<br />
www.imation.com/support<br />
Product Warranty<br />
Limited Warranty: If any defect in material or manufacture appears within 3 years of<br />
the date of original purchase of this product, it will be replaced or the purchase price<br />
refunded.<br />
For more information, go to www.imation.com/rdx. This warranty does not apply to<br />
normal wear or damage from misuse, abuse or accident. <strong>Imation</strong> will not be liable for<br />
any lost data or other indirect, incidental or consequential damages. This warranty<br />
gives you specific rights - you may have other rights that vary from country to<br />
country.<br />
Product Registration<br />
Stay up to date with the latest news and software for your product by registering it<br />
today at:<br />
www.imation.com/support
Contents<br />
Introduction ......................................................................................................4<br />
Scope ...................................................................................................................... 4<br />
Contact <strong>Imation</strong> ....................................................................................................... 4<br />
Technical Support.................................................................................................... 4<br />
Product Warranty..................................................................................................... 4<br />
Product Overview.............................................................................................3<br />
Overview.................................................................................................................. 3<br />
Features .................................................................................................................. 3<br />
<strong>RDX</strong> <strong>Media</strong> <strong>Secure</strong> .............................................................................................. 3<br />
Security features .................................................................................................. 4<br />
Product Requirements and Software Compatibility..........................................5<br />
System Requirements ............................................................................................. 5<br />
Operating systems ............................................................................................... 5<br />
Required supporting software .............................................................................. 5<br />
Compatible Backup Applications ............................................................................. 6<br />
Installation and Setup.......................................................................................7<br />
Install Software ........................................................................................................ 7<br />
To install <strong>RDX</strong> <strong>Media</strong> <strong>Secure</strong> Client..................................................................... 7<br />
Setting up the <strong>RDX</strong> <strong>Media</strong> <strong>Secure</strong> Cartridge ........................................................... 9<br />
Set up <strong>Secure</strong> <strong>Media</strong> Login Information ................................................................ 10<br />
To set up secure media...................................................................................... 10<br />
Uninstall Software.................................................................................................. 11<br />
Operating <strong>RDX</strong> <strong>Media</strong> <strong>Secure</strong>........................................................................13<br />
Log into <strong>RDX</strong> <strong>Media</strong> <strong>Secure</strong> .................................................................................. 13<br />
To log in ............................................................................................................. 13<br />
Encryption and Decryption .................................................................................... 14<br />
Encrypt files........................................................................................................ 14<br />
Decrypt files ....................................................................................................... 14<br />
Access encrypted information without the <strong>RDX</strong> <strong>Media</strong> <strong>Secure</strong> Client software . 14<br />
Recover Password ................................................................................................ 15<br />
To recover a password....................................................................................... 15<br />
Using the <strong>RDX</strong> <strong>Media</strong> <strong>Secure</strong> Client Menu ....................................................18<br />
<strong>RDX</strong> <strong>Media</strong> <strong>Secure</strong> Client Menu Functions ........................................................... 18<br />
To access the <strong>RDX</strong> <strong>Media</strong> <strong>Secure</strong> Client menu................................................. 18<br />
View <strong>Manual</strong> .......................................................................................................... 19<br />
To access the manual ........................................................................................ 19<br />
Change Password ................................................................................................. 19<br />
To change a password....................................................................................... 20<br />
Change Hint Question/Answer .............................................................................. 22<br />
To change hint information................................................................................. 22<br />
Logoff All Drives .................................................................................................... 23<br />
Contents - i
To logoff drives................................................................................................... 23<br />
Upgrade Java ........................................................................................................ 24<br />
To select the Upgrade Java option .................................................................... 24<br />
Re-enter Passwords .............................................................................................. 24<br />
To re-enter a password ...................................................................................... 25<br />
Safely Remove Device .......................................................................................... 26<br />
To safely remove an <strong>RDX</strong> <strong>Media</strong> <strong>Secure</strong> cartridge............................................ 27<br />
Recycle Device...................................................................................................... 28<br />
Recycle cartridges.............................................................................................. 28<br />
To recycle a cartridge......................................................................................... 28<br />
Access third-party shred software information ................................................... 29<br />
To access third-party shred software information .............................................. 30<br />
About ..................................................................................................................... 31<br />
To view the About <strong>RDX</strong> <strong>Media</strong> <strong>Secure</strong> Client dialog box ................................... 32<br />
To view the license agreement .......................................................................... 32<br />
To view cartridge information ............................................................................. 33<br />
Troubleshooting .............................................................................................34<br />
Troubleshooting Information.................................................................................. 34<br />
Contacting <strong>Imation</strong> .........................................................................................36<br />
Company Information ............................................................................................ 36<br />
Technical Support.................................................................................................. 36<br />
Contents - ii
Product Overview<br />
Overview<br />
The <strong>RDX</strong> <strong>Media</strong> <strong>Secure</strong> product consists of a <strong>RDX</strong> cartridge and <strong>RDX</strong> <strong>Media</strong> <strong>Secure</strong><br />
Client software. This secure product is used in conjunction with an <strong>RDX</strong> docking<br />
station directly attached to a host computer that has a Microsoft® Windows®<br />
operating system installed on it (both of which are sold separately from the <strong>RDX</strong><br />
<strong>Media</strong> <strong>Secure</strong> product).<br />
The <strong>RDX</strong> <strong>Media</strong> <strong>Secure</strong> cartridge consists of a rugged, removable disk cartridge.<br />
When used with a <strong>RDX</strong> docking station, it enables users to back up data like a tape<br />
drive, with the instant access of a hard drive. For more information about <strong>Imation</strong><br />
<strong>RDX</strong> cartridges and docking stations, please refer to <strong>RDX</strong> Removable Hard Disk<br />
Storage System <strong>User</strong> Guide, which is included with <strong>Imation</strong> <strong>RDX</strong> Hard Disk Storage<br />
Systems.<br />
The <strong>RDX</strong> <strong>Media</strong> <strong>Secure</strong> Client software enables users to encrypt the data stored on<br />
their <strong>RDX</strong> <strong>Media</strong> <strong>Secure</strong> cartridge.<br />
The installation file for the <strong>RDX</strong> <strong>Media</strong> <strong>Secure</strong> Client software is located on the <strong>RDX</strong><br />
<strong>Media</strong> <strong>Secure</strong> cartridge. <strong>User</strong>s install the software on their computers so that it can<br />
protect <strong>RDX</strong> <strong>Media</strong> <strong>Secure</strong> cartridges used with the computers.<br />
Features<br />
Following are descriptions of the features of the <strong>RDX</strong> <strong>Media</strong> <strong>Secure</strong> cartridge and the<br />
<strong>RDX</strong> <strong>Media</strong> <strong>Secure</strong> Client software.<br />
<strong>RDX</strong> <strong>Media</strong> <strong>Secure</strong><br />
• Red color enables easy distinction from other <strong>RDX</strong> media<br />
• Provides forward and backwards compatibility with all direct-attach <strong>RDX</strong> docking<br />
stations<br />
• Provides high level of data reliability:<br />
• Ruggedized cartridge designed to prevent data loss due to normal user<br />
handling of cartridge<br />
• Cartridge materials engineered to protect from data loss due to electrostatic<br />
discharge (ESD)<br />
• <strong>Media</strong> error rate determined by hard disk drive (HDD) model in cartridge<br />
Product Overview: Overview 3
• Includes a fault indicator at the front of the cartridge to inform users when the<br />
cartridge is faulty<br />
• Includes a write-protect switch to protect the cartridge from accidental overwrite<br />
of user data<br />
• Includes venting to enable cooling of the HDD<br />
• Includes gripping features for automation<br />
• Provides a rear opening for use with a latch to control media removal<br />
• Profile is unsymmetrical (keyed) to prevent incorrect insertion<br />
Security features<br />
• Incorporates a FIPS 140-2 certified cryptographic module to provide AES 256-bit<br />
encryption<br />
• Automatically encrypts and decrypts data exclusively on <strong>RDX</strong> <strong>Media</strong> <strong>Secure</strong><br />
cartridges<br />
• Encryption and decryption operations are transparent to users<br />
• Includes built-in password recovery mechanism with countermeasures to prevent<br />
password attacks<br />
• Recycle feature cryptographically erases all data for media disposal or<br />
repurposing<br />
Product Overview: Features 4
Product Requirements and<br />
Software Compatibility<br />
System Requirements<br />
Operating systems<br />
<strong>RDX</strong> <strong>Media</strong> <strong>Secure</strong> cartridges function with the following operating systems:<br />
• Microsoft® Windows® XP Professional with latest service pack<br />
• Microsoft Windows Vista, 32- and 64-bit versions, with latest service pack<br />
• Microsoft Windows 7, 32- and 64-bit versions, with latest service pack<br />
• Microsoft Windows Server 2003, 2008, and 2008 R2, with latest service packs<br />
Required supporting software<br />
The following software applications are prerequisites for installing <strong>RDX</strong> <strong>Media</strong><br />
<strong>Secure</strong> Client.<br />
Company Product Name Version<br />
Oracle® Corp. Java Version 6, update 31 or<br />
newer, 32-bit<br />
<strong>RDX</strong> docking station<br />
manufacturer<br />
<strong>RDX</strong> utilities (generic term,<br />
not product name)<br />
Latest version<br />
If <strong>RDX</strong> <strong>Media</strong> <strong>Secure</strong> Client does not run automatically after installation, it is possible<br />
that Java is not installed on the host computer for the <strong>RDX</strong> docking stations or that<br />
an unsupported version is installed.<br />
<strong>User</strong>s can check their list of installed programs through the Windows Control Panel<br />
to see if the 32-bit version of Java, version 6.31 or newer is installed on their PC. If it<br />
is not, they can download Java for free from http://java.com.<br />
IMPORTANT: It is required that the 32-bit version of Java be installed on the<br />
computer to run the <strong>RDX</strong> <strong>Media</strong> <strong>Secure</strong> Client software, even if the 64-bit<br />
version of Java is already installed.<br />
Product Requirements and Software Compatibility: System Requirements 5
Compatible Backup Applications<br />
For a list of compatible backup software applications verified to work with the <strong>RDX</strong><br />
<strong>Media</strong> <strong>Secure</strong> cartridges, please check the <strong>Imation</strong> support Web site at:<br />
www.imation.com/support<br />
Product Requirements and Software Compatibility: 6
Installation and Setup<br />
To encrypt data on an <strong>RDX</strong> <strong>Media</strong> <strong>Secure</strong> cartridge, install the <strong>RDX</strong> <strong>Media</strong> <strong>Secure</strong><br />
Client software (included on the cartridge) on the host computer of the <strong>RDX</strong> docking<br />
station. Then, set up the cartridge.<br />
Install Software<br />
The installation file for the software is located on the root of the <strong>RDX</strong> <strong>Media</strong> <strong>Secure</strong><br />
cartridge.<br />
Note: Run the software installation file directly from the <strong>RDX</strong> <strong>Media</strong> <strong>Secure</strong><br />
cartridge. It will not function correctly if copied to another location and<br />
executed.<br />
To install <strong>RDX</strong> <strong>Media</strong> <strong>Secure</strong> Client<br />
1. Verify that the host computer meets the system requirements.<br />
2. Verify that the host computer has the required supporting software, including the<br />
32-bit version of Java, installed on it.<br />
3. Log into the host computer, using an account with administrator rights.<br />
4. Insert an <strong>RDX</strong> <strong>Media</strong> <strong>Secure</strong> cartridge into an <strong>RDX</strong> docking station connected to<br />
the host computer.<br />
5. Through Windows Explorer, find and double-click the <strong>RDX</strong> <strong>Media</strong> <strong>Secure</strong> Client<br />
installation file, which is located on the root of the cartridge.<br />
6. In the first screen of the <strong>RDX</strong> <strong>Media</strong> <strong>Secure</strong> Client installation wizard, click Next.<br />
Installation and Setup: Install Software 7
7. Review the license agreement, accept the terms of the license agreement, and<br />
follow the installation instructions that display.<br />
Installation and Setup: Install Software 8
8. After rebooting the host computer which is the last step of the installation<br />
procedure, the user can log into the computer as any type of user (administrator<br />
or non-administrator).<br />
Following successful installation of the <strong>RDX</strong> <strong>Media</strong> <strong>Secure</strong> Client software, a padlock<br />
icon displays in the notification area of the Windows taskbar (typically located in<br />
the lower right corner of the desktop).<br />
Right-clicking the icon displays a context menu of the functions available in <strong>RDX</strong><br />
<strong>Media</strong> <strong>Secure</strong> Client (all menu items are enabled after setting up the cartridge or<br />
logging into it thereafter).<br />
Setting up the <strong>RDX</strong> <strong>Media</strong> <strong>Secure</strong> Cartridge<br />
Each <strong>RDX</strong> <strong>Media</strong> <strong>Secure</strong> cartridge requires a password to log in and enable its<br />
cryptographic keys. Setting up the cartridge consists of entering a unique password<br />
and supplying a hint question and answer for password recovery.<br />
The cartridge set up dialog box automatically displays if there is no password for the<br />
cartridge.<br />
<strong>User</strong>s must know either their password or the answer to the password recovery hint<br />
question to access their encrypted files. If they forget both, they will not be able to log<br />
into the cartridge and access their files.<br />
Installation and Setup: Setting up the <strong>RDX</strong> <strong>Media</strong> <strong>Secure</strong> Cartridge 9
Set up <strong>Secure</strong> <strong>Media</strong> Login Information<br />
It is recommended that users create strong passwords by entering a complex pass<br />
phrase that consists of at least eight characters and a mixture of alphabetical<br />
characters, numerals, and symbols instead of a simple password.<br />
Login Component<br />
Password<br />
Hint question<br />
Hint answer<br />
Requirements<br />
– Must be 8 characters or more<br />
– Must contain an alphabetical character<br />
– Must contain a numeral<br />
– Is case-sensitive<br />
– Must not contain the user name of the<br />
Windows account logged into the <strong>RDX</strong><br />
host computer<br />
– Must be 2 characters or more<br />
– Must not contain the password<br />
– Must not contain the hint answer<br />
– Must be 8 characters or more<br />
To set up secure media<br />
1. Insert the secure media into an <strong>RDX</strong> docking station connected to a host<br />
computer that has <strong>RDX</strong> <strong>Media</strong> <strong>Secure</strong> Client installed on it.<br />
2. In the user setup dialog box, enter a password that conforms to the password<br />
requirements in the Password and Confirm boxes.<br />
Installation and Setup: Set up <strong>Secure</strong> <strong>Media</strong> Login Information 10
3. Enter a hint question that conforms to the hint question requirements.<br />
4. Enter a hint answer that conforms to the hint answer requirements.<br />
5. Click OK.<br />
When finished, a message will appear indicating that the <strong>RDX</strong> <strong>Media</strong> <strong>Secure</strong><br />
cartridge is ready for use.<br />
Uninstall Software<br />
The uninstall feature of Windows Control Panel enables the user to uninstall the <strong>RDX</strong><br />
<strong>Media</strong> <strong>Secure</strong> Client software.<br />
IMPORTANT: <strong>RDX</strong> <strong>Media</strong> <strong>Secure</strong> cartridges will not function properly if the<br />
<strong>RDX</strong> <strong>Media</strong> <strong>Secure</strong> Client software is uninstalled.<br />
Installation and Setup: Uninstall Software 11
Installation and Setup: Uninstall Software 12
Operating <strong>RDX</strong> <strong>Media</strong> <strong>Secure</strong><br />
Operating <strong>RDX</strong> <strong>Media</strong> <strong>Secure</strong> consists of:<br />
• Inserting the secure media into an <strong>RDX</strong> docking station connected to a host<br />
computer that has <strong>RDX</strong> <strong>Media</strong> <strong>Secure</strong> Client installed on it<br />
• Providing the cartridge password<br />
• Working with files on the cartridge (e.g., adding, modifying, and deleting) as one<br />
would with any Windows storage device, which in the process automatically<br />
encrypts and decrypts them<br />
Log into <strong>RDX</strong> <strong>Media</strong> <strong>Secure</strong><br />
After cartridge setup, <strong>RDX</strong> <strong>Media</strong> <strong>Secure</strong> cartridges require providing a password<br />
every time that they are inserted into the <strong>RDX</strong> docking stations or whenever the host<br />
computer is restarted.<br />
Note: Any attempt to access the encrypted files on the cartridge before the<br />
password has been entered will not succeed. Difficulties accessing these files<br />
may persist even after entering the correct password due to Windows file<br />
system caching. Ejecting and reinserting the cartridge, followed by reentering<br />
the password, will clear these issues.<br />
To log in<br />
1. Insert the encrypted media into an <strong>RDX</strong> docking station connected to a host<br />
computer that has <strong>RDX</strong> <strong>Media</strong> <strong>Secure</strong> Client installed on it.<br />
2. In the <strong>RDX</strong> <strong>Media</strong> <strong>Secure</strong> Client Login dialog box, enter the password for the<br />
cartridge.<br />
Operating <strong>RDX</strong> <strong>Media</strong> <strong>Secure</strong>: Log into <strong>RDX</strong> <strong>Media</strong> <strong>Secure</strong> 13
3. Click OK.<br />
4. After the software has accepted the password, a notice displays that the<br />
cartridge is ready for use. Also, all <strong>RDX</strong> <strong>Media</strong> <strong>Secure</strong> Client menu items are<br />
now available.<br />
Encryption and Decryption<br />
When users add unencrypted files to an encrypted <strong>RDX</strong> <strong>Media</strong> <strong>Secure</strong> cartridge in a<br />
computer that has by <strong>RDX</strong> <strong>Media</strong> <strong>Secure</strong> Client installed on it, the software<br />
automatically and transparently encrypts the files.<br />
Decrypting encrypted files on a cartridge in a computer that has <strong>RDX</strong> <strong>Media</strong> <strong>Secure</strong><br />
Client installed on it is as simple and transparent a process as encrypting them.<br />
Encrypt files<br />
<strong>RDX</strong> <strong>Media</strong> <strong>Secure</strong> Client will encrypt any files written to an <strong>RDX</strong> <strong>Media</strong> <strong>Secure</strong><br />
cartridge by an application, a DOS command window, or through Windows Explorer.<br />
The encrypted files on an <strong>RDX</strong> <strong>Media</strong> <strong>Secure</strong> cartridge are inaccessible to<br />
applications and the Microsoft Windows operating system when users are working<br />
on computers that do not have <strong>RDX</strong> <strong>Media</strong> <strong>Secure</strong> Client installed on them. The files<br />
are visible on the cartridge, but they are encrypted.<br />
Decrypt files<br />
Whenever a user opens a file encrypted by <strong>RDX</strong> <strong>Media</strong> <strong>Secure</strong> Client from a<br />
computer that has <strong>RDX</strong> <strong>Media</strong> <strong>Secure</strong> Client installed on it, the software<br />
automatically decrypts the file. It also decrypts the file when the user copies or saves<br />
it to a location other than on the cartridge.<br />
Access encrypted information without the <strong>RDX</strong> <strong>Media</strong> <strong>Secure</strong> Client software<br />
If users want to use encrypted files on computers that do not have <strong>RDX</strong> <strong>Media</strong><br />
<strong>Secure</strong> Client installed on them, they can copy or save the files on the cartridge to<br />
other removable media while the cartridge is inserted in a computer that has <strong>RDX</strong><br />
<strong>Media</strong> <strong>Secure</strong> Client installed on it.<br />
Operating <strong>RDX</strong> <strong>Media</strong> <strong>Secure</strong>: Encryption and Decryption 14
Recover Password<br />
If a user does not remember their password while logging in, they can choose to use<br />
their hint question and answer to recover it.<br />
They can choose to recover their password either instead of entering a password if<br />
they are certain that they cannot remember their password. Or, they can initiate<br />
password recovery after unsuccessfully trying to log in.<br />
To recover a password<br />
1. In the <strong>RDX</strong> <strong>Media</strong> <strong>Secure</strong> Client Login dialog box, click Recover Password.<br />
– or –<br />
After unsuccessfully entering a password, in the <strong>RDX</strong> <strong>Media</strong> <strong>Secure</strong> Client<br />
Invalid Password dialog box, select the Attempt password recovery option and<br />
click OK.<br />
Operating <strong>RDX</strong> <strong>Media</strong> <strong>Secure</strong>: Recover Password 15
2. In the <strong>RDX</strong> <strong>Media</strong> <strong>Secure</strong> Client Recover Password dialog box, enter the hint<br />
answer and click OK.<br />
3. To view the password, in the <strong>RDX</strong> <strong>Media</strong> <strong>Secure</strong> Client Recovered Password<br />
dialog box, click Show Password and click OK.<br />
Note: The user can ignore the <strong>RDX</strong> <strong>Media</strong> <strong>Secure</strong> Client Recovered<br />
Password dialog box and follow the next step if they are not interested in<br />
viewing their password.<br />
4. In the <strong>RDX</strong> <strong>Media</strong> <strong>Secure</strong> Client Login dialog box, which automatically contains<br />
the password, click OK.<br />
Operating <strong>RDX</strong> <strong>Media</strong> <strong>Secure</strong>: Recover Password 16
Operating <strong>RDX</strong> <strong>Media</strong> <strong>Secure</strong>: Recover Password 17
Using the <strong>RDX</strong> <strong>Media</strong> <strong>Secure</strong> Client<br />
Menu<br />
The <strong>RDX</strong> <strong>Media</strong> <strong>Secure</strong> Client menu enables users to perform all <strong>RDX</strong> <strong>Media</strong> <strong>Secure</strong><br />
Client functions other than encryption and decryption.<br />
<strong>RDX</strong> <strong>Media</strong> <strong>Secure</strong> Client Menu Functions<br />
The <strong>RDX</strong> <strong>Media</strong> <strong>Secure</strong> Client functions include:<br />
• Modifying login information, such as the user password and hint information<br />
• Logging in and off<br />
• Enabling Java software upgrades<br />
• Safely removing <strong>RDX</strong> <strong>Media</strong> <strong>Secure</strong> cartridges<br />
• Recycling cartridges<br />
• Viewing product and cartridge information<br />
To access the <strong>RDX</strong> <strong>Media</strong> <strong>Secure</strong> Client menu<br />
Right-click the <strong>RDX</strong> <strong>Media</strong> <strong>Secure</strong> Client padlock icon in the notification area of<br />
the Windows taskbar (typically located in the lower right corner of the desktop).<br />
The menu displays.<br />
Using the <strong>RDX</strong> <strong>Media</strong> <strong>Secure</strong> Client Menu: <strong>RDX</strong> <strong>Media</strong> <strong>Secure</strong> Client Menu Functions 18
View <strong>Manual</strong><br />
You can access the .pdf file for this manual through the <strong>RDX</strong> <strong>Media</strong> <strong>Secure</strong> Client<br />
menu if you have the Adobe ® Acrobat ® Reader software installed on your PC.<br />
To download this free software, go to the Web site for Adobe Systems, Incorporated<br />
at http://www.adobe.com.<br />
To access the manual<br />
Right-click the <strong>RDX</strong> <strong>Media</strong> <strong>Secure</strong> Client icon<br />
and select View <strong>Manual</strong>.<br />
The <strong>RDX</strong> <strong>Media</strong> <strong>Secure</strong> Client <strong>User</strong> <strong>Manual</strong> displays in a separate Adobe Acrobat<br />
Reader window.<br />
Change Password<br />
<strong>User</strong>s can change their password through the <strong>RDX</strong> <strong>Media</strong> <strong>Secure</strong> Client menu.<br />
While changing their password, they can view the password requirements, such as<br />
minimum password length and type of characters.<br />
Using the <strong>RDX</strong> <strong>Media</strong> <strong>Secure</strong> Client Menu: 19
To change a password<br />
1. Right-click the <strong>RDX</strong> <strong>Media</strong> <strong>Secure</strong> Client padlock icon and select Change<br />
Password.<br />
The <strong>RDX</strong> <strong>Media</strong> <strong>Secure</strong> Client Change Password dialog box displays.<br />
Using the <strong>RDX</strong> <strong>Media</strong> <strong>Secure</strong> Client Menu: Change Password 20
2. To view password requirements, click the View Password Requirements link.<br />
The <strong>RDX</strong> <strong>Media</strong> <strong>Secure</strong> Client Password Requirements dialog box displays the<br />
password requirements.<br />
3. To change the user’s password:<br />
a. Enter the existing password in the Old password box.<br />
b. Enter the new password in the New Password and Confirm Password boxes.<br />
c. If more than one <strong>RDX</strong> docking station is attached to the host computer and<br />
more than one cartridge is inserted, select the drive-letter for the relevant<br />
cartridge in the Device box.<br />
d. Click OK.<br />
Using the <strong>RDX</strong> <strong>Media</strong> <strong>Secure</strong> Client Menu: Change Password 21
Change Hint Question/Answer<br />
<strong>User</strong>s can change their hint information (hint question, hint answer, or both) through<br />
the <strong>RDX</strong> <strong>Media</strong> <strong>Secure</strong> Client menu.<br />
To change hint information<br />
1. Right-click the <strong>RDX</strong> <strong>Media</strong> <strong>Secure</strong> Client padlock icon and select Change Hint<br />
Question/Answer.<br />
The <strong>RDX</strong> <strong>Media</strong> <strong>Secure</strong> Client Change Password Hint dialog box displays.<br />
2. Enter the cartridge password in the Password box.<br />
3. To change the hint question, replace the question in the New Hint Question box<br />
with a new hint question that consists of two or more characters.<br />
4. Enter a hint answer of eight characters or more in the New Hint Answer box.<br />
5. If more than one <strong>RDX</strong> docking station is attached to the host computer and more<br />
than one cartridge is inserted, select the drive-letter for the relevant cartridge in<br />
the Device box.<br />
6. Click OK.<br />
Using the <strong>RDX</strong> <strong>Media</strong> <strong>Secure</strong> Client Menu: Change Hint Question/Answer 22
Logoff All Drives<br />
After users have logged into their cartridge, they can log out without ejecting the<br />
cartridge through the <strong>RDX</strong> <strong>Media</strong> <strong>Secure</strong> Client menu. They can select the Re-enter<br />
Passwords menu option to regain access to the cartridge without ejecting it.<br />
Attempts to access encrypted files when the cartridges are logged off will result in an<br />
error message indicating that the file is unavailable. Any unencrypted files on the<br />
cartridges will be limited to read-only access.<br />
To logoff drives<br />
Right-click the <strong>RDX</strong> <strong>Media</strong> <strong>Secure</strong> Client padlock icon<br />
Drives.<br />
and select Logoff All<br />
<strong>RDX</strong> <strong>Media</strong> <strong>Secure</strong> Client log offs all cartridges logged into the software.<br />
Using the <strong>RDX</strong> <strong>Media</strong> <strong>Secure</strong> Client Menu: Logoff All Drives 23
Upgrade Java<br />
The Upgrade Java menu option enables users to upgrade their Java software if they<br />
encounter difficulties in upgrading. After they upgrade the software, they must restart<br />
their PC.<br />
IMPORTANT: This option does not initiate and run the Java software<br />
upgrade.<br />
To select the Upgrade Java option<br />
1. Right-click the <strong>RDX</strong> <strong>Media</strong> <strong>Secure</strong> Client padlock icon and select Upgrade<br />
Java.<br />
2. Upgrade the Java software according to Java upgrade instructions.<br />
3. Restart the computer after the upgrade process completes.<br />
Re-enter Passwords<br />
If users log out without ejecting their cartridge through the Re-Enter Passwords<br />
option on the <strong>RDX</strong> <strong>Media</strong> <strong>Secure</strong> Client menu, they can log back in by selecting to<br />
re-enter their password through this menu.<br />
This functionality also enables users to enter a password for a cartridge that was<br />
originally blocked by canceling or closing the password prompt.<br />
Using the <strong>RDX</strong> <strong>Media</strong> <strong>Secure</strong> Client Menu: Upgrade Java 24
To re-enter a password<br />
1. Right-click the <strong>RDX</strong> <strong>Media</strong> <strong>Secure</strong> Client padlock icon and select Re-enter<br />
Passwords.<br />
The <strong>RDX</strong> <strong>Media</strong> <strong>Secure</strong> Client Login dialog box displays.<br />
2. Enter the user’s password and click OK.<br />
– or –<br />
Click Recover Password to initiate password recovery. (For more information on<br />
recovering a user’s password, please refer to “To recover a password” on page<br />
15.)<br />
If more than one <strong>RDX</strong> docking station is attached to the host computer and more<br />
than one cartridge is inserted, a login dialog box for the next cartridge displays.<br />
Using the <strong>RDX</strong> <strong>Media</strong> <strong>Secure</strong> Client Menu: Re-enter Passwords 25
Safely Remove Device<br />
IMPORTANT: The cartridge is formatted with the NTFS file system, so it is<br />
very important that users safely remove it. Otherwise, data loss and/or<br />
corruption of the file system on the cartridge can result.<br />
For the same reasons, we caution users to safely remove cartridges before<br />
disconnecting the <strong>RDX</strong> docking station cable from the host computer for the<br />
external docking station or the <strong>RDX</strong> power cable from the power outlet if a<br />
logged-in encrypted cartridge is inserted in the docking station and the <strong>RDX</strong><br />
<strong>Media</strong> <strong>Secure</strong> Client is running on the computer.<br />
<strong>User</strong>s can employ several methods to safely remove an <strong>RDX</strong> <strong>Media</strong> <strong>Secure</strong> cartridge<br />
from an <strong>RDX</strong> docking station. Safe removal consists of logically disconnecting the<br />
cartridge from the Windows operating system, which then automatically ejects the<br />
cartridge from the docking station. Following are some common ways to safely<br />
remove a cartridge:<br />
• Selecting Safely Remove Device on the <strong>RDX</strong> <strong>Media</strong> <strong>Secure</strong> Client menu<br />
(recommended method, especially if two other methods have been tried but do<br />
not succeed)<br />
• Pressing the eject button on the <strong>RDX</strong> docking station (the <strong>RDX</strong> utility software<br />
should be upgraded to the latest version to enable this feature)<br />
• Right-clicking the drive-letter for the cartridge in Windows Explorer and choosing<br />
Eject from the menu<br />
Note: If an application has recently written a large amount of data to the<br />
cartridge, <strong>RDX</strong> <strong>Media</strong> <strong>Secure</strong> Client may take additional time to safely<br />
remove the cartridge.<br />
Using the <strong>RDX</strong> <strong>Media</strong> <strong>Secure</strong> Client Menu: Safely Remove Device 26
To safely remove an <strong>RDX</strong> <strong>Media</strong> <strong>Secure</strong> cartridge<br />
1. Close any application windows that are using files on the cartridge.<br />
2. Right-click the <strong>RDX</strong> <strong>Media</strong> <strong>Secure</strong> Client padlock icon and select Safely<br />
Remove Device.<br />
The <strong>RDX</strong> <strong>Media</strong> <strong>Secure</strong> Client Safely Remove Device dialog box displays.<br />
3. If more than one <strong>RDX</strong> docking station is attached to the host computer and more<br />
than one cartridge is inserted, select the cartridge to be safely removed in the<br />
device box.<br />
4. Click OK.<br />
<strong>RDX</strong> <strong>Media</strong> <strong>Secure</strong> Client safely removes and ejects the cartridge.<br />
–or–<br />
If the safe removal process encounters a problem, such as an application<br />
attempting to write data to the cartridge, a message that enables forced ejection<br />
of the cartridge displays.<br />
To forcibly ejecting the cartridge without safely removing it first, click Force Eject.<br />
Using the <strong>RDX</strong> <strong>Media</strong> <strong>Secure</strong> Client Menu: Safely Remove Device 27
IMPORTANT: To prevent data loss and/or corruption of the cartridge file<br />
system, users should ensure that the drive light for the cartridge is not<br />
flashing before initiating a forced ejection. This is particularly important for<br />
computers that have the Windows XP or Windows Server 2003 operating<br />
system installed on them.<br />
Recycle Device<br />
The <strong>RDX</strong> <strong>Media</strong> <strong>Secure</strong> Client software enables users to natively remove all of the<br />
data on their encrypted cartridges, including the <strong>RDX</strong> <strong>Media</strong> <strong>Secure</strong> Client<br />
application files. It also provides information about third-party shredding software that<br />
has other algorithms to overwrite the data on their cartridges.<br />
When users select the Recycle Device menu option, they can either choose to<br />
recycle a cartridge or view information about third-party shredding software.<br />
Recycle cartridges<br />
If the software cannot remove one or more files (e.g., a file or application on the<br />
cartridge may be open during the recycling operation), the user can reformat the<br />
cartridge through their operating system as another method of removing all cartridge<br />
contents.<br />
To recycle a cartridge<br />
1. Close any application windows that are using files on the cartridge.<br />
2. Right-click the <strong>RDX</strong> <strong>Media</strong> <strong>Secure</strong> Client padlock icon and select Recycle<br />
Device.<br />
Using the <strong>RDX</strong> <strong>Media</strong> <strong>Secure</strong> Client Menu: Recycle Device 28
The <strong>RDX</strong> <strong>Media</strong> <strong>Secure</strong> Client Recycle and Shred Device Options dialog box<br />
displays.<br />
3. In the <strong>RDX</strong> <strong>Media</strong> <strong>Secure</strong> Client Recycle and Shred Device Options dialog box, if<br />
more than one <strong>RDX</strong> docking station is attached to the host computer and more<br />
than one cartridge is inserted, select the drive letter for the cartridge to recycle in<br />
the device box.<br />
IMPORTANT: Make sure to select the right cartridge to recycle, or the<br />
software will remove the wrong contents.<br />
4. Select the Recycle the device now option, if it is not already selected.<br />
5. In the confirmation message, click OK.<br />
After <strong>RDX</strong> <strong>Media</strong> <strong>Secure</strong> Client has recycled the cartridge, it adds new copies of<br />
the <strong>RDX</strong> <strong>Media</strong> <strong>Secure</strong> Client installation files to the cartridge and ejects the<br />
cartridge from the docking station.<br />
–or–<br />
If <strong>RDX</strong> <strong>Media</strong> <strong>Secure</strong> Client cannot recycle one or more files, a message<br />
displays that the file (s) could not be deleted and the software does not eject the<br />
cartridge. Click OK to close this message.<br />
6. To protect the cartridge and encrypt new files, re-insert the cartridge in the<br />
docking station and use the <strong>RDX</strong> <strong>Media</strong> <strong>Secure</strong> Client user setup dialog box to<br />
set it up again.<br />
For more information on setting up cartridges, please refer to “Setting up the <strong>RDX</strong><br />
<strong>Media</strong> <strong>Secure</strong> Cartridge” page 9.<br />
Access third-party shred software information<br />
While <strong>RDX</strong> <strong>Media</strong> <strong>Secure</strong> Client does not enable users to shred data on their<br />
cartridge, it presents contact information for third-party applications that perform this<br />
function.<br />
Using the <strong>RDX</strong> <strong>Media</strong> <strong>Secure</strong> Client Menu: Recycle Device 29
To access third-party shred software information<br />
1. Right-click the <strong>RDX</strong> <strong>Media</strong> <strong>Secure</strong> Client padlock icon and select Recycle<br />
Device.<br />
2. In the <strong>RDX</strong> <strong>Media</strong> <strong>Secure</strong> Client Recycle and Shred Device Options dialog box,<br />
select the Instructions for third-party shred software option.<br />
3. Click OK.<br />
Using the <strong>RDX</strong> <strong>Media</strong> <strong>Secure</strong> Client Menu: Recycle Device 30
4. The <strong>RDX</strong> <strong>Media</strong> <strong>Secure</strong> Client Instructions for Third-Party Shred Software dialog<br />
box displays with information for two third-party shred applications.<br />
About<br />
The user can view basic information about the <strong>RDX</strong> <strong>Media</strong> <strong>Secure</strong> Client software<br />
installed on the host computer through the About <strong>RDX</strong> <strong>Media</strong> <strong>Secure</strong> Client dialog<br />
box.<br />
This information includes:<br />
• <strong>RDX</strong> <strong>Media</strong> <strong>Secure</strong> Client software version<br />
• Cartridge drive-letter<br />
• Cartridge Vendor ID (VID), Product ID (PID), and Drive ID (if any)<br />
• Encryption engine<br />
They can also access the software license agreement and information about the<br />
<strong>RDX</strong> <strong>Media</strong> <strong>Secure</strong> cartridge currently inserted into the <strong>RDX</strong> docking station through<br />
the About <strong>RDX</strong> <strong>Media</strong> <strong>Secure</strong> Client dialog box.<br />
Using the <strong>RDX</strong> <strong>Media</strong> <strong>Secure</strong> Client Menu: About 31
To view the About <strong>RDX</strong> <strong>Media</strong> <strong>Secure</strong> Client dialog box<br />
1. Right-click the <strong>RDX</strong>® <strong>Media</strong> <strong>Secure</strong> Client padlock icon and select About.<br />
The About <strong>RDX</strong> <strong>Media</strong> <strong>Secure</strong> Client dialog box displays.<br />
2. If more than one <strong>RDX</strong> docking station is attached to the host computer and more<br />
than one cartridge is inserted, select the drive letter for the relevant cartridge in<br />
the Drive box to view the information for that cartridge.<br />
To view the license agreement<br />
The user can view the license agreement for the <strong>RDX</strong> <strong>Media</strong> <strong>Secure</strong> Client software<br />
through the <strong>RDX</strong> <strong>Media</strong> <strong>Secure</strong> Client License Agreement dialog box. This text also<br />
displays when the user initiates installing the software.<br />
1. In the About <strong>RDX</strong> <strong>Media</strong> <strong>Secure</strong> Client dialog box, click License Agreement.<br />
Using the <strong>RDX</strong> <strong>Media</strong> <strong>Secure</strong> Client Menu: About 32
The <strong>RDX</strong> <strong>Media</strong> <strong>Secure</strong> Client License Agreement dialog box displays.<br />
2. Click Close to exit the dialog box.<br />
To view cartridge information<br />
The <strong>RDX</strong> <strong>Media</strong> <strong>Secure</strong> Client Cartridge Properties dialog box contains information<br />
both for the cartridge and its internal hard drive.<br />
1. In the About <strong>RDX</strong> <strong>Media</strong> <strong>Secure</strong> Client dialog box, if more than one <strong>RDX</strong> docking<br />
station is attached to the host computer and more than one cartridge is inserted,<br />
select the drive letter for the relevant cartridge in the Drive box.<br />
2. Click Cartridge Properties.<br />
The <strong>RDX</strong> <strong>Media</strong> <strong>Secure</strong> Client Cartridge Properties dialog box displays for the<br />
selected cartridge.<br />
3. Click OK to exit the dialog box.<br />
Using the <strong>RDX</strong> <strong>Media</strong> <strong>Secure</strong> Client Menu: About 33
Troubleshooting<br />
Following are some common issues with installing and using the <strong>RDX</strong> <strong>Media</strong> <strong>Secure</strong><br />
Client software.<br />
Troubleshooting Information<br />
Problem<br />
Host computer connected to<br />
<strong>RDX</strong> docking station stopped<br />
rebooting after successful<br />
installation of the <strong>RDX</strong> <strong>Media</strong><br />
<strong>Secure</strong> Client software.<br />
Copied the <strong>RDX</strong> <strong>Media</strong> <strong>Secure</strong><br />
Client software installation file<br />
on <strong>RDX</strong> <strong>Media</strong> <strong>Secure</strong><br />
cartridge to a hard drive<br />
location. Cannot install the<br />
software from that location.<br />
Interested in installing <strong>RDX</strong><br />
<strong>Media</strong> <strong>Secure</strong> Client on a<br />
second computer but unsure if<br />
this is possible.<br />
Problems setting up the<br />
password for the <strong>RDX</strong> <strong>Media</strong><br />
<strong>Secure</strong> cartridge. The following<br />
error message is displayed:<br />
“Password must not contain<br />
the login name”<br />
Apprehension about formatting<br />
an encrypted <strong>RDX</strong> <strong>Media</strong><br />
<strong>Secure</strong> cartridge and whether<br />
a reformatted cartridge can be<br />
used with the <strong>RDX</strong> <strong>Media</strong><br />
<strong>Secure</strong> Client software.<br />
Answer<br />
If your computer has USB devices before the computer’s<br />
hard drive in the boot sequence in BIOS, this might occur.<br />
Disconnect the <strong>RDX</strong> docking station cable from your<br />
computer and it will resume rebooting. Because the<br />
computer has already shut down, removing the cable<br />
should not corrupt the <strong>RDX</strong> <strong>Media</strong> <strong>Secure</strong> cartridge in this<br />
instance.<br />
Consult the documentation for your computer for<br />
information on how to modify the boot sequence in BIOS for<br />
your computer.<br />
You must run the <strong>RDX</strong> <strong>Media</strong> <strong>Secure</strong> Client installation file<br />
directly from the <strong>RDX</strong> <strong>Media</strong> <strong>Secure</strong> cartridge. It will not<br />
function if copied to another location and executed.<br />
<strong>RDX</strong> <strong>Media</strong> <strong>Secure</strong> Client can be installed on as many<br />
computers as a customer wishes. Simply run the<br />
installation file from the cartridge on the new computer that<br />
you want to use.<br />
The password that you entered when setting up the<br />
cartridge is the same as or contained the user name for the<br />
Windows account logged into the computer that you are<br />
using with the <strong>RDX</strong> <strong>Media</strong> <strong>Secure</strong> Client software.<br />
Enter a different password that does not contain the<br />
Windows login user name when you set up the cartridge.<br />
If you reformat the cartridge in a computer that has <strong>RDX</strong><br />
<strong>Media</strong> <strong>Secure</strong> Client installed on it or insert a reformatted<br />
cartridge into such a computer, the software copies the<br />
<strong>RDX</strong> <strong>Media</strong> <strong>Secure</strong> Client installation and user manual files<br />
to the root of the cartridge and the user setup dialog box<br />
displays. You can then set up the cartridge for use with<br />
<strong>RDX</strong> <strong>Media</strong> <strong>Secure</strong> Client.<br />
Troubleshooting: Troubleshooting Information 34
Problem<br />
The recycle operation<br />
completed successfully but<br />
<strong>RDX</strong> <strong>Media</strong> <strong>Secure</strong> Client did<br />
not remove all of the files on<br />
the cartridge.<br />
Backup software is not working<br />
with the <strong>RDX</strong> <strong>Media</strong> <strong>Secure</strong><br />
cartridge.<br />
Need help with the <strong>RDX</strong> <strong>Media</strong><br />
<strong>Secure</strong> Client software.<br />
Answer<br />
Following are three reasons why <strong>RDX</strong> <strong>Media</strong> <strong>Secure</strong> Client<br />
might not remove all files during the recycle operation:<br />
• If you do not close all of the applications using files<br />
on the cartridge before performing the recycle<br />
operation, it will not remove the open files. You can<br />
close all open applications and files, and eject and<br />
re-insert the cartridge before formatting the<br />
cartridge or setting it up and recycling the cartridge<br />
again to remove all files on it.<br />
• The write-protect tab on the cartridge has been<br />
enabled so that all contents are read-only and<br />
cannot be removed. Eject the cartridge and<br />
examine the cartridge. If the write-protect tab is<br />
enabled, switch it to the disabled position so that<br />
the cartridge is writable. Re-insert the cartridge<br />
before formatting the cartridge or setting it up and<br />
recycling the cartridge again to remove all files on<br />
it.<br />
• If someone else created the files that the recycle<br />
operation did not remove, it is possible that you do<br />
not have permission to delete them. To remove<br />
these and all other files, reformat the cartridge.<br />
Then, eject and re-insert the cartridge to set it up<br />
again.<br />
Make sure that you are using backup software that is<br />
compatible with <strong>RDX</strong> <strong>Media</strong> <strong>Secure</strong> cartridges.<br />
For a list of compatible backup software applications<br />
verified to work with the <strong>RDX</strong> <strong>Media</strong> <strong>Secure</strong> cartridges,<br />
please check the <strong>Imation</strong> support Web site at:<br />
www.imation.com/support<br />
Email support at techsupport@imation.com or access the<br />
<strong>Imation</strong> Web site at www.imation.com and select Support to<br />
open the support page.<br />
Troubleshooting: Troubleshooting Information 35
Contacting <strong>Imation</strong><br />
Company Information<br />
<strong>Imation</strong> is based in Oakdale, Minnesota.<br />
Postal address: 1 <strong>Imation</strong> Way<br />
Oakdale, MN 55128<br />
Web site address: www.imation.com<br />
Technical Support<br />
If you have a problem and need technical support, you can:<br />
• Visit the <strong>Imation</strong> Web site.<br />
• Send an e-mail message with your question or issue to<br />
techsupport@imation.com<br />
Contacting <strong>Imation</strong>: Company Information 36


