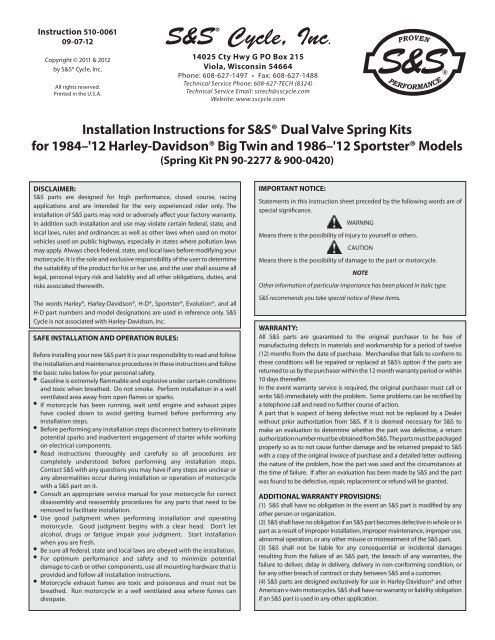
Installation Instructions for S&S® Dual Valve Spring Kits ... - S&S Cycle
Installation Instructions for S&S® Dual Valve Spring Kits ... - S&S Cycle
Installation Instructions for S&S® Dual Valve Spring Kits ... - S&S Cycle

You also want an ePaper? Increase the reach of your titles
YUMPU automatically turns print PDFs into web optimized ePapers that Google loves.
Instruction 510-0061<br />
09-07-12<br />
Copyright © 2011 & 2012<br />
by S&S® <strong>Cycle</strong>, Inc.<br />
All rights reserved.<br />
Printed in the U.S.A.<br />
®<br />
S&S<br />
<strong>Cycle</strong>, Inc.<br />
14025 Cty Hwy G PO Box 215<br />
Viola, Wisconsin 54664<br />
Phone: 608-627-1497 • Fax: 608-627-1488<br />
Technical Service Phone: 608-627-TECH (8324)<br />
Technical Service Email: sstech@sscycle.com<br />
Website: www.sscycle.com<br />
<strong>Installation</strong> <strong>Instructions</strong> <strong>for</strong> S&S® <strong>Dual</strong> <strong>Valve</strong> <strong>Spring</strong> <strong>Kits</strong><br />
<strong>for</strong> 1984–'12 Harley-Davidson® Big Twin and 1986–'12 Sportster® Models<br />
(<strong>Spring</strong> Kit PN 90-2277 & 900-0420)<br />
DISCLAIMER:<br />
S&S parts are designed <strong>for</strong> high per<strong>for</strong>mance, closed course, racing<br />
applications and are intended <strong>for</strong> the very experienced rider only. The<br />
installation of S&S parts may void or adversely affect your factory warranty.<br />
In addition such installation and use may violate certain federal, state, and<br />
local laws, rules and ordinances as well as other laws when used on motor<br />
vehicles used on public highways, especially in states where pollution laws<br />
may apply. Always check federal, state, and local laws be<strong>for</strong>e modifying your<br />
motorcycle. It is the sole and exclusive responsibility of the user to determine<br />
the suitability of the product <strong>for</strong> his or her use, and the user shall assume all<br />
legal, personal injury risk and liability and all other obligations, duties, and<br />
risks associated therewith.<br />
The words Harley®, Harley-Davidson®, H-D®, Sportster®, Evolution®, and all<br />
H-D part numbers and model designations are used in reference only. S&S<br />
<strong>Cycle</strong> is not associated with Harley-Davidson, Inc.<br />
SAFE INSTALLATION AND OPERATION RULES:<br />
Be<strong>for</strong>e installing your new S&S part it is your responsibility to read and follow<br />
the installation and maintenance procedures in these instructions and follow<br />
the basic rules below <strong>for</strong> your personal safety.<br />
••<br />
Gasoline is extremely flammable and explosive under certain conditions<br />
and toxic when breathed. Do not smoke. Per<strong>for</strong>m installation in a well<br />
ventilated area away from open flames or sparks.<br />
••<br />
If motorcycle has been running, wait until engine and exhaust pipes<br />
have cooled down to avoid getting burned be<strong>for</strong>e per<strong>for</strong>ming any<br />
installation steps.<br />
••<br />
Be<strong>for</strong>e per<strong>for</strong>ming any installation steps disconnect battery to eliminate<br />
potential sparks and inadvertent engagement of starter while working<br />
on electrical components.<br />
••<br />
Read instructions thoroughly and carefully so all procedures are<br />
completely understood be<strong>for</strong>e per<strong>for</strong>ming any installation steps.<br />
Contact S&S with any questions you may have if any steps are unclear or<br />
any abnormalities occur during installation or operation of motorcycle<br />
with a S&S part on it.<br />
••<br />
Consult an appropriate service manual <strong>for</strong> your motorcycle <strong>for</strong> correct<br />
disassembly and reassembly procedures <strong>for</strong> any parts that need to be<br />
removed to facilitate installation.<br />
••<br />
Use good judgment when per<strong>for</strong>ming installation and operating<br />
motorcycle. Good judgment begins with a clear head. Don’t let<br />
alcohol, drugs or fatigue impair your judgment. Start installation<br />
when you are fresh.<br />
Be sure all federal, state and local laws are obeyed with the installation.<br />
••<br />
For optimum per<strong>for</strong>mance and safety and to minimize potential<br />
damage to carb or other components, use all mounting hardware that is<br />
provided and follow all installation instructions.<br />
••<br />
Motorcycle exhaust fumes are toxic and poisonous and must not be<br />
breathed. Run motorcycle in a well ventilated area where fumes can<br />
dissipate.<br />
IMPORTANT NOTICE:<br />
Statements in this instruction sheet preceded by the following words are of<br />
special significance.<br />
WARNING<br />
Means there is the possibility of injury to yourself or others.<br />
CAUTION<br />
Means there is the possibility of damage to the part or motorcycle.<br />
NOTE<br />
Other in<strong>for</strong>mation of particular importance has been placed in italic type.<br />
S&S recommends you take special notice of these items.<br />
WARRANTY:<br />
All S&S parts are guaranteed to the original purchaser to be free of<br />
manufacturing defects in materials and workmanship <strong>for</strong> a period of twelve<br />
(12) months from the date of purchase. Merchandise that fails to con<strong>for</strong>m to<br />
these conditions will be repaired or replaced at S&S’s option if the parts are<br />
returned to us by the purchaser within the 12 month warranty period or within<br />
10 days thereafter.<br />
In the event warranty service is required, the original purchaser must call or<br />
write S&S immediately with the problem. Some problems can be rectified by<br />
a telephone call and need no further course of action.<br />
A part that is suspect of being defective must not be replaced by a Dealer<br />
without prior authorization from S&S. If it is deemed necessary <strong>for</strong> S&S to<br />
make an evaluation to determine whether the part was defective, a return<br />
authorization number must be obtained from S&S. The parts must be packaged<br />
properly so as to not cause further damage and be returned prepaid to S&S<br />
with a copy of the original invoice of purchase and a detailed letter outlining<br />
the nature of the problem, how the part was used and the circumstances at<br />
the time of failure. If after an evaluation has been made by S&S and the part<br />
was found to be defective, repair, replacement or refund will be granted.<br />
ADDITIONAL WARRANTY PROVISIONS:<br />
(1) S&S shall have no obligation in the event an S&S part is modified by any<br />
other person or organization.<br />
(2) S&S shall have no obligation if an S&S part becomes defective in whole or in<br />
part as a result of improper installation, improper maintenance, improper use,<br />
abnormal operation, or any other misuse or mistreatment of the S&S part.<br />
(3) S&S shall not be liable <strong>for</strong> any consequential or incidental damages<br />
resulting from the failure of an S&S part, the breach of any warranties, the<br />
failure to deliver, delay in delivery, delivery in non-con<strong>for</strong>ming condition, or<br />
<strong>for</strong> any other breach of contract or duty between S&S and a customer.<br />
(4) S&S parts are designed exclusively <strong>for</strong> use in Harley-Davidson® and other<br />
American v-twin motorcycles. S&S shall have no warranty or liability obligation<br />
if an S&S part is used in any other application.
WARNING<br />
The safety of the motorcycle rider is dependent of proper installation of this product. If you are not certain of your capabilities or do not<br />
have the correct tools <strong>for</strong> this installation, please consult a shop to have it done. Improper installtion of this product could result in injury<br />
or death to the rider.<br />
S&S® valve spring and collar kits part numbers 90-2277 and 900-0420 accommodate valve lifts up to .585" using standard length, 5⁄16" diameter and<br />
7mm diameter valves, and are compatible with stock style valve guides. These spring kits are available with S&S Super Stock® cylinder heads <strong>for</strong><br />
Harley-Davidson® Evolution® and Twin Cam 88® engines.<br />
NOTE: <strong>Spring</strong> kit components in these kits are not interchangeable with those from other S&S valve spring kits.<br />
CAUTION<br />
Mixing of valves, springs or collars between S&S dual springs and other S&S spring kits can cause extensive engine damage not covered<br />
under warranty.<br />
<strong>Installation</strong> of part numbers 90-2277 and 900-0420 spring kits do not usually require modification <strong>for</strong> S&S or most stock heads. Exceptions are Buell®<br />
Thunderstorm heads and certain Sportster® models and big twin heads with different machining in valve spring pockets. In such cases, removing a<br />
small amount of material (approximately .030") from O.D. of S&S bottom collar should allow collar to rest flat in spring pocket <strong>for</strong> correct installation.<br />
It may be necessary to machine the valve spring pocket deeper to achieve the correct installed height when installing springs in Twin Cam 88®<br />
cylinder heads.<br />
<strong>Spring</strong> pressures are as follows at 1.800" installed height: Closed valve - 130 lbs; .585" lift - 325 lbs.<br />
SPRING INSTALLATION PROCEDURE<br />
1- Remove heads from engine and disassemble. If cylinder heads/valves are to be reconditioned, proceed at this time according to standard<br />
procedure. Refer to Harley-Davidson® service manual as necessary.<br />
2- Place lower spring collar in valve spring pocket in head. Place spring on collar. Collar must sit flat on cylinder head and spring coils must not<br />
contact sides of spring pocket in head. If necessary, machine lower collar and/or spring pocket to obtain minimum clearance of .030". Do not<br />
modify spring in any way.<br />
3- Using following procedure, determine installed spring height and clearance between top collar and valve guide.<br />
A- Lubricate valve stem and install valve in guide.<br />
B- Install bottom collar, valve seal, top collar, and valve keepers. Pull top collar tightly against keepers to seat keepers in collar.<br />
C- While holding valve firmly against seat in closed position, measure installed spring height (distance between lower valve spring seating<br />
surface and outside step of top collar). See Figure A, Dimension A. Record measurement.<br />
D- Measure distance between top collar keepers and top of valve guide or seal (if applicable). See Figure A, Dimension B. Distance must be<br />
at least .060" greater than valve lift of cam to be used. If dimension B is not .060" greater than valve lift, valve guide must be shortened to<br />
obtain required clearance.<br />
Figure A<br />
2
CAUTION<br />
When installing the S&S® spring kits on 7mm valve stems in 2005 and later big twin and 2004 and later Sportster® models please refer<br />
to Figure B below. For both the .585" and the .650" spring kits, the keepers must be located in the groove closest to the tip of the valve.<br />
Any other groove will yield the incorrect installed height and may cause premature valve train failure. S&S is not responsible <strong>for</strong> incorrect<br />
installation.<br />
Figure B<br />
E- Repeat Steps A-D <strong>for</strong> remaining valves and record all measurements. Be sure to keep track of all parts during assembly to assure they are<br />
installed in same location and with same valves clearances were measured with.<br />
4- Adjust installed spring height <strong>for</strong> all valves to 1.800" ± .010". If spring height is too high, place shims under lower collar to achieve correct spring<br />
height. Shims are available from S&S® and local sources such as automotive parts houses. If spring height is too low, grind valve or valve seat,<br />
or machine bottom of valve spring pocket to achieve correct spring height. Special valve spring pocket cutting tools are available from various<br />
tool manufacturers.<br />
NOTE: Installed spring height is height when valve and spring are installed and in closed position. Correct installed spring height is 1.800" ± .010".<br />
••<br />
Installing springs at height less than recommended dimension will cause rapid spring fatigue resulting in possible engine damage.<br />
Engine should be frequently disassembled <strong>for</strong> spring tension measurement.<br />
••<br />
Installing springs at height above recommended dimension will decrease spring tension resulting in possible valve float and engine<br />
damage.<br />
••<br />
Failure to establish required clearances may cause valve seal failure and other, more extensive engine damage not covered under<br />
warranty.<br />
CAUTION<br />
<strong>Valve</strong> spring assembly is under considerable tension when compressed and is potentially dangerous. Wear eye protection and take due<br />
caution when checking <strong>for</strong> coil bind and during installation. After assembly, carefully strike tip of valve stem with plastic hammer to<br />
insure that keepers are seated. Direct spring assembly away from face and body during this procedure.<br />
5- Install valves and valve springs in heads. Be sure valve guide seals are in place. Install top collar and keepers. For 2005-up Harley-Davidson® big<br />
twin and 2004-up Sportster models with 7mm valve stems, see Figure B above.<br />
NOTE: Installed height should be the same <strong>for</strong> each spring assembly.<br />
WARNING<br />
6- Confirm that rocker arm does not contact top collar. This is most likely to occur when valve is fully closed. Clearance should be at least .040".<br />
7- Confirm rocker arm to rocker cover clearance.<br />
A- Install pushrods and rocker assemblies. Adjust pushrods per manufacturer’s instructions.<br />
B- Place thin deposit of clay or putty on inside of top rocker cover directly above pushrod and valve spring areas.<br />
C- Install top cover and rotate flywheels two complete revolutions (720°).<br />
3
NOTE: Do not <strong>for</strong>ce engine if resistance is encountered. Instead remove top cover and determine cause.<br />
D- Remove top cover and examine clay <strong>for</strong> indentation caused by rocker arm. Thickness of clay beneath indentation should be at least .060".<br />
Carefully remove metal from cover or rocker arm to obtain correct clearance.<br />
NOTE: Remove minimum amount of metal needed <strong>for</strong> correct clearance. Care must be taken not to break through rocker covers or alter rocker arm heat<br />
treatment by overheating while grinding. Oil is supplied to top end through pushrods and rocker arms, so it is also important not to disturb oil<br />
passages.<br />
4