LCD Control Panel-Basic Operating.pdf - Pride Mobility UK
LCD Control Panel-Basic Operating.pdf - Pride Mobility UK
LCD Control Panel-Basic Operating.pdf - Pride Mobility UK
Create successful ePaper yourself
Turn your PDF publications into a flip-book with our unique Google optimized e-Paper software.
Synergy BASIC OPERATION TRU-Balance INSTRUCTIONS<br />
<strong>LCD</strong> <strong>Control</strong> <strong>Panel</strong><br />
®
SAFETY GUIDELINES<br />
WARNING! An authorized <strong>Pride</strong> Provider or a qualified<br />
technician must perform the initial setup of this product<br />
and must perform all of the instructions in this manual.<br />
The symbols below are used throughout this owner's manual and on the<br />
product to identify warnings and important information. It is very important<br />
for you to read them and understand them completely.<br />
WARNING! Indicates a potentially hazardous condition/<br />
situation. Failure to follow designated procedures can<br />
cause either personal injury, component damage, or<br />
malfunction. On the product, this icon is represented as a<br />
black symbol on a yellow triangle with a black border.<br />
MANDATORY! These actions should be performed as<br />
specified. Failure to perform mandatory actions can cause<br />
personal injury and/or equipment damage. On the product,<br />
this icon is represented as a white symbol on a blue dot<br />
with a white border.<br />
PROHIBITED! These actions are prohibited. These actions<br />
should not be performed at any time or in any<br />
circumstances. Performing a prohibited action can cause<br />
personal injury and/or equipment damage. On the product,<br />
this icon is represented as a black symbol with a red circle<br />
and a red slash.<br />
NOTE: These instructions are compiled from the latest specifications and<br />
product information available at the time of publication. We reserve the<br />
right to make changes as they become necessary. Any changes to our<br />
products may cause slight variations between the illustrations and<br />
explanations in this manual and the product you have purchased. The<br />
latest/current version of this manual is available on our website.<br />
Copyright © 2011<br />
<strong>Pride</strong> <strong>Mobility</strong> Products Corporation<br />
INFMANU4146/Rev A/March 2011
TABLE OF CONTENTS<br />
LABEL INFORMATION ...................................................................4<br />
INTRODUCTION ................................................................................5<br />
EMI/RFI ...................................................................................................7<br />
THE <strong>LCD</strong> CONTROL PANEL .........................................................8<br />
<strong>LCD</strong> SCREEN AND CONTROL PANEL SETTINGS .........10<br />
DIAGNOSTIC FAULT CODES ....................................................14<br />
CARE AND MAINTENANCE ........................................................15<br />
WARRANTY ........................................................................................15<br />
www.pridemobility.com<br />
<strong>LCD</strong> <strong>Control</strong> <strong>Panel</strong>
LABEL INFORMATION<br />
PRODUCT SAFETY SYMBOLS<br />
The symbols below are used on the product to identify warnings, mandatory<br />
actions, and prohibited actions. It is very important for you to read and<br />
understand them completely.<br />
Read and follow the information in the owner’s manual.<br />
Avoid exposure to rain, snow, ice, salt, or standing water<br />
whenever possible. Maintain and store in a clean and dry<br />
condition.<br />
Disposal and recycling - Contact your authorized <strong>Pride</strong><br />
Provider for information on proper disposal and recycling of<br />
your <strong>Pride</strong> product and its packaging.<br />
EMI/RFI - This product has been tested and passed at an<br />
immunity level of 20 V/m.<br />
<strong>LCD</strong> <strong>Control</strong> <strong>Panel</strong><br />
www.pridemobility.com
<strong>Basic</strong> Operation Instructions 5<br />
INTRODUCTION<br />
WELCOME to <strong>Pride</strong> <strong>Mobility</strong> Products (<strong>Pride</strong>). The product you have<br />
purchased combines state-of-the-art components with safety, comfort, and<br />
styling in mind. We are confident that the design features will provide you<br />
with the conveniences you expect during your daily activities.<br />
Understanding how to safely operate and care for this product should bring<br />
you years of trouble-free operations and service.<br />
Read and follow all instructions, warnings, and notes in this manual before<br />
attempting to operate your product for the first time. You must also read all<br />
instructions, warnings, and notes contained in any supplemental<br />
instructional booklets that accompanied your scooter before initial<br />
operation. Your safety depends upon you, as well as your provider,<br />
caretaker, or healthcare professional in using good judgement.<br />
This manual is to be used in addition to the product owner’s manual that<br />
came with your scooter. If there is any information in this manual which you<br />
do not understand, or if you require additional assistance for setup or<br />
operation, please contact your authorized <strong>Pride</strong> Provider. Failure to follow<br />
the instructions, warnings, and notes in this manual and those located<br />
on your <strong>Pride</strong> product can result in personal injury and/or product<br />
damage and will void <strong>Pride</strong>’s product warranty.<br />
PURCHASER’S AGREEMENT<br />
By accepting delivery of this product, you promise that you will not change,<br />
alter, or modify this product or remove or render inoperable or unsafe any<br />
guards, shields, or other safety features of this product; fail, refuse, or<br />
neglect to install any retrofit kits from time to time provided by <strong>Pride</strong> to<br />
enhance or preserve the safe use of this product.<br />
INFORMATION EXCHANGE<br />
We want to hear your questions, comments, and suggestions about this<br />
manual. We would also like to hear about the safety and reliability of your<br />
new <strong>Pride</strong> product, and about the service you received from your authorized<br />
<strong>Pride</strong> Provider. Please notify us of any change of address, so we can keep<br />
you apprised of important information about safety, new products, and new<br />
options that can increase your ability to use and enjoy your <strong>Pride</strong> product.<br />
www.pridemobility.com<br />
<strong>LCD</strong> <strong>Control</strong> <strong>Panel</strong>
6 <strong>Basic</strong> Operation Instructions<br />
NOTE: If you ever lose or misplace your product registration card or your<br />
copy of this manual, contact us and we will be glad to send you a new one<br />
immediately.<br />
My authorized <strong>Pride</strong> Provider Is:<br />
Name:<br />
Address:<br />
Phone Number:<br />
Purchase Date:<br />
<strong>LCD</strong> <strong>Control</strong> <strong>Panel</strong><br />
www.pridemobility.com
<strong>Basic</strong> Operation Instructions 7<br />
ELECTROMAGNETIC AND RADIO FREQUENCY INTERFERENCE<br />
(EMI/RFI)<br />
WARNING! Laboratory tests have shown that<br />
electromagnetic and radio frequency waves can have an<br />
adverse affect on the performance of electrically-powered<br />
mobility vehicles.<br />
Electromagnetic and Radio Frequency Interference can come from sources<br />
such as cellular phones, mobile two-way radios (such as walkie-talkies),<br />
radio stations, TV stations, amateur radio (HAM) transmitters, wireless<br />
computer links, microwave signals, paging transmitters, and medium-range<br />
mobile transceivers used by emergency vehicles. In some cases, these<br />
waves can cause unintended movement or damage to the control system.<br />
Every electrically-powered mobility vehicle has an immunity (or resistance)<br />
to EMI. The higher the immunity level, the greater the protection against<br />
EMI. This product has been tested and has passed at an immunity level of<br />
20 V/m.<br />
WARNING! Be aware that cell phones, two-way radios,<br />
laptops, and other types of radio transmitters may cause<br />
unintended movement of your electrically-powered<br />
mobility vehicle due to EMI. Exercise caution when using<br />
any of these items while operating your mobility vehicle<br />
and avoid coming into close proximity of radio and TV<br />
stations.<br />
WARNING! The addition of accessories or components to<br />
the electrically-powered mobility vehicle can increase the<br />
susceptibility of the vehicle to EMI. Do not modify your<br />
scooter in any way not authorized by <strong>Pride</strong>.<br />
WARNING! The electrically-powered mobility vehicle itself<br />
can disturb the performance of other electrical devices<br />
located nearby, such as alarm systems.<br />
NOTE: For further information on EMI/RFI, go to the Resource Center<br />
on www.pridemobility.com. If unintended motion or brake release occurs,<br />
turn your scooter off as soon as it is safe to do so. Contact <strong>Pride</strong> or your<br />
authorized <strong>Pride</strong> Provider to report the incident.<br />
www.pridemobility.com<br />
<strong>LCD</strong> <strong>Control</strong> <strong>Panel</strong>
8 <strong>Basic</strong> Operation Instructions<br />
<strong>LCD</strong> CONTROL PANEL<br />
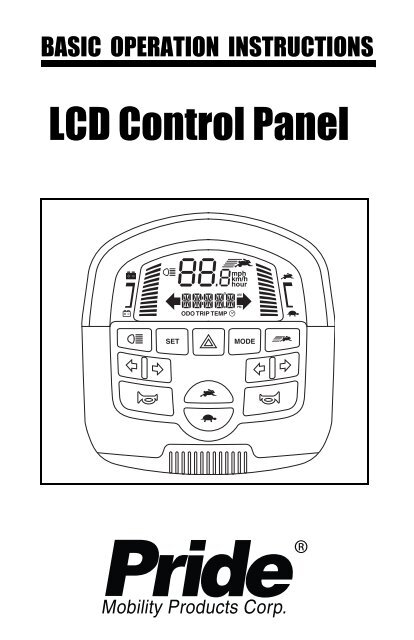
The <strong>LCD</strong> control panel houses all of the controls and indicators needed to<br />
drive your scooter, including speed adjustment, trip information, lighting<br />
buttons, horn buttons, battery condition status, and scooter system status.<br />
PROHIBITED! Do not expose the control panel to moisture.<br />
In the event that the control panel does become exposed<br />
to moisture, do not attempt to operate your scooter until<br />
the control panel has dried thoroughly.<br />
HAZARD LIGHTS<br />
BUTTON<br />
SET BUTTON<br />
LIGHTS BUTTON<br />
LEFT AND RIGHT<br />
TURN INDICATOR<br />
BUTTONS<br />
MODE BUTTON<br />
HIGH-LOW<br />
BUTTON<br />
LEFT AND RIGHT<br />
TURN INDICATOR<br />
BUTTONS<br />
HORN BUTTON<br />
HORN BUTTON<br />
SPEED ADJUSTMENT<br />
(INCREASE)<br />
Figure 1. <strong>LCD</strong> <strong>Control</strong> <strong>Panel</strong><br />
SPEED ADJUSTMENT<br />
(DECREASE)<br />
Lights Button<br />
• Press the lights button once to activate the lighting system. The light<br />
symbol will be shown on the <strong>LCD</strong> screen.<br />
• Press the lights button again to turn the lighting system off.<br />
WARNING! Scooter users are required to use their lights<br />
when visibility is restricted—day or night.<br />
Turn Indicator Buttons<br />
• Press the appropriate turn indicator button once to activate it. The turn<br />
indicator will flash on the <strong>LCD</strong> screen.<br />
• Press the same indicator button to turn it off.<br />
NOTE: The turn indicators are timed to shut off after 15 seconds. A warning beep<br />
will sound as long as the turn indicator is on. See figure 8 for volume control.<br />
<strong>LCD</strong> <strong>Control</strong> <strong>Panel</strong><br />
www.pridemobility.com
<strong>Basic</strong> Operation Instructions 9<br />
Hazard Lights Button<br />
This button activates the 4-way yellow flashers on your scooter.<br />
• Press the button once to turn on the flashers.<br />
• Press the button again to turn off the flashers.<br />
NOTE: The 4-way flashers will flash and a warning beep will sound as long<br />
as the hazard lights are on. See figure 8 for volume control.<br />
Horn Buttons<br />
These buttons activate a warning horn. Your scooter must be powered up<br />
for the horn to be operational. Do not hesitate to use the warning horn<br />
when doing so may prevent accident or injury.<br />
High-Low Button<br />
This button toggles the scooter’s speed between HIGH and LOW.<br />
• Press the High-Low button once to set the speed adjustment to high.<br />
The High-Low indicator will display on the <strong>LCD</strong> screen. See figure 2.<br />
Using this setting in conjunction with the speed adjustment buttons<br />
will allow the scooter to achieve speeds up to the maximum<br />
preprogramed speed for the scooter.<br />
• Press the High-Low button again to set the speed adjustment to Low.<br />
The High-Low indicator will not display on the <strong>LCD</strong> screen. Using<br />
this setting in conjunction with the speed adjustment buttons will allow<br />
the scooter to achieve speeds up to the half the maximum<br />
preprogrammed speed for the scooter.<br />
Speed Adjustment Buttons<br />
These adjustment buttons enable you to pre-select and limit your scooter’s<br />
speed. This is indicated by the maximum speed indicator on the <strong>LCD</strong><br />
screen. See figure 2.<br />
• Press the image of the tortoise to decrease the speed of the scooter.<br />
• Press the image of the rabbit to increase the speed of the scooter.<br />
NOTE: The more bars shown on the maximum speed indicator, the<br />
faster your pre-selected maximum speed will be. See figure 2.<br />
Mode Button<br />
Use the mode button to scroll between the odometer, tripometer,<br />
temperature, and clock.<br />
www.pridemobility.com<br />
<strong>LCD</strong> <strong>Control</strong> <strong>Panel</strong>
10 <strong>Basic</strong> Operation Instructions<br />
<strong>LCD</strong> SCREEN AND CONTROL PANEL SETTINGS<br />
The <strong>LCD</strong> control panel offers easily intuited feedback information via the<br />
<strong>LCD</strong> screen. See figure 2. The <strong>LCD</strong> screen is also used during the set-up<br />
(activation) of the various control panel settings.<br />
SPEED/ERROR CODE/VOLUME<br />
LIGHTS INDICATOR<br />
UNIT INDICATOR<br />
HIGH/LOW<br />
INDICATOR<br />
BATTERY<br />
CONDITION<br />
INDICATOR<br />
MAXIMUM<br />
SPEED<br />
INDICATOR<br />
LEFT TURN<br />
INDICATOR<br />
ODOMETER<br />
TRIPOMETER<br />
DISTANCE/TIME/<br />
TEMP/ERROR<br />
MESSAGE<br />
RIGHT TURN<br />
INDICATOR<br />
AM/PM<br />
CLOCK<br />
TEMPERATURE<br />
Figure 2. <strong>LCD</strong> Screen<br />
Odometer Mode (ODO)<br />
The odometer displays the total distance<br />
traveled over the life of the scooter and<br />
cannot be reset. See figure 3.<br />
Choose between:<br />
• mph = miles per hour<br />
• km/h = kilometers per hour<br />
• hour = hours of use<br />
Figure 3. Odometer Mode<br />
To set the odometer:<br />
1. Press the MODE button until ODO appears on the <strong>LCD</strong> screen.<br />
2. Press and hold the SET button, then simultaneously press the MODE<br />
button until the setting options flash.<br />
3. Scroll through the options by pressing the SET button.<br />
4. When the desired option flashes, press any button except SET to exit.<br />
<strong>LCD</strong> <strong>Control</strong> <strong>Panel</strong><br />
www.pridemobility.com
<strong>Basic</strong> Operation Instructions 11<br />
Tripometer Mode (TRIP)<br />
The tripometer displays trip distance<br />
traveled. The tripometer can be reset back<br />
to (0) at any time. See figure 4.<br />
To reset the tripometer:<br />
1. Press the MODE button until TRIP<br />
appears on the <strong>LCD</strong> screen<br />
2. Press and hold the SET button, then<br />
simultaneously press the MODE<br />
button for 2 seconds and release.<br />
3. Press the SET button until the<br />
tripometer resets to 0.0.<br />
4. Press any button except SET to exit.<br />
Figure 4. Tripometer Mode<br />
Temperature Mode (TEMP)<br />
This mode will display the current<br />
temperature in either °F or °C. See<br />
figure 5.<br />
To set the temperature:<br />
1. Press the MODE button until<br />
TEMP appears on the <strong>LCD</strong> screen.<br />
2. Press and hold the SET button, then<br />
simultaneously press the MODE<br />
button until the settings options flash.<br />
3. Scroll through the options (°F or °C)<br />
by pressing the SET button.<br />
4. When your choice is flashing, press<br />
any button except SET to exit.<br />
Figure 5. Temperature Mode<br />
www.pridemobility.com<br />
<strong>LCD</strong> <strong>Control</strong> <strong>Panel</strong>
12 <strong>Basic</strong> Operation Instructions<br />
Clock Mode ( )<br />
Clock mode can be viewed in either the<br />
standard 12 hour or a 24 hour display. See<br />
figure 6.<br />
To set the clock:<br />
Figure 6. Clock Mode<br />
1. Press the MODE button until the clock<br />
symbol appears on the <strong>LCD</strong> screen.<br />
2. Press and hold the SET button, then simultaneously press the MODE<br />
button until the hour digit flashes.<br />
3. Use the SET button to increase the hour to the correct number.<br />
4. Continue to use the MODE and SET buttons to program the minutes<br />
and AM/PM setting.<br />
5. Press any button except MODE or SET to exit.<br />
NOTE: If AM or PM is not selected, the clock will revert to 24 hour mode.<br />
Battery Charging Mode<br />
During battery charging, the console will<br />
display the clock and the battery condition<br />
indicator. See figure 7.<br />
Battery Condition Indicator<br />
When the key is turned to the “on”<br />
position, this LED indicator gives an<br />
approximate reading of battery strength.<br />
See figure 7.<br />
BATTERY<br />
CONDITION<br />
INDICATOR<br />
CLOCK<br />
Figure 7. Battery Charging Mode<br />
When the scooter’s battery voltage reaches a low enough level, a warning<br />
beep will sound once, indicating the batteries need charging. The warning<br />
beep will not sound again until the scooter is restarted or the throttle control<br />
lever is pressed.<br />
Maximum Speed Indicator LED<br />
The maximum speed indicator displays the maximum speed selected with<br />
the speed adjustment buttons. The more bars that are lit, the faster the<br />
speed. The maximum scooter speed will be determined by the HIGH-LOW<br />
setting, which limits the maximum speed to half when set to LOW. The<br />
actual travel speed will be shown in the speed display on the <strong>LCD</strong> screen.<br />
See figure 2.<br />
<strong>LCD</strong> <strong>Control</strong> <strong>Panel</strong><br />
www.pridemobility.com
<strong>Basic</strong> Operation Instructions 13<br />
Volume <strong>Control</strong><br />
The volume of the hazard lights, horn, low<br />
voltage, turn signals, and error message<br />
beeps can be increased, decreased, or turned<br />
off separately. See figure 8.<br />
To set the volume:<br />
1. Ensure the key is in the “off” position.<br />
2. Press the appropriate two buttons<br />
simultaneously (see the table below),<br />
VOLUME/<br />
LANGUAGE<br />
OPTION<br />
and turn the key to the “on” position.<br />
3. Once the volume control screen appears, release the buttons.<br />
4. Press the rabbit button to increase the volume and the tortoise button to<br />
decrease the volume of the beep (0 indicates off and 4 indicates the<br />
loudest volume).<br />
5. To exit, press any button except the rabbit or tortoise.<br />
NOTE: The error message language option is set the same way as the<br />
volume.<br />
FUNCTION BUTTONS FUNCTION<br />
INDICATOR<br />
Hazard Lights SET + HAZARD LIGHTS SET 1<br />
Horn SET + HORN SET 2<br />
Low Voltage SET + LEFT TURN INDICATOR SET 3<br />
Turn Signals SET + RIGHT TURN INDICATOR SET 4<br />
FUNCTION<br />
INDICATOR<br />
Figure 8. Volume <strong>Control</strong> Display<br />
Error Message<br />
Language<br />
Option<br />
SET + LIGHTS SET 5<br />
6 - Spanish<br />
5 - Italian<br />
4 - French<br />
3 - German<br />
2 - Dutch<br />
1 - English<br />
0 - Close<br />
www.pridemobility.com<br />
<strong>LCD</strong> <strong>Control</strong> <strong>Panel</strong>
14 <strong>Basic</strong> Operation Instructions<br />
DIAGNOSTIC FAULT CODES<br />
The diagnostic fault codes for your scooter<br />
are designed to help you perform basic<br />
troubleshooting quickly and easily. A<br />
diagnostic fault code and error message<br />
will be displayed (see figure 9) in the<br />
event one of the conditions listed below<br />
develops.<br />
NOTE: Your scooter will not run unless<br />
the fault code condition is resolved and<br />
the scooter has been turned off, then<br />
turned back on.<br />
FAULT<br />
CODE<br />
ERROR<br />
MESSAGE<br />
Figure 9. Fault Code Display<br />
FAULT<br />
CODE<br />
CONDITION SOLUTION ERROR<br />
MESSAGE<br />
1 Batteries need charging Charge batteries as soon as<br />
possible.<br />
N/A<br />
2 Low voltage, batteries need<br />
charge immediately<br />
Charge batteries as soon as<br />
possible.<br />
Lo BAT<br />
3 Over Voltage Unplug charger and/or turn<br />
scooter off, then back on.<br />
4 Over Current Turn scooter off for a few<br />
minutes, then turn scooter<br />
back on.<br />
5 Park brake fault Remove the key from the key<br />
switch, then push the manual<br />
freewheel lever to the drive<br />
position and restart your<br />
scooter. Refer to the scooter<br />
owner’s manual.<br />
HI BAT<br />
HI CUR<br />
BRAKE<br />
6 Throttle control lever not<br />
centered at start up<br />
7 Throttle control lever<br />
broken or faulted<br />
Return the throttle control<br />
lever to center position, turn<br />
scooter off, then back on.<br />
Contact your authorized <strong>Pride</strong><br />
Provider.<br />
T POT<br />
T POT<br />
8 Motor fault Contact your authorized <strong>Pride</strong><br />
Provider.<br />
9 Other fault Contact your authorized <strong>Pride</strong><br />
Provider.<br />
MOTOR<br />
OTHER<br />
<strong>LCD</strong> <strong>Control</strong> <strong>Panel</strong><br />
www.pridemobility.com
<strong>Basic</strong> Operation Instructions 15<br />
CARE AND MAINTENANCE<br />
Refer to your scooter owner’s manual for proper cleaning and disposal<br />
instructions.<br />
WARRANTY<br />
Refer to your scooter owner’s manual for specific information on the<br />
product warranty.<br />
www.pridemobility.com<br />
<strong>LCD</strong> <strong>Control</strong> <strong>Panel</strong>
®<br />
<strong>Pride</strong> <strong>Mobility</strong> Products Corporation<br />
182 Susquehanna Avenue<br />
Exeter, PA 18643-2694<br />
USA<br />
<strong>Pride</strong> <strong>Mobility</strong> Products Company<br />
380 Vansickle Road Unit 350<br />
St. Catharines, Ontario L2R 6P7<br />
Canada<br />
<strong>Pride</strong> <strong>Mobility</strong> Products Ltd.<br />
32 Wedgwood Road<br />
Bicester, Oxon OX26 4UL<br />
<strong>Pride</strong> <strong>Mobility</strong> Products Australia Pty. Ltd.<br />
21 Healey Road<br />
Dandenong, 3175<br />
Victoria, Australia<br />
<strong>Pride</strong> <strong>Mobility</strong> Products Italia S.r.l.<br />
Via del Progresso - ang. Via del Lavoro<br />
Loc. Prato della Corte<br />
00065-Fiano Romano (RM)<br />
<strong>Pride</strong> <strong>Mobility</strong> Products Europe B.V.<br />
Castricummer Werf 26<br />
1901 RW Castricum<br />
The Netherlands


