Using the Mackie Control with Cool Edit Pro 2.1
Using the Mackie Control with Cool Edit Pro 2.1
Using the Mackie Control with Cool Edit Pro 2.1

Create successful ePaper yourself
Turn your PDF publications into a flip-book with our unique Google optimized e-Paper software.
<strong>Using</strong> <strong>the</strong> <strong>Mackie</strong> <strong>Control</strong> <strong>with</strong> <strong>Cool</strong> <strong>Edit</strong> <strong>Pro</strong> <strong>2.1</strong><br />
The <strong>Cool</strong> <strong>Edit</strong> <strong>Pro</strong> <strong>2.1</strong> update adds support for <strong>the</strong> <strong>Mackie</strong> <strong>Control</strong> surface controller<br />
device. Please note that you must have installed <strong>the</strong> <strong>2.1</strong> (or later) update, since this device<br />
is not supported in <strong>Cool</strong> <strong>Edit</strong> <strong>Pro</strong> version 2.0. To see which version of <strong>Cool</strong> <strong>Edit</strong> <strong>Pro</strong> you<br />
are currently running, open your <strong>Cool</strong> <strong>Edit</strong> <strong>Pro</strong> and go to Help-About <strong>Cool</strong> <strong>Edit</strong> <strong>Pro</strong>. In <strong>the</strong><br />
window that opens you should see <strong>the</strong> version number. If you have version 2.0, <strong>the</strong>n it is<br />
necessary that you go to <strong>the</strong> download page of <strong>the</strong> Syntrillium web site and download <strong>the</strong><br />
latest update and install it following <strong>the</strong> instructions provided.<br />
http://www.syntrillium.com/cep/<br />
SETUP<br />
There is no additional software required for <strong>Cool</strong> <strong>Edit</strong> <strong>Pro</strong> to access <strong>the</strong> <strong>Mackie</strong> <strong>Control</strong><br />
unit. This unit needs to be connected to a MIDI In and Out port on your PC, and <strong>Cool</strong> <strong>Edit</strong><br />
<strong>Pro</strong> 2 needs to be set to detect <strong>the</strong> device on <strong>the</strong> MIDI port. Most PC sound cards offer an<br />
included MIDI hardware In and Out port. If not, <strong>the</strong>re are many options for MIDI port<br />
devices available from most any music equipment retailer. For more information on MIDI<br />
connection options for <strong>the</strong> <strong>Mackie</strong>, please be sure to consult your <strong>Mackie</strong> documentation.<br />
To follow are configuration settings for selecting <strong>the</strong> <strong>Mackie</strong> <strong>Control</strong> and MIDI port <strong>with</strong>in<br />
<strong>Cool</strong> <strong>Edit</strong> <strong>Pro</strong> 2. Close <strong>Cool</strong> <strong>Edit</strong> <strong>Pro</strong> and <strong>the</strong>n follow <strong>the</strong>se steps:<br />
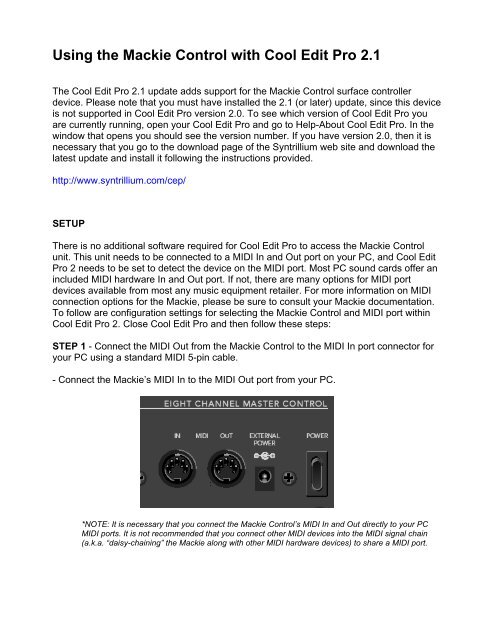
STEP 1 - Connect <strong>the</strong> MIDI Out from <strong>the</strong> <strong>Mackie</strong> <strong>Control</strong> to <strong>the</strong> MIDI In port connector for<br />
your PC using a standard MIDI 5-pin cable.<br />
- Connect <strong>the</strong> <strong>Mackie</strong>’s MIDI In to <strong>the</strong> MIDI Out port from your PC.<br />
*NOTE: It is necessary that you connect <strong>the</strong> <strong>Mackie</strong> <strong>Control</strong>’s MIDI In and Out directly to your PC<br />
MIDI ports. It is not recommended that you connect o<strong>the</strong>r MIDI devices into <strong>the</strong> MIDI signal chain<br />
(a.k.a. “daisy-chaining” <strong>the</strong> <strong>Mackie</strong> along <strong>with</strong> o<strong>the</strong>r MIDI hardware devices) to share a MIDI port.
STEP 2 - Turn on <strong>the</strong> Power for <strong>the</strong> <strong>Mackie</strong> unit – <strong>the</strong> <strong>Mackie</strong> must be powered on before<br />
launching <strong>Cool</strong> <strong>Edit</strong> <strong>Pro</strong> in order for <strong>the</strong> software to detect it.<br />
STEP 3 - Launch <strong>Cool</strong> <strong>Edit</strong> <strong>Pro</strong> and go to <strong>the</strong> Options > Device Order > Ext. <strong>Control</strong>lers<br />
tab window. Select <strong>Mackie</strong> <strong>Control</strong> from <strong>the</strong> drop-down menu field titled “External <strong>Control</strong><br />
Device”.<br />
STEP 4 – Click on <strong>the</strong> “Configure…” button to launch <strong>the</strong> “Configure <strong>Mackie</strong> <strong>Control</strong>”<br />
dialog. Here you need to select <strong>the</strong> MIDI In and Out Devices from <strong>the</strong> respective lists. You<br />
will want to select <strong>the</strong> ports that you connected your <strong>Mackie</strong> <strong>Control</strong> unit into in step 1.<br />
Leave <strong>the</strong> “<strong>Mackie</strong> Switch” field blank for now – you can use this option later if you wish to<br />
customize some of <strong>the</strong> user-configurable buttons on <strong>the</strong> <strong>Mackie</strong> unit. Click “OK” to close<br />
this window. If you do not click OK before closing this Configure dialog, your settings will<br />
not be retained.
NOTE: If your MIDI port device does not appear in <strong>the</strong> MIDI Input Device or MIDI<br />
Output Device lists, <strong>the</strong>n Windows has not detected or installed <strong>the</strong> MIDI Port<br />
device correctly and you should refer to <strong>the</strong> MIDI hardware’s documentation for<br />
proper installation steps.<br />
STEP 5 – Click OK on <strong>the</strong> Ext <strong>Control</strong>lers dialog to close it. If you do not click OK before<br />
closing this dialog, your settings will not be retained.<br />
STEP 6 – Go to File > Exit and close <strong>Cool</strong> <strong>Edit</strong> <strong>Pro</strong>. Then, <strong>with</strong> <strong>the</strong> <strong>Mackie</strong> <strong>Control</strong> device<br />
still powered on, re-launch <strong>Cool</strong> <strong>Edit</strong> again. This may be necessary to establish <strong>the</strong><br />
connection to <strong>the</strong> <strong>Mackie</strong> <strong>Control</strong>. Your <strong>Mackie</strong> <strong>Control</strong> should now be properly configured<br />
and ready to use <strong>with</strong> <strong>Cool</strong> <strong>Edit</strong> <strong>Pro</strong>. You should not need to repeat <strong>the</strong>se steps since <strong>the</strong><br />
<strong>Mackie</strong> <strong>Control</strong> should retain <strong>the</strong>se settings unless you decide to change <strong>the</strong>m.<br />
The ”Update text display in real-time” checkbox is offered in case your MIDI port device<br />
has trouble communicating data back to <strong>the</strong> <strong>Mackie</strong> LED display. It is recommended that<br />
you keep this box checked (<strong>the</strong> default state). But if you encounter issues where <strong>the</strong><br />
numerical values on <strong>the</strong> <strong>Mackie</strong> LED display are not updating fast enough while moving<br />
faders or V-Pots, or if <strong>the</strong> MIDI port stops responding, <strong>the</strong>n you may try un-checking this<br />
box. This reduces <strong>the</strong> update of <strong>the</strong> display and may resolve <strong>the</strong>se types of issues.<br />
If you wish to plug your <strong>Mackie</strong> <strong>Control</strong> into a different MIDI port at a later time, you can<br />
<strong>the</strong>n use <strong>the</strong> “Configure…” button in <strong>the</strong> Ext. <strong>Control</strong>ler window to access <strong>the</strong> new MIDI<br />
device settings. To manually reset <strong>the</strong> <strong>Mackie</strong> to a MIDI port repeat <strong>the</strong> steps above.
Customizing <strong>the</strong> <strong>Mackie</strong> Switches<br />
<strong>Cool</strong> <strong>Edit</strong> <strong>Pro</strong> already includes a preset “<strong>Pro</strong>file” for <strong>the</strong> <strong>Mackie</strong> <strong>Control</strong>. This is a set of<br />
commonly accessed functions mapped to <strong>the</strong> <strong>Mackie</strong> unit’s faders, V-pot rotary knobs and<br />
push button controls. This profile is automatically loaded once you have <strong>the</strong> <strong>Mackie</strong><br />
<strong>Control</strong> active <strong>with</strong> <strong>Cool</strong> <strong>Edit</strong> <strong>Pro</strong>. <strong>Cool</strong> <strong>Edit</strong> <strong>Pro</strong> also offers customization for many of <strong>the</strong><br />
<strong>Mackie</strong> push-button switches. Within <strong>Cool</strong> <strong>Edit</strong> <strong>Pro</strong>’s Configure dialog you can change <strong>the</strong><br />
<strong>Cool</strong> <strong>Edit</strong> <strong>Pro</strong> command that is assigned any of <strong>the</strong> <strong>Mackie</strong> switches in <strong>the</strong> menu of <strong>the</strong><br />
“<strong>Mackie</strong> Switch” field. Just select <strong>the</strong> desired <strong>Mackie</strong> push-button switch from this menu<br />
and <strong>the</strong>n click on <strong>the</strong> “<strong>Cool</strong> <strong>Edit</strong> Commands” drop-down menu and select <strong>the</strong> <strong>Cool</strong> <strong>Edit</strong> <strong>Pro</strong><br />
2 command from <strong>the</strong> list that you wish to map to <strong>the</strong> selected push-button switch. Repeat<br />
this step for each <strong>Mackie</strong> switch you wish to customize, <strong>the</strong>n click OK to exit <strong>the</strong> Configure<br />
dialog and retain your changes.<br />
Reset to Default <strong>Pro</strong>file<br />
Since <strong>Cool</strong> <strong>Edit</strong> <strong>Pro</strong> allows you to customize <strong>the</strong> commands of many of <strong>the</strong> <strong>Mackie</strong>’s<br />
buttons, <strong>Cool</strong> <strong>Edit</strong> <strong>Pro</strong> also offers a “Reset” switch to allow you to set <strong>the</strong>se buttons all<br />
back to <strong>the</strong>ir original <strong>Cool</strong> <strong>Edit</strong> <strong>Pro</strong>/<strong>Mackie</strong> <strong>Pro</strong>file settings. This will discard any custom<br />
button settings you may have set up. The “Reset to Defaults” switch is located in <strong>Cool</strong> <strong>Edit</strong><br />
<strong>Pro</strong> 2’s Options > Device <strong>Pro</strong>perties > Ext <strong>Control</strong>lers > Configure button dialog for <strong>the</strong><br />
<strong>Mackie</strong> controller. Click on this reset button when <strong>the</strong> <strong>Mackie</strong> is active to reset <strong>the</strong> unit to<br />
default <strong>Pro</strong>file settings.<br />
The <strong>Cool</strong> <strong>Edit</strong> <strong>Pro</strong> Layout Overlay<br />
The <strong>Mackie</strong> <strong>Control</strong> offers interchangeable plastic “Overlay” template sheets to allow you<br />
to have software-specific labels for push buttons on <strong>the</strong> right portion of <strong>the</strong> controller unit.<br />
(Shown on <strong>the</strong> last page of this document.) You may have received a <strong>Cool</strong> <strong>Edit</strong> <strong>Pro</strong><br />
Overlay in <strong>the</strong> box <strong>with</strong> your <strong>Mackie</strong> <strong>Control</strong> unit. If not, <strong>the</strong>n please contact <strong>Mackie</strong> or<br />
<strong>Mackie</strong> hardware dealer to receive a <strong>Cool</strong> <strong>Edit</strong> <strong>Pro</strong> Overlay and consult <strong>the</strong> <strong>Mackie</strong><br />
documentation for <strong>the</strong> instructions on affixing <strong>the</strong> Overlay sheet. The <strong>Cool</strong> <strong>Edit</strong> <strong>Pro</strong> Overlay<br />
offers its own descriptive text labels for <strong>the</strong> many buttons on <strong>the</strong> right side of <strong>the</strong> <strong>Mackie</strong><br />
surface. In this document we will refer to button names as those provided on <strong>the</strong> <strong>Cool</strong> <strong>Edit</strong><br />
<strong>Pro</strong> overlay.
The <strong>Cool</strong> <strong>Edit</strong> <strong>Pro</strong> 2 <strong>Mackie</strong> <strong>Pro</strong>file<br />
Commands List<br />
<strong>Cool</strong> <strong>Edit</strong> <strong>Pro</strong> already includes a preset “<strong>Pro</strong>file” for <strong>the</strong> <strong>Mackie</strong> <strong>Control</strong>. This is a set of<br />
commonly accessed functions mapped to <strong>the</strong> <strong>Mackie</strong> unit’s faders, V-pot rotary knobs and<br />
push button controls. To follow are descriptions of <strong>the</strong>se <strong>Pro</strong>file commands. You can<br />
fur<strong>the</strong>r customize several <strong>Mackie</strong> Switches in <strong>the</strong> Ext. <strong>Control</strong>lers dialog – refer to <strong>the</strong><br />
previous “Customizing <strong>the</strong> <strong>Mackie</strong> Switches” section for details.<br />
Assigning Channel Strips to <strong>Cool</strong> <strong>Edit</strong> <strong>Pro</strong> Tracks<br />
To set up <strong>the</strong> <strong>Mackie</strong> <strong>Control</strong>’s channel faders and switches for your <strong>Cool</strong> <strong>Edit</strong> <strong>Pro</strong> session,<br />
it is first necessary to learn how to assign <strong>the</strong> <strong>Mackie</strong>’s 8 channel strips to <strong>the</strong> desired <strong>Cool</strong><br />
<strong>Edit</strong> <strong>Pro</strong> tracks. This is achieved using <strong>the</strong> 6 buttons in <strong>the</strong> FADER BANKS section.<br />
FADER BANKS buttons<br />
BANK < > = <strong>the</strong>se left and right arrow buttons are used to assign <strong>the</strong> <strong>Mackie</strong> channel<br />
faders to <strong>the</strong> previous/next set of 8 <strong>Cool</strong> <strong>Edit</strong> <strong>Pro</strong> tracks. For example, upon starting a <strong>Cool</strong><br />
<strong>Edit</strong> <strong>Pro</strong> new session, <strong>the</strong> 8 <strong>Mackie</strong> channel strips are assigned to control <strong>Cool</strong> <strong>Edit</strong> <strong>Pro</strong><br />
tracks 1 – 8 respectively. However, if you click on <strong>the</strong> BANK right arrow button once, <strong>the</strong><br />
<strong>Mackie</strong> channel strips will <strong>the</strong>n control track 9 – 16, and you can assign <strong>the</strong> channel strips<br />
to successive banks all <strong>the</strong> way up to tracks 121 - 128.<br />
CHANNEL < > = <strong>the</strong>se left and right arrow buttons re-set <strong>the</strong> Bank set to include a<br />
different set of tracks. For example, by default <strong>the</strong> 8 <strong>Mackie</strong> channel strips are assigned to<br />
banks in <strong>the</strong> order of tracks 1 – 8, 9 – 16, 17 – 24, etc. By using <strong>the</strong>se Channel < ><br />
buttons it is possible to reconfigure <strong>the</strong> Bank sets to tracks 2 – 9, 10 – 17, 18 – 24, etc.<br />
Hitting one of <strong>the</strong> Channel arrow buttons should ascend/descend <strong>the</strong> bank groups by one<br />
track per click.
The FLIP and EDIT buttons located just above <strong>the</strong> Master fader offer more control over<br />
channel strips:<br />
FLIP button = this button “resets” <strong>the</strong> channel strip assignment to <strong>Cool</strong> <strong>Edit</strong> <strong>Pro</strong> tracks 1 –<br />
8, so that you can easily reset <strong>the</strong> <strong>Mackie</strong> back to this first set of tracks.<br />
EDIT button = this button instantly sets <strong>the</strong> 8 channel strips to <strong>Cool</strong> <strong>Edit</strong> <strong>Pro</strong> tracks 121 –<br />
128.<br />
Channel Strip <strong>Control</strong>s<br />
Each of <strong>the</strong> <strong>Mackie</strong>’s 8 channel strips has <strong>the</strong> following common buttons. These are only<br />
active in <strong>Cool</strong> <strong>Edit</strong> <strong>Pro</strong>’s Multitrack View.<br />
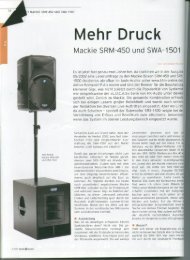
By default, <strong>the</strong> <strong>Mackie</strong> <strong>Control</strong> will initialize and be set in <strong>the</strong> MIX mode, where <strong>the</strong> LCD<br />
display at <strong>the</strong> top of <strong>the</strong> unit shows <strong>the</strong> currently selected track’s number, text title and its<br />
Track Volume setting. The bottom row of this display indicates <strong>the</strong> current track number<br />
assignment for each <strong>Mackie</strong> channel strip. For example, once <strong>Cool</strong> <strong>Edit</strong> <strong>Pro</strong> is launched<br />
and set to <strong>the</strong> Multitrack View, <strong>the</strong> <strong>Mackie</strong> LCD display would look similar to this:<br />
009 Track 9 Vol –3.4dB<br />
9 10 11 12 13 14 15 16<br />
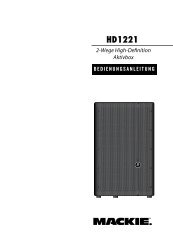
V-POTS & ASSIGMENT buttons<br />
V-POTS
ASSIGNMENT Buttons<br />
• The rotary knob at <strong>the</strong> top of each channel strip is referred to as a V-Pot. Each V-<br />
Pot is a multi-function control knob and has different uses for <strong>Cool</strong> <strong>Edit</strong> <strong>Pro</strong><br />
depending on <strong>the</strong> current “mode” assignment.<br />
• The V-Pot functions are governed by <strong>the</strong> buttons to <strong>the</strong> right in <strong>the</strong> ASSIGNMENT<br />
section. <strong>Cool</strong> <strong>Edit</strong> <strong>Pro</strong> allows you to switch into two optional modes – PAN or EQ –<br />
by selecting one of <strong>the</strong>se two buttons. The current mode selection is indicated by<br />
<strong>the</strong> LED light next to <strong>the</strong> respective ASSIGNMENT button. De-selecting ei<strong>the</strong>r <strong>the</strong><br />
PAN or EQ assignment buttons always returns you to <strong>the</strong> default MIX mode.<br />
• Each V-Pot knob also includes a switch (press down on <strong>the</strong> rotary knob itself). This<br />
knob switch can also is also assigned as listed below…<br />
PAN Assignment button – this button places <strong>the</strong> V-Pots in PAN mode. When engaged, this<br />
button’s LED illuminates and all V-Pots will pan <strong>the</strong> currently selected track output left or<br />
right. While in Pan mode you will also see that <strong>the</strong> main <strong>Mackie</strong> display (above <strong>the</strong> channel<br />
strips) shows you your currently selected track’s Pan settings. To exit Pan mode simply<br />
press <strong>the</strong> PAN assignment button again so that its LED light is no longer lit. This will return<br />
<strong>the</strong> unit to MIX mode where <strong>the</strong> LCD display also returns to showing <strong>the</strong> track volume<br />
settings. (See <strong>the</strong> Display section in this document for more details). While in PAN mode,<br />
<strong>the</strong> V-Pot knob push switch has no function.<br />
EQ Assignment button – this button allows you to toggle in and out of EQ mode, which<br />
allows <strong>the</strong> V-Pots to control <strong>Cool</strong> <strong>Edit</strong> <strong>Pro</strong>’s dedicated Track EQ for <strong>the</strong> selected track.<br />
The EQ button’s LED illuminates when EQ mode is engaged. Pressing <strong>the</strong> EQ button<br />
again disengages <strong>the</strong> EQ mode and returns <strong>the</strong> unit to MIX mode. When EQ mode is<br />
engaged, <strong>the</strong> selected track’s V-Pot knob push switch cycles through <strong>the</strong> Hi, Med and Low<br />
EQ Gain value parameters. Turning <strong>the</strong> V-Pot should <strong>the</strong>n adjust <strong>the</strong> active parameter<br />
up/down. When in EQ mode, <strong>the</strong> LCD display will show <strong>the</strong> Track EQ settings as you<br />
make <strong>the</strong>m for <strong>the</strong> selected track. (See <strong>the</strong> Display section in this document for more<br />
details).<br />
Note - The o<strong>the</strong>r 4 ASSIGNMENT buttons have no related function <strong>with</strong>in <strong>Cool</strong> <strong>Edit</strong> <strong>Pro</strong>.
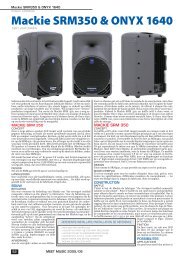
Channel Strip Buttons – <strong>the</strong>se buttons are common to each channel strip and will act<br />
upon <strong>the</strong> currently assigned track.<br />
REC/RDY Button<br />
SOLO Button<br />
MUTE Button<br />
SELECT Button<br />
• Toggles <strong>Cool</strong> <strong>Edit</strong> <strong>Pro</strong>’s Track Record Arm button. The red light on this<br />
button illuminates when <strong>the</strong> track is armed for recording.<br />
• Toggles <strong>Cool</strong> <strong>Edit</strong> <strong>Pro</strong>’s Track Solo function. This button illuminates when<br />
Solo is active.<br />
• Toggles <strong>Cool</strong> <strong>Edit</strong> <strong>Pro</strong>’s Track Mute function. This button illuminates when<br />
Mute is active.<br />
• Shifts <strong>the</strong> focus and selects this track. The button will illuminate to indicate<br />
which channel is currently selected.<br />
• It is only possible to select one channel/track at a time.
Channel Faders<br />
• Any channel becomes selected by ei<strong>the</strong>r pressing this SELECT button, or<br />
also by pressing <strong>the</strong> channel’s REC/RDY, SOLO, or MUTE buttons. You will<br />
see <strong>the</strong> selected track in <strong>Cool</strong> <strong>Edit</strong> <strong>Pro</strong> is <strong>the</strong>n shaded a lighter color for both<br />
<strong>the</strong> Multitrack Track itself, and in <strong>the</strong> <strong>Cool</strong> <strong>Edit</strong> <strong>Pro</strong> Mixer panel.<br />
• Once you push <strong>the</strong> <strong>Mackie</strong> Select button on any channel strip, this channel<br />
stays selected until ano<strong>the</strong>r channel is selected. Therefore, if you select a<br />
channel and <strong>the</strong>n press <strong>the</strong> BANK switch to assign <strong>the</strong> 8 Channel Faders to<br />
a different set of <strong>Cool</strong> <strong>Edit</strong> <strong>Pro</strong> tracks, you should note that <strong>the</strong> currently<br />
Selected channel is still <strong>the</strong> one in <strong>the</strong> previous Bank.<br />
• The <strong>Mackie</strong> channel faders are also touch-sensitive, <strong>the</strong>refore, simply<br />
touching any fader knob will allow you to still access <strong>the</strong> assigned <strong>Cool</strong> <strong>Edit</strong><br />
<strong>Pro</strong> track volume, even though it does not ‘select’ <strong>the</strong> track.<br />
• The Signal LED light in each channel strip is not utilized by <strong>Cool</strong> <strong>Edit</strong> <strong>Pro</strong><br />
• The 8 channel faders and 1 master fader allow control of <strong>Cool</strong> <strong>Edit</strong> <strong>Pro</strong>’s track<br />
volumes and master volume. The channel faders default as assigned to track 1 – 8<br />
on opening a new session. The 8 channel faders can be assigned to and switched<br />
between different sets of 8 tracks easily by using <strong>the</strong> FADER BANKS switches<br />
located above <strong>the</strong> Master Fader.<br />
• The channel faders on <strong>the</strong> <strong>Mackie</strong> are motorized and <strong>the</strong>y will update to reflect <strong>Cool</strong><br />
<strong>Edit</strong> <strong>Pro</strong>’s Multitrack Mixer’s fader settings. It is not necessary to “Null” <strong>the</strong> <strong>Mackie</strong><br />
faders – when you switch to a different Bank <strong>the</strong>se motorized faders will move to<br />
reflect <strong>the</strong> new 8 <strong>Cool</strong> <strong>Edit</strong> <strong>Pro</strong> track volume settings.<br />
• Likewise, moving any <strong>Cool</strong> <strong>Edit</strong> <strong>Pro</strong> Multitrack Mixer fader <strong>with</strong> <strong>the</strong> mouse also<br />
moves <strong>the</strong> <strong>Mackie</strong> motorized fader that is assigned to this track. Again, you will
only be able to see <strong>the</strong> <strong>Mackie</strong> channel fader move if <strong>the</strong> <strong>Mackie</strong> Bank is currently<br />
set to one of <strong>the</strong> 8 <strong>Cool</strong> <strong>Edit</strong> <strong>Pro</strong> tracks you happen to be accessing <strong>with</strong> <strong>the</strong> mouse.<br />
NOTE: The following sections of buttons can be covered <strong>with</strong> <strong>the</strong> optional plastic Overlay.<br />
Once installed, <strong>the</strong> <strong>Cool</strong> <strong>Edit</strong> <strong>Pro</strong> overlay provides <strong>the</strong> following text labels.<br />
UNDO = At <strong>the</strong> top left of this section is <strong>the</strong> Undo button. This ‘undoes’ <strong>the</strong> last performed<br />
command.<br />
REDO = The button re-applies <strong>the</strong> last command that was ‘undone” using <strong>the</strong> Undo<br />
command<br />
EDIT VIEW COMMANDS<br />
The 8 buttons in this row currently each have an assigned <strong>Cool</strong> <strong>Edit</strong> <strong>Pro</strong> <strong>Pro</strong>file function by<br />
default and this list is as follows. These 8 functions are ones that are used in <strong>the</strong> <strong>Cool</strong> <strong>Edit</strong><br />
<strong>Pro</strong> <strong>Edit</strong> View only. These 8 buttons are also “User Configurable” – that is, you can remap<br />
<strong>the</strong>se buttons to any <strong>Cool</strong> <strong>Edit</strong> <strong>Pro</strong> command <strong>with</strong>in <strong>the</strong> Ext <strong>Control</strong>lers-Configure<br />
button dialog. Please refer to <strong>the</strong> preceding “Customizing <strong>the</strong> <strong>Mackie</strong> Switches” section for<br />
details.<br />
COPY = Copy current selection<br />
CUT = Cut current selection<br />
PASTE = Paste at current cursor location<br />
TRIM = Deletes all but <strong>the</strong> selected area of <strong>the</strong> current file<br />
FREQ = Toggles <strong>the</strong> Frequency Analysis window open/closed<br />
PHASE = Toggles <strong>the</strong> Phase Analysis window open/closed<br />
SPECTRAL = Toggles <strong>the</strong> <strong>Cool</strong> <strong>Edit</strong> <strong>Pro</strong> <strong>Edit</strong> View display between Waveform/Spectral<br />
INSERT = Inserts <strong>the</strong> current file or selection from <strong>Edit</strong> View into <strong>the</strong> next available track in<br />
<strong>the</strong> Multitrack.<br />
GLOBAL COMMANDS BUTTONS<br />
The 8 buttons in this row currently each have an assigned <strong>Cool</strong> <strong>Edit</strong> <strong>Pro</strong> <strong>Pro</strong>file function by<br />
default and this list is as follows. These 8 functions are ones that function in both <strong>Cool</strong> <strong>Edit</strong><br />
<strong>Pro</strong>’s <strong>Edit</strong> and Multitrack Views. These 8 buttons are also “User Configurable” – that is,<br />
you can re-map <strong>the</strong>se buttons to any <strong>Cool</strong> <strong>Edit</strong> <strong>Pro</strong> command <strong>with</strong>in <strong>the</strong> Ext <strong>Control</strong>lers-<br />
Configure button dialog. Please refer to <strong>the</strong> preceding “Customizing <strong>the</strong> <strong>Mackie</strong> Switches”<br />
section for details.<br />
VIEW = Toggles <strong>the</strong> <strong>Cool</strong> <strong>Edit</strong> <strong>Pro</strong> display between <strong>Edit</strong> and Multitrack Views<br />
MON.REC. = Toggles <strong>Cool</strong> <strong>Edit</strong> <strong>Pro</strong> into ‘Record Monitor” mode to allow you to check your<br />
input levels
CUE = Adds current cursor location or selection to Cue List<br />
CUE LIST = Toggles <strong>the</strong> Cue List open/closed<br />
SEL. ALL = Selects all data in <strong>the</strong> current view – in <strong>Edit</strong> View this highlights <strong>the</strong> entire<br />
length of <strong>the</strong> file. In Multitrack this selects all blocks.<br />
ZOOM FULL = Zooms <strong>the</strong> current view out vertically and horizontally to show <strong>the</strong> entire<br />
length of <strong>the</strong> file or session<br />
CLOSE = Closes <strong>the</strong> current File or Session<br />
SAVE = Saves <strong>the</strong> current File or Session<br />
SHOW/HIDE buttons<br />
These 4 buttons allow you to show or hide <strong>the</strong> respective dockable windows. These four<br />
button assignments are:<br />
MIXER = Show/hide <strong>the</strong> Multitrack Mixer window<br />
SES. PROP. = Show/hide <strong>the</strong> Session <strong>Pro</strong>perties window<br />
EQ = Show/Hide <strong>the</strong> currently selected track’s EQ window. This is handy to toggle <strong>the</strong> EQ<br />
window open or closed when also using <strong>the</strong> <strong>Mackie</strong> V-Pots in EQ mode to access <strong>the</strong><br />
Track EQ parameters.<br />
ORGANIZER = show/hide <strong>the</strong> File Organizer window in ei<strong>the</strong>r <strong>Edit</strong> or Multitrack View.<br />
MULTITRACK FUNCTIONS Buttons<br />
The 10 buttons in this section are assigned to specific Multitrack View <strong>Cool</strong> <strong>Edit</strong> <strong>Pro</strong><br />
actions as described below.<br />
NEXT = Selects <strong>the</strong> next block in <strong>the</strong> currently selected track so that a function can be<br />
applied to <strong>the</strong> block (such as Nudge, Split, Remove, etc.)<br />
SPLIT Splits <strong>the</strong> currently selected block into two blocks at <strong>the</strong> cursor location<br />
TRIGGER = Toggles <strong>Cool</strong> <strong>Edit</strong> <strong>Pro</strong>’s MIDI Trigger option on/off<br />
SMPTE S = Toggles <strong>the</strong> SMPTE Slave option on/off<br />
SMPTE M = Toggles <strong>the</strong> SMPTE Master option on/off<br />
REMOVE = Removes <strong>the</strong> currently selected block from <strong>the</strong> session<br />
METRONOME = Toggles <strong>the</strong> Metronome on/off<br />
< CURSOR = Resets <strong>the</strong> cursor back to <strong>the</strong> 00:00 time position.<br />
< NUDGE = Nudges <strong>the</strong> currently selected block Left
NUDGE > = Nudges <strong>the</strong> currently selected block Right<br />
TRANSPORT CONTROLS<br />
The ‘tape deck style” transport buttons, as expected, will shuttle <strong>Cool</strong> <strong>Edit</strong> <strong>Pro</strong>’s REWIND,<br />
FAST FORWARD, STOP, PLAY, & RECORD functions. The LED for each button will<br />
illuminate when <strong>the</strong> action is engaged. These transport buttons function in both <strong>Cool</strong> <strong>Edit</strong><br />
<strong>Pro</strong>’s <strong>Edit</strong> and Multitrack Views as well. There are also a few o<strong>the</strong>r commands available<br />
using <strong>the</strong>se Transport buttons:<br />
• Double-tap <strong>the</strong> > FF button to place <strong>the</strong> cursor and view to <strong>the</strong> end of <strong>the</strong> session<br />
(MT), file (EV) or next right Cue marker (MT and EV)<br />
• Once you are in playback mode, PAUSE is available if you press <strong>the</strong> PLAY > button<br />
once during playback (MT and EV). To resume playback, press <strong>the</strong> PLAY > button<br />
again.<br />
• Once you are in record mode, PAUSE is available if you press <strong>the</strong> RECORD button<br />
once during playback (MT and EV). To resume record, press <strong>the</strong> RECORD again.<br />
TRANSPORT FUNCTIONS<br />
In addition, <strong>the</strong> row of push buttons just above <strong>the</strong> Transport can also be used to modify<br />
<strong>the</strong> behavior of <strong>the</strong> Transport. The left three buttons offer <strong>the</strong> 3 <strong>Cool</strong> <strong>Edit</strong> <strong>Pro</strong> transport<br />
Play modes and only one can be active at a time. Therefore you will note that as you<br />
select any one of <strong>the</strong>se 3 buttons, it will automatically de-select <strong>the</strong> previously active play<br />
mode. The green LED glows to indicate <strong>the</strong> active button. These Play mode selectors<br />
make <strong>the</strong> <strong>Mackie</strong> Transport Play button duplicate <strong>the</strong> <strong>Cool</strong> <strong>Edit</strong> <strong>Pro</strong> play button mode. This<br />
means that you can still also right click your mouse on <strong>the</strong> <strong>Cool</strong> <strong>Edit</strong> <strong>Pro</strong> transport buttons<br />
to select exactly which play behavior you want for each of <strong>the</strong>se respective play modes,<br />
and <strong>the</strong> <strong>Mackie</strong> transport Play button will simply trigger it.<br />
= Duplicates <strong>the</strong> behavior of <strong>the</strong> <strong>Cool</strong> <strong>Edit</strong> <strong>Pro</strong> Transport standard Play button<br />
(<strong>the</strong> right arrow Play button).
utton.<br />
= Duplicates <strong>the</strong> behavior for <strong>the</strong> <strong>Cool</strong> <strong>Edit</strong> <strong>Pro</strong> “Play to End” transport Play<br />
= Duplicates <strong>the</strong> <strong>Cool</strong> <strong>Edit</strong> <strong>Pro</strong> Transport “Loop Play” button.<br />
PUNCH IN = When engaged places <strong>Cool</strong> <strong>Edit</strong> <strong>Pro</strong>’s Multitrack into Punch In recording<br />
mode. You must first select a waveblock in a track and highlight <strong>the</strong> desired selection of<br />
<strong>the</strong> block to initiate Punch In mode. To disengage punch In mode, simply disarm <strong>the</strong> REC<br />
button for <strong>the</strong> Punch In enabled track(s).<br />
ANCHOR L = Anchors <strong>the</strong> cursor during playback. Press this while <strong>Cool</strong> <strong>Edit</strong> <strong>Pro</strong> is<br />
playing to change <strong>the</strong> cursor location to <strong>the</strong> current time position.<br />
ANCHOR R = Anchors a 2 nd , Right cursor position during playback. Press this while <strong>Cool</strong><br />
<strong>Edit</strong> <strong>Pro</strong> is playing to create a highlighted selection from <strong>the</strong> existing anchored cursor<br />
position to <strong>the</strong> current time position<br />
DISABLE = disables recording altoge<strong>the</strong>r in <strong>Cool</strong> <strong>Edit</strong> <strong>Pro</strong> so that pressing <strong>the</strong> Record<br />
transport button does nothing. The red LED will illuminate to indicate when record is<br />
disabled.<br />
JOG WHEEL<br />
The Jog Wheel shuttles <strong>the</strong> cursor left or right in time across <strong>the</strong> waveform in <strong>Edit</strong> View, or<br />
<strong>the</strong> Session display in Multitrack View. Since <strong>Cool</strong> <strong>Edit</strong> starts playback from <strong>the</strong> cursor<br />
position, this is a handy way to move your playback start position easily.
ARROW - ZOOM Buttons<br />
The 4 Arrow buttons located below <strong>the</strong> Transport controls offer two “modes” of operation,<br />
which are accesses by <strong>the</strong> ZOOM button in <strong>the</strong> middle of <strong>the</strong> keys. With <strong>the</strong> ZOOM button<br />
de-activated (<strong>the</strong> red LED not illuminated) <strong>the</strong> four arrow buttons function as follows:<br />
Left Arrow = Adjust Selection Left Side to Left (<strong>Edit</strong> View and Multitrack View). This allows<br />
you to extend a highlighted selection by moving <strong>the</strong> left edge fur<strong>the</strong>r to <strong>the</strong> left. It also<br />
allows a selection to be created from <strong>the</strong> cursor (if no selection is currently defined),<br />
extending to <strong>the</strong> left.<br />
Right Arrow = Adjust Selection Right Side to Right (<strong>Edit</strong> View and Multitrack View). This<br />
allows you to extend a highlighted selection by moving <strong>the</strong> right edge fur<strong>the</strong>r to <strong>the</strong> right. It<br />
also allows a selection to be created from <strong>the</strong> cursor (if no selection is currently defined),<br />
extending to <strong>the</strong> right.<br />
Up Arrow = Selects <strong>the</strong> next track up (in <strong>the</strong> Multitrack View) – and Selects Left Channel<br />
only of <strong>the</strong> current file (in <strong>the</strong> <strong>Edit</strong> View)<br />
Down Arrow = Selects <strong>the</strong> next track down (in <strong>the</strong> Multitrack View) - and Selects <strong>the</strong> Right<br />
Channel only of <strong>the</strong> current file (in <strong>the</strong> <strong>Edit</strong> View)<br />
When <strong>the</strong> ZOOM button is active (<strong>the</strong> LED illuminated), <strong>the</strong>se arrow buttons <strong>the</strong>n function<br />
as follows (in both <strong>Edit</strong> and Multitrack Views):<br />
Left Arrow = Zooms out horizontally<br />
Right Arrow = Zooms in horizontally to <strong>the</strong> current playback cursor position or selection<br />
Up Arrow = Zooms in vertically<br />
Down Arrow = Zooms out vertically<br />
Note: The SCRUB button in this section has no current <strong>Cool</strong> <strong>Edit</strong> <strong>Pro</strong> assignment.
DISPLAY – Left LCD Display<br />
This display above <strong>the</strong> Channel <strong>Control</strong>s provides information related to <strong>the</strong> selected<br />
track’s Volume, Pan or EQ settings, depending upon <strong>the</strong> current “Mode” that is selected.<br />
The bottom row of <strong>the</strong> display always shows <strong>the</strong> 8 track numbers for <strong>the</strong> current bank set,<br />
which allows you to easily see what <strong>Cool</strong> <strong>Edit</strong> <strong>Pro</strong> track <strong>the</strong> fader below is currently<br />
assigned to. Note that if you have typed in a name for your track that top row will display<br />
your track name text in place of <strong>the</strong> default “Track xx”.<br />
The default Mode is “Mix” mode, and alternatively you can select <strong>the</strong> Pan or EQ<br />
assignment buttons to switch to Pan or EQ mode (refer to <strong>the</strong> V-POTS & ASSIGMENT<br />
buttons section in this document for fur<strong>the</strong>r details regarding <strong>the</strong>se modes). In Mix mode,<br />
<strong>the</strong> top row of this display will show <strong>the</strong> Volume setting for <strong>the</strong> currently selected track. To<br />
follow is an example where Track 9 is <strong>the</strong> selected track and its volume is set to –3.4 dB:<br />
To follow is an example of <strong>the</strong> LCD display when in Pan mode, where Track 9 is selected<br />
and its Pan value is set right 14 %:<br />
To follow is an example of <strong>the</strong> LCD display when in EQ mode, where track 9 is selected,<br />
<strong>the</strong> Track EQ Mid Gain parameter is selected, and its value is set to a +1.3 dB boost.<br />
ASSIGNMENT LED display<br />
The unit offers a 2 character LED display already titled ASSIGNMENT. This display has no<br />
related function for <strong>Cool</strong> <strong>Edit</strong> <strong>Pro</strong> 2 and <strong>the</strong>refore will not display any characters.<br />
TIME POSITION LED DISPLY<br />
009 Track 9 Vol –3.4dB<br />
9 10 11 12 13 14 15 16<br />
009 Track 9 Pan Right 14<br />
9 10 11 12 13 14 15 16<br />
009 Track 9 EQ Gain Mid +1.3dB<br />
9 10 11 12 13 14 15 16
The red LED numerical display will reflect <strong>the</strong> <strong>Cool</strong> <strong>Edit</strong> <strong>Pro</strong> Time position. Note that it will<br />
also reflect <strong>the</strong> current <strong>Cool</strong> <strong>Edit</strong> <strong>Pro</strong> Time Ruler formatting for any of <strong>Cool</strong> <strong>Edit</strong> <strong>Pro</strong>’s<br />
options – HMS, BPM, SMPTE fps, Samples, or Custom. This display format will update<br />
whenever you select any of <strong>the</strong> Time Ruler options <strong>with</strong>in <strong>Cool</strong> <strong>Edit</strong> <strong>Pro</strong>.<br />
One of <strong>the</strong> two indicator LED lights at <strong>the</strong> left of <strong>the</strong> numerical characters in this display will<br />
show when <strong>the</strong> format is SMPTE or BPM (“Beats”). If <strong>the</strong> current Ruler Display format is<br />
HMS or Samples, <strong>the</strong>n no indicator light will be illuminated.<br />
Rude Solo Light = This indicator light is not utilized by <strong>Cool</strong> <strong>Edit</strong> <strong>Pro</strong> and will remain unlit.<br />
USER SWITCHES A and B (on <strong>the</strong> <strong>Mackie</strong> back panel)<br />
These two ¼ inch jacks are intended for plugging in a momentary footswitch to trigger <strong>the</strong><br />
assigned software functions. (The remote footswitch units are not supplied <strong>with</strong> <strong>the</strong> <strong>Mackie</strong><br />
<strong>Control</strong>, but can typically be purchased from any musical instrument retailer.)<br />
In <strong>Cool</strong> <strong>Edit</strong> <strong>Pro</strong> <strong>the</strong>se User Switches are “User Configurable” – that is, you can re-map<br />
<strong>the</strong>se to any <strong>Cool</strong> <strong>Edit</strong> <strong>Pro</strong> command <strong>with</strong>in <strong>the</strong> Ext <strong>Control</strong>lers-Configure button dialog.<br />
Please refer to <strong>the</strong> preceding “Customizing <strong>the</strong> <strong>Mackie</strong> Switches” section for details. The<br />
default functions assignment in <strong>Cool</strong> <strong>Edit</strong> <strong>Pro</strong> for <strong>the</strong>se two jack switches are as follows:<br />
USER SWITCH A = Toggles between Record and Stop (in both EV and MT).<br />
USER SWITCH B = Toggles between Play and Stop (in both EV and MT).
MACKIE EXTENDER UNIT<br />
In addition to <strong>the</strong> <strong>Mackie</strong> <strong>Control</strong> unit, <strong>Mackie</strong> also offers <strong>the</strong> “Extender” unit, which is<br />
designed to be used in tandem <strong>with</strong> <strong>the</strong> main <strong>Mackie</strong> <strong>Control</strong> unit, thus adding controller<br />
support for additional channel control. <strong>Cool</strong> <strong>Edit</strong> <strong>Pro</strong> does not currently support <strong>the</strong> use of<br />
an Extender device simultaneously <strong>with</strong> <strong>the</strong> main <strong>Mackie</strong> <strong>Control</strong> device on <strong>the</strong> same<br />
system.<br />
For additional support regarding <strong>the</strong> <strong>Mackie</strong> <strong>Control</strong>, please visit:<br />
http://www.mackie.com/record/mackiecontrol/mackiecontrol_support.html<br />
or contact <strong>Mackie</strong> Designs Tech Support toll-free at 800.258.6883<br />
(outside <strong>the</strong> US and Canada call +1 425.487.4333)
--END--