download - Legends of Flight
download - Legends of Flight
download - Legends of Flight

Create successful ePaper yourself
Turn your PDF publications into a flip-book with our unique Google optimized e-Paper software.
TOOLKIT FOR INFORMAL EDUCATORS<br />
Sample Education Materials<br />
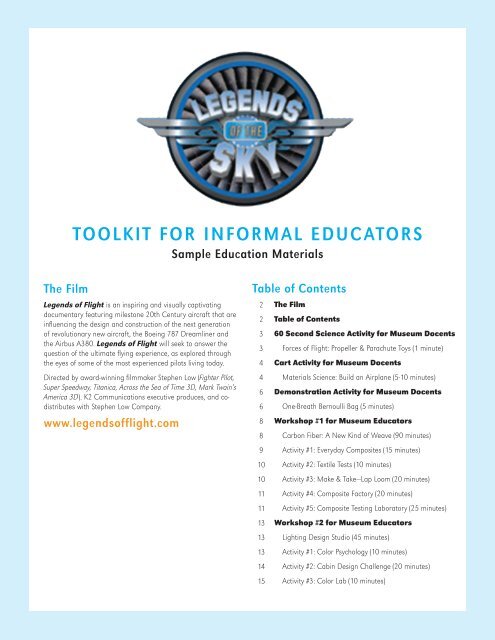
The Film<br />
<strong>Legends</strong> <strong>of</strong> <strong>Flight</strong> is an inspiring and visually captivating<br />
documentary featuring milestone 20th Century aircraft that are<br />
influencing the design and construction <strong>of</strong> the next generation<br />
<strong>of</strong> revolutionary new aircraft, the Boeing 787 Dreamliner and<br />
the Airbus A380. <strong>Legends</strong> <strong>of</strong> <strong>Flight</strong> will seek to answer the<br />
question <strong>of</strong> the ultimate flying experience, as explored through<br />
the eyes <strong>of</strong> some <strong>of</strong> the most experienced pilots living today.<br />
Table <strong>of</strong> Contents<br />
2 The Film<br />
2 Table <strong>of</strong> Contents<br />
3 60 Second Science Activity for Museum Docents<br />
3 Forces <strong>of</strong> <strong>Flight</strong>: Propeller & Parachute Toys (1 minute)<br />
4 Cart Activity for Museum Docents<br />
Directed by award-winning filmmaker Stephen Low (Fighter Pilot,<br />
Super Speedway, Titanica, Across the Sea <strong>of</strong> Time 3D, Mark Twain’s<br />
America 3D). K2 Communications executive produces, and codistributes<br />
with Stephen Low Company.<br />
www.legends<strong>of</strong>flight.com<br />
4<br />
6<br />
6<br />
8<br />
8<br />
9<br />
10<br />
10<br />
11<br />
11<br />
13<br />
13<br />
13<br />
14<br />
15<br />
Materials Science: Build an Airplane (5-10 minutes)<br />
Demonstration Activity for Museum Docents<br />
One-Breath Bernoulli Bag (5 minutes)<br />
Workshop #1 for Museum Educators<br />
Carbon Fiber: A New Kind <strong>of</strong> Weave (90 minutes)<br />
Activity #1: Everyday Composites (15 minutes)<br />
Activity #2: Textile Tests (10 minutes)<br />
Activity #3: Make & Take—Lap Loom (20 minutes)<br />
Activity #4: Composite Factory (20 minutes)<br />
Activity #5: Composite Testing Laboratory (25 minutes)<br />
Workshop #2 for Museum Educators<br />
Lighting Design Studio (45 minutes)<br />
Activity #1: Color Psychology (10 minutes)<br />
Activity #2: Cabin Design Challenge (20 minutes)<br />
Activity #3: Color Lab (10 minutes)
60 SECOND SCIENCE ACTIVITY<br />
FOR MUSEUM DOCENTS<br />
Forces <strong>of</strong> <strong>Flight</strong>:<br />
Propeller & Parachute Toys<br />
(1 minute)<br />
Four forces are required for flight: gravity, lift, drag, and<br />
thrust. With two simple toys and sixty seconds, you can quickly<br />
demonstrate the forces <strong>of</strong> flight. Lift, thrust, and gravity can be<br />
demonstrated with a propeller toy. Drag and gravity can be<br />
demonstrated with a parachute toy.<br />
Key Information:<br />
Ages: Appropriate for ages five and older.<br />
Key Concept: Four forces <strong>of</strong> flight: gravity, lift, thrust, and drag.<br />
Objectives: Museum visitors will be able to understand that<br />
gravity, lift, thrust, and drag are the four forces that are<br />
needed for flight.<br />
Education Standards:<br />
National Science Education Standards for Grades K-4<br />
Position and Motion <strong>of</strong> Objects: Students develop abilities<br />
to describe the position and motion <strong>of</strong> objects.<br />
National Science Education Standards for Grades 5-8<br />
Motions and Forces: Students develop abilities to describe<br />
the position, direction, motion, and speed <strong>of</strong> objects.<br />
National Science Education Standards for Grades 9-12<br />
Motions and Forces: Students develop abilities to<br />
describe and measure the position, direction, motion,<br />
and speed <strong>of</strong> objects.<br />
Summary <strong>of</strong> Supplies:<br />
Item<br />
Aero-Prop<br />
toy propeller<br />
Paratrooper<br />
parachute toy<br />
Safety Guidelines:<br />
Description<br />
Plastic toy propellers with a propeller blade<br />
that is 3” (7.62 x 1.91 cm). The propellers<br />
can be imprinted with a custom message.<br />
Available from Aero-Motion<br />
(www.aero-motion.com) or other online toy<br />
stores. Cost: about $.80 each.<br />
3” (7.62 cm) tall plastic figure with a plastic<br />
parachute attached with string. Available<br />
from toy stores or party stores. Cost: about<br />
$.20 each.<br />
Quantity<br />
The Aero-Prop toys can fly up to 35’ (10.67 m) in the air. Carefully<br />
choose a location for this program so that other museum visitors<br />
will not be at risk <strong>of</strong> getting struck by a flying Aero-Prop toy.<br />
5<br />
5<br />
Procedure:<br />
1. Welcome the museum visitor. Ask the visitor if he/she would<br />
like to investigate the four forces <strong>of</strong> flight with some fun flying<br />
toys.<br />
2. Explain that there are four forces that together allow for flight<br />
to occur. These are gravity, lift, drag, and thrust.<br />
ACTIVITY 1: LIFT AND THRUST<br />
3. Aviation engineers have many challenges when they design an<br />
airplane. The first challenge is to design an airplane that has<br />
enough upward lift to counteract the downward pull <strong>of</strong> gravity.<br />
4. Hand the visitor an Aero-Prop toy and show them how to<br />
launch the propeller into the air.<br />
• Hold the stick <strong>of</strong> the toy between the inside <strong>of</strong> your left<br />
palm and the fingertips <strong>of</strong> your right hand.<br />
• Tilt the propeller forward, away from your body.<br />
• Launch the toy by squeezing the stick between your two<br />
hands and rolling your right hand forward in a quick and<br />
firm motion.<br />
5. Ask:<br />
• What force do you think is pulling down on the toy? (Gravity).<br />
• What force do you think is allowing the toy to counteract gravity<br />
and fly up into the air? (Lift is lifting the toy up against the pull <strong>of</strong><br />
gravity).<br />
• What provides lift? (The airfoil shape <strong>of</strong> the propeller).<br />
• What provides thrust? (The spinning motion <strong>of</strong> the propeller).<br />
6. Have the visitor launch their Aero-Prop again and together,<br />
watch the path that the toy makes. Ask the visitor:<br />
• Would you want to ride on an airplane that only moved upward?<br />
(No, you want to go somewhere).<br />
• What helps the airplane move forward? (The spinning motion <strong>of</strong><br />
the propeller; this is thrust)<br />
ACTIVITY 2: DRAG<br />
7. Introduce the concept <strong>of</strong> drag by asking the visitor:<br />
• What would happen if we put a 20-foot tall windshield on the front<br />
<strong>of</strong> a plane? Would it fly well? Would it speed up or slow down?<br />
8. Hand the visitor a parachute toy and show them how to hold<br />
the toy with the parachute closed, and then throw the toy into<br />
the air so that the parachute opens and the toy slowly floats<br />
back down to you.<br />
9. Ask:<br />
• We have talked about gravity pulling down, lift lifting upwards,<br />
and thrust pushing forward. What force do you think<br />
is slowing the toy so that it doesn’t just plummet down to the<br />
ground? (Drag is caused by the shape <strong>of</strong> the parachute).<br />
Notes to Presenter:<br />
This 60 Second Science Activity is appropriate for all ages. Given<br />
the short presentation time, the activity focuses on only one main<br />
concept, making it appropriate for younger children. Here are<br />
some ways to adapt the activity for different age groups:<br />
3
5-8 year olds: Keep your language simple. Focus on having<br />
children describe the motion <strong>of</strong> the toys, using words such as: fly,<br />
lift, spin, float, fast, slow, up, and down. Young children may need<br />
help launching the Aero-Prop toys.<br />
8-14+ year olds: Engage older children and adults in the activity by<br />
focusing on the four forces <strong>of</strong> flight. Encourage visitors to develop<br />
an understanding <strong>of</strong> the terms: gravity, lift, drag, thrust, and force.<br />
Ask visitors if they can think <strong>of</strong> other examples <strong>of</strong> objects that<br />
demonstrate the four forces <strong>of</strong> flight (such as birds, bats, insects,<br />
helicopters, airplanes, etc.).<br />
Career Link:<br />
• Airplane pilot<br />
• Physicist<br />
• Toy inventor<br />
CART ACTIVITY<br />
FOR MUSEUM DOCENTS<br />
Materials Science: Build an Airplane<br />
(5-10 minutes)<br />
Throughout history, aviation engineers and material scientists<br />
have designed airplane from a variety <strong>of</strong> materials, from the first<br />
wood and fabric bi-planes to the carbon fiber composite planes <strong>of</strong><br />
today. Each material used in the aviation industry is chosen based<br />
on its specific characteristics, including weight, strength, flexibility,<br />
and resistance to corrosion.<br />
Key Information:<br />
Ages: Appropriate for ages five and older.<br />
Key Concept: Properties <strong>of</strong> materials.<br />
Objectives: Museum visitors will be able to understand that materials<br />
have different characteristics, such as weight and strength.<br />
Standards:<br />
National Science Education Standards for Grades K-4<br />
• Properties <strong>of</strong> Objects and Materials: Students develop the<br />
ability to observe and describe the properties <strong>of</strong> objects and<br />
materials.<br />
• Science and Technology: Students develop an understanding<br />
about science and technology.<br />
National Science Education Standards for Grades 5-8<br />
• Properties and Changes <strong>of</strong> Properties in Matter:<br />
Students develop the abilities to observe and describe properties<br />
<strong>of</strong> substances.<br />
• Science and Technology: Students develop an understanding<br />
about science and technology.<br />
National Science Education Standards for Grades 9-12<br />
• Science and Technology: Students develop an understanding<br />
about science and technology.<br />
Summary <strong>of</strong> Supplies:<br />
Item<br />
Wood sample<br />
Fabric sample<br />
Steel sample<br />
Aluminum sample<br />
Titanium sample<br />
(optional)<br />
Fiberglass epoxy<br />
sample<br />
Carbon fiber<br />
laminate sample<br />
Carbon fiber<br />
sandwich sample<br />
Strength-Weight<br />
Chart<br />
Boeing 787<br />
Materials Poster<br />
Airplane Cards<br />
Materials Cards<br />
Model Airplane<br />
(optional)<br />
Special Note:<br />
The Boeing 787 Materials Poster should be created using the<br />
following information:<br />
• 50% Composites<br />
• 20% Aluminum<br />
• 15% Titanium<br />
• 10% Steel<br />
Description<br />
• 5% Other materials<br />
Piece <strong>of</strong> spruce wood. Labeled as “Spruce<br />
Wood.”<br />
Piece <strong>of</strong> strong linen fabric. Labeled as<br />
“Linen Fabric.”<br />
Piece cut from a sheet <strong>of</strong> steel. Labeled as<br />
“Steel.”<br />
Piece cut from a sheet <strong>of</strong> aluminum.<br />
Labeled as “Aluminum.”<br />
Piece <strong>of</strong> titanium. Labeled as “Titanium.”<br />
(This is optional, as titanium can be quite<br />
expensive to purchase).<br />
Piece <strong>of</strong> fiberglass epoxy. Labeled as<br />
“Fiberglass Epoxy.”<br />
Piece <strong>of</strong> carbon fiber epoxy. Labeled as<br />
“Carbon Fiber Laminate.” Can be purchased<br />
from www.robotmarketplace.com.<br />
Piece <strong>of</strong> honeycomb-shaped material sandwiched<br />
between two carbon fiber sheets.<br />
Labeled as “Carbon Fiber Sandwich.” Can be<br />
purchased from www.robotmarketplace.com.<br />
A chart comparing the “specific strength”<br />
and the “relative weight per unit volume”<br />
for the following materials: carbon fiber<br />
epoxy, fiberglass epoxy, aluminum, titanium,<br />
and steel.<br />
Poster that shows the types <strong>of</strong> construction<br />
materials used on the Boeing 787 aircraft.<br />
See “Special Note” below for more details.<br />
A set <strong>of</strong> flashcards. One side has a large<br />
photograph <strong>of</strong> an airplane. The other<br />
side has the years that the airplane was<br />
manufactured and a smaller version <strong>of</strong> the<br />
photograph <strong>of</strong> the airplane. See “Special<br />
Note” below for more details.<br />
A set <strong>of</strong> flashcards. One side has information<br />
about the materials used to construct<br />
an airplane. The other side has the name <strong>of</strong><br />
that airplane. See “Special Note” below for<br />
more details.<br />
Scale-model <strong>of</strong> an airplane. If possible, choose<br />
an airplane that is featured in the film.<br />
The Airplane Cards should be created using the following information:<br />
• Boeing Stearman Kaydet Bi-plane (1936 – 1948)<br />
• Lockheed Constellation (1937 – 1967)<br />
• Schleicher ASW-20 Glider (1977 – 1990)<br />
Quantity<br />
1<br />
1<br />
1<br />
1<br />
1<br />
1<br />
1<br />
1<br />
1<br />
1<br />
1 set <strong>of</strong> 7<br />
cards<br />
1 set <strong>of</strong> 7<br />
cards<br />
1 or more<br />
4
• Boeing Harrier V/STOL Jump Jet (1980 – present)<br />
• Boeing F/A-18 Hornet (1983 – present)<br />
• Airbus A380 (2007 – present)<br />
• Boeing 787 Dreamliner (Under development)<br />
The Materials Cards should be created using the following information:<br />
• This plane was built with steel, spruce wood, and fabric.<br />
(Boeing Stearman Kaydet Bi-plane)<br />
• This plane was built with steel and a lot <strong>of</strong> shiny aluminum.<br />
(Lockheed Constellation)<br />
• This plane was built with light-weight fiberglass.<br />
(Schleicher ASW-20 Glider)<br />
• This jet was built with aluminum, composites (including<br />
graphite/epoxy and carbon fiber), steel, and titanium.<br />
(Boeing Harrier V/STOL Jump Jet)<br />
• This jet was built with aluminum, titanium, carbon fiber epoxy,<br />
and steel. (Boeing F/A-18 Hornet)<br />
• This new plane is being built from new materials, including<br />
carbon fiber reinforced plastic, GLARE (a material made<br />
from layers <strong>of</strong> fiberglass and aluminum), and thermoplastics.<br />
(Airbus A380)<br />
• Half <strong>of</strong> this new plane will be built from carbon fiber<br />
composites. Other materials include aluminum, titanium,<br />
steel, and fiberglass. (Boeing 787 Dreamliner)<br />
Set-up:<br />
• Lay out the sample materials on the top <strong>of</strong> the cart in no<br />
particular order. Mix up the order <strong>of</strong> the Airplane Cards<br />
and the Materials Cards and set both “decks” aside.<br />
• If at all possible, it is best to have sample materials that<br />
are all approximately the same size. This allows visitors to<br />
hold each material and compare the weight.<br />
Safety Guidelines:<br />
Be sure that the sample materials are prepared so that all edges<br />
are sanded and smooth, or else covered.<br />
Procedure:<br />
1. Invite museum visitors to the cart program by asking:<br />
• Would you like to help me build an airplane? I need your help to<br />
determine what material to use for a new airplane design.<br />
ACTIVITY #1: MATERIALS EXPLORATION (Ages 5+)<br />
2. Explain that the materials on the cart are all samples <strong>of</strong><br />
materials that have been used to build airplanes throughout<br />
history, from the earliest wooden bi-planes to modern commercial<br />
jets.<br />
3. Encourage the visitor to explore each material’s properties, by asking:<br />
• Does the material feel light or heavy?<br />
• Does the material feel strong or weak?<br />
• Does the material feel flexible or rigid?<br />
• Do you think this material could be damaged over time by<br />
cold, heat, or moisture?<br />
ACTIVITY #2: STRENGTH-TO-WEIGHT COMPARISON<br />
(Ages 5+)<br />
4. Explain that aviation engineers choose materials based on<br />
many different qualities, including: weight, strength, rigidity,<br />
and resistance to corrosion. For the airplane we are designing,<br />
we’re going to focus on weight and strength. We want to find<br />
the material that has the best combination <strong>of</strong> low weight and<br />
high strength. Put more simply, we need a material that is<br />
light, but strong.<br />
5. Challenge the visitor to pick up each material and weigh it in<br />
their hand. Then, challenge the visitor to consider the weight<br />
<strong>of</strong> the material in comparison to its size and to organize the<br />
materials in order <strong>of</strong> their weight, from light to heavy.<br />
6. Show the Strength-Weight Chart, which compares the strength<br />
<strong>of</strong> each material to its weight. Ask:<br />
• Which material would you choose for our airplane, which must be<br />
light, but strong?<br />
7. Show the Boeing 787 Materials Poster, which illustrates<br />
how steel, titanium, aluminum, fiberglass, and carbon fiber<br />
composites are being used to build the new Boeing 787<br />
Dreamliner. This is one <strong>of</strong> the first plane that has a fuselage<br />
shell, and many other parts, built from carbon fiber composites<br />
instead <strong>of</strong> aluminum. By using carbon fiber composites,<br />
Boeing engineers have been able to create a strong, light<br />
plane. A lighter plane means that it burns less fuel, and gives<br />
<strong>of</strong>f fewer emissions.<br />
8. You can also use the airplane scale-model to point out where<br />
different materials are used on modern planes.<br />
Composites<br />
Aluminum<br />
Other materials<br />
Amount <strong>of</strong> Materials Used in the<br />
New Boeing 787 vs. 777 (by weight)<br />
Materials used in the<br />
Boeing 787 Dreamliner<br />
50%<br />
20%<br />
30%<br />
Adapted from: Boeing. 2007. 787 Program Fact Sheet.<br />
Materials used in<br />
the Boeing 777<br />
12%<br />
50%<br />
38%<br />
ACTIVITY #3: MATCHING AIRPLANES & MATERIALS<br />
(Ages 10+)<br />
9. First, lay out the Airplane Cards with the photo side facing up.<br />
Lay out the Materials Cards with the materials side up.<br />
10. Explain that scientists and engineers have changed the design<br />
<strong>of</strong> airplanes over time, making them faster, lighter, and better.<br />
As new materials have been developed, these scientists and<br />
engineers have learned how to apply them in the construction<br />
<strong>of</strong> airplanes.<br />
11. Challenge the visitor to match the airplanes with their construction<br />
materials by trying to match each Airplane Card<br />
with a Materials Card.<br />
12. You can help the visitor check his/her answers by turning over<br />
the Materials Cards. The back <strong>of</strong> each Materials Card has the<br />
name <strong>of</strong> the correct airplane.<br />
5
ACTIVITY #4: AIRPLANE TIMELINE (Ages 5+)<br />
13. First, lay out the Airplane Cards, in no particular order.<br />
14. Challenge the visitor to create an airplane timeline by<br />
organizing the Airplane Cards in order <strong>of</strong> earliest plane<br />
to most recent plane. Encourage the visitor to look at the<br />
design and materials used on each plane.<br />
15. You can help the visitor check his/her answers by turning over<br />
the Airplane Cards. The back <strong>of</strong> each Airplane Card has the<br />
dates that the airplane was—or is being—manufactured.<br />
Notes to Presenter:<br />
The cart is geared for ages eight and older. Here are some ways<br />
to adapt the cart for different age groups:<br />
5-8 year olds: Younger visitors can participate in the Materials<br />
Exploration and the Airplane Timeline. You can adapt the<br />
Strength-to-Weight Comparison by challenging younger visitors to<br />
feel the different materials and place them in order by approximate<br />
weight. Focus the experience <strong>of</strong> younger children on making<br />
observations and describing the characteristics <strong>of</strong> the different<br />
materials.<br />
8-12 year olds: These visitors can participate in all activities,<br />
but may need some help reading the Airplane Cards and<br />
Materials Cards.<br />
13+ year olds: Older children and adults can participate in all<br />
the activities.<br />
Career Link:<br />
• Material scientists<br />
• Aerospace engineer<br />
Standards:<br />
National Science Education Standards for Grades K-4<br />
• Position and Motion <strong>of</strong> Objects: Students develop abilities<br />
to describe the position and motion <strong>of</strong> objects.<br />
• Properties <strong>of</strong> Earth Materials: Students develop an understanding<br />
<strong>of</strong> earth materials, including the gases <strong>of</strong> the atmosphere.<br />
National Science Education Standards for Grades 5-8<br />
• Motions and Forces: Students develop abilities to describe the<br />
position, direction, motion, and speed <strong>of</strong> objects.<br />
National Science Education Standards for Grades 9-12<br />
• Motions and Forces: Students develop abilities to describe and<br />
measure the position, direction, motion, and speed <strong>of</strong> objects.<br />
Summary <strong>of</strong> Supplies:<br />
Durable Supplies:<br />
Item<br />
Bernoulli’s Principle<br />
Newton’s Third Law<br />
Scissors<br />
Model airfoil<br />
Description<br />
Consumable Supplies:<br />
Poster, chart, or slide <strong>of</strong> Bernoulli’s<br />
Principle: “As the velocity <strong>of</strong> a fluid<br />
increases, the pressure exerted by that<br />
fluid decreases” with this simplification<br />
printed below it: “As the speed<br />
<strong>of</strong> the air increases, the air pressure<br />
decreases.”<br />
Poster, chart, or slide <strong>of</strong> Newton’s Third<br />
Law: “For every action there is an equal<br />
and opposite reaction.”<br />
Scissors are needed only if you are<br />
using the Diaper Genie® refill.<br />
Model airplane, bird wing, or other model<br />
that demonstrates the shape <strong>of</strong> an aifoil.<br />
Quantity<br />
1<br />
1<br />
1<br />
1<br />
DEMONSTRATION ACTIVITY<br />
FOR MUSEUM DOCENTS<br />
One-Breath Bernoulli Bag<br />
(5 minutes)<br />
Can you blow up an eight foot long bag with just one breath? If<br />
you use Bernoulli’s Principle <strong>of</strong> air pressure, you can! (This demonstration<br />
element can be used as part <strong>of</strong> a larger demonstration<br />
program on the forces <strong>of</strong> flight).<br />
Item<br />
Diaper Genie ®<br />
refill or<br />
Windbags ®<br />
Description<br />
Platex ® Diaper Genie ® refills can be found<br />
at large department stores. The product is<br />
a tube <strong>of</strong> plastic that can be cut to size for<br />
the Bernoulli Bag demonstration. One refill<br />
costs about $6.00.<br />
Windbags ® are a product that can be<br />
purchased from science supply companies,<br />
such as Steve Spangler Science (www.<br />
stevespanglerscience.com). A 4-pack is<br />
$5.00, a 32-pack is $25.00, and a 100-<br />
pack is $50.00.<br />
Quantity<br />
2 Windbags ® or<br />
2 — 8’ (2.44m)<br />
long sections<br />
<strong>of</strong> a Diaper<br />
Genie ® refill<br />
Key Information:<br />
Balloon<br />
Party-style balloon<br />
1<br />
Ages: Appropriate for all ages.<br />
Key Concept: Air pressure and Bernoulli’s Principle.<br />
Objectives: Museum visitors will be able to: Understand the<br />
basic concept <strong>of</strong> Bernoulli’s Principle: that as the speed <strong>of</strong> air<br />
increases, the pressure <strong>of</strong> the air decreases.<br />
Set-up:<br />
• If you are using the Diaper Genie ® refill, pull out an 8’ (2.44 m)<br />
long piece <strong>of</strong> the plastic tube and cut it <strong>of</strong>f using scissors.<br />
Tie a knot in one end <strong>of</strong> the tube, leaving the other end open.<br />
Repeat to make two bags.<br />
• If you are using a Windbag ® , tie a knot in one end <strong>of</strong> the tube,<br />
leaving the other end open. Repeat to make two bags.<br />
• Set aside one Bernoulli Bag for visitors to use and one for you to use.<br />
6
Safety Guidelines:<br />
When a volunteer audience member is attempting to blow up the<br />
bag, limit them to five breaths to avoid overexertion.<br />
Procedure:<br />
1. Gather an audience.<br />
2. Pull out the Bernoulli Bag and stretch it out to its full length, so<br />
that the audience can see how large it is.<br />
3. Ask for a volunteer who is full <strong>of</strong> hot air.<br />
4. Hold the knotted end <strong>of</strong> the bag. Hand the open end to the<br />
volunteer. Challenge the volunteer to inflate the bag, using<br />
big, deep breaths.<br />
5. After the volunteer has given five breaths into the bag, pinch<br />
the balloon closed and ask them to stop.<br />
6. Run your hand quickly down the length <strong>of</strong> the bag, from the<br />
open end down to the knotted end, so that you push all <strong>of</strong> the<br />
captured air to the bottom <strong>of</strong> the bag. Show the audience the<br />
amount <strong>of</strong> air that filled the bag after five big breaths.<br />
7. With the audiences help, estimate how many total breaths it<br />
would take for your volunteer to fully inflate the bag.<br />
8. Now, tell the audience that you can blow up the bag with just<br />
one breath. That’s right, with just one breath, you can fully<br />
inflate the bag.<br />
9. Ask the audience if they believe it is possible for you to blow<br />
up the bag with just one breath. Ask the audience to raise<br />
their hands if they believe you can do it. Now, ask them to<br />
raise their hands if they think it is impossible.<br />
10. Before you blow up the Bernoulli Bag, tell the audience that<br />
you will give them a hint as to how to blow up the Bernoulli<br />
Bag using only one breath. Blow up the party balloon. Pinch<br />
the neck <strong>of</strong> the balloon closed. Explain that the balloon is now<br />
filled with air under high pressure. Ask the visitors:<br />
• What will happen if I let go <strong>of</strong> the balloon? Why?<br />
11. Explain that the high pressure air inside the balloon wants to<br />
move toward the lower pressure air in the room.<br />
12. Now, tell the audience that you will show them the concept <strong>of</strong><br />
how “higher pressure air moves to where there is lower pressure<br />
air” by blowing up the Bernoulli Bag with just one breath.<br />
13. Stretch out your lungs by taking a few noisy, deep breaths. Then,<br />
proceed to fully inflate the bag in just one breath, as promised!<br />
• Hold the opening <strong>of</strong> the bag wide open.<br />
• Hold the opening <strong>of</strong> the bag about 10” (25.4 cm) away<br />
from your mouth.<br />
• Take a deep breath and forcefully blow in the direction <strong>of</strong><br />
the bag, completely emptying your lungs.<br />
• Use your hand to close the end <strong>of</strong> the bag. Tie a knot to<br />
keep the air contained inside.<br />
14. Ask the visitors:<br />
• Where did the air come from that just filled up the bag?<br />
• Do I have enough air in my lungs to fill up an eight foot<br />
long bag?<br />
15. The audience will want to know how you managed the impossible<br />
and inflated an eight foot long bag with just one breath.<br />
Explain that you used a scientific principle discovered by an<br />
eighteenth century Swiss scientist named Daniel Bernoulli.<br />
16. Show the poster, chart, or slide <strong>of</strong> Bernoulli’s Principle. Read<br />
Bernoulli’s Principle and the simplified statement below that<br />
relates directly to how the principle applies to lift and flight.<br />
17. Explain the secret to the One-Breath Bernoulli Bag. The secret<br />
is to open the mouth <strong>of</strong> the bag and hold it about 10” (25.4<br />
cm) away from your mouth. When you exhale a large breath<br />
toward the bag, which is air moving at a fast speed, you were<br />
able to create a zone <strong>of</strong> low pressure at the mouth <strong>of</strong> the bag.<br />
The nearby air, which is at atmospheric pressure, was drawn<br />
into the zone <strong>of</strong> low air pressure. With one breath, you were<br />
able to harness the power <strong>of</strong> all the air around you, drawing<br />
the nearby air into the bag to inflate it.<br />
18. Explain that the same phenomenon that allows us to blow up<br />
the bag in one breath is the same phenomenon that creates<br />
lift on an airplane wing. Show the visitors the airfoil model<br />
and explain that airplanes and birds have wings that have the<br />
airfoil shape.<br />
19. Explain that scientists have several explanations <strong>of</strong> how lift is<br />
created by an airfoil. One explanation is based on Bernoulli’s<br />
Principle, as was just seen with the one-breath demonstration.<br />
An airfoil has a curved top surface which causes the air traveling<br />
above the wing to take a longer path. The longer path<br />
means the air above the airfoil must travel faster than the air<br />
below it. Faster moving air is lower in pressure than slower<br />
moving air. The slower moving air, with greater pressure,<br />
pushes the underside <strong>of</strong> the airfoil up into the faster air flow.<br />
When the force <strong>of</strong> lift is greater than the force <strong>of</strong> gravity on<br />
that object, then that object takes flight.<br />
20. Show the poster, chart, or slide <strong>of</strong> Newton’s Third Law. A<br />
second, compatible explanation is that as air moves over and<br />
underneath the airfoil, it is directed downward by the trailing<br />
edge <strong>of</strong> the wing. This is called a downwash. Newton’s Law<br />
states that there must be an equal and opposite reaction to<br />
the downward force <strong>of</strong> the air, which forces the wing upward<br />
and creates lift.<br />
21. If there is time, allow your volunteer to give the bag one more<br />
try using Beroulli’s Principle to inflate the bag.<br />
Notes to Presenter:<br />
This demonstration activity is appropriate for all ages. Younger<br />
children will be amazed by the trick and your explanation <strong>of</strong> how<br />
it works. Older children and adults will be able to understand the<br />
underlying concepts and the importance <strong>of</strong> Bernoulli’s Principle to<br />
flight.<br />
Career Link:<br />
• Physicist<br />
7
WORKSHOP #1<br />
FOR MUSEUM EDUCATORS<br />
Carbon Fiber: A New Kind <strong>of</strong> Weave<br />
(90 minutes)<br />
Workshop participants will investigate the amazing properties <strong>of</strong><br />
carbon fiber composites in five different activities. Participants will<br />
begin by examining everyday composites. They will discover the<br />
process <strong>of</strong> creating carbon fiber composites by using an analogy<br />
to the textile industry. The participants then examine weave<br />
patterns <strong>of</strong> different fabrics and then will have a chance to add<br />
their own unique weave patterns to a Lap Loom. In the Composite<br />
Factory, participants will make their own woven mats to<br />
model the process <strong>of</strong> making carbon fiber composite materials for<br />
airplane construction. Then, participants will put their woven mats<br />
to the test in the Composite Testing Laboratory.<br />
Key Information:<br />
Ages: Appropriate for ages nine to eleven (grades 3-5).<br />
Key Concept: Carbon fiber composites.<br />
Objectives: Workshop participants will be able to:<br />
• Define and give examples <strong>of</strong> a composite.<br />
• Model one way in which carbon fiber composites are manufactured.<br />
• Understand the connection between carbon fiber composites<br />
and the textile industry.<br />
• Determine the tensile strength <strong>of</strong> weave patterns <strong>of</strong> their own<br />
design.<br />
Standards:<br />
National Science Education Standards for Grades K-4<br />
• Science as Inquiry: Students develop abilities necessary to<br />
conduct scientific inquiry.<br />
• Properties <strong>of</strong> Objects and Materials: Students develop the<br />
ability to observe and describe the properties <strong>of</strong> objects and<br />
materials.<br />
• Science and Technology: Students develop the abilities <strong>of</strong><br />
technological design.<br />
• Science and Technology: Students develop an understanding<br />
about science and technology.<br />
Summary <strong>of</strong> Supplies:<br />
Durable Supplies:<br />
Item<br />
Carbon fiber<br />
laminate sample<br />
Carbon fiber<br />
sandwich sample<br />
Samples <strong>of</strong> consumer<br />
products that are<br />
made from carbon<br />
fiber composites<br />
Whiteboard, chalkboard,<br />
or chart paper<br />
Magnifying tools<br />
Cotton thread<br />
Spool <strong>of</strong> cotton yarn<br />
Knitted cotton hat,<br />
scarf, or sweater<br />
Lap loom<br />
(aka potholder loom)<br />
Scissors<br />
Ruler (optional)<br />
Pennies<br />
Item<br />
Samples <strong>of</strong> different<br />
types <strong>of</strong> fabric<br />
Cotton weaving loops<br />
or a variety <strong>of</strong> different<br />
types <strong>of</strong> fabric, ribbon,<br />
twin, raffia, and/or yarn<br />
Paper towel<br />
Cellophane tape<br />
Corrugated<br />
cardboard<br />
Description<br />
Piece <strong>of</strong> carbon fiber epoxy. Labeled<br />
as “Carbon Fiber Laminate.”<br />
Can be purchased from<br />
www.robotmarketplace.com.<br />
Piece <strong>of</strong> honeycomb-shaped material<br />
sandwiched between two carbon fiber<br />
sheets. Labeled as “Carbon Fiber<br />
Sandwich.” Can be purchased from<br />
www.robotmarketplace.com.<br />
Includes certain types <strong>of</strong>: baseball<br />
bats, golf club shafts, fishing rods,<br />
archery bows and arrows, bicycle<br />
frames, hockey sticks, canoe and<br />
kayak paddles, skateboards, and the<br />
interior components <strong>of</strong> some basketball<br />
shoes.<br />
Magnifying glasses or loupes. Stereo<br />
microscopes, digital microscopes, or<br />
digital microcameras can also be used.<br />
Black. Cut into 6” (15.24 cm) pieces<br />
Black<br />
Black<br />
Consumable Supplies:<br />
Plastic loom, approximately 7 x 7” (17.78<br />
x 17.78 cm). Loom sets can be purchased<br />
at craft or fabric stores. Alternatively, lap<br />
looms can be created from a wood frame<br />
with 18 finishing nails evenly spread<br />
across each <strong>of</strong> the four sides.<br />
100 pennies are needed for each<br />
group. This correlates to 2 banker rolls.<br />
Description<br />
Linen, wool, denim, nylon, acrylic, silk,<br />
etc. Pieces should be at least 3 x 3”<br />
(7.62 x 7.62 cm)<br />
Loom sets <strong>of</strong>ten come packaged with<br />
cotton weaving loops. Alternatively, a selection<br />
<strong>of</strong> textiles can be provided. Pieces<br />
should be at least 8” (20.32 cm) long<br />
Roll <strong>of</strong> kitchen-quality paper towels,<br />
separated into sheets<br />
Roll<br />
Cut into pieces at least 3 x 6”<br />
(7.62 x 15.24 cm). Pieces can be cut<br />
from cardboard boxes.<br />
Quantity<br />
1 or more<br />
1 or more<br />
As many<br />
as you can<br />
provide<br />
1<br />
1/participant<br />
2 pieces<br />
1<br />
1<br />
1/participant<br />
1/participant<br />
1/participant<br />
100/group <strong>of</strong><br />
3 participants<br />
Quantity<br />
1/participant<br />
40 pieces/<br />
participant<br />
4 sheets/<br />
participant<br />
1/participant<br />
1 piece/<br />
participant<br />
8
ACTIVITY #1: EVERYDAY COMPOSITES (15 minutes)<br />
Activity Materials:<br />
Item<br />
Carbon fiber laminate sample<br />
Carbon fiber sandwich sample<br />
Samples <strong>of</strong> consumer products that are made from<br />
carbon fiber composites<br />
Whiteboard, chalkboard, or chart paper<br />
Magnifying tools<br />
Procedure:<br />
Quantity<br />
1 or more<br />
1 or more<br />
As many as you<br />
can provide<br />
1<br />
1/participant<br />
1. Welcome participants to the workshop, Carbon Fiber Composites:<br />
A New Kind <strong>of</strong> Weave. Tell participants that today they<br />
are going to take on the job <strong>of</strong> material scientists. A material<br />
scientist uses their knowledge <strong>of</strong> chemicals and the physical<br />
properties <strong>of</strong> materials to create brand new materials.<br />
2. Begin by telling the Greek myth <strong>of</strong> Icarus. This myth tells one<br />
<strong>of</strong> the first stories <strong>of</strong> human flight and explains how a new<br />
material was created by combining two ingredients.<br />
The architect Daedalus and his young son Icarus were imprisoned<br />
by the angry King Minos in an open-air labyrinth that Daedalus<br />
himself had designed. They were provided with some food<br />
and candles. The maze <strong>of</strong> the labyrinth was terribly complicated<br />
and it was hopeless that they would find their way out. Even if<br />
they did find the exit, the labyrinth was completely surrounded by<br />
guards. The only option for escape was through the air.<br />
Each night, Daedalus told his son to carefully collect the s<strong>of</strong>t wax<br />
from their candles. Each day, they carefully explored the maze,<br />
collecting feathers that had been dropped by birds flying over the<br />
labyrinth.<br />
Over time, Daedalus formed two sets <strong>of</strong> wings out <strong>of</strong> the wax<br />
and feathers, one for father and one for son. Before taking to<br />
the sky, Daedalus <strong>of</strong>fered his son a warning: “Follow me on the<br />
middle course.” Daedalus warned Icarus not to fly too close to<br />
the sun or the wax would melt. He warned Icarus not to fly too<br />
close to the ocean or the moisture would wet the feathers.<br />
Daedalus beat his wings and took <strong>of</strong>f, with Icarus following after<br />
him. Icarus loved flying. He glided, zoomed, circled, and looped<br />
through the sky. He felt amazing and never, ever wanted to stop<br />
flying. He wondered how high he could go and started upward.<br />
Daedalus heard a cry and looked upward to see what looked like<br />
a shooting star. It was his son, falling from the sky, hopelessly<br />
flapping his bare arms since his wings had melted away. Icarus<br />
plunged through the sky, splashed into the sea, and sunk out <strong>of</strong><br />
sight. The sea was later named the Icarian Sea.<br />
Adapted from Martin, R. 2003. Myths <strong>of</strong> the Ancient Greeks.<br />
3. Explain that the combination <strong>of</strong> organic fibers in the feathers<br />
with the wax created a composite structure for Icarus’ wings.<br />
Icarus was warned by his father not to fly too close to the sun,<br />
or too close to the ocean, for fear that his fragile wings would<br />
melt or dissolve. Fortunately, today’s composites can withstand<br />
both high temperatures and corrosion from humidity.<br />
4. Ask the participants if anyone can define “composite.” Listen<br />
to participants’ responses and <strong>of</strong>fer additional information<br />
until the class can agree to the following definition:<br />
A composite is a combination <strong>of</strong> two or more different<br />
ingredients. When combined, the features <strong>of</strong> each ingredient<br />
are shared and the composite benefits beyond the individual<br />
parts. In a composite, there must be a reinforcement ingredient,<br />
which provides the structure, and a matrix ingredient,<br />
which is the binding agent.<br />
5. Explain that a composite can be anything that is made <strong>of</strong> two<br />
or more ingredients that when combined create something<br />
entirely new. For example, in the myth <strong>of</strong> Icarus, the feathers<br />
were the reinforcement and the wax was the matrix. Bricks<br />
used to be formed from a mixture <strong>of</strong> straw and mud that was<br />
then baked. The straw was the reinforcement and the mud<br />
was the matrix.<br />
6. Elicit participants’ preconceptions and existing knowledge<br />
about composites by asking them: How many real life<br />
examples <strong>of</strong> composites can you list? As participants brainstorm<br />
everyday composites, record their suggestions on the<br />
whiteboard, chalkboard, or a piece <strong>of</strong> chart paper. Encourage<br />
participants to consider what ingredients make up each<br />
material, and if possible, identify which ingredient(s) is the<br />
reinforcement and which ingredient(s) is the matrix. Some<br />
example answers include:<br />
• Concrete (cement matrix; gravel and/or sand reinforcement)<br />
• Fiberglass (plastic polymer matrix; glass fiber reinforcement)<br />
• Plywood and strand board (glue matrix; wood fiber reinforcement)<br />
• Peanut brittle candy (corn syrup and sugar water matrix;<br />
peanut reinforcement)<br />
• Bamboo (lignin matrix; cellulose fiber reinforcement)<br />
• Automobile tires (rubber matrix; steel or nylon reinforcement)<br />
7. Explain that although modern composites are much more<br />
advanced than Icarus’ feathers and wax, carbon fiber composites<br />
are made out <strong>of</strong> similar basic ingredients: fibers and resin.<br />
Share the following definition with the participants:<br />
Carbon fiber composites are a combination <strong>of</strong> very fine<br />
carbon fibers (the reinforcement) and polymer epoxy resin (the<br />
matrix), which is a liquid that hardens into a plastic with the help<br />
<strong>of</strong> high temperatures and/or specific hardening chemicals.<br />
8. If possible, try to obtain several objects made from carbon<br />
fiber composites so that you can share this material with participants.<br />
In some instances, you will be able to see the carbon<br />
fiber weave in these materials. Pass the materials around so<br />
the participants can examine the weave <strong>of</strong> the materials, and<br />
also experience their strength to weight ratio.<br />
9
9. Next, pass around the carbon fiber composite laminate and<br />
sandwich samples. Encourage participants to use magnifying<br />
glasses or loupes to examine the weave patterns.<br />
ACTIVITY #2: TEXTILE TESTS (10 minutes)<br />
Workshop participants discover the process <strong>of</strong> creating carbon<br />
fiber composites by using an analogy to the textile industry. The<br />
participants then examine weave patterns <strong>of</strong> different fabrics.<br />
Activity Materials:<br />
Item<br />
Cotton thread (black), cut into 6” (15.24 cm) pieces<br />
Spool <strong>of</strong> cotton yarn (black)<br />
Knitted hat, scarf, or sweater (black)<br />
Samples <strong>of</strong> different types <strong>of</strong> fabric (linen, wool, denim,<br />
nylon, acrylic, silk, etc.)<br />
Magnifying glasses or loupes. Stereo microscopes, digital<br />
microscopes, or digital microcameras can also be used.<br />
Scissors<br />
Set-up:<br />
Quantity<br />
2 pieces<br />
1<br />
1<br />
1/participant<br />
1/participant<br />
• Cut two 6” (15.24 cm) pieces <strong>of</strong> cotton thread. Separate<br />
the fibers from one piece <strong>of</strong> thread so that you have one<br />
individual fiber.<br />
• Cut one 6” (15.24 cm) piece <strong>of</strong> cotton yarn.<br />
Procedure:<br />
1. In the previous activity, participants were able to see visible<br />
weave patterns in the samples <strong>of</strong> carbon fiber composites.<br />
Explain to participants that the technology for creating carbon<br />
fiber composites was first learned in the textile industry, where<br />
thread, yarn, ribbons, and fabrics are manufactured. Carbon<br />
fiber composites can be made in a variety <strong>of</strong> ways. One way<br />
to manufacture carbon fiber composites is similar to how a<br />
knitted hat, scarf, or sweater is created.<br />
2. Pass around the piece <strong>of</strong> black fiber. Explain that it all begins<br />
with the creation <strong>of</strong> extremely fine carbon filaments, which<br />
can be many times thinner than the diameter <strong>of</strong> a single human<br />
hair.<br />
3. Pass around the piece <strong>of</strong> black thread. Explain that many<br />
pieces <strong>of</strong> filaments are then twisted together into fibers called<br />
threads.<br />
4. Pass around the piece <strong>of</strong> black yarn. Explain that the threads<br />
are then woven together to create a material called a yarn or<br />
tape. When a carbon fiber tape yarn or tape is being created,<br />
it is mixed with an epoxy resin to bind the fibers together.<br />
5. Pass around the spool <strong>of</strong> yarn. Explain that the yarn or tape is<br />
wound on spindles. These spindles can be placed on a machine<br />
called a prepregger, which is like a huge, mechanical loom.<br />
6. Pass around the black knitted hat, scarf, or sweater. Encourage<br />
participants to use their magnifying glasses or loupes to<br />
examine the weave in the knitted fabric.<br />
1<br />
7. Explain that the loom-like prepregger pulls yarn from multiple<br />
spindles and weaves them together using a series <strong>of</strong> combs<br />
to create a woven mat, like a huge sheet <strong>of</strong> fabric. Knitted<br />
clothing is formed in the correct shape to create a hat or a<br />
sweater. Carbon fiber composites can be woven around a<br />
form to create the correct shape, or the woven fabric can be<br />
mixed with a polymer epoxy resin, pressed into a mold, and<br />
cooked in an industrial oven, called an autoclave.<br />
8. Distribute one piece <strong>of</strong> fabric to each participant. Encourage<br />
participants to examine the weave <strong>of</strong> the fabric with their<br />
magnifying glasses or loupes. Also challenge participants to<br />
test to strength <strong>of</strong> each fabric by pulling, stretching, and trying<br />
to rip it along both its width and its length.<br />
9. After a few minutes, ask each participant to switch fabric<br />
samples with another participant. Depending on time, have<br />
participants switch several times, so that each participant has<br />
the opportunity to examine several fabric samples.<br />
10. Ask the participants:<br />
• What do you notice about the different weave patterns?<br />
• Which fabrics do you think are strongest? In what way?<br />
• Which fabrics do you think are s<strong>of</strong>test?<br />
• Which fabrics do you think stretch the most?<br />
ACTIVITY #3: MAKE & TAKE—LAP LOOM (20 minutes)<br />
In the previous activity, participants examined different types <strong>of</strong><br />
weave patterns. The weave pattern <strong>of</strong> a carbon fiber composite<br />
can create a material that meets the designers’ specifications for<br />
weight, strength, rigidity, and flexibility. In this activity, participants<br />
are challenged to add their own unique weave pattern to a<br />
Lap Loom to create an art piece that they can take home.<br />
Activity Materials:<br />
Item<br />
Lap loom<br />
Cotton weaving loops or a variety <strong>of</strong> different types <strong>of</strong><br />
fabric, ribbon, twin, raffia, and/or yarn<br />
Scissors<br />
Set-up:<br />
Quantity<br />
1/participant<br />
40/participant<br />
1/participant<br />
• If you are using cotton weaving loops, separate into piles <strong>of</strong> about<br />
40 loops each, so that you have a pile for each participant.<br />
• If you are not using cotton weaving loops, cut the ribbon, yarn,<br />
twine, raffia, and other supplies into pieces at least 8” (20.32<br />
cm) long. You will also need to provide each participant with<br />
a piece <strong>of</strong> yarn long enough to wrap around the hooks on two<br />
sides <strong>of</strong> the loom.<br />
Procedure:<br />
1. In the previous activity, participants modeled the process<br />
<strong>of</strong> creating one type <strong>of</strong> carbon fiber composite and they<br />
examined different types <strong>of</strong> weaves in fabric. In this activity,<br />
participants will be exploring the essential question: What<br />
kinds <strong>of</strong> weave patterns can we create?<br />
10
2. Invite participants to help create their own woven art piece by<br />
adding their own unique weave patterns to a lap loom. Each<br />
participant can choose their own textile (cotton weaving loops<br />
or fabric, yarn, ribbon, twin, and raffia) to add to their loom<br />
using a weave pattern <strong>of</strong> their own design. Challenge participants<br />
to think beyond the over-under weave pattern to come<br />
up with something all their own, or a combination <strong>of</strong> different<br />
weave patterns.<br />
3. If you are using cotton weaving loops, then follow the directions<br />
that came with the loom set to begin weaving and to<br />
finish the project. If you are not using cotton weaving loops,<br />
then follow the directions below to begin weaving and to finish<br />
the project.<br />
4. To create the warp threads, tell participants to take a long<br />
piece <strong>of</strong> yarn and tie it around the hook on one corner <strong>of</strong> their<br />
loom. Then, participants should thread the yarn back and<br />
forth to the hooks on the opposite side <strong>of</strong> the loom, creating<br />
rows <strong>of</strong> warp threads. When they reach the last hook, tell<br />
participants to tie the yarn onto the last hook and then trim it<br />
with scissors.<br />
5. Tell participants to choose a textile. Tie one end <strong>of</strong> their chosen<br />
textile onto the first hook on one <strong>of</strong> the sides adjacent to the<br />
warp threads. The participant can then begin weaving the<br />
other end <strong>of</strong> their textile across the warp threads. These rows<br />
are called weft threads.<br />
6. When a participant has come to the end <strong>of</strong> their piece <strong>of</strong> textile,<br />
they can connect it to the next piece <strong>of</strong> textile with a knot<br />
and continue weaving.<br />
7. Continue in this pattern, until all the hooks have been used<br />
up. Tie the end <strong>of</strong> the last weft thread onto the last remaining<br />
corner hook.<br />
8. You can remove the weaving by cutting the warp threads.<br />
Then, create a fringed border by tying <strong>of</strong>f the warp threads.<br />
Choose one corner, and then work from left to right, tying the<br />
first two warp threads together with a square knot. Then tie<br />
the second and third warp threads together, then the third<br />
and forth, and so on, continuing around each corner. Trim the<br />
warp threads just past the knots to create fringe.<br />
9. You may choose to share with participants some <strong>of</strong> the<br />
traditional weave patterns used by textile artists and basket<br />
makers. These traditional weave patterns include:<br />
• Plain:<br />
• Basket:<br />
• Twill:<br />
One under, one over.<br />
One over, one under.<br />
Two under, two over.<br />
Two over, two under.<br />
One under, two over, one under, two over.<br />
One over, one under, two over, one under.<br />
Two over, one under, two over, one under.<br />
One under, two over, one under, two over.<br />
ACTIVITY #4: COMPOSITE FACTORY<br />
(20 minutes)<br />
Participants will model a carbon fiber composite by creating mats<br />
with different weave patterns.<br />
Activity Materials:<br />
Item<br />
Paper towel, kitchen-quality<br />
Scissors<br />
Cellophane tape<br />
Ruler (optional)<br />
Set-up:<br />
Quantity<br />
4 sheets/participant<br />
1 pair/participant<br />
1 roll/participant<br />
1/participant<br />
Take the roll <strong>of</strong> paper towels and tear it into separate sheets, so<br />
that you have four per participant.<br />
Procedure:<br />
1. In the previous activity, participants created different weave<br />
patterns on their own design. In this activity and the following<br />
Composite Testing Laboratory activity, participants will be<br />
exploring the essential question: How does the weave pattern<br />
affect the strength <strong>of</strong> a material?<br />
2. Distribute the materials to each student.<br />
3. Ask students to cut uniform strips from three <strong>of</strong> the paper<br />
towels. Strips that are _ to 1” (1.3 to 2.5 cm) wide will work<br />
well. It is important that the edges <strong>of</strong> the strips are as straight<br />
as possible, so you might want to encourage students to use<br />
a ruler to measure the strip intervals and to draw straight<br />
lines before cutting. One paper towel will be left uncut for the<br />
experiment control.<br />
4. Explain that students will be weaving the strips together to<br />
form two mats. For accurate testing, weaving must be as tight<br />
as possible. Discuss possible weave patterns:<br />
• One over; one under<br />
• Two over; two under<br />
5. Encourage students to weave two mats. They can use one <strong>of</strong><br />
the example weave patterns for one mat, and design their<br />
own weave pattern for the second mat.<br />
6. Each weave mat should be at least six strips wide and long.<br />
Have students use the cellophane tape to secure the edges<br />
<strong>of</strong> each weave mat. Tape should not be added to the mats<br />
anywhere except for the edges. Also, have students place tape<br />
along the edges <strong>of</strong> the uncut paper towel.<br />
ACTIVITY #5: COMPOSITE TESTING LABORATORY<br />
(25 minutes)<br />
Participants will discover three different types <strong>of</strong> material strength<br />
while trying to destroy a piece <strong>of</strong> corrugated cardboard. Then,<br />
participants will design and conduct an investigation to test the<br />
tensile strength <strong>of</strong> their own woven mats created in the previous<br />
Composite Factory activity.<br />
11
Activity Materials:<br />
Item<br />
Corrugated cardboard, cut into pieces at<br />
least 3 x 6” (7.62 x 15.24 cm). Pieces can be<br />
cut from cardboard boxes.<br />
Woven mats from previous activity<br />
Uncut paper towel (experiment control) from<br />
previous activity<br />
100 pennies (2 banker rolls)<br />
Whiteboard, chalkboard, or chart paper<br />
Markers or chalk<br />
Set-up:<br />
1. Cut the corrugated cardboard into pieces at least 3 x 6”<br />
(7.62 x 15.24 cm)<br />
2. Create a data table on the whiteboard, chalkboard, or a<br />
piece <strong>of</strong> chart paper. The table should have enough rows<br />
for each small group <strong>of</strong> three participants. The table should<br />
have four columns, labeled as: Names, Control, Variable #1,<br />
and Variable #2. Make sure the data table is not out <strong>of</strong> the<br />
participants’ reach. The table needs to be located so that<br />
participants can add their own data to it.<br />
Procedure:<br />
1. Welcome participants to the Composites Testing Laboratory.<br />
Explain that in this activity, participants need to think like<br />
a material scientist. When material scientists develop materials,<br />
they need a material that meets specific design specifications.<br />
A material scientist might need a material that is strong in one<br />
direction, but the strength <strong>of</strong> the material in another direction<br />
might not matter. After developing a material, the material scientists<br />
then has to test it to determine if the design specifications<br />
were met, and if the material is safe for its intended use.<br />
2. Distribute one piece <strong>of</strong> cardboard to each participant. Explain<br />
that their challenge is to determine what the design specifications<br />
were for the material scientist that created this corrugated<br />
cardboard. What type <strong>of</strong> strength do you think the<br />
material scientist was trying to achieve?<br />
3. Challenge the participants to try to destroy their piece <strong>of</strong><br />
cardboard by bending, tearing, or crunching it. Allow time<br />
for participants to test the cardboard. Then, discuss what the<br />
participants discovered.<br />
• In what ways was the cardboard strong?<br />
• In what ways was the cardboard weak?<br />
4. Explain the three types <strong>of</strong> material strength:<br />
Quantity<br />
1 piece/participant<br />
2/participant<br />
1 sheet/participant<br />
100/each group <strong>of</strong> 3<br />
participants<br />
• Compressive Strength: The maximum amount <strong>of</strong> compression<br />
(squishing, crunching, etc.) that a material can<br />
handle before it fails. An example <strong>of</strong> compressive strength<br />
is stomping on an aluminum soda can.<br />
• Tensile Strength: The maximum amount <strong>of</strong> loading that<br />
a material can handle before it fails. Some materials will<br />
stretch before breaking. An example <strong>of</strong> tensile strength is<br />
piling pennies on top <strong>of</strong> a paper towel until the towel tears.<br />
1<br />
Assorted<br />
• Shear Strength: The maximum amount <strong>of</strong> stress along<br />
a plane that a material can handle before it fails. An<br />
example <strong>of</strong> shear strength is tearing a piece <strong>of</strong> fabric into<br />
strips. Shear strength can be measure across the width,<br />
length, and diagonal <strong>of</strong> a material.<br />
5. Challenge participants to test the tensile strength <strong>of</strong> the<br />
woven mats that they created in the previous activity. Each <strong>of</strong><br />
their woven mats will serve as the variables in the investigation.<br />
A regular piece <strong>of</strong> paper towel will serve as the control<br />
in the investigation. Ask the participants what questions they<br />
might be able to answer through the investigation. Sample<br />
questions might include:<br />
• What weave pattern was the strongest?<br />
• Does weaving a paper towel make it stronger than a regular<br />
paper towel?<br />
• Can a mat be strong in one way, but weak in another?<br />
6. Ask each participant to team up in groups <strong>of</strong> three. Distribute<br />
the pennies to each small group.<br />
7. Encourage each group to test the tensile strength <strong>of</strong> their<br />
woven mats and the uncut paper towel using one <strong>of</strong> the<br />
following directions:<br />
• Two students hold the corners <strong>of</strong> the mat about 6” (15.24<br />
cm) above to table top while a partner places coins onto<br />
the center. How many coins can the mat support before<br />
failing by either tearing or allowing the coins to slide<br />
through the weave?<br />
• Two students sit on the floor and hold the corners <strong>of</strong> the<br />
mat a few inches from the floor. Next, their partner tries<br />
dropping pennies from different heights into the center <strong>of</strong><br />
the mat. Try dropping a single penny from various heights<br />
or tape 2-3 pennies together to change the mass. How<br />
high or how much mass can the weave catch before failing<br />
by either tearing or allowing the coins to slide through<br />
the weave?<br />
8. Discuss what “failure” <strong>of</strong> the weave means, i.e. coins sliding<br />
through the weave and/or tearing <strong>of</strong> the paper. Then, have<br />
each group test the tensile strength <strong>of</strong> the control, and then<br />
take turns helping each other test the tensile strength <strong>of</strong> each<br />
<strong>of</strong> their own woven mats.<br />
9. When finished with the investigation, each group should add<br />
their data to the data table.<br />
10. When all the groups have added their data to the table,<br />
examine it as a whole group. Whose designs were the<br />
strongest? Gather the strongest three to five mats and display<br />
them (or at least, the remaining pieces <strong>of</strong> them) to allow all<br />
the participants to examine the weave patterns <strong>of</strong> each.<br />
12
Notes to Presenter:<br />
The workshop is designed to follow the process <strong>of</strong> inquiry-based<br />
science. While the activities in this workshop could be used à la<br />
carte, or rearranged, the workshop as it is written brings participants<br />
through the steps <strong>of</strong> inquiry, which includes:<br />
• Eliciting participants’ preconceptions and existing knowledge<br />
• Modeling the concept<br />
• Making casual observations<br />
• Developing essential questions<br />
• Investigating and collecting data<br />
• Compiling and analyzing data<br />
Summary <strong>of</strong> Supplies:<br />
Durable Supplies:<br />
Item<br />
Colored acetate<br />
sheets<br />
Scissors<br />
Overhead<br />
projector<br />
Description<br />
8.5 x 11 in. (21.59 x 27.94 cm)<br />
plastic sheets in red, blue, green,<br />
yellow, and orange. Available<br />
from Boreal (http://boreal.com),<br />
Item #WW6672093. A 30-pack <strong>of</strong><br />
all five colors costs about $30.00.<br />
Quantity<br />
1 sheet <strong>of</strong> each color:<br />
red, blue, green,<br />
yellow, and orange.<br />
1/participant<br />
1<br />
Career Link:<br />
• Material scientist<br />
• Chemical engineer<br />
• Aeronautical engineer<br />
• Sporting good designer<br />
• Textile artist<br />
• Fabric designer<br />
WORKSHOP #2 FOR<br />
MUSEUM EDUCATORS<br />
Lighting Design Studio<br />
(45 minutes)<br />
Can the lighting in an airplane cabin make travelers happy,<br />
sleepy, or hungry? Investigate the impacts <strong>of</strong> lighting in the<br />
Lighting Design Studio and discover how modern lighting helps<br />
travelers arrive at their destinations fresh and rested. (Depending<br />
on how you present the Lighting Design Studio workshop, it could<br />
be used as part <strong>of</strong> a longer program focused on light and color,<br />
or on aeronautical engineering and aircraft design).<br />
Key Information:<br />
Ages: Appropriate for ages twelve to fourteen (grades 6-8).<br />
Concept: Color psychology and airplane cabin design.<br />
Objective: Workshop participants will be able to understand<br />
that color can impact how people feel and can be used to<br />
minimize jet lag.<br />
Standards:<br />
National Science Education Standards for Grades 5-8<br />
• Science as Inquiry: Students develop abilities necessary to<br />
conduct scientific inquiry.<br />
• Science and Technology: Students develop an understanding<br />
about science and technology.<br />
• Science and Technology in Society: Students develop an<br />
understanding <strong>of</strong> the roles <strong>of</strong> science and technology in society.<br />
Consumable Supplies:<br />
Item<br />
Design Board<br />
Glue<br />
Collage<br />
materials<br />
Airplane snacks<br />
Newspaper<br />
Index card<br />
Item<br />
Description<br />
11 x 17” (72.94 x 43.18 cm) or<br />
larger piece <strong>of</strong> cardboard, tag<br />
board, or other stiff paper.<br />
Non-toxic white glue.<br />
A variety <strong>of</strong> collage materials,<br />
including:<br />
• Wallpaper samples<br />
• Fabric remnants<br />
• Paint chip samples<br />
• Upholstery samples<br />
• Carpet samples<br />
• Buttons<br />
• Ribbons<br />
• Old magazines<br />
Some material samples may be<br />
obtained from fabric, hardware,<br />
and carpet stores, which may have<br />
outdated sample books.<br />
Some assortment <strong>of</strong> durable food<br />
items, such as:<br />
• Pretzels<br />
• Colorful hard candies<br />
• Raisins<br />
Old newspaper cut into small<br />
pieces, about 3 x 3” (7.62 cm)<br />
4 x 6” (10.16 x 15.24 cm) index card<br />
or paper cut into that size.<br />
ACTIVITY #1: COLOR PSYCHOLOGY<br />
(15 minutes)<br />
Activity Materials:<br />
Colored acetate sheets in red, blue, green, yellow,<br />
and orange.<br />
Overhead projector<br />
Set-up:<br />
Quantity<br />
1/participant<br />
1 bottle/participant<br />
A large assortment<br />
<strong>of</strong> different collage<br />
materials<br />
1 small handful/<br />
participant<br />
1 small piece/<br />
participant<br />
1/participant<br />
Quantity<br />
1 sheet <strong>of</strong> each color<br />
• Set up the overhead projector so that it will project onto a<br />
screen or a white wall.<br />
1<br />
13
Procedure:<br />
1. Welcome workshop participants to the Lighting Design<br />
Studio. Explain that they have an interesting challenge: to<br />
design the interior cabin <strong>of</strong> a brand new commercial airplane.<br />
The airline executives want an airplane that focuses on the passengers’<br />
comfort. Your challenge is to design the interior cabin<br />
so that passengers feel safe, comfortable, and relaxed during<br />
the five phases <strong>of</strong> the flight:<br />
• Boarding<br />
• Cruising (when passengers relax, read, and watch movies)<br />
• Meal Service<br />
• Sleep<br />
• Take-<strong>of</strong>f and Landing<br />
2. In order to design the new airplane cabin, workshop participants<br />
need to understand the impacts <strong>of</strong> color on people’s<br />
mood. This is called “color psychology.”<br />
3. Begin by projecting a color on the screen by using a colored<br />
acetate sheet on the overhead projector. Ask the participants:<br />
• How does this color make you feel?<br />
• What words can you use to describe how this color affects<br />
your mood?<br />
Continue by projecting different colors, until you have discussed<br />
all five colors: red, blue, green, yellow, and orange.<br />
4. Explain that psychologists have studied the ways that colors affect<br />
people’s moods. As you project each color onto the screen,<br />
share the following information with the participants, linking it<br />
back to what the participants’ said in the previous discussion:<br />
The emotion triggered by a color depends on a person’s<br />
nationality, past experiences, and, sometimes, personal preference.<br />
However, studies have shown that specific colors and<br />
color combinations can psychologically affect the majority <strong>of</strong><br />
people, regardless <strong>of</strong> their culture or past. Generally speaking:<br />
Red triggers a sense <strong>of</strong> power and impulsiveness, and increases<br />
one’s appetite. Be careful how you use red. It can also<br />
trigger anger, forcefulness, impatience, intimidation, conquest,<br />
violence, and revenge.<br />
Yellow has a stimulating impact on your memory. (Consider<br />
the popularity <strong>of</strong> the yellow notepads and Post-It® notes.)<br />
Yellow stimulates the intellect and promotes organization. It<br />
triggers joy, but when used in the wrong manner, or with the<br />
wrong combination <strong>of</strong> other colors, it can create feelings <strong>of</strong><br />
criticism, laziness, and cynicism.<br />
Blue generates feelings <strong>of</strong> tranquility, love, acceptance,<br />
patience, understanding, and cooperation. If used inappropriately,<br />
its negative qualities are fear, coldness, passivity, and<br />
depression.<br />
Orange triggers steadfastness, courage, confidence, friendliness,<br />
and cheerfulness. Its opposite effects are ignorance, inferiority,<br />
sluggishness, and superiority.<br />
From: Bloomsburg University, 2002.<br />
Green generates feelings <strong>of</strong> hope, growth, good health, freshness,<br />
soothing, sharing, and responsiveness. Its negative effects<br />
are envy, greed, constriction, guilt, jealousy, and disorder.<br />
5. Explain that color is used by advertisers and interior designers<br />
to affect people’s mood in deliberate ways. Ask the participants<br />
to suggest what color(s) they would choose for the<br />
following places:<br />
• Doctor’s <strong>of</strong>fice<br />
• School classroom<br />
• Hotel room<br />
• Fast food restaurant<br />
ACTIVITY #2: CABIN DESIGN CHALLENGE<br />
(20 minutes)<br />
Activity Materials:<br />
Item<br />
Scissors<br />
Design Board<br />
Glue<br />
Collage materials<br />
Airplane snacks<br />
Newspaper<br />
Index card<br />
Set-up:<br />
Quantity<br />
1/participant<br />
1/participant<br />
1 bottle/ participant<br />
A large assortment<br />
1 small handful/ participant<br />
1 small piece/ participant<br />
1/participant<br />
• Set-up the room so that there is one table for all the collage<br />
materials and the flight snacks.<br />
• Each workshop participant will need to have their own space<br />
at a table, with room to spread out their materials and Design<br />
Boards. Distribute the following materials to each participant’s<br />
workspace: one pair <strong>of</strong> scissors, one bottle <strong>of</strong> glue, one<br />
Design Board, one index card, and one newspaper piece.<br />
Procedure:<br />
1. Provide the following background information on the Boeing<br />
787 Dreamliner:<br />
When Boeing began designing the interior cabin <strong>of</strong> its new 787<br />
Dreamliner jet, the company wanted to create the best possible<br />
atmosphere for the passengers. The airplane designers carefully<br />
chose the colors and textures <strong>of</strong> the walls, seats, and carpet to<br />
create just the right feel inside the cabin. The airplane designers<br />
also chose to use light-emitting diodes (LED) lights throughout the<br />
cabin <strong>of</strong> the plane. The flight attendants are able to control both<br />
the brightness and the color <strong>of</strong> the LED lights, depending on the<br />
mood they want to create inside the cabin.<br />
2. Issue this challenge to the participants:<br />
Your challenge is to work as an interior designer to choose the<br />
colors, textures, and fabrics to be used in the cabin <strong>of</strong> a new<br />
airplane. You will use a Design Board on which to glue material<br />
samples to help communicate your vision for the cabin design.<br />
14
You are free to use any <strong>of</strong> the materials on the table. In addition,<br />
you must include a piece <strong>of</strong> newspaper, an index card (leave it<br />
blank), and some flight snacks on your Design Board. I’ll explain<br />
later how we will use these materials.<br />
3. Allow time for participants to choose materials and assemble<br />
their Design Boards. Make sure each participant includes a<br />
piece <strong>of</strong> newspaper, an index card, and some flight snacks<br />
on their boards. Also be sure each participant writes his/her<br />
name on the Design Board.<br />
ACTIVITY #3: COLOR LAB<br />
(10 minutes)<br />
Activity Materials:<br />
5. Ask each participant to present his/her Design Board and<br />
color plan to the entire group.<br />
Notes to Presenter:<br />
This workshop program can be presented as a stand-alone<br />
activity, or can be incorporated into a longer workshop program<br />
focused on airplane design, interior design, or light and color.<br />
Career Link:<br />
• Interior designer<br />
• Psychologist<br />
• Artist<br />
• Advertising/marketing designer<br />
Item<br />
Colored acetate sheets in red, blue, green,<br />
yellow, and orange.<br />
Overhead projector<br />
Quantity<br />
1 sheet <strong>of</strong> each color<br />
1<br />
Set-up:<br />
• Set up the overhead projector so that it will project onto a<br />
screen or a white wall.<br />
Procedure:<br />
1. Compliment the participants on their excellent work as interior<br />
designers. Explain the next challenge:<br />
Now, the airline executives want to test your designs in the Color<br />
Lab. The executives want you to determine what color lighting you<br />
will use inside the cabin at the five different flight phases. They<br />
want to know how colored light will interact with your cabin design<br />
to create the right moods for the passengers.<br />
2. Revisit the five flight phases. Ask participants to determine<br />
what mood should be created during each flight phase:<br />
• Boarding (comfort, relaxation, calm)<br />
• Cruising ( relaxation, ability to read or work)<br />
• Meal Service (hunger, alertness, food should look appetizing)<br />
• Sleep (quiet, calm, relaxed)<br />
• Take-<strong>of</strong>f and Landing (confident, calm, safe)<br />
3. Take turns projecting each color onto the screen. As each color<br />
is projected, allow each participant the chance to hold their<br />
Design Board up in the colored light. Encourage participants<br />
to consider how the colored light affects their design and<br />
what mood is created. Ask:<br />
• How does this color <strong>of</strong> light make you feel?<br />
• Does the food look appetizing?<br />
• Can you comfortably read the newspaper?<br />
4. Now that the participants have tested their Design Boards in<br />
the Color Lab, ask them to write down their “color plan” for<br />
the flight. On the index card that they have already glued onto<br />
the Design Boards, they should write down the color <strong>of</strong> light<br />
that they have chosen for each <strong>of</strong> the five flight phases.<br />
Credits<br />
The <strong>Legends</strong> <strong>of</strong> <strong>Flight</strong> Informal Educator’s Toolkit was developed<br />
by Kristen Clapper Bergsman and Matthew Merritt<br />
for Pacific Science Center, under the direction <strong>of</strong> project<br />
manager Heather Gibbons.<br />
Layout, design, and illustrations by Clayton DeFrate.<br />
Editing by Sally Armbrecht.<br />
Special thanks to Ryan Bergsman; Dr. Jim Sefaris and<br />
David Bowes <strong>of</strong> Glocal Network Corporation Lab.<br />
Prototyping thanks to Jeremy Higgins and Beth Amsbary,<br />
Pacific Science Center; Pacific Science Center visitors.<br />
An IMAX ® Experience<br />
LEGENDS OF FLIGHT<br />
Directed by Stephen Low<br />
Produced by Stephen Low and Pietro Serapiglia<br />
Executive produced by Bob Kresser and Jan Baird<br />
In association with the Smithsonian Institution<br />
15