Create successful ePaper yourself
Turn your PDF publications into a flip-book with our unique Google optimized e-Paper software.
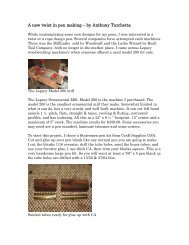
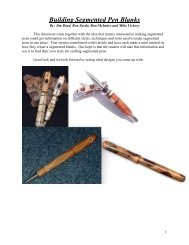
3. Now comes the cutting, this part of the work is where you can make it as complex as you<br />
wish. But remember the more cuts you do the more pieces you will have to put back<br />
together. I have only done two cuts in this tutorial to keep it easier to understand. Fig 4<br />
When starting, cut the end which has NOT been glued first. The red line represents the<br />
glued end. PLEASE TAKE GREAT CARE WHEN CUTTING AS FINGERS CAN BE VERY<br />
CLOSE TO THE BLADE.<br />
Fig 4<br />
After you have done your cuts you need to<br />
separate the pieces and swap the cut pieces<br />
for each other. Fig 5 . If the pieces do not<br />
separate easily I normally use the band saw<br />
and cut the two different pieces of wood along<br />
where they were glued.<br />
Fig 5<br />
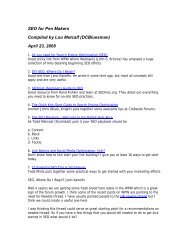
4. The next step is to glue the pieces together, sometimes you may end up with a bit of a burr<br />
edge on some pieces, carefully hand sand of these burrs to get the best fit possible. When<br />
you are happy with a dry fit you can glue them together. I use a thick CA glue for this process<br />
as it gives you better gap filling and<br />
more time to position the pieces. Use<br />
clamps if you have them to get the best<br />
possible fit, when I have clamped them<br />
together I normally throw a bit a<br />
sawdust onto the excess glue to stop it<br />
running onto the clamps Fig 6. Allow<br />
time to dry and then you are ready for<br />
the next stage.<br />
Fig 6