Athletics Quick Start Guide - Special Olympics
Athletics Quick Start Guide - Special Olympics
Athletics Quick Start Guide - Special Olympics
You also want an ePaper? Increase the reach of your titles
YUMPU automatically turns print PDFs into web optimized ePapers that Google loves.
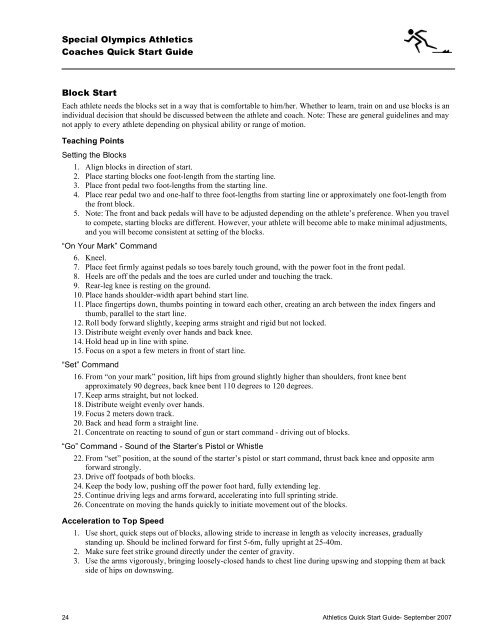
<strong>Special</strong> <strong>Olympics</strong> <strong>Athletics</strong><br />
Coaches <strong>Quick</strong> <strong>Start</strong> <strong>Guide</strong><br />
Block <strong>Start</strong><br />
Each athlete needs the blocks set in a way that is comfortable to him/her. Whether to learn, train on and use blocks is an<br />
individual decision that should be discussed between the athlete and coach. Note: These are general guidelines and may<br />
not apply to every athlete depending on physical ability or range of motion.<br />
Teaching Points<br />
Setting the Blocks<br />
1. Align blocks in direction of start.<br />
2. Place starting blocks one foot-length from the starting line.<br />
3. Place front pedal two foot-lengths from the starting line.<br />
4. Place rear pedal two and one-half to three foot-lengths from starting line or approximately one foot-length from<br />
the front block.<br />
5. Note: The front and back pedals will have to be adjusted depending on the athlete’s preference. When you travel<br />
to compete, starting blocks are different. However, your athlete will become able to make minimal adjustments,<br />
and you will become consistent at setting of the blocks.<br />
“On Your Mark” Command<br />
6. Kneel.<br />
7. Place feet firmly against pedals so toes barely touch ground, with the power foot in the front pedal.<br />
8. Heels are off the pedals and the toes are curled under and touching the track.<br />
9. Rear-leg knee is resting on the ground.<br />
10. Place hands shoulder-width apart behind start line.<br />
11. Place fingertips down, thumbs pointing in toward each other, creating an arch between the index fingers and<br />
thumb, parallel to the start line.<br />
12. Roll body forward slightly, keeping arms straight and rigid but not locked.<br />
13. Distribute weight evenly over hands and back knee.<br />
14. Hold head up in line with spine.<br />
15. Focus on a spot a few meters in front of start line.<br />
“Set” Command<br />
16. From “on your mark” position, lift hips from ground slightly higher than shoulders, front knee bent<br />
approximately 90 degrees, back knee bent 110 degrees to 120 degrees.<br />
17. Keep arms straight, but not locked.<br />
18. Distribute weight evenly over hands.<br />
19. Focus 2 meters down track.<br />
20. Back and head form a straight line.<br />
21. Concentrate on reacting to sound of gun or start command - driving out of blocks.<br />
“Go” Command - Sound of the <strong>Start</strong>er’s Pistol or Whistle<br />
22. From “set” position, at the sound of the starter’s pistol or start command, thrust back knee and opposite arm<br />
forward strongly.<br />
23. Drive off footpads of both blocks.<br />
24. Keep the body low, pushing off the power foot hard, fully extending leg.<br />
25. Continue driving legs and arms forward, accelerating into full sprinting stride.<br />
26. Concentrate on moving the hands quickly to initiate movement out of the blocks.<br />
Acceleration to Top Speed<br />
1. Use short, quick steps out of blocks, allowing stride to increase in length as velocity increases, gradually<br />
standing up. Should be inclined forward for first 5-6m, fully upright at 25-40m.<br />
2. Make sure feet strike ground directly under the center of gravity.<br />
3. Use the arms vigorously, bringing loosely-closed hands to chest line during upswing and stopping them at back<br />
side of hips on downswing.<br />
24 <strong>Athletics</strong> <strong>Quick</strong> <strong>Start</strong> <strong>Guide</strong>- September 2007


