

USB ENDOSCOPE CAMERA PROCAM USER MANUAL
USB ENDOSCOPE CAMERA PROCAM USER MANUAL
USB ENDOSCOPE CAMERA PROCAM USER MANUAL

You also want an ePaper? Increase the reach of your titles
YUMPU automatically turns print PDFs into web optimized ePapers that Google loves.
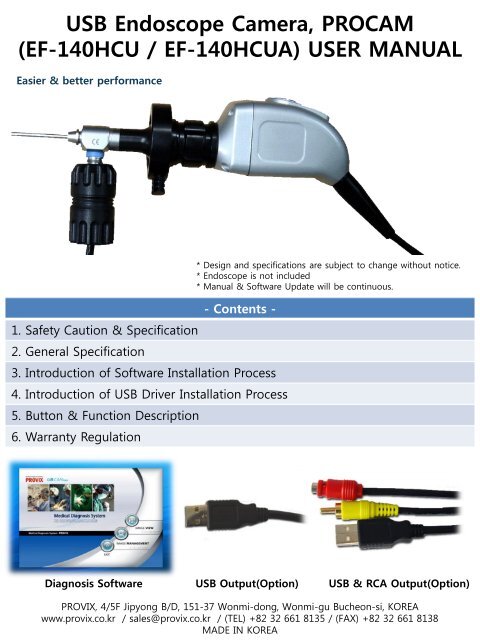
<strong>USB</strong> Endoscope Camera, <strong>PROCAM</strong><br />
(EF-140HCU / EF-140HCUA) <strong>USER</strong> <strong>MANUAL</strong><br />
Easier & better performance<br />
1. Safety Caution & Specification<br />
2. General Specification<br />
- Contents -<br />
3. Introduction of Software Installation Process<br />
4. Introduction of <strong>USB</strong> Driver Installation Process<br />
5. Button & Function Description<br />
6. Warranty Regulation<br />
* Design and specifications are subject to change without notice.<br />
* Endoscope is not included<br />
* Manual & Software Update will be continuous.<br />
Diagnosis Software <strong>USB</strong> Output(Option) <strong>USB</strong> & RCA Output(Option)<br />
PROVIX, 4/5F Jipyong B/D, 151-37 Wonmi-dong, Wonmi-gu Bucheon-si, KOREA<br />
www.provix.co.kr / sales@provix.co.kr / (TEL) +82 32 661 8135 / (FAX) +82 32 661 8138<br />
MADE IN KOREA
1. Safety Caution & Specification<br />
Safety Caution<br />
*. In order to obtain optimum performance and ensure patient safety, please<br />
read this instruction manual thoroughly.<br />
* Do not use <strong>CAMERA</strong> if you notice any signs of damage or malfunction and<br />
contact PROVIX or its official distributor in your country immediately.<br />
* Do not use in the presence of flammable anesthetics.<br />
* Do not use any other attachments which don’t follow the international<br />
standard other than the attachments designed by PROVIX exclusively for<br />
<strong>CAMERA</strong>.<br />
* Always be careful when using this device to patient.<br />
* Do not disinfect <strong>CAMERA</strong> by using steam or autocalve. (the best way is using<br />
EO Gas)<br />
* Water Ingress Protection, IPX7—protected against the effects of temporary<br />
immersion in water<br />
* This product complies with current required standards for electromagnetic<br />
interference and should not present any complications to other equipment or<br />
devices. Avoid using this device in close proximity of other equipment.<br />
* Keep out of reach of children. Only to be used by trained personnel.<br />
* Operating Temperature: -10℃ ~ 50℃<br />
* Operating Humidity: 0% ~ 80%<br />
* Storage Temperature: -20℃ ~ 60℃<br />
* Storage Humidity: 0% ~ 90%
* 1/3 SONY CCD<br />
* Pixels: 500,000<br />
* Resolution : 640 x 480p / 25~30 fps<br />
2. General Specification<br />
<strong>USB</strong> Endoscope Camera, <strong>PROCAM</strong><br />
* <strong>USB</strong> 2.0 Connection Available (Cable Length: 3m)<br />
* Including Free Diagnosis Software (Windows Only)<br />
* Dimension of Camera: 40mm X 40mm X 84mm<br />
* Weight of Camera Head: 120g<br />
* Function: White Balance Button, Capture Button, Recording Function (By Software)<br />
* Output (Option 1 / MODLE – EF140HCU): <strong>USB</strong> 2.0<br />
* Output (Option 2 / MODEL – EF140HCUA): <strong>USB</strong> 2.0 & RCA (CVBS / Composite)<br />
Coupler Lens<br />
* C-Mount Coupler Lens<br />
* Focal Length: F=22mm or F=25mm Available.<br />
* Dust Protect Glass<br />
<strong>USB</strong> Portable LED Lamp, EF-LED<br />
* 3 Watt LED<br />
* Wolf Connector Style<br />
* <strong>USB</strong> 2.0 Connection Available (Cable Length: 3m)<br />
80W LED LIGHT SOURCE, LL250 SINGLE<br />
* 80 Watt LED Light Source<br />
* Brightness Control Available<br />
* Stroz / Wolf Connector Available<br />
* Fiber Optic Cable (Wolf / Storz) Available
3. Introduction of Software Installation Process<br />
Introduction of Software Installation Process<br />
Before installing Software, Please check the Basic System Requirement<br />
as below<br />
* Windows XP, Windows Vista, Windows 7<br />
* <strong>USB</strong> 2.0 port<br />
* Minimum Specification of Computer<br />
- CPU: Intel Pentium Dual Core B950 / 2.1Ghz, Cash: 2MB<br />
- MEMORY: More than 2GB<br />
- Graphic Card: G-Force GT, more than 2 GB<br />
- O/S: Windows XP or later O/S<br />
Please close all windows & save all data.<br />
* Caution *<br />
Because this installation software is designed for medical purpose<br />
specially, users or doctors have to follow the directions in this<br />
manual completely due to the Video Codec Installation.<br />
If you don’t follow the direction and just click ―next‖, ―next‖. The<br />
software will not operate properly.
Introduction of Software Installation Process<br />
1. Please insert the CD provided by PROVIX 2. Double Click CD-Driver, or open the files in CD.<br />
3. Double Click ―Setup‖ file 4. Click ―Next‖ Button<br />
5. After designate the folder, click ―Next‖ button 6. Click ―Install‖ Button
Introduction of Software Installation Process<br />
7. Click ―Continue Anyway‖ Button 8. Click ―Finish‖ Button<br />
9. Wait for few seconds until Install window shown up 10. Click ―Next‖ Button<br />
11. Click ―Finish‖ Button 12. Just click Finish (Do not restart the computer)
Introduction of Software Installation Process<br />
13. Wait for few seconds until Install window shown up 14. Choose the proper language. Then click ―OK‖<br />
15. Click ―Next‖ Button 16. Select location. Then Click ―Next‖ Button<br />
17. Click ―I accept...‖ option, then Click ―Next‖ Button 18. Click ―Next‖ Button
Introduction of Software Installation Process<br />
19. Click ―Next‖ Button 20. Click ―Next‖ Button<br />
Very<br />
important<br />
Very<br />
important<br />
21. Choose ―Do not limit‖ option. Then Click ―Next‖ 22. Choose ―Do not limit‖ option. Then Click ―Next‖<br />
23. Click ―Next‖ Button 24. Click ―Install‖ Button
Introduction of Software Installation Process<br />
25. Click ―Finish‖ Button 26. Click ―Next‖ Button<br />
27. Click ―Next‖ Button 28. Click ―Install‖ Button<br />
29. Click ―Finish‖ Button 30. Click ―Yes I want to restart…‖. Then, Click ―Finish‖<br />
Button
Introduction of Software Installation Process<br />
31. After restarting, Please plug in <strong>USB</strong> Cable 32. Found New Hardware will be shown up<br />
33. few seconds later, ―ready to use ―will be shown up 34. Double-click the UBCAMPRO PROVIX icon<br />
35. Diagnosis System will be operated as above 36. Please check ―<strong>USB</strong>2860 Device‖ is shown up
Options & Functions In Image View Menu<br />
1<br />
2<br />
3<br />
If you click Image View button, you’ll have this kind of Viewing Screen.<br />
There are 3 red rectangles with numbers.<br />
If you take a look at the next page, you can have detail descriptions about<br />
these functions
Options & Functions In Image View Menu<br />
1<br />
* View Icon: If you click this icon, you can have the live image.<br />
* Pen Icon: After pressing Freeze Button, if you click this icon<br />
and draw lines on the captured image, you can draw lines on the<br />
captured image<br />
* Eraser Icon: If you click this icon, you can erase what you drew.<br />
* Pen Color Icon: You can choose the pen color with this<br />
* Print Icon: Print the current captured image<br />
2<br />
* Image Control Icon: If you click this icon, you can control the<br />
Brightness, Contrast, Hue, Saturation, Sharpness, Gamma,<br />
Backlight Comp.<br />
* Save Icon: If you click this icon, you can save the current image(s)<br />
and designate the folder & file name.<br />
* Full Screen Icon: If you click this icon, the screen will be exchanged to the<br />
full screen mode.<br />
3<br />
* Full Mode: If you click this icon, a single screen will be appeared.<br />
* Half Mode: If you click this icon, dual screens will be appeared.<br />
* Quarter Mode: If you click this icon, quarter screens will be<br />
appeared.
1<br />
Options & Functions In Image Management Menu<br />
2<br />
4<br />
3<br />
5<br />
If you double click the saved<br />
image, you can delete it<br />
If you click Image Management button, you’ll have this kind of Viewing Screen.<br />
There are 5 red rectangles with numbers.<br />
If you take a look at the next page, you can have detail descriptions about<br />
these functions
1<br />
Options & Functions In Image Management Menu<br />
* Capture Tap: In this tap, you can capture the image(s) or<br />
record the video(s). Captured images will be saved automatically<br />
& shown to the below screen (#5).<br />
* Image Tap: In this tap, you can edit image(s).<br />
* MovieTap: In this tap, you can open & play the movie(s).<br />
2<br />
3<br />
* Image tools: Automatically saved pictures can be edited by<br />
these tools in Image tap.<br />
* Recording Icon: You can record & save the video through this<br />
icon.<br />
* Stop Recording Icon: If you click this icon, recording video will<br />
be stopped & saved.<br />
* Save Icon: If you click this icon, you can save the current image(s)<br />
and designate the folder & file name.<br />
* Full Screen Icon: If you click this icon, the screen will be exchanged to the<br />
full screen mode.<br />
4<br />
5<br />
* Image Control Icon: If you click this icon, you can control the<br />
Brightness, Contrast, Hue, Saturation, Sharpness, Gamma, Backlight<br />
Comp.<br />
* The folder for auto-saving images: If you capture image(s) in Image<br />
Management Menu, the captured images will be saved this folder<br />
automatically.<br />
* Pre-view Tap: This tap shows the image(s) that you captured. If you<br />
click, you can edit the image. Or if you double-click the image, you can<br />
delete the image.
Options & Functions In Image Management Menu<br />
- Patient Information Management Function-<br />
1. Please click the Folder Option Button<br />
2. You can create the folder(s) with the patient name(s) or any other and you<br />
can save the data to each folder<br />
3. When you re-load the data, just click Folder Option Button again, then you<br />
can find the folder(s), and you can re-load the previous data.<br />
4. If you click Convert Name, you can save the current image as other name.
5. Button & Function Description<br />
Button Description & Function<br />
White Balance Button:<br />
Activating White Balance<br />
Capture Button:<br />
Activating Capture
5. Button & Function Description<br />
Button Description & Function<br />
Power Cable: Power<br />
Adaptor has to be<br />
connected (Only when<br />
the RCA Port is<br />
connected)<br />
CABLE PART<br />
Video Cable: Monitor<br />
Input or BNC adaptor has<br />
to be connected<br />
<strong>USB</strong> Cable: <strong>USB</strong> port has<br />
to be connected<br />
Also, if power cable is not<br />
connected, you can use<br />
this port as power too<br />
If both <strong>USB</strong> & RCA Video Cable are connected, it works without D/C Power Adaptor,<br />
Because <strong>USB</strong> Also provides necessary power. It is okay to connect all ports. (Up to<br />
user)
5. Button & Function Description<br />
Button Description & Function<br />
1st WAY: If the 80W LED Light Source is required,<br />
* 80W LED Light Source will give enough brightness to all of application such as<br />
Laryngoscope, Nasopharyngoscope, Sinuscope, etc..<br />
<strong>PROCAM</strong>, EF-140HCUA<br />
* <strong>USB</strong> & RCA Output<br />
* Waterproof<br />
3m <strong>USB</strong> & RCA Cable<br />
Connect TO<br />
LL-250 LED LIGHT SOURCE<br />
Connect TO<br />
CVBS(RCA/Composite)<br />
Port of LCD Monitor<br />
Connect TO <strong>USB</strong> 2.0<br />
PORT<br />
LL-250SINGLE<br />
(80W LED LIGHT Source)<br />
Monitor for showing to the patients<br />
Computer for data storage<br />
or management for<br />
doctor’s reference
5. Button & Function Description<br />
Button Description & Function<br />
2nd WAY: If the only 3W LED Light Source is required,<br />
* For this application, only you can use 3 LED Light Source. Hence, the brightness is not<br />
enough. Only for Otoscope & Sinuscope Applications.<br />
<strong>PROCAM</strong>, EF-140HCUA<br />
* <strong>USB</strong> & RCA Output<br />
* Waterproof<br />
LED LAMP<br />
(3W <strong>USB</strong> LED LAMP)<br />
3m <strong>USB</strong> & RCA Cable<br />
Connect TO<br />
<strong>USB</strong> 2.0 PORT<br />
Connect TO <strong>USB</strong> 2.0 PORT<br />
Connect TO<br />
CVBS(RCA/Composite)<br />
Port of LCD Monitor<br />
Monitor for showing to the<br />
patients<br />
Computer for data storage or<br />
management for doctor’s reference
6. Warranty Regulation<br />
Warranty Card<br />
According to the warranty rule, PROVIX provides customers with the<br />
warranty service as following<br />
Warranty service is valid until 12 months (1 year) after purchasing<br />
P.S.: In order to get warranty service in other region expect Korea,<br />
please contact the official distributor or branch office of PROVIX for<br />
better & faster service.<br />
Manufacture<br />
Origin<br />
Product<br />
Article Number<br />
Warranty Period<br />
PROVIX<br />
Republic of Korea<br />
<strong>USB</strong> Endoscope Camera<br />
EF-140HCU<br />
12 months (1 year)<br />
Serial Number<br />
Address of Manufacture<br />
Website of Manufacture<br />
PROVIX, 4/5F Jipyong B/D, 151-37 Wonmi-dong,<br />
Wonmi-gu ,Bucheon-si, KOREA<br />
www.provix.co.kr<br />
Contact Information (TEL) +82 32 661 8135<br />
(FAX) +82 32 661 8138<br />
Person in Charge<br />
Email Address<br />
Mr. Julian Kim<br />
julian@provix.co.kr<br />
PROVIX, 4/5F Jipyong B/D, 151-37 Wonmi-dong, Wonmi-gu, Bucheon-si, KOREA<br />
www.provix.co.kr / sales@provix.co.kr / (TEL) +82 32 661 8135 / (FAX) +82 32 661 8138<br />
MADE IN KOREA