Operating Instructions 09/10 - Hotronic
Operating Instructions 09/10 - Hotronic
Operating Instructions 09/10 - Hotronic

Create successful ePaper yourself
Turn your PDF publications into a flip-book with our unique Google optimized e-Paper software.
6. Maintain dry, clean socks! Change midday for afternoon comfort and<br />
warmth.<br />
7. Use single pair of medium weight socks. Select wool blend,<br />
polypropylene®, or thermax® type socks to wick moisture away and<br />
keep feet dry and warm.<br />
8. Do not use thick socks, neoprene socks, or reflective sock liners as<br />
these keep heat from toes.<br />
9. Do not use cotton or other moisture absorbing socks.<br />
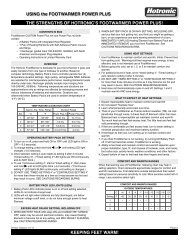
ATTACHING BATTERY PACKS (Fig. 1-3, 8-13)<br />
1. Slide Battery Pack Wire Clip SECURELY over boot top (see point 2<br />
below), boot or shoe laces, or attach to strap such as Velcro® power<br />
strap on ski or snowboard boot. (Fig. 1-2)<br />
2. NOTE: DO NOT SLIDE BATTERY PACK OVER SLIPPERY<br />
MATERIAL SUCH AS SKI BOOT PLASTIC AS THE EASIER IT SLIDES<br />
ON, THE EASIER IT WILL SLIDE OFF. SECURELY ATTACH<br />
BATTERY PACK AT ALL TIMES. (Fig. 3)<br />
3. Mounting Bracket Accessory (optional). For simple, secure, quick<br />
attachment of Battery Packs to ski or hard shell snowboard boots.<br />
(Fig. <strong>10</strong>)<br />
4. Strap Bracket Accessory (optional). For simple, secure, quick<br />
attachment of Battery Packs to ski or snowboard boot power straps.<br />
(Fig. 9)<br />
5. Slide Strap Bracket Accessory (optional). For Battery Pack Power<br />
Plus m4 and m3 only. Provides simple, secure, quick attachment of<br />
Battery Packs to ski or snowboard boot power straps. (Fig. 8)<br />
6. Velcro® Attachment Strap Accessory (optional). Strap around leg at<br />
or above calf or around boot top. Battery Pack clips over Strap.<br />
(Fig. 11)<br />
7. Extension Cord Accessory (optional). Run Cord underneath pant leg<br />
and plug into Battery Pack at waist height (80 cm Cord) or chest<br />
height (120 cm Cord). (Fig. 12-13)<br />
POSITIONING BATTERY PACKS (SKI & SNOWBOARD BOOTS)<br />
(Fig. 4-7)<br />
1. Positioning Battery Pack HIGH on back of boot permits pant leg to<br />
cover Battery Pack but increases potential chair lift damage. (Fig. 4)<br />
2. Positioning Battery Pack LOW on back of boot reduces potential<br />
chair lift damage but increases potential damage while walking<br />
down stairs. (Fig. 5)<br />
3. Positioning Battery Pack on TOP FRONT of boot permits pant leg to<br />
cover Battery Pack, eliminates potential chair lift and stair damage,<br />
and is convenient when adjusting setting. (Fig. 6)<br />
4. Positioning Battery Pack on TOP LATERAL SIDE of boot (see Strap<br />
Bracket and Slide Strap Bracket drawings) permits pant leg to cover<br />
Battery Pack, eliminates potential chair lift and stair damage, and is<br />
convenient when adjusting setting. (Fig. 7)<br />
RECHARGING BATTERY PACKS<br />
• CAUTION - WARRANTY: Use <strong>Hotronic</strong>’s White Plug Recharger<br />
ONLY for Power Plus m4 and Power Plus m3 Battery Packs. Using<br />
other than <strong>Hotronic</strong>’s White Plug Recharger voids Warranty.<br />
• CONDITIONING CHARGE: When Battery Pack is new or has not<br />
been used for more than 2 months, it is very important to charge<br />
Battery Pack for 48 to 72 hours uninterrupted. Conditioning Charge<br />
brings new, unused, or unconditioned Battery Pack to full capacity<br />
potential.<br />
• FULLY CHARGED IN 3 HOURS OR LESS: <strong>Hotronic</strong>’s White Plug<br />
Recharger detects when Battery Pack is fully charged and<br />
automatically switches to trickle current recharging after<br />
approximately 3 hours or less of full current recharging. Fully<br />
charged, properly conditioned Battery Pack reaches full capacity<br />
potential. Fully charged, unconditioned Battery Pack does NOT<br />
reach full capacity potential. (See Conditioning Charge.)<br />
- 9 -