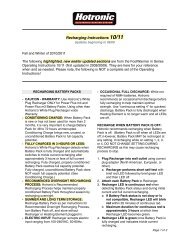
Operating Instructions 09/10 - Hotronic
Operating Instructions 09/10 - Hotronic
Operating Instructions 09/10 - Hotronic

Create successful ePaper yourself
Turn your PDF publications into a flip-book with our unique Google optimized e-Paper software.
TEMPERATURE & DURATION CHART<br />
Approx. Avg. Temp. Range Duration Range<br />
Set. °C °F<br />
Power Plus Power Plus<br />
m4<br />
m3<br />
1 28°-32° 83°-89° 19-21 hrs 15-17 hrs<br />
2 36°-41° 96°-<strong>10</strong>6° 7-9 hrs 5.5-7 hrs<br />
3 40°-47° <strong>10</strong>5°-116° 5-6.5 hrs 3.5-5 hrs<br />
4 57°-62° 135°-144° 2.5-3.75 hrs 2-3 hrs<br />
OPERATING BATTERY PACK SETTINGS<br />
1. To turn on or off, press-and-hold ON or OFF until LED light is ON<br />
or OFF (~2.0 seconds).<br />
2. To change setting, press-and-hold ◄ or ► until setting LED light<br />
changes (~0.5 seconds).<br />
3. Once selected, setting 4 auto-resets to setting 3 after 3 minutes<br />
(“timed setting 4”). (“Timed setting 4” LED lights are ON<br />
continuously and do NOT blink.)<br />
4. To use “continuous setting 4”, start at “timed setting 4”, then press<br />
and hold ► until all LED lights blink (~5.0 seconds). (“Continuous<br />
setting 4” LED lights BLINK continuously until setting is changed.)<br />
5. DO NOT USE “TIMED SETTING 4” or ”CONTINUOUS SETTING<br />
4” for more than three minutes at a time as it may become too hot<br />
and may result in burns. SEE CAUTIONS REGARDING BURNS.<br />
BATTERY PACK LED LIGHTS (LEDs)<br />
1. Battery Pack LEDs indicate power is on or off and setting selected.<br />
LEDs do not indicate charge level.<br />
2. LEDs will not light when batteries are fully discharged, are below<br />
minimum voltage cutoff level, or do not have enough power to heat<br />
Element.<br />
EXCESS HEAT ON ANY SETTING, INCLUDING OFF<br />
1. WHEN BATTERY PACK LED stays ON and CANNOT BE TURNED<br />
OFF, water may be around electrical contacts, may cause Heating<br />
Element to become hot at any setting, and MAY RESULT IN BURNS.<br />
See CAUTIONS REGARDING BURNS.<br />
2. WHEN BATTERY PACK IS ON ANY SETTING, INCLUDING OFF,<br />
and you feel your foot getting hot, you think you might be getting a<br />
burn, or you experience any early warning sensations of a burn,<br />
IMMEDIATELY UNPLUG Heating Element from Battery Pack and<br />
IMMEDIATELY REMOVE your foot from FootWarmer. See<br />
CAUTIONS REGARDING BURNS.<br />
USING HEAT SETTINGS<br />
1. Use FootWarmer to maintain comfort and warmth. (Note: Prevent<br />
feet from getting cold. Warming cold feet requires more energy, is<br />
less effective, and is not intended use of FootWarmer.)<br />
2. Before going into cold, set at 1, 2, or 3 to maintain comfort and<br />
warmth.<br />
3. For additional burst of heat, set to “timed setting 4”. “Timed setting<br />
4” auto-resets to setting 3 after 3 minutes.<br />
4. DO NOT USE “TIMED SETTING 4” or ”CONTINUOUS SETTING<br />
4” for more than three minutes at a time as it may become too hot<br />
and may result in burns. SEE CAUTIONS REGARDING BURNS.<br />
5. Heat does not thermostatically cycle on and off. Settings 1 and 2<br />
maintain warmth AND save energy.<br />
WHAT TO EXPECT OF HEAT SETTINGS<br />
1. Expect imperceptible heat to maintain comfort and warmth.<br />
2. Do not expect “fireplace toes”.<br />
3. Learn what personally works best over time.<br />
4. Think of your FootWarmer as Thermo Active Insulation (TM). As<br />
cold penetrates through insole, it draws heat off Element rather than<br />
toes. Balanced heat is imperceptible yet maintains comfort and<br />
- 7 -