How to Configure Your Internet Router - MTS
How to Configure Your Internet Router - MTS
How to Configure Your Internet Router - MTS

You also want an ePaper? Increase the reach of your titles
YUMPU automatically turns print PDFs into web optimized ePapers that Google loves.
<strong>How</strong> <strong>to</strong> <strong>Configure</strong> <strong>Your</strong> <strong>Internet</strong> <strong>Router</strong><br />
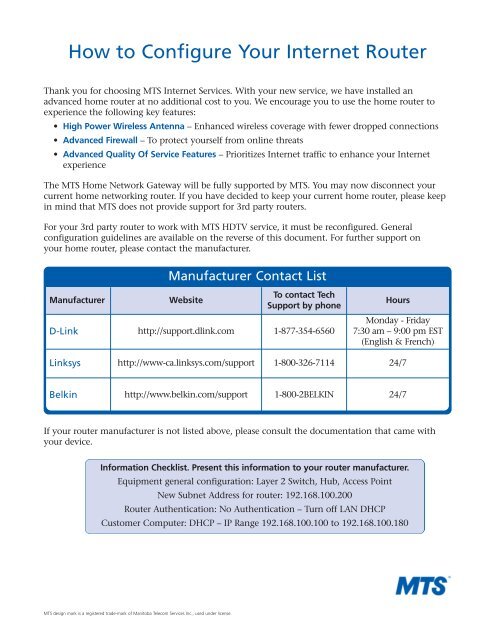
Thank you for choosing <strong>MTS</strong> <strong>Internet</strong> Services. With your new service, we have installed an<br />
advanced home router at no additional cost <strong>to</strong> you. We encourage you <strong>to</strong> use the home router <strong>to</strong><br />
experience the following key features:<br />
• High Power Wireless Antenna – Enhanced wireless coverage with fewer dropped connections<br />
Advanced Firewall – To protect yourself from online threats<br />
Advanced Quality Of Service Features – Prioritizes <strong>Internet</strong> traffic <strong>to</strong> enhance your <strong>Internet</strong><br />
experience<br />
The <strong>MTS</strong> Home Network Gateway will be fully supported by <strong>MTS</strong>. You may now disconnect your<br />
current home networking router. If you have decided <strong>to</strong> keep your current home router, please keep<br />
in mind that <strong>MTS</strong> does not provide support for 3rd party routers.<br />
For your 3rd party router <strong>to</strong> work with <strong>MTS</strong> HDTV service, it must be reconfigured. General<br />
configuration guidelines are available on the reverse of this document. For further support on<br />
your home router, please contact the manufacturer.<br />
Manufacturer Website<br />
Manufacturer Contact List<br />
To contact Tech<br />
Support by phone<br />
D-Link http://support.dlink.com 1-877-354-6560<br />
Hours<br />
Monday - Friday<br />
7:30 am – 9:00 pm EST<br />
(English & French)<br />
Linksys http://www-ca.linksys.com/support 1-800-326-7114 24/7<br />
Belkin http://www.belkin.com/support 1-800-2BELKIN 24/7<br />
If your router manufacturer is not listed above, please consult the documentation that came with<br />
your device.<br />
Information Checklist. Present this information <strong>to</strong> your router manufacturer.<br />
Equipment general configuration: Layer 2 Switch, Hub, Access Point<br />
New Subnet Address for router: 192.168.100.200<br />
<strong>Router</strong> Authentication: No Authentication – Turn off LAN DHCP<br />
Cus<strong>to</strong>mer Computer: DHCP – IP Range 192.168.100.100 <strong>to</strong> 192.168.100.180<br />
<strong>MTS</strong> design mark is a registered trade-mark of Mani<strong>to</strong>ba Telecom Services Inc., used under license.
General Configuration Guidelines<br />
**Please note: The following instructions will vary slightly, depending on your operating system<br />
and router, and are meant <strong>to</strong> be followed if you have previous home networking experience or<br />
technical expertise. If you do not, we recommend you contact your router’s manufacturer <strong>to</strong> walk<br />
you through these configuration steps.<br />
1. All computers in your home network should be configured <strong>to</strong> “obtain their IP addresses<br />
au<strong>to</strong>matically”. This is located in your Network Connections properties. If you have assigned static<br />
IP addresses for the computers in your home network, they should be changed <strong>to</strong> obtain their IP<br />
addresses au<strong>to</strong>matically or for dynamic host configuration pro<strong>to</strong>col (DHCP) service. If you have<br />
never set a static IP address before, you can disregard this step.<br />
2. Connect a computer directly <strong>to</strong> your 3rd party router (preferably wired) and login <strong>to</strong> the router’s<br />
configuration Graphic User Interface (GUI). In most cases this is accessed through an <strong>Internet</strong><br />
browser with an address of http://192.168.XXX.XXX. Be sure <strong>to</strong> have your username and password<br />
for your router available. Consult your router documentation <strong>to</strong> identify where this is located.<br />
3. Once in the router GUI, go <strong>to</strong> the LAN Connection Settings and change your internal router’s IP<br />
address <strong>to</strong> 192.168.100.200. This is done so that you continue <strong>to</strong> have functional access <strong>to</strong> your<br />
router. The 2Wire RG and your own router must be on the same subnet. If this procedure is not<br />
done, you may lose access <strong>to</strong> your router in the future.<br />
4. While still in the router GUI,, you will need <strong>to</strong> locate the LAN DHCP section in your router. You<br />
must “Disable DHCP Server”, or choose “NO DHCP” in the LAN section. If you previously had<br />
<strong>MTS</strong> High Speed <strong>Internet</strong> service, this may be located in the area that you selected PPPoE and<br />
entered in your username (username@res1.mts.net and password when you first configured your<br />
router. You do not need <strong>to</strong> worry about the WAN DHCP. You will not be using the WAN port in<br />
this configuration.<br />
5. Save your configuration and reboot your router as directed. After this reboot, shut down all of your<br />
computers and your 3rd party router.<br />
6. Plug an Ethernet cable from the <strong>MTS</strong> 2Wire RG <strong>to</strong> a LAN port on your 3rd party router.<br />
NOTE: Do not plug the cable in<strong>to</strong> the WAN port of your router. <strong>Your</strong> network may not function<br />
correctly if this is done.<br />
7. In order, first turn on your router, THEN turn on all of your computers.<br />
8. Begin browsing the <strong>Internet</strong>.