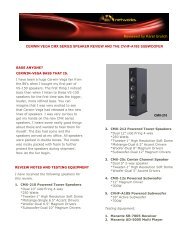
View User Manual - Skywalker
View User Manual - Skywalker
View User Manual - Skywalker

You also want an ePaper? Increase the reach of your titles
YUMPU automatically turns print PDFs into web optimized ePapers that Google loves.
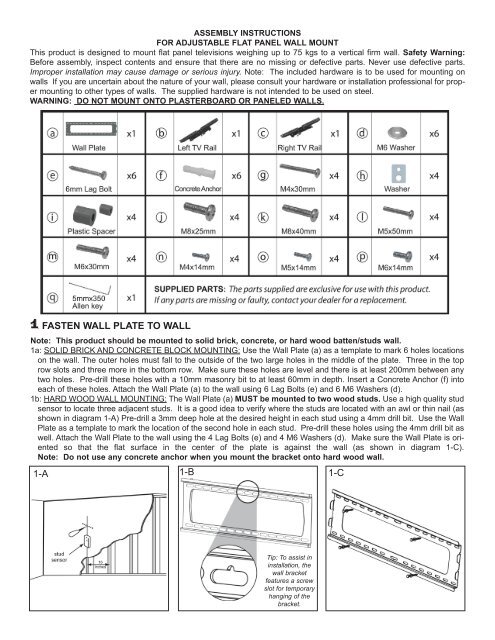
ASSEMBLY INSTRUCTIONS<br />
FOR ADJUSTABLE FLAT PANEL WALL MOUNT<br />
This product is designed to mount flat panel televisions weighing up to 75 kgs to a vertical firm wall. Safety Warning:<br />
Before assembly, inspect contents and ensure that there are no missing or defective parts. Never use defective parts.<br />
Improper installation may cause damage or serious injury. Note: The included hardware is to be used for mounting on<br />
walls If you are uncertain about the nature of your wall, please consult your hardware or installation professional for proper<br />
mounting to other types of walls. The supplied hardware is not intended to be used on steel.<br />
WARNING: DO NOT MOUNT ONTO PLASTERBOARD OR PANELED WALLS.<br />
1 FASTEN WALL PLATE TO WALL<br />
Note: This product should be mounted to solid brick, concrete, or hard wood batten/studs wall.<br />
1a: SOLID BRICK AND CONCRETE BLOCK MOUNTING: Use the Wall Plate (a) as a template to mark 6 holes locations<br />
on the wall. The outer holes must fall to the outside of the two large holes in the middle of the plate. Three in the top<br />
row slots and three more in the bottom row. Make sure these holes are level and there is at least 200mm between any<br />
two holes. Pre-drill these holes with a 10mm masonry bit to at least 60mm in depth. Insert a Concrete Anchor (f) into<br />
each of these holes. Attach the Wall Plate (a) to the wall using 6 Lag Bolts (e) and 6 M6 Washers (d).<br />
1b: HARD WOOD WALL MOUNTING: The Wall Plate (a) MUST be mounted to two wood studs. Use a high quality stud<br />
sensor to locate three adjacent studs. It is a good idea to verify where the studs are located with an awl or thin nail (as<br />
shown in diagram 1-A) Pre-drill a 3mm deep hole at the desired height in each stud using a 4mm drill bit. Use the Wall<br />
Plate as a template to mark the location of the second hole in each stud. Pre-drill these holes using the 4mm drill bit as<br />
well. Attach the Wall Plate to the wall using the 4 Lag Bolts (e) and 4 M6 Washers (d). Make sure the Wall Plate is oriented<br />
so that the flat surface in the center of the plate is against the wall (as shown in diagram 1-C).<br />
Note: Do not use any concrete anchor when you mount the bracket onto hard wood wall.<br />
1-A 1-B 1-C<br />
Tip: To assist in<br />
installation, the<br />
wall bracket<br />
features a screw<br />
slot for temporary<br />
hanging of the<br />
bracket.