2006 - Gran Fondo 1
2006 - Gran Fondo 1
2006 - Gran Fondo 1

Create successful ePaper yourself
Turn your PDF publications into a flip-book with our unique Google optimized e-Paper software.
© Marzocchi Suspension<br />
<strong>2006</strong> - <strong>Gran</strong> <strong>Fondo</strong> 1<br />
Setting: General rules for calibration<br />
By carefully calibrating the damping system you can get the maximum performance out of the same.<br />
This paragraph indicates the sequence of operations to perform to set up the Marzocchi forks correctly.<br />
In order to find the best settings for you, you will need to try several times to understand where and how to make adjustments. When doing so,<br />
please ride in an open area, free from traffic, obstacles and other hazards.<br />
The optimal setting is influenced by the geometry of the frame of the mountain bike, the weight of the cyclist, the type of terrain the bike will be<br />
used on and the type of obstacles you have to deal with, but also by subjective factors associated with your riding style; therefore it is impossible to<br />
provide objective data on the desired settings.<br />
Nevertheless by carefully following the instructions below you will soon be able to find the optimal setting for you.<br />
The shock absorber must be calibrated simply by using one adjuster at a time, following the order explained, noting the operations and any result<br />
step-by-step.<br />
During setting don't force the adjusters beyond their limit of travel and don't exceed the max recommended air pressure.<br />
To keep the pressure inside the fork’s legs, only use the special MARZOCCHI pump with pressure gauge.<br />
The use of any other pump can compromise the inflating operation and cause malfunction or damage to the fork, resulting in an<br />
accident, personal injury or death.<br />
Once the correct setting has been found, we recommend noting the number of clicks or turns of the adjuster with respect to the "fully closed"<br />
position (adjuster fully clockwise) for a faster re-setting of your fork in case of need.<br />
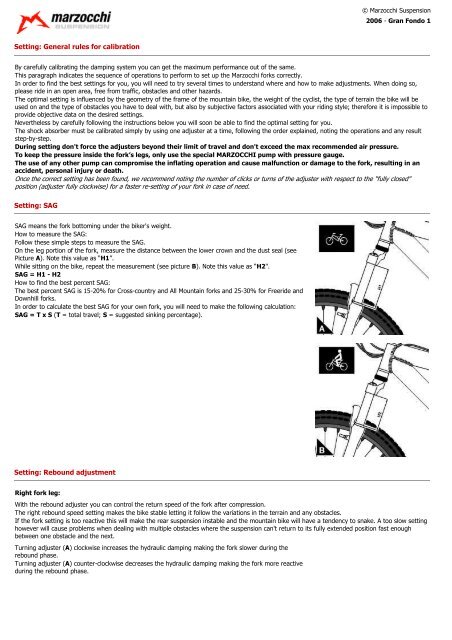
Setting: SAG<br />
SAG means the fork bottoming under the biker's weight.<br />
How to measure the SAG:<br />
Follow these simple steps to measure the SAG.<br />
On the leg portion of the fork, measure the distance between the lower crown and the dust seal (see<br />
Picture A). Note this value as “H1”.<br />
While sitting on the bike, repeat the measurement (see picture B). Note this value as “H2".<br />
SAG = H1 - H2<br />
How to find the best percent SAG:<br />
The best percent SAG is 15-20% for Cross-country and All Mountain forks and 25-30% for Freeride and<br />
Downhill forks.<br />
In order to calculate the best SAG for your own fork, you will need to make the following calculation:<br />
SAG = T x S (T = total travel; S = suggested sinking percentage).<br />
Setting: Rebound adjustment<br />
Right fork leg:<br />
With the rebound adjuster you can control the return speed of the fork after compression.<br />
The right rebound speed setting makes the bike stable letting it follow the variations in the terrain and any obstacles.<br />
If the fork setting is too reactive this will make the rear suspension instable and the mountain bike will have a tendency to snake. A too slow setting<br />
however will cause problems when dealing with multiple obstacles where the suspension can't return to its fully extended position fast enough<br />
between one obstacle and the next.<br />
Turning adjuster (A) clockwise increases the hydraulic damping making the fork slower during the<br />
rebound phase.<br />
Turning adjuster (A) counter-clockwise decreases the hydraulic damping making the fork more reactive<br />
during the rebound phase.