

Earn the Official BSA Whittling Chip Wallet Card ! The Rules
Earn the Official BSA Whittling Chip Wallet Card ! The Rules
Earn the Official BSA Whittling Chip Wallet Card ! The Rules

Create successful ePaper yourself
Turn your PDF publications into a flip-book with our unique Google optimized e-Paper software.
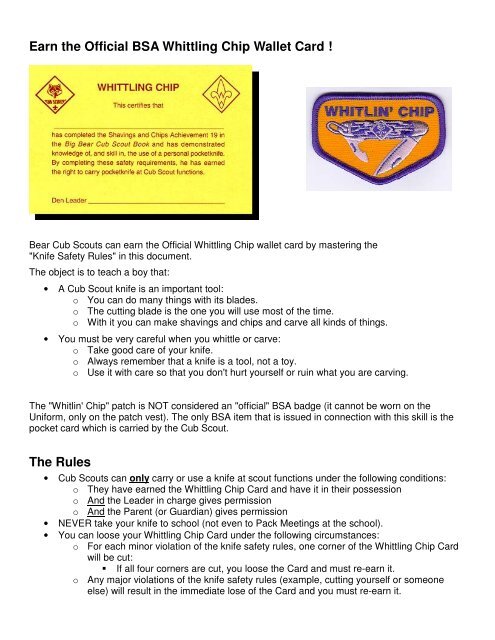
<strong>Earn</strong> <strong>the</strong> <strong>Official</strong> <strong>BSA</strong> <strong>Whittling</strong> <strong>Chip</strong> <strong>Wallet</strong> <strong>Card</strong> !<br />
Bear Cub Scouts can earn <strong>the</strong> <strong>Official</strong> <strong>Whittling</strong> <strong>Chip</strong> wallet card by mastering <strong>the</strong><br />
"Knife Safety <strong>Rules</strong>" in this document.<br />
<strong>The</strong> object is to teach a boy that:<br />
• A Cub Scout knife is an important tool:<br />
o You can do many things with its blades.<br />
o <strong>The</strong> cutting blade is <strong>the</strong> one you will use most of <strong>the</strong> time.<br />
o With it you can make shavings and chips and carve all kinds of things.<br />
• You must be very careful when you whittle or carve:<br />
o Take good care of your knife.<br />
o Always remember that a knife is a tool, not a toy.<br />
o Use it with care so that you don't hurt yourself or ruin what you are carving.<br />
<strong>The</strong> "Whitlin' <strong>Chip</strong>" patch is NOT considered an "official" <strong>BSA</strong> badge (it cannot be worn on <strong>the</strong><br />
Uniform, only on <strong>the</strong> patch vest). <strong>The</strong> only <strong>BSA</strong> item that is issued in connection with this skill is <strong>the</strong><br />
pocket card which is carried by <strong>the</strong> Cub Scout.<br />
<strong>The</strong> <strong>Rules</strong><br />
• Cub Scouts can only carry or use a knife at scout functions under <strong>the</strong> following conditions:<br />
o <strong>The</strong>y have earned <strong>the</strong> <strong>Whittling</strong> <strong>Chip</strong> <strong>Card</strong> and have it in <strong>the</strong>ir possession<br />
o And <strong>the</strong> Leader in charge gives permission<br />
o And <strong>the</strong> Parent (or Guardian) gives permission<br />
• NEVER take your knife to school (not even to Pack Meetings at <strong>the</strong> school).<br />
• You can loose your <strong>Whittling</strong> <strong>Chip</strong> <strong>Card</strong> under <strong>the</strong> following circumstances:<br />
o For each minor violation of <strong>the</strong> knife safety rules, one corner of <strong>the</strong> <strong>Whittling</strong> <strong>Chip</strong> <strong>Card</strong><br />
will be cut:<br />
If all four corners are cut, you loose <strong>the</strong> <strong>Card</strong> and must re-earn it.<br />
o Any major violations of <strong>the</strong> knife safety rules (example, cutting yourself or someone<br />
else) will result in <strong>the</strong> immediate lose of <strong>the</strong> <strong>Card</strong> and you must re-earn it.
Knives Are Not Toys<br />
• Close <strong>the</strong> blade with <strong>the</strong> palm of your hand.<br />
• Always cut away from you, never toward you.<br />
• When you are using <strong>the</strong> cutting blade, do not try to make big shavings or chips.<br />
• Be careful that you do not cut yourself or any person nearby.<br />
o Learn & use <strong>the</strong> “Safety Circle”.<br />
o Learn & use <strong>the</strong> “make eye contact” method of handing a knife to someone else.<br />
• Never carry an open knife in your hand.<br />
• When you are not using your knife, close it and put it away.<br />
• Never use a knife on something that will dull or break it.<br />
• Never throw a knife for any reason.<br />
• Never use a knife to strip <strong>the</strong> bark from a tree.<br />
• Know how to sharpen a knife. A sharp knife is safer because it is less likely to slip & cut you.<br />
• Keep <strong>the</strong> blade clean.<br />
• Keep your knife dry.<br />
• Do not carve your initials into anything that does not belong to you.<br />
• Easy does it.<br />
• Always think before you cut.<br />
POCKETKNIFE PLEDGE<br />
• I understand <strong>the</strong> reason for safety rules.<br />
• I will treat my pocketknife with <strong>the</strong> respect due a useful tool.<br />
• I will always close my pocketknife and put it away when I'm not using it.<br />
• I will not use my pocketknife when it might injure someone near me.<br />
• I promise never to throw my pocketknife for any reason.<br />
• I will use my pocketknife in a safe manner at all times.
Test your knowledge<br />
You should close <strong>the</strong> blade with <strong>the</strong> palm of your hand<br />
True<br />
False<br />
A knife is just a toy.<br />
True<br />
False<br />
It's okay to keep your knife wet.<br />
True<br />
False<br />
A dull knife is more likely to slip and cut you.<br />
True<br />
False<br />
You should carry your open knife in your pocket.<br />
True<br />
False<br />
Carving your initials into a tree is okay.<br />
True<br />
False<br />
<strong>The</strong> Pocketknife Pledge (fill in <strong>the</strong> blanks)<br />
I understand <strong>the</strong> reason for ________________________ rules.<br />
I will treat my pocketknife with <strong>the</strong> ______________________________ due a useful tool.<br />
I will always _________________________ my pocketknife and put it away when not in use.<br />
I will not use my pocketknife when it might _______________________ someone near me.<br />
I ______________________________ never to throw my pocketknife for any reason.<br />
I will use my pocketknife in a safe manner at ________________________times.<br />
close, respect, injure, promise, all, safety
Learning to Whittle (Carve) Using Soap<br />
1. <strong>The</strong> Tools – your medium and tools are simple and inexpensive; a large cake of white soap<br />
(Ivory Soap’s shape and texture are most satisfactory), a paring knife, one or two<br />
“manicure” orangewood sticks, pencil and paper for sketching (or pre-printed patterns).<br />
2. Preparing <strong>the</strong> Soap – it’s best to unwrap <strong>the</strong> soap and allow it to dry for a day or two before<br />
you start carving. Cut away <strong>the</strong> raised edges; scrape off <strong>the</strong> lettering. You’ll have a<br />
beautiful flat surface for your carving. Carving on a tray will keep everything ship-shape<br />
and make it easy to collect <strong>the</strong> chips.<br />
3. Your Idea – your subject is often suggested by <strong>the</strong> shape and quality of <strong>the</strong> soap. Don’t be<br />
too ambitious at first. Choose a simple design with a solid, basic shape, without too many<br />
delicate undercuts or projections.<br />
4. From Idea to Soap – if you have a clear mental picture of your idea, you can carve directly<br />
in <strong>the</strong> soap, or you may use <strong>the</strong> orangewood stick to outline a rough sketch on all surfaces<br />
of <strong>the</strong> form you wish to carve. Beginners may wish to sketch ideas on a piece of paper<br />
first, <strong>the</strong>n transfer it to <strong>the</strong> soap by tracing or by using carbon paper.<br />
5. First Rough Cuts – regardless of <strong>the</strong> way you mark <strong>the</strong> rough outline on <strong>the</strong> surface of <strong>the</strong><br />
soap, your next step is to make your first rough cuts, removing <strong>the</strong> greater part of <strong>the</strong> soap<br />
which will not be used to carve your design. Place <strong>the</strong> soap on <strong>the</strong> table or tray, and<br />
holding it with <strong>the</strong> left hand, start cutting at <strong>the</strong> upper right-hand corner, leaving about ¼”<br />
margin outside your outline or penciled sketch. Cut clear through <strong>the</strong> cake, removing<br />
excess soap all <strong>the</strong> way around. After making <strong>the</strong>se first cuts, you will probably find it more<br />
comfortable to carve along your outline, using <strong>the</strong> knife as if peeling a potato. Keep 1/8”<br />
to1/4” away from your guide lines to allow for finer work later.<br />
Caution – in roughing out, cut away in small pieces or slices. Soap often breaks if cut in big<br />
chunks, and your whole design might be spoiled. Cut too little ra<strong>the</strong>r than too much,<br />
because you cannot put back a piece once it is cut off (or breaks off).<br />
6. Shaping <strong>the</strong> Model – round out your design by cutting around <strong>the</strong> corners. As you work,<br />
keep turning <strong>the</strong> soap, always keeping <strong>the</strong> shape of <strong>the</strong> piece in mind. Watch your high<br />
points (those that jut out far<strong>the</strong>st from <strong>the</strong> surface) and your low points (those far<strong>the</strong>st in).<br />
Carve gradually from <strong>the</strong> high points toward <strong>the</strong> deepest cuts. It may help to use your knife<br />
point in some of this work. Keep observing <strong>the</strong> whole form as you work at each point.<br />
Don’t try to finish any one part in detail before ano<strong>the</strong>r.<br />
7. To Polish – first, allow <strong>the</strong> model to dry for a day or two. <strong>The</strong>n, rub it with a soft paper<br />
napkin, being careful not to break off corners or projections. Finally, rub it gently with finger<br />
tops or palm.<br />
8. Details – when <strong>the</strong> piece is about finished and all planes and forms shaped, you can<br />
smooth rough edges with <strong>the</strong> edge of <strong>the</strong> knife and mark in details like eyes or ears, etc.<br />
with <strong>the</strong> knife tip or with your orangewood stick.<br />
9. Soap Sample Designs – attached are some sample ideas of what could be carved out of<br />
soap (<strong>the</strong>se may need to be enlarged or made smaller depending on <strong>the</strong> soap size).<br />
Please keep in mind shapes with feet are <strong>the</strong> ones most likely to break or crack. Simple<br />
shapes like acorns are just as challenging, but will not crack as easily. Encourage <strong>the</strong><br />
scouts to put a lot of detail on <strong>the</strong> shapes that are plain.
Soap Carving Templates


