BAR CODE - Champtek
BAR CODE - Champtek
BAR CODE - Champtek
Create successful ePaper yourself
Turn your PDF publications into a flip-book with our unique Google optimized e-Paper software.
<strong>BAR</strong> <strong>CODE</strong>
Programming Menu<br />
V3.9<br />
Notice<br />
The manufacturer shall not be liable for technical or<br />
editorial errors or omissions contained herein; nor<br />
for incidental or consequential damages in<br />
connection with the furnishing, performance or use of<br />
use the publication.
Contents<br />
Chapter 1 Description ............................................................ 3<br />
1.1 General ................................................................ 3<br />
1.2 Introduction ......................................................... 4<br />
1.3 Codes Read .......................................................... 4<br />
1.4 Installation ........................................................... 4<br />
1.5 Pin Assignment ..................................................... 6<br />
Chapter 2 Configuration - General ...................................... 8<br />
2.1 Flow Chart ............................................................ 8<br />
2.2 Loop of Programming .......................................... 9<br />
2.3 Factory Default Settings ....................................... 9<br />
2.4 Main Page of Configuration ............................... 10<br />
Chapter 3 Interface and ..................................................... 11<br />
3.1 Interface SeIection ............................................. 11<br />
3.2 Reading Mode Selection .................................... 12<br />
Chapter 4 Communication Parameters ................................. 13<br />
4.1 RS232 Communication Parameters .................... 13<br />
4.2 Keyboard Wedge Mode Parameters .................. 15<br />
4.3 Output Characters Parameters .......................... 17<br />
4.4 Wand Emulation Mode Parameters ................... 19<br />
Chapter 5 Bar Codes & Others ............................................ 20<br />
5.1 SymboIogies Selection ....................................... 20<br />
5.2 UPC/EANI/JAN Parameters ................................. 24<br />
5.3 Code 39 Parameters .......................................... 26<br />
5.4 Code 128 Parameters ......................................... 28<br />
5.5 Interleave 25 Parameters ................................... 30<br />
5.6 IndustriaI 25 Parameters .................................... 32<br />
5.7 Matrix 25 Parameters ........................................ 34<br />
5.8 CODA<strong>BAR</strong>/NW7 Parameters .............................. 36<br />
5.9 Code 93 Parameters ........................................... 38<br />
5.10 Code 11 Parameters ........................................... 40<br />
5.11 MSI/PLESSEY Code Parameters .......................... 42<br />
5.12 Code 2 of 6 Parameters ...................................... 44<br />
5.13 LCD25 Parameters ............................................. 46<br />
5.14 Telepen Parameters ........................................... 48<br />
5.15 GS1 Databar ...................................................... 50<br />
Chapter 6 Miscellaneous Parameters ................................ 52<br />
6.1 Language Selection ............................................ 52<br />
6.2 Bar Code ID ........................................................ 54<br />
6.3 Reading Level ...................................................... 57<br />
6.4 Accuracy ............................................................. 57<br />
6.5 Buzzer Beep Tone ............................................... 57<br />
6.6 Sensitivity of Continuous Reading Mode .............. 58<br />
6.7 Reverse Output Characters ........................... 59<br />
6.8 Setup Deletion ................................................. 59<br />
1
6.9 Setup Insertion .................................................. 62<br />
6.10 Scanning Line Selection for Multi Parallel lines<br />
modes ........................................................................ 65<br />
Chapter 7 Bluetooth Configuration.................................... 66<br />
7.1 Scanner Mode ..................................................... 66<br />
7.2 Out of Range ....................................................... 67<br />
7.3 Sleep Mode ......................................................... 68<br />
7.4 Batch Mode ......................................................... 68<br />
7.5 Firmware Version ............................................... 69<br />
Appendix A Decimal Value Table ...................................... 70<br />
Appendix B ASCII Table .................................................... 71<br />
Appendix C Function Key Table ........................................ 75<br />
Appendix D Decimal Value Table II ................................... 76<br />
2
Chapter 1 Description<br />
1.1 General<br />
Thank you for purchasing this barcode scanner with<br />
an advanced and versatile decoder. The decoder<br />
works with variety of barcode types, reading devices,<br />
and computer interfaces. It discriminates over twenty<br />
different symbologies automatically.<br />
This menu provides an easy way to configure the<br />
decoding options and interface selections by scanning<br />
bar codes listed in the menu.<br />
FCC Approval<br />
This device had been tested in accordance with the procedures<br />
and in compliance with Part 15 Subpart B of FCC<br />
Rules. And keeps all requirements according ANSI C63.4 &<br />
FCC Part 15 B Regulation and CISPR22 Class B.<br />
CE Standards<br />
The CE mark as shown here indicates this product had<br />
been tested in accordance with the procedures given in<br />
European Council Directive 2004/108/EC and confirmed to<br />
comply with the Europe Standard EN55022:2006:Class B,<br />
EN 55024:1998+A1:2001+A2:2003,IEC61000-3-2:2006,<br />
IEC61000-3-3:1995+A1:2005,IEC61000-4-2:2001,<br />
IEC61000-4-3:2006,IEC61000-4-4:2004,IEC61000-4-5:<br />
2006,IEC61000-4-6:2001,IEC61000-4-8:2001,IEC61000-4-<br />
11:2004.<br />
LEGISLATION AND WEEE SYMBOL<br />
This marking shown on the product or its literature,<br />
indicates that it should not be disposed with other<br />
households wastes at the end of its working life. To<br />
prevent possible harm to the environment or human<br />
healthy from uncontrolled waste disposal,<br />
please separate this from other types of wastes and<br />
recycle it responsibly to promote the sustainable reuse<br />
of material resources.<br />
Household users should contact either the retailer<br />
where they purchased this product, or their local<br />
government office, for details of where and how<br />
they can take this item for environ entally safe<br />
recycling. Business users should contact their suppliers<br />
and check the terms and conditions of the purchase<br />
3
1.2 Introduction<br />
The Decoder is an advanced and versatile<br />
decoding facility for barcoding systems .It works<br />
with variety of bar code types, reading devices,<br />
and computer interfaces. It discriminates about<br />
twenty different symbologies automatically.<br />
This menu provide an easy way to config the<br />
decoding options and interface selections by<br />
scanning bar codes listed in the menu.<br />
1.3 Codes Read<br />
. Codes Read<br />
ALL UPC/EAN/JAN , Code 39, Code 39 Full ASCII,<br />
Code 128, Interleave 25, Industrial 25, Matrix 25,<br />
CODA<strong>BAR</strong>/NW7, Code 11, MSI/PLESSEY, Code<br />
93, China Postage, Code32/Italian Pharmacy<br />
Others available upon request.<br />
1.4 Installation<br />
Unpacking -<br />
Remove the scanner from its packing and check it<br />
for damage. If the scanner was defected in transit,<br />
please contact your vendor immediately. Be sure<br />
that you keep the packing with all accessories<br />
contains in the package for your returning of<br />
service.<br />
Connecting the scanner -<br />
Keyboard wedge/RS-232C/USB:<br />
Connect the 10-pins RS-45 male connector into<br />
the bottom of the scanner and you will hear a<br />
“click” when the connection is made.<br />
4
Power supply for RS-232C scanner -<br />
There are 3 ways to supplying the power, use external<br />
+5V power supply, use optional power cable<br />
(KBDC) which taking the power from KB wedge or if<br />
the host supports +5V power from pin 9.<br />
Installing the scanner to the Host System -<br />
1. Turn off the host system.<br />
2. Connect the power if needed.<br />
3. Connect to the proper port on the host system.<br />
4. Turn on the host system.<br />
Switching cable -<br />
Before removing the cable from the scanner, it is<br />
recommended that the power on the host system is<br />
off and the power supply has been disconnected<br />
from unit.<br />
1. Find the small "Pin-hole" on the bottom of the<br />
unit.<br />
2. Use a bended regular paperclip and insert the<br />
tip into the hole.<br />
3. You will head a "click" , then gentle on the strainrelief<br />
of the cable and it will slide out of the<br />
scanner.<br />
SG/LG Series<br />
SD Series<br />
5
1.5 Pin Assignment<br />
A> Input Port for Mini Decoder<br />
DB 9 Male<br />
Pin No. Wand / CCD /<br />
Slot Reader Laser Scanner<br />
1 N.C. S.O.S.<br />
2 DATA DATA<br />
3 N.C. N.C.<br />
4 N.C. N.C.<br />
5 N.C. TRIGGER<br />
6 N.C. P. E.<br />
7 GND GND<br />
8 SHIELD SHIELD<br />
9 +5V +5V<br />
1 5<br />
6 9<br />
B> Output Port<br />
1. PC Keyboard Output<br />
DIN 5 MALE<br />
DIN 5 FEMALE<br />
Pin No. Function Pin No. Function<br />
1 HOST CLK 1 KB CLK<br />
2 HOST DATA 2 KB DATA<br />
4 GND 4 GND<br />
5 Vcc(+5V) 5 Vcc(+5V)<br />
1 3<br />
3 1<br />
4 5 5 4<br />
2 2<br />
MiniDIN 6 MALE MiniDIN 6 )EMALE<br />
Pin No. Function Pin No. Function<br />
1 HOST DATA 1 KB DATA<br />
3 GND 3 GND<br />
4 Vcc 4 Vcc<br />
5 HOST CLK 5 KB CLK<br />
5<br />
3<br />
1<br />
6<br />
4<br />
2<br />
6<br />
4<br />
2<br />
5<br />
3<br />
1<br />
6
Power Lead<br />
6<br />
7<br />
8 8<br />
7<br />
6<br />
3 5 5 3<br />
1 2 2 1<br />
4 4<br />
7
Chapter 2 Configuration - General<br />
2.1 Flow Chart<br />
8
2.2 Loop of Programming<br />
The philosophy of programming parameters<br />
has been shown on the flow chart of 2.1.<br />
Basically user should<br />
1. Scan Start of Configuration.<br />
2. Scan all necessary labels for parameters that meet<br />
applications.<br />
3. Scan End of Configuration to end the programming.<br />
4. To permanently save the settings you programmed,<br />
just scan label for Save Parameters.<br />
5. To go back to the Default Settings, just scan label<br />
for Set All Defaults.<br />
2.3 Factory Default Settings<br />
The factory default settings are shown with <br />
and bold in the following sections. You can<br />
make your own settings by following the<br />
procedures in this manual. If you want to save the<br />
settings permanently, you should scan the label of<br />
“Save Parameters“ in chapter 2.4,otherwise the<br />
settings will not be saved after the decoder<br />
power is off, and all settings will go back to<br />
previous settings.<br />
By scanning “Set All Default“ label, the settings<br />
will go back to the factory default settings.<br />
9
2.4 Main Page of Configuration<br />
Save Parameters<br />
%$ +/0<br />
Recall Stored<br />
Parameters<br />
%$ + / 1<br />
Set AII Defaults<br />
%$ + / 2<br />
Start Configuration<br />
%$ + / 3<br />
End Configuration<br />
%$ + / 4<br />
Abort Configuration<br />
%$ + / 6<br />
Version Information<br />
%$ + / 5<br />
Save Parameters -<br />
The parameter settings will be saved permanently.<br />
Recall Stored Parameters -<br />
Replace the current parameters by the parameters<br />
you saved last time.<br />
Set AII Defaults -<br />
Set all the parameters to the factory default settings.<br />
Abort Configuration -<br />
Terminate current programming status.<br />
Version Information -<br />
Display the decoder version information and date<br />
code.<br />
10
Chapter 3 Interface and<br />
Reading Mode Selection<br />
3.1 Interface SeIection<br />
<br />
%00 U0<br />
RS232 Mode<br />
WAND Emulation<br />
%00 U8<br />
%00 M2<br />
USB Mode<br />
%0 XO8<br />
12
3.2 Reading Mode Selection<br />
<br />
%0 2 71<br />
Trigger ON/OFF<br />
Continuous/Trigger OFF %0 2 7 0<br />
%0 2 7 2 Testing<br />
Continuous/Auto Power On<br />
%0 2 7 5<br />
%0 2 7 3 Flash<br />
Flash/Auto Power On<br />
%0 2 7 4<br />
%0 2 76<br />
Reserved1<br />
Auto Sense(Option) %0 2 77<br />
%09F8 Reserved3<br />
Reserved4 %09F9<br />
%09FA<br />
Reserved5<br />
%09FB<br />
12
Ch.4 Communication Parameters<br />
4.1 RS232 Communication Parameters<br />
A> Set Up BAUD Rate<br />
1200<br />
2400<br />
% 0Y71<br />
% 0Y7 2 4800<br />
<br />
% 0 Y73<br />
%0Y7 7<br />
19200<br />
38400 %0Y74<br />
%0Y7 5<br />
B> Set Up Data Bits<br />
7 Data Bits<br />
%0Y80 <br />
C> Set Up Stop Bits %0Y8 8<br />
<br />
%0YO8<br />
2 Bits<br />
%0 YO0<br />
13
D> Set Up Parity<br />
<br />
%0YN7<br />
Even<br />
Odd %0YN 2<br />
%0YN3<br />
Mark<br />
Space<br />
%0YN1<br />
%0 YN0<br />
E Handshaking<br />
RTS/CTS Enable<br />
%0 188<br />
<br />
ACK/NAK Enable<br />
%0 1 8 0<br />
%0 144<br />
<br />
XON/XOFF Enable %0140<br />
%03 K4 <br />
%03 K0<br />
14
4.2 Keyboard Wedge Mode Parameters<br />
A > Terminal Type<br />
<br />
%0 ZF0<br />
IBM PC/XT<br />
IBM PS/2 25, 30<br />
%0 ZF1<br />
%0 ZF2<br />
NEC 9800<br />
Apple Desktop Bus(ADB)<br />
%0 ZF3<br />
%0 ZF4<br />
IBM 5550<br />
IBM 122 Key (1)<br />
%0 ZF5<br />
%0 ZF6<br />
IBM 102 Key<br />
IBM 122 Key (2)<br />
%0 ZF7<br />
%0 ZF8<br />
Reserved 1<br />
Reserved 2<br />
%0 ZF9<br />
%0 ZFA<br />
Reserved 4<br />
Reserved 3<br />
%0 ZFB<br />
%0 ZFC<br />
Reserved 5<br />
15<br />
% 0ZFD
B> Upper/Lower Case<br />
<br />
%0 330<br />
Upper Case<br />
Lower Case<br />
%0 331<br />
%0 332<br />
C> Caps Lock Detection<br />
Enable<br />
%0 X8 8 <br />
%0 X80<br />
D> Send Character by ALT Method<br />
Enable<br />
%03O 8<br />
<br />
E> Select Numerical<br />
Pad<br />
% 03O0<br />
ON<br />
%0 1K4 <br />
% 01K0<br />
16
4.3 Output Characters Parameters<br />
A> Select Terminator<br />
<br />
% 7 S2 +<br />
None<br />
CR<br />
% 7 S7 +<br />
% 7 S0 +<br />
LF<br />
Space<br />
% 7 S1 +<br />
% 7 S4 +<br />
HT(TAB)<br />
STX-ETX<br />
% 7 S3 +<br />
% 7 S5 +<br />
17
B> Time-out Between Characters<br />
<br />
%0070<br />
5 ms<br />
10 ms<br />
%0071<br />
%0072<br />
25 ms<br />
50 ms<br />
%0073<br />
%0074<br />
100 ms<br />
200 ms<br />
%0075<br />
%0076<br />
300 ms<br />
%0077<br />
18
4.4 Wand Emulation Mode Parameters<br />
A> TTL Level Representation<br />
<br />
%0 2 K4<br />
Bar Equals Low<br />
%0 2 K0<br />
B> Scan Speed Selection<br />
<br />
%0 288<br />
Slow<br />
%0 280<br />
C> Output Format Selection<br />
<br />
%0 2 O8<br />
Output as Code 39<br />
Full ASCII<br />
Output as Original<br />
Code Format<br />
%0 2 O0<br />
%0 XK4<br />
19
Ch.5 Bar Codes & Others<br />
5.1 SymboIogies Selection<br />
UPC-A <br />
%0 A4 4<br />
OFF<br />
UPC-E <br />
%0 A40<br />
%0 BO8<br />
OFF<br />
EAN-13/JAN-13/ISBN-13<br />
<br />
%0 BO0<br />
%0 A22 OFF<br />
EAN-8/JAN-8 <br />
%0 A20<br />
%0 A11<br />
OFF<br />
<strong>CODE</strong> 39 <br />
%0 A10<br />
%0 EO8<br />
OFF<br />
<strong>CODE</strong> 128 <br />
%0 EO0<br />
%0 F O8<br />
OFF<br />
CODA<strong>BAR</strong>/NW7 <br />
%0 F O0<br />
OFF<br />
%0 J O8<br />
%0 J O 0<br />
20
Interleave 25 <br />
%0GO8<br />
OFF<br />
Industrial 25 ON<br />
%0GO0<br />
%0HO8<br />
<br />
Matrix 25 ON<br />
%0HO0<br />
%0 I O8<br />
<br />
<strong>CODE</strong> 93 ON<br />
%0 I O0<br />
% 0KO8<br />
<br />
<strong>CODE</strong> 11 ON<br />
%0 KO0<br />
<br />
% 0 LO8<br />
China Postage ON<br />
%0 L O 0<br />
% CM O8<br />
<br />
MSI/PLESSEY ON<br />
%0 M O0<br />
% CNO8<br />
<br />
%0 NO0<br />
21
Code 2 of 6ON<br />
%0 PO8 <br />
LCD25 ON<br />
%0 POC<br />
%0QO8<br />
<br />
Telepen ON<br />
%0 QO0<br />
% 0 TO8<br />
<br />
Reserved5 ON<br />
% 0 TO0<br />
% 0 RO8<br />
<br />
%0RO0<br />
Reserved6 ON<br />
% 0 SO8<br />
<br />
%0 SO0<br />
22
GS1 DataBar Omnidirectional ON<br />
% 0 UO8<br />
<br />
GS1 DataBar Limited ON<br />
% 0 UO0<br />
% 0VO8<br />
<br />
GS1 DataBar Expanded ON<br />
%0VO0<br />
% 0WO8<br />
<br />
Select All Bar Codes<br />
% 0WO0<br />
% 1 A/+<br />
23
5.2 UPC/EANI/JAN Parameters<br />
A Reading Type<br />
UPCA=EAN13 ON<br />
%0 AK4 UPCA=EAN13<br />
ISBN-1C Enable<br />
%0 B88<br />
ISSN Enable<br />
%0AK0<br />
ISBN-13 <br />
%0 B 8 0<br />
%0 B44 ISSN <br />
Decode with Supplement<br />
%0 B40<br />
%01O0 <br />
Expand UPC-E<br />
Enable<br />
%0BH1<br />
%0 1O8<br />
Expand UPC-E<br />
<br />
EAN8=EAN13<br />
Enable<br />
%0BH0<br />
%0 A O 8<br />
EAN8=EAN13<br />
<br />
GTIN Format<br />
Enable<br />
%0AO0<br />
%0 X 4 4<br />
GTIN Format<br />
<br />
%0 X40<br />
24
B> Supplemental Set Up<br />
<br />
%0B3 3<br />
Transmit 5 Code<br />
%0B3 2<br />
Transmit 2 Code<br />
%0B3 1<br />
Transmit 2&5 Code<br />
C> Check Digit Transmission<br />
UPC-A Check Digit<br />
Transmission <br />
%0B3 0<br />
%0 AI2<br />
OFF<br />
UPC-E Check Digit<br />
Transmission <br />
%0AI 0<br />
OFF<br />
%0 BI2<br />
EAN-8 Check Digit<br />
Transmission <br />
%0BI0<br />
OFF<br />
%0A88<br />
EAN-13 Check Digit<br />
Transmission <br />
%0A80<br />
OFF<br />
%0AH1<br />
ISSN Check Digit<br />
Transmission <br />
%0AH0<br />
OFF<br />
%0BK4<br />
% 0 B K 0<br />
25
5.3 Code 39 Parameters<br />
A> Type of Code<br />
<br />
%0EH1<br />
Full ASCII<br />
Italian Pharmacy/Code 32<br />
<br />
%0EH0<br />
%0E80 Italian Pharmacy/<br />
Code 32 ON<br />
%0E88<br />
B> Check Digit Transmission<br />
<br />
%0EM 2<br />
Calculate Check Digit<br />
& Transmit<br />
Calculate Check Digit<br />
& Not Transmit<br />
%0EM 6<br />
%0EM 4<br />
C> Output Start/Stop Character<br />
Enable<br />
<br />
%0E4 4<br />
26<br />
%0 E 4 0
D> Decode Asterisk<br />
Enable<br />
%0E2 2 < Disable><br />
E> Set Up Code Length<br />
%0E20<br />
To set the fixed length:<br />
1. Scan the “Begin“ label of the desired set.<br />
2. Go to the Decimal Value Tables in Appendix A,<br />
scan label(s) that represents the length to be<br />
read.<br />
3. Scan the “Complete“ label of the desired set.<br />
Repeat the steps 1 - 3 to set additional lengths.<br />
<br />
% 4 E1 +<br />
Fix Length (2 Sets Available)<br />
1. 1st Set Begin 2. Decimal Value<br />
(Appendix A)<br />
% 4E00 3. 1st Set Complete<br />
% 4E01<br />
1. 2nd Set Begin 2. Decimal Value<br />
(Appendix A)<br />
% 4E00 3. 2nd Set Complete<br />
% 4E02<br />
Minimum Length<br />
1. Begin 2. Decimal Value<br />
(Appendix A)<br />
3. Complete<br />
% 2 + - /<br />
27<br />
%2C0+
5.4 Code 128 Parameters<br />
A> Reading Type<br />
UCC/EA1-128<br />
Enable<br />
%0F4 4<br />
<br />
%0 F 2 2<br />
<br />
%0F1 1<br />
<br />
%0F40<br />
Disable‘]C1‘Code<br />
Format<br />
%0F20<br />
Disable Code128<br />
Group Separators(GS)<br />
B> Check Digit Transmission<br />
Do Not Calculate<br />
Check Digit<br />
%0F10<br />
%0F N1<br />
<br />
Calculate Check<br />
Digit & Transmit<br />
%0FN7<br />
%0FN5<br />
C> Append FNC2<br />
ON<br />
<br />
%0F8 8<br />
%0F80<br />
28
D> Set Up Code Length<br />
To set the fixed length<br />
1. Scan the “Begin“ label of the desired set.<br />
2. Go to the Decimal Value Tables in Appendix A<br />
scan label(s) that represents the length to be<br />
read.<br />
3. Scan the “Complete“ label of the desired set.<br />
Repeat the steps 1 - 3 to set additional lengths.<br />
<br />
% 4 E1 +<br />
Fix Length (2 Sets Available)<br />
1. 1st Set Begin 2. Decimal Value<br />
(Appendix A)<br />
% 4F0 0<br />
3. 1st Set Complete<br />
% 4F0 1<br />
1. 2nd Set Begin 2. Decimal Value<br />
(Appendix A)<br />
% 4 F00 3. 2nd Set Complete<br />
% 4F0 2<br />
Minimum Length<br />
1. Begin 2. Decimal Value<br />
(Appendix A)<br />
% 2 + - /<br />
3. Complete<br />
% 2 C1+<br />
29
5.5 Interleave 25 Parameters<br />
A> Check Digit Transmission<br />
<br />
% 0G N3<br />
Calculate Check Digit<br />
& Transmit<br />
%0GN7<br />
Calculate Check Digit<br />
& Not Transmit<br />
%0GN5<br />
B Set Up Number of Character<br />
<br />
%0G88 Odd<br />
%0G80<br />
C Brazilian Banking Code<br />
<br />
%0G40<br />
Enable<br />
%0G44<br />
30
D> Set 8p Code Length<br />
To set the fixed length:<br />
1. Scan the “Begin“ label of the desired set.<br />
2. Go to the Decimal Value Tables in Appendix A,<br />
scan label(s) that represents the length to be<br />
read.<br />
3. Scan the “Complete“ label of the desired set.<br />
Repeat the steps 1 - 3 to set additional lengths.<br />
<br />
% 4G1+<br />
Fix Length (2 Sets Available><br />
1.1st Set Beg<br />
2. Decimal Value<br />
(Appendix A)<br />
% 4G00<br />
3. 1st Set Complete<br />
% 4G01<br />
1.2nd Set Begin<br />
2. Decimal Value<br />
(Appendix A)<br />
% 4G00<br />
3. 2nd Set Complete<br />
% 4G0 2<br />
Minimum Length<br />
1. Begin 2. Decimal Value<br />
(Appendix A)<br />
% 2 + - /<br />
3. CompIete<br />
% 2C2 +<br />
31
5.6 IndustriaI 25 Parameters<br />
A> Reading type<br />
IATA25 Enable<br />
%0H44 <br />
B Check Digit Transmission<br />
%0 H40<br />
<br />
%0HN3<br />
Calculate Check Digit<br />
& Transmit<br />
%0HN7<br />
Calculate Check Digit<br />
& Not Transmit<br />
% 0 HN5<br />
C> Set Up Code Length<br />
To set the fixed length<br />
1. Scan the “Begin“ label of the desired set.<br />
2. Go the Decimal Value Tables in Appendix A,<br />
scan label(s) that represents the length to be<br />
read.<br />
3. Scan the “Complete“ label of the desired set.<br />
Repeat the steps 1 - 3 to set additional lengths.<br />
32
% 4 H1+<br />
Fix Length (2 Sets Available><br />
1. 1st Set Begin 2. Decimal Value<br />
(Appendix A)<br />
% 4 H00 3. 1st Set Complete<br />
% 4 H01<br />
1. 2nd Set Begin 2. Decimal Value<br />
(Appendix A)<br />
%4H00<br />
3. 2nd Set Complete<br />
%4 H02<br />
Minimum Length<br />
1. Begin 2. Decimal Value<br />
(Appendix A)<br />
%2 + - /<br />
3. Complete<br />
%2 C3 +<br />
33
5.7 Matrix 25 Parameters<br />
A> Check Digit Transmission<br />
<br />
% 0 I N 3<br />
Calculate Check Digit<br />
& Transmit<br />
Calculate Check Digit<br />
& Not Transmit<br />
% 0 I N 7<br />
% 0 I N 5<br />
B> Set Up Code Length<br />
To set the fixed length:<br />
1. Scan the “Begin“ label of the desired set.<br />
2. Go to the Decimal Value Tables in Appendix A,<br />
scan label(s) that represents the length to be<br />
read.<br />
3. Scan the “Complete“ label of the desired set.<br />
Repeat the steps 1 - 3 to set additional lengths.<br />
34
%4 I1 +<br />
Fix Length (2 Sets Available)<br />
1. 1st Set Begin 2. Decimal Value<br />
(Appendix A)<br />
% 4 I00<br />
3. 1st Set Complete<br />
% 4 I00<br />
1. 2nd Set Begin 2. Decimal Value<br />
(Appendix A)<br />
% 4 I00<br />
3. 2nd Set Complete<br />
%4 I0 2<br />
Minimum Length<br />
1. Begin 2. Decimal Value<br />
(Appendix A)<br />
%2 + - /<br />
3. Complete<br />
%2 C4 +<br />
35
5.8 CODA<strong>BAR</strong>/NW7 Parameters<br />
A> Set Up Start/Stop Characters Upon<br />
Transmission<br />
ON<br />
<br />
%C J H1<br />
%0 J H0<br />
B> Transmission Type of Start/Stop<br />
<br />
%0 4 V F<br />
<br />
A Start<br />
%0 4 FF<br />
%0 4 V1 A Stop<br />
B Start<br />
%0 4 F1<br />
%0 4 V2<br />
B Stop<br />
C Start<br />
%0 4 F 2<br />
%0 4 V 4<br />
C Stop<br />
D Start %0 4 F 4<br />
D Stop<br />
%0 4 V 8<br />
36<br />
% 0 4 F 8
C> Set Up Code Length<br />
To set the fixed length:<br />
1. Scan the “Begin“ label of the desired set.<br />
2. Go to the Decimal Value Tables in Appendix A,<br />
scan label(s) that represents the length to be<br />
read.<br />
3. Scan the “Complete“ label of the desired set.<br />
Repeat the steps 1 - 3 to set additional lengths.<br />
<br />
%4 J 1 +<br />
Fix Length (2 Sets Available)<br />
1. 1st Set Begin 2. Decimal Value<br />
(Appendix A)<br />
%4J00<br />
3. 1st Set Complete<br />
% 4J01<br />
1. 2nd Set Begin 2. Decimal Value<br />
(Appendix A)<br />
%4J00<br />
3. 2nd Set Complete<br />
%4J0 2<br />
Minimum Length<br />
1. Begin 2. Decimal Value<br />
(Appendix A)<br />
%2 + - /<br />
3. Complete<br />
37<br />
% 2C5+
5.9 Code 93 Parameters<br />
A> Check Digit Transmission<br />
<br />
%0 KN4<br />
Do Not Calculate<br />
Check Digit<br />
%0 KN3<br />
B> Set Up Code Length<br />
To set the fixed length:<br />
1. Scan the “Begin“ label of the desired set.<br />
2. Go to the Decimal Value Tables in Appendix A,<br />
scan label(s) that represents the length to be<br />
read.<br />
3. Scan the “Complete“ label of the desired set.<br />
Repeat the steps 1 - 3 to set additional lengths.<br />
38
% 4 K1 +<br />
Fix Length (2 Sets Available)<br />
1. 1st Set Begin 2. Decimal Value<br />
(Appendix A)<br />
% 4 K0 0<br />
3. 1st Set Complete<br />
% 4 K0 1<br />
1. 2nd Set Begin 2. Decimal Value<br />
(Appendix A)<br />
% 4 K0 0<br />
3. 2nd Set Complete<br />
% 4 K0 2<br />
Minimum Length<br />
1. Begin 2. Decimal Value<br />
(Appendix A)<br />
% 2 + - /<br />
3. Complete<br />
% 2 C6 +<br />
39
5.10 Code 11 Parameters<br />
A> Check Digit Transmission<br />
<br />
%0 L N 3 Calculate Check 1<br />
Digit & Transmit<br />
Calculate Check 2 Digits<br />
& Not Transmit<br />
%0 L N 7<br />
%0 L N 5<br />
Calculate Check 2<br />
Digits & Transmit<br />
Calculate Check 2 Digits<br />
& Not Transmit<br />
%0 L N 6<br />
% 0 L N 4<br />
B> Set Up Code Length<br />
To set the fixed length:<br />
1. Scan the “Begin“ label of the desired set.<br />
2. Go to the Decimal Value Tables in Appendix A,<br />
scan label(s) that represents the length to be<br />
read.<br />
3. Scan the “Complete“ label of the desired set.<br />
Repeat the steps 1 - 3 to set additional lengths.<br />
40
% 4L1+<br />
Fix Length (2 Sets Available)<br />
1. 1st Set Begin 2. Decimal Value<br />
(Appendix A)<br />
%4L00<br />
3. 1st Set Complete<br />
%4L01<br />
1. 2nd Set Begin 2. Decimal Value<br />
(Appendix A)<br />
%4L00 3. 2nd Set Complete<br />
%4L0 2<br />
Minimum Length<br />
1. Begin 2. Decimal Value<br />
(Appendix A)<br />
% 2 + - /<br />
3. Complete<br />
% 2C7 +<br />
41
5.11 MSI/PLESSEY Code Parameters<br />
A> Check Digit Transmission<br />
Do Not Calculate<br />
Check Digit<br />
% ONN3 Calculate Check Digit<br />
& Transmit<br />
<br />
% ONN7<br />
% ONN5<br />
B> Set Up Code Length<br />
To set the fixed length:<br />
1. Scan the “Begin“ label of the desired set.<br />
2. Go to the Decimal Value Tables in Appendix A,<br />
scan label(s) that represents the length to be<br />
read.<br />
3. Scan the “Complete“ label of the desired set.<br />
Repeat the steps 1 - 3 to set additional lengths.<br />
42
% 4 N1 +<br />
Fix Length (2 Sets Available)<br />
1. 1st Set Begin 2. DecimaI VaIue<br />
(Appendix A)<br />
% 4 N0 0<br />
3. 1st Set Complete<br />
% 4 N0 1<br />
1. 2nd Set Begin 2. DecimaI VaIue<br />
(Appendix A)<br />
% 4 N0 0 3. 2nd Set Complete<br />
% 4 N02<br />
Minimum Length<br />
1. Begin 2. Decimal Value<br />
(Appendix A)<br />
% 2 + - /<br />
3. Complete<br />
% 2 C9 +<br />
43
5.12 Code 2 of 6 Parameters<br />
A> Check Digit Transmission<br />
<br />
% 0 PN3<br />
Calculate Check<br />
Digit & Transmit<br />
% 0 P N 7<br />
Calculate Check Digit<br />
& Not Transmit<br />
% 0 P N 5<br />
B> Set Up Code Length<br />
To set the fixed length:<br />
1. San the “Begin“ label of the desired set.<br />
2. Go to the Decimal Value Tables in Appendix A,<br />
scan label(s) that represents the length to be<br />
read.<br />
3. Scan the “Complete“ label of the desired set.<br />
Repeat the steps 1 - 3 to set additional lengths.<br />
44
%4 P1+<br />
Fix Length (2 Sets Available)<br />
1. 1st Set Begin 2. Decimal Value<br />
(Appendix A)<br />
%4 P00<br />
3. 1st Set Complete<br />
%4 P01<br />
1. 2nd Set Begin 2. Decimal Value<br />
(Appendix A)<br />
%4 P00<br />
3. 2nd Set Complete<br />
% 4 P02<br />
Minimum Length<br />
1. Begin 2. Decimal Value<br />
(Appendix A)<br />
% 2 + - /<br />
3. Complete<br />
% 2 CB+<br />
45
5.13 LCD25 Parameters<br />
A> Check Digit Transmission<br />
<br />
% 0QN3<br />
Calculate Check Digit<br />
& Transmit<br />
Calculate Check<br />
Digit & Not Transmit<br />
%0 Q N 7<br />
% 0 Q N 5<br />
B> Setup Code length<br />
To set the fixed length:<br />
1. Scan the “Begin“ label of the desired set.<br />
2. Go to the Decimal Value Tables in Appendix A,<br />
scan label(s) that represents the length to be<br />
read.<br />
3. Scan the “Complete“ label of the desired set.<br />
Repeat the steps 1 - 3 to set additional lengths.<br />
46
% 4 Q1 +<br />
Fix Length (2 Sets Available)<br />
1. 1st Set Begin 2. Decimal Value<br />
(Appendix A)<br />
% 4Q00<br />
3. 1st Set Complete<br />
% 4Q01<br />
1. 2st Set Begin 2. Decimal Value<br />
(Appendix A)<br />
% 4Q00<br />
2. 2nt Set Complete<br />
% 4Q02<br />
Minimum Length<br />
1. Begin 2. Decimal Value<br />
(Appendix A)<br />
%2 + - /<br />
3. Complete<br />
% 2CC+<br />
47
5.14 Telepen Parameters<br />
48
%4T1+<br />
%4T00<br />
%4T01<br />
%4T02<br />
%2%+-/<br />
3. Complete<br />
%2CF+<br />
49
5.15 GS1 Databar<br />
A> GS1 DataBar Omnidirectionl<br />
<br />
%0UN7<br />
Don’t Transmit<br />
Check Digit<br />
<br />
%0UN5<br />
%0U88<br />
Transmit Symbology ID<br />
Don’t Transmit<br />
Application ID<br />
%0U80<br />
%0U44<br />
<br />
%0U40<br />
B> GS1 DataBar Limited Parameters<br />
<br />
%0VN7<br />
Don’t Transmit<br />
Check Digit<br />
%0VN5<br />
50
%0 V88<br />
Don‘t Transmit<br />
Application ID<br />
Transmit Symbology ID<br />
%0 V80<br />
%0 V4 4<br />
<br />
%0 V4 0<br />
C> GS1 DataBar Expanded Parameters<br />
Transmit Symbology ID<br />
%0 W4 4<br />
<br />
%0 W 4 0<br />
51
Ch.6 Miscellaneous Parameters<br />
6.1 Language Selection<br />
<br />
%0 Z V0<br />
UK English<br />
Italian<br />
%0 Z V1<br />
%0 Z V2<br />
Spanish<br />
French<br />
%0 Z V3<br />
%0 Z V4<br />
German<br />
Swedish<br />
%0 Z V5<br />
%0 Z V6<br />
Switzerland<br />
Hungarian<br />
%0 Z V7<br />
%0 Z V8<br />
Japanese<br />
%0 Z V9<br />
52
Belgium<br />
%0 Z V A<br />
Portuguese<br />
Denmark<br />
%0 Z V B<br />
%0 Z V C<br />
Netherlands<br />
Turkey<br />
%0 Z V D<br />
% 0 Z V E<br />
Reserved2<br />
%0 Z V F<br />
53
6.2 Bar Code ID<br />
ON<br />
%0 0 H1 <br />
%0 0 H0<br />
Default<br />
%9 13+<br />
With this function ON, a leading character will<br />
be added to the output string while scanning code,<br />
user may refer to the following table to know what<br />
kind of bar code is being scanned.<br />
Please refer to the table below for matching code<br />
ID of codes read in.<br />
Code Type ID Code Type ID<br />
UPC-A A UPC-E<br />
B<br />
EAN-8 C EAN-13 D<br />
<strong>CODE</strong> 39 E <strong>CODE</strong> 128 F<br />
Interleave 25 G Industrial 25 H<br />
Matrix 25 I Codabar/NW7 J<br />
<strong>CODE</strong> 93 K <strong>CODE</strong> 11 L<br />
China Postage M MSI/PLESSEY N<br />
Code 2 of 6 P LCD25 Q<br />
Telepen T GS1 DataBar U<br />
GS1 DataBar V Omnidirectional<br />
GS1 DataBar W<br />
User Define Code ID<br />
To set the code ID:<br />
1. Scan the symbologies label.<br />
2. Go to the ASCII Tables in Appendix B, scan label<br />
that represents the desired code ID.<br />
Note:<br />
User define code ID will override default value.<br />
Program will not check the conflict. It is possible to<br />
have more than two symbologies which have same<br />
code ID.<br />
54
UPC-A<br />
%9 1 A+ UPC-E<br />
EAN-13/JAN-13 %9 1 B+<br />
%9 1Y+ EAN-8/JAN-8<br />
<strong>CODE</strong> 39<br />
%9 1Z +<br />
%9 1 E+ <strong>CODE</strong> 128<br />
CODA<strong>BAR</strong>/NW7 %9 1 F +<br />
%9 1 J + Interleave 25<br />
Industrial 25<br />
%91G+<br />
% 9 1 H+<br />
Matrix 25<br />
<strong>CODE</strong> 93<br />
% 9 1 I +<br />
% 9 1 K+<br />
<strong>CODE</strong> 11<br />
ChinaPostage<br />
% 9 1 L +<br />
% 9 1 M+<br />
MSI/PLESSEY<br />
% 9 1 N+<br />
55
Code 2 of 6<br />
% 9 1 P+<br />
Telepen<br />
% 91T +<br />
LCD25<br />
% 9 1 Q+ GS1 DataBar<br />
Omnidirectional ON<br />
GS1 DataBar<br />
Limited ON<br />
% 9 1 U+<br />
% 91V+<br />
GS1 DataBar<br />
Expanded ON<br />
% 9 1W+<br />
Reserved5<br />
% 9 1R+<br />
Reserved6<br />
% 9 1 S+<br />
56
6.3 Reading Level<br />
Bar Equals High<br />
%0 3 I 2<br />
<br />
6.4 Accuracy<br />
%0 3 I 0<br />
<br />
%0 130<br />
2 Times (V-1040/LG700)<br />
3 Times %0 131<br />
%0 132<br />
4 Times<br />
6.5 Buzzer Beep Tone<br />
%0 133<br />
<br />
%0 1 J 3 Medium<br />
Low %0 1 J 2<br />
%0 1 J 1 Off<br />
%0 1 J 0<br />
57
6.6 Sensitivity of Continuous Reading Mode<br />
A> Quick Setting:<br />
<br />
%0 388<br />
Slow<br />
%0 3 8 0<br />
B> Same Code Delay Reading Interval<br />
Following code sequences represent the<br />
length of time before a barcode can be<br />
rescanned at continuous and flash reading<br />
mode. The value can be defined from 1-50<br />
and they represent 100ms to 5 seconds in<br />
100ms interval. Default value is 3 (0.3 seconds).<br />
To setup same code delay reading interval:<br />
1.Scan the "Begin" label<br />
2.Go the Decimal Value Tables in Appendix A,<br />
Scan label(s),that represents the same code<br />
delay reading interval. They are ranged form<br />
1-50.One step is represented 0.1second.So<br />
the interval is from 0.1 to 5 seconds.<br />
3.Scan the "Complete" label<br />
Repeat the steps 1-3 to set time out of same<br />
symbol<br />
1.Begin<br />
2.Decimal Value<br />
(1-50) (Appendix A)<br />
3.Complete<br />
58
6.7 Reverse Output Characters<br />
<br />
Enable<br />
%03H0 Enable<br />
6.8 Setup Deletion<br />
%03H1<br />
To setup the deletion of output characters:<br />
Repeat the steps 1 – 6 to set additional deletion.<br />
A> Select Deletion Set Number<br />
1. 1st Set<br />
%800+ 2. 2nd Set<br />
3.<br />
3rd Set<br />
%801+<br />
%802+ 4. 4th Set<br />
5.<br />
5th Set<br />
%803+<br />
%804+ 6. 6th Set<br />
%805+
B> SymboIogies Selection<br />
UPC-A<br />
% 8 1 A+ UPC-E<br />
EAN-13/JAN-13/ISBN-13 % 8 1 B+<br />
% 8 1 Y+<br />
EAN-8/JAN-8<br />
<strong>CODE</strong> 39<br />
% 8 1Z +<br />
% 8 1 E+<br />
<strong>CODE</strong> 128<br />
CODA<strong>BAR</strong>/N97<br />
% 8 1 F +<br />
% 8 1 J +<br />
Interleave 25<br />
Industrial 25<br />
% 8 1 G+<br />
% 8 1 H+<br />
Matrix 25<br />
<strong>CODE</strong> 93<br />
% 8 1 I +<br />
% 8 1 K+<br />
<strong>CODE</strong> 11<br />
China Postage<br />
% 8 1 L +<br />
% 8 1 M+<br />
MSI/PLESSEY<br />
% 8 1 N+<br />
60
Code 2 of 6<br />
Telepen<br />
%81T+<br />
GS1 DataBar<br />
Omnidirectional<br />
%81U+<br />
LCD25<br />
% 81P+<br />
%81 Q+<br />
GS1 DataBar<br />
Limited<br />
GS1 DataBar<br />
Expanded % 81V+<br />
% 81W+ All Codes<br />
None<br />
% 8 1 S+<br />
% 814+<br />
C> Character Position to be Deleted<br />
1. Decimal Value<br />
(Appendix A)<br />
2. Complete<br />
%8 20+<br />
D> Number of Characters to be Deleted<br />
1. Decimal Value<br />
(Appendix A)<br />
2. Complete<br />
%8 30+<br />
61
6.9 Setup Insertion<br />
To setup the insertion of output characters<br />
1. Scan the label of the desired set.<br />
2. Scan the label of the desired symbology.<br />
3. Go to the Decimal Value Tables in Appendix A, scan<br />
label(s) that represents the desired position to be<br />
inserted.<br />
4. Scan the “Complete“ label of “Character Position<br />
to be Inserted“.<br />
5. Go to the ASCII Tables in Appendix B or Function<br />
Key Tables in Appendix C, scan label(s) that<br />
represents the desired characters to be inserted.<br />
6. Scan the “Complete“ label of “Characters to be<br />
Inserted“.<br />
Repeat the steps 1 - 6 to set additional insertion.<br />
A> Select Insertion Set Number<br />
1. 1st Set<br />
% 5 00+ 2. 2nd Set<br />
3. 3rd Set<br />
% 5 01+<br />
% 5 02+ 4. 4th Set<br />
5. 5th Set % 5 03+<br />
% 5 04+<br />
6. 6th Set<br />
% 5 05+<br />
62
B> SymboIogies Selection<br />
UPC-A<br />
% 51A+ UPC-E<br />
EAN-13/JAN-13/ISBN-13 % 51B+<br />
% 51Y+<br />
EAN-8/JAN-8<br />
<strong>CODE</strong> 39<br />
% 51Z+<br />
% 51E+<br />
<strong>CODE</strong> 128<br />
CODA<strong>BAR</strong>/NW7<br />
% 51F+<br />
% 51J+<br />
Interleave 25<br />
Industrial 25<br />
% 5 1 G +<br />
% 5 1 H +<br />
Matrix 25<br />
<strong>CODE</strong> 93<br />
% 5 1 I +<br />
% 5 1 K +<br />
<strong>CODE</strong> 11<br />
China Postage<br />
% 5 1 L +<br />
% 5 1 M +<br />
MSI/PLESSEY<br />
63<br />
% 5 1 N +
Code 2 of 6<br />
Telepen<br />
%51P+<br />
% 51T +<br />
LCD255<br />
GS1 DataBar<br />
Omnidirectional<br />
% 5 1 Q +<br />
% 5 1 U+<br />
GS1 DataBar<br />
Limited<br />
GS1 DataBar<br />
Expanded % 51V+<br />
% 51W +<br />
All Codes<br />
None % 5 1 S+<br />
% 5 14+<br />
C> Character Position to be Inserted<br />
1. Decimal Value<br />
(Appendix A)<br />
2. Complete<br />
% 5 2 0 +<br />
D> Characters to be Inserted<br />
1. ASCII Table<br />
(Appendix B)<br />
2. Complete<br />
64<br />
% 5 3 0 +
6.10 Scanning Line Selection for Multi<br />
Parallel lines modes<br />
**Only for V-1040(BT)/LG700(BT)**<br />
<br />
Multiple Parallel Lines Only<br />
Single Line Only<br />
65
Ch7. Bluetooth Configuration<br />
BT Parameter Set Default<br />
7.1 Scanner Mode<br />
A>Setup SPP Master Mode<br />
<br />
Please follow the steps to setup the communication<br />
between the scanner and cradle.<br />
1) The scanner must scan “SPP Master Mode”<br />
barcode to set the scanner in master mode.<br />
2) Scan the Bluetooth MAC address code located<br />
on the bottom of the cradle.<br />
3) When the Bluetooth MAC address code was<br />
successfully scanned, scanner will sound 3 short<br />
beeps with green LED flash once.<br />
4) Wait approximately five seconds for completing<br />
the connection process with up-tone.<br />
5) If successful, blue LED of scanner will slow flash<br />
and the cradle will be continued on.<br />
B>Setup SPP Slave Mode<br />
SPP Slave Mode<br />
Please follow the below steps to setup the<br />
communication between the scanner and Bluetooth<br />
application device.<br />
1) The scanner must scan “SPP Slave Mode”<br />
barcode, to set the scanner in slave mode.<br />
2) When control the Bluetooth device to search the<br />
scanner, enter pin code (default 00:00:00) to<br />
setup comport.<br />
3) When scanner is successful connected, the<br />
scanner blue LED will also blink with up-tone.<br />
Blue LED will slowly flash to finish the setup.<br />
66
C>Setup HID Slave Mode<br />
HID Slave Mode<br />
To setup the communication between the scanner and<br />
Bluetooth HID profile application device, follow the<br />
steps.<br />
1) The scanner must scan “HID Slave Mode”<br />
barcode to set the scanner in HID slave mode.<br />
2) When control the Bluetooth device to search the<br />
scanner, enter pin code to setup pairing. You can<br />
scan number barcode on Appendix D, “Decimal<br />
Value Table II” number 0~9, to setup.<br />
3) When scanner is successful connected, scanner<br />
blue LED will also blink with up-tone. Blue LED<br />
will slowly flash to finish the setup.<br />
7.2 Out of Range<br />
When “Out of Range” function is enabled, and the<br />
scanner is working at out of transmission range, the<br />
scanned data will be stored to out-of-range memory.<br />
Memory size is approximately 25,000 sets of EAN13<br />
barcode type. The all stored data will be transmitted to<br />
device when the link is reconnected, and the all data<br />
stored in out-of-range memory will be cleared.<br />
<br />
Out of Range Disable<br />
67
7.3 Sleep Mode<br />
The scanner is equipped with sleep mode function<br />
to save battery energy when the scanner is not used<br />
for 1 minute or 10 minutes. During sleep mode, all<br />
the functions and connection will be halted until<br />
pressing the trigger button. The communication with<br />
cradle or Bluetooth device will be reconnected.<br />
Sleep Mode 1 min. ON<br />
Sleep Mode10 min. ON<br />
<br />
7.4 Batch Mode<br />
“***” means “Quick Setting Label”. The function can be<br />
executed directly by scanning barcode instead of doing the<br />
general programming process.<br />
Batch Mode On<br />
< Batch Mode Off><br />
*** Batch Data Read<br />
***Delete Last Data<br />
*** Batch Data Clear<br />
68
7.5 Firmware Version<br />
Display the firmware version of the scanner, please<br />
scan below barcode.<br />
Scanner Firmware Version<br />
Cradle Firmware Version<br />
Scanner MAC Address<br />
Cradle MAC Address<br />
69
Appendix A Decimal Value Table<br />
0<br />
1<br />
2<br />
3<br />
4<br />
5<br />
6<br />
7<br />
8<br />
9<br />
70
Appendix B ASCII Table<br />
NULL<br />
ETX<br />
ACK<br />
HT<br />
FF<br />
SI<br />
DC2<br />
NAK<br />
CAN<br />
ESC<br />
RS<br />
00<br />
03<br />
C6<br />
C9<br />
0C<br />
0 F<br />
12<br />
15<br />
18<br />
1B<br />
STX<br />
0 2<br />
ENQ<br />
BS<br />
VT<br />
SO<br />
DC1<br />
DC4<br />
ETB<br />
SUB<br />
GS<br />
0 5<br />
0 8<br />
0B<br />
0E<br />
11<br />
14<br />
17<br />
1A<br />
1D<br />
SOH<br />
EOT<br />
BEL<br />
LF<br />
CR<br />
DLE<br />
DC3<br />
SYN<br />
EM<br />
FS<br />
US<br />
0 1<br />
0 4<br />
0 7<br />
0A<br />
0D<br />
10<br />
13<br />
16<br />
19<br />
1C<br />
1E<br />
1F<br />
71
SPACE !<br />
2 0<br />
“<br />
21<br />
# 22<br />
$<br />
23<br />
%<br />
24<br />
&<br />
25<br />
‘<br />
26<br />
(<br />
27<br />
)<br />
28<br />
*<br />
29<br />
+<br />
2A<br />
,<br />
2B<br />
-<br />
2C<br />
.<br />
2D<br />
/<br />
2E<br />
0<br />
2F<br />
1<br />
30<br />
2<br />
31<br />
3<br />
32<br />
4<br />
33<br />
5<br />
34<br />
6<br />
35<br />
7<br />
36<br />
8<br />
37<br />
9<br />
38<br />
:<br />
39<br />
; 3A <<br />
3B<br />
=<br />
3C<br />
> 3D ?<br />
3E<br />
3F<br />
72
@<br />
A<br />
40<br />
B<br />
41<br />
C<br />
42<br />
D<br />
43<br />
E<br />
44<br />
F<br />
45<br />
G<br />
46<br />
H<br />
47<br />
I<br />
48<br />
J<br />
49<br />
K<br />
4A<br />
L<br />
4B<br />
M<br />
4C<br />
N<br />
4D<br />
O<br />
4E<br />
P<br />
4F<br />
Q<br />
5 0<br />
R<br />
51<br />
S<br />
52<br />
T<br />
5 3<br />
U<br />
54<br />
V<br />
55<br />
W<br />
56<br />
X<br />
57<br />
Y<br />
58<br />
Z<br />
59<br />
[ 5A \<br />
5B<br />
]<br />
5C<br />
^ 5D _<br />
5E<br />
5F<br />
73
`<br />
a<br />
c<br />
60<br />
b<br />
62<br />
d<br />
61<br />
63<br />
e<br />
64<br />
f<br />
65<br />
g<br />
66<br />
h<br />
67<br />
i<br />
68<br />
j<br />
69<br />
k<br />
6A<br />
l<br />
6B<br />
m<br />
6C<br />
n<br />
6D<br />
o<br />
6E<br />
p<br />
6F<br />
r<br />
71<br />
72<br />
t<br />
u<br />
74<br />
q<br />
s<br />
v<br />
7C<br />
73<br />
75<br />
w<br />
x<br />
77<br />
y<br />
76<br />
78<br />
z<br />
79<br />
{<br />
7A<br />
|<br />
7B<br />
}<br />
7C<br />
~ 7D<br />
DEL<br />
7E<br />
7F<br />
74
Appendix C Function Key Table<br />
F1<br />
F2<br />
C0<br />
F3<br />
C1<br />
F4<br />
C2<br />
F5<br />
C3<br />
F6<br />
C4<br />
F7<br />
C5<br />
F8<br />
C6<br />
F9<br />
C7<br />
F10<br />
C8<br />
F11<br />
C9<br />
F12<br />
CA<br />
Insert<br />
CB<br />
Delete<br />
CC<br />
Home<br />
CD<br />
Page Up<br />
CE<br />
Page Down<br />
CF<br />
End<br />
D0<br />
Left<br />
D1<br />
Right<br />
D2<br />
Up<br />
D3<br />
Down<br />
D4<br />
D5 75
Appendix D<br />
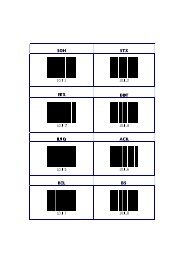
Decimal Value Table II<br />
0 1<br />
2 3<br />
4 5<br />
6 7<br />
8 9<br />
Enter<br />
76
All above programming are subject to change without<br />
notice.
%$+/0<br />
%$+/1<br />
%$+/2<br />
%$+/3<br />
%$+/4<br />
%$+/6<br />
%$+/5<br />
Ver3.9<br />
0145-85E00I1


