SIXNET Embedded Linux Development Kit (ELDK)
SIXNET Embedded Linux Development Kit (ELDK)
SIXNET Embedded Linux Development Kit (ELDK)

Create successful ePaper yourself
Turn your PDF publications into a flip-book with our unique Google optimized e-Paper software.
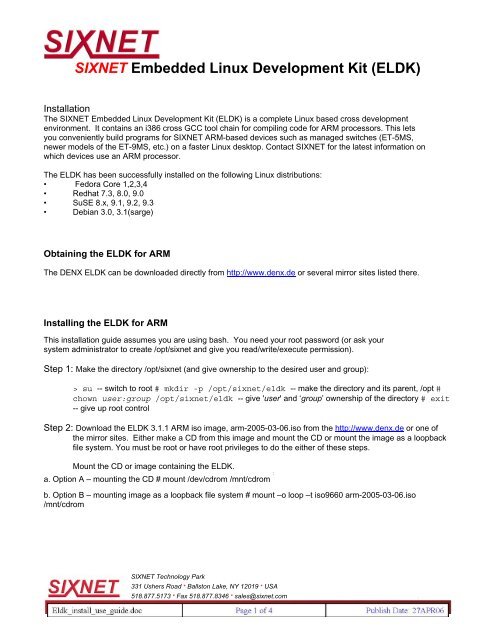
<strong>SIXNET</strong> <strong>Embedded</strong> <strong>Linux</strong> <strong>Development</strong> <strong>Kit</strong> (<strong>ELDK</strong>)<br />
Installation<br />
The <strong>SIXNET</strong> <strong>Embedded</strong> <strong>Linux</strong> <strong>Development</strong> <strong>Kit</strong> (<strong>ELDK</strong>) is a complete <strong>Linux</strong> based cross development<br />
environment. It contains an i386 cross GCC tool chain for compiling code for ARM processors. This lets<br />
you conveniently build programs for <strong>SIXNET</strong> ARM-based devices such as managed switches (ET-5MS,<br />
newer models of the ET-9MS, etc.) on a faster <strong>Linux</strong> desktop. Contact <strong>SIXNET</strong> for the latest information on<br />
which devices use an ARM processor.<br />
The <strong>ELDK</strong> has been successfully installed on the following <strong>Linux</strong> distributions:<br />
• Fedora Core 1,2,3,4<br />
• Redhat 7.3, 8.0, 9.0<br />
• SuSE 8.x, 9.1, 9.2, 9.3<br />
• Debian 3.0, 3.1(sarge)<br />
Obtaining the <strong>ELDK</strong> for ARM<br />
The DENX <strong>ELDK</strong> can be downloaded directly from http://www.denx.de or several mirror sites listed there.<br />
Installing the <strong>ELDK</strong> for ARM<br />
This installation guide assumes you are using bash. You need your root password (or ask your<br />
system administrator to create /opt/sixnet and give you read/write/execute permission).<br />
Step 1: Make the directory /opt/sixnet (and give ownership to the desired user and group):<br />
> su -- switch to root # mkdir -p /opt/sixnet/eldk -- make the directory and its parent, /opt #<br />
chown user:group /opt/sixnet/eldk -- give 'user' and ‘group’ ownership of the directory # exit<br />
-- give up root control<br />
Step 2: Download the <strong>ELDK</strong> 3.1.1 ARM iso image, arm-2005-03-06.iso from the http://www.denx.de or one of<br />
the mirror sites. Either make a CD from this image and mount the CD or mount the image as a loopback<br />
file system. You must be root or have root privileges to do the either of these steps.<br />
Mount the CD or image containing the <strong>ELDK</strong>.<br />
a. Option A – mounting the CD # mount /dev/cdrom /mnt/cdrom :<br />
b. Option B – mounting image as a loopback file system # mount –o loop –t iso9660 arm-2005-03-06.iso<br />
/mnt/cdrom<br />
<strong>SIXNET</strong> Technology Park<br />
331 Ushers Road • Ballston Lake, NY 12019 • USA<br />
518.877.5173 • Fax 518.877.8346 • sales@sixnet.com
<strong>SIXNET</strong> <strong>Embedded</strong> <strong>Linux</strong> <strong>Development</strong> <strong>Kit</strong> (<strong>ELDK</strong>)<br />
Step 3: Install the <strong>ELDK</strong> to the directory created in step 1.<br />
> cd /mnt/cdrom > ./install –d /opt/sixnet/eldk arm<br />
Note: you should now have an /opt/sixnet/eldk subdirectory with the cross-compiler, libraries and<br />
sample programs inside.<br />
Step 4: Add /opt/sixnet/eldk/bin and /opt/sixnet/eldk/usr/bin to PATH:<br />
In BASH this means adding the following line to ~/.bash_profile along with all the other PATH statements:<br />
PATH=/opt/sixnet/eldk/bin:/opt/sixnet/eldk/usr/bin:$PATH<br />
In csh: Setenv PATH /opt/sixnet/denx/bin:/opt/sixnet/denx/usr/bin:$(PATH)<br />
Use your favorite text editor (vi, emacs, pico). Alternately, as root you could edit /etc/profile to<br />
make this path global for all users. But it is probably better to do it for each user individually.<br />
Using the <strong>ELDK</strong><br />
Step 1: If ‘/opt/sixnet/bin’ is missing from the path, set it now. using bash: export<br />
PATH=/opt/sixnet/denx/bin:/opt/sixnet/denx/usr/bin:${PATH} using csh: setenv PATH<br />
/opt/sixnet/denx/bin:/opt/sixnet/denx/usr/bin:${PATH}<br />
Step 2: Compile the program:<br />
To compile a program, just use ‘arm-<strong>Linux</strong>-' pre-pended to the normal gcc commands. Example: armlinux-gcc<br />
file.c -o my_program -- turns 'file.c' source code into 'my_program' arm-linuxobjdump<br />
-d my_program -- dumps to the screen the code for 'my_program'<br />
You can also use make files in this fashion. You can find tutorials for make files on the Internet.<br />
Step 3: Load the program (my_program) to the <strong>SIXNET</strong> device (such as a Managed Switch) using ftp.<br />
:<br />
Using FTP and Telnet:<br />
Note: FTP and Telnet must first be enabled in the <strong>SIXNET</strong> device. To enable ftp and telnet you must<br />
install the package msdev.tgz. See the “<strong>Linux</strong> <strong>Development</strong> in Managed Switches” tech note to<br />
find instructions on installing this package.<br />
<strong>SIXNET</strong> Technology Park<br />
331 Ushers Road • Ballston Lake, NY 12019 • USA<br />
518.877.5173 • Fax 518.877.8346 • sales@sixnet.com
<strong>SIXNET</strong> <strong>Embedded</strong> <strong>Linux</strong> <strong>Development</strong> <strong>Kit</strong> (<strong>ELDK</strong>)<br />
Now run your favorite FTP client (or just type “ftp” at the command prompt) and open a connection to the <strong>SIXNET</strong><br />
device (see example below). Login is "anonymous". No password is necessary. (Hit .)<br />
Example: if your <strong>SIXNET</strong> device’s IP address is 10.2.0.1, you would type:<br />
ftp 10.1.0.1 [enter]anonymous [enter][enter]<br />
Next, 'cd' to the existing location you want to place 'my_program' (typically /usr/local/bin) and use<br />
'put' in binary mode to upload your file:<br />
bin [enter]cd /usr/local/bin [enter]put my_program [enter]quit [enter]<br />
Optionally, you can use the mkdir command and create a folder to upload your file into:<br />
mkdir my_folder [enter]bin [enter]cd /my_folder [enter]put my_program<br />
[enter]quit [enter]<br />
Step 4: Start your program (my_program) running in the <strong>SIXNET</strong> device.<br />
To start the program running, make a Telnet connection to the <strong>SIXNET</strong> device. (Note: Telnet<br />
must be enabled in the unit. See “Using FTP and Telnet” above.) The default login/password is<br />
'root'. There is no password. Then 'cd' to the directory where you placed the program:<br />
telnet 10.1.0.1 [enter]root [enter]cd /usr/local/bin [enter]<br />
Note: You may need to set the execute flag for the file:<br />
chmod +x my_program<br />
To run the program, type:<br />
./my_program<br />
:<br />
<strong>SIXNET</strong> Technology Park<br />
331 Ushers Road • Ballston Lake, NY 12019 • USA<br />
518.877.5173 • Fax 518.877.8346 • sales@sixnet.com
<strong>SIXNET</strong> <strong>Embedded</strong> <strong>Linux</strong> <strong>Development</strong> <strong>Kit</strong> (<strong>ELDK</strong>)<br />
Configuring the <strong>SIXNET</strong> device to start your program automatically:<br />
Your program, and the appropriate path to it, will need to be listed in a startup script file (.sh file) located in the<br />
/etc/user.d folder in the <strong>SIXNET</strong> device. Any startup script files found in the /etc/user.d folder will be launched<br />
automatically by the <strong>SIXNET</strong> device after powerup. For more information on the behavior of startup scripts, refer<br />
to the User Script Management technical note (user_script_management.pdf). The latest IPm and other <strong>Linux</strong>related<br />
technical notes are available for download from:<br />
http://www.sixnetio.com/html_files/ipm_tech_notes/ipm_technotes.htm<br />
Here is an example of a startup script file:<br />
#!/bin/sh/usr/local/bin/my_program<br />
Note: Your startup script file must be saved or resaved in such a manner that each line does not end with a<br />
carriage return. You can assure that the file is in the correct format by running Telnet and issuing<br />
the following commands on your file (called “myfile.sh” in this example):<br />
cd /etc/user.ddos2unix -u myfile.shchmod 755 myfile.sh<br />
If you experience problems such as:<br />
bash: ./my_program: Permission denied Use 'chmod +x my_program' to make the file executable.<br />
bash: ./my_program: cannot execute binary file The file is probably compiled for a desktop, not the IPm.<br />
Make sure you didn't use 'gcc' instead of<br />
'arm-linux-gcc'.<br />
:<br />
<strong>SIXNET</strong> Technology Park<br />
331 Ushers Road • Ballston Lake, NY 12019 • USA<br />
518.877.5173 • Fax 518.877.8346 • sales@sixnet.com