F&P ICON+ Premo CPAP Manual (PDF) - Direct Home Medical
F&P ICON+ Premo CPAP Manual (PDF) - Direct Home Medical
F&P ICON+ Premo CPAP Manual (PDF) - Direct Home Medical

Create successful ePaper yourself
Turn your PDF publications into a flip-book with our unique Google optimized e-Paper software.
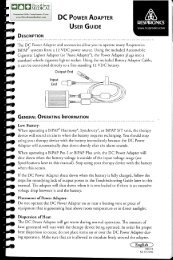
Use and Care <strong>Manual</strong>
BEFORE YOU START<br />
USA Federal Law restricts this device for sale by or on the order of a physician.<br />
Please read this guide before use and save instructions for future reference. Section 2 contains important safety<br />
information about the use of this device. The device is suitable for continuous operation.<br />
If you feel that your device or any accessories are not operating correctly, please contact your healthcare<br />
provider.<br />
NOTE: This device contains no serviceable parts. Refer all therapy and equipment queries to your healthcare<br />
provider.<br />
ENGLISH<br />
TABLE OF CONTENTS<br />
SECTION 1 - Quick Start Information<br />
1. Getting Started ........................................................................................................................................ A - 2<br />
2. F&P ICON Menu System .......................................................................................................................... A - 4<br />
Simple Mode<br />
(1) On/Off and Ramp ............................................................................................................................. A - 4<br />
(2) Humidity ........................................................................................................................................... A - 4<br />
(3) Sleep Data ........................................................................................................................................ A - 4<br />
Advanced Mode<br />
(4) On/Off and Ramp ............................................................................................................................. A - 5<br />
(5) Humidity ........................................................................................................................................... A - 5<br />
(6) Alarm On/Off ..................................................................................................................................... A - 5<br />
(7) Alarm Time ....................................................................................................................................... A - 6<br />
(8) Alarm Volume ................................................................................................................................... A - 6<br />
(9) Clock Time ........................................................................................................................................ A - 6<br />
(10) Brightness ........................................................................................................................................ A - 6<br />
(11) Sleep Data ........................................................................................................................................ A - 7<br />
(12) User Preferences ............................................................................................................................... A - 7<br />
(12i) Flight Mode ............................................................................................................................ A - 7<br />
(12ii) Display Pressure .................................................................................................................... A - 8<br />
(12iii) SensAwake On/Off ............................................................................................................. A - 8<br />
(12iv) Altitude Adjustment ............................................................................................................... A - 8<br />
3. Communicating Sleep Data ..................................................................................................................... A - 9<br />
4. Cleaning and Maintenance ...................................................................................................................... A - 10<br />
SECTION 2 - Other Product Information<br />
1. Intended Use ............................................................................................................................................ A - 11<br />
2. Symbol Definitions .................................................................................................................................. A - 11<br />
3. General Warnings and Cautions .............................................................................................................. A - 11<br />
3.1 Contraindications ............................................................................................................................. A - 11<br />
3.2 Warnings .......................................................................................................................................... A - 11<br />
3.3 Cautions ........................................................................................................................................... A - 13<br />
3.4 Replacement Parts ........................................................................................................................... A - 13<br />
4. Product Specifications ............................................................................................................................. A - 14<br />
5. F&P ICON Models and Features Matrix .................................................................................................... A - 16<br />
6. Device and Consumables Disposal Instructions....................................................................................... A - 16<br />
7. Warranty Statement.................................................................................................................................. A - 16<br />
8 Troubleshooting ....................................................................................................................................... A - 17<br />
A - 1
SECTION 1 - QUICK START INFORMATION<br />
1. GETTING STARTED<br />
1<br />
Place the device on a level surface, level with or below head height,<br />
to prevent water entering the tubing and the device enclosure.<br />
Plug the power cord into the power supply.<br />
2<br />
Remove the Chamber Lid and reach inside the Water Chamber with your<br />
fingers to take hold of the circular chamber grip. Pull the Water Chamber up<br />
and out of the device.<br />
CAUTION: Do not fill the Water Chamber while it is in the device; the Water<br />
Chamber should always be removed before filling.<br />
3<br />
Fill the Water Chamber with distilled water up to the maximum water line,<br />
which is marked on the side of the Water Chamber.<br />
CAUTION: Do not use the device without a Water Chamber. Do not use hot<br />
water, and water should be replaced before each use.<br />
IMPORTANT: The Water Chamber cannot be disassembled.<br />
4<br />
To replace the Water Chamber, the arrow on the circular chamber grip should<br />
face toward the Elbow.<br />
5<br />
Fit the Chamber Lid by lining up the large dot on the lid with the large<br />
dot on the top of the device . When the two symbols are aligned, apply<br />
downward force and turn clockwise to align the large dot with the small dot<br />
on the top of the device.<br />
NOTE: The Chamber Lid must be correctly fitted for optimal pressure delivery.<br />
A - 2
6<br />
When the Chamber Lid is locked into place, it should be flush, with no gaps<br />
for air to leak. It can now be used as a handle for lifting and carrying.<br />
7<br />
The Chamber Lid can be unlocked by twisting in an anti-clockwise direction,<br />
then removed by lifting away from the device.<br />
8<br />
Attach the breathing tube to the Elbow and connect to your mask.<br />
NOTE: Make sure the electrical connectors on the ThermoSmart Breathing<br />
Tube come together with the electrical connectors on the Elbow. Please refer to<br />
Oxygen Elbow user instructions if attaching an Oxygen Elbow.<br />
9<br />
From the <strong>Home</strong> Screen, a quick press to the SmartDial will start therapy. The<br />
<strong>Home</strong> Screen will light up and the clock-face of the Menu System will rotate to<br />
indicate therapy is starting. If Ramp is required, press the SmartDial again and<br />
hold for 3 seconds to activate. The Ramp symbol will display.<br />
Your device is now ready for use.<br />
10<br />
Turn the SmartDial to select and adjust settings. Refer to Section 1, Part 2 for<br />
a description of the Menu System.<br />
A - 3
2. F&P ICON MENU SYSTEM<br />
Simple Mode<br />
The Simple Mode is the default Menu System of the F&P ICON.*<br />
* Not in all models<br />
1<br />
1. On/Off and Ramp<br />
• A quick press to the SmartDial will start therapy.<br />
• To activate Ramp, press the SmartDial again and hold for<br />
3 seconds. The Ramp symbol will appear .<br />
2<br />
3<br />
2. Humidity<br />
• To control the level of humidity delivered to the mask, turn the<br />
SmartDial to select the desired humidity level from 0 (off) to 7<br />
(maximum). Press again to accept the change. For example, if the air is<br />
feeling too cold, increase the Humidity setting in increments of 1 or 2<br />
over 2 to 3 nights until you find the level that is comfortable.<br />
NOTE: The default setting is Humidity level 4. If using without water, or<br />
where low power consumption is required (e.g. for aircraft and trucking<br />
use), set the humidity level to 0.<br />
3. Sleep Data<br />
Press and hold the SmartDial for 7 seconds to access the Sleep Data<br />
setting. Turn the SmartDial to scroll through each of the following<br />
statistics:<br />
• Total Compliant Hours .<br />
• Average Compliant Hours over the last 30 nights . Press the<br />
SmartDial to access the average for the last 7 nights and again for the<br />
last night.<br />
• Percentage of nights used greater than 4 hours over the last 30 nights<br />
. Press the SmartDial to access the percentage for the last<br />
7 nights.<br />
• The number of nights elapsed since therapy commenced .<br />
• Check Sum .<br />
• Exit the Sleep Data setting.<br />
NOTE: A symbol will appear on the <strong>Home</strong> Screen once the compliance<br />
requirements have been achieved for the North America models only.<br />
A - 4
Advanced Mode<br />
The Advanced Mode is a menu system for users that provides additional features that are not<br />
available in Simple Mode. (Note: This Mode may be restricted by your healthcare provider.)<br />
4<br />
4. On/Off and Ramp<br />
• A quick press to the SmartDial will start therapy.<br />
• To activate Ramp, press the SmartDial again and hold for 3 seconds.<br />
The Ramp symbol will appear .<br />
5<br />
6<br />
5. Humidity<br />
• To control the level of humidity delivered to the mask, turn the<br />
SmartDial to the Humidity setting . Press to enter and turn the<br />
SmartDial again to select the desired humidity level from 0 (off) to 7<br />
(maximum). Press again to accept the change. For example, if the air is<br />
feeling too cold increase the Humidity setting in increments of 1 or 2<br />
over 2 to 3 nights until you find the level that is comfortable.<br />
NOTE: The default setting is Humidity level 4. If using without water, set<br />
the humidity level to 0. The humidity level cannot be adjusted if Flight<br />
Mode is set to ON.<br />
• The Boost control offers three additional levels (1, 2, 3) to optimize the<br />
Humidity setting. Press and hold the SmartDial for<br />
3 seconds while in the Humidity setting and the Boost symbols<br />
will appear. Turn to select low (1), medium (2) or high (3) and press<br />
again to accept the change.<br />
CAUTION: The Boost control should only be used in extreme situations<br />
when experiencing symptoms from your <strong>CPAP</strong> therapy. The default<br />
Boost setting (medium) will be suitable for most patients.<br />
6. Alarm On/Off<br />
• Turn the SmartDial to the Alarm setting , press to enter, then turn to<br />
select either On or Off . Press again to accept the change.<br />
• If Alarm On is chosen, turn the SmartDial to select either the default<br />
bell or the music symbol for AlarmTunes , and press again to<br />
accept the change.<br />
• Press the SmartDial once to snooze the Alarm for 10 minutes, twice to<br />
turn the Alarm off and a third time to discontinue therapy.<br />
NOTE: The AlarmTunes symbol is only visible when the InfoUSB is<br />
inserted. F&P Studio software is required to utilize the AlarmTunes<br />
feature.<br />
A - 5
F&P ICON MENU SYSTEM (continued)<br />
• If AlarmTunes is selected, turn the SmartDial to select the desired<br />
music track (from 1 to 5, depending on how many songs are loaded<br />
onto the InfoUSB), or if there are two or more songs loaded select<br />
Auto for shuffle and press again to accept the change. Refer to the F&P<br />
Studio CD for instructions to install and transfer music to your InfoUSB.<br />
7<br />
7. Alarm Time<br />
• Turn the SmartDial to the Alarm Time setting and press to enter.<br />
Turn the SmartDial to select the hour, press to accept. Turn to select<br />
the minutes and press again to accept the change.<br />
8<br />
9<br />
8. Alarm Volume<br />
• To adjust the volume of the alarm, turn the SmartDial to the Alarm<br />
Volume setting and press to enter. Turn the SmartDial to adjust the<br />
volume from quiet to loud and press again to accept the change.<br />
• To adjust the “click” volume of the SmartDial, press and hold for<br />
3 seconds while in the Alarm Volume setting. The volume symbol<br />
will be present, turn to select the desired volume and press again to<br />
accept the change.<br />
9. Clock Time<br />
• Turn the SmartDial to the Clock Time setting and press to enter. Turn<br />
the SmartDial to select the hour, minutes, 12-hr or 24-hr time. After<br />
each selection, press again to accept the change.<br />
10<br />
10. Brightness<br />
• Turn the SmartDial to the Brightness setting and press to enter. Turn<br />
the SmartDial to select the desired <strong>Home</strong> Screen Brightness and press<br />
to accept the change.<br />
• To adjust the Active Screen Brightness, press and hold the SmartDial<br />
for<br />
3 seconds and the device symbol will appear .<br />
NOTE: The <strong>Home</strong> Screen Brightness controls the level of light emitted<br />
by the LCD when the device is in “stand-by” or “pressure on” mode, and<br />
the Active Screen Brightness controls the level of light emitted by the<br />
LCD whilst navigating the Menu System.<br />
A - 6
11<br />
12<br />
11. Sleep Data<br />
Turn the SmartDial to the Sleep Data setting and press to enter.<br />
Alternatively, press and hold the SmartDial for 7 seconds. Turn the<br />
SmartDial to either the Centers for Medicare and Medicaid (CMS) report<br />
(US specific) or Patient report and press to enter.<br />
Turn the SmartDial to scroll through each of the following statistics:<br />
• Total Compliant Hours .<br />
• Average Compliant Hours over the last 30 nights . Press the<br />
SmartDial to access the average for the last 7 nights and again for the<br />
last night.<br />
• Percentage of nights used greater than 4 hours over the last 30 nights<br />
. Press the SmartDial to access the percentage for the last<br />
7 nights.<br />
• The number of nights elapsed since therapy commenced .<br />
• Check Sum .<br />
• AHI for last 30, 7, and 1 nights.<br />
• Leak for last 30, 7, and 1 nights.<br />
• 90 th percentile pressure for last 30, 7, and 1 nights.<br />
• SensAwake for last 30, 7, and 1 nights.<br />
• Exit the Sleep Data setting.<br />
NOTE: A symbol will appear on the <strong>Home</strong> Screen when the Sleep<br />
Data is within the compliance requirements. Once CMS requirements<br />
are met, the data within the CMS sub-menu will stop logging.<br />
• Exit the Sleep Data setting.<br />
12. SensAwake On/Off<br />
The SensAwake setting is available on both Auto and <strong>Premo</strong> models,<br />
but may be restricted by your healthcare provider. To adjust, turn the<br />
SmartDial to the SensAwake setting and press to enter. Turn the<br />
SmartDial to select On or Off and press again to accept the change.<br />
NOTE: This setting is not available with the Novo model.<br />
13<br />
13. User Preferences<br />
Turn the SmartDial to the User Preferences<br />
setting and press to enter.<br />
A - 7
F&P ICON MENU SYSTEM (continued)<br />
13i<br />
13ii<br />
13iii<br />
13i. Flight Mode<br />
Flight Mode allows for the device to operate on a reduced power (75<br />
W). Situations for use in this mode might include long-haul air flights<br />
and camping.<br />
NOTE: Humidity output will be significantly reduced in this mode and is<br />
not recommended for long-term use.<br />
• Turn the SmartDial to the Flight Mode setting and press to enter.<br />
Turn to select On or Off and press again to accept the change.<br />
• The Flight Mode symbol will be displayed continuously on the<br />
<strong>Home</strong> Screen while the Flight Mode is activated.<br />
NOTE: If you are intending to use your <strong>CPAP</strong> during flight, confirm<br />
with your airline for F&P ICON approval prior to travel.<br />
13ii. Display Pressure<br />
The Display Pressure setting provides two display options for the <strong>Home</strong><br />
Screen. Time is the default setting, however this can be changed to<br />
show pressure (cmH2O or hPa) if required.<br />
• Turn the SmartDial to the Display Pressure setting and press<br />
to enter. Turn to select On or Off and press again to accept the<br />
change.<br />
• If a different unit of measure is required, press the SmartDial and<br />
hold for 3 seconds. Turn the SmartDial to select either cmH2O or<br />
hPa and press again to accept the change.<br />
13iii. Altitude Adjustment<br />
• For models without automatic Altitude Adjustment, turn the<br />
SmartDial to the Altitude setting and press to enter. Turn the<br />
SmartDial to select the Altitude level from 0 to 9,000 ft and press to<br />
accept the change.<br />
• To choose meters, press the SmartDial and hold for 3 seconds while<br />
at the Altitude Adjustment setting. When the symbol starts to flash,<br />
turn to select meters and press to accept the change. Press the<br />
SmartDial again to enter the menu and turn to adjust to the desired<br />
Altitude level. Press again to accept the change.<br />
A - 8
3. COMMUNICATING SLEEP DATA<br />
• The USB Port houses the InfoUSB 2 which records patient compliance, efficacy and flow data. The<br />
InfoUSB 2 must be pushed completely into the USB Port until it clicks into place. To remove, push the<br />
end of the InfoUSB 2 for a spring-release retrieval.<br />
• The InfoUSB 2 is used to record sleep data from the device memory when it is inserted into the USB<br />
Port of the device and to store music for use with AlarmTunes. The InfoUSB 2 can be removed and<br />
sent to your healthcare provider to view and adjust settings. Changes will be automatically transferred<br />
when the InfoUSB 2 is next inserted into the USB port of the device.<br />
InfoUSB 2 Application*<br />
The InfoUSB 2 application is intended for home and clinical use as an accessory with the InfoUSB 2.<br />
How to install and use<br />
When requested by your healthcare provider, remove the InfoUSB 2 from your <strong>CPAP</strong> device and insert it<br />
into the USB port of a computer connected to the internet.<br />
The first time you insert the InfoUSB 2 into your computer, open Windows Explorer and navigate to the<br />
drive called FPHCARE.<br />
1. To install an InfoUSB detector on your computer, open this folder and double-click on the Setup.<br />
exe file. Follow the on-screen instructions. Upon successful installation of the InfoUSB 2 application,<br />
and upon detection of an InfoUSB 2 in your computer, InfoUSB 2 will automatically launch and the<br />
message below will appear.<br />
2. To run InfoUSB 2 application once, click on the InfoUSB application. InfoUSB 2 will automatically<br />
launch and the message below will appear.<br />
Enter your date of birth and click the Upload button.<br />
After the data has been uploaded successfully, a confirmation message will appear. Remove the<br />
InfoUSB 2 from your computer and place it back into your <strong>CPAP</strong> device. The <strong>CPAP</strong> device is now ready<br />
to be used for future logging. The InfoUSB detector only needs to be installed once. The next time you<br />
place the InfoUSB 2 into you computer, the start screen (image above) will appear automatically.<br />
* Not available in all countries.<br />
A - 9
4. CLEANING AND MAINTENANCE<br />
The device should be cleaned as follows:<br />
• Ensure the wall power outlet is turned off before unplugging the device from the power supply where<br />
appropriate.<br />
• Wipe the exterior and basin of the device (when the Water Chamber has been removed) with a clean,<br />
damp (not wet) cloth and mild dishwashing detergent. Do not use harsh abrasives, solvents or alcohol<br />
as these may damage the device.<br />
Daily<br />
Clean the Water Chamber, Chamber Lid and the Breathing Tube:<br />
• Unlock the Chamber Lid by twisting in the anti-clockwise direction and lift away from the device.<br />
• Wash the Chamber Lid in a mild dishwashing detergent, rinse thoroughly and dry.<br />
• Disconnect the Breathing Tube from the mask and the device Elbow.<br />
• Clean Breathing Tube with warm, soapy water, rinse thoroughly and hang with both ends pointing to<br />
the floor to dry.<br />
• Remove the Water Chamber and discard any remaining water. Do not remove the rubber seal on the<br />
chamber.<br />
• The one-piece Water Chamber should not be disassembled.<br />
• The Water Chamber can be washed in a domestic dishwashing machine, or cleaned and washed with<br />
mild dishwashing detergent, then rinsed and dried.<br />
Weekly<br />
Thoroughly clean the Water Chamber, Outlet Seal, and the Elbow:<br />
• Soak the inside of the Water Chamber for 10 minutes in a solution of one part white vinegar to two<br />
parts water.<br />
• Empty the vinegar solution and rinse the Water Chamber thoroughly with water.<br />
• Disconnect the Elbow from the device and the Outlet Seal can be easily removed by lightly pushing it<br />
from the back of the device into the Water Chamber housing.<br />
• The Elbow and the Outlet Seal can be cleaned and washed with mild dishwashing detergent, then<br />
rinsed and dried.<br />
• Please place the Outlet Seal before the Elbow in seal cavity when re-fitting.<br />
Air Filter<br />
The Air Filter is located on the rear of the device. The Air Filter ensures the air is filtered from particles<br />
and dust. To access, first pull out the Filter Grill, then pinch the gauze to remove. The Filter Grill must be<br />
pushed back into the cavity to keep the Air Filter in place.<br />
Replace the Air Filter when it becomes significantly discolored, at least once every three months or after<br />
1,000 hours’ worth of running time.<br />
NOTE: When replacing the Air Filter the black stripe should be on the inside.<br />
Breathing Tube and Water Chamber<br />
It is recommended that you inspect the device and all parts on a regular basis after cleaning. The<br />
equipment should be replaced immediately if there is any sign of cracking, discoloration or leaking.<br />
NOTE: The device is not serviceable and should not be disassembled. Refer all therapy and equipment<br />
queries to your healthcare provider.<br />
The device is intended for single or multiple use. Refer to the high level disinfection instructions in the<br />
Healthcare Provider <strong>Manual</strong> for cleaning between users.<br />
A - 10
SECTION 2 - OTHER PRODUCT INFORMATION<br />
1. INTENDED USE<br />
The device is for use on adult patients for the treatment of Obstructive Sleep Apnea (OSA).<br />
The device is for use in the home or sleep laboratory.<br />
2. SYMBOL DEFINITIONS<br />
Type BF Applied Part<br />
Alternating Current<br />
IPX2<br />
ATTENTION<br />
Consult accompanying documents<br />
Do not discard as regular rubbish<br />
Drip-proof<br />
Catalogue number<br />
Prescription only<br />
NZ Radio Interference C-tick mark<br />
UL Classified symbol<br />
Class II <strong>Medical</strong> Electrical Equipment<br />
Conforms with medical device<br />
directive 93/42/EEC<br />
Date of manufacture<br />
Serial number<br />
Authorized representative in the<br />
European community<br />
3. GENERAL WARNINGS AND CAUTIONS<br />
This manual refers to the F&P ICON series model as “the device”.<br />
The device treats OSA by delivering a flow of continuous positive airway pressure (<strong>CPAP</strong>) at a level<br />
prescribed by the physician, to splint open the airway and prevent airway collapse.<br />
3.1 Contraindications<br />
Research indicates that the following pre-existing conditions may contraindicate the use of positive<br />
pressure for some patients: pneumothorax, bullous lung disease, pneumocephalus, cerebrospinal<br />
fluid leak, recent cranial surgery or trauma, abnormalities of the cribriform plate, pathologically low<br />
blood pressure or in patients whose upper airways are bypassed.<br />
3.1.1 Precautions:<br />
• The safety and effectiveness of positive pressure has not been established in patients with<br />
respiratory failure or chronic obstructive pulmonary disease.<br />
• The safety and effectiveness of the auto-adjusting device has not been established in patients with<br />
congestive heart failure, obesity hypoventilation syndrome or central sleep apnea.<br />
3.1.2 Adverse effects:<br />
• Nosebleeds, ear and sinus discomfort may occur from the use of positive pressure therapy.<br />
3.2 Warnings<br />
3.2.1 To avoid electric shock from the device:<br />
• Only operate if the device, power cord and plug are dry and in good working order.<br />
• If water damage occurs to your device, disconnect the power cord, discontinue use immediately<br />
and seek advice from your healthcare provider.<br />
• Do not store or use the device where it can be pulled into water.<br />
A - 11
3.2.2 To avoid choking, or inhalation of a foreign object:<br />
• Never place any non-approved objects into any opening of the device, breathing tube or mask.<br />
• Ensure the recommended filter is fitted to the device before use.<br />
• Ensure the breathing tube is positioned so it can not become entangled with the body or furniture<br />
during sleep.<br />
3.2.3 To avoid burns:<br />
• Do not fill the Water Chamber with hot water.<br />
• After use, wait for the water to cool before touching, carrying or emptying the Water Chamber.<br />
• Do not touch the heater plate shortly after the device has been operating.<br />
• Do not touch the water in the Water Chamber while the device is operating.<br />
• Position the ThermoSmart Breathing Tube so it is uncovered and free from bedding or other<br />
materials.<br />
3.2.4 Other:<br />
• Ensure the device is stored and operated on a surface, level or below head height, to prevent<br />
water entering the tubing and the device enclosure.<br />
• The device is not intended to be used as a life-supporting device.<br />
• The device complies with the electromagnetic compatibility requirements of IEC60601-1-2. In<br />
certain circumstances the device may affect or be affected by nearby portable mobile radio<br />
frequency communication equipment, due to the effects of electromagnetic interference. If this<br />
should happen, try moving your device or the location of the equipment causing interference, or<br />
alternatively consult your healthcare provider.<br />
• Do not block the flow through the device as this may cause the motor to overheat.<br />
• Do not block the exhaust flow holes of the mask as they are designed to allow a continuous flow<br />
of air out of the mask and if blocked CO 2 re-breathing may occur.<br />
• In the event of power failure, machine malfunction or if the device is turned off, remove the mask<br />
immediately as the flow through the mask may be insufficient to clear all exhaled gas, which may<br />
result in CO 2 re-breathing occuring that can be hazardous.<br />
• The device is not suitable for use in environments with flammable anaesthetic mixtures with air or<br />
oxygen or nitrous oxide.<br />
3.2.5 To ensure optimal therapy:<br />
• Do not operate the device, Water Chamber, or breathing tube if it is dropped, damaged or not<br />
working as intended.<br />
• Pressure adjustments should only be made by a qualified healthcare provider.<br />
• Only use masks, breathing tubes and accessories compliant with ISO 17510-2, distributed for use<br />
with this device, and recommended by Fisher & Paykel Healthcare or your healthcare provider.<br />
• It is recommended to only use the parts that have been specified in this manual.<br />
• On models without automatic altitude adjustment, ensure the altitude level is manually adjusted to<br />
ensure optimal pressure delivery.<br />
• Do not use the device without a Water Chamber in place.<br />
• If using the device without water in the Water Chamber it is recommended to set the humidity level<br />
to zero.<br />
• It is recommended to use distilled water to extend the life of your Water Chamber. This is likely to<br />
prevent residue buildup on the chamber base.<br />
A - 12
3.2.6 Using supplemental oxygen with your device:<br />
• Supplemental oxygen can be administered at the mask end of the breathing tube or with an Oxygen<br />
Elbow.<br />
NOTE: At a fixed flow rate of supplemental oxygen the inhaled oxygen concentration will vary,<br />
depending on the pressure settings, the patient’s breathing pattern, mask selection and leak rate.<br />
• Ensure there is no obstruction downstream of the Oxygen Port as this can affect the delivered<br />
oxygen concentration.<br />
• Oxygen concentration should be measured at the point of delivery to the patient.<br />
• Avoid the risk of fire:<br />
• Only use oxygen when the device is operating. If the device is turned off it can lead to<br />
accumulation of oxygen within the device.<br />
• Ensure adequate ventilation is provided around the device.<br />
• Remove any source of ignition: such as cigarettes, an open flame, or materials which burn or<br />
ignite easily at high oxygen concentration.<br />
• Keep oxygen regulators, cylinder valves, tubing, connections and all other oxygen equipment<br />
away from oil, grease or greasy substances. Spontaneous and violent ignition may occur if these<br />
substances come into contact with oxygen under pressure.<br />
3.3 Cautions<br />
3.3.1 To prevent water damage to the device:<br />
• Remove the Water Chamber from the device before filling.<br />
• Do not fill the Water Chamber above the maximum level.<br />
• Do not move, carry, transport or store the device with water in the Water Chamber.<br />
3.3.2 General:<br />
• Only use the device within the Operating Conditions specified in Section 2, Part 4.<br />
• Position the device so the power cord connection to the power supply is easily accessible.<br />
• Only clean the device in accordance with the cleaning instructions set out in the Cleaning and<br />
Maintenance Section (Section 1, Part 4) and only when it is disconnected from the power supply.<br />
• Only use the F&P ICON InfoUSB with the device. Use of any other USB drives may cause data<br />
corruption. Do not attempt to change the directories or view the data without software distributed<br />
or designed for use with the F&P ICON.<br />
3.4 Replacement Parts<br />
900ICON200<br />
900ICON202<br />
900ICON203<br />
900ICON112<br />
900ICON204<br />
900ICON205<br />
900ICON206<br />
900ICON208<br />
Water Chamber (10 pack)<br />
InfoUSB 2 (5 pack)<br />
InfoUSB 2* (5 pack)<br />
F&P Studio CD<br />
Elbow<br />
Oxygen Elbow<br />
Outlet Seal<br />
ThermoSmart Breathing Tube**<br />
* US and Canada only<br />
** Applied Parts – to fit 0.86 inches (22 mm) Conical Connector<br />
900HC221<br />
900ICON214<br />
900ICON216<br />
900ICON217<br />
900ICON218<br />
900ICON503<br />
900ICON213<br />
900ICON315<br />
Standard Breathing Tube**<br />
Silver Gloss Lid<br />
Matt Gray Lid<br />
Charcoal Lid<br />
Filter Grill<br />
Air Filter (single pack)<br />
Air Filter (2 pack)<br />
Carry-bag<br />
A - 13
4. PRODUCT SPECIFICATIONS<br />
DIMENSIONS:<br />
WEIGHT:<br />
PERFORMANCE:<br />
Maximum Flow Rates<br />
6.3 H x 6.7 W x 8.7 D in. (160 H x 170 W x 220 D mm)<br />
4.8 lb (2.2 kg) Packed Weight 8.7 lb (4.0 kg)<br />
Pressure Range:<br />
4 to 20 cmH 2 O / hPa (in the unlikely event of fault conditions, pressure may reach up<br />
to 29 cmH 2 O)<br />
<strong>CPAP</strong> Pressure Setting (cmH 2 O) 4 8 12 16 20<br />
Measured flow at patient connection port (Lpm)<br />
– Auto/<strong>Premo</strong><br />
Measured flow at patient connection port (Lpm)<br />
– Novo<br />
62.1 101.5 129.4 148.8 143.3<br />
46.7 52.4 56.5 60.6 64.5<br />
Dynamic Pressure Stability<br />
Test Pressure<br />
Breath Rate<br />
BPM<br />
Pmin<br />
Pmin<br />
1 ⁄4 (Pmax-Pmin)<br />
Pmin<br />
1 ⁄2 (Pmax-Pmin)<br />
Pmin<br />
3 ⁄4 (Pmax-Pmin)<br />
Pmin<br />
4.0 cmH 2<br />
O<br />
8.0 cmH 2<br />
O<br />
12.0 cmH 2<br />
O<br />
16.0 cmH 2<br />
O<br />
20.0 cmH 2<br />
O<br />
Novo<br />
Dynamic Pressure<br />
Stability (cmH 2 O)<br />
Auto/<strong>Premo</strong><br />
Dynamic Pressure<br />
Stability (cmH 2 O)<br />
10 0.76 0.84 0.90 0.99 1.04<br />
15 0.76 0.84 0.91 0.99 1.04<br />
20 1.16 1.22 1.28 1.38 1.44<br />
10 0.13 0.16 0.22 0.28 0.33<br />
15 0.27 0.26 0.31 0.37 0.44<br />
20 0.52 0.47 0.47 0.52 0.54<br />
THE PNEUMATIC FLOW PATH:<br />
Air flow<br />
Breathing tube<br />
Inlet filter<br />
Chamber<br />
Air flow<br />
continues<br />
in next<br />
figure<br />
Blower<br />
Inlet filter<br />
Air flow<br />
Blower<br />
Mask<br />
Continued from<br />
previous figure<br />
Air flow from rear of device to blower<br />
Air flow from blower to mask<br />
A - 14
Static Pressure Stability<br />
Auto/<strong>Premo</strong><br />
Novo<br />
Pressure change (cmH 2 O) at connection port at a<br />
pressure setting of 10 cmH 2 O<br />
0.2 0.4<br />
Humidity<br />
With ThermoSmart Breathing Tube<br />
Maximum Humidity<br />
Typical Humidity<br />
36 mg/L Body Temperature and Pressure Saturated (BTPS), 82% RH at 10 cmH 2 O, with<br />
Humidity level 7 and Boost level high.<br />
24 mg/L (BTPS), 90% RH at 10 cmH 2 O, with Humidity level 4 and Boost level medium.<br />
With Standard Breathing Tube<br />
Maximum Humidity<br />
Typical Humidity<br />
32.24 mg/L, 73.21% RH at 10 cmH 2 O with Humidity level 7 and Boost level high.<br />
17.97 mg/L, 85.88% RH at 10 cmH 2 O with Humidity level 4 and Boost level medium.<br />
Electrical Ratings<br />
Rated Supply Voltage Rated Current Input Rated Supply Frequency<br />
100 - 115 V 1.27 A (1.43 A Max) 50 - 60 Hz/400 Hz<br />
220 - 240 V 1.07 A (1.21 A Max) 50 - 60 Hz<br />
GAS TEMPERATURES:<br />
NOISE LEVEL:<br />
WATER CHAMBER VOLUME:<br />
Maximum = 100 °F (38 °C)<br />
Sound Pressure Level < 29 dBA<br />
Average Sound Power Level < 37 dBA<br />
420 ml up to the maximum fill line<br />
STANDARDS COMPLIANCE: IEC60601-1: 1988 + A1 & A2; AS/NZS 3200.1.0: 1998<br />
EN60601-1: 1990 + A1-A2; UL60601-1: 2003<br />
DATA RECORDING:<br />
The InfoUSB records up to 365 days of summary efficacy data,<br />
7 days of detailed efficacy data (AHI, Leak), Pressure and Leak data<br />
(50 Hz), as well as cumulative data from first use. The device memory can<br />
also record up to 365 sessions of summary data or up to 200 sessions<br />
(400 hours) of detailed efficacy data.<br />
STORAGE AND TRANSPORT: The device should always be stored and transported within the following<br />
temperatures:<br />
Transport:<br />
14 to 140 °F (–10 °C to 60 °C)<br />
Storage:<br />
14 to 140 °F (–10 °C to 60 °C)<br />
CAUTION: Ensure water is emptied from the Water Chamber before traveling.<br />
OPERATING CONDITIONS: Ambient Temperature: 41 to 95 °F (5 to 35 °C)<br />
Humidity:<br />
15 to 95% Relative Humidity<br />
Altitude: 0 to 9,000 ft (0 to 3,000 m)<br />
NOTE: Above 4,500 ft (1,500 m) the maximum operating pressure will be<br />
reduced.<br />
A - 15
5. F&P ICON MODELS AND FEATURES MATRIX<br />
Performance Features Auto <strong>Premo</strong> Novo<br />
Fully Integrated • • •<br />
ThermoSmart Technology* • • •<br />
Auto-Adjusting Pressure<br />
•<br />
Efficacy Reporting • •<br />
Compliance Reporting • • •<br />
InfoUSB • • •<br />
SensAwake • •<br />
Proportional Ramp • • •<br />
Altitude Adjusting Automatic Automatic <strong>Manual</strong><br />
Leak Compensation • •<br />
Clock and AlarmTunes • • •<br />
InfoSmart Software • • •<br />
Plug Type Auto <strong>Premo</strong> Novo<br />
Australasia/China ICONAAA ICONPBA ICONNAA<br />
Europe ICONAAE/ICONAHE** ICONPAE**/ICONPBE/ICONPHE** ICONNAE<br />
United Kingdom/Hong Kong ICONAAK ICONPBK ICONNAK<br />
North America (model numbers with<br />
HT include heated breathing tube)<br />
ICONAAN/ICONAAN-HT ICONPBN/ICONPBN-HT ICONNAN/ICONNAN-HT<br />
Brazil ICONAAB ICONPBB ICONNAB<br />
Japan/Taiwan ICONAAJ ICONPBJ ICONNAJ<br />
* In some countries the ThermoSmart Breathing Tube needs to be purchased as an accessory to activate ThermoSmart Technology<br />
** Part may vary depending on country<br />
6. DEVICE AND CONSUMABLES DISPOSAL INSTRUCTIONS<br />
Device Disposal Instructions<br />
This device contains electronics. Please do not discard as regular rubbish.<br />
Dispose of electronics according to local guidelines.<br />
Consumable Disposal Instructions<br />
Place the mask, breathing tube and Water Chamber in a rubbish bag at the end of use and<br />
discard with normal rubbish.<br />
7. WARRANTY STATEMENT<br />
Fisher & Paykel Healthcare warrants that the <strong>CPAP</strong> (excluding consumable items forming part of the<br />
<strong>CPAP</strong> delivery system), when used in accordance with its instructions for use, shall be free from defects<br />
in workmanship and materials and will perform in accordance with Fisher & Paykel Healthcare’s official<br />
published product specifications for a period of 2 years from the date of purchase by the end user.<br />
This warranty is subject to the limitations and exceptions set out in detail in http://www.fphcare.com/osa/<br />
cpap-solutions/cpap-warranty.html.<br />
A - 16
8. TROUBLESHOOTING<br />
If you feel that your device is not operating correctly, please refer to the following suggestions. If the<br />
problem persists, please consult your healthcare provider. Do not attempt to repair the device yourself.<br />
Problem Possible Cause Solution<br />
I cannot turn the pressure<br />
on or off<br />
Insufficient air is delivered<br />
from the device<br />
“Error” is displayed on<br />
the <strong>Home</strong> Screen of the<br />
device<br />
AlarmTunes does not<br />
work<br />
The Heater-Plate and/or<br />
Water Chamber base is<br />
warm to the touch even<br />
though the device isn’t<br />
being used<br />
I think my Water Chamber<br />
is leaking because there<br />
is a build-up of water on<br />
the Heater-Plate<br />
I don’t think my<br />
Humidifier is working<br />
The InfoUSB symbol<br />
is constantly flashing on<br />
the <strong>Home</strong> Screen<br />
The device seems noisy;<br />
there is a hissing noise<br />
coming from the device<br />
The device is likely to be in the Advance<br />
Mode of the Menu System and the selection<br />
may not be at the 12 o’clock position.<br />
The Chamber Lid may not be correctly fitted<br />
to the device. Ensure the Water Chamber is<br />
in the device.<br />
An error may have been detected with the<br />
device.<br />
The Alarm may be set to “off”.<br />
The Alarm may be set to “buzzer”.<br />
F&P Studio software may not have been<br />
installed.<br />
The Alarm volume may not be set loud<br />
enough.<br />
The InfoUSB may not be inserted all the way<br />
into the USB port.<br />
The power supply is located directly<br />
underneath the Heater-Plate and in standby<br />
mode generates approximately 5 W of power,<br />
which causes the feeling of warmth. The<br />
Water Chamber is also fully insulated by the<br />
device which can cause heat to be retained.<br />
This is perfectly normal and should not cause<br />
concern.<br />
After therapy the device will cool, which may<br />
result in condensation forming inside the<br />
Water Chamber and pooling on the heater<br />
plate.<br />
Check the Humidity setting is above 1. Check<br />
your Water Chamber as it may be empty.<br />
The InfoUSB may not be inserted correctly.<br />
The Chamber Lid may not be properly fitted,<br />
causing air to leak.<br />
Turn the selection circle to the 12 o’clock<br />
position and press the SmartDial to turn the<br />
pressure on or off.<br />
Refer to Section 1, Part 1.<br />
Disconnect from power, then connect and<br />
re-start device. If error persists, record the<br />
number displayed and contact your healthcare<br />
provider for further instructions.<br />
Refer to Section 1, Part 2 for instructions on<br />
the Alarm Setting.<br />
Once F&P Studio software has been installed<br />
onto your computer and your favorite songs<br />
selected, download onto your InfoUSB and<br />
then ensure the InfoUSB is inserted into the<br />
USB Port of the device.<br />
If concerned about overheating, unplug the<br />
device from the power supply when it is not<br />
being used.<br />
Before each use remove the Water Chamber<br />
and dry the basin of the device with a cloth.<br />
If the water build-up becomes excessive,<br />
please contact your healthcare provider.<br />
Refer to Section 1, Part 2 for more<br />
information on the humidity controls.<br />
Take the InfoUSB completely out of the USB<br />
port, then insert again until it clicks.<br />
Remove the Chamber Lid and replace again<br />
so that it is completely flush with the device,<br />
by following the instructions set out in<br />
Section 1.<br />
A - 17
185046221 REV G 2012- 09 © 2012 Fisher & Paykel Healthcare Limited<br />
Manufacturer Fisher & Paykel Healthcare Ltd, 15 Maurice Paykel Place, East Tamaki, Auckland 2013, PO Box 14 348, Panmure,<br />
Auckland 1741, New Zealand Tel: +64 9 574 0100 Fax: +64 9 574 0158 Email: info@fphcare.co.nz Web: www.fphcare.com<br />
Australia Fisher & Paykel Healthcare Pty Limited, 36-40 New Street, PO Box 167, Ringwood, Melbourne, Victoria 3134, Australia<br />
Tel: +61 3 9879 5022 Fax: +61 3 9879 5232 Austria Tel: 0800 29 31 23 Fax: 0800 29 31 22 Benelux Tel: +31 40 216 3555<br />
Fax: +31 40 216 3554 China Tel: +86 20 3205 3486 Fax: +86 20 3205 2132 France Tel: +33 1 6446 5201 Fax: +33 1 6446 5221<br />
Germany Tel: +49 7181 98599 0 Fax: +49 7181 98599 66 India Tel: +91 80 4284 4000 Fax: +91 80 4123 6044<br />
Irish Republic Tel: 1800 409 011 Italy Tel: +39 06 7839 2939 Fax: +39 06 7814 7709 Japan Tel: +81 3 3661 7205<br />
Fax: +81 3 3661 7206 Northern Ireland Tel: 0800 132 189 Spain Tel: +34 902 013 346 Fax: +34 902 013 379<br />
Sweden Tel: +46 8 564 76 680 Fax: +46 8 36 63 10 Switzerland Tel: 0800 83 47 63 Fax: 0800 83 47 54<br />
Taiwan Tel: +886 2 8751 1739 Fax: +886 2 8751 5625 Turkey Fisher Paykel Sağlık Ürünleri Ticaret Limited Şirketi,<br />
P.O. Box 06371 Ostim, Alinteri Bulvari 1161/1 Sokak No. 12-14, Ankara, Turkey Tel: +90 312 354 34 12 Fax: +90 312 354 31 01<br />
UK Fisher & Paykel Healthcare Ltd, Unit 16, Cordwallis Park, Clivemont Road, Maidenhead, Berkshire SL6 7BU, UK<br />
Tel: +44 1628 626 136 Fax: +44 1628 626 146 USA/Canada Tel: 1800 446 3908 or +1 949 453 4000 Fax: +1 949 453 4001