AU Gets Connected with Zimbra Quick Start Guide - Aurora University
AU Gets Connected with Zimbra Quick Start Guide - Aurora University
AU Gets Connected with Zimbra Quick Start Guide - Aurora University
Create successful ePaper yourself
Turn your PDF publications into a flip-book with our unique Google optimized e-Paper software.
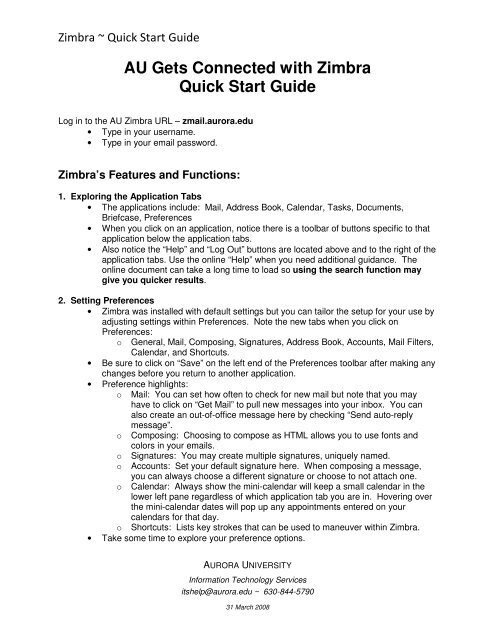
<strong>Zimbra</strong> ~ <strong>Quick</strong> <strong>Start</strong> <strong>Guide</strong><br />
<strong>AU</strong> <strong>Gets</strong> <strong>Connected</strong> <strong>with</strong> <strong>Zimbra</strong><br />
<strong>Quick</strong> <strong>Start</strong> <strong>Guide</strong><br />
Log in to the <strong>AU</strong> <strong>Zimbra</strong> URL – zmail.aurora.edu<br />
• Type in your username.<br />
• Type in your email password.<br />
<strong>Zimbra</strong>’s Features and Functions:<br />
1. Exploring the Application Tabs<br />
• The applications include: Mail, Address Book, Calendar, Tasks, Documents,<br />
Briefcase, Preferences<br />
• When you click on an application, notice there is a toolbar of buttons specific to that<br />
application below the application tabs.<br />
• Also notice the “Help” and “Log Out” buttons are located above and to the right of the<br />
application tabs. Use the online “Help” when you need additional guidance. The<br />
online document can take a long time to load so using the search function may<br />
give you quicker results.<br />
2. Setting Preferences<br />
• <strong>Zimbra</strong> was installed <strong>with</strong> default settings but you can tailor the setup for your use by<br />
adjusting settings <strong>with</strong>in Preferences. Note the new tabs when you click on<br />
Preferences:<br />
o General, Mail, Composing, Signatures, Address Book, Accounts, Mail Filters,<br />
Calendar, and Shortcuts.<br />
• Be sure to click on “Save” on the left end of the Preferences toolbar after making any<br />
changes before you return to another application.<br />
• Preference highlights:<br />
o Mail: You can set how often to check for new mail but note that you may<br />
have to click on “Get Mail” to pull new messages into your inbox. You can<br />
also create an out-of-office message here by checking “Send auto-reply<br />
message”.<br />
o Composing: Choosing to compose as HTML allows you to use fonts and<br />
colors in your emails.<br />
o Signatures: You may create multiple signatures, uniquely named.<br />
o Accounts: Set your default signature here. When composing a message,<br />
you can always choose a different signature or choose to not attach one.<br />
o Calendar: Always show the mini-calendar will keep a small calendar in the<br />
lower left pane regardless of which application tab you are in. Hovering over<br />
the mini-calendar dates will pop up any appointments entered on your<br />
calendars for that day.<br />
o Shortcuts: Lists key strokes that can be used to maneuver <strong>with</strong>in <strong>Zimbra</strong>.<br />
• Take some time to explore your preference options.<br />
<strong>AU</strong>RORA UNIVERSITY<br />
Information Technology Services<br />
itshelp@aurora.edu ~ 630-844-5790<br />
31 March 2008
<strong>Zimbra</strong> ~ <strong>Quick</strong> <strong>Start</strong> <strong>Guide</strong><br />
3. Using the Mail Application<br />
• Sort your emails by clicking on any of the column titles in your email content pane.<br />
• Reading Emails:<br />
o The number of messages displayed in your inbox is controlled <strong>with</strong>in<br />
Preferences. If you have more messages than those displayed, use the<br />
arrows on the right side of the toolbar to navigate to the next set.<br />
o Messages may be read in the small reading pane, if selected in the “View”<br />
menu or <strong>with</strong>in Preferences.<br />
o Double click on the message to read in an enlarged view or in a separate<br />
window if you’ve chosen to do so <strong>with</strong>in Preferences.<br />
o Note that there is also a ‘Launch in a separate window’ icon on the toolbar.<br />
• Printing Emails<br />
o Click on the Printer toolbar icon or right click on the message line in the inbox<br />
and select Print. The message opens in a large window along <strong>with</strong> a smaller<br />
printer dialog box. After printing, click on the “X” in the upper right-hand<br />
corner to close the message window.<br />
• Writing Email Messages<br />
o Reply/Reply All and Forward on the toolbar perform these respective<br />
functions.<br />
o Compose new messages by clicking on the “New” toolbar icon or by typing<br />
‘nm’ or ‘c’. Shift-c will open a separate compose window. This will allow you<br />
to move about your existing <strong>Zimbra</strong> applications while composing your email.<br />
o Begin typing the address and a search will begin. Alternatively, click on the<br />
“To:” button to search your address books.<br />
o Click on “Options” on the toolbar to show a BCC field.<br />
o Save unfinished emails in your Draft Folder by clicking on “Save Draft” on the<br />
toolbar.<br />
o Add attachments by clicking on the “Add Attachment” toolbar icon.<br />
o Check the spelling by using “Spell Check” on the toolbar.<br />
o Insert your signature by clicking on “Signature” on the toolbar (if not already<br />
set as the default in Preferences).<br />
4. Managing Address Books<br />
• You may have multiple Address Books. Right click on the Address Book Pane on<br />
the left-hand side of your screen to create a new one.<br />
• Add a new contact by clicking on “New” on the toolbar. Complete the information,<br />
including which address book, and click “Save”.<br />
• Create a Group Contact List by clicking the down arrow of the “New” toolbar icon<br />
and selecting “Contact Group”.<br />
• Edit contacts by clicking on “Edit” on the toolbar.<br />
• Save any email address in the header or body of an email message by right-clicking<br />
on the address and selecting Add to Contacts. Choose which address book you<br />
want to add this to.<br />
• The Global Address List (GAL) holds information for every <strong>AU</strong> student, faculty<br />
member and staff member and is used in searches. You may not edit it.<br />
<strong>AU</strong>RORA UNIVERSITY<br />
Information Technology Services<br />
itshelp@aurora.edu ~ 630-844-5790<br />
31 March 2008
<strong>Zimbra</strong> ~ <strong>Quick</strong> <strong>Start</strong> <strong>Guide</strong><br />
5. Working <strong>with</strong> the Calendar<br />
• Work <strong>with</strong> multiple calendars - Right click on the Calendar Pane on the left-hand side<br />
of your screen to:<br />
o Create a new calendar (and decide who will share it <strong>with</strong> you).<br />
o Link to a shared calendar<br />
o Check all calendars<br />
o Clear all calendars<br />
• Note: Departmental calendars should be created by Information Technology<br />
Services.<br />
• Select a calendar view (Day, Work Week, Week, Month or Schedule) on the toolbar.<br />
• Create a new appointment by clicking on New on the toolbar or by double-clicking on<br />
the calendar.<br />
• Respond to calendar invitations from others by clicking on your response at the top<br />
of the email message or <strong>with</strong>in the calendar by right-clicking on the calendar entry.<br />
6. Scheduling Meetings & Inviting Attendees<br />
• Create a new appointment. If using <strong>Quick</strong> Add, Click on More Details. Then enter<br />
attendee names in one of the following ways:<br />
o In the Attendees text field, type the email addresses, separating addresses<br />
by a semicolon (;). Names in your Contact list matching what you type are<br />
displayed as you type.<br />
o Go to the Find Attendees tab. Type a name and select which source to use,<br />
either Contacts or Global Address List. Select the names and press Add.<br />
When complete, click on the Appointment Details tab or the Schedule tab.<br />
o To see the free/busy schedules for attendees:<br />
• Click the Schedule tab.<br />
• As you enter attendees' names and email addresses, if attendees'<br />
schedules are known, availability appears in horizontal bars next to<br />
the names.<br />
• Return to the Appointment tab when the attendee's list is complete.<br />
• Note: Regardless of how you entered the attendees, you will probably want to<br />
check their schedules by clicking on Schedule.<br />
• Click Save<br />
7. Getting Organized <strong>with</strong> Folders and Tags<br />
• Save a message in a folder by clicking on the Move icon on the toolbar or by rightclicking<br />
on the message in the inbox and choosing Move.<br />
• Creating, renaming, moving, and deleting folders can be done <strong>with</strong> a right click on<br />
the Folder Pane on the left-hand side of your screen. Note that folders can have<br />
sub-folders.<br />
• Use Tags to classify messages and contacts.<br />
<strong>AU</strong>RORA UNIVERSITY<br />
Information Technology Services<br />
itshelp@aurora.edu ~ 630-844-5790<br />
31 March 2008
<strong>Zimbra</strong> ~ <strong>Quick</strong> <strong>Start</strong> <strong>Guide</strong><br />
8. Additional Assistance<br />
• Visit the Information Technology Services web pages at: http://www.aurora.edu/its<br />
o <strong>Zimbra</strong> email/calendar collaboration suite web page link<br />
o <strong>Zimbra</strong> <strong>Quick</strong> <strong>Start</strong> <strong>Guide</strong> (this document)<br />
o <strong>Zimbra</strong> FAQ<br />
o These documents will be updated continually as we learn of other helpful tips<br />
that are beneficial for our users.<br />
<strong>AU</strong>RORA UNIVERSITY<br />
Information Technology Services<br />
itshelp@aurora.edu ~ 630-844-5790<br />
31 March 2008


