2006 - Gran Fondo 2
2006 - Gran Fondo 2
2006 - Gran Fondo 2

Create successful ePaper yourself
Turn your PDF publications into a flip-book with our unique Google optimized e-Paper software.
© Marzocchi Suspension<br />
<strong>2006</strong> - <strong>Gran</strong> <strong>Fondo</strong> 2<br />
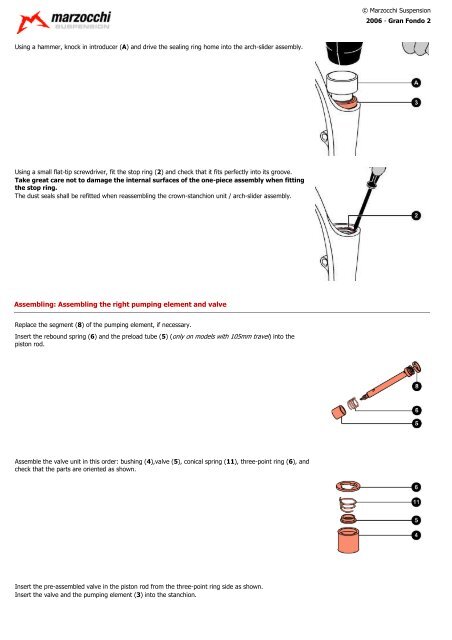
Using a hammer, knock in introducer (A) and drive the sealing ring home into the arch-slider assembly.<br />
Using a small flat-tip screwdriver, fit the stop ring (2) and check that it fits perfectly into its groove.<br />
Take great care not to damage the internal surfaces of the one-piece assembly when fitting<br />
the stop ring.<br />
The dust seals shall be refitted when reassembling the crown-stanchion unit / arch-slider assembly.<br />
Assembling: Assembling the right pumping element and valve<br />
Replace the segment (8) of the pumping element, if necessary.<br />
Insert the rebound spring (6) and the preload tube (5) (only on models with 105mm travel) into the<br />
piston rod.<br />
Assemble the valve unit in this order: bushing (4),valve (5), conical spring (11), three-point ring (6), and<br />
check that the parts are oriented as shown.<br />
Insert the pre-assembled valve in the piston rod from the three-point ring side as shown.<br />
Insert the valve and the pumping element (3) into the stanchion.