Download the SWALEDEK Information Brochure - Swalegroup
Download the SWALEDEK Information Brochure - Swalegroup
Download the SWALEDEK Information Brochure - Swalegroup
You also want an ePaper? Increase the reach of your titles
YUMPU automatically turns print PDFs into web optimized ePapers that Google loves.
Swaledek Assembly Instructions<br />
Gates are still to be installed along wall edge<br />
black gate<br />
900mm<br />
Use leg laid<br />
horizontal<br />
black gate<br />
900mm<br />
yellow gate<br />
1m<br />
fig 14<br />
red gate<br />
1.1m<br />
blue gate<br />
1.2m<br />
red gate<br />
1.1m<br />
fig 16<br />
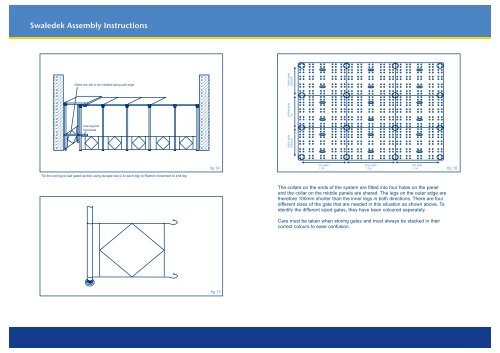
Tie <strong>the</strong> end leg to last gated section using bungee ties (2 to each leg) to Restrict movement to end leg.<br />
The collars on <strong>the</strong> ends of <strong>the</strong> system are fitted into four holes on <strong>the</strong> panel<br />
and <strong>the</strong> collar on <strong>the</strong> middle panels are shared. The legs on <strong>the</strong> outer edge are<br />
<strong>the</strong>refore 100mm shorter than <strong>the</strong> inner legs in both directions. There are four<br />
different sizes of <strong>the</strong> gate that are needed in this situation as shown above. To<br />
identify <strong>the</strong> different sized gates, <strong>the</strong>y have been coloured seperately.<br />
Care must be taken when storing gates and must always be stacked in <strong>the</strong>ir<br />
correct colours to ease confusion.<br />
fig 15


