Opening Instructions Slim - McCarthy Pools
Opening Instructions Slim - McCarthy Pools
Opening Instructions Slim - McCarthy Pools

You also want an ePaper? Increase the reach of your titles
YUMPU automatically turns print PDFs into web optimized ePapers that Google loves.
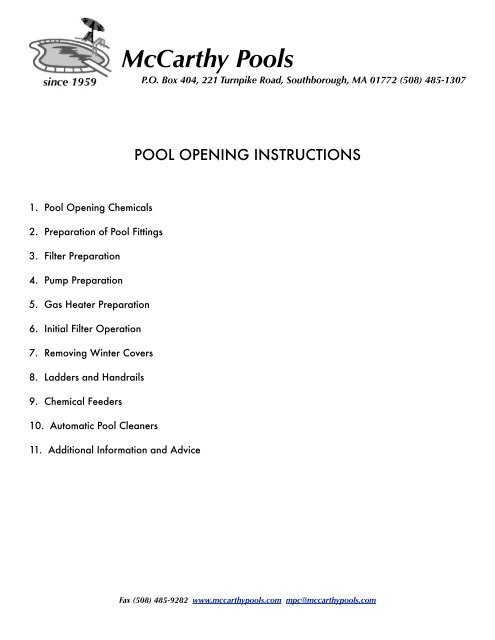
<strong>McCarthy</strong> <strong>Pools</strong><br />
P.O. Box 404, 221 Turnpike Road, Southborough, MA 01772 (508) 485-1307<br />
POOL OPENING INSTRUCTIONS<br />
1. Pool <strong>Opening</strong> Chemicals<br />
2. Preparation of Pool Fittings<br />
3. Filter Preparation<br />
4. Pump Preparation<br />
5. Gas Heater Preparation<br />
6. Initial Filter Operation<br />
7. Removing Winter Covers<br />
8. Ladders and Handrails<br />
9. Chemical Feeders<br />
10. Automatic Pool Cleaners<br />
11. Additional Information and Advice<br />
Fax (508) 485-9282 www.mccarthypools.com mpc@mccarthypools.com
1. POOL OPENING CHEMICALS<br />
Pool clean up in the Spring is a combination of oxidation and filtration. The key to<br />
clearing cloudy or green water is consistent filtration and chemical addition.<br />
Synergy Pool Care System, Granular Chlorine, Stabilized Chlorine Tablets, Chlorine Generators<br />
LIQUID SHOCK - 4 or more gallons are recommended. It is the safest way to superchlorinate<br />
the pool water.<br />
SEA KLEER - 1 or more quarts are recommended to prevent minerals in the pool<br />
water from causing green discolored water and staining on the liner.<br />
ALKALINITY INCREASER - At least 10 lbs. is recommended to help raise the Total<br />
Alkalinity of the pool water. ALKALINITY INCREASER helps to stabilizes the pH level and<br />
helps to prevent corrosion of metal pipes, pumps, heaters, etc...<br />
CHLORINE STABILIZER - Helps retain chlorine residual. Add to pool when water is<br />
clean and clear. Do not add until your water has been tested and the proper amount<br />
needed has been determined.<br />
ORDER IN WHICH TO ADD THE OPENING CHEMICALS<br />
1. Add SEA KLEER directly into pool water<br />
2. Broadcast ALKALINITY INCREASER into pool water<br />
3. Add 4 gallons of LIQUID SHOCK<br />
4. Add CHLORINE STABILIZER after water has been tested<br />
*If the pool water is relatively clean and clear and you can see the pool floor, it is recommended<br />
that you vacuum the pool to “Waste” before adding the pool opening chemicals. This procedure is<br />
described in your filter operation manual.<br />
**It is highly recommended that you bring a pool water sample to our Showroom for a complete<br />
water analysis test. We will be able to determine the correct amounts of CHLORINE STABILIZER,<br />
SYNERGY INITIATOR and/or SALT needed to properly balance your pool water. We will also<br />
ensure that your Total Alkalinity, Total Hardness, and pH are at the proper levels eliminating the<br />
potential of corrosive damage to metal pool components. You should have a your pool water<br />
levels tested at least once every three weeks.<br />
***Salt Generators should not be turned on until your salt readings are at the proper level.<br />
Fax (508) 485-9282 www.mccarthypools.com mpc@mccarthypools.com
2. PREPARATION OF POOL FITTINGS<br />
A. WALL SKIMMER - Remove the green “Gizzmo” or plug from skimmer. Reinstall<br />
Skimmer Basket or replace if necessary. Ensure that the Weir (skimmer door) moves<br />
freely.<br />
B. SIDE WALL SUCTION AND RETURN - Remove the plugs from the side wall fittings.<br />
Install a SAFETY GRATE in the side wall suction (if you have one) and a HYDROSWEEP<br />
into the side wall return fittings.<br />
3. FILTER PREPARATION<br />
A. SAND FILTERS<br />
1. Replace drain plug or cap on bottom of filter tank.<br />
2. Multiport Valves: install pressure gauge, move multiport selector<br />
handle to “Waste”, open Backwash Gate Valve<br />
3. Backwash Line - make sure that the backwash line has been reconnected or<br />
that your discharge hose is intact.<br />
B. SYSTEM 3 MODULAR MEDIA FILTER<br />
1. Replace 1 1/2” plug at bottom of filter tank<br />
2. Install both filter cartridges<br />
3. Install filter tank top and tighten mounting plates (hand-tight)<br />
*All Filter elements should be chemically cleaned prior to Spring opening. If this was not done the<br />
previous Fall, please do so before starting up the filter.<br />
4. PUMP PREPARATION<br />
A. Install two 1/4” drain plugs in pump housing (if they were removed in the fall)<br />
B. Place pump basket in pump housing<br />
C. Inspect pump cover oring and replace if stretched or worn<br />
D. Close the Main Suction and Skimmer Valves<br />
E. Fill the pump housing with water and screw on pump cover<br />
F. Turn on motor<br />
G. Slowly open the Main Suction Valve until completely open<br />
H. Let the motor run for 3 minutes or until fully primed, then open the<br />
Skimmer Valve (only if the pool water level is at the middle of the Skimmer<br />
Faceplate)<br />
*If the pump will not prime, check all plugs, petcocks, orings, and fitting connections at the pump<br />
housing and manifold. The pump must be air tight to pick up the prime.<br />
Fax (508) 485-9282 www.mccarthypools.com mpc@mccarthypools.com
5. GAS HEATER PREPARATION<br />
A. Replace all drain plugs<br />
B. Close all petcocks<br />
C. Reconnect copper tubing for the pressure switch (not necessary on RayPak heaters with<br />
capron headers)<br />
6. INITIAL FILTER OPERATION<br />
A. SAND FILTERS<br />
1. Shut off motor again and move the multiport selector handle to “Filter”<br />
position, close backwash valve, and turn on the motor<br />
2. There should be a strong flow of water returning into the pool from the<br />
Side wall Return fitting<br />
3. If the pool water is relatively clean and clear and you can see the pool floor, it is<br />
recommended that you vacuum the pool to “Waste” before adding the pool opening<br />
chemicals (refer to you filter operation manual)<br />
B. SYSTEM 3 MODULAR MEDIA FILTER<br />
1. When the pump if primed, there should be a strong flow of water returning<br />
into the pool from the Side wall Return fitting<br />
2. If the pool water is relatively clean and clear and you can see the pool floor, it is<br />
recommended that you vacuum the pool to “Waste” before adding the pool<br />
opening chemicals (refer to you filter operation manual)<br />
7. REMOVING THE WINTER COVER<br />
A. REMOVING A SOLID POOL COVER<br />
1. If possible, add 2 gallons of liquid shock to the water on top of the pool cover 48<br />
hours prior to cover removal<br />
2. Pump water off cover and into pool with either a sump pump or your pool<br />
pump<br />
3. Remove cover.<br />
4. Pool cover should be washed, dried, folded and stored away from rodents<br />
and insects (your cover warranty does not include damage incurred from<br />
improper storage)<br />
*If you remove the water from your winter cover by any other means than what is described<br />
above, be sure to have water running into the pool under the cover at the same time and at the<br />
same rate as the water is being removed from on top of the cover. If you have any questions,<br />
please call us at (508) 485-1307.<br />
Fax (508) 485-9282 www.mccarthypools.com mpc@mccarthypools.com
C. REMOVING A LOOP LOC COVER<br />
1. Remove any debris on top of Loop Loc cover<br />
2. To remove Loop Loc cover<br />
a. Insert Installation Rod over anchor bolt with heel of rod facing cover<br />
(see Figure 2 below)<br />
b. Pressing downward, rotate rod 180 degrees so that heel of rod is<br />
between anchor bolt and retaining ring (see Figure 3 below)<br />
c. Tilt rod slightly toward cover until retaining ring slides off of anchor<br />
bolt<br />
d. Release all the springs and remove cover from pool<br />
3. Pool cover should be washed, dried, folded and stored away from rodents<br />
and insects (your cover warranty does not include damage incurred from<br />
improper storage)<br />
4. Refer to “Pool <strong>Opening</strong> Chemicals” on page 2<br />
8. LADDERS AND HANDRAILS<br />
Figure 2 Figure 3<br />
A. LADDERS<br />
1. Replace the rubber bumpers at the bottom of the ladder<br />
2. Apply waterproof grease to the insides of the ladder anchors and to the<br />
outside ends of the ladder<br />
3. Insert ladder into the anchors and tighten anchor screws (Do not over<br />
tighten)<br />
B. HANDRAILS<br />
1. Apply waterproof grease to the insides of the handrail sockets and to the<br />
outside ends of the handrail<br />
2. Loosen wedge screw (soak in WD-40 if needed)<br />
3. Insert handrail into the sockets and tighten wedge screw (Do not over<br />
tighten)<br />
Fax (508) 485-9282 www.mccarthypools.com mpc@mccarthypools.com
9. OFF LINE CHEMICAL FEEDERS<br />
A. Reconnect the IN and OUT Lines to the Feeder and to the clamp assemblies<br />
on the pump plumbing<br />
B. Replace cover oring if needed<br />
C. We do not recommend the use of Stabilized Chlorine until the pool water is<br />
clean and clear; you should use a non-stabilized chlorine such as LIQUID SHOCK<br />
or GRANULAR CHLORINE to clear the pool water<br />
10. ADDITIONAL ADVICE AND INFORMATION<br />
A. SOLAR COVERS<br />
1. When the solar cover is not on the pool, it is best to keep it in a poly bag or out<br />
of the sunlight<br />
2. The warmer the water gets the greater the potential for algae; chemically<br />
treat the pool accordingly with an algaecide<br />
B. CHLORINE STORAGE<br />
1. Do not store chlorine near metal objects - chlorine vapors may cause metal<br />
objects to rust and pit<br />
2. Do not store chlorine near combustible materials<br />
C. HIGH WATER TABLE<br />
1. It is very important to keep the pool filled with water to counteract the<br />
pressure placed on the pool walls from the water table in the ground<br />
2. The proper water level is half way up the skimmer faceplate<br />
Fax (508) 485-9282 www.mccarthypools.com mpc@mccarthypools.com