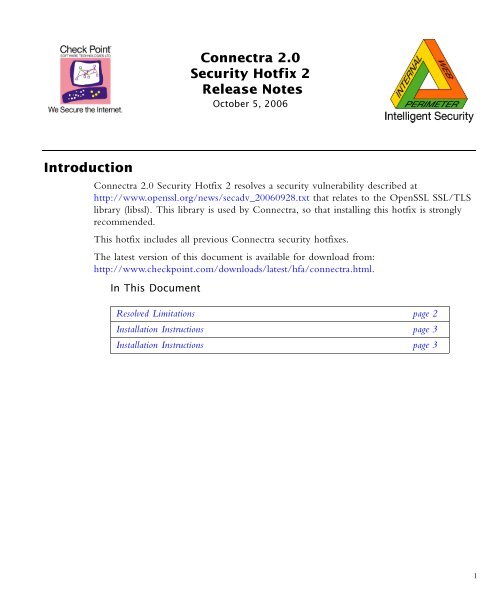
Connectra 2.0 Security Hotfix 2 Release Notes Introduction
Connectra 2.0 Security Hotfix 2 Release Notes Introduction
Connectra 2.0 Security Hotfix 2 Release Notes Introduction

You also want an ePaper? Increase the reach of your titles
YUMPU automatically turns print PDFs into web optimized ePapers that Google loves.
<strong>Introduction</strong><br />
<strong>Connectra</strong> <strong>2.0</strong><br />
<strong>Security</strong> <strong>Hotfix</strong> 2<br />
<strong>Release</strong> <strong>Notes</strong><br />
October 5, 2006<br />
<strong>Connectra</strong> <strong>2.0</strong> <strong>Security</strong> <strong>Hotfix</strong> 2 resolves a security vulnerability described at<br />
http://www.openssl.org/news/secadv_20060928.txt that relates to the OpenSSL SSL/TLS<br />
library (libssl). This library is used by <strong>Connectra</strong>, so that installing this hotfix is strongly<br />
recommended.<br />
This hotfix includes all previous <strong>Connectra</strong> security hotfixes.<br />
The latest version of this document is available for download from:<br />
http://www.checkpoint.com/downloads/latest/hfa/connectra.html.<br />
In This Document<br />
Resolved Limitations page 2<br />
Installation Instructions page 3<br />
Installation Instructions page 3<br />
1
Resolved Limitations<br />
Resolved in this <strong>Security</strong> <strong>Hotfix</strong><br />
Recent OpenSSL advisories reveal vulnerabilities in OpenSSL which may allow a malicious<br />
user to perpetrate a Denial of Service attack. <strong>Connectra</strong> uses the OpenSSL SSL/TLS library<br />
(libssl) and may therefore be affected. For more information, see<br />
http://www.openssl.org/news/secadv_20060928.txt.<br />
Also Resolved in Previous <strong>Security</strong> <strong>Hotfix</strong>es<br />
Recent OpenSSL advisories reveal vulnerabilities in OpenSSL which may allow forged<br />
certificates to be verified as correct. <strong>Connectra</strong> uses the OpenSSL SSL/TLS library (libssl)<br />
and may therefore be affected. For more information, see<br />
http://www.openssl.org/news/secadv_20060905.txt.<br />
Check Point <strong>Connectra</strong> <strong>2.0</strong> <strong>Security</strong> <strong>Hotfix</strong> 2 <strong>Release</strong> <strong>Notes</strong>. Last Update — October 5, 2006 2
Installation Instructions<br />
<strong>Connectra</strong> <strong>2.0</strong> <strong>Security</strong> <strong>Hotfix</strong> can only be installed over the following:<br />
• Version <strong>2.0</strong> <strong>Hotfix</strong> Accumalator (HFA_1)<br />
• Previous <strong>Connectra</strong> security hotfixes.<br />
It is installed using the command line. Before installing, it is recommended to preserve the<br />
previous configuration by taking a snapshot image.<br />
In This Section<br />
Preserving the Previous Configuration page 3<br />
Installation page 4<br />
Reverting to a Previous Version page 5<br />
Preserving the Previous Configuration<br />
Before installing the <strong>Hotfix</strong>, it is recommended that you create an image of the entire<br />
system using the snapshot tool, either locally or on a TFTP or SCP server. This feature<br />
greatly reduces the risks of configuration changes.<br />
With a snapshot image you can restore the installation to the state before the upgrade,<br />
using the revert command. At boot time you are given the option of booting from any of<br />
the available snapshots.<br />
To make it possible to uninstall this <strong>Hotfix</strong>, create a snapshot image before installation. You<br />
can then uninstall using the revert command.<br />
Running the snapshot command without any additional flags runs it in interactive mode<br />
that takes you through the process.<br />
You can also create a snapshot image using the command line syntax.<br />
Check Point <strong>Connectra</strong> <strong>2.0</strong> <strong>Security</strong> <strong>Hotfix</strong> 2 <strong>Release</strong> <strong>Notes</strong>. Last Update — October 5, 2006 3
Snapshot Command Syntax<br />
Installation<br />
snapshot [-h] [-d] [[--tftp ]<br />
|[--scp ]<br />
|[--file ]]<br />
TABLE 1-1 Snapshot command parameters<br />
Parameter meaning<br />
-h Obtain usage.<br />
-d Generate debug information.<br />
--tftp <br />
IP address and TFTP server from which the snapshot<br />
<br />
is made as well as the snapshot’s filename.<br />
--scp IP address of SCP server from which the snapshot is<br />
made, the username and password used to access the<br />
SCP Server, and the filename of the snapshot.<br />
--file When the snapshot is made locally, specify a filename.<br />
1 Download the <strong>Connectra</strong> <strong>2.0</strong> security hotfix 2 package from the Check Point<br />
Download Center https://downloads.checkpoint.com/dc/login.htm.<br />
2 Open an SSH connection to <strong>Connectra</strong>, or connect to it via a console.<br />
3 Log in to <strong>Connectra</strong> using your administrator username and password.<br />
4 Change to Expert mode by typing expert and supplying the password.<br />
5 Use FTP in bin mode to upload the package to <strong>Connectra</strong> to a temporary directory.<br />
6 Backup files to be replaced in the <strong>Hotfix</strong> by running the following command:<br />
gtar -cf ssl_hf_backup.tar $CVPNDIR/bin/openssl $CVPNDIR/lib/*.9.7<br />
A file name ssl_hf_backup.tar will be created in your current directory, which<br />
includes the files that will be replaced by the <strong>Hotfix</strong>. Save this file to a secure location<br />
to enable uninstall of the <strong>Hotfix</strong>.<br />
7 Stop all Check Point processes by running cpstop.<br />
8 Open the tgz package by running the following command:<br />
gtar -zxpvf ssl_HOTFIX2_<strong>2.0</strong>.tgz<br />
Check Point <strong>Connectra</strong> <strong>2.0</strong> <strong>Security</strong> <strong>Hotfix</strong> 2 <strong>Release</strong> <strong>Notes</strong>. Last Update — October 5, 2006 4
9 Copy the new files to the required locations by running the following commands from<br />
the temporary directory to which you extracted the files:<br />
cp lib*.0.9.7 $CVPNDIR/lib/<br />
cp openssl $CVPNDIR/bin/<br />
10 After the installation is complete, run cpstart to start Check Point processes.<br />
Reverting to a Previous Version<br />
Using the Revert Command<br />
If a SecurePlatform snapshot was created before the installation as recommended, reverting<br />
to the pre-security <strong>Hotfix</strong> state can be done using the revert command.<br />
Running the revert command without any additional flags runs it in interactive mode that<br />
takes you through the process of restoring the machine.<br />
You can also use the command line syntax.<br />
The revert command functionality can also be accessed from the Snapshot image<br />
management boot option of <strong>Connectra</strong>.<br />
Syntax<br />
revert [-h] [-d] [[--tftp ]<br />
|[--scp ]<br />
| [--file ]]<br />
TABLE 1-2 Revert command parameters<br />
Parameter meaning<br />
-h Obtain usage<br />
-d Generate debug information<br />
--tftp IP address and TFTP server from which the snapshot is<br />
<br />
rebooted, as well as the filename of the snapshot.<br />
--scp IP address of SCP server from which the snapshot is<br />
rebooted, the username and password used to access the<br />
<br />
SCP Server, and the filename of the snapshot.<br />
--file When the snapshot is made locally, specify a filename.<br />
Reverting from a Backup File<br />
Reverting the machine to the pre-<strong>Hotfix</strong> installation state can be done using the backup file<br />
(ssl_hf_backup.tar) created in step 6 of the “Installation” section.<br />
1 Stop all Check Point processes by running cpstop.<br />
Check Point <strong>Connectra</strong> <strong>2.0</strong> <strong>Security</strong> <strong>Hotfix</strong> 2 <strong>Release</strong> <strong>Notes</strong>. Last Update — October 5, 2006 5
2 Open the tgz package by running the following command:<br />
gtar -zxpvf ssl_hf_backup.tar<br />
3 Copy the new files to the required locations by running the following commands from<br />
the temporary directory to which you extracted the files:<br />
cp lib*.0.9.7 $CVPNDIR/lib/<br />
cp openssl $CVPNDIR/bin/<br />
4 After the installation is complete, run cpstart to start Check Point processes.<br />
Check Point <strong>Connectra</strong> <strong>2.0</strong> <strong>Security</strong> <strong>Hotfix</strong> 2 <strong>Release</strong> <strong>Notes</strong>. Last Update — October 5, 2006 6