

DEMO - 1977 Ford Truck Shop Manual - ForelPublishing.com
DEMO - 1977 Ford Truck Shop Manual - ForelPublishing.com
DEMO - 1977 Ford Truck Shop Manual - ForelPublishing.com

You also want an ePaper? Increase the reach of your titles
YUMPU automatically turns print PDFs into web optimized ePapers that Google loves.
Copyright © 2012, Forel Publishing Company, LLC, Woodbridge, Virginia<br />
All Rights Reserved. No part of this book may be used or reproduced in any manner whatsoever<br />
without written permission of Forel Publishing Company, LLC. For information write to Forel<br />
Publishing Company, LLC, 3999 Peregrine Ridge Ct., Woodbridge, VA 22192<br />
<strong>1977</strong> <strong>Ford</strong> <strong>Truck</strong> <strong>Shop</strong> <strong>Manual</strong><br />
EAN: 978-1-60371-085-5<br />
ISBN: 1-60371-085-X<br />
Forel Publishing Company, LLC<br />
3999 Peregrine Ridge Ct.<br />
Woodbridge, VA 22192<br />
Email address: sales@<strong>ForelPublishing</strong>.<strong>com</strong><br />
Website: http://www.<strong>ForelPublishing</strong>.<strong>com</strong><br />
This publication contains material that is reproduced and distributed under a license from <strong>Ford</strong><br />
Motor Company. No further reproduction or distribution of the <strong>Ford</strong> Motor Company material is<br />
allowed without the express written permission of <strong>Ford</strong> Motor Company.<br />
Note from the Publisher<br />
This product was created from the original <strong>Ford</strong> Motor Company’s publication. Every effort has<br />
been made to use the original scanned images, however, due to the condition of the material;<br />
some pages have been modified to remove imperfections.<br />
Disclaimer<br />
Although every effort was made to ensure the accuracy of this book, no representations or<br />
warranties of any kind are made concerning the accuracy, <strong>com</strong>pleteness or suitability of the<br />
information, either expressed or implied. As a result, the information contained within this book<br />
should be used as general information only. The author and Forel Publishing Company, LLC<br />
shall have neither liability nor responsibility to any person or entity with respect to any loss or<br />
damage caused, or alleged to be caused, directly or indirectly by the information contained in<br />
this book. Further, the publisher and author are not engaged in rendering legal or other<br />
professional services. If legal, mechanical, electrical, or other expert assistance is required, the<br />
services of a <strong>com</strong>petent professional should be sought.
GROUP AND PART INDEX (CONT'D)<br />
DRIVE SHAFT - Double Cardan-Type U-Joint 15-66-1<br />
- Single Snap Ring Type U-Joint 15-60-1<br />
- Single Bearing Cap and Bolt-Type and Bolted End Cap Type U-Joint 15-62-1<br />
FRONT DRIVING AXLE - Rockwell 15-33-1<br />
- 441F Dana 15-30-1<br />
- 44-7F Dana 15-31-1<br />
- 44-6CF - HD Dana , , 15-32-1<br />
GENERAL DRIVING AXLE AND DRIVE SHAFT SERViCE 15-01-1<br />
INTEGRAL CARRIER AXLE - Dana 15-05-1<br />
LIMITED SLIP DIFFERENTIAL - Dana 15-42-1<br />
REMOVABLE CARRIER AXLE - <strong>Ford</strong> 15-10-1<br />
SINGLE-SPEED, SINGLE REDUCTION AXLE - Eaton 15-15-1<br />
- Rockwell 15-16-1<br />
TANDEM AXLE - Eaton 15-50-1<br />
- Rockwell , 15-51-1<br />
TRACTION-LOK LIMITED SLIP DIFFERENTIAL - <strong>Ford</strong> 15-40-1<br />
2-SPEED DOUBLE REDUCTION AXLE - Eaton 15-20-1<br />
I VOLUME 1 I CHASSIS I<br />
CLARK - 280 Five-Speed Transmission 16-40-1<br />
- 380 Five-Speed Transmission 16-41-1<br />
- 390 Five-Speed Transmission 16-39-1<br />
CLUTCH 16-02-1<br />
DANA 20 FOUR WHEEL DRIVE TRANSFER CASE 16-80-1<br />
DANA 21 FOUR WHEEL DRIVE TRANSFER CASE 16-81-1<br />
FORD 3.03 THREE SPEED TRANSMISSION 16-11-1<br />
FULLER - RT-61 0 Ten-Speed Transmission 16-60-1<br />
- RT-613 Thirteen-Speed Transmission 16-63-1<br />
- RT-906 Six-Speed Transmission 16-22-1<br />
- RTF, RT-12510 and New Process Part Time RT-1110 and<br />
RTOF-910 Ten-Speed Transmission 16-61-1<br />
- RT-12513 Thirteen-Speed Transmission 16-65-1<br />
- RT-, RTF-, RTO-, RTOF-9513 Thirteen-Speed Transmission 16-62-1<br />
- T-905-A Five-Speed Transmission 16-46-1<br />
GENERAL CLUTCH SERViCE 16-01-1<br />
GENERAL MANUAL TRANSMISSION SERViCE 16-10-1<br />
HYDRAULIC CLUTCH LINKAGE 16-04-1<br />
MECHANICAL CLUTCH LINKAGE 16-03-1<br />
NEW PROCESS 203 FULL TIME TRANSFER CASE 16-85-1<br />
NEW PROCESS 205 TRANSFER CASE 16-84-1<br />
NEW PROCESS 435 FOUR-SPEED TRANSMISSION 16-25-1<br />
NEW PROCESS 532 FIVE-SPEED TRANSMISSION 16-26-1<br />
ROCKWELL T-223 - C11 Transfer Case 16-83-1<br />
RT-9509 - Nine-Speed Transmission 16-66-1<br />
SPICER - Auxiliary Transmission 16-70-1<br />
- RP-8516-3A Sixteen-Speed Compound Transmission 16-64-1<br />
- SST-10072A Transmission 16-56-1<br />
- SST-10102A Ten-Speed Transmission 16-59-1<br />
- CM-50 and CM-60 Five-Speed Transmission 16-42-1<br />
WARNER T18 FOUR-SPEED TRANSMiSSiON 16-23-1<br />
WARNER T19 FOUR-SPEED TRANSMiSSiON 16-24-1<br />
AT-540 AUTOMATIC TRANSMISSION 17-27-1<br />
C6 AUTOMATIC TRANSMiSSiON 17-10-1<br />
C4 AUTOMATIC TRANSMiSSiON 17-05-1<br />
FMX AUTOMATIC TRANSMiSSiON 17-15-1<br />
GENERAL AUTOMATIC TRANSMISSION SERViCE 17-01-1<br />
MT-SERIES AUTOMATIC TRANSMiSSiON 17-30-1<br />
SHIFT CONTROL LINKAGE 17-02-1<br />
NOISE, VIBRATION AND HARSHNESS DIAGNOSiS 18-00-1
foreword ...<br />
This <strong>1977</strong> <strong>Truck</strong> <strong>Shop</strong> <strong>Manual</strong> has been prepared to provide information<br />
covering normal service repairs and maintenance for <strong>1977</strong> <strong>Ford</strong> <strong>Truck</strong>s<br />
manufactured in the United States and Canada. It is divided into five<br />
volumes, each covering a specific major area:<br />
Volume 1 - Chassis<br />
Volume 2 - Engine<br />
Volumes 3 & 4 - Body and Electrical<br />
Volume 5 - Pre-Delivery, Maintenance and Lubrication.<br />
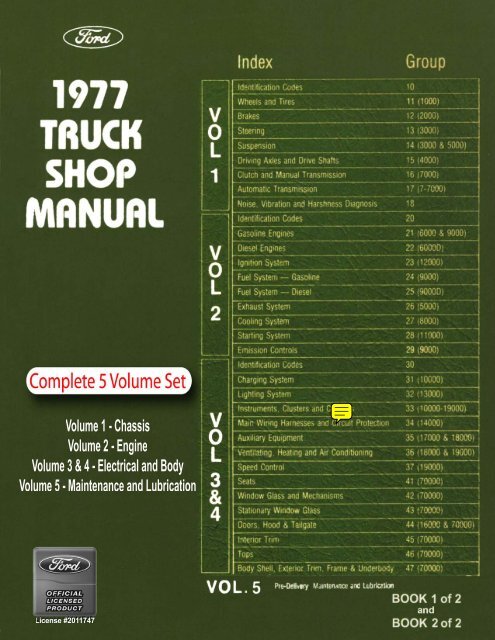
Information in each volume is divided into Groups covering a general<br />
system. The table of contents on the cover of each volume indicates the<br />
Group title, number, and volume in which each Group is located.<br />
For <strong>1977</strong>, the basic part numberfor <strong>com</strong>ponents covered in the Group is also<br />
included in parenthesis after the Group number.<br />
Example:<br />
Cooling System<br />
~<br />
General System Covered<br />
in Group<br />
Group 27<br />
~<br />
Group Number<br />
(8000)<br />
~<br />
Basic Part Number<br />
for Cooling System<br />
Components<br />
Some <strong>com</strong>ponents covered within a Group do not have the same basic part<br />
number. In these cases, more than one basic part number will appear on the<br />
Group index.<br />
Example: Gasoline Engines<br />
--------......-<br />
General System<br />
Covered in Group<br />
Group 21 (6000<br />
~<br />
Basic Part<br />
Number for<br />
Gasoline<br />
Engine<br />
Components<br />
& 9000)<br />
~<br />
Intake and<br />
Exhaust Manifold<br />
Basic Part<br />
Number Only<br />
For easy reference, information in each Group has been divided into smaller<br />
units or Parts. There is one Partfor each <strong>com</strong>ponent in the system, as well as<br />
a General Service Part in some Groups to cover procedures <strong>com</strong>mon to<br />
several <strong>com</strong>ponents within the Group. In general, each Part contains the<br />
Description, Operation, Diagnosis and Testing, Removal and Installation<br />
and Disassembly and Assembly procedures for the <strong>com</strong>ponent covered in<br />
the Part. Diagnosis Charts are also included in some Parts to help you<br />
systematically locate and correct problems encountered. In most cases,<br />
specifications are included at the end of each Part.
To aid in locating specific items in this manual, the index at the front ofeach<br />
volume provides an alphabetical listing, with page number, for all Parts in<br />
the volume. The tab locator on the right side ofthis index will help you find<br />
the first page of each Group.<br />
On the first page ofeach Group there is an index listing the Part title and Part<br />
number for each <strong>com</strong>ponent covered within the Group. The first page of<br />
each Part contains an index to locate service operations covered in that<br />
Part. This Group-Part breakdown is also indicated in the page number<br />
located at the top of each page.<br />
Example: 11-02-21 = (Group) 11 - (Part) 02 - (Page) 21<br />
Metric conversion tables have been included at the back ofeach volume to<br />
aid in converting specifications in this manual to the metric equivalent.<br />
The descriptions and specifications in this manual were in effect at the time<br />
this manual was approved for printing. <strong>Ford</strong> Motor Company reserves the<br />
right to discontinue models at any time, or change specifications or design<br />
without notice and without incurring obligation.<br />
..<br />
<strong>Ford</strong> Parts and Service Division<br />
Training and Publications Department
10-00-1 Identification Codes 10-00-1<br />
GENERAL INFORMAliON<br />
VEHICLE CERTIFICATION LABEL<br />
The Vehicle Certification Label (V.C.<br />
Label) is attached to the rear face of the<br />
driver's door or door pillar. The upper half<br />
of the label contains the name of the manufacturer,<br />
the month and year of manufacture<br />
and the certification statement. The<br />
V.C. Label also contains the Vehicle Identification<br />
Number.<br />
The remaining information codes on<br />
the V.c. Label are the same as the <strong>Truck</strong><br />
Rating Plate Codes (Fig. I). Vehicle<br />
codes shown on the <strong>Truck</strong> Rating Plate<br />
are explained in the following<br />
paragraphs.<br />
RATING PLATE<br />
Fig. I illustrates a typical <strong>Truck</strong><br />
Rating Plate. On light and medium cowl<br />
and windshield vehicles, the Rating Plate<br />
is mounted on the right side of the cowl<br />
top panel under the hood. On stripped<br />
Parcel Delivery vehicles, the rating plate<br />
is placed in an envelope stapled to the<br />
dunnage box. On Bronco models, the<br />
plate is mounted on the inside panel of<br />
the glove <strong>com</strong>partment door. On all other<br />
vehicles, the Rating Plate is mounted on<br />
the rear face of the left front door.<br />
VEHICLE IDENTIFICATION<br />
NUMBER<br />
(Vehicle Serial and Warranty)<br />
The identification number is the first<br />
line of numbers and letters appearing on<br />
the Rating Plate (Fig. 1). The first letter<br />
and two numbers indiate the truck series<br />
code. The letter following the truck series<br />
code designates the engine identification<br />
code. The letter following the engine<br />
identification code indicates the assembly<br />
plant at which the vehicle was built. The<br />
remaining numbers indicate the<br />
consecutive unit number (serial and warranty<br />
number). The charts that follow list<br />
the various vehicle identification number<br />
codes.<br />
VEHICLE OATA<br />
The Vehicle Data appears on the<br />
Rating Plate on the two lines following<br />
the identification number. The first three<br />
digits under W. B. designate the wheelbase<br />
in inches. The one or two letters under<br />
COLOR identify the exterior paint color<br />
(two letters designate a two-tone). The letter<br />
and three digits under TYPE/G.V.W. designate<br />
the truck model within a series and the<br />
gross vehicle weight rating. The letter and<br />
numerals under BODY designate the interior<br />
trim, seat and body type. (See Figs. 2,<br />
3 and 4.) The transmission installed in the<br />
vehicle is identified under TRANS by either<br />
a numeric or alphabetical code (if two symbols<br />
appear, the first identifies the auxiliary<br />
transmission, ifso equipped, and the second<br />
symbol identifies the main transmission). A<br />
letter and a number or two numbers under<br />
AXLE identify the rear axle ratio (when<br />
required, a letter is also stamped behind the<br />
rear axle code to identify the front axle<br />
capacity). The maximum gross vehicle<br />
weight in pounds is stamped under MAX.<br />
a.v.w.<br />
A two-digit number is stamped under<br />
D.S.O. to identify the district which<br />
MFD. BY FORD MOTOR CO. IN U.S.A.<br />
DATE: 08/76 GVWR 6200<br />
GAWR: FRONT 3000 REAR 5300<br />
THIS VEHICLE CONFORMS TO<br />
ALL APPLICABLE FEDERAL MOTOR<br />
VEHICLE SAFETY STANDARDS IN<br />
EFFECT ON THE DATE OF<br />
MANUFACTURE SHOWN ABOVE<br />
F 25 Y L 000 000 TRUCK~<br />
VEH. IDENT. Np. I TYPE<br />
BODY I COLOR I TRIM I TRANSI AXLE1 DSO<br />
VEHICLE CERTIFICATION LABEL<br />
CD TRUCK SERIES CODE ®<br />
~<br />
WHEEL BASE<br />
ENGINE CODE (j) EXTERIOR PAINT CODES<br />
3 ASSEMBLY PLANT CODE @ MODEL CODE AND GVW<br />
® CONSECUTIVE UNIT ®<br />
®<br />
AND WARRANTY NO.<br />
INTERIOR TRIM, SEAT AND<br />
BODY/CAB TYPE<br />
RECOMMENDED MAX. @ TRANSMISSION CODE<br />
GROSS VEHICLE WEIGHT<br />
(jJ)<br />
DISTRICT/SPECIAL ORDER<br />
CODES<br />
G REAR AXLE CODES<br />
@ FRONT AXLE CODES<br />
(IF SO EQUIPPED)<br />
9 VEHICLE TYPE<br />
W1017-K<br />
FIG. 1 Typical <strong>Truck</strong> Rating Plate and Vehicle Certification label
10-00-2 Identification Codes 10-00-2<br />
TRIM SCHEME<br />
A VINYL<br />
B VINYL LIB BUCKET - STD. - CUSTOM DECOR FHB<br />
C B/CLOTH & VINYL LIB BUCKET - OPT. - CHATEAU FHB<br />
D VINYL LIB BUCKET - STD. - CHATEAU DECOR FHF<br />
G VINYL CAPTAIN CHAIRS - OPT. - CHATEAU DECOR FHF ONLY<br />
H B/CLOTH & VINYL CAPTAIN CHAIRS - OPT. - CHATEAU DECOR FHF ONLY<br />
J VINYL CAPTAIN CHAIRS - OPT. - CUSTOM DECOR FHB<br />
BODY<br />
r r r 1<br />
TRIM COLOR<br />
A<br />
B<br />
G<br />
U<br />
BLACK<br />
BLUE<br />
GREEN<br />
TAN<br />
BLANK (NOT USED ON ECONOLlNE)<br />
W1341-C<br />
FIG. 2 Trim, Seat, Body-Cab Type Identification-Econoline-Vans and Club Wagons<br />
ordered the vehicle. If the vehicle is built<br />
to special order (Domestic Special Order,<br />
Foreign Special Order, Limited<br />
Production Option, or other special<br />
order), the <strong>com</strong>plete order number will<br />
also appear under D.S.O. The charts that<br />
follow list the various vehicle data codes.<br />
W.B. (WHEELBASE)<br />
The wheelbase in inches in entered in<br />
this space.<br />
MAX. G.V.W. LBS<br />
The maximum gross vehicle weight in<br />
pounds is recorded in this space.<br />
0.5.0.<br />
If vehicle is built on a D.S.O., F.S.O.,<br />
L.P.O. (special orders) the <strong>com</strong>plete<br />
order number will be reflected under the<br />
D.S.O. space including the District Code<br />
Number.
10-00-3 Identification Codes 10-00-3<br />
r<br />
I<br />
I<br />
BODY<br />
ON COWLIWINDSHIELD BUS & PARCEL UNITS I<br />
THE FIRST TWO SPACES REMAIN BLANK<br />
I I I I<br />
TRIM SCHEME & SEAT TYPE<br />
BRONCO<br />
--<br />
RANGER CAB<br />
----<br />
A B/CLOTH - VINYL LPB BUCKET B VINYL STANDARD LIB BENCH<br />
R KNIT & VINYL LIB BUCKET E KNIT & VINYL OPTIONAL LIB BENCH<br />
S KNIT & VINYL LIB BUCKET H LEATHER VINYL HEAVY DUTY LIB BENCH<br />
LIGHT TRUCKS - CUSTOM CAB RANGER CAB XLT<br />
A COLTON VINYL STANDARD LIB BENCH C B/CLOTH & VINYL LIB BENCH<br />
D KNIT & VINYL DECOR LIB BENCH F KNIT & VINYL LIB BENCH<br />
G LEATHER VINYL HEAVY DUTY LIB BENCH J LEATHER VINYL HEAVY DUTY LIB BENCH<br />
L VINYL SUPER SOFT LIB BENCH<br />
K B/CLOTH &VINYL LUXURY DECOR LIB BENCH<br />
F50G - F60G CABS<br />
A VINYL STANDARD TRiM STANDARD CAB LIB BENCH<br />
D KNIT & VINYL OPTIONAL TRIM STANDARD CAB LIB BENCH<br />
E KNIT & VINYL OPTIONAL CUSTOM CAB<br />
G LEATHER VINYL OPTIONAL HEAVY DUTY STANDARD CAB<br />
H LEATHER VINYL OPTIONAL HEAVY DUTY CUSTOM CAB LIB BENCH<br />
K LEATHER VINYL OPTIONAL BOSTROM SEAT STANDARD CAB liB BUCKET<br />
L LEATHER VINYL OPTIONAL BOSTROM SEAT CUSTOM CAB<br />
TRIM COLOR<br />
A BLACK<br />
B BLUE N RED<br />
0 RED Q BLUE<br />
G GREEN 4 TAN<br />
U TAN 5 GREEN<br />
V PARCHMENT A BLACK<br />
HD BLACK SEAT WITH COLOR COMPONENTS<br />
CAllBACK OF CAB<br />
F100-350 FIB 500-600<br />
6-MAN<br />
CREW CAB SUPER CAB REGULAR SPECIFICATIONS SPECIFICATIONS<br />
- - 3 FLARESIDED PICK·UP 7 COWL<br />
0 M 4 STYLESIDE PICK·UP 8 CHASSIS CAB STEEL REGULAR<br />
- 5 PLATFORM STAKE G CHASSIS CREW CAB<br />
- - 7 COWL 6 CHASSIS CAB STEEL, FIRE<br />
G P 8 CHASSIS CAB TRUCK REGULAR<br />
- - 9 PLATFORM<br />
W1342·C<br />
FIG. 3 Trim, Seat, Body/Cab Type Identification - Bronco - Light and Medium <strong>Truck</strong> - School Bus - 100 Thru 600
10-00-4 Identification Codes<br />
10-00-4<br />
MEDIUM, SUB-HEAVY AND HEAVY<br />
I ON COWLIBUS UNITS THE FIRST<br />
I<br />
TWO SPACES REMAIN BLANK 1<br />
BODY<br />
f f I<br />
CAB TRIM<br />
CUSTOM STANDARD CABS F500 - F600 CABS<br />
A 1 GRAY A VINYL STANDARD TRIM STANDARD CAB LIB BENCH<br />
B 2 BLUE 0 KNIT & VINYL OPTIONAL TRIM STANDARD CAB LIB BENCH<br />
C 3 TAN 10- E KNIT & VINYL OPTIONAL CUSTOM CAB<br />
0 4 BLACK G LEATHER VINYL OPTIONAL HEAVY DUTY STANDARD CAB<br />
E 5 RED H LEATHER VINYL OPTIONAL HEAVY DUTY CUSTOM CAB LIB BENCH<br />
F 6 GREEN K LEATHER VINYL OPTIONAL BOSTROM SEAT STANDARD CAB LIB BUCKET<br />
G 7 SADDLE<br />
H a TOBACCO<br />
L LEATHER VINYL OPTIONAL BOSTROM SEAT CUSTOM CAB<br />
SEAT TYPE<br />
HD F500 - F600<br />
BLACK W/COMP. SINGLE<br />
HD BLACK SEAT<br />
VINYL PASS. DRIVER BENCH<br />
TRIM<br />
WITH COLOR<br />
A - - 1 BENCH SEAT COLOR COMPONENTS<br />
B - -<br />
2 BENCH CUSTOM SEAT<br />
- A BLACK N RED<br />
- C 3 - L-S (UNISON ACTION)<br />
B BLUE a BLUE<br />
- 0 4 - L-S #675<br />
0 RED 4 TAN<br />
- E 5 - BOSTROM WESTCOASTER<br />
G GREEN 5 GREEN<br />
- F 6 - BOSTROM T-BAR<br />
U TAN A BLACK<br />
- G 7 - NATIONAL CUSH-N-AIRE<br />
- H a - BOSTROM LEVELAIRE<br />
BODY TYPE<br />
SLEEPER<br />
W/FOAM<br />
F500 - F600<br />
W/SPRING LESS<br />
MATTRESS MATTRESS MATTRESS BODY SPECIFICATIONS<br />
-----<br />
- - - 0 PARCEL, MOTOR HOME 7 COWL<br />
10-<br />
- - - 2 CHASSIS CAB/W/BUTIERFLY HOOD a<br />
CHASSIS CAB STEEL REGULAR<br />
- - - 7 COWL G CHASSIS CREW CAB<br />
A J Y 8 CHASSIS CAB, STEEL 6 CHASSIS CAB STEEL, FIRE<br />
B K a H CHASSIS CAB, ALUMINUM TRUCK REGULAR<br />
- - - 6 FIRE TRUCK/EMERGENCY CC STEEL<br />
- - - 7 FIRE TRUCK W/BUTIERFLY HOOD<br />
W1343·C<br />
FIG. 4 Trim, Seat, Body/Cab Type Identification -<br />
Parcel Medium, Sub Heavy and Heavy (500 Thru 9000 Series)
10-00-5 Identification Codes 10-00-5<br />
ENGINEERING COMPONENT RATING PLATE<br />
CODE COLOR TRIM CODE<br />
MEDIUM CONVENTIONAL 'F' SERIES TRIM SCHEMES<br />
TRIM SCHEME<br />
COLTON/KIWI - ALL VINYL<br />
(Al BENCH - BASE DOOR PANEL)<br />
MODEL/SERIES<br />
STANDARD TRIM 81A - STANDARD CAB<br />
AA AA BLACK F500-600<br />
LEATHER GRAIN - H.D. VINYL<br />
(A5 BENCH - BASE DOOR PANEL)<br />
OPT. H.D. VINYL FOR STD. TRIM 81A - STANDARD CAB<br />
GA W/BLACK GA BLACK F500·600<br />
VILON KNIT/KIWI ALL VINYL<br />
(A4 BENCH - BASE DOOR PANEL)<br />
OPT. KNIT VINYL FOR STD. TRIM<br />
81A STANDARD CAB<br />
DA DA BLACK<br />
DB DB MED. BLUE<br />
DO DO RED, OK. RED. F500-600<br />
DU DU TAN<br />
DR DR MED. GREEN<br />
VI LON KNIT/KIWI- ALL VINYL<br />
(A4 BENCH - CUSTOM DOOR PANEL)<br />
CUSTOM TRIM 81B - CUSTOM CAB<br />
EA EA BLACK<br />
EB EB MED. BLUE<br />
ED ED RED, OK. RED F500-600<br />
EU EU TAN<br />
EG EG MED. GREEN<br />
LEATHER GRAIN - H.D. VINYL<br />
(A5 BENCH - CUSTOM DOOR PANEL)<br />
OPT. H.D. VINYL FOR CUSTOM TRIM 81 B- CUSTOM CAB<br />
HA<br />
)Wffl~CK<br />
W/BLUE<br />
HO<br />
HA W/RED HN BLACK FSOO-600<br />
WITAN<br />
H4<br />
W/GREEN<br />
H5<br />
FIG. 5 Trim, Seat, Body/Cab Type Identification<br />
CY1726-B
10-00-6 Identification Codes 10-00-6<br />
ENOINEERINO COMPONENT RAnNG PLATE<br />
CODE COLOR TRIM CODE<br />
MED. HEAVY CONVENTIONAL 'F' SERIES TRIM SCHEMES<br />
TRIM SCHEME<br />
COLTON/KIWI - ALL VINYL<br />
(A1 BENCH - BASE DOOR PANEL)<br />
MODEl/SERIES<br />
STANDARD TRIM<br />
81A STANDARD CAB<br />
AA 41 BLACK MET. F/100-750<br />
LEATHER GRAIN - HD VINYL<br />
(A5 BENCH - BASE DOOR PANEL)<br />
OPT. H.D. VINYL FOR STD. TRIM<br />
81A STANDARD CAB<br />
GA 4A BLACK 700-750<br />
STD. TRIM FOR F6000-7000<br />
VILON KNIT/KIWI - ALL VINYL<br />
(A4 BENCH - BASE DOOR PANEL)<br />
OPT. KNIT VINYL FOR STD. TRIM<br />
81A STANDARD CAB<br />
DA 42 BLACK MET.<br />
DB 22 MED. BLUE MET.<br />
DO 52 RED. DK. RED MET. F700-750. F6000-7000<br />
DU 32 TAN<br />
DG 62 MED. GREEN MET.<br />
VILON KNIT/KIWI - ALL VINYL<br />
(A4 BENCH - CUSTOM DOOR PANEL)<br />
MED. TRUCK CUSTOM TRIM<br />
81B CUSTOM CAB<br />
EA D1 MED. BLUE MET.<br />
ED E1 RED, OK. RED MET. F700-750. F6000-7000<br />
EU C1 TAN<br />
EG F1 MED. GREEN MET.<br />
LEATHER GRAIN - HD VINYL<br />
(A5 BENCH - CUSTOM DOOR PANEL)<br />
OPT. H.D. VINYL FOR CUSTOM TRIM<br />
81 B CUSTOM CAB<br />
DA<br />
)W/BU~<br />
WIBLUE<br />
BA<br />
HA W/RED EA BLACK F700-750, F6000-7000<br />
W/GINGER<br />
CA<br />
W/GREEN<br />
FA<br />
DRIVER<br />
DRIVER<br />
-- W/PASSENGER<br />
BOSTROM VIKING<br />
INDIVIDUAL SEATS<br />
LEATHER GRAIN - ALL VINYL<br />
(A6 BOSTROM - BAS DOOR PANEL)<br />
OPT. SEAT FOR STD. TRIM<br />
81A STANDARD CAB<br />
KA 46 4F BLACK F700-750-7000<br />
LEATHER GRAIN - ALL VINYL<br />
(A6 BOSTROM - CUSTOM DOOR PANEL)<br />
OPT. SEAT FOR CUSTOM TRIM<br />
810 CUSTOM CAB<br />
LA 06 OF BLACK F700-750-7000<br />
CY1727-B<br />
FIG. 6 Trim, Seat, Body/Cab Type Identification
10-00-7 Identification Codes 10-00-7<br />
CONVENTIONAL "L" SERIES TRUCK TRIM<br />
RATING PLATE TRIM COOE<br />
ENGR.<br />
COMFORT<br />
STD. H.D.<br />
CODE -- (STD. CAB)<br />
CUSTOM TRIM SCHEME MODEL SERIES<br />
--<br />
BENCH SEATS<br />
CITY DELIVERY STANDARD CAB TRIM-BENCH-(Al)<br />
% LANARK REPEAT/ROMAINE VINYL<br />
lZ 81 OK. TOBACCO F-FT-FTS-N-NT8oo, N600-700-750<br />
(L-LT-LTS-LN-LNT800-LN-600-700-750)<br />
CITY DELIVERY OPT. COMFORT SEAT FOR STD.<br />
CAB-BENCH-(A2)<br />
% DIAMOND MSKETWEAVE/ROMAINE VINYL<br />
BZ 82 OK. TOBACCO F-FT-FTS-N-NT8oo-900-80oo<br />
(L-LT-LTS-LN-LNT800-900-8000)<br />
N-600-7oo-750-6000-7000<br />
CITY DELIVERY OPT. H.D. VINYL FOR STD.<br />
(LN600-700-750-60oo-70oo)<br />
CAB-BENCH-(A3)<br />
% LEATHER GRAIN H.D. VINYL<br />
CL 4A 4B BLACK F-FT-FTS-NT8oo, N600-700-750-800<br />
(L-LT-LTS-LNT800, LN6oo-700-750-800)<br />
AS STANDARD SEAT FOR STANDARD CAB-BENCH-(A3)<br />
% LEATHER GRAIN H.D. VINYL<br />
CL 4A 4B BLACK F-FT-FTS-N-NT900-80oo, N6000-7000<br />
(L-LT-LTS-LN-LNT900-8oo0,<br />
LN-6000-7oo0)<br />
CITY DELIVERY CUSTOM TRIM-BENCH-(A2)<br />
% DIAMOND BASKETWEAVE/ROMAINE VINYL<br />
2Z H2 OK. TOSACCO N600-700-750-800-900-6000-7000-8000<br />
F-FT-FTS-NT800-900-8000<br />
(LN600-7oo-750-800-900-6000-7oo0-8000,<br />
L-LT-LTS-LNT-800-900-8000)<br />
CITY DELIVERY OPT. H.D. VINYL FOR CUSTOM<br />
CAB-BENCH-(A3)<br />
% LEATHER GRAIN H.D. VINYL<br />
3L DB BLACK N600-700-750-800-900-60oo-7000-8000<br />
F-FT-FTS-NT600-~0-8000<br />
(LN600-700-750-800-900-6000-7000-8000,<br />
L-LT-LTS-LNT800-900-8000)<br />
() AS IDENTIFIED BY SALES<br />
% NOT AVAILABLE WITH LINE HAUL INSTRUMENT PANEL<br />
CY1728-B1<br />
FIG. 7 Trim, Seat, Body/Cab Type Identification
10-00-8 Identification Codes 10-00-8<br />
ENGINEERING<br />
CODE<br />
RATING PLATE TRIM CODE<br />
DRIVER<br />
DRIVER<br />
-- W. PASSENGER<br />
CONVENTIONAL "L" SERIES TRUCK TRIM<br />
TRIM SCHEME<br />
INDIVIDUAL SEATS<br />
MODEL SERIES<br />
(L.S.) UNISON ACnON - (M)<br />
AS STANDARD SEAT FOR STANDARD CAB<br />
#CLARION KNIT/RUFFINO VINYL<br />
DZ 83 8C OK. TOBACCO F-FT-FTS-N-NT900<br />
(L-LT-LTS-LN-LNT90oo)<br />
AS OPTIONAL SEAT FOR STANDARD CAB<br />
#CLARION KNIT/RUFFINO VINYL<br />
DZ 83 8C OK. TOBACCO N600-700-750-6000-7000,<br />
F-FT-FTS-N-NT800-900-8000<br />
(LN600-7oo-750-6oo0-7000<br />
L-LT-LTS-LN-LNT800-900-80oo)<br />
AS STD. SEAT FOR CUSTOM CAB (DIESEL)<br />
#CLARION KNIT/RUFFINO VINYL<br />
4Z H3 HC OK. TOBACCO F-FT-FTS-N-NT9OO0<br />
(L-LT-LTS-LN-LNT9000)<br />
AS OPTIONAL SEAT FOR CUSTOM CAB<br />
#CLAIRON KNIT/RUFFINO VINYL<br />
4Z H3 HC OK. TOBACCO N6oo-700-750-6000-7000,<br />
F-FT-FTS-N-NT800-9OO-8000<br />
(LN-600-700-750-6000-7000,<br />
L-LT-LTS-LN-LNT800-900-8000)<br />
(L.S.) UNISON #175 -<br />
AS OPTIONAL SEAT FOR STANDARD CAB<br />
#CLARION KNIT/RUFFINO VINYL<br />
OZ H4 HO OK. TOBACCO F-FT-FTS-N-NT800-900-80oo-9000<br />
(L-LT-LTS-LN-LNT8oo-900-8oo0-9000)<br />
AS OPTIONAL SEAT FOR CUSTOM CAB<br />
#CLARION KNIT/RUFFINO VINYL<br />
4Z H4 HD OK. TOBACCO F-FT-FTS-N-NT800-9OO-8000-9000<br />
(L-LT-LTS-LN-LNT800-900-8000-9000)<br />
(M)<br />
BOSTROM WESTCOAmR -<br />
AS OPTIONAL SEAT FOR STANDARD CAB<br />
·CLARION KNIT/RUFFINO VINYL<br />
EZ H5 HE OK. TOBACCO F-FT-FTS-N-NT800-900-8000-9000<br />
(L-LT-LTS-LN-LNT800-900-8000-9000)<br />
AS OPTIONAL SEAT FOR CUSTOM CAB<br />
#CLARION KNIT/RUFFINO VINYL<br />
5Z H5 HE OK. TOBACCO F-FT-FTS-N-NT800-900-8oo0-9000<br />
(L-LT-LTS-LN-LNT800-9OO-80oo-9000)<br />
(AI)<br />
0 AS IDENTIFIED BY SALES<br />
# CITY DELIVERY AND LINE HAUL INSTRUMENT PANEL<br />
CY1728·A2<br />
FIG. 7 cont. Trim, Seat, Body/Cab Type Identification
10-00-9 Identification Codes 10-00-9<br />
ENGR.<br />
CODE<br />
STD.<br />
TILT CABS<br />
BENCH SEATS<br />
RATING PLATE TRIM CODE<br />
COMFORT<br />
H.D. CUSTOM TRIM SCHEME MODEL SERIES<br />
(STD. CAB)<br />
STANDARD CAB TRIM-BENCH-(A6)<br />
BLOCKWEAVE AND CRUSH VINYL<br />
01 11 LT. GRAY C600-700-750-800, CT800<br />
OPTIONAL H.D. VINYL FOR STD. CABS-BENCH-(A8)<br />
LEATHER GRAIN HEAVY DUTY VINYL<br />
36 4B 4A BLACK C600-700-750-800, CT800<br />
STANDARD SEAT H.D. VINYL FOR STD.<br />
CAB-BENCH-(A8)<br />
LEATHER GRAIN HEAVY DUTY VINYL<br />
36 4A 4B BLACK C900-CT900<br />
OPT. COMFORT SEAT FOR STD. CAB-BENCH-(A7)<br />
TWILL STRIPE PLASTIC AND CRUSH VINYL<br />
11 12 GRAY MULTI-COLOR LT. GRAY C600-700-750-800-900,<br />
CT800-900<br />
CUSTOM CAB TRIM-BENCH-(A7)<br />
TWILL STRIPE PLASTIC AND CRUSH VINYL<br />
11 A2 GRAY MULTI-COLOR LT. GRAY C600-700-750-800-900,<br />
CT800-900<br />
OPT. H.D. VINYL FOR CUSTOM CABS-BENCH-(A8)<br />
LEATHER GRAIN HEAVY DUTY VINYL<br />
36 DB BLACK C600-700-750-800-900,<br />
CT800-900<br />
CYl729-A<br />
FIG. 8 Trim, Seat, Body/Cab Type Identification
10-00-10 Identification Codes 10-00-10<br />
TILT CAB<br />
EIOINEERIIO<br />
CODE<br />
RAnia PLATE TRI. CODE<br />
DRIVER<br />
DRIVER<br />
W/PASSEHEft<br />
IIDIVIDUAL SEAYS<br />
TRIM SCHEME<br />
MODEL SERIES<br />
UNISON ACTION (LIER SIEGLER)<br />
AS STANDARD SEAT FOR STANDARD CAB<br />
LEATHER GRAIN VINYL<br />
26 43 4C BLACK C6000-700-8000<br />
AS OPTIONAL SEAT FOR STANDARD CAB<br />
LEATHER GRAIN VINYL<br />
26 43 4C BLACK C600-700-750-800-900, CT800-900<br />
AS STANDARD SEAT FOR CUSTOM CAB<br />
LEATHER GRAIN VINYL<br />
26 03 DC BLACK C6000·7000-8000<br />
AS OPTIONAL SEAT FOR CUSTOM CAB<br />
LEATHER GRAIN VINYL<br />
26 03 DC BLACK C600-700-750-800-900, CT800-900<br />
HI·WAY TRACTOR<br />
UNISON #675 WITH ROADRUNNER SUSPENSION<br />
AS STANDARD SEAT - NON SLEEPER<br />
CRINKLE VINLY<br />
7F G4 GO (SADDLE) W-WT-9000<br />
AS STANDARD SEAT - SLEEPER<br />
CRINKLE VINYL<br />
8F G4 GO (SADDLE) W-WT-9000<br />
10STROM SEAT -<br />
WEST COASTER<br />
AS OPTIONAL SEAT - NON SLEEPER<br />
LEATHER GRAIN VINYL<br />
7F G5 GE (SADDLE) W-WT-9000<br />
AS OPTIONAL SEAT - SLEEPER<br />
LEATHER GRAIN VINYL<br />
8F G5 GE (SADDLE) W·WT-9000<br />
CUlH·I·AIRE<br />
AS OPTIONAL SEAT - NON SLEEPER<br />
LEATHER GRAIN VINYL<br />
77F G7 GG (SADDLE) W-WT-9000<br />
AS OPTIONAL SEAT - SLEEPER<br />
LEATHER GRAIN VINYL<br />
78F G7 GG (SADDLE) W-WT·9000<br />
IOSTROM SEAT -<br />
LEVELAIR<br />
AS OPTIONAL SEAT - NON SLEEPER<br />
LEATHER GRAIN VINYL<br />
7F G8 GH (SADDLE) W-WT-9000<br />
AS OPTIONAL SEAT - SLEEPER<br />
LEATHER GRAIN VINYL<br />
8F G8 GH (SADDLE) W-WT-9000<br />
FIG. 9 Trim, Seat, Body/Cab Type Identification<br />
CY1730-A
10-00-11 Identification Codes 10-00-11<br />
TRUCK SERIES CODES<br />
Typ, C....II C.II Plck·Up laic 11,111 LT·S'rllI - 01..'1<br />
U Bronco U80, U81 LT8000<br />
X17 Xl0 Fl00 U90, U91 LT9OO0<br />
B••le S.rI,. X19 X15 F150<br />
U15 Ul00 (Wagon) 4x4<br />
LTS·S,rl'. - G••<br />
X27 X25 F250<br />
V80, V81 LTS800<br />
X37 X35 F350<br />
V90, V91, V92 LTS900<br />
CONVENTIONAL - F·500·800 - GAS<br />
~ LTS·S,rl'. - 01••,1<br />
F50<br />
F500<br />
Y80, Y81 LTS8000<br />
100 S,rl'.<br />
F60 F600 Y90, Y91 LTS9000<br />
Conv,ntlonal Super F61 F600<br />
EOl - El00 Club Wagon 5 passenger F65 F6004x4<br />
SHORT CONVENTIONAL - LN·SERIES<br />
E02 - El00 Club Wagon 8 Passenger F66 F6004x4<br />
E04 - El00 Cargo Van<br />
LN·S,rl.. - G,.<br />
E05 - El00 Window Van BUS - B·SERIES - GAS N60 N600<br />
E06 - El00 Display Van<br />
N61, N62 N600<br />
B50<br />
B500<br />
N70, N71 N700<br />
B60<br />
B600<br />
~<br />
N75, N76 N750<br />
Ell Sll E150 Club Wagon 5 Passenger B61 B600<br />
N80, N81 N800<br />
E12 S12 E150 Club Wagon 8 Passenger<br />
N90, N91 N900<br />
E14 S14 E150 Cargo Van<br />
CONVENTIONAL - F·SERIES - GAS<br />
E15 S15 E150 Window Van LN·S,rl'. - 01..'1<br />
F50 F500<br />
E16 S16 E150 Display Van R60<br />
N6000<br />
F60 F600 GVW Range Split<br />
R61<br />
N6000<br />
250 S,rl..<br />
F61<br />
F600 GVW Range Split<br />
R70, R71 N7000<br />
E21 821 E250 Club Wagon 5 Passenger F654x4 F600 GVW Range 5plit<br />
R80, R81 N8000<br />
E22 S22 E250 Club Wagon 8 Passenger F664x4 F600 GVW Range Split<br />
R90<br />
N9000<br />
E23 823 E250 Club Wagon 12 Passenger F70 F700<br />
- S29 E250 Club Wagon 15 Passenger F75 F750 LNT·S'rl'. - Ga.<br />
E24 524 E250 Cargo Van F88 F880 S80, 581 NT800<br />
E25 525 E250 Window Van F·B.rl.. - 01•••1<br />
E26 S26 E250 Display Van<br />
K70<br />
F7000<br />
5S8, 590, 591 NT900<br />
1!l!...!!!:!!! LNT·S.rll' - 0111.1<br />
- S32 E350 Club Wagon 8 Passenger BUS CHASSIS COWLS - B·SERIES W80, W81 NT8000<br />
- 533 E350 Club Wagon 12 Passenger B50 B500<br />
W90, W91 NT9000<br />
- S39 E350 Club Wagon 15 Passenger<br />
860 8600 GVW Range Split<br />
E34 S34 E350 Cargo Van<br />
LOW TILT CABS - C·SERIES<br />
861 8600 GVW Range Split<br />
E35 S35 E350 Window Van<br />
870 B700 C·S,rI,. - Gal<br />
E36 S36 E350 Display Van<br />
B75 B750 C60 C600<br />
C61<br />
C600<br />
B·S.rt,. - 01,.'1<br />
C70<br />
C700<br />
ECONOLINE "CUTAWAY" MODEL J70 87000<br />
- C75<br />
C750<br />
E27 E250 Cutaway PARCEL - GAS CSO C800<br />
E37 E350 Cutaway C90, C91 C900<br />
P50<br />
PSOO<br />
P60 (DSO) P600 C·S'rll' - 01,.'1<br />
060,061 C6000<br />
PARCEL DELIVERY<br />
CONVENTIONAL - L·SERIES 070 C7000<br />
E28 E250 Cutaway 080 C8000<br />
L·S,rt,. - Ga.<br />
E38<br />
E350 Cutaway<br />
CONVENTIONAL - F·SERIES - GAS<br />
NT880<br />
F80, F81 L800 CT·Strl'. - G••<br />
F90, F91 L900 L80 CT800<br />
L·Strl'. -<br />
01,.'1<br />
L90, L91 CT900<br />
Chassl. Cab Pick·Up Ba.lc S'rl•• K80 L8000 CT·S,rt.. - 01,.'1<br />
KSl LSOOO aso CTSooO<br />
F17 FlO Fl00<br />
K90<br />
L9000<br />
F16 F14 F1504x4<br />
HIGH TILT CABS - W·SERIES<br />
F19 F15 F150 LT·S,rI,. - Ga.<br />
F27 F25 F250 T80. T81 LT800 W·S,rl•• - 01,.'1<br />
F28 F26 F2504x4 TS8 LTSSO Z90 W9000<br />
F37 F35 F350 T90, T91 LT900 X90, X91 WT9000<br />
CY1700·C
10-00-12 Identification Codes 10-00-12<br />
ENGINE CODES: BRONCO - LT. TRUCK - MED. TRUCK -<br />
SCHOOL BUS - 1000 THRU eoo VEHICLE NUMBERING SYSTEM<br />
Coda Englna CID Cyl.<br />
Gal (Bronco)<br />
G 302·2V 8<br />
Gal (Light F·100·350)<br />
B 300-1 V 6<br />
G 302-2V 8<br />
Z<br />
(DSO)<br />
H 351-2V 8<br />
S 4OO·2V 8<br />
J 460·4V 8<br />
Gal (Madlum F , B500·_)<br />
B 300-1V 6<br />
B 300-1V H.D. 6<br />
(_Sarlll)<br />
C 330-2V M.D. 8<br />
0 330·2V X.D. 8<br />
E 361-4V X.D. 8<br />
P 361-2V X.D. 8<br />
F 391-4V X.D. 8<br />
U 330·2V LPG (DSO) 8<br />
W 361·4V LPG (DSO) 8<br />
M 361·2V LPG fDSO) 8<br />
X 391-4V LPG (DSO) 8<br />
J 300-2V LPG (DSO) 6<br />
Z<br />
(DSO)<br />
-.- Gal (Export Low Comp)<br />
2 3OO-1V 6<br />
4 330-2V X.D. 8<br />
5 361-2V X.D. 8<br />
8 351-2V 8<br />
ECONOllNE -<br />
CLUB WAGON<br />
Coda Englna CID Cyt.<br />
Gal (Econollna)<br />
B 300-1 V 6<br />
H 351-2V 8<br />
A 460·4V 8<br />
GAS ~NGINE CODES: <strong>1977</strong> FORD HEAVY' EXTRA·HEAVY TRUCK<br />
SERIES 700 THRU 900, N·.·C800<br />
'F' B5OO-800 - PARCEL' VEHICLE NUMBERING SymM<br />
Low Compo<br />
Coda Code Pareal<br />
- G 300-IV H.D.<br />
F' B500·.<br />
2 B 300" 1V<br />
- B 300" 1V H.D. (600 Series)<br />
- C 330" 2V MD<br />
4 0 330" 2V X.D.<br />
- E 361" 4V X.D.<br />
5 P 361" 2V X.D.<br />
- F 391" 4V X.D.<br />
- U 330" 2V-LPG (DSO)<br />
- W 361" 4V-lPG (DSO)<br />
- M 361" 2V-lPG (DSO)<br />
- X 391" 4V·lPG (DSO)<br />
- J 300" 2V·LPG (DSO)<br />
- Z DSO<br />
Low Comp.<br />
Coda Coda Pareal<br />
700 Thru 900 - N·C800<br />
G 3OO-IV H.D.<br />
- 0 330-2V<br />
5 P 361·2V<br />
E 361·4V H.D.<br />
F 391-4V H.D.<br />
J 475·4V<br />
K 477·4V S.D.<br />
L 534-4V S.D.<br />
- Z DSO<br />
DIESEL ENGINE CODES: <strong>1977</strong> FORD HEAVY' EXTRA·HEAVY TRUCK<br />
SERIES 700 THRU MOO, N.·C800<br />
'F , B.·.- PARCEL' VEHICLE NUMBERING SYSTEM<br />
LIII<br />
1000<br />
~ Detroit G 855 NTC·350 320 H.P. 1900 RPM<br />
7 568 8V71N 263 H.P. 2100 RPM 0 855 NTC·350 335 H.P. 2100 RPM<br />
6 568 8V71N 280 H.P. 2100 RPM I 855 NTC·350 335 H. P. 1900 RPM<br />
T 568 8V71N 304 H.P. 2100 RPM l 855 NTC-350 350 H.P. 2100 RPM<br />
N 568 8V71T 308 H.P. 2100 RPM P 855 NTC-350 350 H.P. 1900 RPM<br />
E 568 8V71T 335 H.P. 2100 RPM S SPECIAL ORDER CUMMINS<br />
y 568 8V71T 350 H.P. 2100 RPM<br />
toGO<br />
4 568 8V71TI 305 H.P. 1950 RPM<br />
IIdu<br />
A SPECIAL ORDER DETROIT<br />
catarplllir<br />
Detroit<br />
B 6363208 V190 175 H.P. 2800 RPM 4 8V·71 TI INE 395 H.P. 1900 RPM<br />
0 636 3208 V225 210 H.P. 2800 RPM 2 6-7 IN 238 H.P. 2100 RPM<br />
a 6363208 V200 H.P. 2800 RPM 7 8V·7 INE 253 H.P.<br />
H 8933406 280 H.P. 2100 RPM 6 8V·7 IN 280 H.P.<br />
J 8933406 280 H.P. 1900 RPM T 8V·7 IN 304 H.P.<br />
M 8933406 325 H.P. 2100 RPM B 8V·71T 308 H.P.<br />
C SPECIAL ORDER CATERPILLAR E 8V·71T 335 H.P.<br />
Cummlnl<br />
Y 8V-71T 350 H.P.<br />
1 855 NTC-230 230 H.P. 2100 RPM Cummlnl<br />
R 855 NTC·230 230 H.P. 1900 RPM U NTC·290 H.P. 1900 RPM<br />
F 855 NTC·250 250 H.P. 2100 RPM K NTC·270 PT 270 H. P.<br />
2 855 NTC·250 250 H. P. 1900 RPM V NTC·29O 290 H.P. 2100 RPM<br />
K 855 NTC-270 PT 270 H.P. 2100 RPM l NTC·350 350 H.P.<br />
3 855 NTC·29O 255 H.P. 2100 RPM 0 NTC-35O 335 H. P.<br />
9 855 NTC·29O 255 H.P. 1900 RPM 8 NTC·350 320 H. P.<br />
V 855 NTC-290 290 H.P. 2100 RPM G V903 295 H. P.<br />
U 855 NTC·29O 290 H.P. 1900 RPM Z Special Engine (DSO)<br />
W 855 NTC·350 300 H.P. 2100 RPM S Special Order Engine Cummins (DSO)<br />
X 855 NTC-350 300 H.P. 1900 RPM A Special Order Engine Detroit (OSO)<br />
8 855 NTC·350 320 H.P. 2100 RPM C Special Order Engine Caterpillar (OSO)<br />
Code<br />
ASSEMBLY PLANTS CODE LEnERS<br />
Aatmbly Pllnt<br />
C ..........................................Ontario <strong>Truck</strong><br />
E...............................................Mahwah<br />
H ................................................Lorain<br />
I ...........................................Highland Park<br />
K ............................................Kansas City<br />
L .........................................Michigan <strong>Truck</strong><br />
N ...............................................Norfolk<br />
P ............................................Twin Cities<br />
R..............................................san Jose<br />
S .............................................Allen Park<br />
U..............................................Louisvllie<br />
V .........................................KentuckY <strong>Truck</strong><br />
CY1701·C
10-00-13 Identification Codes<br />
10-00-13<br />
"Job #1<br />
.--!lli.-<br />
"Job #1<br />
-1!IL..<br />
August"<br />
September<br />
October<br />
November<br />
December<br />
August"<br />
September<br />
October<br />
November<br />
December<br />
ECONOLINE CLUB WAGONS VEHICLE NUMBERING SYSTEM<br />
The Uniform Sequential Serial and Warranty Numbering System for the $977 Model Year Program is outlined as follows:<br />
SERIAL & WARRANTY NO BLOCKS BASED UPON THE SCHEDULED MONTH<br />
<strong>1977</strong> Model Program<br />
000,000 - 019,999<br />
020,000 - 039,999<br />
040,000 - 059,999<br />
060,000 - 079,999<br />
080,000 - 099,999<br />
January<br />
February<br />
March<br />
April<br />
May<br />
June<br />
July<br />
August<br />
X80,000 - X99,999<br />
YOO,OOO - Y19,999<br />
Y20,000 - Y39, 999<br />
Y40,000 - Y59,999<br />
Y60,000 - Y79,999<br />
Y80,000 - Y99,999<br />
ZOO,OOO - Z19,999<br />
Z20,000 - Z99,999<br />
1976 Model Program<br />
For record purposes the 1976 Model Year Serial Number is shown to reflect August thru 1976 Model Build Serial Numbers.<br />
1975 Calendar Year 1976 Calendar Year<br />
AOO,OOO - A24,999 January 825,000 - 849,999<br />
A25,000 - A49,999 February 850,000 - 874,999<br />
A50,000 - A74,000 March B75,000 - B99,999<br />
A75,000 - A99,999 April COO,OOO - C24,999<br />
800,000 - 824,999 May C25,000 - C49,999<br />
June C50,000 - C74,999<br />
JUly C75,000 - C99,999<br />
August 000,000 - 024.999<br />
"Job #1<br />
--!lli.-<br />
August<br />
September<br />
October<br />
November<br />
December<br />
000,000 - 019,999<br />
020,000 - 039,999<br />
040,000 - 059,999<br />
060,000 - 079,999<br />
080,000 - 099,999<br />
BRONCO·LT TRUCK·MEO TRUCK·SCHOOL BUS·100 THRU 600 VEHICLE NUMBERING SYSTEM<br />
SERIAL & WARRANTY NO. BLOCKS BASED UPON THE SCHEDULED MONTH<br />
Starting Serial Number for all 8ronco F100-350 F & B 500-600 is 000 000<br />
1976 Calendar Year<br />
Kentucky <strong>Truck</strong> Pit.<br />
F & B 500-600<br />
000,000 - 004,999<br />
020,000 - 024,999<br />
040,000 - 044,999<br />
060,000 - 064,999<br />
080,000 - 084,999<br />
January<br />
February<br />
March<br />
April<br />
May<br />
June<br />
July<br />
August<br />
X80,000 - X99,999<br />
YOO.OOO - Y19,999<br />
Y20,000 - Y39.999<br />
Y40,000 - Y59,999<br />
Y60,000 - Y79,999<br />
Y80, 000 - Y99, 999<br />
ZOO,OOO - Z19,999<br />
Z20,000 - Z99,999<br />
<strong>1977</strong> Calendar Year<br />
Kentucky <strong>Truck</strong> PIt.<br />
F & B 500-600<br />
X80,000 - X84,999<br />
YOO,OOO - Y04,999<br />
Y20,000 - Y24,999<br />
Y40,000 - Y44,999<br />
Y60,000 - Y64, 999<br />
Y80,000 - Y84.999<br />
ZOO,OOO - Z04,999<br />
Z20,000 - Z24,999<br />
"Job #1<br />
--!!!L<br />
For record purposes the 1976 Model Year Serial Numbenng is shown starting Serial Number for all 8ronco Fl00-350 F & B 500-600 is AOO.OOO<br />
1975 Calendar Year 1976 Calendar Year<br />
August<br />
September<br />
October<br />
November<br />
December<br />
AOO,OOO -<br />
A25,000 -<br />
A50,000 -<br />
A75,000 -<br />
800,000 -<br />
A24,999<br />
A49,999<br />
A74,999<br />
A99,999<br />
824,999<br />
January<br />
February<br />
March<br />
April<br />
May<br />
825,000 -<br />
850,000 -<br />
A75,000 -<br />
COO,OOO -<br />
C25,000 -<br />
849,999<br />
B74,999<br />
B99,999<br />
C24,999<br />
C49,999<br />
June C50,000 - C74,999<br />
July C75,000 - C99,999<br />
August 000,000 - 024,999<br />
FORO HEAVY &EXTRA-HEAVY TRUCK SERIES 700 THRU 9000 N600 C600 'F &B 500 600 PARCEL' VEHICLE NUMBERING SYSTEM<br />
SERIAL & WARRANTY NUM8ER BLOCKS BASED UPON THE SCHEDULED MONTH<br />
<strong>1977</strong> Model Prop ram for Heavy, Extra-Heavy and Parcel <strong>Truck</strong>s<br />
"Job #1<br />
1976 Calendar Year<br />
<strong>1977</strong> Calendar Year<br />
--!!IL August" 005,000 - 019,999 January X85,000 - X99,999<br />
September 025,000 - 039,999 February Y05,000 - Y19,999<br />
October 045,000 - 059,999 March Y25,000 - Y39, 999<br />
November 065,000 - 079,999 April Y45.000 - Y59.999<br />
December 085,000 - 099,999 May Y65,000 - Y79,999<br />
June Y85,000 - Y99,999<br />
July Z05,000 - Z19,999<br />
August Z25,000 - Z99,999<br />
<strong>1977</strong> Model Program for F-B500-600 - Med. TrUCks<br />
"Job #1 1976 Calendar Year <strong>1977</strong> Calendar Year<br />
....!!rL. August" 000,000 - 004,000 January X80,000 - X84,999<br />
September 020,000 - 024,999 February YOO,OOO - Y04,999<br />
October 040,000 - 044,999 March Y20,000 - Y24,999<br />
November 060,000 - 064,999 April Y40,000 - Y44,999<br />
December 080, 000 - 084,999 May Y60,000 - Y64,999<br />
June Y80,000 - Y84,999<br />
July ZOO,OOO - Z04,999<br />
August Z20,000 - Z24,999<br />
I<br />
1976 Model Program for Heavy, Extra-Heavy and Parcel <strong>Truck</strong>s<br />
For record purposes the 1976 Model Year Serial Numbering is shown<br />
"Job #1 1975 Calendar Year 1976 Calendar Year<br />
--!lli..- August" A05,000 - A24,999 January 835, 000 - 849,999<br />
September A35,000 - A49,999 February 860,000 - 874,999<br />
October A60,000 - A74,999 March B85,000 - B99,999<br />
November A85,000 - A99,999 April Cl0,000 - C24,999<br />
December 810,000 - 824,999 May C35,000 - C49,999<br />
June C60,000 - C74,999<br />
July C85,000 - C99,999<br />
August 010,000 - 024,999<br />
1976 Model Propram for F-B500-600 Med. <strong>Truck</strong>s<br />
"Job #1 1975 Calendar Year 1976 Calendar Year<br />
--illL August" AOO.OOO - A04.999 January B25,000 - B34.999<br />
September A25,000 - A34.999 February 850,000 - 859,999<br />
October A50,000 - A59,999 March 875,000 - 884,999<br />
November A75.000 - A84.999 April COO.OOO - C09.999<br />
December BOO,OOO - 809,999 May C25,000 - C34,999<br />
June CSO,OOO - CS9,999<br />
July C75,000 - C84,999<br />
August 000,000 - 009,999<br />
CY1731-B
10-00-14 Identification Codes 10-00-14<br />
TRUCK EXTERIOR COLOR CODES (See Footnote)<br />
•<br />
Econo Vans<br />
u'<br />
~ := 8<br />
'"<br />
II: Wagons & Cutaways c •<br />
10-00-15<br />
Identification Codes 10-00-15<br />
FRONT AXLE CODES, LIGHT AND MEDIUM TRUCKS<br />
Bronco and F·100-350 F & B 500 -600<br />
W/Powef<br />
P/Steeflng W!Powef<br />
Code<br />
front AxlelPowef Steering<br />
Steering Delete Steering<br />
Front Axle<br />
J - Power Steering A J - Power Steering<br />
R 9 3,800# Dana - 60F K 2 5,500<br />
E 5 3,800# - L 3 6,000<br />
G 7 High All. 0 M 4 7,000<br />
H 8 High All. Not Required E N 5 9,000<br />
Standard Front Axles will not be punched on FB-500-600.<br />
FRONT AXLE CODES, HEAVY TRUCKS<br />
W/Powef Steering<br />
Code<br />
K 2<br />
L 3<br />
M 4<br />
N 5<br />
P 7<br />
8<br />
S<br />
T<br />
U<br />
#Front Axle -<br />
GVW<br />
5,500<br />
6,000<br />
7,000<br />
9,000<br />
12,000<br />
12,000 Steer Ease<br />
16,000<br />
18,000<br />
20,000<br />
DISTRICT CODES<br />
11 BOSTON 41 CHICAGO 71 LOS ANGELES <strong>Ford</strong> of Canada<br />
12 BUFFALO 42 CLEVELAND 72 SAN JOSE<br />
13 NEW YORK 43 MILWAUKEE 73 SALT LAKE CITY MERCURY REGIONS FORD REGIONS<br />
14 PITISBURGH 45 LANSING 74 SEATILE<br />
15 NEWARK 46 INDIANAPOLIS 75 PHOENIX A1 CENTRAL B1 CENTRAL<br />
16 PHILADELPHIA 47 CINCINNATI 76 DENVER A2 EASTERN 82 EASTERN<br />
17 WASHINGTON 48 DETROIT A3 ATLANTIC B3 ATLANTIC<br />
A4 MIDWESTERN<br />
84 MIDWESTERN<br />
A6 WESTERN<br />
B6 WESTERN<br />
21 ATLANTA 52 DALLAS 83 GOVERNMENT A7 PACIFIC B7 PACIFIC<br />
22 CHARLOnE 53 KANSAS CITY 84 HOME OFFICE RESERVE<br />
23 MEMPHIS 54 OMAHA 85 AMERICAN RED CROSS 12 EXPORT 12 EXPORT<br />
24 JACKSONVILLE 55 ST. LOUIS 89 TRANSPORATION SERVICES<br />
25 RICHMOND 56 DAVENPORT 87 80DY COMPANY<br />
26 NEW ORLEANS 57 HOUSTON NOTE: EXPORT ALPHABETICAL I<br />
28 LOUISVILLE 58 TWIN CITIES 90's EXPORT<br />
CY1702-C
10-00-16 Identification Codes<br />
10-00-16<br />
MODEL CODES AND GROSS VEHICLE WEIGHT RATINGS<br />
ECONOLINE CLUB, CUSTOM a CHATEAU WAGONS<br />
Code<br />
GVW<br />
Cony. Super Passenger Cony. Super<br />
E·100 Series<br />
E-Ol0 . 5 5,500 .<br />
E-Oll 5 5,700<br />
E-012 5 5,900<br />
E-020 8 5,900<br />
E-021 8 6,000<br />
E·150 Series<br />
E-l00 5 6,200<br />
E·lll 5 6,200<br />
E-112 5 6,400<br />
E-113 5 6,600<br />
E-120 8 6,300<br />
E-121 8 6,500<br />
E-122 8 6,600<br />
E-123 8 6,300<br />
E-124 8 6,500<br />
E-125 8 6,600<br />
Code<br />
GVW<br />
Cony. Super Passenger Cony. Super<br />
E·250 Series<br />
E-210 5 6,900<br />
E-211 5 7,100<br />
E-212 5 7,800<br />
E-220 8 6,900<br />
E-221 8 7,100<br />
E-222 8 7,300<br />
E-223 8 7,500<br />
E-224 8 7,700<br />
E-225 8 8,200<br />
E-230 12 7,700<br />
E-231 12 7,900<br />
E-232 12 8,100<br />
E-233 12 8,500<br />
E-234 12 8,900<br />
ECONOLINE CARGO, WINDOW, DISPLAY VANS a CUTAWAY, CUTAWAY PARCEL DELIVERY MODELS<br />
Code<br />
GVW<br />
Cony. Super Cony. Super Cony. Super<br />
Cargo Cargo Window Window Display Display Cony. Super<br />
E·100 Series<br />
E-040 . E·050<br />
. E-060 . 5,150 .<br />
E-041 E-051 E-061 5,750<br />
E·150 Series<br />
E-140 E-150 E-160 6,150<br />
E·250 Series<br />
E-240 E-250 E-260 6,800<br />
E-241 E-251 E-261 7,500<br />
E-242 E-252 E-262 8,300<br />
E·350 Series<br />
E·340 E-350 E-360 8,600<br />
E-341 E-351 E-361 9,550<br />
E-342 E-352 E-362 9,850<br />
Cutaway GVW Cutaway Parcel Delivery GVW<br />
E·250 Series<br />
E-270 8,400 E-280 7,700<br />
E·350 Series<br />
E·370 - 8,750 Single Rear<br />
E-371 - 9,650 Single Rear<br />
E-372 - 8,750 Dual Rear<br />
E-373 - 10,000 Dual Rear<br />
E-374 - 11,000 Dual Rear<br />
- E-380 8,750 Dual Rear<br />
- E-381 9,850 Dual Rear<br />
- E-382 10,000 Dual Rear<br />
- E-383 10,500 Dual Rear<br />
·SUPER Requirements to be determined.<br />
CY1703-C
10-00-17<br />
Identification Codes<br />
10-00-17<br />
BRONCO, LT TRUCK, MED TRUCK,<br />
SCHOOL BUS - 100 THRU 100<br />
Bronco<br />
Code G.V.W. Nom Ton,V2<br />
U 150 4,400 U-100<br />
U 151 4,600<br />
U152 4,900 HO Package<br />
light and Medium<br />
Chassis<br />
Wheel·<br />
Pick-Ups Cab G.V.W. Base<br />
F·l00 412<br />
F-l01 F-171 4,700 133<br />
F-103 F-173 4,900 117<br />
F-105 F-175 5,100 133<br />
F-l06 F-176 5,250 117<br />
F-107 F-177 5,400 133<br />
F-150 412<br />
F-150 F-190 6,050 133<br />
F-150 414<br />
F-140 F-160 6,050 117<br />
F-141 F-161 6,150 133<br />
F-143 F-163 6,350 133<br />
F·250 412<br />
F-250 F-270 6,200 133<br />
F-251 F-271 6,800 133<br />
F-252 F-272 7,700 133<br />
F-253 F-273 7,900 133<br />
F-250 4x4<br />
F-260 F-280 6,750 133<br />
F-261 F-281 7,500 133<br />
F-262 F-282 7,700 133<br />
MODEL CODES AND GROSS VEHICLE WEIGHT RATINGS<br />
Chassis<br />
Wheel-<br />
Pick-Ups Cab G.V.W. Base<br />
F·350 4x2<br />
- F-370 6,600 137<br />
F-351 F-371 6,750 161<br />
- F-372 8,000 137<br />
F-353 F-373 8,200 161<br />
- F-374 8,300 137<br />
- F-375 8,500 161<br />
- F-377 9,500 137, 161<br />
- F-378 10,000 137, 161<br />
F-354 - 8,300 140<br />
F-356 - 8,900 140<br />
F-358 - 9,900 140<br />
Super-Cab<br />
F-l00 4x2<br />
X-108 X-178 5,500 139<br />
X-109 X-179 5,650 155<br />
Xl0N X17N 5,200 139, 155<br />
F-150 4x2<br />
X-150 X-190 6,050 139, 155<br />
F·250 4x2<br />
X-251 X-271 6,800 139<br />
X-254 X-274 6,300 139<br />
X-255 X-275 6,550 155<br />
X-256 X-276 7,800 139<br />
X-257 X-277 7,050 155<br />
X-258 X-278 7,600 139<br />
X-259 X-279 8,100 155<br />
X-25N X-27N 7,500 155<br />
F-350 4x2<br />
X-359 I X-379 9,250 155<br />
Model<br />
Code<br />
G.V.W.<br />
F-500 4x2<br />
F-500 14,000<br />
F-501 16,000<br />
F-502 17,400<br />
F-503 19,200<br />
F·600 4x2<br />
F-600 16,000<br />
F-601 17,000<br />
F-610 19,700 Ryder<br />
F-611 20,200<br />
F-612 21,000<br />
F-613 22,000<br />
(6,000 Frt. 6,160 Rear)<br />
F-614 22,000<br />
(7,000 Frt. 15,000 Rear)<br />
F-615 23,000<br />
F-616 24,000<br />
F-618 17,900 U-Haul<br />
F-600 4x4<br />
F-650 17,200<br />
F-660 21,700<br />
F-661 24,000<br />
8-500 8us 4x2<br />
B-502 17,400<br />
8-503 19,200<br />
8-600 8us 4x2<br />
8-602 19,200<br />
8-610 19,700<br />
8-611 20,200<br />
8-613 21,000<br />
(6,000 Frt. 15,000 Rear)<br />
8-614 22,000<br />
(6,000 Frt. 17,500 Rear)<br />
8-615 22,000<br />
(7,000 Frt. 15,000 Rear)<br />
B-616 23,000<br />
8-617 24,500<br />
FORD HEAVY & EXTRA-HEAVY TRUCK SERIES<br />
700 THRU 9000, N800·C600 'F &B 500-800 - PARCEL'<br />
BUS CHASSIS COWL<br />
-.=series - Gas<br />
B·500<br />
8-502 17,400<br />
8-503 19200<br />
B-600<br />
B-602 19,200<br />
B610 19,700<br />
8-611 20,200<br />
B-613 21,000 GAWR Frt. 6,000 Rear 15,000<br />
B-614 22,000 GAWR Frt. 6,000 Rear 17 ,SOD<br />
B-615 22,000 GAWR Frt. 7,000 Rear 15,000<br />
B-616 23,000<br />
B-617 24,500<br />
B-700<br />
B-700 19,700<br />
B-701 21,000<br />
8-702 21,000<br />
B-703 22,000<br />
B-704 23,000<br />
8-705 24,000<br />
B-706 24,000<br />
B-707 25,500<br />
B-708 22000<br />
BUS CHASSIS COWL<br />
8-750<br />
8-750 21,500<br />
8-751 22,000<br />
8-752 23,000<br />
8-753 24,000<br />
B-754 24,000<br />
B-755 25,500<br />
B-756 22,000<br />
8-Serles - Diesel<br />
B-7000<br />
J-700 20,200<br />
J-701 22,000<br />
J-702 23,000<br />
J-703 24,000<br />
J-704 24,000<br />
J-705 25,500<br />
J-706 22,000<br />
CONVENTIONAL 'F' SERIES CAB<br />
F-Sclrles - Gas<br />
F-SOO<br />
F-500 14,000<br />
F-501 16,000<br />
F-502 17,400<br />
F-503 19,200<br />
CONVENTIONAL 'F' SERIES CA8<br />
F·600<br />
F-600 16,000<br />
F-601 17,000<br />
F-602 19,200<br />
F-610 19,700 Ryder<br />
F-611 20,200<br />
F-612 21,000<br />
F-613 22,000 GAWR Frt. 6,000 Rear 6,160<br />
F-614 22,000 GAWR Frt. 7,000 Rear 15,000<br />
F-615 23,000<br />
F-616 24,000<br />
F-618 17,900 U-Haul<br />
F·600 4x4<br />
F-650 17,200 F-880<br />
F-660 21,700 F-880 25,500<br />
F-66l 24,000 F-881 27,500<br />
F-700<br />
F-700 19,200<br />
F-701 21,000<br />
F-702 22,000<br />
F-703 23,000<br />
F-704 24,000<br />
F-705 24,000<br />
F-706 25,500<br />
F-707 22,000<br />
CY1704-C
10-00-18 Identification Codes 10-00-18<br />
CDNVENnONAL 'F' SERIES CAB<br />
F·750<br />
F-750 21,500<br />
F-751 22,000<br />
F-752 23,000<br />
F-753 24,000<br />
F-754 24,000<br />
F-755 25,500<br />
F-756 27,500<br />
F·757 21,500<br />
F·758 22,000<br />
F·7000 - (011'11)<br />
K-700 19,200<br />
K·701 21,000<br />
K-702 22,000<br />
K·703 23,000<br />
K-704 24,000<br />
K-705 24,000<br />
K-706 25,500<br />
K-707 27,500<br />
K-708 22,000<br />
CONVENnONAL 'L' SERIES CAB<br />
L-Slrtl' - Ga.<br />
L·.<br />
F-802 24,500<br />
F-803 25,500<br />
F·804 27,500<br />
F-805 29,000<br />
F-806 31,000<br />
F-808 34,000<br />
F-809 31,000<br />
F-810 22,100<br />
F-811 31,800<br />
F-812 22,100<br />
F-813 31,800<br />
F-814 34,000<br />
L·900<br />
F-900 25,500<br />
F-902 27,500<br />
F-905 31,000<br />
F-906 32,000<br />
F-908 34,000<br />
F-909 35,000<br />
F-912 23,100<br />
F-913 31,800<br />
F-914 31,000<br />
L·Slrtl. - 011.11<br />
L·8000<br />
K-802 25,500<br />
K-S03 27,500<br />
K-S05 31,000<br />
K-S06 32,000<br />
K-S07 34,000<br />
K-SOS 35,000<br />
K-812 23,100<br />
K-S13 31 SOO<br />
L·9ODO<br />
K-902 32,000<br />
K-904 35.000<br />
K-907 2S.000<br />
K-90S 31,800<br />
LT·Slrll. - Ga.<br />
LT·800" LT·880<br />
T-SOO 37,000<br />
T-802 39,000<br />
T-S04 43,000<br />
T-S06 46,000<br />
T-S07 50,000<br />
MODEL CODES AND GROSS VEHICLE WEIGHT RATINGS<br />
LT·SERIES - GAS<br />
LT·800 AND LT·880<br />
T·Sll 41,000<br />
T-S12 44,800<br />
T-S80 39,000<br />
T-S81 41,000<br />
T-S82 43,000<br />
T-883 44,800<br />
T-S84 46,000<br />
T-885 41,000<br />
LT·900<br />
T-900 39,000<br />
T-902 41,000<br />
T-904 43,000<br />
T-906 46,000<br />
T-907 50,000<br />
T-90S 50,000<br />
T-909 54,000<br />
T-911 60,000<br />
T-914 44,800<br />
T-915 48.000<br />
T-916 52,000<br />
T-917 58,000<br />
LT·Slrtl' - 011.11<br />
LT·.O<br />
U-SOO 39,000<br />
U-805 46,000<br />
U-806 50,000<br />
U-807 50,000<br />
U-S08 54,000<br />
U-809 60,000<br />
U-S15 41,000<br />
U-S16 44,800<br />
U-S17 61,000<br />
U-Sl0 55000<br />
LT·9UOO<br />
U-900 43,000<br />
U-903 46,000<br />
U-904 50,000<br />
U-905 50,000<br />
U-906 54,000<br />
U-90S 60,000<br />
U-911 52,000<br />
U-914 44,SOO<br />
U-915 61,000<br />
U-916 4S,000<br />
U-917 58~000<br />
LTS·Slrll. - Ga.<br />
LTS·800<br />
V-SOO 39,000<br />
V-804 46,000<br />
V-80S 50,000<br />
V-S09 41.000<br />
V-810 44,000<br />
LTS·9OO<br />
V-goo 39,000<br />
V-904 46,000<br />
V-905 50,000<br />
V-906 50,000<br />
V-907 52,000<br />
V-90S 54,000<br />
V-909 56,000<br />
V-911 5S,000<br />
V-912 60,000<br />
V-913 62,000<br />
V-914 64.000<br />
V-91S 41,000<br />
V-919 54,000<br />
V-920 4S,000<br />
I'":L"'=TS=-·=-se"""'::,.-II----=-DI=-I.-I:-I---------.,<br />
LTS·I000<br />
Y·800<br />
Y-804<br />
Y·805<br />
Y·806<br />
Y·807<br />
Y-8OB<br />
Y-812<br />
Y-814<br />
V-818<br />
39,000<br />
46,000<br />
50,000<br />
50,000<br />
52,000<br />
54,000<br />
60,000<br />
64,000<br />
41,000<br />
LTS·90OO<br />
y-goo 43,000<br />
V-903 50.000<br />
Y-904 50,000<br />
V-905 52,000<br />
Y-906 54,000<br />
V-907 56,000<br />
V-909 58,000<br />
Y-910 60,000<br />
Y-911 62,000<br />
Y-918 70,000<br />
V-919 48,000<br />
SHORT CONVENTIONAL 'N' SERIES CAB<br />
N·SI"I. - GI.<br />
N-IOO<br />
N-604 16,000<br />
N-605 19,200<br />
N-610 21,000<br />
N-611 22,000<br />
N-612 23,000<br />
N-615 24,000<br />
N-618 17.900<br />
N-619 20,200<br />
N-620 22,000<br />
N-621 22000<br />
N·700 " N·150<br />
N-700 22,000<br />
N-702 23,000<br />
N-703 24,000<br />
N-704 25,500<br />
N-709 19,200<br />
N-710 21,000<br />
N-711 22,000<br />
N-712 24,000<br />
N-752 23,000<br />
N-753 24,000<br />
N-754 25,500<br />
N-760 27,500<br />
N-762 21,500<br />
N-763 22,000<br />
N-764 22,000<br />
N-765 24000<br />
N·IOO<br />
N-S02 24,500<br />
N-S03 25,500<br />
N-S04 27,500<br />
N-S05 29,000<br />
N-S06 31.000<br />
N-SOS 34,000<br />
N-811 31,000<br />
N-812 22,100<br />
N-S13 31,SOO<br />
N-814 22,100<br />
N-815 31,800<br />
N-816 34,000<br />
CY1705-C
10-00-19 Identification Codes<br />
10-00-19<br />
SHORT CONVENTIONAL 'N' SERIES CAB -<br />
N·Slrlll - Gil<br />
N·.<br />
N-900 25,500<br />
N-902 27,500<br />
N-905 31,000<br />
N-9oo 32,000<br />
N-908 34,000<br />
N·QOQ 35,000<br />
N-911 23,100<br />
N-912 31,800<br />
N·Slrlll - 011111<br />
N·6000<br />
R-602 16,000<br />
R-603 19,200<br />
R-610 21,000<br />
R-611 22,000<br />
R-612 23,000<br />
R-615 24,000<br />
R-616 20,200<br />
R-617 22,000<br />
R-61B 22,000<br />
N-7000<br />
R-700 22,000<br />
R-702 23,000<br />
R-703 24,000<br />
R-704 25,500<br />
R-707 27,500<br />
R-709 19,200<br />
R-710 21,000<br />
R-711 22,000<br />
R-712 24,000<br />
MODEL CODES AND GROSS VEHICLE WEIGHT RATINGS<br />
Cont'd<br />
NT-Slrlll- GII- Conl'd<br />
NT-100<br />
5-900 39,000<br />
5-902 41,000<br />
15-904 43,000<br />
5-906 46,000<br />
S-907 50,000<br />
S-gog 54,000<br />
S-914 44,800<br />
S-915 48,000<br />
S-916 52,000<br />
NT-Slrlll- 011111<br />
NT-lOGO<br />
W-800 39,000<br />
W-805 46,000<br />
W-8OO 50,000<br />
W-807 50,000<br />
W-808 54,000<br />
W-812 41,000<br />
W-814 44,800<br />
W-815 55,000<br />
W-816 60,000<br />
W-817 61,000<br />
NT-9000<br />
W-903 46,000<br />
W-904 50,000<br />
W-906 54,000<br />
W-907 43,000<br />
W-911 44,800<br />
W-912 48,000<br />
W-913 52,000<br />
C·Slrll' - 011.11<br />
C·6000<br />
0-602 17,000<br />
0-611 22,000<br />
0-612 23,000<br />
0-615 20,200<br />
0-616 21,200<br />
C·7000<br />
0-702 25,500<br />
0-705 27,500<br />
0-707 21,200<br />
0-708 23.000<br />
C-IOOO<br />
0-802 27,500<br />
0-806 25,100<br />
0-807 32,000<br />
0-808 35.000<br />
CT-Slrlll - GI.<br />
CT·lOO<br />
L-800 43,000<br />
L-802 39,000<br />
L-806 42,000<br />
L-807 46.000<br />
L-808 47,100<br />
L-809 48,000<br />
CT-900<br />
L-9oo 39,000<br />
L-913 42,000<br />
L-914 46,000<br />
L-915 47,100<br />
L-916 50,000<br />
L-917 51,100<br />
L-918 54,000<br />
L-919 50,000<br />
N·8000<br />
R-802 25,500<br />
R-B03 27,500<br />
R-805 31,000<br />
R-B06 32,000<br />
R-B07 34,000<br />
R-B08 35,000<br />
R-Bl0 23,100<br />
R-8ll 31,800<br />
N·9000<br />
R-902 32,000<br />
R-904 35,000<br />
R-906 28,000<br />
R-907 31,800<br />
NT-Slrlll- Gil<br />
NT·100 • NT-.10<br />
S-800 37,000<br />
S-B02 39,000<br />
S-804 43,000<br />
5-806 46,000<br />
S-807 50,000<br />
5-811 41,000<br />
S-812 44,800<br />
5-880 39,000<br />
S-881 41,000<br />
S-882 43,000<br />
5-883 44,800<br />
5-884 46,000<br />
5-885 41,000<br />
LOW TILT 'C' SERIES CAB<br />
C·Slrll' - GI.<br />
C·lOO<br />
C-602 17,000<br />
C-611 22,000<br />
C-612 23,000<br />
C-616 20,200<br />
C-617 21,200<br />
C·700<br />
C-702 25,500<br />
C-706 21,200<br />
C-707 23,000<br />
C-750<br />
C-752 25,500<br />
C-755 27,500<br />
C-756 23000<br />
C·800<br />
C-802 27,500<br />
C-807 25,100<br />
C·900<br />
C-904 27,500<br />
C-906 31,000<br />
C-907 32,000<br />
C-910 34,000<br />
C-912 36,000<br />
C-913 31,000<br />
C-914 25,100<br />
C-915 39,000<br />
CT·Slrlll - 011111<br />
CT·8000<br />
0-800 43,000<br />
0-802 39,000<br />
0-803 45,000<br />
a-80S 41,000<br />
0-807 46,000<br />
0-808 47,100<br />
0-809 50,000<br />
HIGH TILT 'W' SERIES CAB<br />
W, WT-Slrlll- 011111<br />
W-9000<br />
Z-903 36,000<br />
Z-904 29,900<br />
Z-905 35,000<br />
Z-906 36,000<br />
Z-907 29,640<br />
WT-9000<br />
X-90S 44,BOO<br />
X-9OO 46,000<br />
X-907 46,000<br />
X-908 47,100<br />
X-909 44,600<br />
X-915. 44,800<br />
X-916. 46,000<br />
X-917. 46,000<br />
X-918. 47,100<br />
X-919 • 44,600<br />
(.OSO)<br />
CY1706-C
10-00-20<br />
Identification Codes<br />
10-00-20<br />
AXLE RATIO CODES<br />
Econollne Non-Locking<br />
Medium - Parcel - School Bus<br />
F & B500-600 & Parcel<br />
Code Description NCapaclty Ratio Code Description NCapaclty Ratio Code Description NCapaclty Ratio<br />
01 <strong>Ford</strong> 2750 3.00 24 Dana 60 Parcel 5200 4.10 H4 Rockwell R-171 23000 488<br />
05 <strong>Ford</strong> 2750 2.75 25 Dana 60 Parcel 5200 4.56 H5 Rockwell R-171 23000 5.29<br />
13 <strong>Ford</strong> 3750/3600 2.75 22 Dana 70 Parcel 7400 4.88 H6 Rockwell R-171 23000 5.86<br />
14 <strong>Ford</strong> 3750/3600 3.00 28 Dana 70 Parcel 7400 4.56 H7 Rockwell R-171 23000 614<br />
16 <strong>Ford</strong> 3750/3600 3.50 42 Rockwell 0-140 13000 6.20 H9 Rockwell R-171 23000 3.70<br />
15 <strong>Ford</strong> 3750/3600 325 41 Rockwell 0-140 13000 5.83 1A Rockwell R-170 23000 4.11<br />
22 Dana 5300 307 62 Rockwell F-l06 15000 6.20 2A Rockwell R-170 23000 4.33<br />
23 Dana 5300 3.31 64 Rockwell F-l06 15000 6.80 3A Rockwell R-170 23000 5.29<br />
38 Dana 5300 3.73 66 Rockwell F-l06 15000 7.20 4A Rockwell R-170 23000 614<br />
24 Dana 5300 4.10 F2 Eaton 15201 15000 2-Speed 5.83/812 7A Rockwell R-170 23000 5.86<br />
36 Dana 7400 3.73 F3 Eaton 15201 15000 2-Speed 6.33/881 JA Rockwell R-170 wlTraction 23000 4.11<br />
27 Dana 7400 410 52 Rockwell H-170 17500 5.86 KA Rockwell R-170 wlTraction 23000 4.33<br />
Econollne - Locklna<br />
53 Rockwell H-170 17500 6.14 LA Rockwell R-170 wlTraction 23000 5.29<br />
54<br />
H2 <strong>Ford</strong><br />
Rockwell H-170<br />
3750/3600<br />
17500<br />
3.50<br />
6.83 MA Rockwell R-170 wlTraction 23000 6.14<br />
55 Rockwell H-170 17500 7.17 EC Eaton 30-DSC "32000 6.50<br />
H4 <strong>Ford</strong> 3750/3600 3.25<br />
C8 Dana 5300 3.73<br />
07 Dana 7400 4.10<br />
El Eaton 16244 17500 2-Speed 5.57/7.75 FC Eaton 30-DSC "32000 7.17<br />
E2 Eaton 16244 17500 2-Speed 6.1718.58 GC Eaton 30-DSC "32000 760<br />
E3 Eaton 16244 17500 2-Speed 6.50/9.04 JF Eaton 34-DSC "34000 4.11<br />
Bronco F-100 350 EH Eaton 16221 18500 2-Speed 5.57/6.60 BF Eaton 34-DSC "34000 4.33<br />
18 <strong>Ford</strong> 2900 250 FH Eaton 16221 18500 2-Speed 6.15/8.38 CF Eaton 34-DSC "34000 456<br />
03 <strong>Ford</strong> 2900 4.11 GH Eaton 16221 18500 2-Speed 6.50/8.87 OF Eaton 34-DSC "34000 4.B8<br />
12 <strong>Ford</strong> 2900 3.00 HH Eaton 16221 18500 2-Speed 7.17/9.77 LF Eaton 34-DSC "34000 3.70<br />
07 <strong>Ford</strong> 2900 3.25 Fa Eaton 17121 15800 2-Speed 6.14 FF Eaton 34-DSC "34000 5.57<br />
06 <strong>Ford</strong> 2900 2.75 GO Eaton 17121 15800 2-Speed 6.50 GF Eaton 34-DSE "34000 614<br />
B8 <strong>Ford</strong> Limited Slip 2900 3.50 HO Eaton 17121 15800 2-Speed 7.17 HF Eaton 34-DSE "34000 6.50<br />
A3 <strong>Ford</strong> Limited Slip 2900 4.11<br />
MF Eaton 34-DSE "34000 7.17<br />
Heavv<br />
02 <strong>Ford</strong> 3300 3.00 KF Eaton 34-DSE "34000 7.60<br />
41<br />
17 <strong>Ford</strong><br />
Rockwell D-140<br />
3300 3.25<br />
13000 5.83<br />
ON Eaton 34-DPC "34000 6.21<br />
42<br />
08 <strong>Ford</strong><br />
Rockwell 0-140<br />
3300<br />
13000<br />
3.50<br />
6.20<br />
FN Eaton 34-DPC "34000 7.60<br />
11 <strong>Ford</strong><br />
44<br />
3300<br />
Rockwell 0-140<br />
2.75<br />
13000 6.80<br />
FW Eaton 34-DTE "34000 6.14/8.3B<br />
14 <strong>Ford</strong><br />
62 Rockwell F-l06<br />
3750<br />
15000<br />
3.00<br />
6.20<br />
GW Eaton 34-DTE "34000 6.50/8.87<br />
64<br />
15 <strong>Ford</strong><br />
Rockwell F-l06<br />
3750<br />
15000<br />
3.25<br />
6.80<br />
HW Eaton 34-DTE "34000 7.17/977<br />
66 Rockwell F-l06<br />
16 <strong>Ford</strong> 3750<br />
15000 7.20<br />
3.50<br />
Bl Rockwell Slhd. (Hendrickson) "34000 4.11<br />
F2<br />
13 <strong>Ford</strong><br />
Eaton 15201<br />
3750<br />
15000 2-Speed<br />
2.75<br />
5.83/8.12<br />
B2 Rockwell Slhd (Hendrickson) "34000 4.44<br />
F3 Eaton 15201 15000 2-Speed 6.33/8.81<br />
19 <strong>Ford</strong> 3750 4.11 52 Rockwell H-170 175000 5.b6 B3 Rockwell Slhd. (Hendrickson) "34000 463<br />
H2 Ltd. Slip 3750 3.50 53 Rockwell H-170 175000 6.14 B4 Rockwell Slhd. (Hendrickson) "34000 4.88<br />
H9 Ltd. Slip 3750 4.11 54 Rockwell H-170 175000 6.83 B6 Rockwell Slhd. (Hendrickson) "34000 5.83<br />
H4 Ltd. Slip 3750 3.25 55 Rockwell H-170 175000 7.17 B7 Rockwell Slhd. (Hendrickson) "34000 617<br />
23 Dana 61 5300 3.31 El Eaton 16244 17500 2-Speed 5.57/757 B8 Rockwell Slhd. (Hendrickson) "34000 6.83<br />
22 Dana 61 5300 3.07 E2 Eaton 16244 17500 2-Speed 6.17/8.58 B9 Rockwell Slhd. (Hendrickson) "34000 7.80<br />
24 Dana 60 5300 4.10 E3 Eaton 16244 17500 2-Speed 6.50/9.04 BB Rockwell Slhd. (Hendrickson) "34000 8.60<br />
37 Dana 60 5300 3.54 FO Eaton 17121 18500 6.14 AJ Eaton 38-DSC "38000 4.56<br />
38 Dana 60 5300 3.73 GO Eaton 17121 18500 6.50 BJ Eaton 38-DSC "38000 4.88<br />
B4 Dana 60 Limited Slip 5300 4.10 HO Eaton 17121 18500 7.17 CJ Eaton 38-DSC "38000 5.57<br />
C7 Dana 60 Limited Slip 5300 3.54 EH Eaton 17221 18500 2-Speed 5.57/7.60 FJ Eaton 38-DSC "38000 4.11<br />
C8 Dand 60 Limited Slip 5300 3.73 FH Eaton 17221 18500 2-Speed 6.14/8.38 GJ Eaton 38-DSC "38000 4.33<br />
27 Dana 70 7400 4.10 GH Eaton 17221 18500 2-Speed 6.50/8.87 HJ Eaton 38-DSC "38000 5.29<br />
28 Dana 70 7400 4.56 HH Eaton 17221 18500 2-Speed 7.1719.77 LJ Eaton 38-DSC "38000 370<br />
36 Dana 70 7400 3.73 OK Eaton 18121 22000 6.50 OJ Eaton 38-DSE "38000 6.14<br />
07 Dana 70 Limited Slip 7400 4.10 EK Eaton 18121 22000 7.17 EJ Eaton 38-DSE "38000 6.50<br />
F & B500-600<br />
DB Eaton 18221 22000 2-Speed 5.5717.60 JJ Eaton 38-DSE "38000 7.17<br />
41 Rockwell 0-140 13000<br />
EB Eaton 18221 22000 2-Speed 6.14/8.38<br />
5.83<br />
KJ Eaton 38-DSE "48000 7.60<br />
42 Rockwell 0-140 13000<br />
FB Eaton 18221 22000 2-Speed 6.50/8.87<br />
6.20<br />
AR Eaton 38-0PC "38000 505<br />
62 Rockwell F-l06 15000<br />
GB Eaton 18221 22000 2-Speed 7.1719.77<br />
6.20<br />
DR Eaton 38-DPC "38000 6.22<br />
64 Rockwell F-l06 15000 6.80<br />
AG Eaton 19121 23000 4.11 ER Eaton 38-DPC "38000 6.65<br />
66 Rockwell F-l06 15000 7.20<br />
BG Eaton 19121 23000 4.33 FR Eaton 38-DPC "38000 7.60<br />
F2 Eaton 15201 15000 2-Speed 5.83/8.12<br />
HG Eaton 19121 23000 4.56 01 Rockwell SQhd. (Hendrickson) "38000 4.11<br />
F3 Eaton 15201 15000 2-Speed<br />
CG Eaton 19121 23000 4.88<br />
6.33/8.81<br />
02 Rockwell SQhd. (Hendrickson) "38000 4.44<br />
52 Rockwell H-170 17500 5.86<br />
DG Eaton 19121 23000 5.43 03 Rockwell SQhd. (Hendrickson) "3BOOO 4.63<br />
53 Rockwell H-170 17500 6.14<br />
EG Eaton 19121 23000 6.17 04 Rockwell SQhd. (Hendrickson) "38000 5.29<br />
54 Rockwell H-170 17500 6.83<br />
FG Eaton 19121 23000 6.67 05 Rockwell SQhd. (Hendrickson) "38000 5.83<br />
55 Rockwell H-170 17500 7.17<br />
GG Eaton 19121 23000 3.70 06 Rockwell SQhd. (Hendrickson) "38000 683<br />
El Eaton 16244 17500 2-Speed 5.5717.75<br />
GP Eaton 19221 23000 2-Speed 4.11/5.60 07 Rockwell SQhd. (Hendrickson) "38000 7.80<br />
E2 Eaton 16244 17500 2-Speed 6.1718.58<br />
CP Eaton 19221 23000 2-Speed 5.43/7.39 08 Rockwell SQhd. (Hendrickson) "38000 4.88<br />
DP Eaton 19221 23000 2-Speed 6.17/8.40<br />
E3 Eaton 16244 17500 2-Speed 6.50/9.04<br />
DA Rockwell SQhd. (Hendrickson) "3BOOO 6.17<br />
FO Eaton 17121<br />
EP Eaton 19221 23000 2-Speed<br />
18500<br />
6.67/9.08<br />
6.14<br />
AV Eaton 42-DPB "44000 7.60<br />
GO Eaton 17121 18500 6.50<br />
AP Eaton 19221 23000 2-Speed 4.35/5.90 CV Eaton 42-DPB "34000 5.05<br />
Hl Rockwell R-171 23000 4.11<br />
HO Eaton 17121 18500 7.17<br />
DV Eaton 42-DPB "44000 5.91<br />
EH Eaton 17221 18500 2-Speed<br />
H2 Rockwell R-171 23000 4.33<br />
5.57/7.60<br />
AX Eaton 50-DP "50000 5.61<br />
FH Eaton 17221 185002-Speed 6.14/838<br />
H3 Rockwell R-171 23000 4.63<br />
" Tandem<br />
GH Eaton 17221 18500 2-Speed 6.50/8.87<br />
HH Eaton 17221 18500 2-Speed 7.1719.77<br />
CY1707-Cl
8<br />
10-00-21 Identification Codes 10-00-21<br />
HEAVY<br />
TRANSMISSION CODES Parcel & Heavy - Less 9000 'W' Series<br />
Code Description Gas Diesel<br />
Econoline - Club Wagon L - Allison AT -540 Automatic<br />
C 3 Speed <strong>Manual</strong> <strong>Ford</strong> 8 - Allison MT-640 Automatic<br />
G Automatic H H Allison MT-650 Automatic<br />
Z Crulsomahc e-6 4 - Clark 280 5-Speeo<br />
Bronco - F-l00-350<br />
2 2 Clark 282 5-Speed<br />
G<br />
Automatic<br />
M M Clark 285 5-Speed<br />
-<br />
C<br />
<strong>Ford</strong> <strong>Manual</strong> 3-Speed<br />
6 Clark 390 5-Speed<br />
F<br />
A<br />
Warner T-18 4-Speed<br />
New Process 435 4-Speed<br />
- Z Clark 397 5-Speed<br />
W - <strong>Ford</strong> e-6 Automatic<br />
J - <strong>Ford</strong> FMX Automatic<br />
F & B500-600 C C Fuller RT-6l0 10-Speed<br />
L Allison AT540 P P Fuller RT-6l3 13-Speed<br />
P Warner T-19 4-Speed - X Fuller T-905A 5-Speed<br />
G e-6 Automalic - 0 Fuller T-9058 5-Speed<br />
4 Clark 280-VO Overdnve 5-Speed - 3 Fuller RT -906 6-Speed<br />
2 Clark 282-V Direct 5 Speed - V Fuller RT-910 1O-Speed<br />
M Clark 285-V Direct 5-Speed - 5 Fuller RTO-9l0 10-Speed DID<br />
6 Clark 390- V Direct 5-Speed - Q Fuller RT-l1l 0 10-Speed<br />
Z Clark 397-V Direct 5-Speed -~<br />
Fuller RT -9509A 9-Speed<br />
A New Process 435 4-Speed - T Fuller RTO- 95098 9-Speed 0/0<br />
9 New Process 542 Direct 5-Speed - 4 Fuller RT -9513 l3-Speed<br />
0 New Process 542-FL Direct 5-Speed - J Fuller RTO-9513 l3-Speed OlD<br />
T New Process 542-FO Overdrive 5-Speed -- E Fuller RT-12510 10-Speed<br />
7 Spicer CM-5052 Direct 5- Speed - F Fuller RTO-12513 10-Speed 010<br />
0 Spicer CM-5252 Direct 5-Speed A - New Process NP-435 4-Speed<br />
Q Spicer CM-5052A Direct 5-Speed 9 -- New Process "IP-542-FD 5-Speed<br />
S Spicer CM-6052B Direct 5-Speed 0 - New Process NP-542-FL 5-Speed<br />
N Spicer CM-6052C Direct 5-Speed T - New Process NP-542-FO 5-Sneed<br />
AUXILIARY TRANSMISSION<br />
FORO HEAVY AND EXTRA-HEAVY TRUCK -<br />
PARCEL<br />
Code Description - G Spicer SST-l007-2A 7-Speed<br />
- A Spicer SST-l010 10-Speed<br />
4 Spicer 7231-0<br />
7 7 Spicer CM-5052A 5-Speed<br />
5 Spicer R-834l2 0 0 Spicer CM-5252A 5-Speed<br />
8 Spicer 7041<br />
0 --- Spicer 5652 5-Speed<br />
MED - SCHOOL BUS - F-B 500·600<br />
S -- Spicer 5656-8 5-Speed<br />
B B Spicer CM-6052A 5-Speed<br />
Code Description K K Spicer CM-60528 5-Speed<br />
R R Spicer CM-6052C 5-Speed<br />
4 Clark 280-VO Overdnve 5-Speed<br />
N N Spicer 6352 5-Speed<br />
2 Clark 282-V Direct 5-Speed<br />
U U Spicer 6852G 5-Speed<br />
M<br />
Clark 285-V Direct 5-Speed<br />
- Y Spicer RP-85163-A 16-Speed<br />
9 New Process 542 Direct 5-Speed<br />
0 New Process 542FL Dilect 5-Speed 9000 'W' Series<br />
T New Process 542-FC Overdrive 5-Speed 0 Fuller T-9058 Direct 5-Speed<br />
7 Spicer CM-5052 Direct 5 Speed 3 Fuller RT-906 Direct 6-Speed<br />
0 Spicer CM-5252 Direct 5-Sp,ed 5 Fuller RTO-9l0 Overdrive 10-Speed<br />
0 Spicer CM-6052A Direct 5-Speed V Fuller RT-9l0 Direct 10-Speed<br />
S Spicer CM-6052B Direct 5-Speed Q Fuller RT-1110 Dilect 10-Speed<br />
L Allison AT 540 8 Fuller RT -9509A Direct 9-Speed<br />
P Warner T-19 4Speerl 4 Fuller RT-9513 Direct 13-Speed<br />
G C6 Automatic E Fuller RT-125l0 Dilectl0-Speed<br />
A New Process 435 4-Speed J Fuller RTO-9513 Overdrive 13-Speed<br />
N Spicer CM-6052C Dllect 5 Speed F Fuller RTO-12513 Overdrive 13-Speed<br />
6 Clork 390-V Ollect 5 Speed G Spicer SST-l0072A Direct 7-Speed<br />
Z Clark 397V Direct 5 Speed A Spicer SST-10 Direct 10-Speed<br />
CY1707-C2
11-01-1 Wheels and Tires 11-01-1<br />
General Wheel and Tire Service 11-01<br />
Wheels and Tires -<br />
Drop-Center Rim 11-02<br />
Wheels and Tires -<br />
Three-Piece Rim 11-04<br />
Wheels and Tires -<br />
Two-Piece Rim 11-03<br />
Wheel Hubs and Bearings -<br />
Front (Except Front Drive) 11-10<br />
Wheel Hubs and Bearings -<br />
Front Wheel Drive 11-12<br />
Wheel Hubs and Bearings Rear<br />
(Semi Floating Axle) 11-11<br />
Wheel Hubs and Bearings -<br />
Rear (Full Floating Axle) 11-14<br />
General Wheel and Tire Service<br />
PART<br />
11-01<br />
APPLIES TO ALL MODELS<br />
SUBJECT PAGE SUBJECT PAGE<br />
SAFETY 01-1 Front Wheel Bearing Maintenance 01-7<br />
DIAGNOSIS AND TESTING 01-3 Rear Wheels on <strong>Truck</strong>s with<br />
ADJUSTMENTS Semi-Lock Differential 01-7<br />
Balancing Wheels 01-6 CLEANING AND INSPECTION<br />
Procedure to Diagnose Tire Front Wheel Bearings 01-7<br />
and Wheel Runout 01-6 Wheels 01-7<br />
Wheel and Tire Checking Procedure 01-6<br />
SAFETY<br />
When replacing tires, use the same<br />
size, load range and construction type<br />
(bias, bias belted or radial) as originally<br />
installed on your vehicle. When replacing<br />
wheels, use original equipment<br />
manufacturers wheels or equivalent<br />
available from your <strong>Ford</strong> dealer with<br />
equivalent capacity, width, offset and<br />
mounting configuration as those<br />
originally installed on your vehicle. Use<br />
of improper replacement wheels and tires<br />
may adversely affect ride, handling, load<br />
carrying capacity, bearing life, tire<br />
clearance to body and chassis<br />
<strong>com</strong>ponents, vehicle ground clearance,<br />
vehicle width and brake cooling.<br />
SAFETY PRECAUTIONS WHEN<br />
SERVICING TRUCK TIRES<br />
CAUTION AND SAFETY FIRST<br />
are bywords when handling tires,<br />
particularly truck tires. Careful attention<br />
to the suggestions that follow may<br />
prevent crippling injuries, or even death.<br />
Make it a rule to respect the terrific force<br />
contained in an inflated tire. You may be<br />
glad some day that you did.<br />
Prepare for any tire repair operation<br />
in a safe and efficient way. In changing<br />
tires on drop center wheels, remove the<br />
wheel and tire from the truck, as<br />
changing tires with the wheel on the<br />
truck is hazardous, more difficult, and<br />
takes more time. In servicing of all tires<br />
use caution not to drop them (or the<br />
wheels or assemblies) on the feet, hands
11-01-2<br />
General Wheel and Tire Service<br />
11-01-2<br />
FIG. 1 Handling Wheels and Tires<br />
or body, or heavily on the floor (Fig. 1).<br />
Practice good methods oflifting; use your<br />
legs as well as your arms and your body.<br />
This will help to prevent painful, internal<br />
injury. When carrying tires or wheels<br />
don't step in oil or grease. Keep the floor<br />
clean and dry.<br />
Deflating a tire properly is very<br />
important to your safety. First, reduce<br />
the pressure as much as you possibly can<br />
by pushing the valve core plunger. Only<br />
then should you remove the valve core.<br />
Keep your eyes away from the valve: Fig.<br />
2 shows the safe way to do it.<br />
Demounting tires from wheels or rims<br />
requires special care. Tires on drop center<br />
rims are best handled on a wheel holder,<br />
or tire-changing machine (Fig. 3).<br />
FIG. 5 Tire Spreader<br />
Inspect the rim parts carefully for<br />
rust, damage or distortion (Fig. 6). Never<br />
use rims, locking rings or flanges which<br />
are out of shape, rusted or cracXed or<br />
broken in any way. Never use a ring or<br />
other rim parts of different manufacture<br />
than the original rims or any different<br />
size or type.<br />
FIG. 4 Use of Tire Irons<br />
F 1858·A<br />
FIG. 2 Safe Air Removal<br />
F1853·A<br />
FIG. 3 Changing Tire on Drop Center<br />
Rim<br />
This can help prevent cuts on hands<br />
and wrists and will make it unnecessary<br />
to use a mallet for seating the tire.<br />
Use only standard tire mounting tools<br />
and equipment. The use of makeshift<br />
tools, screwdrivers or pliers to force tires<br />
on or off rims or wheels is dangerous.<br />
Always lubricate tire beads to assure<br />
sealing of tire beads on rim.<br />
The Rotunda tire changer includes a<br />
bead seater/inflator using an<br />
automatically adjustable inflation ring,<br />
which aids in properly seating the bead<br />
for inflation. To properly operate the<br />
Rotunda tire changer, follow the<br />
instructions provided.<br />
As with the drop-center rims, be<br />
certain on split-rim assemblies that all air<br />
is out before unlocking a rim or ring. Use<br />
special care when using tire irons. Grip<br />
them firmly and keep them free ofoil and<br />
grease. They can slip and fly with<br />
tremendous force (Fig. 4).<br />
A careful inspection should be made<br />
of the tire and all necessary repairs<br />
should be performed. A tire spreader is<br />
very helpful (Fig. 5) but use care when<br />
working around it. Keep the spreader<br />
arms closed when the machine is idle.<br />
FIG. 6 Visual Inspection<br />
F 1854.A<br />
Tires and rims often require a buffing<br />
operation before being mounted once the<br />
regular repairs have been made.<br />
Always wear Safety Goggles, or a<br />
face shield when performing any buffing<br />
operation.<br />
Avoid hammering rings or rims with<br />
steel hammers. Small bits of steel may be<br />
broken off the hammer or rim, flying into<br />
the eyes (wear safety goggles) face or<br />
body. Use rubber-covered, steel-headed<br />
hammers wherever possible (Fig. 7).<br />
Rubber mallets only should be used on<br />
passenger car tires; although with<br />
modern tire changing equipment no<br />
pounding is necessary.<br />
Make certain the rim ring is seated to<br />
full depth of the groove, fits tightly all<br />
around, and is securely locked.
11-01-3<br />
General Wheel and Tire Service<br />
11-01-3<br />
FIG. 7 Seating of Rings<br />
F18S9·A<br />
Stand away from the valve stem as far<br />
as possible while inflating tires. Avoid a<br />
position where the face or body is<br />
FIG. 8 Inflation Details<br />
F 18SS·A<br />
immediately over the work being done on<br />
any tire in which there is pressure.<br />
With certain types of wheels,<br />
however, it is necessary to seat the rings<br />
while the tire is being inflated. In either<br />
case before inflating study the next step.<br />
Attach a portable safety device, made<br />
especially for the purpose, to the<br />
assembly. This portable device should be<br />
used with all types of wheels and rims.<br />
If the assembly is not of the type<br />
which requires inflation to seat the rings,<br />
a Safety Cage should be used, although<br />
the portable device is the best (Fig. 8).<br />
Use only accurate, tested gauges to<br />
insure proper air pressure. Check all<br />
gauges regularly with a master gauge.<br />
Play it SAFE. Set a good example for<br />
others who work with you. Follow the<br />
above suggestions <strong>com</strong>pletely. If you are<br />
ever tempted to take a short cut because<br />
you are in a hurry, that is the time that<br />
you could get hurt.<br />
Finally, always remember, a jack is<br />
provided for wheel and tire maintenance<br />
only. Never run the engine when the<br />
vehicle is supported. by a jack.<br />
DIAGNOSIS AND TESTING<br />
DIAGNOSIS CHARTS<br />
The following charts can be used as<br />
an aid in wheel and tire service diagnosis.<br />
PROBLEM POSSIBLE CAUSE CORRECTION<br />
• Tires show excess wear on edges of tread • Underinflated tires • Adjust air pressure in tires<br />
• Vehicle overloaded<br />
• Correct as required<br />
• High speed cornering<br />
• Correct as required<br />
• Incorrect toe setting<br />
• Set toe to specifications<br />
• Tires show excess wear in center of tread • Tires overinflated • Adjust air pressure in tires<br />
• Excessive tire wear problems • Improper tire pressure • Adjust air pressure in tires<br />
• Incorrect tire/wheel usage<br />
• Install correct tire/wheel <strong>com</strong>bination<br />
• Loose or leaking shock absorbers<br />
• Tighten or replace as necessary<br />
• Front wheels out of alignment<br />
• Align front wheels<br />
• Front wheel bearings out of adjustment<br />
• Adjust front wheel bearings<br />
• Loose, worn or damaged steering linkage<br />
• Inspect, repair or replace as required<br />
or joints<br />
• Loose, worn or damaged suspension <strong>com</strong>ponellts, • Inspect, repair or replace as required<br />
bushings and ball joints<br />
• Wheels and tires out of balance<br />
• Balance wheels and tires<br />
• Excessive lateral and/or radial runout<br />
• Check, repair or replace as required<br />
of wheels and tires<br />
CF2458-A
11·01·4 General Wheel and Tire Service 11·01·4<br />
I TIRE COMPLAINTS 1<br />
I<br />
CHECK TIRES FOR EXCESSIVE<br />
WEAR AND CUPPING.<br />
OK 1<br />
CHECK WHEELS FOR<br />
LATERAL AND RADIAL<br />
RUN· OUT.<br />
NOT OK<br />
REPLACE EXCESSIVELY WORN<br />
OR CUPPED TIRES.<br />
OK r NOT OK<br />
CHECK TIRES FOR LATERAL<br />
RUNOUT.<br />
REPLACE WHEEL IF EITHER<br />
RUNOUT EXCEEDS<br />
SPECI FICATIONS.<br />
OK<br />
NOTOK<br />
1<br />
CHECK TIRES FOR RADIAL REPLACE TIRE IF LATERAL I<br />
RUNOUT.<br />
RUNOUT EXCEEDS<br />
SPEcr FICATlONS.<br />
I<br />
OK 1<br />
NOT OK<br />
BALANCE ALL WHEEL AND REINDEX TIRES AND REPLACE<br />
TIRE ASSEMBLIES ON IF RADIAL RUNOUT EXCEEDS<br />
VEHICLE (HIGHWAY TREADI.<br />
.090" TOTAL WHEEL AND TIRE.<br />
NOT OK<br />
BALANCE ALL WHEEL ANDI<br />
TIRE ASSEMBLIES ON VE·<br />
HICLE (HIGHWAY TREAD).<br />
MUD AND SNOW TREAD TYPE REPLACE TIRES THAT CANNOTU OK<br />
ONLY.<br />
BE BALANCED (HIGH· WAY<br />
TREADI.<br />
r<br />
NOTOK<br />
VIBRATION, BEATING OR<br />
DRUMMING NOISE WITH MUD<br />
REPLACE WITH HIGHWAY<br />
AND SNOW TYPE TIRES THAT TYPE TREAD IF BALANCING<br />
CAN BE MIS· DIAGNOSED AS A ONLY DOES NOT CORRECT<br />
DRIVELINE VIBRATION.<br />
PROBLEM.<br />
~ ROAD TEST. ~<br />
CF2458·A1
11-01-5 General Wheel and Tire Service<br />
11-01.5<br />
I<br />
I<br />
TIRE COMPLAINTS - NOISE OR VIBRATION -<br />
PART TIME AND FULL TIME 4·WHEEL DRIVE MODELS<br />
t<br />
VERIFY THE CONDITION BY ROAD TESTING.<br />
NOTE: FOR 4·WHEEL DRIVE VEHICLES. VERIFY COM·<br />
PLAINT WITH KNOWN QUALITY CONVENTIONAL<br />
TIRES. IF SYMPTOM STILL EXISTS:<br />
1. SHI FT TRANSFER CASE INTO 2·WHEELDRIVE.<br />
2. UNLOCK FRONT HUBLOCKS lOR REMOVE FRONT<br />
DRIVESHAFTI.<br />
3. IF COMPLAINT DISAPPEARS, CAUSE IS IN FRONT<br />
DRIVESHAFT.<br />
4. IF COMPLAINT PERSISTS, REMOVE REAR DRIVE·<br />
SHAFT AND ROAD TEST USING FRONT DRIVE.<br />
S. IF COMPLAINT DISAPPEARS, FAULT IS IN REAR<br />
DRIVESHAFT.<br />
6. IF PROBLEM PERSISTS, REFER TO DRIVELINE 01·<br />
AGNOSIS IN PART 1S-01 OR OTHER SOURCES.<br />
I<br />
NOT OK<br />
CHECK WHEEL FOR LATERAL AND RADIAL RUNOUT.<br />
I<br />
OK<br />
REPLACE WHEEL IF SPECIFICATION IS EXCEEOED.<br />
CHECK TIRE FOR LATERAL RUNOUT.<br />
NOTOK<br />
OK<br />
REPLACE TIRE IF SPECI FICAnON IS EXCEEDED.<br />
CHECK TIRE FOR RADIAL RUNOUT.<br />
NOTOK<br />
REPLACE TIRE IF SPECIFICATION IS EXCEEDED.<br />
- FULL TIME DRIVE EXCEPTIONS:<br />
1. REMOVE FRONT DRIVE SHAFT.<br />
2. SHIFT TRANSFER CASE INTO HI LOCK AND ROAD TEST.<br />
3. IF COMPLAINT PERSISTS. REMOVE REAR DRIVE SHAFT,SHIFT TRANSFER<br />
CASE TO HI LOCK AND ROAD TEST USING FRONT DRIVE AXLE.<br />
ALL OTHER INFORMATION APPLIES TO FULL AND PART TIME "·WHEEL DRIVE.<br />
CF2468·A2
11-01-6<br />
General Wheel and Tire Service<br />
11-01-6<br />
ADJUSTMENTS<br />
WHEEL AND TIRE CHECKING<br />
PROCEDURE<br />
Inspect tires for wear from incorrect<br />
mounting misalignment, loose wheel<br />
bearings, bent wheels, or cupping or<br />
scalping from inbalance. Tires which<br />
show irregularities and definite<br />
roughness must be replaced.<br />
See the instructions provided with the<br />
Rotunda Wheel Balancer.<br />
Make certain that the brakes are not<br />
dragging and wheel bearings are properly<br />
adjusted before attempting to spin the<br />
wheels. On vehicles equipped with disc<br />
brakes, push the brake shoes into the<br />
caliper to free the rotor.<br />
f.<br />
~CHECKTOTAL<br />
RADIAL RUNOUT HERE<br />
CHECK TOTAL<br />
LATERAL RUNOUT HERE<br />
Procedure to Diagnose Tire and<br />
Wheel Runout<br />
NOTE: Remove mud and snow type<br />
tires before attempting to correct any<br />
moving vehicle vibration problems.<br />
1. Promptly after road test, raise vehicle<br />
on a hoist to prevent tire flat spots.<br />
2. Spin front wheels fast enough by hand<br />
to check bearings for roughness.<br />
3. Using a tire dial indicator Fig. 9 check<br />
the radial and lateral runout of the<br />
tire and wheel assembly. If both<br />
runouts are less than .090 inch,<br />
proceed to tire balancing.<br />
NOTE: To insure an accu'rate<br />
reading, rotate the tire and wheel<br />
assembly by hand, slowly so that the<br />
indicator pickup roller does not vibrate<br />
or chatter.<br />
4. If the LATERAL RUNOUT of the<br />
tire and wheel assembly is more than<br />
.090 inch, check the wheel runout. If<br />
the wheel lateral runout is more than<br />
.045 inch, replace the wheel. If the<br />
lateral run-out is less than .045 inch,<br />
replace the tire. After replacing a<br />
wheel and/or tire recheck run-outs.<br />
5. Ifthe RADIAL RUNOUT ofthe tire<br />
and wheel assembly is more than .090<br />
inch, mark the point of the highest<br />
runout on the tire. Check the radial<br />
runout of the wheel. If the runout is<br />
more than .045 inch, replace the<br />
wheel. If the runout is less than .045<br />
inch, mark the point of the lowest<br />
runout on the wheel, dismount the<br />
tire from the wheel and align the<br />
mark on the tire (high spot) and the<br />
mark on the wheel (low spot).<br />
Remount the tire on the wheel.<br />
Rechp.ck the tire radial runout and if<br />
it is still more than .090 inch, replace<br />
the tire with an original equipment<br />
level tire. After replacing a wheel<br />
and/or tire, reche~k runouts.<br />
NOTE: When remounting tire on<br />
wheel, use ample lubricant on tire and<br />
FIG. 9 Correct Placement of Runout Indicator Pickup<br />
wheel bead area. Overinflate tire to seat<br />
bead (but not more than 45 psi for<br />
passenger type tires, or 80 psi for tubetype<br />
or 60 psi for tubeless truck type<br />
tires), then bleed to re<strong>com</strong>mended<br />
pressure. \<br />
6. Balance all four wheel and tire<br />
assemblies using an on-the-vehicle<br />
balancer.<br />
7. Remove balance equipment, spin tire<br />
to speed and allow to coast down to<br />
verify balance.<br />
8. Imbalanced brake drums can also<br />
cause a vibration similar to wheels<br />
and tires, or driveline. Remove rear<br />
wheels and tires, engage transmission.<br />
Drive rear hubs and drums 30-50<br />
MPH, if vehicle vibrates static and<br />
dynamic balance drums; and then<br />
wheels, tires and drums as an<br />
assembly. Install on vehicle and check<br />
for vibration. Road test for final<br />
result.<br />
BALANCING WHEELS<br />
Balancing Single Rear Wheels<br />
Don't use the spinner on any single<br />
rear wheels.<br />
Jack up one rear wheel at a time,<br />
locate the jack securely under the frame,<br />
approximately one-foot ahead of the rear<br />
wheel. Make sure the jack is secure and<br />
safe.<br />
Spin the wheel with the engine and<br />
transmission in high gear at 30-40 mph<br />
on the speedometer. Do not spin powered<br />
wheels with a wheel spinner. Start the<br />
wheel as gradually as possible. Take care<br />
to avoid jerking condition on trucks<br />
equipped with an automatic shift. Use an<br />
accelerator pedal prop on vehicles not<br />
equipped with a hand throttle.<br />
To balance, place the pick-up as close<br />
to the wheel as possible; then, with the<br />
F2457·A<br />
wheel spinning at the speed where the<br />
maximum vibration is showing, read the<br />
strobe and follow the same procedure as<br />
balancing front wheels.<br />
Balancing Rear Wheels of <strong>Truck</strong> with<br />
Semi-lock Differential<br />
Use one of the following methods for<br />
rear wheels:<br />
1. Place a jack under the frame, one foot<br />
ahead of the rear wheel you want to<br />
balance. Jack up the wheel. Place<br />
another jack under the axle near the<br />
opposite rear wheel, and raise the<br />
wheel. Place the pick-up under the<br />
wheel. Spin the wheel with the motor<br />
to approximately 60-70 mph, to<br />
where the most vibration shows. Read<br />
the strobe and follow the same<br />
procedure required for balancing<br />
front wheels.<br />
2. Jack up the rear wheels as noted in<br />
step 1. Remove the rear wheel<br />
opposite the wheel you are to balance.<br />
Balance the rear wheelan the vehicle<br />
and reinstall the other wheel. After<br />
reversing the position of the jacks,<br />
balance the opposite rear wheel. Do<br />
not remove the first rear wheel.<br />
Balancing Dual Wheels and Wheels of<br />
<strong>Truck</strong>s Equipped with Full Floating<br />
Axles<br />
Jack up the rear wheels with the jack<br />
located securely under the differential<br />
housing. Raise the wheels 1-112 inches<br />
from the floor.<br />
Disconnect the wheel from the axle<br />
drive by removing the hub flange nuts or<br />
screWs. Pull the hub flange out to clear<br />
the studs at least 1/2 inch.<br />
Spin Dual Wheels with an 800-C2 or<br />
500-C Heavy-Duty <strong>Truck</strong> Spinner or<br />
equivalent.
11-01-7<br />
General Wheel and Tire Service<br />
11-01-7<br />
FRONT WHEEL BEARING<br />
MAINTENANCE<br />
Wheel bearings are adjustable.<br />
Satisfactory operation and long life of<br />
bearings depend on proper adjustment<br />
and correct lubrication. If bearings are<br />
adjusted too tightly, they will overheat<br />
and wear rapidly. An adjustment that is<br />
excessively loose can cause pounding and<br />
contribute to uneven tire wear, steering<br />
difficulties and inefficient brakes. The<br />
bearing adjustment should be checked at<br />
regular inspection intenals.<br />
CLEANING AND INSPECTION<br />
WHEELS<br />
Wheel stud nuts should be inspected<br />
and tightened twice within the first 500<br />
miles of operation. After the first 1000<br />
miles of operation, they should again be<br />
inspected and tightened. Loose wheel<br />
stud nuts may cause shimmy and<br />
vibration. Elongated stud holes in the<br />
wheels may also result from the loose<br />
stud nuts.<br />
Keep the wheels and hubs clean.<br />
Stones or lumps of mud wedged between<br />
the wheel and drum will unbalance a<br />
wheel and tire.<br />
Check for damage that would affect<br />
the runout of the wheels. Wobble or<br />
shimmy caused by a damaged wheel will<br />
eventually damage the wheel bearings<br />
and cause uneven tire wear. Inspect the<br />
wheel rims for dents that could permit air<br />
to leak from the tires.<br />
TIRES<br />
The tires should be checked<br />
frequently to be sure that the air<br />
pressures agree with those specified for<br />
the tires and vehicle model. Inspect the<br />
tire tread, and remove all stones, nails,<br />
glass or other objects that may be wedged<br />
in the tread. Check for holes or cuts that<br />
may permit air leakage from the tire, arid<br />
make the necessary repairs.<br />
Inspect the tire side walls for cuts,<br />
bruises, and other damage. If internal<br />
damage is suspected, demount the tire<br />
from the wheel for further inspection,<br />
repair or replacement.<br />
Check the tire valve for air leaks, and<br />
replace the valve if necessary. Replace<br />
any missing valve caps.<br />
On F-l00, -250, -350, Econoline and<br />
Bronco models, it is important that all<br />
wheels be balanced. Fig. 10 describes<br />
<strong>com</strong>mon tire wear conditions.<br />
FRONT WHEEL BEARINGS<br />
Wheel bearings are adjustable, to<br />
correct for bearing and shoulder wear of<br />
the spindle. Satisfactory operation and<br />
long life of bearings depend on proper<br />
adjustment and correct lubrication. If<br />
bearings are adjusted too tightly, they<br />
will overheat and wear rapidly. An<br />
adjustment that is excessively loose can<br />
cause pounding and contribute to uneven<br />
tire wear, steering difficulties and<br />
inefficient brakes. The bearing<br />
adjustment should be checked at regular<br />
inspection intenals.<br />
Front hub assemblies and bearings<br />
should be cleaned, inspected and<br />
lubricated whenever the hub assemblies<br />
are removed or at the mileage/time<br />
periods indicated in the maintenance<br />
schedule.<br />
New hub assembly grease seals should<br />
be installed when the hub is removed. A<br />
damaged or worn seal may permit<br />
bearing lubricant to reach the brake<br />
linings, resulting in ineffective brake<br />
operation and necessitating premature<br />
replacement of linings.<br />
Bearing adjustment is described in<br />
Part 11-10 for front wheels. Part 11-12<br />
covers front drive bearing adjustment.<br />
Parts 11-11 and 11-14 cover rear wheel<br />
bearing adjustments.
11-01-8 General Wheel and Tire Service 11-01-8<br />
UNDERINFLATION<br />
OVERINFLATION<br />
.~<br />
CUPPING-UNDERINFLATION AND/OR<br />
MECHANICAL IRREGULARITIES<br />
INCORRECT TOE-IN OR EXTREME CAMBER<br />
FEATHERING DUE TO MISALIGNMENT<br />
OR SEVERE- CORNERING<br />
STONE BRUISE<br />
STONE BRUISE<br />
BRUISE HEAT BRUISE DOUBLEBRUISE-SHARP OBJECT<br />
AND RESULTING FATIGUE F1467.D<br />
FIG. 10 Tire Wear Conditions
11-02-1 Wheels and Tires-Drop-Center Rim 11-02-1<br />
Wheels and Tires -<br />
PART<br />
Drop-Center Rim 11-02<br />
APPLIES TO BRONCO, E-100-E-350, F-100-F-350, P-500, AND MEDIUM TRUCKS<br />
SUBJECT PAGE SUBJECT PAGE<br />
DESeRI PTION<br />
REMOVAL AND INSTALLATION<br />
Front Wheel Assembly ................. 02-1 Tire Replacement Precautions ...... , .... 02-2<br />
Front Wheel Assembly -<br />
Wheel Replacement<br />
Four Wheel Drive ..................... 02-1 Light Vehicles ......................02-1<br />
Rear Wheel Assembly .................. 02-1 Medium Vehicles ...................02-2<br />
SPECIFICATIONS ....................... 02-2<br />
DESCRIPTION<br />
FRONT WHEEL ASSEMBLY<br />
Each front wheel and tire assembly is<br />
bolted to its respective front hub and<br />
brake drum or rotor assembly. Two<br />
opposed tapered roller bearings are<br />
installed in each hub (Fig. 1). A grease<br />
retainer is installed at the inner end ofthe<br />
hub to prevent lubricant from leaking.<br />
The entire assembly is retained on its<br />
spindle by the lock nut and/or adjusting<br />
nut and cotter pin.<br />
FRONT WHEEL<br />
ASSEMBLY-FOUR-WHEEL DRIVE<br />
The front axles used on 4-wheeI drive<br />
models are described in Parts 15-30,<br />
15-32 and 15-33 of this manual. The<br />
locking hub assemblies are described in<br />
Part 11-12.<br />
REAR WHEEL ASSEMBLY<br />
Information on rear wheels may be<br />
found in Group 11, Parts II and 14.<br />
INNER BEARING CONE<br />
AND ROLLER<br />
WHEEL ASSEMBLY<br />
F 1851-A<br />
FIG. 1 Front Hub, Bearings and Grease Retainer-Disc Brakes-F100-F350,<br />
E1OO-E350<br />
REMOVAL AND INSTALLATION<br />
WHEEL REPLACEMENT<br />
Light Vehicles<br />
Removal<br />
1. Pry off the hub cap or wheel cover (if<br />
the vehicle is so equipped), and loosen<br />
but do not remove the wheel stud<br />
nuts.<br />
2. Raise the vehicle until the wheel and<br />
tire clear the floor. When installing<br />
the hub cap, notice the wheel hubs.<br />
The hub cap should be positioned on<br />
the wheel over one of the retaining<br />
nubs and the two locating nubs. Be<br />
sure that the lip of the hub cap is<br />
firmly seated in the groove of the<br />
retaining nub, and then force the cap<br />
over the other retaining nub. Any<br />
other procedure necessitates heavy<br />
pounding with possible damage to the<br />
hub cap.<br />
3. Remove the wheel stud nuts and the<br />
wheel and tire from the hub and drum<br />
assembly, or the hub and rotor<br />
assembly.<br />
Instal/ation<br />
1. Clean all dirt from the hub and rotor<br />
assembly. The replacement wheel and<br />
tire must be clean.<br />
2. Position the wheel and tire on the hub<br />
and rotor assembly, and install the
11-02-2 Wheels and Tires-Drop-Center Rim 11-02-2<br />
wheel stud nuts. Tighten the stud nuts<br />
enough to hold the wheel firmly in<br />
place. Always tighten alternate nuts<br />
to draw the wheel evenly against the<br />
hub and drum (or hub and rotor).<br />
On dual wheels, except E-350 and<br />
F-350 be sure to back ofT the outer nut<br />
before tightening the inner nut. Then<br />
tighten the outer nut. E-350 and F<br />
350 dual wheels have mounting bolt<br />
holes which are alternately flared<br />
inward and outward. These surfaces<br />
must be mated when the wheels are<br />
mounted. Fig. 2 illustrates the dual<br />
wheel radial alignment locating pin<br />
used on E-350 and F-350.<br />
3. Lower the vehicle to the floor, and<br />
tighten the wheel stud nuts to the<br />
specified torque. On a new vehicle,<br />
and each time a wheel and tire is<br />
installed, the wheel nuts should be<br />
tightened to specification and<br />
rechecked at 500 miles.<br />
Medium Vehicles<br />
Removsl<br />
1. Loosen but do not remove the wheel<br />
stud nuts.<br />
2. Raise the vehicle until the wheel and<br />
tire clear the floor.<br />
3. Remove the wheel stud nuts and the<br />
wheel and tire from the hub and<br />
drum.<br />
ALIGN DUAL WHEELS<br />
ON LOCATING PIN<br />
F 1829-A<br />
FIG. 2 Dual Wheel Radial Alignment<br />
to Hub (E-350, F·350)<br />
Instsllstion<br />
1. Clean all dirt from the hub and drum.<br />
The replacement wheel and tire must<br />
be clean.<br />
2. Position the wheel and tire on the hub<br />
and drum, and install the wheel stud<br />
nuts. Tighten the stud nuts enough to<br />
hold the wheel firmly in place.<br />
Always tighten alternate nuts to draw<br />
the wheel evenly against the hub and<br />
drum.<br />
On dual wheels, be sure to back off<br />
the outer nut before tightening the<br />
inner nut. Then tighten the outer nut.<br />
3. Lower vehicle to the floor, and<br />
tighten the wheel stud nuts to the<br />
specifications. On a new vehicle, and<br />
each time a wheel and tire is installed,<br />
the wheel nuts should be checked for<br />
tightness.<br />
TIRE REPLACEMENT<br />
PRECAUTIONS<br />
The tire must be <strong>com</strong>pletely deflated<br />
before removal, and the bead must not be<br />
damaged by a tire iron.<br />
After installation, a tube tire should<br />
be inflated to re<strong>com</strong>mended pressure,<br />
deflated, and then inflated again to insure<br />
that the tube is not folded inside the tire.<br />
Be sure the- tube flap is properly<br />
positioned before inflating the tire. On F<br />
100, -250, -350, Econoline, and Bronco<br />
series, it is important that each front and<br />
rear tire and wheel be balanced.<br />
When installing tires on F-I00/350,<br />
and E-I00/350 vehicles, thoroughly<br />
lubricate the tire beads. Inflate the tire<br />
until both bead seats against the rim of<br />
the wheel, then deflate to the specified<br />
"Tire Inflation Pressures" shown in the<br />
<strong>1977</strong> <strong>Truck</strong> Owners <strong>Manual</strong> for each<br />
vehicle series. To seat the tire beads, the<br />
initial inflation for passenger-type tires<br />
is 45 psi maximum; for truck-type<br />
tubeless tires, 60 psi maximum; for trucktype<br />
tube tires 80 psi maximum. Follow<br />
the instructions supplied with the<br />
Rotunda (35-002, 35-0010 or equivalent)<br />
tire changer. Refer to Part 11-01 for<br />
diagnosis and testing procedures, safety<br />
procedures and illustrations.<br />
SPECIFICATIONS<br />
WHEEL TORQUE LIMITS - F-100 THRU F-350, ECONOLlNE, BRONCO, P-500<br />
Model<br />
Nut<br />
Size<br />
Ft-Lb<br />
E-100, E150 1/2-20 90<br />
F-1 00, F-150 (4 X 4), U-1 00<br />
(Std. Wheel)<br />
F-250 (4 x 2 and 4 x 4)<br />
Model Nut Size Ft-Lb<br />
E-350, F-350, 9/16-18 210<br />
(W/Dual Wheels)CD<br />
(and 7400 Ib Axle)(2)<br />
F-350, E-350 9/16-18 135<br />
E-350<br />
E-250 1/2-20 135<br />
E-350 SiR 9/16-18 135<br />
E·350 D/R 9/16-18 210<br />
P-500 3/4-16 or 450<br />
1-1/8-16<br />
CD E-350, F-250 and F-350 Single Rear Wheel Lug Nuts are<br />
Black in Color.<br />
(2) E-350, F-350, Dual Rear Wheel Lug Nuts<br />
are Zinc Plate in Color.<br />
The Lug Nuts Should not be mixed. The Dual Wheel Lug<br />
Nuts are Left Handed Threads for Left Rear Wheels Only_<br />
CF1804·E
11-03-1 Wheels and Tires-Two-Piece Rims 11-03-1<br />
Wheels and Tires -<br />
PART<br />
Two-Piece Rims 11-03<br />
APPLIES TO F·250, F·350 VEHICLES<br />
SUBJECT PAGE SUBJECT PAGE<br />
DESCRIPTION .......................... 03-1 Tire Removal and Mounting (Cont'd)<br />
REMOVAL AND INSTALLATION<br />
Two-Piece Semi-Drop<br />
Tire Removal and Mounting Center Rims ....................... 03-2<br />
Two-Piece Rims .................... 03-1<br />
DESCRIPTION<br />
Two-piece rims are used on disc and<br />
cast wheels with tube-type tires only.<br />
Refer to Part 11-01 for diagnosis and<br />
testing procedures, safety procedures and<br />
illustrations.<br />
REMOVAL AND INSTALLATION<br />
The tire must be <strong>com</strong>pletely deflated<br />
before removal, and the bead must not be<br />
damaged by a tire iron.<br />
After installation, a tube tire should<br />
be inflated to re<strong>com</strong>mended pressure,<br />
deflated, and then inflated again to insure<br />
that the tube is not folded inside the tire.<br />
Be sure the tube flap is properly<br />
positioned before inflating the tire.<br />
It is re<strong>com</strong>mended that tire-changing<br />
equipment be used in changing all truck<br />
tires. See Safety Precautions in Part 11<br />
01.<br />
TIRE REMOVAL AND<br />
MOUNTING-TWO·PIECE RIM<br />
Removing Tire from Wheel<br />
If no tire-changing machine is<br />
available, remove tire as detailed in<br />
following Steps.<br />
1. First, remove valve core and<br />
<strong>com</strong>pletely deflate the tire. Then,<br />
place the wheel (ring side up) on the<br />
floor. Insert the hook end of the rim<br />
tool between the ring flange and the<br />
tire and press downward on bead.<br />
Continuing around the ring, pry the<br />
tire off the tapered seat of the ring<br />
(Fig. 1).<br />
2. To remove the ring, insert the straight<br />
end ofthe rim tool into the notch, and<br />
force ring opposite the notch down<br />
with foot, and pry ofT. Be careful not<br />
to bend side ring.<br />
3. Force upper tire bead into well<br />
opposite the valve slot and with tire<br />
F1460·B<br />
FIG. 1 Removing Rim and Removing<br />
Tire-Two-Piece Rim<br />
tool pry opposite portion of bead over<br />
edge of rim.<br />
4. Stand assembly in vertical position.<br />
Lubricate second bead. At top of<br />
assembly insert straight end of tool<br />
between bead and back flange of rim<br />
at about a 45 degree angle. Turn tool<br />
so that it is perpendicular to rim. Pry<br />
second bead ofT.<br />
5. Turn tire over. With rim tools, loosen<br />
bead on opposite bead seat. This can<br />
be further aided by using foot<br />
pressure.<br />
Make sure one portion of second<br />
bead is still in the rim well, then pry<br />
opposite portion of bead over edge of<br />
rim. This will free the tire from the<br />
rim.<br />
Mounting Tire to Wheel<br />
1. Place tire on rim so that valve is in<br />
line with rim slot and insert valve<br />
through the slot (Fig. 2). Force first<br />
bead down into well ofrim just to side<br />
ofvalve. Mount first bead over rim lip<br />
with rim tool, progressing around the<br />
tire.<br />
FIG. 2 Positioning and Starting<br />
Ring-Two-Piece Rim<br />
F1027·B<br />
2. To apply second bead, start at point<br />
opposite valve and press tire bead<br />
over rim lip and into rim well (Fig. 3).<br />
Mount remainder ofbead over rim lip<br />
by means of thin tire tool, being<br />
careful not to pinch tube. Ifnecessary,<br />
insert second tire tool and lubricate<br />
last 6 inches of bead before<br />
<strong>com</strong>pleting mounting.<br />
FIG. 3 Installing and Checking<br />
Ring-Two-Piece Rim<br />
F1028-B<br />
3. Place half of side ring under the rim<br />
lip with cutaway p~O'ttSjn.position<br />
as shown. Insert. th'itl.en~:'()ftim tool<br />
or heavy screwdri~~ '. ", ,~un ring<br />
'i:/,~~f;,'.:t:~·~<br />
..... :'.,;.,
11-03-2<br />
Wheels and Tires-Two-Piece Rims<br />
11-03-2<br />
"e" RING<br />
SAFETY BEAD HUMP<br />
FIG. 6 Removing Split Ring<br />
F1473.B<br />
FIG. 4 Two-Piece Split Ring-light <strong>Truck</strong><br />
~;m<br />
Tools<br />
outward toward centered position.<br />
Strike with mallet to start ring over<br />
rim lip, then strike remaining portion<br />
to force it over rim lip.<br />
TIRE REMOVAL AND<br />
MOUNTING-TWO-PIECE<br />
SEMI-DROP CENTER<br />
RIM-F250-F350<br />
Recent developments make possible<br />
the removal and mounting of tires from<br />
this type of wheel-rim <strong>com</strong>bination with<br />
mechanical tire-changing equipment. If<br />
available, follow instructions of<br />
equipment manufacturer. Otherwise, use<br />
the following instructions.<br />
This two-piece wheel uses a split C<br />
type ring, as shown in Fig. 4.<br />
Removal of Side Ring from Rim<br />
with Tire<br />
I. Deflate tire <strong>com</strong>pletely and place the<br />
wheel (ring side up) on the floor.<br />
2. Break the tire bead free from the rim,<br />
being careful not to damage the bead<br />
(Fig. 5).<br />
3. Insert the straight end of the rim tool<br />
into and under the notch in the ring<br />
(Fig. 6).<br />
4. Forc e the too I dow n war d to<br />
disengage the ring from the rim<br />
gutter. Work the tool around the rim,<br />
freeing the ring from the rim, and<br />
remove the ring.<br />
5. Turn the wheel over and loosen the<br />
opposite tire bead from the rim by<br />
driving the hook end of the rim tool<br />
between the rim flange and the tire<br />
bead. Pry the tire bead away from the<br />
taper, and remove the tire from the<br />
rim (Fig. 7).<br />
FIG. 5 loosening Tire Bead<br />
Mounting Tire to Wheel<br />
I. Position the tube in the tire and place<br />
the wheel (gutter side up) on the floor.<br />
Soap both beads of the tire and<br />
position the tire on the rim. It is<br />
important that the tire be soaped well<br />
as it must be forced over the safety<br />
bead hump and the rim edge (Fig. 8).<br />
2. Position the ring with the notch about<br />
3 inches from the valve stem.<br />
3. Insert the rim tool under the ring at<br />
a position approximately 180 degrees<br />
from the notch and pry tire onto rim.<br />
Work the remaining section of rim<br />
over the gutter with a second tool.<br />
4. Make certain that the ring is entirely<br />
seated in the gutter. If the ring is not<br />
seated correctly as described, it may<br />
be forced off violently, either during<br />
inflation or when the vehicle is<br />
operated.<br />
FIG. 7 Removing Tire From Rim<br />
FIG. 8 Installing First Tire Bead on<br />
Wheel<br />
5. After installation, inflate the tire and<br />
tube to 80 psi maximum to snap the<br />
tire beads over the bead hump and<br />
fully seat the tire against the rim and<br />
lock ring. Deflate the tire, then<br />
reinflate it to re<strong>com</strong>mended pressure<br />
to insure that the tube is not folded<br />
inside the tire. Be sure the tube flap<br />
is properly positioned before inflating<br />
the tire. Always use a cage or safety<br />
chain during initial inflation.
11-04-1 Wheels and Tires-Three-Piece Rims 11-04-1<br />
Wheels and Tires -<br />
PART<br />
Three-Piece Rims 11-04<br />
APPLIES TO ALL 500-9000 SERIES VEHICLES<br />
SUBJECT PAGE SUBJECT PAGE<br />
DESCRIPTION .......................... 04-1 Tire Removal and Mounting (Cont'd)<br />
REMOVAL AND INSTALLATION Three-Piece Rims ...................04-1<br />
Tire Removal and Mountinq<br />
Cast Wheels .......................04-2<br />
CF2463-A<br />
DESCRIPTION<br />
WHEEL ASSEMBLY<br />
WHEEL RIM LOCK RING<br />
FLANGE<br />
Three-piece rims are used on disc and<br />
cast wheels. Fig. 1 shows a dual wheel<br />
sectional view.<br />
Demountable rims for cast-spoke<br />
wheels are secured by a ramp at the back<br />
edge of each spoke, together with a lug<br />
retained by a stud and nut at the edge of<br />
each spoke. Refer to Part 11-01 for diagnosis<br />
and testing procedures, safety procedures<br />
and illustrations.<br />
3·PIECE RIM, DUAL WHEELS<br />
FIG. 1 Three-Piece Rim-Dual Wheel Sectional View<br />
F1806·A<br />
REMOVAL AND INSTALLATION<br />
The tire must be <strong>com</strong>pletely deflated<br />
before removal, and the bead must not be<br />
damaged by a tire iron.<br />
After installation, a tube tire should<br />
be inflated to re<strong>com</strong>mended pressure,<br />
deflated, and then inflated again to insure<br />
that the tube is not folded inside the tire.<br />
Be sure the tube flap is properly<br />
positioned before inflating the tire.<br />
TIRE REMOVAL AND<br />
MOUNTING-THREE-PIECE RIM<br />
Tire mounting procedures are the<br />
same for disc wheels and for cast wheels<br />
equipped with the three-piece rims.<br />
However, cast wheels require special final<br />
centering and runout adjustment.<br />
Removing Tire from Wheel<br />
1. Place the wheel and deflated tire on<br />
the floor, with the ring up.<br />
2. Insert the straight end of the rim tool<br />
in the locking ring depression and<br />
loosen the tire bead by pressing. down<br />
on the side ring (Fig. 2).<br />
3. Insert the straight end of the rim tool<br />
in the notch provided in the locking<br />
ring, and pry the locking ring out of<br />
the gutter (Fig. 2).<br />
4. Lift out the locking ring, and remove<br />
the slide ring (Fig. 3).<br />
...-<br />
Fl461.A<br />
FIG. 2 Loosening Tire Bead and<br />
locking Ring-Three-Ring Rim<br />
Fl462·A<br />
FIG. 3 Removing locking Ring and<br />
Positioning locking<br />
Ring-Three-Piece Rim<br />
5. Turn the wheel over and loosen the<br />
tire bead from the rim by driving the<br />
hooked end of the rim tool between<br />
the rim flange and the tire bead.<br />
6. Pry the tire bead away from the taper<br />
all around the rim until tire is free and<br />
remove the tire.<br />
Mounting Tire to Wheel<br />
1. Position the wheel (gutter side up) on<br />
the floor. Soap both beads of the tire<br />
and position the tire on the rim.<br />
2. Position the solid side ring on the tire<br />
and insert the tapered toe of the split<br />
locking ring between the rim and the<br />
side ring (Fig. 3).<br />
3. Using a soft hammer, drive the<br />
locking ring into place (Fig. 4). Start<br />
at one end of the split ring and<br />
progressively drive the ring into the<br />
gutter until the entire ring is seated<br />
(Fig. 4).<br />
The ring must be entirely seated<br />
around the entire circumference of the<br />
rim. The split ends must be engaged in the<br />
gutter, or the ring will be forced off
11-04-2<br />
Wheels and Tires-Three-Piece Rims<br />
11-04-2<br />
violently during inflation or when vehicle<br />
is driven. When inflating the tire do not<br />
stand in front of the ring. See Safety<br />
Precautions in Part 11·01.<br />
TIRE REMOVAL AND<br />
MOUNTING-CAST WHEELS<br />
Remoysl<br />
1. To remove the rim and tire from a<br />
cast wheel, apply the parking brake,<br />
and block at least one wheel. Raise<br />
the vehicle and remove the rim<br />
clamps.<br />
2. With dual rear wheels, lift off the<br />
outer rim and tire, remove the spacer<br />
rim, and the inside rim and tire<br />
assembly.<br />
Instmlstion<br />
1. To install the tire and rim on a dual<br />
wheel, place the inner tire and wheel<br />
on the wheel hub. The rim must ride<br />
high enough up on the tapered<br />
retainer flange of the inner section of<br />
the wheel to prevent the assembly<br />
from sliding down on the tapered<br />
surface.<br />
2. Position the spacer between the inner<br />
and outer rim.<br />
3. Place the outer rim and tire assembly<br />
on the wheel, and install the clamps<br />
(Fig. 5).<br />
4. Tighten the top clamp until the spacer<br />
pushes the inner rim onto the tapered<br />
surface of the wheel inner section.<br />
5. Tighten the bottom clamp to help<br />
center the rim on the wheel.<br />
6. Tighten the remaining clamps<br />
alternately and evenly, and tighten all<br />
wheel nuts to specification. .<br />
NOTE: The r e <strong>com</strong> men d e d<br />
procedure for tightening five spoke<br />
cast wheels is by "triangulation" as<br />
shown in Fig. 6. Turn nut number 1<br />
until snug, then rotate the wheel and<br />
rim assembly until nut number 3 is at<br />
the top position. Turn the nut until<br />
snug. Rotate the wheel and rim<br />
assembly until nut number 4 is at the<br />
top postion and turn the nut until<br />
snug. Since the entire weight of the<br />
wheel and rim assembly is on the top<br />
spoke position, this procedure allows<br />
equal application of force against<br />
three points of the rim for proper<br />
alignment. Repeat the triangle<br />
procedure, tightening each nut to the<br />
re<strong>com</strong>mended specifications. Tighten<br />
the remaining nuts (2 and 5) to<br />
specifications.<br />
See the manufacturers<br />
re<strong>com</strong>mendations for tightening<br />
procedures for six spoke wheels and<br />
three spoke single or double clamp<br />
wheels.<br />
After 50-100 miles ofoperation, the<br />
nuts should again be tightened to<br />
specifications and thereafter<br />
periodically inspected and tightened.<br />
Lateral or side runout should not<br />
exceed lI8-inch for the front rims and<br />
1/4-inch for the dual rear rims.<br />
Lateral or side runout must be<br />
checked at the outer bead surface of<br />
the wheel.<br />
2<br />
FIG. 4 Starting locking Ring and<br />
locking Ring<br />
Installed-Three-Piece Rim<br />
Fl463·A<br />
FIG. 5 Three-Piece Rim Installed on<br />
Cast Wheel<br />
F2482·A<br />
FIG. 6 Five Spoke Cast Wheel Nut<br />
Tightening Procedure
11-10-1 Wheels, Hubs and Bearings-Front (Except Front Drive) 11-10-1<br />
Wheels, Hubs and Bearings <br />
Front (Except Front Drive)<br />
PART<br />
11·10<br />
SUBJECT<br />
APPLIES TO ALL MODELS<br />
PAGE<br />
SUBJECT<br />
PAGE<br />
DESCRIPTION<br />
Front Wheel Assembly 10-1<br />
ADJUSTMENTS<br />
Front Wheel Bearing<br />
All Medium, Heavy and Extra<br />
Heavy <strong>Truck</strong>s 10-4<br />
Double Nut with Double Washer<br />
(12000 - Pound Center<br />
Point Axle) 10-4<br />
Double Nut with Lock Ring<br />
9000 and 12000 Pound<br />
Front Axle 10-4<br />
15000 Pound Front Axle 10-4<br />
Single Nut with Cotter Pin<br />
5000-7000 Pound Front Axle 10-4<br />
16000, 18000 and 20000<br />
Pound Front Axle 10-4<br />
F-100 - F-350 (4x2) and<br />
E-100 - E-350 10-4<br />
P-500 10-4<br />
REMOVAL AND INSTALLATION<br />
Disc Brakes<br />
Medium, Heavy and Extra<br />
Heavy Vehicles 10-5<br />
F-100 - F-350, E-100 - E350 10-5<br />
Drum Brakes<br />
P-500 10-5<br />
Front Wheel Grease Seal<br />
and Bearings 10-5<br />
Front Hub Seal<br />
National 10-7<br />
Stemco 10-6<br />
Oil Lubrication<br />
Medium, Heavy, Extra Heavy<br />
Vehicles 10-6<br />
SPECIFICATIONS 10-8<br />
DESCRIPTION<br />
FRONT WHEEL ASSEMBLY<br />
Each front wheel and tire assembly is<br />
bolted to its respective front hub and<br />
brake drum or rotor assembly. Two<br />
opposed tapered roller bearings are<br />
installed in each hub, Figs. 1 and 2. A<br />
grease retainer is installed at the inner<br />
end of the hub to prevent lubricant from<br />
leaking into the drum or onto the rotor.<br />
The entire assembly is retained to its<br />
spindle by the lock nut and/or adjusting<br />
nut and cotter pin, or an adjusting nut<br />
and lock nut <strong>com</strong>bination.
11-10-2 Wheels, Hubs and Bearings-Front (Except Front Drive) 11-10-2<br />
WHEEL<br />
DISC<br />
TYPE<br />
BRAKE<br />
DRUM<br />
5n}~~~;:'A~{\~z-:':-<br />
~i 'I/l ~ADJUSTING NUT I<br />
GASKET<br />
I<br />
\ ADJUSTING I<br />
9000 12,000 "~'~ /Ul:<br />
15,~r{~B. ~ ~,~,~@f-------l<br />
LOCK LOCK :<br />
GREASE NUT RING I<br />
GASKET CAP WASHER I<br />
ADJUSTING I<br />
~ NUT I<br />
~<br />
, INNER<br />
1200~~tEC.~.~ ~~------: HUB<br />
GREASE / WASHER I HUB STUD<br />
CAP ,LOCK I 1<br />
,,' NUT<br />
7<br />
e.~Zl- \\ \\0,------- -: -- --<br />
1 \1 1\ CAST I<br />
.'<br />
!!'}I '/!~<br />
CLAMP !"\ I'll TYPE " ~.<br />
J_.",ffi OUTER BEARING \<br />
GREASE RETAINER<br />
SPACER·<br />
'~'~~0)1<br />
II<br />
INNER "ARING CUP<br />
INNER BEARING SPACER·<br />
GREASE RETAINER<br />
BRAKE<br />
DRUM<br />
BEARING CUP<br />
·USED WITH 15000 LB. CAPACITY FRONT AXLE ONLY<br />
F1466·B<br />
FIG. 1 Typical Front Hubs and Bearings
11-10-3 Wheels, Hubs and Bearings-Front (Except Front Drive) 11-10-3<br />
INNER<br />
BEARING<br />
1201<br />
OUTER BEARING<br />
1216<br />
P·SERIES<br />
OUTER<br />
BEARING<br />
1216<br />
9000-12000 LB. AXLES<br />
CONE AND ROLLER<br />
ASSEMBLY(INNER)<br />
1201-A<br />
GREASE<br />
RETAINER<br />
1190<br />
LOCK<br />
RING<br />
3293<br />
:("7<br />
~<br />
:<br />
CONE AND ROLLER<br />
_ -/ASSEMBLY(OUTER)<br />
..j 1216-A<br />
5000.6000 AND 7000 LB. AXLES<br />
WASHER<br />
~95 ~~;<br />
WJ ffDl276<br />
GREASE<br />
RETAINER<br />
----------<br />
1190<br />
PIN<br />
72107-S36<br />
NUT<br />
351163-52<br />
CONE AND ROLLER<br />
ASSEMBLY(INNER)<br />
1216-B<br />
HUB AND DRUM<br />
ASSEMBLY<br />
1102-3<br />
12000 LB. AXLE<br />
BEARING<br />
ASSEMBLY<br />
(OUTER)<br />
44135-A<br />
RETAINER<br />
385603-S2<br />
PIN<br />
72169-S3<br />
"'_.::----_}<br />
CONE AND ROLLER<br />
ASSEMBLY(lNNER)<br />
1201<br />
GREASE<br />
RETAINER<br />
1190<br />
NUT<br />
38560-52<br />
PIN<br />
72145-S36<br />
CONE AND ROLLER<br />
ASSEMBLY (OUTER)<br />
1216<br />
1000,9000 LB. AXLES<br />
(HEAVY)<br />
NUT<br />
386218-52<br />
GREASE<br />
RETAINER<br />
COTTER<br />
PIN<br />
15000, 16000, 18000,<br />
20000 LB. AXLES<br />
F1474-H<br />
FIG. 2 Front Hubs, Bearings and Grease Retainers
11-10-4<br />
Wheels, Hubs and Bearings-Front (Except Front Drive) 11-10-4<br />
ADJUSTMENTS<br />
FRONT WHEEL BEARING<br />
ADJUSTMENT<br />
To check the wheel bearing<br />
adjustment, raise the front ofthe vehicle.<br />
Then, grasp the tire at the sides, and<br />
alternately push inward and pull outward<br />
on the tire. Ifany looseness is felt, adjust<br />
the front wheel bearings.<br />
F1oo-F350 (4x2) AND l100-E35O<br />
1. Remove the hub cap or wheel cover,<br />
wheel and tire assembly, disc brake<br />
caliper and pads, (refer to Part 12-24),<br />
dustcap, retainer and cotter pin.<br />
2. Tighten wheel retention nut to 22-25<br />
ft-Ibs while rotating the disc brake<br />
rotor in the opposite direction.<br />
3. Back otT the wheel retention nut 1/4<br />
turn and install retainer and cotter<br />
pin without additional movement of<br />
wheel nut.<br />
4. Re-install dustcap, caliper, pads and<br />
wheel and tire assembly.<br />
P-500<br />
1. Remove hub cap, ifso equipped, and<br />
remove grease cap from hub.<br />
2. Remove any excess grease from the<br />
end of the spindle and remove the<br />
adjusting nut cotter pin.<br />
3. While rotating the wheel, tighten the<br />
adjusting nut, (see Fig. 2), to 40-50<br />
ft-lb to seat the bearings.<br />
4. If necessary, back otT the adjusting<br />
nut to the next slot so nut aligns with<br />
the cotter pin hole. Then, back otT the<br />
adjusting nut two slots and install the<br />
cotter pin.<br />
5. Check the front wheel rotation. Ifthe<br />
wheel rotates freely with no<br />
noticeable end play, install the grease<br />
cap. If the wheel is still loose, or if it<br />
rotates roughly or noisily, the bearing<br />
cones, rollers and cups are dirty or<br />
worn and should be cleaned or<br />
replaced.<br />
6. Install the hub cap, if so equipped.<br />
ALL MEDIUM, HEAVY AND<br />
EXTRA-HEAVY TRUCKS<br />
Single Nut with Cotter Pin<br />
(5000-7000 Pound Front Axles)<br />
1. While rotating the wheel, torque the<br />
adjusting nut, 70 to 100 ft-Ib, to seat<br />
the bearings.<br />
2. Back otT the adjusting nut 180 degrees<br />
(one half tum).<br />
3. Hand tighten the adjusting nut finger<br />
tight (13 to 17 in-Ib) while moving the<br />
top part of the tire in and out.<br />
4. If the cotter pin hole lines up with a<br />
slot in the nut, insert and secure a new<br />
cotter pin. If it does not, back otT the<br />
adjusting nut to align a slot with the<br />
first available cotter pin hole. Final<br />
bearing adjustment must provide .001<br />
to OlD-inch end play.<br />
5. Install the gasket and grease cap and<br />
adjust the brakes. The final<br />
adjustment must not result in a<br />
preloaded bearing.<br />
Double Nut with Lock Ring<br />
(1 SOOO-Pound Front Axle)<br />
1. While rotating the wheel in both<br />
directions, torque the adjusting nut,<br />
100 to 125 ft-lb to seat the bearings.<br />
2. Back off the adjusting nut one<br />
<strong>com</strong>plete tum, Fig. 2.<br />
3. Again, rotate the wheel in both<br />
directions, and re-torque the<br />
adjusting nut, 40 to 55 ft-lb.<br />
4. Back otT the adjusting nut to obtain<br />
an initial .004 to .0lD-inch end play<br />
between the wheel hub and spindle.<br />
5. Install the lock ring. Make sure that<br />
adjacent nut dowel is inserted into a<br />
lock ring hole.<br />
6. Install the washer with the dimple<br />
indexed in one ofthe holes in the lock<br />
ring.<br />
7. Install lock nut and tighten, 100 to<br />
125 ft-lb.<br />
8. Re-check the end play. (Final bearing<br />
adjustment must allow .001 to .010<br />
end play.) Re-adjust if necessary.<br />
9. Bend the washer outward in two<br />
places, on opposite sides of lock nut,<br />
to lock the nut in position.<br />
10. Install the gasket and grease cap and<br />
adjust the brakes. The final<br />
adjustment must not result in a<br />
preloaded bearing.<br />
Double Nut with Double Washer<br />
(12000-Pound Center Point Axle)<br />
1. While rotating the wheel in both<br />
directions, tighten the adjusting nut,<br />
100 to 125 ft-Ib to seat the bearings.<br />
2. Back off the adjusting nut one<br />
<strong>com</strong>plete turn, Fig. 2.<br />
3. Again, while rotating the wheel in<br />
both directions, re-tighten the<br />
adjusting nut, 40 to 55 ft-Ib.<br />
4. Back otT the adjusting nut to obtain<br />
an initial .004 to .0lD-inch end play<br />
between the hub and spindle.<br />
5. Install the outer washer and lock nut<br />
and tighten, 100 to 125 ft-lb.<br />
6. Re-check the end play (final limit .001<br />
to .0lD inch). Re-adjust if necessary.<br />
7. Bend the washer outward in two<br />
places, on opposite sides of lock nut,<br />
to lock the outer nut in position.<br />
8. Install the gasket and grease cap and<br />
adjust the brakes. The final<br />
adjustment must not result in a<br />
preloaded bearing.<br />
Single Nut with Cotter Pin<br />
(16000-, 18000-and 20000<br />
Pound Front Axle)<br />
1. While rotating the wheel in both<br />
directions, tighten the adjusting nut,<br />
100 to 125 ft-Ib to seat the bearings.<br />
2. Back off the adjusting nut one<br />
<strong>com</strong>plete tum, Fig. 4.<br />
3. Again rotate the wheel in both<br />
directions, and re-torque the<br />
adjusting riut, 50 to 70 ft-lb.<br />
4. If necessary, back otT the adjusting<br />
nut to align a slot with the next cotter<br />
pin hole.<br />
5. Using the same cotter pin hole as a<br />
reference point, back otT the adjusting<br />
nut to the next slot to allow the wheel<br />
to rotate freely within the limits of<br />
.001 to .Oto-inch end play.<br />
6. Insert and secure the cotter pin.<br />
7. Install the gasket and grease cap and<br />
adjust the brakes. The final<br />
adjustment must not result in a<br />
preloaded bearing.<br />
Double Nut with Lock Ring<br />
(9000-and 12000·Pound Front<br />
Axle)<br />
1. While rotating the wheel in both<br />
directions, tighten the adjusting nut,<br />
100 to 125 ft-Ib to seat the bearing.<br />
2. Back off the adjusting nut one<br />
<strong>com</strong>plete turn.<br />
3. Then, again rotate the wheel in both<br />
directions, and re-torque the<br />
adjusting nut, 50 to 70 ft-lb.<br />
4. Back otT the adjusting nut to obtain<br />
an initial .004 to .0 la-inch end play<br />
between the hub and spindle.<br />
5. Install the lock ring making sure the<br />
adjusting nut dowel is inserted into<br />
the lock ring.<br />
6. Install the outer washer. locating<br />
dimple in washer in one of the lock<br />
ring holes, and install the lock nut.<br />
Tighten, 100 to 150 ft-lb.<br />
7. Re-check to make sure the final<br />
bearing adjustment allows .00 I to<br />
.010-inch end play. Re-adjust if<br />
necessary.<br />
8. Bend the washer outward in two<br />
places, on opposite sides of the lock<br />
nut, to lock the outer nut in position.<br />
9. Install the gasket and grease cap and<br />
adjust the brakes. The final<br />
adjustment must not result in a<br />
preloaded bearing.
11-10-5 Wheels, Hubs and Bearings-Front (Except Front Drive) 11-10-5<br />
REMOVAL AND INSTALLATION<br />
FRONT WHEEL GREASE SEAL<br />
AND BEARING REPLACEMENT<br />
AND REPACKING<br />
Wheel bearing lubricant is a lithium-base<br />
grease, <strong>Ford</strong> specification ESA-MIC75-B<br />
or equivalent.<br />
Sodium-base grease is not <strong>com</strong>patible<br />
with lithium-base grease and should not<br />
be intermixed. Therefore, do not<br />
lubricate front and/or rear wheel<br />
bearings without first ascertaining the<br />
type of original wheel bearing lubricant.<br />
Usage of in<strong>com</strong>patible bearing lubricants<br />
could result in premature lubricant<br />
breakdown. _<br />
If bearing adjustment will not<br />
eliminate looseness or rough and noisy<br />
operation, the hub and bearings should<br />
be cleaned, inspected, and repacked with<br />
specified wheel grease. Ifthe bearing cups<br />
or the cone and roller assemblies are<br />
worn or damaged, they should be<br />
replaced.<br />
DRUM BRAKES<br />
P-600<br />
1. Raise the vehicle until the wheel and<br />
tire clear the floor. Remove wheel and<br />
tire from hub. If drums will not<br />
remove easily, back off the brake shoe<br />
adjusting screw so that the shoes do<br />
not contact the brake drum. Remove<br />
grease cap from the hub.<br />
2. Remove the cotter pin, nut lock,<br />
adjusting nut and washer from the<br />
spindle, Fig. 2.<br />
3. Remove the outer bearing cone and<br />
roller. Pull the hub and drum<br />
assembly off the wheel spindle. Then,<br />
remove and discard the grease<br />
retainer. Remove the inner bearing<br />
cone and roller from the hub. Remove<br />
all traces of old lubricant from<br />
bearings, hubs, and axle spindle.<br />
4. Inspect the cups for scratches, pits or<br />
cracks. If the cups are worn or<br />
damaged, remove them with a drift.<br />
5. Clean the inner and outer bearing<br />
cones and rollers with solvent and dry<br />
thoroughly. Do not spin the bearings<br />
dry with <strong>com</strong>pressed air.<br />
6. Inspect the cones and rollers for<br />
cracks, nicks, brinelling, or seized<br />
rollers. Inspect the grease retainer<br />
and replace it if it is cracked, nicked,<br />
or dented.<br />
7. Cover the spindle with a clean cloth<br />
and brush all loose dust and dirt from<br />
the brake assembly. Remove the cloth<br />
from the spindle carefully to prevent<br />
dirt from falling on the spindle.<br />
8. Install the inner and outer bearing<br />
cups in the hub with T56P-1217-A<br />
installing tool, Fig. 3. Be sure to seat<br />
the cups properly in the hub. The<br />
cups will be properly seated when<br />
they are fully bottomed.<br />
9. Pack the inside of the hub with Multi<br />
Purpose Lubricant <strong>Ford</strong> specification<br />
ESA-MIC75-B or equivalent. Fill the<br />
hub until the grease is flush with the<br />
inside diameters of both bearing cups.<br />
Pack the bearing cones and rollers with<br />
wheel bearing grease. Use a bearing<br />
packer for this operation. If a packer is<br />
not available, work as much lubricant as<br />
possible between the rollers and cages.<br />
Lubricate the cone surfaces with grease.<br />
to. Place the inner bearing cone and<br />
roller in the inner cup and install the<br />
grease retainer (Fig. 4) with the<br />
appropriate driving tool. Be sure that<br />
the retainer is fully bottomed.<br />
11. Install the hub and drum on the wheel<br />
spindle. Keep the hub centered on the<br />
spindle to prevent damage to the<br />
grease retainer or the spindle threads.<br />
12. Install the outer bearing cone and<br />
roller and the flat washer on the<br />
spindle, then install the adjusting nut,<br />
and adjust the wheel bearing as<br />
outlined under Adjustments. Install<br />
the adjusting nut lock, cotter pin and<br />
grease cap.<br />
DISC BRAKES<br />
F-100-F-360, E-100-E-360<br />
1. Raise the vehicle until the tire clears<br />
the floor and remove the wheel and<br />
tire assembly from the hub and rotor.<br />
2. Remove the brake caliper, (refer to<br />
Part 12.24), and wire it to the<br />
underbody to prevent damage to the<br />
brake hose. It is not necessary to<br />
disconnect the hose from the caliper.<br />
Do not let the caliper hang with its<br />
weight on the brake hose or the hose<br />
may be<strong>com</strong>e stretched, twisted or<br />
ruptured.<br />
3. Remove the grease cap, cotter pin,<br />
retainer, nut and washer.<br />
4. Remove the outer bearing cone and<br />
roller.<br />
5. Pull the hub and rotor off the spindle<br />
and remove and discard the grease<br />
retainer.<br />
6. Remove the inner bearing cone and<br />
roller from the hub. Remove all traces<br />
of old lubricant from bearings, hub<br />
and axle spindle.<br />
7. Inspect the cups for scratches, pits or<br />
cracks. If the cups are worn or<br />
damaged, remove them with a drift.<br />
Clean the inner 'and outer bearing<br />
cones and rollers with solvent and dry<br />
thoroughly. Do not spin the bearings<br />
dry with <strong>com</strong>pressed air.<br />
8. Inspect the cones and rollers for<br />
cracks, nicks, brinelling, or seized<br />
rollers. Inspect the grease retainer<br />
and replace it if it is cracked, nicked,<br />
or dented.<br />
9. Cover the spindle with a clean cloth<br />
and brush all loose dust and dirt from<br />
the brake assembly. Remove the cloth<br />
from the spindle carefully to prevent<br />
dirt from falling on the spindle.<br />
10. If inner or outer bearing cups were<br />
removed, install replacement inner<br />
and outer bearing cups in the hub<br />
with tool T56P-1217-A, (Fig. 3). Be<br />
sure to seat the cups properly in the<br />
hub. The cups will be properly seated<br />
when they are fully bottomed.<br />
11. Pack the inside of the hub with<br />
CIAZ-19590-B Multi-Purpose<br />
Lubricant or equivalent. Fill the hub<br />
until the grease is flush with the inside<br />
diameters of both bearing cups. Pack<br />
the bearing cones and rollers with<br />
wheel bearing grease. Use a bearing<br />
packer for this operation. If a packer<br />
is not available, work as much<br />
lubricant as possible between the<br />
rollers and cages. Lubricate the cone<br />
surfaces with grease.<br />
12. Place the inner bearing cone and<br />
roller in the inner cup and install the<br />
new grease retainer with driving tool<br />
T37T-1l90-B, (Fig. 4). Be sure that<br />
the retainer is fully bottomed.<br />
13. Install the hub and rotor on the wheel<br />
spindle. Keep the hub centered on the<br />
spindle to prevent damage to the<br />
grease retainer or the spindle threads.<br />
14. Install the outer bearing cone and<br />
roller and the flat washer on the<br />
spindle, then install the adjusting nut,<br />
and adjust the wheel bearing as<br />
outlined under Adjustments. Install<br />
the grease cap.<br />
15. Install the caliper, (refer to part 12<br />
24).<br />
16. Install the wheel and tire assembly on<br />
the hub.<br />
17. Lower the vehicle and tighten the lug<br />
nuts to specification. Re-install the<br />
wheel cover or hub cap.<br />
MEDIUM, HEAVY AND EXTRA·<br />
HEAVY VEHICLES<br />
There are two basic types ofhubs, disc<br />
and cast, shown in Fig. 1. The basic<br />
design of the hub bearings is the same in<br />
all hubs, but minor differences in size<br />
exist between the various models. The<br />
outer bearing attaching parts differ<br />
according to front axle weight capacity<br />
as indicated in Fig. 1. For further detailed<br />
views of hubs, bearings, and grease<br />
retainers, see Fig. 2.<br />
1. Raise the vehicle until the tires clear<br />
the floor and install safety stands to<br />
support the front axle. Remove the<br />
grease cap and gasket from the hub.<br />
2. To check the wheel bearing<br />
adjustment, alternately push inward<br />
and outward on the tire. If there is
11-10-6 Wheels, Hubs and Bearings-Front (Except Front Drive) 11-10-6<br />
any excessive looseness, or if there is<br />
no end play, adjust the front wheel<br />
bearing.<br />
3. With 5000, 5500, 6000, 7000, 16000,<br />
18000 or 20000-pound capacity front<br />
axles, remove the cotter pin, adjusting<br />
nut and flat washer from the spindle.<br />
Proceed to Step 4.<br />
With 9000, 12000 or l5000-pound<br />
capacity front axles, remove the lock<br />
nut, washer, locking ring and the<br />
adjusting nut and pin. Proceed to<br />
Step 4.<br />
With a 12()()(}.pound capacity center<br />
point front axle, remove the lock nut,<br />
inner washer, adjusting nut and outer<br />
washer.<br />
4. Inspect the condition of the spindle<br />
and nut threads to insure a free<br />
running nut when reassembling.<br />
5. Remove the outer bearing cone and<br />
roller. Pull the hub and drum<br />
assembly otT the spindle.<br />
6. Remove the inner bearing and seal<br />
using a brass drift. Be careful not to<br />
damage the bearing cage.<br />
7. Remove all traces of old lubricant<br />
from the bearings, hubs and axle<br />
spindle. Inspect the cups for pitting,<br />
galling or unusual wear. If either cup<br />
is worn or damaged, remove it with<br />
a brass drift.<br />
8. Clean the inner and outer bearing<br />
cones and rollers with solvent and dry<br />
them thoroughly. Do not spin the<br />
bearings dry with <strong>com</strong>pressed air.<br />
9. Inspect the cones and rollers for<br />
pitting, galling or unusual wear.<br />
Closely inspect the rollers for end<br />
wear and flat or rough spots. Replace<br />
all worn or damaged assemblies. It is<br />
re<strong>com</strong>mended that the cone and roller<br />
assemblies and cups be replaced in<br />
sets.<br />
10. Replace the grease retainer.<br />
11. Cover the spindle with a clean cloth<br />
and brush all loose dust and dirt from<br />
the brake assembly. Remove the cloth<br />
from the spindle carefully to prevent<br />
dirt falling on the spindle.<br />
12. Install the inner and outer bearing<br />
cups in the hub with tool T56P-I2I7<br />
A, (Fig. 5). Check for proper seating<br />
of the new bearing cups by trying to<br />
insert a 0.00IS-inch feeler gauge<br />
between the cup and wheel hub, the<br />
feeler gauge should not enter.<br />
13. Pack the inside ofthe hub with lithiumbase<br />
wheel bearing grease Multi<br />
Purpose lubricant <strong>Ford</strong> specification<br />
EAA-MIC7's-B or equivalent. Fill the<br />
hub until the grease is flush with the<br />
inside diameters of both beanns cups.<br />
·Pacfihe beanngcones and rollers<br />
with wheel bearing grease. Use a<br />
bearing packer for this operation. If<br />
a packer is not available, work as<br />
much lubricant as possible between<br />
FIG. 3 Installing Bearing Cups<br />
FIG. 4 Installing Grease Retainer<br />
F1465-B<br />
the rollers and cages. Lubricate the<br />
cone surfaces with grease.<br />
14. Place the inner bearing cone and<br />
roller in the inner cup and install the<br />
grease retainer with the appropriate<br />
tool. Be sure the retainer is fully<br />
bottomed.<br />
On all synthetic-type seals, coat the<br />
seal lips with wheel bearing grease such<br />
as Multi-Purpose lubricant <strong>Ford</strong><br />
specification ESA-MIC75-B or equivalent,<br />
before installing the hub and drum.<br />
On seals not coated on the 00 with<br />
sealer by the supplier, coat the grease<br />
seal bore in the hub with a thin coat of<br />
non-hardening sealer prior to installing<br />
the grease seal.<br />
15. Install the hub and drum on the wheel<br />
spindle. Keep the hub centered on the<br />
spindle to prevent damage to the<br />
grease retainer or the spindle threads.<br />
16. With 5000, 5500, 6000, 7000, 16000,<br />
18000 or 20000-pound capacity front<br />
axles, install the outer bearing cone<br />
and roller and the flat washer on the<br />
INNER CUP<br />
INSTALLATION<br />
Tool-T56P·1217·A<br />
F2474-A<br />
OUTER CUP<br />
INSTALLATION<br />
FIG. 5 Installing Bearing Cups<br />
Fl464·A<br />
spindle. Then, install the adjusting<br />
nut.<br />
With 9000, 12000 and 15000<br />
pound capacity front axles, install the<br />
outer bearing cone and roller and the<br />
bearing adjusting nut.<br />
With a 12000-pound capacity<br />
center point front axle, install the<br />
washer and adjusting nut. Make the<br />
final bearing adjustment. See<br />
Adjustments, this Part.<br />
MEDIUM, HEAVY AND EXTRA<br />
HEAVY VEHICLES (OIL<br />
LUBRICATION)<br />
Stemco Seals and National Seals,<br />
available as regular production options,<br />
provide sealing where oil is used for<br />
bearing lubrication. The tools required<br />
for Stemco Seal Installation are only<br />
available from the Stemco warehouse.<br />
Refer to Specifications for the tooling<br />
required. Fig. 6 illustrates a front wheel<br />
Stemco Seal Installation.<br />
FRONT HUB SEAL INSTALLATION<br />
Stemco Seals<br />
Clean all parts thoroughly before<br />
starting the installation.
11-10-7 Wheels, Hubs and Bearings-Front (Except Front Drive) 11-10-7<br />
1. Oil the spindle and push the axle ring<br />
flush against the axle face where<br />
applicable.<br />
2. Remove all burrs from the wheel hub<br />
bore seal area, and clean again.<br />
3. Pack grease between the spring and<br />
the seal lip. This will prevent the<br />
spring from dislocating when the seal<br />
is installed.<br />
4. Position the seal in the hub bore (Part<br />
Number Up). Drive the seal into<br />
position using the correct tool. It<br />
must be perfectly square with the<br />
bore, and bottom evenly.<br />
5. Install the wheel and adjust the<br />
bearings. Install the Stemco hub cap.<br />
6. Remove the filler plug and add premium<br />
oil <strong>Ford</strong> specification ESW-M2CI05<br />
BSAE 90 or equivalent. Double check<br />
the oil level before releasing the vehicle<br />
for service. Oil level must be between<br />
the oil level line on the hub cap to 1/4<br />
inch above the line.<br />
NATIONAL SEALS<br />
Install (Fig. 7) as follows:<br />
1. Clean all parts, remove rough spots<br />
and install axle ring flush against face<br />
where applicable.<br />
2. Position the seal into the hub (notice<br />
oil side marking) with drive tool and<br />
lightly hammer into a press fit.<br />
3. Install the wheel and adjust the<br />
bearings the same as for any seal<br />
installation. Install the see-through<br />
hubcap and the retaining screws.<br />
4. Remove the filler plug and add oil to<br />
level on see-through hubcap.<br />
SEAL LIP<br />
VENT<br />
SEAL<br />
JOURNAL<br />
VIEW FOR 15000 LB.<br />
FRONT AXLE ONLY<br />
E 2124·8<br />
FIG. 6 Front Seal Installation (Stemco)
11-10-8 Wheels, Hubs and Bearings-Front (Except Front Drive)<br />
11-10-8<br />
WEAR SLEEVE<br />
•<br />
FIG. 7 National Seal Installation<br />
F1831-A<br />
SPECIFICAliONS<br />
WHEEL TORQUE lIMITS-F·100 THRU F-350, ECONOllNE,<br />
BRONCO, P·SERIES<br />
Model Nut Size Ft·Lb<br />
E-100, E-150 90<br />
F-100 (4 x 4), U-100 (Std. Wheel)<br />
F-250-250 (4 x 4) 1/2-20 90<br />
E-250 (Std. Wheel) (W/Slngle<br />
Rear Wheels) 1/2-20 135<br />
F-350, E-350 9/16-18 135<br />
F-350,<br />
(W/Dual Wheels and 7400-lb. Axle) 9/16-18 210<br />
E-350 (W/Dual Rear Wheels) 9/16-18 210<br />
WHEEL TORQUE lIMITS-500 THRU 9000 SERIES<br />
Description Nut Size Ft·Lb<br />
Disc Wheel Nut All 400-500<br />
Cast Wheel Rim Nut 3/4·10 220-260<br />
SPECIAL SERVICE TOOLS<br />
Tool No.<br />
T-59T-1197-B<br />
Tool 1175-AB<br />
T50T-100-A<br />
T56P-1217-A<br />
173T-1190-B<br />
Description<br />
SPECIAL SERVICE TOOLS-STEMCO<br />
Front Wheel Bearing<br />
Adjustment Spanner Wrench<br />
Grease Seal Remover Head<br />
Impact Slide Hammer<br />
Front Hub Bearing Cup Replacer<br />
Shifllded Grease Seal Installer<br />
<strong>Ford</strong> Seal Kit Part No. Stemco Tool No. Fprd Seal Kit Part Name<br />
DOHZ-1190-A 5064-5351<br />
5061-5062<br />
DOHZ-1190-B 5066-5353 Kit - FrJnt Hub<br />
DOHZ·1190-C 5067-5398 Grease ~etainer<br />
DOHC-1190-D<br />
None-5386<br />
and Wiper<br />
DOHZ-1190-E 5007-5358<br />
Kits on this page consist of one axle ring and one seal for lust one wheel<br />
CF1810·E
FIRST CLASS<br />
PERMIT<br />
NO. 152<br />
PLYMOUTH, MICH.<br />
BUSINESS REPLY MAIL<br />
No postage necessary if mailed in the United States.<br />
POSTAGE WILL BE PAID BY<br />
SHOP MANUAL HEA~QUARTERS<br />
P. O. Box 1000<br />
Plymouth, Michigan 48170<br />
I


