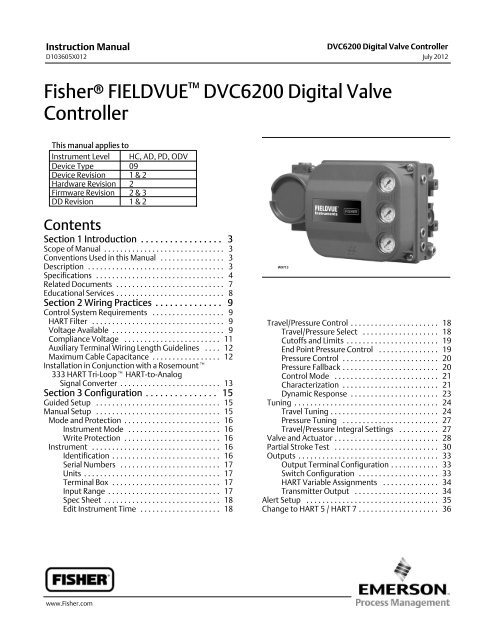
Fisher® FIELDVUE DVC6200 Digital Valve Controller
Fisher® FIELDVUE DVC6200 Digital Valve Controller
Fisher® FIELDVUE DVC6200 Digital Valve Controller

Create successful ePaper yourself
Turn your PDF publications into a flip-book with our unique Google optimized e-Paper software.
Instruction Manual<br />
D103605X012<br />
<strong>DVC6200</strong> <strong>Digital</strong> <strong>Valve</strong> <strong>Controller</strong><br />
July 2012<br />
Fisher <strong>FIELDVUE</strong> <strong>DVC6200</strong> <strong>Digital</strong> <strong>Valve</strong><br />
<strong>Controller</strong><br />
This manual applies to<br />
Instrument Level HC, AD, PD, ODV<br />
Device Type 09<br />
Device Revision 1 & 2<br />
Hardware Revision 2<br />
Firmware Revision 2 & 3<br />
DD Revision 1 & 2<br />
Contents<br />
Section 1 Introduction ................. 3<br />
Scope of Manual .............................. 3<br />
Conventions Used in this Manual ................ 3<br />
Description .................................. 3<br />
Specifications ................................ 4<br />
Related Documents ........................... 7<br />
Educational Services ........................... 8<br />
Section 2 Wiring Practices .............. 9<br />
Control System Requirements .................. 9<br />
HART Filter ................................. 9<br />
Voltage Available ............................ 9<br />
Compliance Voltage ........................ 11<br />
Auxiliary Terminal Wiring Length Guidelines .... 12<br />
Maximum Cable Capacitance ................. 12<br />
Installation in Conjunction with a Rosemount<br />
333 HART Tri‐Loop HART‐to‐Analog<br />
Signal Converter ......................... 13<br />
Section 3 Configuration ............... 15<br />
Guided Setup ............................... 15<br />
Manual Setup ............................... 15<br />
Mode and Protection ........................ 16<br />
Instrument Mode ....................... 16<br />
Write Protection ........................ 16<br />
Instrument ................................ 16<br />
Identification ........................... 16<br />
Serial Numbers ......................... 17<br />
Units .................................. 17<br />
Terminal Box ........................... 17<br />
Input Range ............................ 17<br />
Spec Sheet ............................. 18<br />
Edit Instrument Time .................... 18<br />
W9713<br />
Travel/Pressure Control ...................... 18<br />
Travel/Pressure Select ................... 18<br />
Cutoffs and Limits ....................... 19<br />
End Point Pressure Control ............... 19<br />
Pressure Control ........................ 20<br />
Pressure Fallback ........................ 20<br />
Control Mode .......................... 21<br />
Characterization ........................ 21<br />
Dynamic Response ...................... 23<br />
Tuning .................................... 24<br />
Travel Tuning ........................... 24<br />
Pressure Tuning ........................ 27<br />
Travel/Pressure Integral Settings .......... 27<br />
<strong>Valve</strong> and Actuator .......................... 28<br />
Partial Stroke Test .......................... 30<br />
Outputs ................................... 33<br />
Output Terminal Configuration ............ 33<br />
Switch Configuration .................... 33<br />
HART Variable Assignments .............. 34<br />
Transmitter Output ..................... 34<br />
Alert Setup ................................. 35<br />
Change to HART 5 / HART 7 .................... 36<br />
www.Fisher.com
<strong>DVC6200</strong> <strong>Digital</strong> <strong>Valve</strong> <strong>Controller</strong><br />
July 2012<br />
Contents (continued)<br />
Section 4 Calibration ................. 37<br />
Calibration Overview ......................... 37<br />
Travel Calibration ........................... 38<br />
Auto Calibration ........................ 38<br />
Manual Calibration ...................... 39<br />
Pushbutton Calibration .................. 40<br />
Sensor Calibration .......................... 41<br />
Pressure Sensors ........................ 41<br />
Analog Input Calibration ................. 42<br />
Relay Adjustment ........................... 43<br />
Double‐Acting Relay ..................... 43<br />
Single‐Acting Relays ..................... 44<br />
PST Calibration ............................. 45<br />
Section 5 Device Information,<br />
Diagnostics, and Alerts ............... 47<br />
Overview ................................... 47<br />
Status & Primary Purpose Variables ............ 47<br />
Device Information ......................... 47<br />
Service Tools ................................ 48<br />
Device Status .............................. 48<br />
Alert Record ............................... 48<br />
Electronics ............................. 48<br />
Pressure ............................... 49<br />
Travel ................................. 50<br />
Travel History .......................... 51<br />
Alert Record ............................ 51<br />
Status ................................. 52<br />
Diagnostics ................................ 52<br />
Stroke <strong>Valve</strong> ........................... 52<br />
Partial Stroke Test (ODV only) ............. 52<br />
Variables ................................... 53<br />
Section 6 Maintenance and<br />
Troubleshooting ..................... 55<br />
Replacing the Magnetic Feedback Assembly ...... 56<br />
Module Base Maintenance ..................... 56<br />
Tools Required ............................. 56<br />
Component Replacement .................... 57<br />
Instruction Manual<br />
D103605X012<br />
Removing the Module Base .................. 57<br />
Replacing the Module Base ................... 58<br />
Submodule Maintenance ...................... 58<br />
I/P Converter ............................... 59<br />
Printed Wiring Board (PWB) Assembly .......... 61<br />
Pneumatic Relay ............................ 63<br />
Gauges, Pipe Plugs or Tire <strong>Valve</strong>s .............. 63<br />
Terminal Box ................................ 64<br />
Removing the Terminal Box .................. 64<br />
Replacing the Terminal Box .................. 65<br />
DVC6215 Feedback Unit ...................... 65<br />
Troubleshooting ............................. 65<br />
Checking Voltage Available .................... 65<br />
Restart Processor ............................ 66<br />
<strong>DVC6200</strong> Technical Support Checklist ........... 68<br />
Section 7 Parts ...................... 69<br />
Parts Ordering ............................... 69<br />
Parts Kits ................................... 69<br />
PWB Assembly ............................. 69<br />
Parts List ................................... 70<br />
Housing ................................... 70<br />
Common Parts ............................. 70<br />
Module Base ............................... 71<br />
I/P Converter Assembly ...................... 71<br />
Relay ..................................... 71<br />
Terminal Box ............................... 71<br />
Feedback Connection Terminal Box ............ 71<br />
Pressure Gauges, Pipe Plugs, or Tire<br />
<strong>Valve</strong> Assemblies ......................... 72<br />
HART Filters ............................... 72<br />
Appendix A Principle of Operation ...... 79<br />
HART Communication ........................ 79<br />
<strong>DVC6200</strong> <strong>Digital</strong> <strong>Valve</strong> <strong>Controller</strong> .............. 79<br />
Appendix B Field Communicator<br />
Menu Tree ........................ 83<br />
Glossary ............................ 91<br />
Index .............................. 97<br />
The <strong>FIELDVUE</strong> <strong>DVC6200</strong> <strong>Digital</strong> <strong>Valve</strong> <strong>Controller</strong> is a core component of the PlantWeb digital plant<br />
architecture. The digital valve controller powers PlantWeb by capturing and delivering valve<br />
diagnostic data. Coupled with <strong>Valve</strong>Link software, the <strong>DVC6200</strong> provides users with an accurate<br />
picture of valve performance, including actual stem position, instrument input signal, and pneumatic<br />
pressure to the actuator. Using this information, the digital valve controller diagnoses not only itself,<br />
but also the valve and actuator to which it is mounted.<br />
2
Instruction Manual<br />
D103605X012<br />
Introduction<br />
July 2012<br />
Section 1 Introduction<br />
Scope of Manual<br />
This instruction manual is a supplement to the <strong>DVC6200</strong> Series Quick Start Guide (D103556X012) that ships with<br />
every instrument. This instruction manual includes product specifications, reference materials, custom setup<br />
information, maintenance procedures, and replacement part details.<br />
This instruction manual describes using the 475 Field Communicator to set up and calibrate the instrument. You can<br />
also use Fisher <strong>Valve</strong>Link software or <strong>Valve</strong>Link Mobile software to setup, calibrate, and diagnose the valve and<br />
instrument. For information on using <strong>Valve</strong>Link software with the instrument refer to <strong>Valve</strong>Link software help or<br />
documentation.<br />
Do not install, operate, or maintain a <strong>DVC6200</strong> digital valve controller without being fully trained and qualified in<br />
valve, actuator, and accessory installation, operation, and maintenance. To avoid personal injury or property damage,<br />
it is important to carefully read, understand, and follow all of the contents of this manual, including all safety cautions<br />
and warnings. If you have any questions about these instructions, contact your Emerson Process Management sales<br />
office before proceeding.<br />
Conventions Used in this Manual<br />
Navigation paths and fast‐key sequences are included for procedures and parameters that can be accessed using the<br />
Field Communicator.<br />
For example, to access Device Setup:<br />
Field Communicator Configure > Guided Setup > Device Setup (2‐1‐1)<br />
Refer to Appendix B for Field Communicator menu trees.<br />
Description<br />
<strong>DVC6200</strong> digital valve controllers (figures 1‐1 and 1‐2) are communicating, microprocessor‐based<br />
current‐to‐pneumatic instruments. In addition to the normal function of converting an input current signal to a<br />
pneumatic output pressure, the <strong>DVC6200</strong> digital valve controller, using the HART communications protocol, gives<br />
easy access to information critical to process operation. You can gain information from the principal component of the<br />
process, the control valve itself, using the Field Communicator at the valve, or at a field junction box, or by using a<br />
personal computer or operator's console within the control room.<br />
Using a personal computer and <strong>Valve</strong>Link software or AMS Suite: Intelligent Device Manager, or a Field Communicator,<br />
you can perform several operations with the <strong>DVC6200</strong> digital valve controller. You can obtain general information<br />
concerning software revision level, messages, tag, descriptor, and date.<br />
Diagnostic information is available to aid you when troubleshooting. Input and output configuration parameters can<br />
be set, and the digital valve controller can be calibrated. Refer to table 1‐1 for details on the capabilities of each<br />
diagnostic tier.<br />
Using the HART protocol, information from the field can be integrated into control systems or be received on a single<br />
loop basis.<br />
The <strong>DVC6200</strong> digital valve controller is designed to directly replace standard pneumatic and electro‐pneumatic valve<br />
mounted positioners.<br />
3
Introduction<br />
July 2012<br />
Instruction Manual<br />
D103605X012<br />
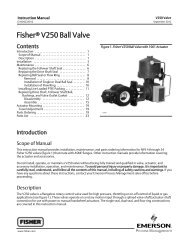
Figure 1‐1. <strong>FIELDVUE</strong> <strong>DVC6200</strong> <strong>Digital</strong> <strong>Valve</strong><br />
<strong>Controller</strong> Mounted on a Fisher Sliding-Stem <strong>Valve</strong><br />
Actuator<br />
Figure 1‐2. <strong>FIELDVUE</strong> <strong>DVC6200</strong> <strong>Digital</strong> <strong>Valve</strong><br />
<strong>Controller</strong> Integrally Mounted to a Fisher GX Control<br />
<strong>Valve</strong><br />
W9643<br />
W9616<br />
Table 1‐1. Instrument Level Capabilities<br />
DIAGNOSTIC LEVEL<br />
CAPABILITY<br />
HC AD PD ODV<br />
Auto Calibration X X X X<br />
Custom Characterization X X X X<br />
Burst Communication X X X X<br />
Alerts X X X X<br />
Step Response, Drive Signal Test & Dynamic Error Band X X X<br />
Advanced Diagnostics (<strong>Valve</strong> Signature) X X X<br />
Performance Tuner X X X<br />
Travel Control ‐ Pressure Fallback X X X<br />
Supply Pressure Sensor X X X<br />
Performance Diagnostics X X<br />
Solenoid <strong>Valve</strong> Testing X X<br />
Lead/Lag Set Point Filter (1)<br />
X<br />
1. Refer to brochure part # D351146X012/D351146X412 for information on Fisher optimized digital valves for compressor antisurge applications.<br />
Specifications<br />
WARNING<br />
Refer to table 1‐2 for specifications. Incorrect configuration of a positioning instrument could result in the malfunction of<br />
the product, property damage or personal injury.<br />
Specifications for <strong>DVC6200</strong> digital valve controllers are shown in table 1‐2. Specifications for the Field Communicator<br />
can be found in the product manual for the Field Communicator.<br />
4
Instruction Manual<br />
D103605X012<br />
Introduction<br />
July 2012<br />
Table 1‐2. Specifications<br />
Available Mounting<br />
<strong>DVC6200</strong> digital valve controller or DVC6215 feedback<br />
unit: Integral mounting to the Fisher GX Control<br />
<strong>Valve</strong> and Actuator System Window mounting to<br />
Fisher rotary actuators Sliding‐stem linear<br />
applications Quarter‐turn rotary applications<br />
DVC6205 base unit for 2 inch pipestand or wall<br />
mounting (for remote‐mount)<br />
The <strong>DVC6200</strong> digital valve controller or DVC6215<br />
feedback unit can also be mounted on other<br />
actuators that comply with IEC 60534‐6-1, IEC<br />
60534-6-2, VDI/VDE 3845 and NAMUR mounting<br />
standards.<br />
Communication Protocol<br />
HART 5 or HART 7<br />
Input Signal<br />
Point-to-Point:.<br />
Analog Input Signal: 4-20 mA DC, nominal; split<br />
ranging available<br />
Minimum Voltage Available at Instrument Terminals<br />
must be 9.5 VDC for analog control, 10 VDC for HART<br />
communication<br />
Minimum Control Current: 4.0 mA<br />
Minimum Current w/o Microprocessor Restart: 3.5 mA<br />
Maximum Voltage: 30 VDC<br />
Overcurrent protected<br />
Reverse Polarity protected<br />
Multi-drop:.<br />
Instrument Power: 11 to 30 VDC at 10 mA<br />
Reverse Polarity protected<br />
Supply Pressure (1)<br />
Minimum Recommended: 0.3 bar (5 psig) higher<br />
than maximum actuator requirements<br />
Maximum: 10.0 bar (145 psig) or maximum pressure<br />
rating of the actuator, whichever is lower<br />
Medium: Air<br />
Supply pressure must be clean, dry air that meets the<br />
requirements of ISA Standard 7.0.01. A maximum 40<br />
micrometer particle size in the air system is<br />
acceptable. Further filtration down to 5 micrometer<br />
particle size is recommended. Lubricant content is<br />
not to exceed 1 ppm weight (w/w) or volume (v/v)<br />
basis. Condensation in the air supply should be<br />
minimized<br />
Output Signal<br />
Pneumatic signal, Up to 95% of supply pressure<br />
Minimum Span: 0.4 bar (6 psig)<br />
Maximum Span: 9.5 bar (140 psig)<br />
Action: Double, Single Direct or Reverse<br />
Steady‐State Air Consumption (2)(3)<br />
Standard Relay:<br />
At 1.4 bar (20 psig) supply pressure:<br />
Less than 0.38 normal m 3 /hr (14 scfh)<br />
At 5.5 bar (80 psig) supply pressure:<br />
Less than 1.3 normal m 3 /hr (49 scfh)<br />
Low Bleed Relay:<br />
At 1.4 bar (20 psig) supply pressure:<br />
Average value 0.056 normal m 3 /hr (2.1 scfh)<br />
At 5.5 bar (80 psig) supply pressure:<br />
Average value 0.184 normal m 3 /hr (6.9 scfh)<br />
Maximum Output Capacity (2)(3)<br />
At 1.4 bar (20 psig) supply pressure:<br />
10.0 normal m 3 /hr (375 scfh)<br />
At 5.5 bar (80 psig) supply pressure:<br />
29.5 normal m 3 /hr (1100 scfh)<br />
Operating Ambient Temperature Limits (1)(4)<br />
-40 to 85C (-40 to 185F)<br />
-52 to 85C (-62 to 185F) for instruments utilizing<br />
the Extreme Temperature option (fluorosilicone<br />
elastomers)<br />
-52 to 125C (-62 to 257F) for remote‐mount<br />
feedback unit<br />
Independent Linearity (5)<br />
Typical Value: ±0.50% of output span<br />
Electromagnetic Compatibility<br />
Meets EN 61326-1 (First Edition)<br />
Immunity—Industrial locations per Table 2 of<br />
the EN 61326-1 standard. Performance is<br />
shown in table 1‐3 below.<br />
Emissions—Class A<br />
ISM equipment rating: Group 1, Class A<br />
Lightning and Surge Protection—The degree of<br />
immunity to lightning is specified as Surge immunity<br />
in table 1‐3. For additional surge protection<br />
commercially available transient protection devices<br />
can be used.<br />
-continued-<br />
5
Introduction<br />
July 2012<br />
Instruction Manual<br />
D103605X012<br />
Table 1‐2. Specifications (continued)<br />
Vibration Testing Method<br />
Tested per ANSI/ISA-S75.13.01 Section 5.3.5. A<br />
resonant frequency search is performed on all three<br />
axes. The instrument is subjected to the ISA specified<br />
1/2 hour endurance test at each major resonance.<br />
Input Impedance<br />
An equivalent impedance of 500 ohms may be used.<br />
This value corresponds to 10V @ 20 mA.<br />
Humidity Testing Method<br />
Tested per IEC 61514‐2<br />
Electrical Classification<br />
Hazardous Area Approvals<br />
Contact your Emerson Process Management sales<br />
office for available approvals.<br />
Connections<br />
Supply Pressure: 1/4 NPT internal and integral pad for<br />
mounting 67CFR regulator<br />
Output Pressure: 1/4 NPT internal<br />
Tubing: 3/8‐inch recommended<br />
Vent: 3/8 NPT internal<br />
Electrical: 1/2 NPT internal, M20 adapter optional<br />
Actuator Compatibility<br />
Stem Travel (Sliding‐Stem Linear):<br />
Minimum: 6.5 mm (0.25 inch)<br />
Maximum: 606 mm (23.875 inches)<br />
Shaft Rotation (Quarter‐Turn Rotary):<br />
Minimum: 45<br />
Maximum: 90<br />
Weight<br />
<strong>DVC6200</strong><br />
Aluminum: 3.5 kg (7.7 lbs)<br />
Stainless Steel: 8.6 kg (19 lbs)<br />
DVC6205: 4.1 kg (9 lbs)<br />
DVC6215: 1.4 kg (3.1 lbs)<br />
Construction Materials<br />
Housing, module base and terminal box:<br />
A03600 low copper aluminum alloy (standard)<br />
Stainless steel (optional)<br />
Cover: Thermoplastic polyester<br />
Elastomers: Nitrile (standard)<br />
Fluorosilicone (extreme temperature)<br />
Options<br />
Supply and output pressure gauges or<br />
Tire valves Integral mounted filter regulator<br />
Low‐Bleed Relay Extreme Temperature<br />
Remote Mount Stainless Steel<br />
Integral 4‐20 mA Position Transmitter (6) :<br />
4‐20 mA output, isolated<br />
Supply Voltage: 8‐30 VDC<br />
Fault Indication: offrange high or low<br />
Reference Accuracy: 1% of travel span<br />
Integral Switch (6) :<br />
One isolated switch, configurable throughout the<br />
calibrated travel range or actuated from a device alert<br />
Off State: 0 mA (nominal)<br />
On State: up to 1 A<br />
Supply Voltage: 30 VDC maximum<br />
Reference Accuracy: 2% of travel span<br />
Contact your Emerson Process Management sales<br />
office, or go to www.<strong>FIELDVUE</strong>.com for additional<br />
information.<br />
Declaration of SEP<br />
Fisher Controls International LLC declares this<br />
product to be in compliance with Article 3 paragraph<br />
3 of the Pressure Equipment Directive (PED) 97 / 23 /<br />
EC. It was designed and manufactured in accordance<br />
with Sound Engineering Practice (SEP) and cannot<br />
bear the CE marking related to PED compliance.<br />
However, the product may bear the CE marking to<br />
indicate compliance with other applicable European<br />
Community Directives.<br />
NOTE: Specialized instrument terms are defined in ANSI/ISA Standard 51.1 - Process Instrument Terminology.<br />
1. The pressure/temperature limits in this document and any other applicable code or standard should not be exceeded.<br />
2. Normal m 3 /hour - Normal cubic meters per hour at 0C and 1.01325 bar, absolute. Scfh - Standard cubic feet per hour at 60F and 14.7 psia.<br />
3. Values at 1.4 bar (20 psig) based on a single-acting direct relay; values at 5.5 bar (80 psig) based on double-acting relay.<br />
4. Temperature limits vary based on hazardous area approval.<br />
5. Not applicable for travels less than 19 mm (0.75 inch) or for shaft rotation less than 60 degrees. Also not applicable for digital valve controllers in long‐stroke applications.<br />
6. The electronic output is available with either the position transmitter or the switch.<br />
6
Instruction Manual<br />
D103605X012<br />
Introduction<br />
July 2012<br />
Table 1‐3. EMC Summary Results—Immunity<br />
Port Phenomenon Basic Standard Test Level<br />
Performance<br />
Criteria (1)<br />
Electrostatic discharge (ESD) IEC 61000‐4‐2<br />
4 kV contact<br />
8 kV air<br />
A<br />
Enclosure Radiated EM field IEC 61000‐4‐3<br />
80 to 1000 MHz @ 10V/m with 1 kHz AM at 80%<br />
1400 to 2000 MHz @ 3V/m with 1 kHz AM at 80%<br />
A<br />
2000 to 2700 MHz @ 1V/m with 1 kHz AM at 80%<br />
Rated power frequency<br />
magnetic field<br />
IEC 61000‐4‐8 30 A/m at 50/60Hz A<br />
Burst IEC 61000‐4‐4 1 kV A<br />
I/O signal/control Surge IEC 61000‐4‐5 1 kV B<br />
Conducted RF IEC 61000‐4‐6 150 kHz to 80 MHz at 3 Vrms A<br />
Performance criteria: +/- 1% effect.<br />
1. A = No degradation during testing. B = Temporary degradation during testing, but is self‐recovering.<br />
Related Documents<br />
This section lists other documents containing information related to the <strong>DVC6200</strong> digital valve controller. These<br />
documents include:<br />
Bulletin 62.1:<strong>DVC6200</strong> - Fisher <strong>FIELDVUE</strong> <strong>DVC6200</strong> <strong>Digital</strong> <strong>Valve</strong> <strong>Controller</strong> (D103415X012)<br />
Bulletin 62.1:<strong>DVC6200</strong> HC - Fisher <strong>FIELDVUE</strong> <strong>DVC6200</strong> <strong>Digital</strong> <strong>Valve</strong> <strong>Controller</strong> (D103423X012)<br />
Bulletin 62.1:<strong>DVC6200</strong>(S1) Fisher <strong>FIELDVUE</strong> <strong>DVC6200</strong> <strong>Digital</strong> <strong>Valve</strong> <strong>Controller</strong> Dimensions (D103543X012)<br />
Fisher <strong>FIELDVUE</strong> <strong>DVC6200</strong> Series <strong>Digital</strong> <strong>Valve</strong> <strong>Controller</strong> Quick Start Guide (D103556X012)<br />
<strong>FIELDVUE</strong> <strong>Digital</strong> <strong>Valve</strong> <strong>Controller</strong> Split Ranging - Supplement to HART Communicating Fisher <strong>FIELDVUE</strong> <strong>Digital</strong><br />
<strong>Valve</strong> <strong>Controller</strong> Instruction Manuals (D103262X012)<br />
Using <strong>FIELDVUE</strong> Instruments with the Smart HART Loop Interface and Monitor (HIM) - Supplement to HART<br />
Communicating Fisher <strong>FIELDVUE</strong> Instrument Instruction Manuals (D103263X012)<br />
Using <strong>FIELDVUE</strong> Instruments with the Smart Wireless THUM Adapter and a HART Interface Module (HIM) -<br />
Supplement to HART Communicating Fisher <strong>FIELDVUE</strong> Instrument Instruction Manuals<br />
Audio Monitor for HART Communications - Supplement to HART Communicating Fisher <strong>FIELDVUE</strong> Instrument<br />
Instruction Manuals (D103265X012)<br />
HART Field Device Specification - Supplement to HART Communicating <strong>FIELDVUE</strong> Instrument Instruction Manuals<br />
(D103266X012)<br />
Using the HART Tri‐Loop HART‐to‐Analog Signal Converter with <strong>FIELDVUE</strong> <strong>Digital</strong> <strong>Valve</strong> <strong>Controller</strong>s - Supplement to<br />
HART Communicating <strong>FIELDVUE</strong> Instrument Instruction Manuals (D103267X012)<br />
Lock‐in‐Last Strategy - Supplement to Fisher <strong>FIELDVUE</strong> DVC6000 or <strong>DVC6200</strong> <strong>Digital</strong> <strong>Valve</strong> <strong>Controller</strong> Instruction<br />
Manual (D103261X012)<br />
Fisher HF340 Filter Instruction Manual (D102796X012)<br />
7
Introduction<br />
July 2012<br />
Instruction Manual<br />
D103605X012<br />
475 Field Communicator User's Manual<br />
<strong>Valve</strong>Link Software Help or Documentation<br />
All documents are available from your Emerson Process Management sales office. Also visit our website at<br />
www.<strong>FIELDVUE</strong>.com.<br />
Educational Services<br />
For information on available courses for the <strong>DVC6200</strong> digital valve controller, as well as a variety of other products,<br />
contact:<br />
Emerson Process Management<br />
Educational Services, Registration<br />
P.O. Box 190; 301 S. 1st Ave.<br />
Marshalltown, IA 50158‐2823<br />
Phone: 800‐338‐8158 or<br />
Phone: 641‐754‐3771<br />
FAX: 641‐754‐3431<br />
e‐mail: education@emerson.com<br />
8
Instruction Manual<br />
D103605X012<br />
Wiring Practices<br />
July 2012<br />
Section 2 Wiring Practices22<br />
Control System Requirements<br />
There are several parameters that should be checked to ensure the control system is compatible with the <strong>DVC6200</strong><br />
digital valve controller.<br />
HART Filter<br />
Depending on the control system you are using, a HART filter may be needed to allow HART communication. The<br />
HART filter is a passive device that is inserted in field wiring from the HART loop. The filter is normally installed near the<br />
field wiring terminals of the control system I/O (see figure 2‐1). Its purpose is to effectively isolate the control system<br />
output from modulated HART communication signals and raise the impedance of the control system to allow HART<br />
communication. For more information on the description and use of the HART filter, refer to the appropriate HART<br />
filter instruction manual.<br />
To determine if your system requires a filter contact your Emerson Process Management sales office.<br />
Note<br />
A HART filter is typically NOT required for any of the Emerson Process Management control systems, including PROVOX, RS3,<br />
and DeltaV systems.<br />
Figure 2‐1. HART Filter Application<br />
NON‐HART BASED DCS<br />
I/O<br />
I/O<br />
HART<br />
FILTER<br />
4‐20 mA + HART<br />
DIGITAL VALVE<br />
CONTROLLER<br />
Tx<br />
Tx<br />
VALVE<br />
A6188‐1<br />
Voltage Available<br />
The voltage available at the <strong>DVC6200</strong> digital valve controller must be at least 10 VDC. The voltage available at the<br />
instrument is not the actual voltage measured at the instrument when the instrument is connected. The voltage<br />
measured at the instrument is limited by the instrument and is typically less than the voltage available.<br />
9
Wiring Practices<br />
July 2012<br />
Instruction Manual<br />
D103605X012<br />
As shown in figure 2‐2, the voltage available at the instrument depends upon:<br />
the control system compliance voltage<br />
if a filter, wireless THUM adapter, or intrinsic safety barrier is used, and<br />
the wire type and length.<br />
The control system compliance voltage is the maximum voltage at the control system output terminals at which the<br />
control system can produce maximum loop current.<br />
The voltage available at the instrument may be calculated from the following equation:<br />
Voltage Available = [Control System Compliance Voltage (at maximum current)] - [filter voltage drop (if a HART filter is<br />
used)] - [total cable resistance maximum current] - [barrier resistance x maximum current].<br />
The calculated voltage available should be greater than or equal to 10 volts DC.<br />
Table 2‐1 lists the resistance of some typical cables.<br />
The following example shows how to calculate the voltage available for a Honeywell TDC2000 control system with a<br />
HF340 HART filter, and 1000 feet of Belden 9501 cable:<br />
Voltage available = [18.5 volts (at 21.05 mA)] - [2.3 volts] - [48 ohms 0.02105 amps]<br />
Voltage available = [18.5] - [2.3] - [1.01]<br />
Voltage available = 15.19 volts<br />
Figure 2‐2. Determining Voltage Available at the Instrument<br />
COMPLIANCE VOLTAGE<br />
TOTAL LOOP<br />
CABLE RESISTANCE<br />
THUM ADAPTER<br />
(IF USED)<br />
CONTROL<br />
SYSTEM<br />
+<br />
-<br />
HART FILTER<br />
(if used)<br />
INTRINSIC SAFETY<br />
BARRIER<br />
(if used)<br />
R<br />
+<br />
-<br />
VOLTAGE<br />
AVAILABLE AT THE<br />
INSTRUMENT<br />
Calculate Voltage Available at the Instrument as follows:<br />
Control system compliance voltage<br />
Example Calculation<br />
18.5 volts (at 21.05 mA)<br />
– Filter voltage drop (if used)<br />
1<br />
– 2.3 volts (for HF300 filter)<br />
– Intrinsic safety barrier resistance (if used) x maximum loop current – 2.55 volts (121 ohms x 0.02105 amps)<br />
– Smart Wireless THUM adapter voltage drop (if used) 2<br />
– Total loop cable resistance x maximum loop current – 1.01 volts (48 ohms x 0.02105 amps for<br />
1000 feet of Belden 9501 cable)<br />
= Voltage available at the instrument<br />
NOTES:<br />
1<br />
3<br />
= 15.19 volts, available—if safety barrier (2.55 volts)<br />
is not used<br />
Obtain filter voltage drop. The measured drop will be different than this value. The measured filter voltage drop<br />
depends upon control system output voltage, the intrinsic safety barrier (if used), and the instrument. See note 3.<br />
2<br />
3<br />
The voltage drop of the THUM adapter is linear from 2.25 volts at 3.5 mA to 1.2 volts at 25 mA.<br />
The voltage available at the instrument is not the voltage measured at the instrument terminals. Once the instrument is<br />
connected, the instrument limits the measured voltage to approximately 8.0 to 9.5 volts.<br />
10
Instruction Manual<br />
D103605X012<br />
Wiring Practices<br />
July 2012<br />
Table 2‐1. Cable Characteristics<br />
Cable Type<br />
Capacitance (1)<br />
pF/Ft<br />
Capacitance (1)<br />
pF/m<br />
Resistance (2)<br />
Ohms/ft<br />
Resistance (2)<br />
Ohms/m<br />
BS5308/1, 0.5 sq mm 61.0 200 0.022 0.074<br />
BS5308/1, 1.0 sq mm 61.0 200 0.012 0.037<br />
BS5308/1, 1.5 sq mm 61.0 200 0.008 0.025<br />
BS5308/2, 0.5 sq mm 121.9 400 0.022 0.074<br />
BS5308/2, 0.75 sq mm 121.9 400 0.016 0.053<br />
BS5308/2, 1.5 sq mm 121.9 400 0.008 0.025<br />
BELDEN 8303, 22 awg 63.0 206.7 0.030 0.098<br />
BELDEN 8441, 22 awg 83.2 273 0.030 0.098<br />
BELDEN 8767, 22 awg 76.8 252 0.030 0.098<br />
BELDEN 8777, 22 awg 54.9 180 0.030 0.098<br />
BELDEN 9501, 24 awg 50.0 164 0.048 0.157<br />
BELDEN 9680, 24 awg 27.5 90.2 0.048 0.157<br />
BELDEN 9729, 24 awg 22.1 72.5 0.048 0.157<br />
BELDEN 9773, 18 awg 54.9 180 0.012 0.042<br />
BELDEN 9829, 24 awg 27.1 88.9 0.048 0.157<br />
BELDEN 9873, 20 awg 54.9 180 0.020 0.069<br />
1. The capacitance values represent capacitance from one conductor to all other conductors and shield. This is the appropriate value to use in the cable length calculations.<br />
2. The resistance values include both wires of the twisted pair.<br />
Compliance Voltage<br />
If the compliance voltage of the control system is not known, perform the following compliance voltage test.<br />
1. Disconnect the field wiring from the control system and connect equipment as shown in figure 2‐3 to the control<br />
system terminals.<br />
Figure 2‐3. Voltage Test Schematic<br />
1 k POTENTIOMETER<br />
MILLIAMMETER<br />
VOLTMETER<br />
CIRCUIT<br />
UNDER<br />
TEST<br />
A6192‐1<br />
2. Set the control system to provide maximum output current.<br />
3. Increase the resistance of the 1 k potentiometer, shown in figure 2‐3, until the current observed on the<br />
milliammeter begins to drop quickly.<br />
4. Record the voltage shown on the voltmeter. This is the control system compliance voltage.<br />
For specific parameter information relating to your control system, contact your Emerson Process Management sales<br />
office.<br />
11
Wiring Practices<br />
July 2012<br />
Instruction Manual<br />
D103605X012<br />
Auxiliary Terminal Wiring Length Guidelines<br />
The Auxiliary Input Terminals of a <strong>DVC6200</strong> with instrument level ODV can be used with a locally‐mounted switch for<br />
initiating a partial stroke test. Some applications require that the partial stroke test be initiated from a remote<br />
location.<br />
The length for wiring connected to the Auxiliary Input Terminals is limited by capacitance. For proper operation of the<br />
Auxiliary Input Terminals capacitance should not exceed 18000 pF. As with all control signal wiring, good wiring<br />
practices should be observed to minimize adverse effect of electrical noise on the Aux Switch function.<br />
Example Calculation: Capacitance per foot or per meter is required to calculate the length of wire that may be<br />
connected to the Aux switch input. The wire should not exceed the capacitance limit of 18000 pF. Typically the wire<br />
manufacturer supplies a data sheet which provides all of the electrical properties of the wire. The pertinent parameter<br />
is the highest possible capacitance. If shielded wire is used, the appropriate number is the “Conductor to Other<br />
Conductor & Shield” value.<br />
Example — 18AWG Unshielded Audio, Control and Instrumentation Cable<br />
Manufacturer's specifications include:<br />
Nom. Capacitance Conductor to Conductor @ 1 KHz: 26 pF/ft<br />
Nom. Conductor DC Resistance @ 20 Deg. C: 5.96 Ohms/1000 ft<br />
Max. Operating Voltage - UL 200 V RMS (PLTC, CMG),150 V RMS (ITC)<br />
Allowable Length with this cable = 18000pF /(26pF/ft) = 692 ft<br />
Example — 18AWG Shielded Audio, Control and Instrumentation Cable<br />
Manufacturer's specifications include:<br />
Nom. Characteristic Impedance: 29 Ohms<br />
Nom. Inductance: .15 μH/ft<br />
Nom. Capacitance Conductor to Conductor @ 1 KHz: 51 pF/ft<br />
Nom. Cap. Cond. to other Cond. & Shield @ 1 KHz 97 pF/ft<br />
Allowable Length with this cable = 18000pF /(97pF/ft) = 185 ft<br />
The AUX switch input passes less than 1 mA through the switch contacts, and uses less than 5V, therefore, neither the<br />
resistance nor the voltage rating of the cable are critical. Ensure that switch contact corrosion is prevented. It is<br />
generally advisable that the switch have gold‐plated or sealed contacts.<br />
Maximum Cable Capacitance<br />
The maximum cable length for HART communication is limited by the characteristic capacitance of the cable.<br />
Maximum length due to capacitance can be calculated using the following formulas:<br />
Length(ft) = [160,000 - C master (pF)] [C cable (pF/ft)]<br />
Length(m) = [160,000 - C master (pF)] [C cable (pF/m)]<br />
where:<br />
160,000 = a constant derived for <strong>FIELDVUE</strong> instruments to ensure that the HART network RC time constant will be no<br />
greater than 65 μs (per the HART specification).<br />
C master = the capacitance of the control system or HART filter<br />
12
Instruction Manual<br />
D103605X012<br />
Wiring Practices<br />
July 2012<br />
C cable = the capacitance of the cable used (see table 2‐1)<br />
The following example shows how to calculate the cable length for a Foxboro I/A control system (1988) with a C master<br />
of 50, 000 pF and a Belden 9501 cable with characteristic capacitance of 50pF/ft.<br />
Length(ft) = [160,000 - 50,000pF] [50pF/ft]<br />
Length = 2200 ft.<br />
The HART communication cable length is limited by the cable characteristic capacitance. To increase cable length,<br />
select a wire with lower capacitance per foot. Contact your Emerson Process Management sales office for specific<br />
information relating to your control system.<br />
Installation in Conjunction with a Rosemount 333 HART Tri‐Loop<br />
HART‐to‐Analog Signal Converter<br />
Use the <strong>DVC6200</strong> digital valve controller in operation with a Rosemount 333 HART Tri‐Loop HART‐to‐Analog Signal<br />
Converter to acquire an independent 4‐20 mA analog output signal for the analog input, travel target, pressure, or<br />
travel. The HART Tri‐Loop accepts any three of these digital signals and converts them into three separate 4‐20 mA<br />
analog channels.<br />
Refer to figure 2‐4 for basic installation information. Refer to the 333 HART Tri‐Loop HART‐to‐Analog Signal Converter<br />
Product Manual for complete installation information.<br />
Figure 2‐4. HART Tri‐Loop Installation Flowchart<br />
START HERE<br />
Unpack the<br />
HART Tri‐Loop<br />
Review the<br />
HART Tri‐Loop<br />
Product Manual<br />
<strong>Digital</strong> valve<br />
controller<br />
Installed<br />
Yes<br />
Set the digital<br />
valve controller<br />
Burst Option<br />
No<br />
Install the digital<br />
valve controller.<br />
Install the HART Tri‐<br />
Loop. See HART Tri‐<br />
Loop product manual<br />
Mount the HART<br />
Tri‐Loop to the<br />
DIN rail.<br />
Wire the digital<br />
valve controller to<br />
the HART Tri‐Loop.<br />
Install Channel 1<br />
wires from HART<br />
Tri‐Loop to the<br />
control room.<br />
Configure the HART<br />
Tri‐Loop to receive<br />
digital valve controller<br />
burst commands<br />
Pass system<br />
test<br />
Yes<br />
DONE<br />
No<br />
Check<br />
troubleshooting<br />
procedures in<br />
HART Tri‐Loop<br />
product manual.<br />
Set the digital<br />
valve controller<br />
Burst Mode<br />
(Optional) Install<br />
Channel 2 and 3 wires<br />
from HART Tri‐Loop to<br />
the control room.<br />
E0365<br />
13
Wiring Practices<br />
July 2012<br />
Instruction Manual<br />
D103605X012<br />
Commissioning the <strong>Digital</strong> <strong>Valve</strong> <strong>Controller</strong> for use with the HART<br />
Tri‐Loop Signal Converter<br />
To prepare the digital valve controller for use with a 333 HART Tri‐Loop, you must configure the digital valve controller<br />
to burst mode, and select Burst Command 3. In burst mode, the digital valve controller provides digital information to<br />
the HART Tri‐Loop HART‐to‐Analog Signal Converter. The HART Tri‐Loop converts the digital information to a 4 to 20<br />
mA analog signal. Each burst message contains the latest value of the primary (analog input), secondary (travel<br />
target), tertiary (configured output pressure), and quaternary (travel) variables.<br />
To commission a <strong>DVC6200</strong> for use with a HART Tri‐Loop, perform the following procedures.<br />
Note<br />
The <strong>DVC6200</strong> must be in HART 5 compatibility mode to use burst communications.<br />
Enable Burst Operation<br />
Field Communicator<br />
With I/O Package<br />
Configure > Manual Setup > Outputs > Burst Mode (2‐2‐6‐5) HC, AD, PD or (2-2-7-5) ODV<br />
Without I/O Package<br />
Configure > Manual Setup > Outputs > Burst Mode (2‐2‐6‐2) HC, AD, PD or (2-2-7-2) ODV<br />
Select Burst Enable and follow the prompts to enable burst mode. Then select Burst Command and follow the prompts<br />
to configure Loop Current/PV/SV/TV/QV.<br />
Select the HART Variable Assignments<br />
Field Communicator<br />
With I/O Package<br />
Configure > Manual Setup > Outputs > HART Variable Assignments (2-2-6-4) HC, AD, PD or (2-2-7-4) ODV<br />
Without I/O Package<br />
Configure > Manual Setup > Outputs > HART Variable Assignments (2-2-6-1) HC, AD, PD or (2-2-7-1) ODV<br />
Configure the HART Variable Assignments. The Primary Variable (PV) is always Analog Input. The Secondary Variable<br />
(SV), Tertiary Variable (TV) and Quaternary Variable (QV) can be configured to any of the following variables.<br />
Setpoint<br />
Travel (see note below)<br />
Pressure A<br />
Pressure B<br />
Pressure AB<br />
Supply Pressure<br />
Drive Signal<br />
Analog Input<br />
Note<br />
If the instrument is configured to operate in pressure control mode, or detects an invalid travel sensor reading, the Travel variable<br />
will report pressure in percent of bench set range.<br />
14
Instruction Manual<br />
D103605X012<br />
Configuration<br />
July 2012<br />
Section 3 Configuration<br />
Guided Setup<br />
Field Communicator Configure > Guided Setup (2‐1)<br />
To quickly setup the instrument, the following procedures will guide you through the process.<br />
Device Setup—This procedure is used to configure actuator and valve information, calibrate the valve assembly, and<br />
assign the tuning set for the valve assembly.<br />
Performance Tuner (instrument level AD, PD, ODV)—This procedure executes a simple step response test and then<br />
calculates a recommended set of gain values based on the response of the control valve. See page 26 for additional<br />
information.<br />
Stabilize Optimize (instrument level HC)—This procedure permits you to adjust valve response by changing the<br />
digital valve controller tuning. See page 26 for additional information.<br />
Manual Setup33<br />
Manual Setup allows you to configure the digital valve controller to your application. Table 3‐1 lists the default settings<br />
for a standard factory configuration. You can adjust actuator response, set the various modes, alerts, ranges, travel<br />
cutoffs and limits. You can also restart the instrument and set the protection.<br />
Table 3‐1. Default Detailed Setup Parameters<br />
Instrument<br />
Configuration<br />
Dynamic Response and<br />
Tuning<br />
Setup Parameter Default Setting (1)<br />
Control Mode<br />
Analog<br />
Restart Control Mode<br />
Resume Last<br />
Analog In Range Low<br />
4 mA<br />
Analog In Range High<br />
20 mA<br />
Analog Input Units<br />
mA<br />
Local AutoCal Button<br />
Disabled<br />
Polling Address 0<br />
Burst Mode Enable<br />
No<br />
Burst Command 3<br />
Cmd 3 (Trending) Pressure<br />
A-B<br />
Input Characterization<br />
Linear<br />
Travel Limit High 125%<br />
Travel Limit Low -25%<br />
Travel/Pressure Cutoff High 99.46%<br />
Travel/Pressure Cutoff Low 0.50%<br />
Set Point Rate Open<br />
0%/sec<br />
Set Point Rate Close<br />
0%/sec<br />
Set Point Filter Time (Lag Time)<br />
0 sec<br />
Integrator Enable<br />
Yes<br />
Integral Gain<br />
9.4 repeats/minute<br />
Integral Deadzone 0.26%<br />
-continued on next page-<br />
15
Configuration<br />
July 2012<br />
Instruction Manual<br />
D103605X012<br />
Table 3‐1. Default Detailed Setup Parameters (continued)<br />
Deviation & Other Alerts<br />
Setup Parameter Default Setting (1)<br />
Travel Deviation Alert Enable<br />
Travel Deviation Alert Point 5%<br />
Travel Deviation Time<br />
Pressure Deviation Alert Enable<br />
Yes<br />
9.99 sec<br />
Yes<br />
Pressure Deviation Alert Point 5 psi (2)<br />
Pressure Deviation Alert Time<br />
Drive Signal Alert Enable<br />
Supply Pressure Alert Enable<br />
5.0 sec<br />
1. The settings listed are for standard factory configuration. <strong>DVC6200</strong> instruments can also be ordered with custom configuration<br />
settings. For the default custom settings, refer to the order requisition.<br />
2. Adjust to bar, kPa, or Kg/cm 2 if necessary<br />
Mode and Protection<br />
Field Communicator Configure > Manual Setup > Mode and Protection (2‐2‐1)<br />
Yes<br />
Yes<br />
Instrument Mode<br />
There are two instrument modes for the <strong>DVC6200</strong>; In Service or Out of Service. In Service is the normal operating<br />
mode such that the instrument follows the 420 mA control signal. Out of Service is required in some cases to modify<br />
configuration parameters or to run diagnostics.<br />
Note<br />
Some changes that require the instrument to be taken Out Of Service will not take effect until the instrument is placed back In<br />
Service or the instrument is restarted.<br />
Write Protection<br />
There are two Write Protection modes for the <strong>DVC6200</strong>: Not Protected or Protected. Protected prevents configuration<br />
and calibration changes to the instrument. The default setting is Not Protected. Write Protection can be changed to<br />
Protected remotely. However, to change Write Protection to Not Protected, you must have physical access to the<br />
instrument. The procedure will require you to press a button ( ) on the terminal box as a security measure.<br />
Instrument<br />
Field Communicator Configure > Manual Setup > Instrument (2‐2‐2)<br />
Follow the prompts on the Field Communicator display to configure the following Instrument parameters:<br />
Identification<br />
HART Tag—A tag name up to 8 characters is available for the instrument. The HART tag is the easiest way to<br />
distinguish between instruments in a multi‐instrument environment. Use the HART tag to label instruments<br />
electronically according to the requirements of your application. The tag you assign is automatically displayed<br />
when the Field Communicator establishes contact with the digital valve controller at power‐up.<br />
HART Long Tag (HART Universal Revision 7 only)—A tag name up to 32 characters is available for the instrument.<br />
16
Instruction Manual<br />
D103605X012<br />
Configuration<br />
July 2012<br />
Description—Enter a description for the application with up to 16 characters. The description provides a longer<br />
user‐defined electronic label to assist with more specific instrument identification than is available with the HART<br />
tag.<br />
Message—Enter any message with up to 32 characters. Message provides the most specific user‐defined means for<br />
identifying individual instruments in multi‐instrument environments.<br />
Polling Address—If the digital valve controller is used in point‐to‐point operation, the Polling Address is 0. When<br />
several devices are connected in the same loop, such as for split ranging, each device must be assigned a unique<br />
polling address. The Polling Address is set to a value between 0 and 63 for HART 7 and 0 and 15 for HART 5. To<br />
change the polling address the instrument must be Out Of Service.<br />
For the Field Communicator to be able to communicate with a device whose polling address is not 0, it must be<br />
configured to automatically search for all or specific connected devices.<br />
Serial Numbers<br />
Instrument Serial Number—Enter the serial number on the instrument nameplate, up to 12 characters.<br />
<strong>Valve</strong> Serial Number—Enter the serial number for the valve in the application, up to 12 characters.<br />
Units<br />
Pressure Units—Defines the output and supply pressure units in either psi, bar, kPa, or kg/cm 2 .<br />
Temperature Units—Degrees Fahrenheit or Celsius. The temperature measured is from a sensor mounted on the<br />
digital valve controller's printed wiring board.<br />
Analog Input Units—Permits defining the Analog Input Units in mA or percent of 4-20 mA range.<br />
Terminal Box<br />
Calibration (CAL) Button—This button is near the wiring terminals in the terminal box and provides a quick means to<br />
autocalibrate the instrument. The button must be pressed for 3 to 10 seconds. Autocalibration will move the valve<br />
through the full range of travel whether the Instrument Mode is In Service or Out of Service. However, if the Write<br />
Protection is Protected, this button will not be active. To abort, press the button again for 1 second. The calibration<br />
button is disabled by default.<br />
Auxiliary Terminal Action—These wire terminals can be configured to initiate a partial stroke test upon detection of<br />
a short across the (+) and (-) terminals. The terminals must be shorted for 3 to 10 seconds.<br />
Note<br />
Auxiliary Terminal Action is only available for instrument level ODV.<br />
Analog Input Range<br />
Input Range Hi—Permits setting the Input Range High value. Input Range High should correspond to Travel Range<br />
High, if the Zero Power Condition is configured as closed. If the Zero Power Condition is configured as open, Input<br />
Range High corresponds to Travel Range Low. See figure 3‐1.<br />
17
Configuration<br />
July 2012<br />
Instruction Manual<br />
D103605X012<br />
Input Range Lo—Permits setting the Input Range Low value. Input Range Low should correspond to Travel Range<br />
Low, if the Zero Power Condition is configured as closed. If the Zero Power Condition is configured as open, Input<br />
Range Low corresponds to Travel Range High. See figure 3‐1.<br />
Figure 3‐1. Calibrated Travel to Analog Input Relationship<br />
TRAVEL<br />
RANGE<br />
HIGH<br />
ZPC = OPEN<br />
ZPC = CLOSED<br />
CALIBRATED TRAVEL, %<br />
TRAVEL<br />
RANGE<br />
LOW<br />
THE SHAPE OF THESE LINES<br />
DEPENDS ON THE INPUT<br />
CHARACTERISTICS LINEAR<br />
CHARACTERISTIC SHOWN<br />
INPUT RANGE<br />
LOW<br />
NOTE:<br />
ZPC = ZERO POWER CONDITION<br />
A6531‐1<br />
ANALOG INPUT<br />
mA OR % OF 4‐20 mA<br />
INPUT RANGE<br />
HIGH<br />
Spec Sheet<br />
The Spec Sheet provides a means to store the entire control valve specifications on board the <strong>DVC6200</strong>.<br />
Edit Instrument Time<br />
Permits setting the instrument clock. When alerts are stored in the alert record, the record includes the time and date.<br />
The instrument clock uses a 24‐hour format.<br />
Travel/Pressure Control<br />
Field Communicator Configure > Manual Setup > Travel/Pressure Control (2‐2-3)<br />
Travel/Pressure Select<br />
This defines the operating mode of the instrument as well as the behavior of the instrument should the travel sensor<br />
fail. There are four choices.<br />
Travel Control—The instrument is controlling to a target travel. Fallback is not enabled.<br />
Pressure Control—The instrument is controlling to a target pressure. Fallback is not enabled.<br />
Fallback-Sensor Failure—The instrument will fallback to pressure control if a travel sensor failure is detected.<br />
18
Instruction Manual<br />
D103605X012<br />
Configuration<br />
July 2012<br />
Fallback-Sensor/Tvl Deviation—The instrument will fallback to pressure control if a travel sensor failure is detected,<br />
or if the Tvl Dev Press Fallback setting is exceeded for more than the Tvl Dev Press Fallback Time.<br />
Note<br />
Travel / Pressure Select must be set to Travel for double‐acting actuators<br />
Cutoffs and Limits<br />
Hi Limit/Cutoff Select—When the Hi Cutoff/Limit Select is configured for Cutoff, the Travel Target is set to 123%<br />
when the Travel exceeds the Hi Cutoff Point. When the Hi Cutoff/Limit Select is configured for Limit, the Travel<br />
Target will not exceed the Hi Limit Point.<br />
Hi Limit/Cutoff Point—This is the point within the calibrated travel range above which the Limit or Cutoff is in effect.<br />
When using cutoffs, a Cutoff Hi of 99.5% is recommended to ensure valve goes fully open. The Hi Cutoff/Limit is<br />
deactivated by setting it to 125%.<br />
Lo Limit/Cutoff Select—When the Lo Cutoff/Limit Select is configured for Cutoff, the Travel Target is set to 23%<br />
when the Travel is below the Lo Cutoff Point. When the Hi Cutoff/Limit Select is configured for Limit, the Travel<br />
Target will not fall below the Lo Limit Point.<br />
Lo Limit/Cutoff Point—This is the point within the calibrated travel range below which the Limit or Cutoff is in effect.<br />
When using cutoffs, a Cutoff Lo of 0.5% is recommended to help ensure maximum shutoff seat loading. The Lo<br />
Limit/Cutoff is deactivated by setting it to 25%.<br />
End Point Pressure Control (EPPC)<br />
Note<br />
End Point Pressure Control is available for instrument level ODV.<br />
EPPC Enable—Select Yes or No. End Point Pressure Control allows the digital valve controller to pull back from<br />
saturation of the pneumatic output after reaching the travel extreme. Rather than having the instrument provide<br />
full supply pressure (saturation) continuously at the travel extreme, the digital valve controller switches to an End<br />
Point Pressure Control where the output pressure (pressure controller set point) to the actuator is maintained at a<br />
certain value. This value is configured through the Upper Operating Pressure feature. Because the digital valve<br />
controller is constantly in control and not allowed to reach a dormant or saturated state, it is constantly testing its<br />
own pneumatic system. If there is an output pressure deviation, for example, the instrument will issue an alert. To<br />
ensure there is an alert when an output pressure deviation occurs, setup the alert as described under Pressure<br />
Deviation Alert.<br />
19
Configuration<br />
July 2012<br />
Instruction Manual<br />
D103605X012<br />
EPPC Set Point—Used in conjunction with End Point Pressure Control, End Point Pressure Control Set Point allows<br />
the user to select a pressure to be delivered by the instrument at the travel extreme. For a fail‐closed valve, this<br />
pressure must be sufficient to maintain the fully open position. For a fail‐open valve, this pressure (which is<br />
automatically set to supply pressure) must be sufficient to fully close the valve and maintain its rated shutoff<br />
classification. For double‐acting spring return actuators, this is the differential pressure required to either maintain<br />
the fully open or fully closed position, depending on the valve and actuator configuration. For a double‐acting<br />
actuator without springs with a fail‐close valve, this is 95% of the supply pressure. If the valve is fail‐open, the upper<br />
operating pressure for all actuator is set to the supply pressure.<br />
EPPC Saturation Time—End Point Pressure Control Saturation Time is the time the digital valve controller stays in<br />
hard cutoff before switching to pressure control. Default is 45 seconds.<br />
Pressure Control<br />
Pressure Range High—The high end of output pressure range. Enter the pressure that corresponds with 100% valve<br />
travel when Zero Power Condition is closed, or 0% valve travel when Zero Power Condition is open. This pressure<br />
must be greater than the Pressure Range Lo.<br />
Pressure Range Lo—The low end of the output pressure range. Enter the pressure that corresponds to 0% valve<br />
travel when Zero Power Condition is closed, or 100% valve travel when Zero Power Condition is open. This pressure<br />
must be less than the Pressure Range Hi.<br />
Pressure Fallback<br />
Note<br />
Pressure Fallback is available for instrument level AD, PD, ODV.<br />
Tvl Dev Press Fallback—When the difference between the travel target and the actual travel exceeds this value for<br />
more than the Tvl Dev Press Fallback Time, the instrument will disregard the travel feedback and control based on<br />
output pressure.<br />
Tvl Dev Press Fallback Time—This is the time, in seconds, that the travel target and the actual travel must be<br />
exceeded before the instrument falls back into pressure control.<br />
Fallback Recovery—If the instrument has fallen into pressure control and the feedback problem is resolved, recovery<br />
to travel control can occur automatically or with manual intervention. To return to travel control when Manual<br />
Recovery is selected, change the Fallback Recovery to Auto Recovery, and then back to Manual Recovery (if<br />
desired).<br />
20
Instruction Manual<br />
D103605X012<br />
Configuration<br />
July 2012<br />
Control Mode<br />
Control Mode—This displays the current control mode of the instrument. This will show Analog if the instrument is<br />
in PointtoPoint mode and is using a 420 mA signal for its power and set point. This will show <strong>Digital</strong> if the<br />
instrument is in Multidrop mode and is using 24 VDC for power and a digital set point for control.<br />
Note<br />
Another mode, Test, may be displayed. Normally the instrument should not be in the Test mode. The digital valve controller<br />
automatically switches to this mode whenever it needs to stroke the valve during calibration or stroke valve, for example.<br />
However, if you abort from a procedure where the instrument is in the test mode, it may remain in this mode. To take the<br />
instrument out of the Test mode, select Change Control Mode and enter Analog or <strong>Digital</strong>.<br />
Change Control Mode—This allows the user to configure the control mode to Analog or <strong>Digital</strong>.<br />
Restart Control Mode—This defines the Control Mode of the instrument after a restart (e.g. power cycle). Available<br />
choices are Resume Last, Analog and <strong>Digital</strong>.<br />
Characterization<br />
Input Characterization<br />
Input Characterization defines the relationship between the travel target and ranged set point. Ranged set point is the<br />
input to the characterization function. If the zero power condition equals closed, then a set point of 0% corresponds to<br />
a ranged input of 0%. If the zero power condition equals open, a set point of 0% corresponds to a ranged input of 100%.<br />
Travel target is the output from the characterization function.<br />
To select an input characterization, select Input Characterization from the Characterization menu. You can select from<br />
the three fixed input characteristics shown in figure 3‐2 or you can select a custom characteristic. Figure 3‐2 shows the<br />
relationship between the travel target and ranged set point for the fixed input characteristics, assuming the Zero<br />
Power Condition is configured as closed.<br />
You can specify 21 points on a custom characteristic curve. Each point defines a travel target, in % of ranged travel, for<br />
a corresponding set point, in % of ranged set point. Set point values range from -6.25% to 106.25%. Before<br />
modification, the custom characteristic is linear.<br />
Custom Characterization<br />
To define a custom input character, from the Characterization menu select Custom Characterization. Select the point<br />
you wish to define (1 to 21), then enter the desired set point value. Press Enter then enter the desired travel target for<br />
the corresponding set point. When finished, select point 0 to return to the Characterization menu.<br />
With input characterization you can modify the overall characteristic of the valve and instrument combination.<br />
Selecting an equal percentage, quick opening, or custom (other than the default of linear) input characteristic<br />
modifies the overall valve and instrument characteristic. However, if you select the linear input characteristic, the<br />
overall valve and instrument characteristic is the characteristic of the valve, which is determined by the valve trim (i.e.,<br />
the plug or cage).<br />
21
Configuration<br />
July 2012<br />
Instruction Manual<br />
D103605X012<br />
Figure 3‐2. Travel Target Versus Ranged Set Point, for Various Input Characteristics (Zero Power Condition = Closed)<br />
125<br />
125<br />
100<br />
100<br />
Travel Target, %<br />
Travel Target, %<br />
0<br />
0<br />
-25<br />
-25<br />
Ranged Set Point, %<br />
-25 0 100 125<br />
Ranged Set Point, %<br />
-25 0 100 125<br />
Input Characteristic = Linear<br />
Input Characteristic = Equal Percentage<br />
125<br />
100<br />
Travel Target, %<br />
0<br />
A6535‐1<br />
-25<br />
-25 0 Ranged Set Point, % 100 125<br />
Input Characteristic = Quick Opening<br />
22
Instruction Manual<br />
D103605X012<br />
Configuration<br />
July 2012<br />
Dynamic Response<br />
SP Rate Open—Maximum rate (% of valve travel per second) at which the digital valve controller will move to the<br />
open position regardless of the rate of input current change. A value of 0 will deactivate this feature and allow the<br />
valve to stroke open as fast as possible.<br />
SP Rate Close—Maximum rate (% of valve travel per second) at which the digital valve controller will move to the<br />
close position regardless of the rate of input current change. A value of 0 will deactivate this feature and allow the<br />
valve to stroke close as fast as possible.<br />
Set Point Filter Time (Lag Time)—The Set Point Filter Time (Lag Time) slows the response of the digital valve<br />
controller. A value ranging from 0.2 to 10.0 can be used for noisy or fast processes to improve closed loop process<br />
control. Entering a value of 0.0 will deactivate the lag filter.<br />
Note<br />
Set Point Filter Time (Lag Time) is available for instrument level HC, AD, and PD.<br />
Lead/Lag Set Point Filter—ODV devices have access to a lead‐lag set point filter that can be used to improve a valve's<br />
dynamic response. The lead‐lag filter is part of the set point processing routine that reshapes the input signal before<br />
it becomes travel set point. Lead‐lag filters are characterized by lead and lag time constants.<br />
Note<br />
Lead/Lag is only available instrument level ODV.<br />
When the valve is in its active control region (off the seat), the lead‐lag filter improves small amplitude response by<br />
momentarily overdriving the travel set point. This is useful when the actuator is large and equipped with accessories.<br />
As a result, any volume boosters that are present will be activated. The longer the lag time, the more pronounced the<br />
overdrive. Since the lead‐lag input filter is used to enhance the dynamic response of a control valve, filter parameters<br />
should be set after the tuning parameters have been established.<br />
When the valve is at its seat, the lead‐lag filter also has a boost function that sets the initial conditions of the filter<br />
artificially low so that small amplitude signal changes appear to be large signal changes to the filter. The boost<br />
function introduces a large spike that momentarily overdrives the instrument and activates any external volume<br />
boosters that may be present. The lead‐lag boost function is normally disabled except for those cases where the valve<br />
must respond to small command signals off the seat. By setting the lead/lag ratio in the opening and closing directions<br />
to 1.0, the boost function can be enabled without introducing lead‐lag dynamics in the active control region. See table<br />
3‐2 for typical lead‐lag filter settings.<br />
Table 3‐2. Typical Lead/Lag Filter Settings<br />
Parameter Description Typical Value<br />
Lag Time First order time constant. A value of 0.0 will disable the lead‐lag filter. 0.2 sec<br />
Opening Lead/Lag Ratio Initial response to the filter in the opening direction. 2.0<br />
Closing Lead/Lag Ratio Initial response to the filter in the closing direction. 2.0<br />
Lead‐Lag Boost Initial conditions of the lead‐lag filter when the lower travel cutoff is active. Off<br />
23
Configuration<br />
July 2012<br />
Instruction Manual<br />
D103605X012<br />
Tuning<br />
Field Communicator Configure > Manual Setup > Tuning (2‐2-4)<br />
Travel Tuning<br />
WARNING<br />
Changes to the tuning set may cause the valve/actuator assembly to stroke. To avoid personal injury and property damage<br />
caused by moving parts, keep hands, tools, and other objects away from the valve/actuator assembly.<br />
Travel Tuning Set<br />
There are eleven tuning sets to choose from. Each tuning set provides a preselected value for the digital valve<br />
controller gain settings. Tuning set C provides the slowest response and M provides the fastest response.<br />
Table 3‐3 lists the proportional gain, velocity gain and minor loop feedback gain values for preselected tuning sets.<br />
Table 3‐3. Gain Values for Preselected Travel Tuning Sets<br />
Tuning Set Proportional Gain Velocity Gain Minor Loop Feedback Gain<br />
C<br />
D<br />
E<br />
F<br />
G<br />
H<br />
I<br />
J<br />
K<br />
L<br />
M<br />
4.4<br />
4.8<br />
5.5<br />
6.2<br />
7.2<br />
8.4<br />
9.7<br />
11.3<br />
13.1<br />
15.5<br />
18.0<br />
3.0<br />
3.0<br />
3.0<br />
3.1<br />
3.6<br />
4.2<br />
4.85<br />
5.65<br />
6.0<br />
6.0<br />
6.0<br />
35<br />
35<br />
35<br />
35<br />
34<br />
31<br />
27<br />
23<br />
18<br />
12<br />
12<br />
X (Expert) User Adjusted User Adjusted User Adjusted<br />
In addition, you can specify Expert tuning and individually set the proportional gain, velocity gain, and minor loop<br />
feedback gain. Individually setting or changing any tuning parameter or running the Performance Tuner or Stabilize<br />
Optimize routint will automatically change the tuning set to X (expert).<br />
Note<br />
Use Expert tuning only if standard tuning has not achieved the desired results.<br />
Stabilize/Optimize or Performance Tuner may be used to achieve the desired results more rapidly than manual Expert tuning.<br />
Table 3‐4 provides tuning set selection guidelines for Fisher and Baumann actuators. These tuning sets are only<br />
recommended starting points. After you finish setting up and calibrating the instrument, you may have to select either<br />
a higher or lower tuning set to get the desired response. You can use the Performance Tuner to optimize tuning.<br />
24
Instruction Manual<br />
D103605X012<br />
Configuration<br />
July 2012<br />
Table 3‐4. Actuator Information for Initial Setup<br />
Actuator<br />
Manufacturer<br />
Fisher<br />
Actuator Model Actuator Size Actuator Style<br />
585C & 585CR<br />
657<br />
667<br />
1051 & 1052<br />
1061<br />
1066SR<br />
2052<br />
3024C<br />
25<br />
50<br />
60<br />
68, 80<br />
100, 130<br />
30<br />
34, 40<br />
45, 50<br />
46, 60, 70, 76, &<br />
80‐100<br />
30<br />
34, 40<br />
45, 50<br />
46, 60, 70, 76, &<br />
80‐100<br />
20, 30<br />
33<br />
40<br />
60, 70<br />
30<br />
40<br />
60<br />
68, 80, 100, 130<br />
20<br />
27, 75<br />
1<br />
2<br />
3<br />
30, 30E<br />
34, 34E, 40, 40E<br />
45, 45E<br />
Piston Dbl w/ or w/o<br />
Spring. See actuator<br />
instruction manual and<br />
nameplate.<br />
Spring & Diaphragm<br />
Spring & Diaphragm<br />
Spring & Diaphragm<br />
(Window‐mount)<br />
Piston Dbl w/o Spring<br />
Piston Sgl w/Spring<br />
Spring & Diaphragm<br />
(Window‐mount)<br />
Spring & Diaphragm<br />
Starting<br />
Tuning Set<br />
E<br />
I<br />
J<br />
L<br />
M<br />
H<br />
K<br />
L<br />
GX<br />
225<br />
750 Spring & Diaphragm<br />
X (1)<br />
K<br />
1200 M<br />
Air to Extend 16<br />
C<br />
32<br />
E<br />
Air to Retract<br />
54<br />
H<br />
Baumann<br />
Spring & Diaphragm<br />
10<br />
E<br />
Rotary<br />
25<br />
H<br />
54<br />
J<br />
NOTE: Refer to figure table 3‐6 for feedback connection (magnet assembly) information.<br />
1. X = Expert Tuning. Proportional Gain = 4.2; Velocity Gain = 3.0; Minor Loop Feedback Gain = 18.0<br />
2. Travel Sensor Motion in this instance refers to the motion of the magnet assembly.<br />
3. Values shown are for Relay A and C. Reverse for Relay B.<br />
M<br />
H<br />
K<br />
L<br />
M<br />
H<br />
I<br />
K<br />
M<br />
J<br />
K<br />
L<br />
M<br />
G<br />
L<br />
H<br />
J<br />
M<br />
E<br />
H<br />
K<br />
Travel Sensor Motion (2)<br />
Relay A or C (3)<br />
User Specified<br />
Away from the top of the instrument<br />
Towards the top of the instrument<br />
Away from the top of the instrument<br />
Depends upon pneumatic connections. See<br />
description for Travel Sensor Motion<br />
Mounting Style<br />
A<br />
B<br />
C<br />
D<br />
Travel Sensor Motion<br />
Away from the top of<br />
the instrument<br />
Towards the top of the<br />
instrument<br />
Towards the top of the<br />
instrument<br />
Away from the top of<br />
the instrument<br />
Away from the top of the instrument<br />
For P o operating mode (air opens):<br />
Towards the top of the instrument<br />
For P s operating mode (air closes):<br />
Away from the top of the instrument<br />
Air to Open<br />
Towards the top of<br />
the instrument<br />
Air to Close<br />
Away from the top of<br />
the instrument<br />
Towards the top of the instrument<br />
Away from the top of the instrument<br />
Specify<br />
Proportional Gain—the proportional gain for the travel control tuning set. Changing this parameter will also change<br />
the tuning set to Expert.<br />
Velocity Gain—the velocity gain for the travel control tuning set. Changing this parameter will also change the<br />
tuning set to Expert.<br />
25
Configuration<br />
July 2012<br />
Instruction Manual<br />
D103605X012<br />
MLFB Gain—the minor loop feedback gain for the travel control tuning set. Changing this parameter will also change<br />
the tuning set to Expert.<br />
Integral Enable—Yes or No. Enable the integral setting to improve static performance by correcting for error that<br />
exists between the travel target and actual travel. Travel Integral Control is enabled by default.<br />
Integral Gain—Travel Integral Gain is the ratio of the change in output to the change in input, based on the control<br />
action in which the output is proportional to the time integral of the input.<br />
Performance Tuner<br />
WARNING<br />
During performance tuning the valve may move, causing process fluid or pressure to be released. To avoid personal injury<br />
and property damage caused by the release of process fluid or pressure, isolate the valve from the process and equalize<br />
pressure on both sides of the valve or bleed off the process fluid.<br />
Note<br />
The Performance Tuner is available for instrument level AD, PD, and ODV, and can only be run while in Travel control mode.<br />
The Performance Tuner is used to determine digital valve controller tuning. It can be used with digital valve controllers<br />
mounted on most sliding‐stem and rotary actuators, including Fisher and other manufacturers' products. Moreover,<br />
because the performance tuner can detect internal instabilities before they become apparent in the travel response, it<br />
can generally optimize tuning more effectively than manual tuning. Typically, the performance tuner takes 3 to 5<br />
minutes to tune an instrument, although tuning instruments mounted on larger actuators may take longer.<br />
Stabilize/Optimize<br />
WARNING<br />
During Stabilize/Optimize the valve may move, causing process fluid or pressure to be released. To avoid personal injury<br />
and property damage caused by the release of process fluid or pressure, isolate the valve from the process and equalize<br />
pressure on both sides of the valve or bleed off the process fluid.<br />
Stabilize/Optimize permits you to adjust valve response by changing the digital valve controller tuning. During this<br />
routine the instrument must be out of service, however, the instrument will respond to setpoint changes.<br />
If the valve is unstable, select Decrease Response to stabilize valve operation. This selects the next lower tuning set<br />
(e.g., F to E). If the valve response is sluggish, select Increase Response to make the valve more responsive. This selects<br />
the next higher tuning set (e.g., F to G).<br />
If after selecting Decrease Response or Increase Response the valve travel overshoot is excessive, select Decrease<br />
Damping to select a damping value that allows more overshoot. Select Increase Damping to select a damping value that<br />
will decrease the overshoot. When finished, select done.<br />
26
Instruction Manual<br />
D103605X012<br />
Configuration<br />
July 2012<br />
Pressure Tuning<br />
Pressure Tuning Set<br />
There are twelve Pressure Tuning Sets to choose from. Each tuning set provides a preselected value for the digital valve<br />
controller gain settings. Tuning set C provides the slowest response and M provides the fastest response.<br />
Tuning set B is appropriate for controlling a pneumatic positioner. Table 3‐5 lists the proportional gain, pressure<br />
integrator gain and minor loop feedback gain values for preselected tuning sets.<br />
Table 3‐5. Gain Values for Preselected Pressure Tuning Sets<br />
Tuning Set Proportional Gain Integrator Gain Minor Loop Feedback Gain<br />
B<br />
C<br />
D<br />
E<br />
F<br />
G<br />
H<br />
I<br />
J<br />
K<br />
L<br />
M<br />
0.5<br />
2.2<br />
2.4<br />
2.8<br />
3.1<br />
3.6<br />
4.2<br />
4.8<br />
5.6<br />
6.6<br />
7.8<br />
9.0<br />
0.3<br />
0.1<br />
0.1<br />
0.1<br />
0.1<br />
0.1<br />
0.1<br />
0.1<br />
0.1<br />
0.1<br />
0.1<br />
0.1<br />
35<br />
35<br />
35<br />
35<br />
35<br />
34<br />
31<br />
27<br />
23<br />
18<br />
12<br />
12<br />
X (Expert) User Adjusted User Adjusted User Adjusted<br />
In addition, you can specify Expert tuning and individually set the pressure proportional gain, pressure integrator gain,<br />
and pressure minor loop feedback gain. Individually setting or changing any tuning parameter will automatically<br />
change the tuning set to X (expert).<br />
Note<br />
Use Expert tuning only if standard tuning has not achieved the desired results.<br />
Stabilize/Optimize or Performance Tuner may be used to achieve the desired results more rapidly than Expert tuning.<br />
Proportional Gain—the proportional gain for the pressure control tuning set. Changing this parameter will also<br />
change the tuning set to Expert.<br />
MLFB Gain—the minor loop feedback gain for the pressure control tuning set. Changing this parameter will also<br />
change the tuning set to Expert.<br />
Integral Enable—Yes or No. Enable the pressure integral setting to improve static performance by correcting for<br />
error that exists between the pressure target and actual pressure. Pressure Integral Control is disabled by default.<br />
Integral Gain—Pressure Integral Gain (also called reset) is the gain factor applied to the time integral of the error<br />
signal between desired and actual pressure. Changing this parameter will also change the tuning set to Expert.<br />
Travel/Pressure Integral Settings<br />
Integral Dead Zone—A window around the Primary Setpoint in which integral action is disabled. This feature is used<br />
to eliminate friction induced limit cycles around the Primary Setpoint when the integrator is active. The Dead Zone<br />
27
Configuration<br />
July 2012<br />
Instruction Manual<br />
D103605X012<br />
is configurable from 0% to 2%, corresponding to a symmetric window from 0% to +/-2% around the Primary<br />
Setpoint. Default value is 0.25%.<br />
Integrator Limit—The Integrator Limit provides an upper limit to the integrator output. The high limit is configurable<br />
from 0 to 100% of the I/P drive signal.<br />
<strong>Valve</strong> and Actuator<br />
Field Communicator Configure > Manual Setup > <strong>Valve</strong> and Actuator (2‐2‐5)<br />
<strong>Valve</strong> Style—Enter the valve style, rotary or sliding‐stem<br />
Actuator Style—Enter the actuator style, spring and diaphragm, piston double‐acting without spring, piston<br />
single‐acting with spring, or piston double‐acting with spring.<br />
Feedback Connection—Refer to table 3‐6 for Feedback Connection options. Choose the assembly that matches the<br />
actuator travel range.<br />
Note<br />
As a general rule, do not use less than 60% of the magnet assembly travel range for full travel measurement. Performance will<br />
decrease as the assembly is increasingly subranged.<br />
The linear magnet assemblies have a valid travel range indicated by arrows molded into the piece. This means that the hall sensor<br />
(on the back of the <strong>DVC6200</strong> housing) has to remain within this range throughout the entire valve travel. The linear magnet<br />
assemblies are symmetrical. Either end may be up.<br />
Table 3‐6. Feedback Connection Options<br />
Travel Range<br />
Magnet Assembly<br />
mm Inch Degrees<br />
SStem #7 4.2-7 0.17-0.28 -<br />
SStem #19 8-19 0.32-0.75 -<br />
SStem #25 20-25 0.76-1.00 -<br />
SStem #38 26-38 1.01-1.50 -<br />
SStem #50 39-50 1.51-2.00 -<br />
SStem #100 51-100 2.01-4.00 -<br />
SStem #210 101-210 4.01-8.25<br />
SStem #1 Roller - - 60-90<br />
RShaft Window #1 - - 60-90<br />
RShaft Window #2 - - 60-90<br />
RShaft End Mount - - 60-90<br />
Relay Type—There are three categories of relays that result in combinations from which to select.<br />
Relay Type: The relay type is printed on the label affixed to the relay body.<br />
A = double‐acting or single‐acting<br />
B = single‐acting, reverse<br />
C= single‐acting, direct<br />
Special App: This is used in single‐acting applications where the “unused” output port is configured to read the<br />
pressure downstream of a solenoid valve.<br />
Lo Bleed: The label affixed to the relay body indicates whether it is a low bleed version.<br />
28
Instruction Manual<br />
D103605X012<br />
Configuration<br />
July 2012<br />
Zero Power Condition—The position of the valve (open or closed) when the electrical power to the instrument is<br />
removed. Zero Power Condition (ZPC) is determined by relay type, as shown in figure 3‐3.<br />
Figure 3‐3. Zero Power Condition<br />
A<br />
B<br />
Relay Type<br />
Single‐Acting Direct (Relay A or C)<br />
Double‐Acting (Relay A)<br />
Single‐Acting Reverse (Relay B)<br />
Loss of Electrical Power<br />
Port A pressure to zero.<br />
Port A pressure to zero.<br />
Port B pressure to full supply.<br />
Port B pressure to full supply.<br />
Travel Sensor Motion<br />
WARNING<br />
If you answer YES to the prompt for permission to move the valve when determining travel sensor motion, the instrument<br />
will move the valve through a significant portion of its travel range. To avoid personal injury and property damage caused<br />
by the release of process fluid or pressure, isolate the valve from the process and equalize pressure on both sides of the<br />
valve or bleed off the process fluid.<br />
Select Clockwise/Toward Bottom, or Counterclockwise/Toward Top. Travel Sensor Motion establishes the proper<br />
travel sensor rotation. For quarter‐turn actuators determine rotation by viewing the rotation of the magnet assembly<br />
from the back of the instrument.<br />
Note<br />
Travel Sensor Motion in this instance refers to the motion of the magnet assembly. Note that the magnet assembly may be<br />
referred to as a magnetic array in user interface tools.<br />
For instruments with Relay A and C: If increasing air pressure at output A causes the magnet assembly to move<br />
down or the rotary shaft to turn clockwise, enter CW/To Bottom Inst. If it causes the magnet assembly to move up,<br />
or the rotary shaft to turn counterclockwise, enter CCW/To Top Inst.<br />
For instruments with Relay B: If decreasing air pressure at output B causes the magnet assembly to down, or the<br />
rotary shaft to turn clockwise, enter CW/To Bottom Inst. If it causes the magnet assembly to move up, or the rotary<br />
shaft to turn counterclockwise, enter CCW/To Top Inst.<br />
Maximum Supply Pressure<br />
Enter the maximum supply pressure that is required to fully stroke the valve.<br />
29
Configuration<br />
July 2012<br />
Instruction Manual<br />
D103605X012<br />
Partial Stroke Test (PST) (Instrument Level ODV only)<br />
Field Communicator Configure > Manual Setup > Partial Stroke (2-2-6)<br />
Note<br />
Partial Stroke is only available for instrument level ODV.<br />
Partial Stroke Test (PST)<br />
PST Pressure Limit— This defines the actuator pressure at which a partial stroke test will abort. This prevents the<br />
<strong>DVC6200</strong> from exhausting (or building) excessive pressure to the actuator in an attempt to move a stuck valve.<br />
During Device Setup or Auto Travel Calibration, the Partial Stroke Pressure Limit will be set automatically as follows:<br />
Single Acting Actuators - For those actuators that exhaust pressure from the partial test start point, the Pressure<br />
Limit will be a minimum value. For those actuators that build pressure from the partial test start point, the Pressure<br />
Limit will be a maximum value.<br />
Double Acting Actuators - The Pressure Limit will be set to a negative value for actuators where the partial stroke<br />
start point is opposite of the Zero Power Condition (e.g., Partial Stroke Start Point = Open and Zero Power<br />
Condition = Closed) and to a positive valve for actuators where the partial stroke start point is the same as the Zero<br />
Power Condition.<br />
The pressure signal used to determine this parameter depends on relay type and is summarized below.<br />
Relay Type<br />
Pressure Signal<br />
A or C<br />
Port A - Port B<br />
B<br />
Port B - Port A<br />
B Special App.<br />
Port B<br />
C Special App.<br />
Port A<br />
To manually set the partial stroke pressure limit, you must examine current partial stroke test results using <strong>Valve</strong>Link<br />
software. The following steps will guide you through the process:<br />
1. Connect the <strong>DVC6200</strong> to a system running <strong>Valve</strong>Link software.<br />
2. Disable the following parameters:<br />
Travel Deviation Alert - set to 125%.<br />
End Point Pressure Control - disable<br />
Partial Stroke Pressure Limit - disable by setting the appropriate value shown in table 3‐7.<br />
30
Instruction Manual<br />
D103605X012<br />
Configuration<br />
July 2012<br />
Table 3‐7. Values for Disabling Partial Stroke Pressure Limit<br />
Actuator Type Relay Type Zero Power Condition Partial Stroke Start Point Partial Stroke Pressure Limit (Disabled)<br />
Open 0.0<br />
Closed<br />
Closed<br />
Psupply<br />
A or C<br />
Open<br />
Psupply<br />
Open<br />
Closed 0.0<br />
Single Acting<br />
Open<br />
Psupply<br />
Closed<br />
Closed 0.0<br />
B<br />
Open 0.0<br />
Open<br />
Closed<br />
Psupply<br />
Double Acting<br />
A<br />
Closed<br />
Open<br />
Open<br />
Closed<br />
Open<br />
Closed<br />
-Psupply<br />
Psupply<br />
Psupply<br />
-Psupply<br />
3. Run a partial stroke test.<br />
4. Select the Press/Time radio button on the partial stroke graph (refer to the example in figure 3‐4, bottom plot). If<br />
the actuator pressure starts high and moves low, find the minimum actuator pressure (Pmin). If the actuator<br />
pressure starts low and moves high, find the maximum actuator pressure (Pmax). Doubleacting actuators will<br />
display differential pressure. Use table 3‐8 to estimate the partial stroke pressure limit.<br />
Table 3‐8. Estimates for Partial Stroke Pressure Limits<br />
Actuator Style Relay Type Zero Power Condition PST Starting Point Partial Stroke Pressure Limit (1)<br />
Open<br />
Pmin - 0.25 * (Bench Set High - Bench Set Low)<br />
Closed<br />
Closed<br />
Pmax + 0.25 * (Bench Set High - Bench Set Low)<br />
A or C<br />
Open<br />
Pmax + 0.25 * (Bench Set High - Bench Set Low)<br />
Open<br />
Spring and<br />
Closed<br />
Pmin - 0.25 * (Bench Set High - Bench Set Low)<br />
Diaphragm<br />
Open<br />
Pmax + 0.25 * (Bench Set High - Bench Set Low)<br />
Closed<br />
Closed<br />
Pmin - 0.25 * (Bench Set High - Bench Set Low)<br />
B<br />
Open<br />
Pmin - 0.25 * (Bench Set High - Bench Set Low)<br />
Open<br />
Closed<br />
Pmax + 0.25 * (Bench Set High - Bench Set Low)<br />
Single Acting Piston<br />
A or C<br />
B<br />
Closed<br />
Open<br />
Closed<br />
Open<br />
Open<br />
Closed<br />
Open<br />
Closed<br />
Open<br />
Closed<br />
Open<br />
Closed<br />
0.5 * Pmin<br />
Pmax + 0.5 * (Psupply - Pmax)<br />
Pmax + 0.5 * (Psupply - Pmax)<br />
0.5 * Pmin<br />
Pmax + 0.5 * (Psupply - Pmax)<br />
0.5 * Pmin<br />
0.5 * Pmin<br />
Pmax + 0.5 * (Psupply - Pmax)<br />
Double Acting Piston<br />
A<br />
Closed<br />
Open<br />
Open<br />
Closed<br />
Open<br />
Closed<br />
Pmin - 0.5 * (Psupply + Pmin)<br />
Pmax + 0.5 * (Psupply - Pmax)<br />
Pmax + 0.5 * (Psupply - Pmax)<br />
Pmin - 0.5 * (Psupply + Pmin)<br />
5. Enable the parameters that were previously disabled:<br />
Travel Deviation Alert - set to 1.5x the maximum travel deviation between travel set point and travel.<br />
End Point Pressure Control - enable<br />
Partial Stroke Pressure Limit - calculate the value using table 3‐8.<br />
31
Configuration<br />
July 2012<br />
Instruction Manual<br />
D103605X012<br />
PST Enable—Yes or No. This enables or disables the Partial Stroke Test.<br />
PST Start Point—<strong>Valve</strong> Open or <strong>Valve</strong> Closed. This defines the travel stop that the valve needs to be at before a partial<br />
stroke test can be initiated. This also defines the travel stop for end point pressure control. Setting this value to Not<br />
Configured will disable partial stroke tests and end point pressure control.<br />
PST Variables—Follow the prompts on the Field Communicator display to enter or view information for following PST<br />
Variables:<br />
Max Travel Movement— This is the percentage of total span that the valve moves away from its normal operating<br />
state towards its tripped state during the test. The default value is 10%.<br />
Test Speed—This is the rate at which the valve will move during the test. The default value is 0.25%/second.<br />
Pause Time—This is the pause time between the up and down strokes of the test. The default value is 5 seconds.<br />
Figure 3‐4. Example Time Series Plots of Travel Set Point, Travel, Error, and Actuator Pressure<br />
ACTUAL TRACE FROM TEST (TYPICAL)<br />
ACTUAL TRACE FROM TEST (TYPICAL)<br />
ACTUAL TRACE FROM TEST (TYPICAL)<br />
32
Instruction Manual<br />
D103605X012<br />
Configuration<br />
July 2012<br />
Outputs<br />
Field Communicator<br />
Configure > Manual Setup > Outputs (2-2-6) HC, AD, PD or (2-2-7) ODV<br />
Output Terminal Configuration<br />
Note<br />
These menu items are only available on units that have the optional 420 mA position transmitter or switch hardware installed.<br />
Output Terminal Enable—If using the optional output terminal for a Position Transmitter or Switch output, this must<br />
be Enabled.<br />
Function—The output terminals can be configured as one of the following:<br />
Transmitter - 420mA output that represents 0100% of the calibrated valve travel.<br />
Limit Switch - Discrete switch (1A max) that trips at a configurable point within 0100% of calibrated valve travel.<br />
Alert Switch - Discrete switch (1A max) that trips based on a configurable device alert.<br />
Fail Signal—Should the output circuit fail to operate properly, the output will attempt to drive to a known state.<br />
Depending on the nature of the failure, the circuit may or may not be able to achieve this fail state. When<br />
configured as a transmitter, the output can be configured to drive high (22.5 mA) or low (3.6 mA). When<br />
configured as a switch, the output can be configured to drive Closed or Open.<br />
Note<br />
On loss of positioner power, the switch circuit will always go to the open state. However, on loss of positioner power, the<br />
transmitter output will continue to operate as long as the transmitter circuit is still powered and functioning.<br />
Switch Configuration<br />
Note<br />
Switch Configuration is only available on units that have the optional 420 mA position transmitter or switch hardware installed.<br />
Limit Switch Trip Point—When the function is configured as a Limit Switch, this defines the threshold for the limit<br />
switch in percent of calibrated travel.<br />
Alert Switch Source—When the function is configured as a Alert Switch, this determines which alert will activate the<br />
switch. The alert choices are: Travel Deviation or Pressure Fallback.<br />
Switch Closed—This configures the action of the switch. The choices are: Below Trip Point / Alert Not Active or<br />
Above Trip Point / Alert Active.<br />
33
Configuration<br />
July 2012<br />
Instruction Manual<br />
D103605X012<br />
HART Variable Assignments<br />
Instrument variables can be reported via four different HART variable assignments. The Primary Variable is always<br />
configured as Analog Input. However, the remaining three variables have additional options as listed below.<br />
Primary Variable (PV) Analog Input<br />
Secondary Variable (SV) Travel, Travel Setpoint, Pressure A, Pressure B, Pressure AB, Supply Pressure,<br />
Drive Signal, or Analog Input<br />
Tertiary Variable (TV) Travel, Travel Setpoint, Pressure A, Pressure B, Pressure AB, Supply Pressure,<br />
Drive Signal, or Analog Input<br />
Quaternary Variable (QV) Travel, Travel Setpoint, Pressure A, Pressure B, Pressure AB, Supply Pressure,<br />
Drive Signal, or Analog Input<br />
Transmitter Output<br />
Note<br />
Transmitter Output is only available on units that have the optional 420 mA position transmitter or switch hardware installed.<br />
This configures the relationship between the valve travel and the position transmitter output signal. There are two<br />
choices; 4mA = <strong>Valve</strong> Closed or 4mA = <strong>Valve</strong> Open.<br />
Burst Mode<br />
Burst mode provides continuous communication from the digital valve controller. Burst mode applies only to the<br />
transmission of burst mode data (HART Variable Assignments) and does not affect the way other data is accessed.<br />
Burst mode is only available in devices configured as HART Universal Revision 5.<br />
Burst Enable—This turns on or off the burst mode.<br />
Burst Command—This defines which HART command is configured for burst reporting. There are three options to<br />
choose from. When using a TriLoop, select the third option.<br />
- Analog Input (Command 1)<br />
- Loop Current / Travel (Command 2)<br />
- Loop Current / PV / SV / TV / QV (Command 3)<br />
Note<br />
Access to information in the instrument is normally obtained through the poll/response of HART communication. The Field<br />
Communicator or the control system may request any of the information that is normally available, even while the instrument is in<br />
burst mode. Between each burst mode transmission sent by the instrument, a short pause allows the Field Communicator or<br />
control system to initiate a request. The instrument receives the request, processes the response message, and then continues<br />
“bursting” the burst mode data.<br />
Burst mode will be automatically disabled during diagnostics tests such as <strong>Valve</strong> Signature.<br />
Note<br />
If the instrument is configured to operate in pressure control mode, or detects an invalid travel sensor reading, the Travel variable<br />
will report pressure in percent of bench set range.<br />
34
Instruction Manual<br />
D103605X012<br />
Configuration<br />
July 2012<br />
Alert Setup<br />
Field Communicator Configure > Alert Setup (2‐3)<br />
An alert is a notification that the instrument has detected a problem. A shutdown is an action that the instrument<br />
takes to drive the air output to the Zero Power Condition as per figure 3‐3. Some alerts can be configured to shutdown<br />
the instrument. Refer to table 3‐9 for default alert and shutdown settings.<br />
Alerts may be enabled or disabled with the instrument In Service, Out of Service, Protected, or Not Protected.<br />
However, the instrument must be Not Protected to enable or disable a shutdown. Alerts are not processed when a<br />
diagnostic is in progress.<br />
If shutdown is enabled, and the alert is active, the instrument will latch in the shutdown state until power to the<br />
instrument is cycled and the alert has cleared. While in the shutdown condition, HART communication will continue if<br />
the instrument remains powered.<br />
For a detailed explanation of the alerts and the recommended actions, refer to Section 5.<br />
Table 3‐9. Default Alert and Shutdown Settings<br />
ALERT DEFAULT ALERT SETTING DEFAULT SHUTDOWN SETTING<br />
Travel Sensor Failure Enabled Disabled<br />
Temperature Sensor Failure Enabled Disabled<br />
Minor Loop Sensor Failure Enabled Disabled<br />
Pressure Sensor Failure Enabled Disabled<br />
Drive Current Failure Enabled Disabled<br />
Critical NVM Failure Enabled Disabled<br />
Non-Critical NVM Failure Enabled Disabled<br />
Flash Integrity Failure Enabled Disabled<br />
Reference Voltage Failure Enabled Disabled<br />
Drive Signal Out of Range Enabled Not Available<br />
Supply Pressure Low () Enabled Not Available<br />
Travel Deviation Enabled Not Available<br />
Pressure Fallback Active () Enabled Not Available<br />
High Travel Disabled Not Available<br />
Low Travel Disabled Not Available<br />
High-High Travel Disabled Not Available<br />
Low-Low Travel Disabled Not Available<br />
Travel Limit/Cutoff High Disabled Not Available<br />
Travel Limit/Cutoff Low Disabled Not Available<br />
Integrator Saturated High Disabled Not Available<br />
Integrator Saturated Low Disabled Not Available<br />
Cycle Count High Disabled Not Available<br />
Travel Accumulator High Disabled Not Available<br />
Output Circuit Communication Failure Disabled Not Available<br />
Alert Record Not Empty Disabled Not Available<br />
Alert Record Full Disabled Not Available<br />
Instrument Time is Approximate Disabled Not Available<br />
1. Instrument level AD, PD, or ODV only.<br />
35
Configuration<br />
July 2012<br />
Instruction Manual<br />
D103605X012<br />
Change to HART 5 / Change to HART 7<br />
Field Communicator<br />
Service Tool > Maintenance > Change to HART 5 / Change to HART 7 (3-5-3) HC or (3-5-4) AD, PD or (3-5-5) ODV<br />
Note<br />
This procedure must never be done while the valve is in service and controlling the process. Depending on the control system or<br />
asset management system attached, complete system reset may be required to reestablish HART communication. Consult the<br />
system documentation for further information.<br />
This procedure changes the instrument from HART Universal Revision 5 to HART Universal Revision 7 (or vice versa).<br />
Before proceeding, verify that your systems are prepared to support HART Universal Revision 7 devices. Follow the<br />
prompts on the Field Communicator display.<br />
36
Instruction Manual<br />
D103605X012<br />
Calibration<br />
July 2012<br />
Section 4 Calibration 44<br />
Calibration Overview<br />
When a <strong>DVC6200</strong> digital valve controller is ordered as part of a control valve assembly, the factory mounts the digital<br />
valve controller on the actuator and connects the necessary tubing, then sets up and calibrates the controller.<br />
For digital valve controllers that are ordered separately, recalibration of the analog input or pressure sensors generally<br />
is unnecessary. However, after mounting on an actuator, perform the initial setup then calibrate travel by selecting<br />
Configure > Calibration > Travel Calibration > Auto Calibration. For more detailed calibration information, refer to the<br />
following calibration procedures.<br />
Field Communicator Configure > Calibration (2-4)<br />
Auto Travel Calibration - see page 38<br />
Manual Travel Calibration - see page 39<br />
Pushbutton Calibration - see page 40<br />
Pressure Sensor Calibration - see page 41<br />
Analog Input Calibration - see page 42<br />
Relay Adjustment - see page 43<br />
PST Calibration (ODV Instrument Level only) - see page 45<br />
Note<br />
The Instrument Mode must be Out Of Service and the Protection set to None before the instrument can be calibrated.<br />
If you are operating in burst mode, we recommend that you disable burst before continuing with calibration. Once calibration is<br />
complete, burst mode may then be turned back on.<br />
WARNING<br />
During calibration the valve will move full stroke. To avoid personal injury and property damage caused by the release of<br />
pressure or process fluid, isolate the valve from the process and equalize pressure on both sides of the valve or bleed off the<br />
process fluid.<br />
37
Calibration<br />
July 2012<br />
Instruction Manual<br />
D103605X012<br />
Travel Calibration<br />
If a double‐acting relay is used, you will be prompted to run the relay adjustment when auto or manual calibration is<br />
selected. Select Yes to adjust the relay, select No to proceed with calibration. For additional information, refer to Relay<br />
Adjustment on page 43.<br />
Auto Calibration<br />
1. The auto calibration procedure is automatic. It is completed when the Calibration menu appears.<br />
During calibration, the instrument seeks the high and low end points and the minor loop feedback (MLFB) and output<br />
bias. By searching for the end points, the instrument establishes the limits of physical travel, i.e. the actual travel 0 and<br />
100% positions. This also determines how far the relay beam swings to calibrate the sensitivity of the MLFB sensor.<br />
2. Place the instrument In Service and verify that the travel properly tracks the current source.<br />
If the unit does not calibrate, refer to table 4‐1 for error messages and possible remedies.<br />
Table 4‐1. Auto Calibrate Travel Error Messages<br />
Error Message<br />
Power failure occurred during Auto Calib<br />
Auto Calib did not complete within the time limit.<br />
Insufficient travel<br />
Drive signal exceed low limit; check supply<br />
pressure<br />
Drive signal exceed high limit; check supply<br />
pressure<br />
Possible Problem and Remedy<br />
The analog input signal to the instrument must be greater than 3.8 mA. Adjust the current output<br />
from the control system or the current source to provide at least 4.0 mA.<br />
The problem may be one or the other of the following:<br />
1. The tuning set selected is too low and the valve does not reach an end point in the allotted time.<br />
Select Manual Setup > Tuning > Travel Tuning > Stabilize/Optimize then Increase Response (selects next<br />
higher tuning set).<br />
2. The tuning set selected is too high, valve operation is unstable and does not stay at an end point<br />
for the allotted time. Select Manual Setup > Tuning > Travel Tuning > Stabilize/Optimize then Decrease<br />
Response (selects next lower tuning set).<br />
Prior to receiving this message, did the instrument output go from zero to full supply If not, verify<br />
instrument supply pressure by referring to the specifications in the appropriate actuator instruction<br />
manual. If supply pressure is correct, check instrument pneumatic components (I/P converter and<br />
relay).<br />
If the instrument output did go from zero to full supply prior to receiving this message, then verify<br />
proper mounting by referring to the appropriate mounting procedure in the Installation section and<br />
checking the magnet array for proper alignment.<br />
1. Check supply pressure (reverse‐acting relay)<br />
2. Friction is too high.<br />
1. Check supply pressure (direct‐acting relay)<br />
2. Friction is too high<br />
38
Instruction Manual<br />
D103605X012<br />
Calibration<br />
July 2012<br />
Manual Calibration<br />
Two procedures are available to manually calibrate travel:<br />
Analog Adjust— This procedure is used when you can manually change the 4-20 mA current source to move the<br />
valve.<br />
<strong>Digital</strong> Adjust— This procedure is used when the 4-20 mA current source cannot be manually changed.<br />
Analog Calibration Adjust<br />
Connect a variable current source to the instrument LOOP + and LOOP - terminals. The current source should be<br />
capable of generating 4 to 20 mA.<br />
Follow the prompts on the Field Communicator display to calibrate the instrument's travel in percent.<br />
Note<br />
0% Travel = <strong>Valve</strong> Closed<br />
100% Travel = <strong>Valve</strong> Open<br />
1. Adjust the input current until the valve is near mid‐travel. Press OK.<br />
Note<br />
In steps 2 through 7 the accuracy of the current source adjustment affects the position accuracy.<br />
2. Adjust the current source until the valve is at 0% travel, then press OK.<br />
3. Adjust the current source until the valve is at 100% travel, then press OK.<br />
4. Adjust the current source until the valve is at 0% travel, then press OK.<br />
5. Adjust the current source until the valve is at 100% travel, then press OK.<br />
6. Adjust the current source until the valve is at 5% travel, then press OK.<br />
7. Adjust the current source until the valve is at 95% travel, then press OK.<br />
8. Place the instrument In Service and verify that the travel properly tracks the current source.<br />
<strong>Digital</strong> Calibration Adjust<br />
Connect a variable current source to the instrument LOOP + and LOOP - terminals. The current source should be set<br />
between 4 and 20 mA.<br />
Follow the prompts on the Field Communicator display to calibrate the instrument's travel in percent.<br />
1. Adjust the input current until the valve is near mid‐travel. Press OK.<br />
Note<br />
0% Travel = <strong>Valve</strong> Closed<br />
100% Travel = <strong>Valve</strong> Open<br />
39
Calibration<br />
July 2012<br />
Instruction Manual<br />
D103605X012<br />
2. From the adjustment menu, select the direction and size of change required to set the travel at 0%.<br />
Selecting large, medium, and small adjustments causes changes of approximately 10.0%, 1.0%, and 0.1%, respectively.<br />
If another adjustment is required, repeat step 2. Otherwise, select Done and go to step 3.<br />
3. From the adjustment menu, select the direction and size of change required to set the travel to 100%.<br />
If another adjustment is required, repeat step 3. Otherwise, select Done and go to step 4.<br />
4. From the adjustment menu, select the direction and size of change required to set the travel at 0%.<br />
If another adjustment is required, repeat step 4. Otherwise, select Done and go to step 5.<br />
5. From the adjustment menu, select the direction and size of change required to set the travel to 100%.<br />
If another adjustment is required, repeat step 5. Otherwise, select Done and go to step 6.<br />
6. From the adjustment menu, select the direction and size of change required to set the travel to 5%.<br />
If another adjustment is required, repeat step 6. Otherwise, select Done and go to step 7.<br />
7. From the adjustment menu, select the direction and size of change required to set the travel to 95%.<br />
If another adjustment is required, repeat step 7. Otherwise, select Done and go to step 8.<br />
8. Place the instrument In Service and verify that the travel properly tracks the current source.<br />
Pushbutton Calibration<br />
A pushbutton near the wiring terminals in the terminal box provides a quick means to autocalibrate the instrument.<br />
The button must be pressed for 3 to 10 seconds. Autocalibration will move the valve through the full range of travel<br />
whether the Instrument Mode is In Service or Out of Service. However, if the Write Protection is Protected, this button<br />
will not be active. To abort, press the button again for 1 second. The calibration button is disabled by default. To<br />
enable it, go to Manual Setup > Instrument > Calibration Button.<br />
Note<br />
Pressure range (used for Pressure Fallback) is not recalibrated during this procedure.<br />
This calibration procedure is recommended whenever the I/P converter or pneumatic relay is replaced. Do not use the<br />
pushbutton calibration for initial calibration when mounting the instrument on an actuator, or if the printed wiring<br />
board assembly was replaced.<br />
If you suspect calibration has changed due to drift, first perform a <strong>Valve</strong> Signature diagnostic test using <strong>Valve</strong>Link<br />
software to capture the asfound data for future root cause analysis.<br />
40
Instruction Manual<br />
D103605X012<br />
Calibration<br />
July 2012<br />
Sensor Calibration<br />
Pressure Sensors<br />
Note<br />
The pressure sensor is calibrated at the factory and should not require calibration.<br />
Output Pressure Sensor<br />
To calibrate the output pressure sensor, connect an external reference gauge to the output being calibrated. The<br />
gauge should be capable of measuring maximum instrument supply pressure. Depending upon the sensor you wish to<br />
calibrate, select either Output A Sensor or Output B Sensor. Follow the prompts on the Field Communicator display to<br />
calibrate the instrument's output pressure sensor.<br />
1. Adjust the supply pressure regulator to the maximum instrument supply pressure. Press OK.<br />
2. The instrument reduces the output pressure to 0. The following message appears.<br />
Use the Increase and Decrease<br />
selections until the displayed<br />
pressure matches the output x<br />
pressure.<br />
Press OK when you have read the message.<br />
3. The value of the output pressure appears on the display. Press OK to display the adjustment menu.<br />
4. From the adjustment menu, select the direction and size of adjustment to the displayed value.<br />
Selecting large, medium, and small adjustments causes changes of approximately 3.0 psi/0.207 bar/20.7 kPa, 0.30<br />
psi/0.0207 bar/2.07 kPa, and 0.03 psi/0.00207 bar/0.207 kPa, respectively.<br />
If the displayed value does not match the output pressure, press OK, then repeat this step (step 4) to further adjust the<br />
displayed value. When the displayed value matches the output pressure, select Done and go to step 5.<br />
5. The instrument sets the output pressure to full supply. The following message appears.<br />
Use the Increase and Decrease<br />
selections until the displayed<br />
pressure matches the output x<br />
pressure.<br />
Press OK when you have read the message.<br />
6. The value of the output pressure appears on the display. Press OK to display the adjustment menu.<br />
7. From the adjustment menu, select the direction and size of adjustment to the displayed value. If the displayed value<br />
does not match the output pressure, press OK, then repeat this step (step 7) to further adjust the displayed value.<br />
When the displayed value matches the output pressure, select Done and go to step 8.<br />
8. Place the instrument In Service and verify that the displayed pressure matches the measured output pressure.<br />
41
Calibration<br />
July 2012<br />
Instruction Manual<br />
D103605X012<br />
Supply Pressure Sensor<br />
Note<br />
Supply Pressure Sensor Calibration is not available for instrument level HC.<br />
To calibrate the supply pressure sensor, connect an external reference gauge to the output side of the supply<br />
regulator. The gauge should be capable of measuring maximum instrument supply pressure. Follow the prompts on<br />
the Field Communicator display to calibrate the instrument's supply pressure sensor.<br />
1. Select a) Zero Only, or b) Zero and Span (gauge required).<br />
a. If Zero Only calibration is selected, adjust the supply pressure regulator to remove supply pressure from the<br />
instrument. Press OK. Once calibration is complete, go to step 5.<br />
b. If Zero and Span calibration is selected, adjust the supply pressure regulator to remove supply pressure from the<br />
instrument. Press OK. Adjust the supply regulator to the maximum instrument supply pressure. Press OK.<br />
Proceed with step 2.<br />
2. The following message appears:<br />
Use the Increase and Decrease<br />
selections until the displayed<br />
pressure matches the supply<br />
pressure.<br />
Press OK when you have read this message.<br />
3. The value of the pressure appears on the display.<br />
4. From the adjustment menu, select the direction and size of adjustment to the displayed value.<br />
Selecting large, medium, and small adjustments causes changes of approximately 3.0 psi/0.207 bar/20.7 kPa, 0.30<br />
psi/0.0207 bar/2.07 kPa, and 0.03 psi/0.00207 bar/0.207 kPa, respectively.<br />
Adjust the displayed value until it matches the supply pressure, select Done and go to step 5.<br />
5. Place the instrument In Service and verify that the displayed pressure matches the measured supply pressure.<br />
Analog Input Calibration<br />
To calibrate the analog input sensor, connect a variable current source to the instrument LOOP+ and LOOP- terminals.<br />
The current source should be capable of generating an output of 4 to 20 mA. Follow the prompts on the Field<br />
Communicator display to calibrate the analog input sensor.<br />
1. Set the current source to the target value shown on the display. The target value is the Input Range Low value. Press<br />
OK.<br />
2. The following message appears:<br />
Use the Increase and Decrease<br />
selections until the displayed<br />
current matches the target.<br />
42
Instruction Manual<br />
D103605X012<br />
Calibration<br />
July 2012<br />
Press OK when you have read this message.<br />
3. The value of the Analog Input appears on the display. Press OK to display the adjustment menu.<br />
4. From the adjustment menu, select the direction and size of adjustment to the displayed value.<br />
Selecting large, medium, and small adjustments causes changes of approximately 0.4 mA, 0.04 mA, and 0.004 mA,<br />
respectively.<br />
If the displayed value does not match the current source, press OK, then repeat this step (step 4) to further adjust the<br />
displayed value. When the displayed value matches the current source, select Done and go to step 5.<br />
5. Set the current source to the target value shown on the display. The target value is the Input Range High value.<br />
Press OK.<br />
6. The following message appears:<br />
Use the Increase and Decrease<br />
selections until the displayed<br />
current matches the target.<br />
Press OK when you have read this message.<br />
7. The value of the Analog Input appears on the display. Press OK to display the adjustment menu.<br />
8. From the adjustment menu, select the direction and size of adjustment to the displayed value. If the displayed value<br />
does not match the current source, press OK, then repeat this step (step 8) to further adjust the displayed value.<br />
When the displayed value matches the current source, select Done and go to step 9.<br />
9. Place the instrument In Service and verify that the analog input displayed matches the current source.<br />
Relay Adjustment<br />
Before beginning travel calibration, check the relay adjustment. Replace the digital valve controller cover when<br />
finished.<br />
Note<br />
Relay B and C are not user‐adjustable.<br />
Double‐Acting Relay<br />
The double‐acting relay is designated by “Relay A” on a label affixed to the relay itself. For double‐acting actuators, the<br />
valve must be near mid‐travel to properly adjust the relay. The Field Communicator will automatically position the<br />
valve when Relay Adjust is selected.<br />
Rotate the adjustment disc, shown in figure 4‐1, until the output pressure displayed on the Field Communicator is<br />
between 50 and 70% of supply pressure. This adjustment is very sensitive. Be sure to allow the pressure reading to<br />
stabilize before making another adjustment (stabilization may take up to 30 seconds or more for large actuators).<br />
If the low bleed relay option has been ordered stabilization may take approximately two minutes longer than the<br />
standard relay.<br />
43
Calibration<br />
July 2012<br />
Instruction Manual<br />
D103605X012<br />
Figure 4‐1. Relay A Adjustment (Shroud Removed for Clarity)<br />
FOR SINGLE‐ACTING DIRECT<br />
RELAYS: ROTATE ADJUSTMENT<br />
DISC IN THIS DIRECTION UNTIL IT<br />
CONTACTS THE BEAM<br />
FOR DOUBLE‐ACTING RELAYS:<br />
ROTATE ADJUSTMENT DISC IN<br />
THIS DIRECTION TO DECREASE<br />
OUTPUT PRESSURE<br />
ADJUSTMENT DISC<br />
FOR DOUBLE‐ACTING RELAYS:<br />
ROTATE ADJUSTMENT DISC IN<br />
THIS DIRECTION TO INCREASE<br />
OUTPUT PRESSURE<br />
W9034<br />
Relay A may also be adjusted for use in single‐acting‐ direct applications. Rotate the adjustment disc as shown in figure<br />
4‐1 for single‐acting direct operation.<br />
CAUTION<br />
Care should be taken during relay adjustment as the adjustment disc may disengage if rotated too far.<br />
Single‐Acting Relays<br />
WARNING<br />
For Instrument Level ODV only:<br />
If the unused port is monitoring pressure, ensure that the pressure source conforms to ISA Standard 7.0.01 and does not<br />
exceed the pressure supplied to the instrument.<br />
Failure to do so could result in personal injury or property damage caused by loss of process control.<br />
Single‐Acting Direct Relay<br />
The single‐acting direct relay is designated by “Relay C” on a label affixed to the relay itself. Relay C requires no<br />
adjustment.<br />
Single‐Acting Reverse Relay<br />
The single‐acting reverse relay is designated by “Relay B” on a label affixed to the relay itself. Relay B is calibrated at the<br />
factory and requires no further adjustment.<br />
44
Instruction Manual<br />
D103605X012<br />
Calibration<br />
July 2012<br />
PST Calibration (ODV Instrument Level only)<br />
This procedure permits you to run the Partial Stroke Calibration, which enables the Partial Stroke Test. It establishes<br />
values for Partial Stroke Pressure Limit, Pressure Set Point and Pressure Saturation Time for End Point Pressure Control,<br />
Travel Deviation Alert Point and Travel Deviation Time. The Partial Stroke Calibration also sets default values for max<br />
travel movement, test speed, and test pause time.<br />
Note<br />
You must take the instrument out of service before running Partial Stroke Calibration.<br />
Ensure that the instrument is put back in service after the completing the calibration procedure.<br />
45
Calibration<br />
July 2012<br />
Instruction Manual<br />
D103605X012<br />
46
Instruction Manual<br />
D103605X012<br />
Device Information, Diagnostics, and Alerts<br />
July 2012<br />
Section 5 Device Information, Diagnostics, and Alerts55<br />
Overview<br />
Field Communicator Overview (1)<br />
Status & Primary Purpose Variables<br />
The overview section provides basic information about the current state of the instrument and gives you access to the<br />
current values of:<br />
Alert Status<br />
Communication Status<br />
Instrument Mode (In/Out of Service)<br />
Analog Input<br />
Setpoint<br />
Travel<br />
Supply Pressure (not available in Instrument Level HC)<br />
Actuator Pressure(s)<br />
Travel/Pressure Control Configuration<br />
Device Information<br />
Device Information provides details about the instrument construction including:<br />
Tag Name<br />
Instrument Model Number<br />
Instrument Level (see table 5‐1)<br />
Device ID (unique number used to prevent the instrument from accepting commands intended for other<br />
instruments)<br />
Serial Numbers<br />
Firmware, DD, and Hardware Revisions<br />
HART Universal Revision<br />
Write Protection (provides a procedure to enable/disable)<br />
Table 5‐1. Functions Available for Instrument Level<br />
Instrument Level<br />
HC<br />
AD<br />
PD<br />
ODV<br />
Functions Available<br />
Communicates with the Field Communicator and <strong>Valve</strong>Link software. In addition,<br />
HC provides: travel cutoffs and limits, minimum opening and closing times, input characterization (linear, equal<br />
percentage, quick opening, and custom), trending with <strong>Valve</strong>Link Solo, and the following alerts: travel deviation;<br />
travel alert high, low, high high, and low low; drive signal; cycle counter; and travel accumulation.<br />
Includes all functions listed above plus (with <strong>Valve</strong>Link software) all offline diagnostic tests (dynamic error band,<br />
drive signal, step response, and valve signature) plus online trending<br />
Includes all functions listed above plus all Performance Diagnostics online/in‐service valve testing (valve friction,<br />
electronics, and mechanical condition)<br />
Includes all functions listed above plus partial stroke test and lead/lag set point filter.<br />
47
Device Information, Diagnostics, and Alerts<br />
July 2012<br />
Instruction Manual<br />
D103605X012<br />
Service Tools<br />
Field Communicator Service Tools (3)<br />
Device Status<br />
Instrument alerts, when enabled, detect many operational and performance issues that may be of interest. If there are<br />
no alerts currently active, this display will be empty.<br />
Alert Record<br />
The <strong>DVC6200</strong> will store 20 alerts. Once the alert record is full, no additional alerts will be stored until the record is<br />
cleared.<br />
Below is a list of the alerts that can be detected by the instrument. To enable or disable the alerts, navigate to<br />
Configure > Alert Setup.<br />
Offline/Failed Alert—This alert is active if a shutdown alert has put the device in a failed state and is therefore not<br />
controlling the input. Press Enter to view the alert(s) that caused the shutdown.<br />
Electronics<br />
Drive Current Failure—This alert is active when the drive current to the I/P converter is not flowing as expected. If<br />
this alert occurs, check the connection between the I/P converter and the printed wiring board assembly. Try<br />
removing the I/P converter and reinstalling it. If the alert does not clear, replace the I/P converter or the printed<br />
wiring board assembly.<br />
Drive Signal Alert—This alert monitors the drive signal and calibrated travel. If one of the following conditions exists<br />
for more than 20 seconds, the alert is set.<br />
For the case where Zero Power Condition is defined as closed:<br />
Drive Signal < 10% and Calibrated Travel > 3%<br />
Drive Signal > 90% and Calibrated Travel < 97%<br />
For the case where Zero Power Condition is defined as open:<br />
Drive Signal < 10% and Calibrated Travel < 97%<br />
Drive Signal > 90% and Calibrated Travel > 3%<br />
NonCritical NVM Alert—This alert is active if there is a failure associated with NVM (nonvolatile memory) that is not<br />
critical for instrument operation. If this alert is active, restart the instrument. If the alert persists, replace the printed<br />
wiring board assembly.<br />
Critical NVM Alert—This alert is active if there is a failure associated with NVM that is critical for instrument<br />
operation. If this alert is active, restart the instrument. If the alert persists, replace the printed wiring board<br />
assembly.<br />
Flash Integrity Failure—This alert is active if there is a failure associated with flash ROM (read only memory). If this<br />
alert is active, restart the instrument. If the alert persists, replace the printed wiring board assembly.<br />
Reference Voltage Failure—This alert is active if there is a failure associated with the internal voltage reference. If<br />
this alert is active, replace the printed wiring board assembly.<br />
48
Instruction Manual<br />
D103605X012<br />
Device Information, Diagnostics, and Alerts<br />
July 2012<br />
Variable Out of Range—This alert is active if there is a problem with one or more of the following: the analog input<br />
signal, the I/P converter, the pneumatic relay, or the printed wiring board.<br />
Field Device Malfunction—This alert is active if the pressure, position, or temperature sensors are providing invalid<br />
readings.<br />
Internal Sensor Out of Limits—This alert is active if there is a problem with either the pressure sensor or the printed<br />
wiring board assembly.<br />
Travel Sensor Alert—This alert is active if the sensed travel is outside the range of 25.0 to 125.0% of calibrated<br />
travel. If this alert is active, check the instrument mounting. Also, check that the electrical connection from the<br />
travel sensor is properly plugged into the printed wiring board assembly. After restarting the instrument, if the alert<br />
persists, troubleshoot the printed wiring board assembly or travel sensor.<br />
Temperature Sensor Alert—This alert is active when the instrument temperature sensor fails, or the sensor reading<br />
is outside of the range of 60 to 100°C (76 to 212°F). The temperature reading is used internally for temperature<br />
compensation of inputs. If this alert is active, restart the instrument. If the alert persists, replace the printed wiring<br />
board assembly.<br />
Pressure Sensor Alert—This alert is active if any of the 3 pressure sensor readings are outside the range of 24.0 to<br />
125.0% of the calibrated pressure for more than 60 seconds. If this alert is active, check the instrument supply<br />
pressure, ensure the printed wiring board assembly is properly mounted onto the module base assembly, and<br />
ensure the pressure sensor orings are properly installed. If the alert persists after restarting the instrument, replace<br />
the printed wiring board assembly.<br />
Minor Loop Sensor Alert—This alert is active if the pneumatic relay position reading is outside the valid range. If the<br />
alert persists, replace the printed wiring board.<br />
Loop Current Validation Alert—This alert is active if the loop current is significantly out of range, or if there is a<br />
problem with the analog circuit electronics. If this alert is active, restart the instrument with the loop current<br />
verified to be in the 420 mA range. If the alert persists, replace the printed wiring board.<br />
Note<br />
If the control system is known to output current beyond 25 mA, Shutdown on Loop Current Validation should not be enabled.<br />
Output Circuit Communication Failure—This alert is active if the output circuit is not responding. If configured as a<br />
position transmitter output, first make sure the transmitter circuit is powered. If the alert persists, make sure the<br />
DIP switch on the main electronics matches the configuration of the OUT terminals. If the alert is still active, replace<br />
the main electronics.<br />
Instrument Time is Approximate Alert—This alert is active if the instrument has been powered down since the last<br />
time the instrument clock was set. To clear the alert, reset the instrument time.<br />
Pressure<br />
Supply Pressure Alert—This alert is active if the supply pressure falls below the supply pressure alert point.<br />
Note<br />
The Supply Pressure Lo alert is available for instrument level AD, PD, and ODV.<br />
49
Device Information, Diagnostics, and Alerts<br />
July 2012<br />
Instruction Manual<br />
D103605X012<br />
Travel<br />
Note<br />
The Travel Alert Deadband applies to the Travel Deviation Alert as well as the Travel Alert Hi, Lo, Hi Hi, and Lo Lo.<br />
Travel Deviation Alert—If the difference between the Travel Target and the Travel exceeds the Travel Deviation Alert<br />
Point for more than the Travel Deviation Time, the Travel Deviation Alert is active. It remains active until the<br />
difference between the travel target and the Travel is less than the Travel Deviation Alert Point minus the Travel<br />
Alert Deadband.<br />
Travel Alert Hi—This alert is active when the Travel exceeds the Travel Alert Hi Point. Once the alert is active, the<br />
alert will clear when the Travel falls below the Travel Alert Hi Point minus the Travel Alert Deadband. See figure 5‐1.<br />
Figure 5‐1. Travel Alert Deadband<br />
ALERT IS SET<br />
TRAVEL ALERT<br />
HIGH POINT<br />
TRAVEL ALERT<br />
DEADBAND<br />
ALERT IS CLEARED<br />
A6532<br />
Travel Alert Hi Hi—This alert is active when the Travel exceeds the Travel Alert Hi Hi Point. Once the alert is active,<br />
the alert will clear when the Travel falls below the Travel Alert Hi Hi Point minus the Travel Alert Deadband.<br />
Travel Alert Lo—This alert is active when the Travel is below the Travel Alert Lo Point. Once the alert is active, the<br />
alert will clear when the Travel exceeds the Travel Alert Lo Point plus the Travel Alert Deadband.<br />
Travel Alert Lo Lo—This alert is active when the Travel is below the Travel Alert Lo Lo Point. Once the alert is active,<br />
the alert will clear when the Travel exceeds the Travel Alert Lo Lo Point plus the Travel Alert Deadband.<br />
Travel Limit/Cutoff Hi Alert—This alert is active when the Travel exceeds the Hi Limit/Cutoff Point.<br />
Travel Limit/Cutoff Lo Alert—This alert is active when the Travel falls below the Lo Limit/Cutoff Point.<br />
Integrator Saturated High Alert—This alert is active if the instrument integrator is saturated at the high extreme.<br />
Integrator Saturated Low Alert—This alert is active if the instrument integrator is saturated at the low extreme.<br />
Pressure Fallback Active Alert—This alert is active when the instrument has detected a problem with the travel<br />
feedback and is now controlling the output like an I/P transducer.<br />
50
Instruction Manual<br />
D103605X012<br />
Device Information, Diagnostics, and Alerts<br />
July 2012<br />
Travel History<br />
Cycle Count High Alert—This alert is active if the Cycle Counter exceeds the Cycle Count Alert Point. The Cycle Count<br />
records the number of times the travel changes direction when it is outside of the deadband. To clear the alert, set<br />
the Cycle Counter to a value less than the alert point.<br />
Travel Accumulator High Alert—This alert is active if the Travel Accumulator exceeds the Travel Accumulator Alert<br />
Point. The Travel Accumulator totalizes the travel of the valve when the deadband is exceeded. To clear the alert,<br />
set the Travel Accumulator to a value less than the alert point.<br />
Note<br />
The Cycle Count / Travel Accumulator Deadband applies to both the Cycle Count High Alert and the Travel Accumulator High<br />
Alert.<br />
The deadband is the percent (%) of ranged travel around a travel reference point. The travel reference point gets<br />
reestablished to the point of travel reversal that occurs outside of the deadband. The deadband must be exceeded<br />
before a change in travel direction will be counted as a cycle and the accumulated travel (up to the point of travel<br />
reversal) is added to the total accumulation. See figure 5‐2.<br />
Figure 5‐2. Cycle Counter and Travel Accumulator Deadband Example (set at 10%)<br />
DEADBAND EXCEEDED, NEW<br />
REFERENCE POINT ESTABLISHED<br />
DEADBAND<br />
REFERENCE POINT<br />
DEADBAND (+/- 5%)<br />
VALVE POSITION<br />
TIME<br />
DEADBAND<br />
DARK SEGMENTS REPRESENT THE AMOUNT OF TRAVEL<br />
THAT WILL BE ADDED TO THE TRAVEL ACCUMULATOR<br />
E1473<br />
CYCLE COUNTER INCREMENTS<br />
Alert Record<br />
Alert Record Not Empty Alert—This alert is active when there are 1 or more alerts stored in the alert record.<br />
Alert Record Full Alert—This alert is active when the alert record is full. Additional alerts that are detected will not be<br />
saved to the alert record until the alert record is cleared.<br />
51
Device Information, Diagnostics, and Alerts<br />
July 2012<br />
Instruction Manual<br />
D103605X012<br />
Status<br />
Calibration in Progress Alert—This alert is active when calibration is in progress.<br />
AutoCal in Progress Alert—This alert is active when auto calibration is in progress.<br />
Diagnostic in Progress Alert—This alert is active when a diagnostic test is in progress.<br />
Diagnostic Data Available Alert—This alert is active when diagnostic data has been collected and is being stored in<br />
the instrument.<br />
Pressure Control Active Alert—This alert is active when the instrument is controlling like an I/P transducer (Pressure<br />
Control instead of Travel Control).<br />
Diagnostics<br />
Stroke <strong>Valve</strong><br />
Follow the prompts on the Field Communicator display to select from the following:<br />
Done—Select this if you are done. All ramping is stopped when DONE is selected.<br />
Ramp Open—ramps the travel toward open at the rate of 1.0% per second of the ranged travel.<br />
Ramp Closed—ramps the travel toward closed at the rate of 1.0% per second of the ranged travel.<br />
Ramp to Target—ramps the travel to the specified target at the rate of 1.0% per second of the ranged travel.<br />
Step to Target—steps the travel to the specified target.<br />
Partial Stroke Test<br />
Note<br />
Partial Stroke Test is only available for instrument level ODV.<br />
The Partial Stroke Test allows <strong>DVC6200</strong> digital valve controllers with instrument level ODV to perform a <strong>Valve</strong><br />
Signature type of test while the instrument is in service and operational. In some applications, it is important to be able<br />
to exercise and test the valve to verify that it will operate when commanded. This feature allows the user to partially<br />
stroke the valve while continually monitoring the input signal. If a demand arises, the test is aborted and the valve<br />
moves to its commanded position. The partial stroke valve travel is configurable between 1 and 30% maximum travel,<br />
in 0.1% increments. Data from the last partial stroke test is stored in the instrument memory for retrieval by <strong>Valve</strong>Link<br />
software.<br />
The Partial Stroke Test allows you to perform a partial, 10%, stroke test (standard) or a custom stroke test. With the<br />
custom stroke test, the stroke may be extended up to 30%. Be sure to check plant guidelines before performing a<br />
custom stroke test. The purpose of this test is to ensure that the valve assembly moves upon demand.<br />
A partial stroke test can be initiated when the valve is operating at either 4 or 20 mA (point‐to‐point mode). In<br />
applications where a spurious trip is to be minimized, 4 mA is the normal operating position.<br />
52
Instruction Manual<br />
D103605X012<br />
Device Information, Diagnostics, and Alerts<br />
July 2012<br />
When enabled, a partial stroke test may be initiated by the device (as a scheduled, auto partial stroke test), a remote<br />
pushbutton located in the field or at the valve, a Field Communicator, or <strong>Valve</strong>Link software.<br />
Automatic (Scheduled)<br />
The Auto Partial Stroke Test allows the partial stroke test to be scheduled by the <strong>DVC6200</strong>. The test is scheduled in<br />
number of hours between tests. Any power cycle will reset the test clock timer.<br />
Local Pushbutton<br />
A partial stroke test command may be sent to the digital valve controller using a set of contacts wired to the auxiliary<br />
+/- terminals. To perform a test, the contacts must be closed for 3 to 5 seconds and then opened. To abort the test,<br />
close the contacts for 1 second. The last set of diagnostic data is stored in the instrument memory for later retrieval via<br />
<strong>Valve</strong>Link software.<br />
Field Communicator<br />
1. Connect the Field Communicator to the LOOP terminals on the digital valve controller.<br />
2. Turn on the Field Communicator.<br />
3. From the Online menu, select Service Tools > Diagnostics > Partial Stroke Test.<br />
4. Select either Standard (10%) or Custom. With the Custom Stroke Test, the stroke may be entered up to 30% with<br />
configurable stroking speed and pause time.<br />
5. The currently configured Stroke, Stroking Speed, and Pause Time is displayed. Choose “Yes” to run the test using<br />
these values. Choose “No” to modify the values. The default value for Stroke Speed is 0.25%/second.<br />
6. The valve begins to move and the actual travel reported by the digital valve controller is displayed on the Field<br />
Communicator.<br />
7. Once the valve has reached the endpoint, check that the valve has reached the desired set point. The valve should<br />
return to its original position.<br />
For information on configuring the Partial Stroke Test, see Partial Stroke Variables in the Detailed Setup section.<br />
Variables<br />
Field Communicator Service Tools > Variables (3-4)<br />
The Variables section provides current values of the instrument variables. Below is a list of the variables available for<br />
viewing:<br />
Write Protection (also provides a procedure to enable/disable)<br />
Instrument Mode (also provides a procedure to place in/out of service)<br />
Analog Input<br />
Setpoint<br />
Travel<br />
Drive Signal<br />
Input Characterization (also provides a procedure to modify)<br />
Cycle Counter<br />
Travel Accumulator<br />
Supply Pressure (not available in Instrument Level HC)<br />
53
Device Information, Diagnostics, and Alerts<br />
July 2012<br />
Instruction Manual<br />
D103605X012<br />
Actuator Pressure(s)<br />
Travel/Pressure Control Configuration (also provides a procedure to modify)<br />
Control Mode (also provides a procedure to modify)<br />
Instrument Temperature<br />
Travel Counts (this is the raw travel sensor reading used for advanced adjustments)<br />
Maximum Recorded Temperature<br />
Minimum Recorded Temperature<br />
Number of Power Ups<br />
Days Powered Up<br />
54
Instruction Manual<br />
D103605X012<br />
Maintenance and Troubleshooting<br />
July 2012<br />
Section 6 Maintenance and Troubleshooting66<br />
The <strong>DVC6200</strong> digital valve controller enclosure is rated Type 4X and IP66, therefore periodic cleaning of internal<br />
components is not required. If the <strong>DVC6200</strong> is installed in an area where the exterior surfaces tend to get heavily<br />
coated or layered with industrial or atmospheric contaminants, however, it is recommended that the vent (key 52) be<br />
periodically inspected to ensure it is fully open. If the vent appears to be clogged, it can be removed, cleaned and<br />
replaced. Lightly brush the exterior of the vent to remove contaminants and run a mild water/detergent solution<br />
through the vent to ensure it is fully open. Allow the vent to dry before reinstalling.<br />
WARNING<br />
Personal injury or property damage can occur from cover failure due to overpressure. Ensure that the housing vent<br />
opening is open and free of debris to prevent pressure buildup under the cover.<br />
WARNING<br />
To avoid static discharge from the plastic cover when flammable gases or dust are present, do not rub or clean the cover<br />
with solvents. To do so could result in a spark that may cause the flammable gases or dust to explode, resulting in personal<br />
injury or property damage. Clean with a mild detergent and water only.<br />
WARNING<br />
Avoid personal injury or property damage from sudden release of process pressure or bursting of parts. Before performing<br />
any maintenance procedures on the <strong>DVC6200</strong> digital valve controller:<br />
Always wear protective clothing, gloves, and eyewear.<br />
Do not remove the actuator from the valve while the valve is still pressurized.<br />
Disconnect any operating lines providing air pressure, electric power, or a control signal to the actuator. Be sure the<br />
actuator cannot suddenly open or close the valve.<br />
Use bypass valves or completely shut off the process to isolate the valve from process pressure. Relieve process pressure<br />
from both sides of the valve.<br />
Vent the pneumatic actuator loading pressure and relieve any actuator spring precompression.<br />
Use lock‐out procedures to be sure that the above measures stay in effect while you work on the equipment.<br />
Check with your process or safety engineer for any additional measures that must be taken to protect against process<br />
media.<br />
WARNING<br />
When using natural gas as the supply medium, or for explosion proof applications, the following warnings also apply:<br />
Remove electrical power before removing the housing cap. Personal injury or property damage from fire or explosion<br />
may result if power is not disconnected before removing the cap.<br />
Remove electrical power before disconnecting any of the pneumatic connections.<br />
When disconnecting any of the pneumatic connections or any pressure retaining part, natural gas will seep from the<br />
unit and any connected equipment into the surrounding atmosphere. Personal injury or property damage may result<br />
55
Maintenance and Troubleshooting<br />
July 2012<br />
Instruction Manual<br />
D103605X012<br />
from fire or explosion if natural gas is used as the supply medium and appropriate preventive measures are not taken.<br />
Preventive measures may include, but are not limited to, one or more of the following: ensuring adequate ventilation<br />
and the removal of any ignition sources.<br />
Ensure that the cover is correctly installed before putting this unit back into service. Failure to do so could result in<br />
personal injury or property damage from fire or explosion.<br />
CAUTION<br />
When replacing components, use only components specified by the factory. Always use proper component replacement<br />
techniques, as presented in this manual. Improper techniques or component selection may invalidate the approvals and<br />
the product specifications, as indicated in table 1‐2, and may also impair operations and the intended function of the<br />
device.<br />
Because of the diagnostic capability of the <strong>DVC6200</strong>, predictive maintenance is available through the use of <strong>Valve</strong>Link<br />
software. Using the digital valve controller, valve and instrument maintenance can be enhanced, thus avoiding<br />
unnecessary maintenance. For information on using <strong>Valve</strong>Link software, refer to the <strong>Valve</strong>Link software online help.<br />
Replacing the Magnetic Feedback Assembly<br />
To remove the magnet assembly from the actuator stem, perform the following basic steps.<br />
1. Make sure that the valve is isolated from the process.<br />
2. Remove the instrument terminal box cover.<br />
3. Disconnect the field wiring from the terminal board.<br />
4. Shut off the instrument air supply.<br />
5. Disconnect the pneumatic tubing and remove the <strong>DVC6200</strong> or the DVC6215 from the actuator.<br />
6. Remove the screws holding the magnet assembly to the connector arm.<br />
When replacing the instrument, be sure to follow the mounting guidelines in the Installation section. Setup and<br />
calibrate the instrument prior to returning to service.<br />
Module Base Maintenance<br />
The digital valve controller contains a module base consisting of the I/P converter, printed wiring board assembly, and<br />
pneumatic relay. The module base may be easily replaced in the field without disconnecting field wiring or tubing.<br />
Tools Required<br />
Table 6‐1 lists the tools required for maintaining the <strong>DVC6200</strong> digital valve controller.<br />
Table 6‐1. Tools Required<br />
Tool Size Component<br />
Phillips Screwdriver<br />
Hex key<br />
Hex key<br />
Hex key<br />
Hex key<br />
5 mm<br />
1.5 mm<br />
2.5 mm<br />
6 mm<br />
Relay, printed wiring board assembly, and cover<br />
screws<br />
Terminal box screw<br />
Terminal box cover screw<br />
I/P converter screws<br />
Module base screws<br />
56
Instruction Manual<br />
D103605X012<br />
Maintenance and Troubleshooting<br />
July 2012<br />
Component Replacement<br />
When replacing any of the components of the <strong>DVC6200</strong>, the maintenance should be performed in an instrument shop<br />
whenever possible. Make sure that the electrical wiring and pneumatic tubing is disconnected prior to disassembling<br />
the instrument.<br />
Removing the Module Base<br />
Refer to figure 7‐2 or 7‐4 for key number locations.<br />
WARNING<br />
To avoid personal injury or equipment damage from bursting of parts, turn off the supply pressure to the digital valve<br />
controller and bleed off any excess supply pressure before attempting to remove the module base assembly from the<br />
housing.<br />
1. Unscrew the four captive screws in the cover (key 43) and remove the cover from the module base (key 2).<br />
2. Using a 6 mm hex socket wrench, loosen the three‐socket head screws (key 38). These screws are captive in the<br />
module base by retaining rings (key 154).<br />
Note<br />
The module base is linked to the housing by two cable assemblies. Disconnect these cable assemblies after you pull the module<br />
base out of the housing.<br />
3. Pull the module base straight out of the housing (key 1). Once clear of the housing, swing the module base to the<br />
side of the housing to gain access to the cable assemblies.<br />
4. The digital valve controller/base unit has two cable assemblies, shown in figure 6‐1, which connect the module<br />
base, via the printed wiring board assembly, travel sensor and the terminal box. Disconnect these cable assemblies<br />
from the printed wiring board assembly on the back of the module base.<br />
Figure 6‐1. Printed Wiring Board Cable Connections<br />
TERMINAL<br />
BOX<br />
MODULE BASE ASSEMBLY<br />
PRINTED WIRING<br />
BOARD ASSEMBLY<br />
W9924-1<br />
HOUSING<br />
CABLE<br />
TO TERMINAL BOX<br />
CABLE TO TRAVEL SENSOR<br />
57
Maintenance and Troubleshooting<br />
July 2012<br />
Instruction Manual<br />
D103605X012<br />
Replacing the Module Base<br />
Refer to figure 7‐2 or 7‐4 for key number locations.<br />
CAUTION<br />
To avoid affecting performance of the instrument, take care not to damage the module base seal or guide surface. Do not<br />
bump or damage the bare connector pins on the PWB assembly. Damaging either the module base or guide surface may<br />
result in material damage, which could compromise the instruments ability to maintain a pressure seal.<br />
Note<br />
To avoid affecting performance of the instrument, inspect the guide surface on the module and the corresponding seating area in<br />
the housing before installing the module base assembly. These surfaces must be free of dust, dirt, scratches, and contamination.<br />
Ensure the module base seal is in good condition. Do not reuse a damaged or worn seal.<br />
1. Ensure the module base seal (key 237) is properly installed in the housing (key 1). Ensure the O‐ring (key 12) is in<br />
place on the module base assembly.<br />
2. Connect the travel sensor and terminal box cable assemblies to the PWB assembly (key 50). Orientation of the<br />
connector is required.<br />
3. Insert the module base (key 2) into the housing (key 1).<br />
4. Install three socket head screws (key 38) in the module base into the housing. If not already installed, press three<br />
retaining rings (key 154) into the module base. Evenly tighten the screws in a crisscross pattern to a final torque of<br />
16 Nm (138 lbfin).<br />
WARNING<br />
Personal injury, property damage, or disruption of process control can result if the cable assemblies/wiring are damaged<br />
when attaching the cover to the module base assembly<br />
Ensure that the cable assemblies/wiring are positioned in the cavity of the module base so they do not get compressed or<br />
damaged when attaching the cover to the module base assembly in step 5.<br />
5. Attach the cover (key 43) to the module base assembly.<br />
Submodule Maintenance<br />
The module base of the <strong>DVC6200</strong> contains the following submodules: I/P converter, PWB assembly, and pneumatic<br />
relay. If problems occur, these submodules may be removed from the module base and replaced with new<br />
submodules. After replacing a submodule, the module base may be put back into service.<br />
CAUTION<br />
Exercise care when performing maintenance on the module base. Reinstall the cover to protect the I/P converter and<br />
gauges when servicing other submodules.<br />
In order to maintain accuracy specifications, do not strike or drop the I/P converter during submodule maintenance.<br />
58
Instruction Manual<br />
D103605X012<br />
Maintenance and Troubleshooting<br />
July 2012<br />
I/P Converter<br />
Refer to figure 7‐2 or 7‐4 for key number locations. The I/P converter (key 41) is located on the front of the module<br />
base.<br />
Note<br />
After I/P converter submodule replacement, calibrate the digital valve controller to maintain accuracy specifications.<br />
Replacing the I/P Filter<br />
A screen in the supply port beneath the I/P converter serves as a secondary filter for the supply medium. To replace this<br />
filter, perform the following procedure:<br />
1. Remove the I/P converter (key 41) and shroud (key 169) as described in the Removing the I/P Converter procedure.<br />
2. Remove the screen (key 231) from the supply port.<br />
3. Install a new screen in the supply port as shown in figure 6‐2.<br />
Figure 6‐2. I/P Filter Location<br />
O‐RING LOCATED IN I/P<br />
CONVERTER OUTPUT PORT<br />
W8072<br />
SCREEN (FILTER) LOCATED IN<br />
I/P CONVERTER SUPPLY PORT<br />
4. Inspect the O‐ring (key 39) in the I/P output port. if necessary, replace it.<br />
5. Reinstall the I/P converter (key 41) and shroud (key 169) as described in the Replacing the I/P Converter procedure.<br />
Removing the I/P Converter<br />
1. Remove the front cover (key 43), if not already removed.<br />
2. Refer to figure 6‐3. Using a 2.5 mm hex socket wrench, remove the four socket‐head screws (key 23) that attach the<br />
shroud (key 169) and I/P converter (key 41) to the module base (key 2).<br />
3. Remove the shroud (key 169); then pull the I/P converter (key 41) straight out of the module base (key 2). Be<br />
careful not to damage the two electrical leads that come out of the base of the I/P converter.<br />
59
Maintenance and Troubleshooting<br />
July 2012<br />
Instruction Manual<br />
D103605X012<br />
4. Ensure that the O‐ring (key 39) and screen (key 231) stay in the module base and do not come out with the I/P<br />
converter (key 41).<br />
Replacing the I/P Converter<br />
1. Refer to figure 6‐2. Inspect the condition of the O‐ring (key 39) and screen (key 231) in the module base (key 2).<br />
Replace them, if necessary. Apply silicone lubricant to the O‐rings.<br />
2. Ensure the two boots (key 210) shown in figure 6‐3 are properly installed on the electrical leads.<br />
Figure 6‐3. I/P Converter<br />
SHROUD<br />
(KEY 169)<br />
I/P CONVERTER<br />
(KEY 41)<br />
SOCKET‐HEAD<br />
SCREWS (4)<br />
(KEY 23)<br />
W9328<br />
BOOTS<br />
(KEY 210)<br />
3. Install the I/P converter (key 41) straight into the module base (key 2), taking care that the two electrical leads feed<br />
into the guides in the module base. These guides route the leads to the printed wiring board assembly submodule.<br />
4. Install the shroud (key 169) over the I/P converter (key 41).<br />
5. Install the four socket‐head screws (key 23) and evenly tighten them in a crisscross pattern to a final torque of<br />
1.6 Nm (14 lbfin).<br />
6. After replacing the I/P converter, calibrate travel or perform touch‐up calibration to maintain accuracy<br />
specifications.<br />
60
Instruction Manual<br />
D103605X012<br />
Maintenance and Troubleshooting<br />
July 2012<br />
Printed Wiring Board (PWB) Assembly<br />
Refer to figure 7‐2 or 7‐4 for key number locations. The PWB assembly (key 50) is located on the back of the module<br />
base assembly (key 2).<br />
Note<br />
If the PWB assembly submodule is replaced, calibrate and configure the digital valve controller to maintain accuracy specifications.<br />
Removing the Printed Wiring Board Assembly<br />
1. Separate the module base from the housing by performing the Removing the Module Base procedure.<br />
2. Remove three screws (key 33).<br />
3. Lift the PWB assembly (key 50) straight out of the module base (key 2).<br />
4. Ensure that the O‐rings (key 40) remain in the pressure sensor bosses on the module base assembly (key 2) after the<br />
PWB assembly (key 50) has been removed.<br />
Replacing the Printed Wiring Board Assembly and Setting the DIP Switch<br />
1. Apply silicone lubricant to the pressure sensor O‐rings (key 40) and install them on the pressure sensor bosses in the<br />
module base assembly.<br />
2. Properly orient the PWB assembly (key 50) as you install it into the module base. The two electrical leads from the<br />
I/P converter (key 41) must guide into their receptacles in the PWB assembly and the pressure sensor bosses on the<br />
module base must fit into their receptacles in the PWB assembly.<br />
3. Push the PWB assembly (key 50) into its cavity in the module base.<br />
4. Install and tighten three screws (key 33) to a torque of 1 Nm (10.1 lbfin).<br />
5. Set the DIP switch on the PWB assembly according to table 6‐2.<br />
Table 6‐2. DIP Switch Configuration (1)<br />
Switch Label Operational Mode DIP Switch Position<br />
PT-PT 420 mA PointtoPoint Loop LEFT<br />
Multi 24 VDC MultiDrop Loop RIGHT<br />
1. Refer to figure 6‐4 for switch location.<br />
61
Maintenance and Troubleshooting<br />
July 2012<br />
Instruction Manual<br />
D103605X012<br />
Figure 6‐4. Printed Wiring Board (PWB) Connections and Settings<br />
TRAVEL SENSOR<br />
CONNECTOR<br />
TERMINAL BOX<br />
CONNECTOR<br />
OPERATIONAL<br />
MODE SELECTION<br />
X0463<br />
TRAVEL SENSOR<br />
CONNECTOR<br />
TRANSMITTER / SWITCH<br />
SELECTION<br />
TERMINAL BOX<br />
CONNECTOR<br />
OPERATIONAL<br />
MODE SELECTION<br />
X0432<br />
Note<br />
For the digital valve controller to operate with a 4 to 20 mA control signal, be sure the DIP switch is in the point‐to‐point loop<br />
position.<br />
6. Reassemble the module base to the housing by performing the Replacing the Module Base procedure.<br />
7. Setup and calibrate the digital valve controller.<br />
62
Instruction Manual<br />
D103605X012<br />
Maintenance and Troubleshooting<br />
July 2012<br />
Pneumatic Relay<br />
Refer to figure 7‐2 or 7‐4 for key number locations. The pneumatic relay (key 24) is located on the front of the module<br />
base.<br />
Note<br />
After relay submodule replacement, calibrate the digital valve controller to maintain accuracy specifications.<br />
Removing the Pneumatic Relay<br />
1. Loosen the four screws that attach the relay (key 24) to the module base. These screws are captive in the relay.<br />
2. Remove the relay.<br />
Replacing the Pneumatic Relay<br />
1. Visually inspect the holes in the module base to ensure they are clean and free of obstructions. If cleaning is<br />
necessary, do not enlarge the holes.<br />
2. Apply silicone lubricant to the relay seal and position it in the grooves on the bottom of the relay as shown in<br />
figure 6‐5. Press small seal retaining tabs into retaining slots to hold relay seal in place.<br />
Figure 6‐5. Pneumatic Relay Assembly<br />
W8074<br />
RELAY SEAL<br />
3. Position the relay (with shroud) on the module base. Tighten the four screws, in a crisscross pattern, to a final<br />
torque of 2 Nm (20.7 lbfin).<br />
4. Using the Field Communicator, verify that the value for Relay Type parameter matches the relay type installed.<br />
5. After replacing the relay and verifying the relay type, calibrate travel or perform touch‐up calibration to maintain<br />
accuracy specifications<br />
Gauges, Pipe Plugs, or Tire <strong>Valve</strong>s<br />
Depending on the options ordered, the <strong>DVC6200</strong> or DVC6205 will be equipped with either gauges (key 47), pipe plugs<br />
(key 66), or tire valves (key 67). Single‐acting direct instruments will also have a screen (key 236, figure 7‐3). These are<br />
located on the top of the module base next to the relay.<br />
63
Maintenance and Troubleshooting<br />
July 2012<br />
Instruction Manual<br />
D103605X012<br />
Perform the following procedure to replace the gauges, tire valves, or pipe plugs. Refer to figure 7‐2 and 7‐3 for key<br />
number locations.<br />
1. Remove the front cover (key 43).<br />
2. Remove the gauge, pipe plug, or tire valve as follows:<br />
For gauges (key 47), the flats are on the gauge case. Use a wrench on the flats of the gauge to remove the gauge from<br />
the module base. For double‐acting instruments, to remove the supply gauge remove one of the output gauges.<br />
For pipe plugs (key 66) and tire valves (key 67), use a wrench to remove these from the module base.<br />
3. Apply zinc based anti-seize sealant (key 64) to the threads of the replacement gauges, pipe plugs, or tire valves.<br />
4. Using a wrench, screw the gauges, pipe plugs, or tire valves into the module base.<br />
Terminal Box<br />
Refer to figure 7‐2 or 7‐4 for key number locations.<br />
The terminal box is located on the housing and contains the terminal strip assembly for field wiring connections.<br />
Note<br />
The DVC6205 feedback connections terminal box (shown in figure 6‐6) is not a replaceable part. Do not remove the tamper proof<br />
paint on the screw.<br />
Figure 6‐6. Terminal Boxes<br />
MAIN TERMINAL<br />
BOX<br />
FEEDBACK CONNECTIONS<br />
TERMINAL BOX; NOT<br />
REPLACEABLE<br />
MAIN TERMINAL BOX<br />
X0338<br />
<strong>DVC6200</strong><br />
X0379<br />
DVC6205<br />
Removing the Terminal Box<br />
WARNING<br />
To avoid personal injury or property damage caused by fire or explosion, remove power to the instrument before removing<br />
the terminal box cover in an area which contains a potentially explosive atmosphere or has been classified as hazardous.<br />
1. Loosen the set screw (key 58) in the cap (key 4) so that the cap can be unscrewed from the terminal box.<br />
2. After removing the cap (key 4), note the location of field wiring connections and disconnect the field wiring from<br />
the terminal box.<br />
64
Instruction Manual<br />
D103605X012<br />
Maintenance and Troubleshooting<br />
July 2012<br />
3. Separate the module base from the housing by performing the Removing the Module Base procedure.<br />
4. Disconnect the terminal box wiring connector from the PWB assembly (key 50).<br />
5. Remove the screw (key 72). Pull the terminal box assembly straight out of the housing.<br />
Replacing the Terminal Box<br />
Note<br />
Inspect all O‐rings for wear and replace as necessary.<br />
1. Apply lubricant, silicone sealant to the O‐ring (key 34) and install the O‐ring over the stem of the terminal box.<br />
2. Insert the terminal box assembly stem into the housing until it bottoms out. Position the terminal box assembly so<br />
that the hole for the screw (key 72) in the terminal box aligns with the threaded hole in the housing. Install the<br />
screw (key 72).<br />
3. Connect the terminal box wiring connector to the PWB assembly (key 50). Orientation of the connector is required.<br />
4. Reassemble the module base to the housing by performing the Replacing the Module Base procedure.<br />
5. Reconnect the field wiring as noted in step 2 in the Removing the Terminal Box procedure.<br />
6. Apply lubricant, silicone sealant to the O‐ring (key 36) and install the O‐ring over the 2‐5/8 inch threads of the<br />
terminal box. Use of a tool is recommended to prevent cutting the O‐ring while installing it over the threads.<br />
7. Apply lithium grease (key 63) to the 2‐5/8 inch threads on the terminal box to prevent seizing or galling when the<br />
cap is installed.<br />
8. Screw the cap (key 4) onto the terminal box.<br />
9. Install a set screw (key 58) into the cap (key 4). Loosen the cap (not more than 1 turn) to align the set screw over<br />
one of the recesses in the terminal box. Tighten the set screw (key 58).<br />
DVC6215 Feedback Unit<br />
There are no replaceable parts on the DVC6215 feedback unit. Contact your Emerson Process Management if a<br />
replacement DVC6215 feedback unit is needed.<br />
Troubleshooting<br />
If communication or output difficulties are experienced with the instrument, refer to the troubleshooting chart in<br />
table 6‐3. Also see the <strong>DVC6200</strong> Technical Support Checklist on page 68.<br />
Checking Voltage Available<br />
WARNING<br />
Personal injury or property damage caused by fire or explosion may occur if this test is attempted in an area which contains<br />
a potentially explosive atmosphere or has been classified as hazardous.<br />
65
Maintenance and Troubleshooting<br />
July 2012<br />
Instruction Manual<br />
D103605X012<br />
To check the Voltage Available at the instrument, perform the following:<br />
1. Connect the equipment in figure 2‐3 to the field wiring in place of the <strong>FIELDVUE</strong> instrument.<br />
2. Set the control system to provide maximum output current.<br />
3. Set the resistance of the 1 kilohm potentiometer shown in figure 2‐3 to zero.<br />
4. Record the current shown on the milliammeter.<br />
5. Adjust the resistance of the 1 kilohm potentiometer until the voltage read on the voltmeter is 10.0 volts.<br />
6. Record the current shown on the milliammeter.<br />
7. If the current recorded in step 6 is the same as that recorded in step 4 (± 0.08 mA), the voltage available is<br />
adequate.<br />
8. If the voltage available is inadequate, refer to Wiring Practices in the Installation section.<br />
Restart Processor<br />
This is a “soft” reset of the device. This procedure can only be performed while the instrument is out of service. A soft<br />
reset will immediately put into effect changes that have been sent to the instrument. Also, if the device is configured<br />
to shutdown on an alert, the soft reset will clear the shutdown.<br />
Table 6‐3. Instrument Troubleshooting<br />
Symptom Possible Cause Action<br />
1. Analog input reading at<br />
instrument does not match<br />
actual current provided.<br />
2. Instrument will not<br />
communicate.<br />
1a. Control mode not Analog. 1a. Check the control mode using the Field Communicator. If in<br />
the <strong>Digital</strong> or Test mode, the instrument receives its set point as<br />
a digital signal. Control is not based on input current. Change<br />
Control Mode to Analog.<br />
1b. Low control system compliance voltage. 1b. Check system compliance voltage (see Wiring Practices in<br />
the Installation section.<br />
1c. Instrument shutdown due to self test failure. 1c. Check instrument status using the Field Communicator (see<br />
Viewing Instrument Status in the Viewing Device Information<br />
section).<br />
1d. Analog input sensor not calibrated. 1d. Calibrate the analog input sensor (see Analog Input<br />
Calibration in the Calibration section).<br />
1e. Current leakage. 1e. Excessive moisture in the terminal box can cause current<br />
leakage. Typically the current will vary randomly if this is the<br />
case. Allow the inside of the terminal box to dry, then retest.<br />
2a. Insufficient Voltage Available. 2a. Calculate Voltage Available (see Wiring Practices in the<br />
Installation section). Voltage Available should be greater than or<br />
equal to 10 VDC.<br />
2b. <strong>Controller</strong> output Impedance too low. 2b. Install a HART filter after reviewing Control System<br />
Compliance Voltage requirements (see Wiring Practices in the<br />
Installation section).<br />
2c. Cable capacitance too high. 2c. Review maximum cable capacitance limits (see Wiring<br />
Practices in the Installation section).<br />
2d. HART filter improperly adjusted. 2d. Check filter adjustment (see the appropriate HART filter<br />
instruction manual).<br />
2e. Improper field wiring. 2e. Check polarity of wiring and integrity of connections. Make<br />
sure cable shield is grounded only at the control system.<br />
2f. <strong>Controller</strong> output providing less than 4 mA to loop. 2f. Check control system minimum output setting, which should<br />
not be less than 3.8 mA.<br />
2g. Disconnected loop wiring cable at PWB. 2g. Verify connectors are plugged in correctly.<br />
2h. PWB DIP switch not set properly. 2h. Check for incorrect setting or broken DIP switch on the back<br />
of the PWB. Reset switch or replace PWB, if switch is broken. See<br />
table 6‐2 for switch setting information<br />
66
Instruction Manual<br />
D103605X012<br />
Maintenance and Troubleshooting<br />
July 2012<br />
Table 6‐3. Instrument Troubleshooting<br />
Symptom Possible Cause Action<br />
2. Instrument will not<br />
communicate.<br />
3. Instrument will not<br />
calibrate, has sluggish<br />
performance or oscillates.<br />
2j. PWB failure. 2j. Use a 4-20 mA current source to apply power to the<br />
instrument. Terminal voltage across the LOOP+ and LOOPterminals<br />
should be 8.0 to 9.5 VDC. If the terminal voltage is not<br />
8.0 to 9.5 VDC, replace the PWB.<br />
2k. Polling address incorrect. 2k. Use the Field Communicator to set the polling address (refer<br />
to the Detailed Setup section). From the Utility menu, select<br />
Configure Communicator > Polling > Always Poll. Set the<br />
instrument polling address to 0.<br />
2l. Defective terminal box. 2l. Check continuity from each screw terminal to the<br />
corresponding PWB connector pin. If necessary, replace the<br />
terminal box assembly.<br />
2m. Defective Field Communicator or <strong>Valve</strong>Link<br />
2m. If necessary, repair or replace cable.<br />
modem cable.<br />
2n. <strong>Valve</strong>Link modem defective or not compatible<br />
2n. Replace <strong>Valve</strong>Link modem.<br />
with PC.<br />
2p. <strong>Valve</strong>Link hardlock defective or not programmed. 2p. Replace if defective or return to factory for programming.<br />
3a. Configuration errors. 3h. Verify configuration:<br />
If necessary, set protection to None.<br />
If Out of Service, place In Service.<br />
Check:<br />
Travel Sensor Motion<br />
Tuning set<br />
Zero Power Condition<br />
Feedback Connection<br />
Control mode (should be Analog)<br />
Restart control mode (should be Analog)<br />
4. <strong>Valve</strong>Link diagnostic tests<br />
provide erroneous results.<br />
5. Field Communicator does<br />
not turn on.<br />
3b. Restricted pneumatic passages in I/P converter. 3j. Check screen in I/P converter supply port of the module base.<br />
Replace if necessary. If passages in I/P converter restricted,<br />
replace I/P converter.<br />
3c. O‐ring(s) between I/P converter ass'y missing or hard 3k. Replace O‐ring(s).<br />
and flattened losing seal.<br />
3d. I/P converter ass'y damaged/corroded/clogged. 3l. Check for bent flapper, open coil (continuity), contamination,<br />
staining, or dirty air supply. Coil resistance should be between<br />
1680 ‐ 1860 ohms. Replace I/P assembly if damaged, corroded,<br />
clogged, or open coil.<br />
3e. I/P converter ass'y out of spec. 3m. I/P converter ass'y nozzle may have been adjusted. Verify<br />
drive signal (55 to 80% for double‐acting; 60 to 85% for<br />
single‐acting) with the valve off the stops. Replace I/P converter<br />
assembly if drive signal is continuously high or low.<br />
3f. Defective module base seal. 3n. Check module base seal for condition and position. If<br />
necessary, replace seal.<br />
3g. Defective relay. 3p. Depress relay beam at adjustment location in shroud, look<br />
for increase in output pressure. Remove relay, inspect relay seal.<br />
Replace relay seal or relay if I/P converter assembly is good and<br />
air passages not blocked. Check relay adjustment.<br />
3h. Defective 67CFR regulator, supply pressure gauge 3q. Replace 67CFR regulator.<br />
jumps around.<br />
4a. Defective pressure sensor. 4a. Replace PWB.<br />
4b. Pressure sensor O‐ring missing. 4b. Replace O‐ring.<br />
5a. Battery pack not charged. 5a. Charge battery pack.<br />
Note: Battery pack can be charged while attached to the Field<br />
communicator or separately. The Field Communicator is fully<br />
operable while the battery pack is charging. Do not attempt to<br />
charge the battery pack in a hazardous area.<br />
67
Maintenance and Troubleshooting<br />
July 2012<br />
Instruction Manual<br />
D103605X012<br />
<strong>DVC6200</strong> Technical Support Checklist<br />
Have the following information available prior to contacting your Emerson Process Management sales office for<br />
support.<br />
1. Instrument serial number as read from nameplate ________________________________________________<br />
2. Is the digital valve controller responding to the control signal Yes _________ No _________<br />
If not, describe ___________________________________________________________________________<br />
3. Measure the voltage across the “Loop -” and Loop +” terminal box screws when the commanded current is 4.0 mA<br />
and 20.0 mA: __________V @ 4.0 mA __________V @ 20.0 mA.<br />
(These values should be around 8.6 V @ 4.0 mA and 8.8 V @ 20 mA).<br />
4. Is it possible to communicate via HART to the digital valve controller Yes _________ No _________<br />
5. What is the Diagnostic Tier of the digital valve controller AC ____ HC ____ AD ____ PD ____ ODV____<br />
6. What is the firmware version of the digital valve controller ______________<br />
7. What is the hardware version of the digital valve controller ______________<br />
8. Is the digital valve controller's Instrument Mode “In Service” Yes _________ No _________<br />
9. Is the digital valve controller's Control Mode set to “Analog” Yes _________ No _________<br />
10. Is it on Travel or Pressure control<br />
11. What are the following parameter readings<br />
Input Signal _________<br />
Drive Signal _________%<br />
Supply Pressure _________ Pressure A _________ Pressure B _________<br />
Travel Target _________% Travel _________%<br />
12. What are the following alert readings<br />
Fail alerts _______________________________________________________________________________<br />
<strong>Valve</strong> alerts _____________________________________________________________________________<br />
Operational status ________________________________________________________________________<br />
Alert event record entries __________________________________________________________________<br />
13. Export <strong>Valve</strong>Link data (if available) for the device (Status Monitor, Detailed Setup, etc.).<br />
Mounting<br />
1. Which digital valve controller do you have <strong>DVC6200</strong> __________ DVC6205/DVC6215 ___________________<br />
2. What Make, Brand, Style, Size, etc. actuator is the <strong>DVC6200</strong> mounted on ______________________________<br />
3. What is the full travel of the valve ______________________________________________________________<br />
4. What is the Mounting Kit part number __________________________________________________________<br />
5. If mounting kits are made by LBP/Customer, please provide pictures of installation.<br />
6. Is the Mounting kit installed per the instructions Yes _________ No _________<br />
7. What is the safe position of the valve Fail closed _________ Fail open _________<br />
68
Instruction Manual<br />
D103605X012<br />
Parts<br />
July 2012<br />
Section 7 Parts77<br />
Parts Ordering<br />
Whenever corresponding with your Emerson Process Management sales office about this equipment, always mention<br />
the controller serial number. When ordering replacement parts, refer to the 11‐character part number of each<br />
required part as found in the following parts list. Part numbers are shown for kits and recommended spares only. For<br />
part numbers not shown, contact your Emerson Process Management sales office.<br />
WARNING<br />
Use only genuine Fisher replacement parts. Components that are not supplied by Emerson Process Management should<br />
not, under any circumstances, be used in any Fisher instrument. Use of components not supplied by Emerson Process<br />
Management may void your warranty, might adversely affect the performance of the instrument, and could cause personal<br />
injury and property damage.<br />
Parts Kits<br />
Figure 7‐1. Terminal Box<br />
Kit Description Part Number<br />
1* Elastomer Spare Parts Kit (kit contains parts to<br />
service one digital valve controller)<br />
Standard<br />
Extreme Temperature option<br />
(fluorosilicone elastomers)<br />
2* Small Hardware Spare Parts Kit (kit contains parts<br />
to service one digital valve controller)<br />
3* Seal Screen Kit<br />
[kit contains 25 seal screens (key 231)<br />
and 25 O‐rings (key 39)]<br />
Standard and Extreme Temperature option<br />
(fluorosilicone elastomers)<br />
4* Terminal Box Kit (see figure 7‐1)<br />
19B5402X012<br />
19B5402X022<br />
19B5403X012<br />
14B5072X182<br />
WITHOUT I/O PACKAGE<br />
WITH I/O PACKAGE<br />
Key Description<br />
50* PWB Assembly (HW2) (see figure 7‐2 and 7‐4)<br />
for <strong>DVC6200</strong> and DVC6205<br />
Note<br />
Use only with replace in-kind. The following terminal boxes are<br />
compatible only with PWB Assembly electronics hardware revision 2<br />
(HW2).<br />
Aluminum, without I/O Package<br />
Standard Temperature (nitrile elastomers) 19B5401X142<br />
Extreme Temperature (fluorosilicone elastomers 19B5401X152<br />
Aluminum, without I/O Package, Natural Gas Approved<br />
Standard Temperature (nitrile elastomers) 19B5401X162<br />
Extreme Temperature (fluorosilicone elastomers 19B5401X172<br />
Aluminum, with I/O Package<br />
Standard Temperature (nitrile elastomers) 19B5401X182<br />
Extreme Temperature (fluorosilicone elastomers) 19B5401X192<br />
Stainless Steel, with I/O Package,<br />
Extreme Temperature (fluorosilicone elastomers) 19B5401X202<br />
Note<br />
The following PWB Assemblies are compatible only with the terminal<br />
boxes shown in figure 7‐1.<br />
Contact your Emerson Process Managment sales offcie for PWB<br />
Assembly FS Numbers<br />
Hardware Revision 2 (HW2), without I/O Package<br />
For instrument level HC<br />
For instrument level AD<br />
For instrument level PD<br />
For instrument level ODV<br />
Hardware Revision 2 (HW2), with I/O Package<br />
For instrument level HC<br />
For instrument level AD<br />
For instrument level PD<br />
For instrument level ODV<br />
*Recommended spare parts<br />
69
Parts<br />
July 2012<br />
Instruction Manual<br />
D103605X012<br />
Kit Description Part Number<br />
5* I/P Converter Kit<br />
Standard<br />
For Extreme Temperature option<br />
(fluorosilicone elastomers)<br />
70<br />
38B6041X152<br />
38B6041X132<br />
6* Spare Module Base Assembly Kit, aluminum<br />
[kit contains module base (key 2); drive screws, qty. 2,<br />
(key 11); shield/label (key 19); hex socket cap screw, qty. 3,<br />
(key 38); self tapping screw, qty. 2 (key 49); pipe plug, qty. 3<br />
(key 61); retaining ring, qty. 3 (key 154); screen (key 236);<br />
and flame arrestors, qty. 3 (key 243)]<br />
GE18654X012<br />
7* Spare Housing Assembly Kit, aluminum<br />
[kit contains housing (key 1); vent assembly (key 52);<br />
seal (only included in Housing A kits) (key 288);<br />
seal (key 237); O‐ring (key 34); O‐ring (only used<br />
with integrally mounted regulator) (key 5)]<br />
Housing A (used for GX actuator)<br />
Standard (nitrile elastomers)<br />
Extreme Temperature option<br />
(fluorosilicone elastomers)<br />
Housing B (used for all actuators except GX)<br />
Standard (nitrile elastomers)<br />
Extreme Temperature option<br />
(fluorosilicone elastomers)<br />
<br />
8* Spare I/P Shroud Kit<br />
[kit contains shroud (key 169) and<br />
hex socket cap screw, qty. 4 (key 23)]<br />
GE48798X032<br />
GE48798X042<br />
GE48798X072<br />
GE48798X082<br />
GE29183X012<br />
9* Remote Mount Feedback Unit Kit (see figure 7‐5)<br />
[remote housing assembly (key25); hex socket set<br />
screw (key 58); 1/2 NPT pipe plug (key 62); wire retainer, qty 2<br />
(key 131); terminal cover (key 255); o-ring (key 256); gasket<br />
(Housing A only, used for GX actuator) (key 287); seal<br />
(Housing A only, used for GX actuator) (key 288)<br />
Housing A (used for GX actuator)<br />
Housing B (used for all actuators except GX)<br />
GE46670X012<br />
GE40178X012<br />
10* Feedback Array Kit<br />
[kit contains feedback array and machine screws, qty. 2 and<br />
washers, qty. 2; 210 mm (8-1/4 inch) kit also contains insert]<br />
7 mm (1/4-inch)<br />
Aluminum<br />
19 mm (3/4-inch)<br />
Aluminum<br />
Stainless steel<br />
25 mm (1-inch)<br />
Aluminum<br />
Stainless steel<br />
38 mm (1-1/2 inch)<br />
Aluminum<br />
Stainless steel<br />
50 mm (2-inch)<br />
Aluminum<br />
Stainless steel<br />
100 mm (4-inch)<br />
Aluminum<br />
Stainless steel<br />
GE09169X022<br />
GE09169X032<br />
GE09169X072<br />
GE09169X012<br />
GE09169X082<br />
GE09169X042<br />
GE09169X092<br />
GE09170X012<br />
GE09169X102<br />
GE43790X012<br />
GE09169X112<br />
Kit Description Part Number<br />
10* Feedback Array Kit (cont'd)<br />
[kit contains feedback array and machine screws, qty. 2 and<br />
washers, qty. 2; 210 mm (8-1/4 inch) kit also contains insert]<br />
210 mm (8-1/4 inch)<br />
Aluminum<br />
Stainless steel<br />
Parts List<br />
GE09169X062<br />
GE09169X132<br />
Note<br />
Part numbers are shown for recommended spares only. For part<br />
numbers not shown, contact your Emerson Process Management sales<br />
office.<br />
Parts with footnote numbers shown are available in parts kits; see<br />
footnote information at the bottom of the page.<br />
Key Description Part Number<br />
Housing (see figure 7‐2 and 7‐4)<br />
<strong>DVC6200</strong> and DVC6205<br />
1 Housing (7)<br />
11 Drive Screw (2 req'd) (DVC6205 only)<br />
20 Shield (DVC6205 only)<br />
52 Vent, plastic (2)<br />
74 Mounting Bracket (DVC6205 only)<br />
248 Screw, hex head (4 req’d) (DVC6205 only)<br />
249 Screw, hex head (4 req’d) (DVC6205 only)<br />
250 Spacer (4 req’d) (DVC6205 only)<br />
267 Standoff (2 req’d) (DVC6205 only)<br />
271 Screen (7)<br />
287 Gasket, Housing A only (used for GX actuator) (<strong>DVC6200</strong> only)<br />
288 Seal, Housing A only (used for GX actuator) (<strong>DVC6200</strong> only)<br />
Common Parts<br />
(see figure 7‐2, 7‐3, and 7‐4)<br />
<strong>DVC6200</strong> and DVC6205<br />
16* O‐ring (1) (3 req'd)<br />
29 Warning label, for use only with LCIE hazardous area<br />
classifications<br />
33 Mach Screw, pan head, SST (2) (3 req'd)<br />
38 Cap Screw, hex socket, SST (2)(6) (3 req'd)<br />
43* Cover Assembly (includes cover screws)<br />
Standard<br />
Extreme temperature option<br />
(fluorosilicone elastomers)<br />
48 Nameplate<br />
49 Screw, self tapping (2 req'd) (6)<br />
*Recommended spare parts<br />
1. Available in the Elastomer Spare Parts Kit<br />
2. Available in the Small Hardware Spare Parts Kit<br />
6. Available in the Spare Module Base Assembly Kit<br />
7. Available in the Spare Housing Assembly Kit<br />
38B9580X022<br />
38B9580X032
Instruction Manual<br />
D103605X012<br />
Parts<br />
July 2012<br />
Key Description Part Number<br />
61 Pipe Plug, hex socket (6)<br />
Housing A with relay C (2 req'd ) (used for GX actuator)<br />
Housing A with relay B (1 req'd) (used for GX actuator)<br />
Housing B with relay B and C (1 req'd)<br />
(used for all actuators except GX)<br />
Not required for relay A<br />
63 Lithium grease (not furnished with the instrument)<br />
64 Zinc based anti‐seize compound (not furnished with the<br />
instrument)<br />
65 Lubricant, silicone sealant (not furnished with the instrument)<br />
154 Retaining Ring (2) (3 req'd)<br />
236 Screen (required for relay B and C only) (7)<br />
237 Module Base Seal (1)<br />
Module Base<br />
(see figure 7‐2 and 7‐4)<br />
<strong>DVC6200</strong> and DVC6205<br />
2 Module Base (6)<br />
11 Drive Screw (6) (2 req'd)<br />
12 O‐ring (1)<br />
19 Shield (6)<br />
61 Pipe Plug, hex socket (6) (3 req'd)<br />
243 Slotted Pin (flame arrestor) (6) (3 req'd)<br />
I/P Converter Assembly<br />
(see figure 7‐2 and 7‐4)<br />
<strong>DVC6200</strong> and DVC6205<br />
23 Cap Screw, hex socket, SST (2)(8) (4 req'd)<br />
39* O‐ring (1)(3)(5)<br />
41 I/P Converter (5)<br />
169 Shroud (5)(8) (see figure 6‐3)<br />
210* Boot, nitrile (1)(5) (2 req'd) (see figure 6‐3)<br />
231* Seal Screen (1)(3)(5)<br />
Relay (see figure 7‐2 and 7‐4)<br />
<strong>DVC6200</strong> and DVC6205<br />
24* Relay Assembly, (includes shroud, relay seal, mounting screws)<br />
Standard (nitrile elastomers)<br />
Standard Bleed<br />
Housing A (used for GX actuator)<br />
Single‐acting direct (relay C)<br />
Single‐acting reverse (relay B)<br />
Housing B (used for all actuators except GX)<br />
Single‐acting direct (relay C)<br />
Double‐acting (relay A)<br />
Single‐acting reverse (relay B)<br />
38B5786X182<br />
38B5786X172<br />
38B5786X132<br />
38B5786X052<br />
38B5786X092<br />
Key Description Part Number<br />
24* Relay Assembly, (includes shroud, relay seal, mounting screws)<br />
(continued)<br />
Low Bleed<br />
Housing A (used for GX actuator)<br />
Single‐acting direct (relay C)<br />
Single‐acting reverse (relay B)<br />
Housing B (used for all actuators except G)<br />
Single‐acting direct (relay C)<br />
Double‐acting (relay A)<br />
Single‐acting reverse (relay B)<br />
38B5786X202<br />
38B5786X192<br />
38B5786X152<br />
38B5786X072<br />
38B5786X112<br />
Extreme Temperature option (fluorosilicone elastomers)<br />
Standard Bleed<br />
Single‐acting direct (relay C)<br />
Double‐acting (relay A)<br />
Single‐acting reverse (relay B)<br />
Low Bleed<br />
Single‐acting direct (relay C)<br />
Double‐acting (relay A)<br />
Single‐acting reverse (relay B)<br />
38B5786X142<br />
38B5786X032<br />
38B5786X102<br />
38B5786X162<br />
38B5786X082<br />
38B5786X122<br />
Loop Connections Terminal Box<br />
(see figure 7‐2 and 7‐4)<br />
<strong>DVC6200</strong> and DVC6205<br />
4 Terminal Box Cap<br />
34* O‐ring (1)(4)<br />
36* O‐ring (1)(4)<br />
58 Set Screw, hex socket, SST (2)<br />
72 Cap Screw, hex socket, SST (2)<br />
164 Terminal Box Assembly<br />
Feedback Connections Terminal<br />
Box (see figure 7‐4)<br />
DVC6205<br />
4 Terminal Box Cap<br />
34* O‐ring (1)(4)<br />
36* O‐ring (1)(4)<br />
58 Set Screw, hex socket, SST (2)<br />
62 Pipe Plug, hex hd, SST<br />
262 Adapter<br />
263* O-ring<br />
Standard<br />
Extreme temperature option, (fluorosilicone)<br />
1F463606992<br />
1F4636X0092<br />
*Recommended spare parts<br />
1. Available in the Elastomer Spare Parts Kit<br />
2. Available in the Small Hardware Spare Parts Kit<br />
3. Available in the Seal Screen Kit<br />
4. Available in the Terminal Box Kit<br />
5. Available in the I/P Converter Kit<br />
6. Available in the Spare Module Base Assembly Kit<br />
8. Available in the Spare Shroud Kit<br />
71
Parts<br />
July 2012<br />
Instruction Manual<br />
D103605X012<br />
Key Description Part Number<br />
Pressure Gauges, Pipe Plugs, or<br />
Tire <strong>Valve</strong> Assemblies<br />
(see figure 7‐3)<br />
<strong>DVC6200</strong> and DVC6205<br />
47* Pressure Gauge, nickel‐plated brass case, brass connection<br />
Double‐acting (3 req'd); Single‐acting (2 req'd)<br />
PSI/MPA Gauge Scale<br />
To 60 PSI, 0.4 MPa<br />
18B7713X042<br />
To 160 PSI, 1.1 MPa<br />
18B7713X022<br />
PSI/bar Gauge Scale<br />
To 60 PSI, 4 bar<br />
18B7713X032<br />
To 160 PSI, 11 bar<br />
18B7713X012<br />
PSI/KG/CM 2 Gauge Scale<br />
To 60 PSI, 4 KG/CM 2<br />
18B7713X072<br />
To 160 PSI, 11 KG/CM 2<br />
18B7713X082<br />
Key Description Part Number<br />
66 Pipe Plug, hex head<br />
For double‐acting and single‐acting direct w/gauges<br />
(none req'd)<br />
For single‐acting reverse w/gauges (1 req'd)<br />
For all units w/o gauges (3 req'd)<br />
67 Tire <strong>Valve</strong>, used with Tire <strong>Valve</strong> Option only<br />
Double‐acting (3 req'd); Single‐acting (2 req'd)<br />
HART Filters<br />
HF340, DIN rail mount<br />
HF341, DIN rail Mount, pass through (no filter)<br />
39B5411X022<br />
39B5412X012<br />
72<br />
*Recommended spare parts
Instruction Manual<br />
D103605X012<br />
Parts<br />
July 2012<br />
Figure 7‐2. <strong>FIELDVUE</strong> <strong>DVC6200</strong> <strong>Digital</strong> <strong>Valve</strong> <strong>Controller</strong><br />
Housing Assembly<br />
HOUSING A—BACK VIEW<br />
(USED FOR GX ACTUATOR)<br />
HOUSING B—BACK VIEW<br />
(USED FOR ALL<br />
ACTUATORS EXCEPT GX)<br />
DOUBLE‐ACTING DIRECT‐ACTING REVERSE‐ACTING<br />
APPLY LUBRICANT, SEALANT, OR THREAD LOCK<br />
APPLY LUBRICANT ON ALL O-RINGS UNLESS OTHERWISE SPECIFIED<br />
GE40185 sheet 1 of 3<br />
73
Parts<br />
July 2012<br />
Instruction Manual<br />
D103605X012<br />
Figure 7‐2. <strong>FIELDVUE</strong> <strong>DVC6200</strong> <strong>Digital</strong> <strong>Valve</strong> <strong>Controller</strong> Housing Assembly (continued)<br />
SECTION C-C<br />
SCALE 2 : 1<br />
SECTION A-A<br />
SECTION E-E<br />
SCALE 2 : 1<br />
APPLY LUBRICANT, SEALANT, OR THREAD LOCK<br />
APPLY LUBRICANT ON ALL O-RINGS UNLESS OTHERWISE SPECIFIED<br />
SECTION F-F<br />
SCALE 2 : 1<br />
GE40185 sheet 2 of 3<br />
Figure 7‐3. Gauge Configuration<br />
DOUBLE‐ACTING DIRECT‐ACTING REVERSE‐ACTING<br />
FOR PIPE PLUG OPTION REPLACE 47 WITH 66<br />
FOR TIRE VALVE OPTION REPLACE 47 WITH 67<br />
APPLY LUBRICANT, SEALANT, OR THREAD LOCK<br />
APPLY LUBRICANT ON ALL O-RINGS UNLESS OTHERWISE SPECIFIED<br />
GE40185 sheet 3 of 3<br />
74
Instruction Manual<br />
D103605X012<br />
Parts<br />
July 2012<br />
Figure 7‐4. <strong>FIELDVUE</strong> DVC6205 Base Unit Housing Assembly<br />
SECTION B-B<br />
SECTION A-A<br />
APPLY LUBRICANT, SEALANT, OR THREAD LOCK<br />
APPLY LUBRICANT ON ALL O-RINGS UNLESS OTHERWISE SPECIFIED<br />
SECTION H-H<br />
GE40181<br />
75
Parts<br />
July 2012<br />
Instruction Manual<br />
D103605X012<br />
Figure 7‐4. <strong>FIELDVUE</strong> DVC6205 Base Unit Housing Assembly (continued)<br />
SECTION C-C<br />
SCALE 2 : 1<br />
SECTION E-E<br />
SCALE 2 : 1<br />
DOUBLE‐ACTING SHOWN<br />
DOUBLE‐ACTING DIRECT‐ACTING REVERSE‐ACTING<br />
APPLY LUBRICANT, SEALANT, OR THREAD LOCK<br />
APPLY LUBRICANT ON ALL O-RINGS UNLESS OTHERWISE SPECIFIED<br />
GE40181<br />
76
Instruction Manual<br />
D103605X012<br />
Parts<br />
July 2012<br />
Figure 7‐4. <strong>FIELDVUE</strong> DVC6205 Base Unit Housing Assembly (continued)<br />
WALL MOUNTING<br />
PIPE MOUNTING<br />
GE40181<br />
APPLY LUBRICANT, SEALANT, OR THREAD LOCK<br />
APPLY LUBRICANT ON ALL O-RINGS UNLESS OTHERWISE SPECIFIED<br />
77
Parts<br />
July 2012<br />
Instruction Manual<br />
D103605X012<br />
Figure 7‐5. <strong>FIELDVUE</strong> DVC6215 Remote Feedback Assembly<br />
PARTS NOT SHOWN: 158<br />
SECTION A-A<br />
APPLY LUBRICANT, SEALANT, OR THREAD LOCK<br />
GE46670-B<br />
HOUSING A<br />
(USED FOR GX ACTUATOR)<br />
PARTS NOT SHOWN: 158<br />
SECTION A-A<br />
GE40178-B<br />
APPLY LUBRICANT, SEALANT, OR THREAD LOCK<br />
HOUSING B<br />
(USED FOR ALL ACTUATORS EXCEPT GX)<br />
78
Instruction Manual<br />
D103605X012<br />
Principle of Operation<br />
July 2012<br />
Appendix A Principle of OperationAA−A<br />
HART Communication<br />
The HART (Highway Addressable Remote Transducer) protocol gives field devices the capability of communicating<br />
instrument and process data digitally. This digital communication occurs over the same two‐wire loop that provides<br />
the 4‐20 mA process control signal, without disrupting the process signal. In this way, the analog process signal, with<br />
its faster update rate, can be used for control. At the same time, the HART protocol allows access to digital diagnostic,<br />
maintenance, and additional process data. The protocol provides total system integration via a host device.<br />
The HART protocol uses frequency shift keying (FSK). Two individual frequencies of 1200 and 2200 Hz are<br />
superimposed over the 4‐20 mA current signal. These frequencies represent the digits 1 and 0 (see figure A‐1). By<br />
superimposing a frequency signal over the 4-20 mA current, digital communication is attained. The average value of<br />
the HART signal is zero, therefore no DC value is added to the 4‐20 mA signal. Thus, true simultaneous communication<br />
is achieved without interrupting the process signal.<br />
Figure A‐1. HART Frequency Shift Keying Technique<br />
+0.5V<br />
0<br />
-0.5V<br />
1200 Hz<br />
“1”<br />
2200 Hz<br />
“0”<br />
ANALOG<br />
SIGNAL<br />
AVERAGE CURRENT CHANGE DURING COMMUNICATION = 0<br />
A6174<br />
The HART protocol allows the capability of multidropping, i.e., networking several devices to a single communications<br />
line. This process is well suited for monitoring remote applications such as pipelines, custody transfer sites, and tank<br />
farms. See table 6‐2 for instructions on changing the printed wiring board DIP switch configuration to multidrop.<br />
<strong>DVC6200</strong> <strong>Digital</strong> <strong>Valve</strong> <strong>Controller</strong><br />
The <strong>DVC6200</strong> digital valve controller housing contains the travel sensor, terminal box, pneumatic input and output<br />
connections and a module base that may be easily replaced in the field without disconnecting field wiring or tubing.<br />
The module base contains the following submodules: I/P converter, printed wiring board (pwb) assembly, and<br />
pneumatic relay. The relay position is detected by sensing the magnet on the relay beam via a detector on the printed<br />
wiring board. This sensor is used for the minor loop feedback (MLFB) reading. The module base can be rebuilt by<br />
replacing the submodules. See figures A‐3 and A‐4.<br />
79
Principle of Operation<br />
July 2012<br />
Instruction Manual<br />
D103605X012<br />
Figure A‐2. Typical <strong>FIELDVUE</strong> Instrument to Personal Computer Connections for <strong>Valve</strong>Link Software<br />
CONTROL SYSTEM<br />
HART MODEM<br />
FIELD TERM.<br />
E1362<br />
<strong>DVC6200</strong> digital valve controllers are loop‐powered instruments that provide a control valve position proportional to<br />
an input signal from the control room. The following describes a double‐acting digital valve controller mounted on a<br />
piston actuator.<br />
The input signal is routed into the terminal box through a single twisted pair of wires and then to the printed wiring<br />
board assembly submodule where it is read by the microprocessor, processed by a digital algorithm, and converted<br />
into an analog I/P drive signal.<br />
As the input signal increases, the drive signal to the I/P converter increases, increasing the I/P output pressure. The I/P<br />
output pressure is routed to the pneumatic relay submodule. The relay is also connected to supply pressure and<br />
amplifies the small pneumatic signal from the I/P converter. The relay accepts the amplified pneumatic signal and<br />
provides two output pressures. With increasing input (4 to 20 mA signal), the output A pressure always increases and<br />
the output B pressure decreases. The output A pressure is used for double‐acting and single‐acting direct applications.<br />
The output B pressure is used for double‐acting and single‐acting reverse applications. As shown in figure A‐3 the<br />
increased output A pressure causes the actuator stem to move downward. Stem position is sensed by the non‐contact<br />
travel feedback sensor. The stem continues to move downward until the correct stem position is attained. At this point<br />
the printed wiring board assembly stabilizes the I/P drive signal. This positions the flapper to prevent any further<br />
increase in nozzle pressure.<br />
As the input signal decreases, the drive signal to the I/P converter submodule decreases, decreasing the I/P output<br />
pressure. The pneumatic relay decreases the output A pressure and increases the output B pressure. The stem moves<br />
upward until the correct position is attained. At this point the printed wiring board assembly stabilizes the I/P drive<br />
signal. This positions the flapper to prevent any further decrease in nozzle pressure.<br />
80
Instruction Manual<br />
D103605X012<br />
Principle of Operation<br />
July 2012<br />
Figure A‐3. <strong>FIELDVUE</strong> <strong>DVC6200</strong> <strong>Digital</strong> <strong>Valve</strong> <strong>Controller</strong> Block Diagram<br />
INPUT SIGNAL<br />
4-20 mA<br />
+<br />
HART<br />
TERMINAL BOX<br />
DRIVE<br />
SIGNAL<br />
PRINTED<br />
WIRING BOARD<br />
VALVE TRAVEL FEEDBACK<br />
AUXILIARY<br />
TERMINALS<br />
I/P<br />
CONVERTER<br />
PNEUMATIC<br />
RELAY<br />
OUTPUT A<br />
SUPPLY PRESSURE<br />
OUTPUT B<br />
E1361<br />
VENT<br />
VALVE AND ACTUATOR<br />
Figure A‐4. <strong>FIELDVUE</strong> <strong>DVC6200</strong> <strong>Digital</strong> <strong>Valve</strong> <strong>Controller</strong> Assembly<br />
HOUSING<br />
PNEUMATIC<br />
RELAY<br />
GAUGES<br />
COVER<br />
TERMINAL BOX WITH COVER<br />
PRINTED WIRING<br />
BOARD ASSEMBLY<br />
MODULE BASE ASSEMBLY<br />
I/P CONVERTER<br />
W9925-2<br />
81
Principle of Operation<br />
July 2012<br />
Instruction Manual<br />
D103605X012<br />
82
Instruction Manual<br />
D103605X012<br />
Field Communicator Menu Trees<br />
July 2012<br />
Appendix B Field Communicator Menu Trees<br />
This section contains the Field Communicator menu trees for instrument level HC, AD, PD, and ODV. It also contains<br />
an alphabetized function/variable list to help locate the function/variable on the appropriate menu tree. All Fast Key<br />
Sequences referenced in the menu trees assume the Online menu (see figure B-2) as the starting point.<br />
Instrument Level HC, AD, PD, and ODV<br />
Function/Variable<br />
See Figure<br />
Actual Travel B-5<br />
Actuator Manufacturer B-5<br />
Actuator Model B-5<br />
Actuator Selection B-5<br />
Actuator Size B-5<br />
Actuator Style B-7<br />
Air B-5<br />
Alert Record Full Enable B-8<br />
Alert Record Not Empty Enable B-8<br />
Alert Switch Source B-7<br />
Analog Input B-3, B-10<br />
Analog Input (Calibration) B-9<br />
Analog Input Units B-5<br />
Area Units B-5<br />
Auto Calibration B-9<br />
Auxiliary Terminal Action B-5<br />
Auxiliary Terminal Action, Edit B-5<br />
Breakout Torque B-5<br />
Burst Mode B-7<br />
Calibration Button B-5<br />
Calibration Record B-9<br />
Calibration Time B-9<br />
Calibration Type B-9<br />
Calibrator B-9<br />
Change Control Mode B-6, B-10<br />
Change Instrument Mode B-1, B-5<br />
Change to HART 5 B-10<br />
Change to HART 7 B-10<br />
Change Write Protection B-1, B-3, B-5<br />
Clear Records B-8, B-10<br />
Control Mode B-6, B-10<br />
Critical NVM Failure Shutdown B-8<br />
Custom Characterization B-6, B-10<br />
Cycle Count Alert Enable B-8<br />
Cycle Count Alert Point B-8<br />
Cycle Counter B-10<br />
Cycle Count/Travel Accum Deadband B-8<br />
Days Powered Up B-10<br />
DD Information B-3<br />
Description B-3, B-5<br />
Device ID B-3<br />
Device Revision B-3<br />
Device Setup B-4<br />
Device Status B-3, B-10<br />
Drive Current Failure Shutdown B-8<br />
Drive Signal B-10<br />
Function/Variable<br />
See Figure<br />
Drive Signal Alert Enable B-8<br />
Dynamic Torque B-5<br />
Edit Cycle Counts B-8<br />
Edit Instrument Time B-5, B-8<br />
Edit Travel Accumulator B-8<br />
Effective Area (Acutator) B-5<br />
End Point Pressure Control (EPPC) B-6<br />
EPPC Deviation (Alert Setup) B-8<br />
Fail Signal B-7<br />
Fallback Recovery B-6, B-8, B-10<br />
Feedback Connection B-7<br />
Firmware Revision B-3<br />
Flash Integrity Failure Shutdown B-8<br />
Flow Direction B-5<br />
Flow Tends to B-5<br />
Function B-7<br />
Hardware Revision (Device) B-3<br />
HART Long Tag B-3, B-5<br />
HART Tag B-3, B-5<br />
HART Universal Revision B-3<br />
Hi Limit/Cutoff Point B-6, B-8<br />
Hi Limit/Cutoff Select B-6, B-8<br />
HART Variable Assignments B-7<br />
Inlet Pressure B-5<br />
Input Characterization B-6, B-10<br />
Input Range Hi B-5<br />
Input Range Lo B-5<br />
Instrument Alert Record B-8<br />
Instrument Level B-3<br />
Instrument Mode B-1, B-5<br />
Instrument Serial Number B-3, B-5<br />
Instrument Time is Approximate Enable B-8<br />
Integral Enable B-7<br />
Integral Gain B-7<br />
Integrator Saturated High Enable B-8<br />
Integrator Saturated Lo Enable B-8<br />
Integrator Limit B-7<br />
Intgegral Dead Zone B-7<br />
Last AutoCal Status B-9<br />
Leak Class (Trim) B-5<br />
Length Units B-5<br />
Lever Arm Length B-5<br />
Lever Style B-5<br />
Limit Switch Trip Point B-7<br />
Limit Switch <strong>Valve</strong> Close B-5<br />
Limit Switch <strong>Valve</strong> Open B-5<br />
83
Field Communicator Menu Trees<br />
July 2012<br />
Instruction Manual<br />
D103605X012<br />
Function/Variable<br />
See Figure<br />
Lo Limit/Cutoff Point B-6, B-8<br />
Lo Limit/Cutoff Select B-6, B-8<br />
Manual Calibration B-9<br />
Manufacturer (Device) B-3<br />
Maximum Recorded Temperature B-10<br />
Maximum Supply Pressure B-7<br />
Message B-3, B-5<br />
Mininum Recorded Temperature B-10<br />
Minor Loop Sensor Failure Shutdown B-8<br />
MLFB Gain B-7<br />
Model (Device) B-3<br />
Non-Critical NVM Failure Shutdown B-8<br />
Number of Power Ups B-10<br />
Outlet Pressure B-5<br />
Output Circuit Comm Failure Enable B-8<br />
Output Terminal Enable B-7<br />
Packing Type B-5<br />
Partial Stroke Test B-10<br />
Partial Stroke Test (PST) B-7<br />
Performance Tuner B-4, B-7, B-10<br />
Polling Address B-5<br />
Port Diameter (Trim) B-5<br />
Port Type (Trim) B-5<br />
Position Transmitter B-5<br />
Pressure A B-3, B-10<br />
Pressure A-B B-3, B-10<br />
Pressure B B-3, B-10<br />
Pressure Fallback Active Enable B-8<br />
Pressure Range Hi B-6<br />
Pressure Range Lo B-6<br />
Pressure Sensor Failure Shutdown B-8<br />
Pressure Sensors (Calibration) B-9<br />
Pressure Tuning Set B-7<br />
Pressure Units B-5<br />
Proportional Gain B-7<br />
PST Enable B-7<br />
PST Calibration B-9<br />
PST Pressure Limit B-7<br />
PST Start Point B-7<br />
PST Variables B-7<br />
Push Down To (Trim) B-5<br />
PWB Serial Number B-3<br />
Quick Release B-5<br />
Rated Travel B-5<br />
Relay Adjust B-9<br />
Relay Type B-7<br />
Reference Voltage Failure Shutdown B-8<br />
Reset <strong>Valve</strong> Stuck Alert B-10<br />
Restart Control Mode B-10<br />
Restart Processor B-10<br />
Seat Type (Trim) B-5<br />
Setpoint B-3, B-10<br />
Shutdown on Alert B-8<br />
Solenoid <strong>Valve</strong> B-5<br />
SP Rate Close B-6<br />
Function/Variable<br />
See Figure<br />
SP Rate Open B-6<br />
Spring Rate B-5<br />
Spring Rate Units B-5<br />
Stabilize/Optimize B-4, B-7, B-10<br />
Stem Diameter B-5<br />
Stroke <strong>Valve</strong> B-10<br />
Supply Pressure B-3, B-10<br />
Supply Pressure Lo Alert B-8<br />
Switch Closed B-7<br />
Temperature B-10<br />
Temperature Units B-5<br />
Temp Sensor Failure Shutdown B-8<br />
Torque Units B-5<br />
Transmitter Output B-7<br />
Travel B-3, B-10<br />
Travel Accumulator B-10<br />
Travel Accumulator Alert Enable B-8<br />
Travel Accumulator Alert Point B-8<br />
Travel Alert Deadband B-8<br />
Tavel Alert Hi Enable B-8<br />
Travel Alert Hi Hi Enable B-8<br />
Travel Alert Hi Hi Point B-8<br />
Travel Alert Hi Point B-8<br />
Travel Alert Lo Enable B-8<br />
Travel Alert Lo Lo Enable B-8<br />
Travel Alert Lo Lo Point B-8<br />
Travel Alert Lo Point B-8<br />
Travel Counts B-10<br />
Travel Deviation (Alert Setup) B-8<br />
Travel Deviation Pressure Fallback B-6<br />
Travel Deviation Pressure Fallback Time B-6<br />
Travel Limit/Cutoff High Enable B-8<br />
Travel Limit/Cutoff Lo Enable B-8<br />
Travel/Pressure Select (Alert Setup) B-8<br />
Travel Sensor Adjust B-9<br />
Travel Sensor Failure Shutdown B-8<br />
Travel Sensor Motion B-7<br />
Travel Tuning Set B-7<br />
Travel Units B-5<br />
Travel/Pressure Select B-6, B-10<br />
Unbalanced Area (Trim) B-5<br />
<strong>Valve</strong> Class B-5<br />
<strong>Valve</strong> Manufacturer B-5<br />
<strong>Valve</strong> Model B-5<br />
<strong>Valve</strong> Serial Number B-3, B-5<br />
<strong>Valve</strong> Size B-5<br />
<strong>Valve</strong> Style B-7<br />
Velocity Gain B-7<br />
View Alert Records B-10<br />
View Edit Lag Time B-6<br />
View Edit Lead/Lag B-6<br />
Volume Booster B-5<br />
Write Protection B-1, B-3, B-5<br />
Zero Power Condition B-7<br />
84
Instruction Manual<br />
D103605X012<br />
Field Communicator Menu Trees<br />
July 2012<br />
Figure B-1. Hot Key<br />
Figure B-2. Online<br />
Hot Key<br />
1 Instrument Mode<br />
2 Change Instrument Mode<br />
3 Write Protection<br />
4 Change Write Protection<br />
HART Application<br />
1 Offline<br />
2 Online<br />
3 Utility<br />
4 HART Diagnostics<br />
Online<br />
1 Overview<br />
2 Configure<br />
3 Service Tools<br />
Figure B-3. Overview (1)<br />
Overview<br />
1 Device Status<br />
2 Analog Input<br />
3 Setpoint<br />
4 Travel<br />
5 Supply Pressure 1<br />
6 Pressure A<br />
7 Pressure B<br />
8 Pressure A-B<br />
9 Device Information<br />
1-8 (HC)<br />
1-9 (AD, PD, ODV)<br />
Device Information<br />
1 Identification<br />
2 Revisions<br />
3 Security<br />
1-8-3 (HC)<br />
1-9-3 (AD, PD, ODV)<br />
Security<br />
1 Write Protection<br />
2 Change Write Protection<br />
1-8-1 (HC)<br />
1-9-1 (AD, PD, ODV)<br />
Identification<br />
1 HART Tag<br />
2 HART Long Tag 2<br />
3 Manufacturer<br />
4 Model<br />
5 Instrument Level<br />
6 Device ID and Serial Numbers<br />
7 Message<br />
8 Description<br />
1-8-2 (HC)<br />
1-9-2 (AD, PD, ODV)<br />
Revisions<br />
1 HART Universal Revision<br />
2 Device Revision<br />
3 Hardware Revision<br />
4 Firmware Revision<br />
5 DD Information<br />
1-8-1-5 (HC, HART 5)<br />
1-8-1-6 (HC, HART 7)<br />
1-9-1-5 (AD, PD, ODV, HART 5<br />
1-9-1-6 (AD, PD, ODV, HART 7)<br />
Device ID and Serial Numbers<br />
1 Device ID<br />
2 <strong>Valve</strong> Serial Number<br />
3 Instrument Serial Number<br />
4 PWB Serial Number<br />
NOTES:<br />
1 SUPPLY PRESSURE IS AVAILABLE FOR INSTRUMENT LEVEL AD, PD, AND ODV.<br />
2 HART LONG TAG IS AVAILABLE WITH HART 7.<br />
Figure B-4. Guided Setup (2-1)<br />
Guided Setup<br />
1 Device Setup<br />
2 Performance Tuner<br />
1<br />
NOTES:<br />
1 THIS MENU ITEM IS STABILIZE/OPTIMIZE FOR INSTRUMENT LEVEL HC.<br />
85
Field Communicator Menu Trees<br />
July 2012<br />
Instruction Manual<br />
D103605X012<br />
Figure B-5. Manual Setup > Mode Protection (2-2-1) and Manual Setup > Instrument (2-2-2)<br />
Manual Setup<br />
1 Mode and Protection<br />
2 Instrument<br />
3 Travel/Pressure Control<br />
4 Tuning<br />
5 <strong>Valve</strong> and Actuator<br />
6 Partial Stroke Test (PST)<br />
7 Outputs<br />
2-2-2-6-5<br />
Accessories<br />
1 Volume Booster<br />
2 Quick Release<br />
3 Solenoid <strong>Valve</strong><br />
4 Position Transmitter<br />
5 Limit Switch <strong>Valve</strong> Open<br />
6 Limit Switch <strong>Valve</strong> Close<br />
2-2-1<br />
Mode and Protection<br />
1 Instrument Mode<br />
2 Change Instrument Mode<br />
3 Write Protection<br />
4 Change Write Protection<br />
2-2-2-6<br />
Spec Sheet<br />
1 Units<br />
2 <strong>Valve</strong><br />
3 Trim<br />
4 Actuator<br />
5 Accessories<br />
2-2-2<br />
Instrument<br />
1 Identification<br />
2 Serial Numbers<br />
3 Units<br />
4 Terminal Box<br />
5 Analog Input Range<br />
6 Spec Sheet<br />
7 Edit Instrument Time<br />
2-2-2-6-3<br />
Trim<br />
1 Seat Type<br />
2 Leak Class<br />
3 Port Diameter<br />
4 Port Type<br />
5 Flow Direction<br />
6 Push Down To<br />
7 Flow Tends To<br />
8 Unbalanced Area<br />
2-2-2-6-4<br />
Actuator<br />
1 Actuator Manufacturer<br />
2 Actuator Model<br />
3 Actuator Size<br />
4 Actuator Selection<br />
5 Lever Style<br />
6 Lever Arm Length<br />
7 Effective Area<br />
8 Spring Rate<br />
9 Air<br />
2-2-2-6-2-9<br />
Torque<br />
1 Dynamic Torque<br />
2 Breakout Torque<br />
NOTES:<br />
1 HART LONG TAG IS AVAILABLE WITH HART 7.<br />
2 AUXILIARY TERMINAL ACTION AND EDIT AUXILIARY TERMINAL ACTION ARE AVAILABLE WITH INSTRUMENT LEVEL ODV.<br />
2-2-2-1<br />
2-2-2-2<br />
2-2-2-3<br />
2-2-2-4<br />
2-2-2-5<br />
2-2-2-6-2<br />
<strong>Valve</strong><br />
1 <strong>Valve</strong> Manufacturer<br />
2 <strong>Valve</strong> Model<br />
3 <strong>Valve</strong> Size<br />
4 <strong>Valve</strong> Class<br />
5 Stem Diameter<br />
6 Packing Type<br />
7 <strong>Valve</strong> Travel<br />
8 Inlet/Outlet Pressures<br />
9 Torque<br />
Identification<br />
1 HART Tag<br />
2 HART Long Tag<br />
3 Description<br />
4 Message<br />
5 Polling Address<br />
Serial Numbers<br />
1 Instrument Serial Number<br />
2 <strong>Valve</strong> Serial Number<br />
Units<br />
1 Pressure Units<br />
2 Temperature Units<br />
3 Analog Input Units<br />
Terminal Box<br />
1 Calibration Button<br />
2 Auxiliary Terminal Action 2<br />
3 Edit Auxiliary Terminal Action<br />
Analog Input Range<br />
1 Input Range Hi<br />
2 Input Range Lo<br />
2-2-2-6-1<br />
Units<br />
1 Travel Units<br />
2 Length Units<br />
3 Area Units<br />
4 Spring Rate Units<br />
5 Torque Units<br />
2-2-2-6-2-7<br />
<strong>Valve</strong> Travel<br />
1 Rated Travel<br />
2 Actual Travel<br />
2-2-2-6-2-8<br />
Inlet/Outlet Pressures<br />
1 Inlet Pressure<br />
2 Outlet Pressure<br />
1<br />
2<br />
86
Instruction Manual<br />
D103605X012<br />
Field Communicator Menu Trees<br />
July 2012<br />
Figure B-6. Manual Setup > Travel/Pressure Control (2-2-3)<br />
Manual Setup<br />
1 Mode and Protection<br />
2 Instrument<br />
3 Travel/Pressure Control<br />
4 Tuning<br />
5 <strong>Valve</strong> and Actuator<br />
6 Partial Stroke Test (PST)<br />
7 Outputs<br />
2-2-3<br />
Travel/Pressure Control<br />
ODV<br />
1 Travel/Pressure Select<br />
2 Cutoffs and Limits<br />
3 End Point Pressure Control (EPPC)<br />
4 Pressure Control<br />
5 Pressure Fallback<br />
6 Control Mode<br />
7 Response Control<br />
8 Dynamic Response<br />
2-2-3-8<br />
Dynamic Response<br />
1 SP Rate Open<br />
2 SP Rate Close<br />
3 View/Edit Lead/Lag<br />
2-2-3-7<br />
Characterization<br />
1 Input Characterization<br />
2 Custom Characterization<br />
ODV<br />
HC, AD, PD<br />
2-2-3<br />
Travel/Pressure Control<br />
HC, AD, PD<br />
1 Travel/Pressure Select<br />
2 Cutoffs and Limits 1<br />
3 Pressure Control<br />
4 Pressure Fallback<br />
5 Control Mode<br />
6 Characterization<br />
7 Dynamic Response<br />
2-2-3-6 (HC)<br />
2-2-3-7 (AD, PD)<br />
Dynamic Response<br />
1 SP Rate Open<br />
2 SP Rate Close<br />
3 View/Edit Lag Time<br />
2-2-3-5 (HC)<br />
2-2-3-6 (AD, PD)<br />
Characterization<br />
1 Input Characterization<br />
2 Custom Characterization<br />
2-2-3-2<br />
Cutoffs and Limits<br />
1 Hi Limit/Cutoff Select<br />
2 Hi Limit/Cutoff Point<br />
3 Lo Limit/Cutoff Select<br />
4 Lo Limit/Cutoff Point<br />
2-2-3-3<br />
End Point Pressure Control (EPPC)<br />
1 EPPC Enab<br />
2 Change EPPC Enab<br />
3 EPPC Set Point<br />
4 EPPC Saturation Time<br />
2-2-3-4<br />
Pressure Control<br />
1 Pressure Range High<br />
2 Pressure Range Lo<br />
2-2-3-2<br />
Cutoffs and Limits<br />
1 Hi Limit/Cutoff Select<br />
2 Hi Limit/Cutoff Point<br />
3 Lo Limit/Cutoff Select<br />
4 Lo Limit/Cutoff Point<br />
2-2-3-3<br />
Pressure Control<br />
1 Pressure Range High<br />
2 Pressure Range Lo<br />
2-2-3-4 (AD, PD)<br />
Pressure Fallback<br />
1 Tvl Dev Press Fallback<br />
2 Tvl Dev Press Fallback Time<br />
3 Fallback Recovery<br />
2-2-3-4 (HC)<br />
2-2-3-5 (AD, PD)<br />
Control Mode<br />
1 Control Mode<br />
2 Change Control Mode<br />
3 Restart Control Mode<br />
2-2-3-6 2-2-3-5<br />
Control Mode<br />
Pressure Fallback<br />
1 Control Mode<br />
2 Change Control Mode<br />
1 Tvl Dev Press Fallback<br />
3 Restart Control Mode<br />
2 Tvl Dev Press Fallback Time<br />
3 Fallback Recovery<br />
NOTE:<br />
1 PRESSURE FALLBACK IS AVAILABLE FOR INSTRUMENT LEVEL AD, PD, AND ODV.<br />
87
Field Communicator Menu Trees<br />
July 2012<br />
Instruction Manual<br />
D103605X012<br />
Figure B-7. Manual Setup > Tuning (2-2-4) through Manual Setup > Outputs (2-2-7)<br />
Manual Setup<br />
1 Mode and Protection<br />
2 Instrument<br />
3 Travel/Pressure Control<br />
4 Tuning<br />
5 <strong>Valve</strong> and Actuator<br />
6 Partial Stroke Test (PST)<br />
7 Outputs<br />
WITH I/O PACKAGE<br />
2-2-6 (HD, AD, PD)<br />
2-2-7 (ODV)<br />
Outputs<br />
1 Output Terminal Config<br />
2 Switch Configuration<br />
3 Transmitter Output 2<br />
4 HART Var Assignments 3<br />
5 Burst Mode 4<br />
2-2-6-5 (HC, AD, PD)<br />
4<br />
2-2-7-5 (ODV)<br />
Burst Mode<br />
1 Burst Enable<br />
2 Burst Command<br />
2-2-6-4 (HC, AD, PD)<br />
2-2-7-4 (ODV)<br />
HART Var Assignments<br />
1 Primary Variable (PV)<br />
2 Secondary Variable (SV)<br />
3 Tertiary Variable (TV)<br />
4 Quaternary Variable (QV)<br />
1<br />
WITH I/O PACKAGE<br />
2-2-4<br />
WITHOUT I/O PACKAGE<br />
Tuning<br />
1 Travel Tuning<br />
2 Pressure Tuning<br />
3 Travel/Pressure Integral Settings<br />
Travel/Pressure Integral Settings<br />
1 Integral Dead Zone<br />
2 Integrator Limit<br />
2-2-6-1 (HC, AD, PD)<br />
2-2-7-1 (ODV)<br />
Output Terminal Config<br />
1 Output Terminal Enable<br />
2 Function<br />
3 Fail Signal<br />
2-2-6-2 (HC, AD, PD)<br />
2-2-7-2 (ODV)<br />
Switch Configuration<br />
1 Limit Switch Trip Point<br />
2 Alert Switch Source<br />
3 Switch Closed<br />
2-2-4-3<br />
2-2-5<br />
<strong>Valve</strong> and Actuator<br />
1 <strong>Valve</strong> Style<br />
2 Actuator Style<br />
3 Feedback Connection<br />
4 Relay Type<br />
5 Zero Power Condition<br />
6 Travel Sensor Motion<br />
7 Maximum Supply Pressure<br />
2-2-6<br />
Partial Stroke Test (PST) 1<br />
1 PST Pressure Limit<br />
2 PST Enable<br />
3 PST Start Point<br />
4 PST Variables<br />
WITHOUT I/O PACKAGE<br />
2-2-6 (HD, AD, PD)<br />
2-2-7 (ODV)<br />
Outputs<br />
1 HART Var Assignments<br />
2 Burst 4<br />
2-2-6-2 (HC, AD, PD)<br />
4<br />
2-2-7-2 (ODV)<br />
Burst Mode<br />
1 Burst Enable<br />
2 Burst Command<br />
2-2-4-1<br />
Travel Tuning<br />
1 Travel Tuning Set<br />
2 Proportional Gain<br />
3 Velocity Gain<br />
4 MLFB Gain<br />
5 Integral Enable<br />
6 Integral Gain<br />
7 Performance Tuner<br />
8 Stabilize/Optimize<br />
2-2-4-2<br />
Pressure Tuning<br />
1 Pressure Tuning Set<br />
2 Proportional Gain<br />
3 MLFB Gain<br />
4 Integral Enable<br />
5 Integral Gain<br />
2-2-6-1 (HC, AD, PD)<br />
2-2-7-1 (ODV)<br />
HART Var Assignments<br />
1 Primary Variable (PV)<br />
2 Secondary Variable (SV)<br />
3 Tertiary Variable (TV)<br />
4 Quaternary Variable (QV)<br />
5<br />
NOTES:<br />
1 PARTIAL STROKE TEST (PST) IS AVAILABLE FOR INSTRUMENT LEVEL ODV.<br />
2 THIS MENU ITEM IS HART VAR ASSIGNMENTS WITH HART 5.<br />
3 THIS MENU ITEM IS TRANSMITTER OUTPUT WITH HART 5.<br />
4 BURST MODE IS AVAILABLE WITH HART 5.<br />
5 PERFORMANCE TUNER IS AVAILABLE FOR INSTRUMENT LEVEL AD, PD, AND ODV.<br />
88
Instruction Manual<br />
D103605X012<br />
Field Communicator Menu Trees<br />
July 2012<br />
Figure B-8. Alert Setup (2-3)<br />
Alert Setup<br />
1 Electronics<br />
2 Supply Pressure Alert 1<br />
3 Travel<br />
4 Pressure Fallback 2<br />
5 Travel History<br />
6 EPPC Deviation 3<br />
7 Output Circuit Comm Failure Enable<br />
8 Shutdown On Alert 5<br />
9 Alert Record/Instrument Time 5<br />
2-3-5 (HC)<br />
2-3-7 (AD, PD)<br />
2-3-9 (ODV) 5<br />
Alert Record/Instrument Time<br />
1 Alert Record Not Empty Enable<br />
2 Alert Record Full Enable<br />
3 View Alert Records<br />
4 Clear Records<br />
5 Instrument Alert Record<br />
6 Instrument Time is Approximate Enable<br />
7 Edit Instrument Time<br />
2-3-4 (HC)<br />
2-3-6 (AD, PD)<br />
Shutdown On Alert<br />
1 Sensors<br />
2 Electronics<br />
2-3-8 (ODV) 5<br />
2-3-4-1 (HC)<br />
2-3-6-1 (AD, PD)<br />
5<br />
2-3-8-1 (ODV)<br />
Electronics<br />
1 Drive Current Failure Shutdown<br />
2 Critical NVM Failure Shutdown<br />
3 Non-Critical NVM Failure Shutdown<br />
4 Flash Integrity Failure Shutdown<br />
5 Reference Voltage Failure Shutdown<br />
4<br />
2-3-1<br />
Electronics<br />
1 Drive Signal Alert Enable<br />
2-3-2-2 (HC)<br />
2-3-2 (AD, PD, ODV)<br />
2-3-3-2 (AD, PD, ODV)<br />
Supply Pressure Lo Alert 1<br />
Travel Deviation<br />
1 Supply Pressure Lo Alert Enable<br />
1 Travel Deviation<br />
2 Supply Pressure Lo Alert Point<br />
2 Travel Deviation Alert Enable<br />
3 Travel Deviation Alert Point<br />
2-3-2 (HC)<br />
4 Travel Deviation Time<br />
2-3-3 (AD, PD, ODV)<br />
2-3-2-3 (HC)<br />
Travel<br />
2-3-3-3 (AD, PD, ODV)<br />
1 Travel Alert DB<br />
Travel Limit<br />
2 Travel Deviation<br />
1 Travel Alert Hi Hi Enable<br />
3 Travel Limit<br />
2 Travel Alert Hi Hi Point<br />
4 Travel Limit/Cutoff<br />
3 Travel Alert Lo Lo Enable<br />
5 Integrator<br />
4 Travel Alert Lo Lo Point<br />
5 Travel Alert Hi Enable<br />
2-3-2-5 (HC)<br />
6 Travel Alert Hi Point<br />
2-3-3-5 (AD, PD, ODV)<br />
7 Travel Alert Lo Enable<br />
Integrator<br />
8 Travel Alert Lo Point<br />
1 Integrator Sat Hi Enable<br />
2 Integrator Sat Lo Enable<br />
2-3-2-4 (HC)<br />
2-3-3-4 (AD, PD, ODV)<br />
2-3-4 (AD, PD, ODV)<br />
Travel Limit/Cutoff<br />
Pressure Fallback 2<br />
1 Travel Limit/Cutoff Hi Enable<br />
2 Hi Limit/Cutoff Point<br />
1 Pressure Fallback Active Enable 3 Hi Limit/Cutoff Select<br />
2 Travel/Pressure Select<br />
4 Travel Limit/Cutoff Lo Enable<br />
3 Fallback Recovery<br />
5 Lo Limit/Cutoff Point<br />
6 Lo Limit/Cutoff Select<br />
2-3-3 (HC)<br />
2-3-5 (AD, PD, ODV)<br />
Travel History<br />
2-3-6 (ODV)<br />
1 Cycle Count/Travel Accum Deadband<br />
EPPC Deviation 3<br />
2 Cycle Count Alert Enable<br />
3 Edit Cycle Counts<br />
1 EPPC Deviation Alert Enable 4 Cycle Count Alert Point<br />
2 EPPC Set Point<br />
5 Travel Accumulator Alert Enable<br />
3 EPPC Deviation Alert Point<br />
6 Edit Travel Accumulator<br />
4 EPPC Deviation Time<br />
7 Travel Accumulator Alert Point<br />
2-3-4-2 (HC)<br />
2-3-6-2 (AD, PD)<br />
2-3-8-2 (ODV)<br />
Sensors 5<br />
1 Travel Sensor Failure Shutdown<br />
2 Temp Sensor Failure Shutdown<br />
3 Minor Loop Sensor Failure Shutdown<br />
4 Pressure Sensor Failure Shutdown<br />
NOTES:<br />
1 SUPPLY PRESSURE LO ALERT IS AVAILABLE FOR INSTRUMENT LEVEL AD, PD, AND ODV.<br />
2 PRESSURE FALLBACK IS AVAILABLE FOR INSTRUMENT LEVEL AD, PD, AND ODV.<br />
3 EPPC DEVIATION IS AVAILABLE FOR INSTRUMENT LEVEL ODV.<br />
4 OUTPUT CIRCUIT COMM FAILURE ENABLE IS AVAILABLE WHEN THE TRANSMITTER FUNCTION IS CONFIGURED.<br />
5 FAST KEY SEQUENCES FOR THESE MENUS DROP ONE MENU SEQUENCE WHEN THE TRANSMITTER FUNCTION IS NOT CONFIGURED.<br />
89
Field Communicator Menu Trees<br />
July 2012<br />
Instruction Manual<br />
D103605X012<br />
Figure B-9. Calibration (2-4)<br />
HART 5<br />
Calibration<br />
1 Travel Calibration HART 7<br />
2 Relay Adjust<br />
3 Sensor Calibration<br />
4 PST Calibration 1<br />
2-4-3<br />
Sensor Calibration<br />
1 Travel Sensor Adjust<br />
2 Pressures Sensors<br />
3 Analog Input 2<br />
HART 5<br />
2-4-1<br />
Travel Calibration<br />
1 Auto Calibration<br />
2 Last AutoCal Status<br />
3 Manual Calibration<br />
4 Calibration Record<br />
HART 7<br />
2-4-1<br />
Travel Calibration<br />
1 Auto Calibration<br />
2 Manual Calibration<br />
3 Calibration Type<br />
4 Calibration Time<br />
5 Calibrator<br />
6 Last AutoCal Status<br />
NOTE:<br />
1 PST CALIBRATION IS AVAILABLE FOR INSTRUMENT LEVEL ODV.<br />
2 ANALOG INPUT IS NOT AVAILABLE WHEN THE DIP SWITCH IS SET TO MULTI-DROP.<br />
Figure B-10. Service Tools (3)<br />
Service Tools<br />
1 Device Status<br />
2 Alert Record<br />
3 Diagnostics<br />
4 Variables<br />
5 Maintenance<br />
3-5<br />
Maintenance<br />
1 Performance Tuner 3<br />
2 Stabilize/Optimize<br />
3 Restart Processor<br />
4 Reset <strong>Valve</strong> Stuck Alert<br />
5 Change to HART 5 5<br />
4<br />
3-2<br />
Alert Record<br />
1 View Alert Records<br />
2 Clear Records<br />
3-3<br />
Diagnostics<br />
1 Stroke <strong>Valve</strong><br />
2 Partial Stroke Test<br />
3-4<br />
Variables<br />
1 Travel/Pressure<br />
2 Control Mode<br />
3 Analog Input<br />
4 Temperature<br />
5 Travel Counts<br />
6 Characterization<br />
7 Travel History<br />
8 Run Time Extremes<br />
3-4-8<br />
Run Time Extremes<br />
1 Maximum Recorded Temperature<br />
2 Minimum Recorded Temperature<br />
3 Days Powered Up<br />
4 Number of Power Ups<br />
1<br />
3-4-7<br />
Travel History<br />
1 Cycle Counter<br />
2 Travel Accumulator<br />
3-4-1<br />
3-4-2<br />
3-4-6<br />
Travel/Pressure<br />
1 Setpoint<br />
2 Travel<br />
3 Drive Signal<br />
4 Supply Pressure 2<br />
5 Pressure A<br />
6 Pressure B<br />
7 Pressure A-B<br />
8 Travel/Pressure Select<br />
9 Fallback Recovery 2<br />
Control Mode<br />
1 Control Mode<br />
2 Change Control Mode<br />
3 Restart Control Mode<br />
Characterization<br />
1 Input Characterization<br />
2 Custom Characterization<br />
NOTES:<br />
1 PARTIAL STROKE TEST IS AVAILALBE IN INSTRUMENT LEVEL ODV.<br />
2 SUPPLY PRESSURE AND FALLBACK RECOVERY ARE AVAILABLE FOR AD, PD, ODV.<br />
3 PERFORMANCE TUNER IS AVAILABLE FOR INSTRUMENT LEVEL AD, PD, AND ODV.<br />
4 RESET VALVE STUCK ALERT IS AVAILABLE IN INSTRUMENT LEVEL OD V.<br />
5 THIS MENU ITEM READS CHANGE TO HART 7 WITH HART 5.<br />
90
Instruction Manual<br />
D103605X012<br />
Glossary<br />
July 2012<br />
Glossary<br />
Alert Point<br />
An adjustable value that, when exceeded,<br />
activates an alert.<br />
Algorithm<br />
A set of logical steps to solve a problem or<br />
accomplish a task. A computer program contains<br />
one or more algorithms.<br />
Alphanumeric<br />
Consisting of letters and numbers.<br />
Analog Input Units<br />
Units in which the analog input is displayed and<br />
maintained in the instrument.<br />
ANSI (acronym)<br />
The acronym ANSI stands for the American<br />
National Standards Institute<br />
ANSI Class<br />
<strong>Valve</strong> pressure/temperature rating.<br />
Bench Set<br />
Pressure, supplied to an actuator, required to<br />
drive the actuator through rated valve travel.<br />
Expressed in pounds per square inch.<br />
Byte<br />
A unit of binary digits (bits). A byte consists of<br />
eight bits.<br />
Calibration Location<br />
Where the instrument was last calibrated; either<br />
in the factory or in the field.<br />
Configuration<br />
Stored instructions and operating parameters for<br />
a <strong>FIELDVUE</strong> Instrument.<br />
Control Loop<br />
An arrangement of physical and electronic<br />
components for process control. The electronic<br />
components of the loop continuously measure<br />
one or more aspects of the process, then alter<br />
those aspects as necessary to achieve a desired<br />
process condition. A simple control loop<br />
measures only one variable. More sophisticated<br />
control loops measure many variables and<br />
maintain specified relationships among those<br />
variables.<br />
Control Mode<br />
Defines where the instrument reads its set point.<br />
The following control modes are available for a<br />
<strong>FIELDVUE</strong> Instrument:<br />
Analog The instrument receives its travel set<br />
point over the 4‐20 mA loop.<br />
<strong>Digital</strong> The instrument receives its set point<br />
digitally, via the HART communications link.<br />
Test This is not a user‐selectable mode. The Field<br />
Communicator or <strong>Valve</strong>Link software places the<br />
instrument in this mode whenever it needs to<br />
move the valve, such as for calibration or<br />
diagnostic tests.<br />
Control Mode, Restart<br />
Determines the instrument control mode after a<br />
restart. See Control Mode for the available restart<br />
control modes.<br />
<strong>Controller</strong><br />
A device that operates automatically to regulate a<br />
controlled variable.<br />
Current‐to‐Pressure (I/P) Converter<br />
An electronic component or device that converts<br />
a milliamp signal to a proportional pneumatic<br />
pressure output signal.<br />
Cycle Counter<br />
The capability of a <strong>FIELDVUE</strong> instrument to record<br />
the number of times the travel changes direction.<br />
The change in direction must occur after the<br />
deadband has been exceeded before it can be<br />
counted as a cycle.<br />
91
Glossary<br />
July 2012<br />
Instruction Manual<br />
D103605X012<br />
Cycle Counter Alert<br />
Checks the difference between the Cycle Counter<br />
and the Cycle Counter Alert Point. Cycle Counter<br />
Alert is active when the cycle counter value<br />
exceeds the Cycle Counter Alert Point. It clears<br />
after you reset the Cycle Counter to a value less<br />
than the alert point.<br />
Cycle Counter Alert Point<br />
An adjustable value which, when exceeded,<br />
activates the Cycle Counter Alert. Valid entries<br />
are 0 to 4 billion cycles.<br />
Cycle Counter Deadband<br />
Region around the travel reference point, in<br />
percent of ranged travel, established at the last<br />
increment of the Cycle Counter. The deadband<br />
must be exceeded before a change in travel can<br />
be counted as a cycle. Valid entries are 0% to<br />
100%. Typical value is between 2% and 5%.<br />
Deviation<br />
Usually, the difference between set point and<br />
process variable. More generally, any departure<br />
from a desired or expected value or pattern.<br />
Device ID<br />
Unique identifier embedded in the instrument at<br />
the factory.<br />
Device Revision<br />
Revision number of the interface software that<br />
permits communication between the Field<br />
Communicator and the instrument.<br />
Drive Signal<br />
The signal to the I/P converter from the printed<br />
wiring board. It is the percentage of the total<br />
microprocessor effort needed to drive the valve<br />
fully open.<br />
Drive Signal Alert<br />
Checks the drive signal and calibrated travel. If<br />
one of the following conditions exists for more<br />
than 20 seconds, the Drive Signal Alert is active. If<br />
none of the conditions exist, the alert is cleared.<br />
If Zero Power Condition = Closed<br />
The alert is active when:<br />
drive signal 3%<br />
drive signal >90% and calibrated travel
Instruction Manual<br />
D103605X012<br />
Glossary<br />
July 2012<br />
HART (acronym)<br />
The acronym HART stands for Highway<br />
Addressable Remote Transducer.<br />
HART Universal Revision<br />
Revision number of the HART Universal<br />
Commands which are the communications<br />
protocol for the instrument.<br />
Input Characteristic<br />
The relationship between the ranged travel and<br />
ranged input. Possible values include: linear,<br />
equal percentage, and quick opening.<br />
Input Current<br />
The current signal from the control system that<br />
serves as the analog input to the instrument. See<br />
also Input Signal.<br />
Input Range<br />
The analog input signal range that corresponds to<br />
the travel range.<br />
Input Signal<br />
The current signal from the control system. The<br />
input signal can be displayed in milliamperes or in<br />
percent of ranged input.<br />
Instrument Level<br />
Determines the functions available for the<br />
instrument. See table 5‐1.<br />
Instrument Mode<br />
Determines if the instrument responds to its<br />
analog input signal. There are two instrument<br />
modes:<br />
In Service: For a fully functioning instrument, the<br />
instrument output changes in response to analog<br />
input changes. Typically changes to setup or<br />
calibration cannot be made when the instrument<br />
mode is In Service.<br />
Out of Service: The instrument output does not<br />
change in response to analog input changes<br />
when the instrument mode is Out of Service.<br />
Some setup parameters can be changed only<br />
when the instrument mode is Out of Service.<br />
Instrument Protection<br />
Determines if commands from a HART device can<br />
calibrate and/or configure certain parameters in<br />
the instrument. There are two types of<br />
instrument protection:<br />
Configuration and Calibration: Prohibits changing<br />
protected setup parameters; prohibits<br />
calibration.<br />
None: Permits both configuration and calibration.<br />
The instrument is ”unprotected.”<br />
Instrument Serial Number<br />
The serial number assigned to the printed wiring<br />
board by the factory but can be changed during<br />
setup. The instrument serial number should<br />
match the serial number on the instrument<br />
nameplate.<br />
Leak Class<br />
Defines the allowable leakage by a valve when it is<br />
closed. Leak class numbers are listed in two<br />
standards: ANSI/FCI 70‐2 and IEC 534‐4.<br />
Linear<br />
A valve flow characteristic where changes in flow<br />
rate are directly proportional to changes in valve<br />
stem travel. One of the input characteristics<br />
available for a <strong>FIELDVUE</strong> Instrument. See also,<br />
Equal Percentage and Quick Opening.<br />
Linearity, dynamic<br />
Linearity (independent) is the maximum<br />
deviation from a straight line best fit to the<br />
opening and closing curves and a line<br />
representing the average value of those curves.<br />
Memory<br />
A type of semiconductor used for storing<br />
programs or data. <strong>FIELDVUE</strong> instruments use<br />
three types of memory: Random Access Memory<br />
(RAM), Read Only Memory (ROM), and<br />
Non‐Volatile Memory (NVM). See also these<br />
listings in this glossary.<br />
Menu<br />
A list of programs, commands, or other activities<br />
that you select by using the arrow keys to<br />
highlight the item then pressing ENTER, or by<br />
entering the numeric value of the menu item.<br />
93
Glossary<br />
July 2012<br />
Instruction Manual<br />
D103605X012<br />
Minimum Closing Time<br />
Minimum time, in seconds, for the travel to<br />
decrease through the entire ranged travel. This<br />
rate is applied to any travel decrease. Valid entries<br />
are 0 to 400 seconds. Deactivate by entering a<br />
value of 0 seconds.<br />
Minimum Opening Time<br />
Minimum time, in seconds, for the travel to<br />
increase through the entire ranged travel. This<br />
rate is applied to any travel increase. Because of<br />
friction, actual valve travel may not respond in<br />
exactly the same time frame. Valid entries are 0<br />
to 400 seconds. Deactivate by entering a value of<br />
0 seconds.<br />
Non‐Volatile Memory (NVM)<br />
A type of semiconductor memory that retains its<br />
contents even though power is disconnected.<br />
NVM contents can be changed during<br />
configuration unlike ROM which can be changed<br />
only at time of instrument manufacture. NVM<br />
stores configuration restart data.<br />
Parallel<br />
Simultaneous: said of data transmission on two or<br />
more channels at the same time.<br />
Polling Address<br />
Address of the instrument. If the digital valve<br />
controller is used in a point‐to‐point<br />
configuration, set the polling address to 0. If it is<br />
used in a multidrop configuration, or split range<br />
application, set the polling address to a value<br />
from 0 to 15.<br />
Pressure Sensor<br />
A <strong>FIELDVUE</strong> instrument internal device that<br />
senses pneumatic pressure. The <strong>DVC6200</strong> has<br />
three pressure sensors: one to sense supply<br />
pressure and two to sense the output pressures.<br />
Primary Master<br />
Masters are communicating devices. A primary<br />
master is a communicating device permanently<br />
wired to a field instrument. Typically, a<br />
HART‐compatible control system or a computer<br />
running <strong>Valve</strong>Link software is the primary master.<br />
In contrast, a secondary master is not often<br />
permanently wired to a field instrument. The<br />
Field Communicator or a computer running<br />
<strong>Valve</strong>Link software communicating through a<br />
HART modem could be considered a secondary<br />
master.<br />
Note: If one type of master takes an instrument<br />
Out Of Service, the same type must put it In<br />
Service. For example, if a device set up as a<br />
primary master takes an instrument Out Of<br />
Service, a device set up as a primary master must<br />
be used to place the instrument In Service.<br />
Quick Opening<br />
A valve flow characteristic where most of the<br />
change in flow rate takes place for small amounts<br />
of stem travel from the closed position. The flow<br />
characteristic curve is basically linear through the<br />
first 40 percent of stem travel. One of the input<br />
characteristics available for a <strong>FIELDVUE</strong><br />
Instrument. See also, Equal Percentage and<br />
Linear.<br />
Random Access Memory (RAM)<br />
A type of semiconductor memory that is normally<br />
used by the microprocessor during normal<br />
operation that permits rapid retrieval and storage<br />
of programs and data. See also Read Only<br />
Memory (ROM) and Non‐Volatile Memory (NVM).<br />
Rate<br />
Amount of change in output proportional to the<br />
rate of change in input.<br />
Read‐Only Memory (ROM)<br />
A memory in which information is stored at the<br />
time of instrument manufacture. You can<br />
examine but not change ROM contents.<br />
Seat Load<br />
Force exerted on the valve seat, typically<br />
expressed in pounds force per lineal inch of port<br />
circumference. Seat load is determined by shutoff<br />
requirements.<br />
94
Instruction Manual<br />
D103605X012<br />
Glossary<br />
July 2012<br />
Set Point Filter Time (Lag Time)<br />
The time constant, in seconds, for the first‐order<br />
input filter. The default of 0 seconds will bypass<br />
the filter.<br />
Software<br />
Microprocessor or computer programs and<br />
routines that reside in alterable memory (usually<br />
RAM), as opposed to firmware, which consists of<br />
programs and routines that are programmed into<br />
memory (usually ROM) when the instrument is<br />
manufactured. Software can be manipulated<br />
during normal operation, firmware cannot.<br />
Stroking Time<br />
The time, in seconds, required to move the valve<br />
from its fully open position to fully closed, or vice<br />
versa.<br />
Temperature Sensor<br />
A device within the <strong>FIELDVUE</strong> instrument that<br />
measures the instrument's internal temperature.<br />
Travel<br />
Movement of the valve stem or shaft which<br />
changes the amount the valve is open or closed.<br />
Travel Accumulator<br />
The capability of a <strong>FIELDVUE</strong> instrument to record<br />
total change in travel. The value of the Travel<br />
Accumulator increments when the magnitude of<br />
the change exceeds the Travel Accumulator<br />
Deadband. To reset the Travel Accumulator, set it<br />
to zero.<br />
Travel Accumulator Alert<br />
Checks the difference between the Travel<br />
Accumulator value and the Travel Accumulator<br />
Alert Point. The Travel Accumulator Alert is active<br />
when the Travel Accumulator value exceeds the<br />
Travel Accumulator Alert Point. It clears after you<br />
reset the Travel Accumulator to a value less than<br />
the alert point.<br />
Travel Accumulator Alert Point<br />
An adjustable value which, when exceeded,<br />
activates the Travel Accumulator Alert. Valid<br />
entries are 0% to 4 billion %.<br />
Travel Accumulator Deadband<br />
Region around the travel reference point<br />
established at the last increment of the<br />
accumulator. This region must be exceeded<br />
before a change in travel can be accumulated.<br />
Valid entries are 0% to 100%.<br />
Travel Alert<br />
Checks the ranged travel against the travel high<br />
and low alert points. The travel alert is active if<br />
either the high or low point is exceeded. Once a<br />
high or low point is exceeded, the ranged travel<br />
must clear that point by the Travel Alert<br />
Deadband before the alert clears. Four travel<br />
alerts are available: Travel Alert Hi, Travel Alert Lo,<br />
Travel Alert Hi Hi, and Travel Alert Lo Lo.<br />
Travel Alert Deadband<br />
Travel, in percent of ranged travel, required to<br />
clear a travel alert, once it is active. Valid entries<br />
are -25% to 125%.<br />
Travel Alert High Point<br />
Value of the travel, in percent of ranged travel,<br />
which, when exceeded, sets the Travel Alert Hi<br />
alert. Valid entries are -25% to 125%.<br />
Travel Alert High High Point<br />
Value of the travel, in percent of ranged travel,<br />
which, when exceeded, sets the Travel Alert Hi Hi<br />
alert. Valid entries are -25% to 125%.<br />
Travel Alert Low Point<br />
Value of the travel, in percent of ranged travel,<br />
which, when exceeded, sets the Travel Alert Lo<br />
alert. Valid entries are -25% to 125%.<br />
Travel Alert Low Low Point<br />
Value of the travel, in percent of ranged travel,<br />
which, when exceeded, sets the Travel Alert Lo Lo<br />
alert. Valid entries are -25% to 125%.<br />
Travel Cutoff<br />
Defines the cutoff point for the travel, in percent<br />
of ranged travel. There are two travel cutoffs:<br />
high and low. Once travel exceeds the cutoff, the<br />
drive signal is set to either maximum or<br />
minimum, depending on the Zero Control Signal<br />
and if the cutoff is high or low. Minimum opening<br />
time or minimum closing time are not in effect<br />
while the travel is beyond the cutoff. Use the<br />
travel cutoff to obtain the desired seat load or to<br />
be sure the valve is fully open.<br />
95
Glossary<br />
July 2012<br />
Instruction Manual<br />
D103605X012<br />
Travel Deviation<br />
The difference between the analog input signal<br />
(in percent of ranged input), the “target” travel,<br />
and the actual “ranged” travel.<br />
Travel Deviation Alert<br />
Checks the difference between the target and the<br />
ranged travel. If the difference exceeds the Travel<br />
Deviation Alert Point for more than the Travel<br />
Deviation Time, the Travel Deviation Alert is<br />
active. It remains active until the difference is less<br />
than the Travel Deviation Alert Point.<br />
Travel Deviation Alert Point<br />
An adjustable value for the target travel and the<br />
ranged travel difference, expressed in percent,<br />
When this value is exceeded by the travel<br />
deviation for more than the Travel Deviation<br />
Time, the Travel Deviation Alert is active. Valid<br />
entries are 0% to 100%. Typically this is set to 5%.<br />
Travel Deviation Time<br />
The time, in seconds. that the travel deviation<br />
must exceed the Travel Deviation Alert Point<br />
before the alert is active. Valid entries are 1 to 60<br />
seconds.<br />
Travel Limit<br />
A setup parameter that defines the maximum<br />
allowable travel (in percent of ranged travel) for<br />
the valve. During operation, the travel target will<br />
not exceed this limit. There are two travel limits:<br />
high and low. Typically the travel limit low will be<br />
used to keep the valve from going completely<br />
closed.<br />
Travel Range<br />
Travel, in percent of calibrated travel, that<br />
corresponds to the input range.<br />
Travel Sensor<br />
A device within the <strong>FIELDVUE</strong> instrument that<br />
senses valve stem or shaft movement. The travel<br />
sensor in the <strong>DVC6200</strong> is the Hall Effect sensor<br />
that measures the position of the magnetic<br />
assembly.<br />
Travel Sensor Motion<br />
Increasing or decreasing air pressure causes the<br />
magnet assembly to move up or down or the<br />
rotary shaft to turn clockwise or<br />
counterclockwise. The Setup Wizard asks if it can<br />
move the valve to determine travel.<br />
Tuning<br />
The adjustment of control terms or parameter<br />
values to produce a desired control effect.<br />
Tuning Set<br />
Preset values that identify gain settings for a<br />
<strong>FIELDVUE</strong> instrument. The tuning set and supply<br />
pressure together determine an instrument's<br />
response to input signal changes.<br />
Watch Dog Timer<br />
A timer that the microprocessor must rearm<br />
periodically. If the microprocessor is unable to<br />
rearm the timer, the instrument goes through<br />
reset.<br />
Zero Power Condition<br />
The position of the valve (open or closed) when<br />
the electrical power to the instrument is<br />
removed. Zero Power Condition (ZPC) is<br />
determined by relay and actuator action as<br />
follows:<br />
Single Acting Direct (Relay C) Upon loss of<br />
electrical power instrument goes to zero air<br />
output at port A.<br />
Double Acting (Relay A) Upon loss of electrical<br />
power instrument goes to full supply air output at<br />
port B. A goes to zero air output.<br />
Single Acting Reverse (Relay B) Upon loss of<br />
electrical power instrument goes to full supply air<br />
output at Port B.<br />
96
Instruction Manual<br />
D103605X012<br />
Index<br />
July 2012<br />
Index<br />
A<br />
Actuator Compatibility, 6<br />
Actuator Style, 28<br />
Alert Record Full Alert, 51<br />
Alert Record Not Empty Alert, 51<br />
Alert Setup, 35<br />
Alert Switch, Function, Output Terminal<br />
Configuration, 33<br />
Alert Switch Source, 33<br />
AMS Suite: Intelligent Device Manager, 3<br />
Analog Calibration Adjust, 39<br />
Analog Input Range, 17<br />
Input Range Hi, 17<br />
Input Range Lo, 18<br />
Analog Input Units, 17<br />
Auto Calibration, 38<br />
Error Messages, 38<br />
Auto Partial Stroke Test, 53<br />
AutoCal in Progress Alert, 52<br />
Auxiliary Terminal, Wiring Length Guidelines, 12<br />
Auxiliary Terminal Action, 17<br />
B<br />
Burst Mode, 34<br />
Burst Operation, setting for Tri-Loop, 14<br />
C<br />
Calibration, 37<br />
Analog Input, 42<br />
Pressure Sensors, 41<br />
PST, 45<br />
Pushbutton, 40<br />
Relay Adjustment, 43<br />
Sensor, 41<br />
Travel, 38<br />
Auto, 38<br />
Manual, 39<br />
Calibration (CAL) Button, 17<br />
Calibration in Progress Alert, 52<br />
Change Control Mode, 21<br />
Change HART Universal Revision, 36<br />
Characterization, 21<br />
Custom Characterization, 21<br />
Input Characterization, 21<br />
Communication Protocol, HART 7 or HART 5, 5<br />
Compliance Voltage, 11<br />
Connections, 6<br />
Construction Materials, 6<br />
Control Mode, 21<br />
Change Control Mode, 21<br />
Control Mode, 21<br />
Restart Control Mode, 21<br />
Critical NVM Alert, 48<br />
Custom Characterization, Defining, 21<br />
Cutoffs and Limits, 19<br />
Hi Limit/Cutoff Point, 19<br />
Hi Limit/Cutoff Select, 19<br />
Lo Limit/Cutoff Point, 19<br />
Lo Limit/Cutoff Select, 19<br />
Cycle Count High Alert, 51<br />
D<br />
Declaration of SEP, 6<br />
Default Parameters, Detailed Setup, 15<br />
Descriptor, 17<br />
Device Diagnostics, 48<br />
Device Information, 47<br />
Device Status, 48<br />
Alert Record, 48<br />
Alert Record, 51<br />
Electronics, 48<br />
Pressure, 49<br />
Status, 52<br />
Travel, 50<br />
Travel History, 51<br />
Diagnostic Data Available Alert, 52<br />
Diagnostic in Progress Alert, 52<br />
Diagnostics, 52<br />
Partial Stroke Test, 52<br />
Stroke <strong>Valve</strong>, 52<br />
<strong>Digital</strong> Calibration Adjust, 39<br />
DIP Switch, setting, 61<br />
97
Index<br />
July 2012<br />
Instruction Manual<br />
D103605X012<br />
Drive Current Failure, 48<br />
Drive Signal Alert, 48<br />
DVC6215 Feedback Unit , Maintenance, 65<br />
Dynamic Response, 23<br />
Lag Time, 23<br />
SP Rate Close, 23<br />
SP Rate Open, 23<br />
E<br />
Edit Instrument Time, 18<br />
Educational Services, 8<br />
Electrical Classification, 6<br />
Electromagnetic Compatibility, 5<br />
EMC Summary Results, Immunity, 7<br />
End Point Pressure Control, 19<br />
End Point Pressure Control (EPPC), 19<br />
Expert tuning, travel tuning, 24, 27<br />
F<br />
Fail Signal, Output Terminal Configuration, 33<br />
Fallback Recovery, 20<br />
Fallback-Sensor Failure, Travel/Pressure Select, 18<br />
Fallback-Sensor/Tvl Deviation, Travel/Pressure Select,<br />
19<br />
Fast Key Sequences, Field Communicator, 83<br />
Feedback Connection, 28<br />
Feedback Connections, 28<br />
Field Communicator, Partial Stroke Test, 53<br />
Field Communicator Menu Trees, 83<br />
Field Device Malfunction, 49<br />
Filter Settings, Typical Lead/Lag, 23<br />
Flash Integrity Failure, 48<br />
frequency shift keying (FSK), 79<br />
Function, Output Terminal Configuration<br />
Alert Switch, 33<br />
Limit Switch, 33<br />
Transmitter, 33<br />
G<br />
Gain Values<br />
Pressure Tuning Sets, 27<br />
Travel Tuning Sets, 24<br />
Gauges, maintenance, 63<br />
Guided Setup, 15<br />
H<br />
HART Communication, principle of operation, 79<br />
HART Filter, 9<br />
HART Long Tag, 16<br />
HART Tag, 16<br />
HART Tri‐Loop, 13<br />
Installation Flowchart, 13<br />
HART Variable Assignments, 34<br />
HARTr communications protocol, 3<br />
Hazardous Area Approvals , 6<br />
Hi Limit/Cutoff Point, 19<br />
Hi Limit/Cutoff Select, 19<br />
Humidity Testing Method, 6<br />
I<br />
I/P Converter<br />
maintenance, 59<br />
removing, 59<br />
replacing, 60<br />
I/P Filter, replacing, 59<br />
Independent Linearity, 5<br />
Input Characterization, 21<br />
Input Impedance, 6<br />
Input Range, 17<br />
Input Range Hi, 17<br />
Input Range Lo, 18<br />
Input Signal, 5<br />
Instrument Level, Capabilities, 4<br />
Instrument Mode, 16<br />
Instrument Time, Edit, 18<br />
Instrument Time is Approximate Alert, 49<br />
Instument Serial Number, 17<br />
98
Instruction Manual<br />
D103605X012<br />
Index<br />
July 2012<br />
Integral 4‐20 mA Position Transmitter, 6<br />
specifications, 6<br />
Integral Dead Zone, Travel/Pressure Integral Settings,<br />
27<br />
Integral Enable<br />
Pressure Tuning, 27<br />
Travel Tuning, 26<br />
Integral Gain<br />
Pressure Tuning, 27<br />
Travel Tuning, 26<br />
Integral Limit Switch, specifications, 6<br />
Integral Setting, 27<br />
Integral Switch, 6<br />
Integrator Limit, Travel/Pressure Integral Settings, 28<br />
Integrator Saturated High Alert, 50<br />
Integrator Saturated Low Alert, 50<br />
Internal Sensor Out of Limits, 49<br />
L<br />
Lag Time, 23<br />
Lead/Lag, 23<br />
typical filter settings, 23<br />
Lead/Lag Time, 23<br />
Lightning and Surge Protection, 5<br />
Limit Switch, Function, Output Terminal<br />
Configuration, 33<br />
Limit Switch Trip Point, 33<br />
Lo Limit/Cutoff Point, 19<br />
Lo Limit/Cutoff Select, 19<br />
Loop Current Validation Alert, 49<br />
M<br />
Magnet Assembly, 28<br />
Magnetic Feedback Assembly, replacing, 56<br />
Maintenance<br />
Gauges, Pipe Plugs, or Tire <strong>Valve</strong>s, 63<br />
I/P Converter, 59<br />
module base, 56<br />
Pneumatic Relay, 63<br />
Printed Wiring Board Assembly, 61<br />
Terminal Box, 64<br />
tools required, 56<br />
Maintenance and Troubleshooting, 55<br />
Manual Calibration, 39<br />
Manual Setup, 15<br />
Max Travel Movement, 32<br />
Maximum Cable Capacitance, 12<br />
Maximum Output Capacity, 5<br />
maximum supply pressure, 29<br />
Message, 17<br />
Minor Loop Sensor Alert, 49<br />
MLFB Gain<br />
Pressure Tuning, 27<br />
Travel Tuning, 26<br />
Mode, Burst, 34<br />
Module Base<br />
removing, 57<br />
replacing, 58<br />
Module Base Maintenance, 56<br />
Mountings, 5<br />
N<br />
natural gas, as supply medium, 55<br />
NonCritical NVM Alert, 48<br />
O<br />
Offline/Failed Alert, 48<br />
Options, 6<br />
Output Circuit Communication Failure, 49<br />
Output Pressure Sensor, Calibration, 41<br />
Output Signal, 5<br />
Output Terminal Configuration, 33<br />
Output Terminal Enable, 33<br />
Outputs, 33<br />
Burst Mode, 34<br />
HART Variable Assignments, 34<br />
Output Terminal Configuration, 33<br />
Switch Configuration, 33<br />
Transmitter Output, 34<br />
Overview, 47<br />
Device, 53<br />
Status & Primary Purpose Variables, 47<br />
99
Index<br />
July 2012<br />
Instruction Manual<br />
D103605X012<br />
P<br />
Partial Stroke Test<br />
Automatic (scheduled), 53<br />
PST Enable, 32<br />
PST Pressure Limit, 30<br />
PST Start Point, 32<br />
PST Variables, 32<br />
Pause Time, 32<br />
Test Speed, 32<br />
Partial Stroke Test (ODV only), 52<br />
Auxiliary Terminal, Local Pushbutton, 53<br />
Field Communicator, 53<br />
Partial Stroke Test (PST), 30<br />
PST Variables, Max Travel Movement, 32<br />
Parts<br />
Kits, 69<br />
List, 70<br />
ordering, 69<br />
Pause Time, 32<br />
Performance Tuner, 26<br />
Pipe Plugs, maintenance, 63<br />
Pneumatic Relay<br />
maintenance, 63<br />
removing, 63<br />
replacing, 63<br />
Polling Address, 17<br />
Position Transmitter, 33<br />
Pressure Control, 20<br />
Pressure Range High, 20<br />
Pressure Range Lo, 20<br />
Travel/Pressure Select, 18<br />
Pressure Control Active Alert, 52<br />
Pressure Fallback Active Alert, 50<br />
Pressure Range High, 20<br />
Pressure Range Lo, 20<br />
Pressure Sensor Alert, 49<br />
Pressure Sensors, Calibration, 41<br />
Pressure Tuning, 27<br />
Pressure Tuning Set, 27<br />
Pressure Tuning Sets, Gain Values, 27<br />
Pressure Units, 17<br />
Principle of Operation<br />
<strong>DVC6200</strong>, 79<br />
HART Communication, 79<br />
Printed Wiring Board Assembly<br />
maintenance, 61<br />
removing, 61<br />
replacing, 61<br />
Proportional Gain<br />
Pressure Tuning, 27<br />
Travel Tuning, 25<br />
PST Calibration, 45<br />
PST Enable, 32<br />
PST Pressure Limit, 30<br />
PST Start Point, 32<br />
PST Variables, 32<br />
Pushbutton Calibration, 40<br />
R<br />
Reference Voltage Failure, 48<br />
Related Documents, 7<br />
Relay Adjustment, 43<br />
Relay Type, 28<br />
Restart Control Mode, 21<br />
Restart Processor, 66<br />
RShaft End Mount, Magnet Assembly, 28<br />
RShaft Window #1, Magnet Assembly, 28<br />
RShaft Window #2, Magnet Assembly, 28<br />
S<br />
Sensor Calibration, 41<br />
Serial Number<br />
Instrument, 17<br />
<strong>Valve</strong>, 17<br />
Service Tools, 48<br />
Device Status, 48<br />
Set Point Filter Lag Time, 23<br />
Set Point Filter Lead/Lag Time, 23<br />
SP Rate Close, 23<br />
SP Rate Open, 23<br />
Spec Sheet, 18<br />
Special App, 28<br />
100
Instruction Manual<br />
D103605X012<br />
Index<br />
July 2012<br />
Specifications, 4<br />
SStem #1 Roller, Magnet Assembly, 28<br />
SStem #100, Magnet Assembly, 28<br />
SStem #19, Magnet Assembly, 28<br />
SStem #210, Magnet Assembly, 28<br />
SStem #25, Magnet Assembly, 28<br />
SStem #38, Magnet Assembly, 28<br />
SStem #50, Magnet Assembly, 28<br />
SStem #7, Magnet Assembly, 28<br />
Stabilize/Optimize, 26<br />
Status & Primary Purpose Variables, Device<br />
Information, 47<br />
Steady‐State Air Consumption, 5<br />
Stroke <strong>Valve</strong>, 52<br />
Supply Pressure, 5<br />
Supply Pressure Alert, 49<br />
Supply Pressure Sensor, Calibration, 42<br />
Switch, 33<br />
Specifications, 6<br />
Switch Closed, 33<br />
Switch Configuration, 33<br />
Alert Switch Source, 33<br />
Limit Switch Trip Point, 33<br />
Switch Closed, 33<br />
T<br />
Technical Support Checklist, 68<br />
Temperature Limits, Operating Ambient, 5<br />
Temperature Sensor Alert, 49<br />
Temperature Units, 17<br />
Terminal Box, 17<br />
Auxiliary Terminal Action, 17<br />
Calibration (CAL) Button, 17<br />
maintenance, 64<br />
removing, 64<br />
replacing, 65<br />
Test Speed, 32<br />
Tire <strong>Valve</strong>s, maintenance, 63<br />
Transmitter, 6, 33<br />
Function, Output Terminal Configuration, 33<br />
Specifications, 6<br />
Transmitter Output, 34<br />
Travel Accumulator High Alert, 51<br />
Travel Alert Hi, 50<br />
Travel Alert Hi Hi, 50<br />
Travel Alert Lo, 50<br />
Travel Alert Lo Lo, 50<br />
Travel Calibration, 38<br />
Travel Control, Travel/Pressure Select, 18<br />
Travel Deviation Alert, 50<br />
Travel Limit/Cutoff Hi Alert, 50<br />
Travel Limit/Cutoff Lo Alert, 50<br />
Travel Sensor Alert, 49<br />
Travel Sensor Motion, 29<br />
Travel Tuning, 24<br />
Performance Tuner, 26<br />
Stabilize/Optimize, 26<br />
Travel Tuning Set, 24<br />
Travel Tuning Sets, Gain Values, 24<br />
Travel/Pressure Control, 18<br />
Control Mode, 21<br />
Cutoffs and Limits, 19<br />
End Point Pressure Control, 19<br />
Fallback Recovery, 20<br />
Pressure Control, 20<br />
Pressure Fallback, 20<br />
Travel/Pressure Select, 18<br />
Tvl Dev Press Fallback, 20<br />
Tvl Dev Press Fallback Time, 20<br />
Travel/Pressure Select, 18<br />
Fallback-Sensor/Tvl Deviation, 18<br />
Pressure Control, 18<br />
Pressure-Sensor Fallback, 18<br />
Travel Control, 18<br />
Troubleshooting<br />
Checking Voltage Available, 65<br />
Communications or Output, 65<br />
instrument, 66<br />
Tuning, 24<br />
Integral Settings, 27<br />
Pressure, 27<br />
Travel, 24<br />
Tuning Set<br />
Pressure, 27<br />
Travel, 24<br />
Tvl Dev Press Fallback, 20<br />
101
Index<br />
July 2012<br />
Instruction Manual<br />
D103605X012<br />
Tvl Dev Press Fallback Time, 20<br />
U<br />
Units<br />
Analog Input, 17<br />
Pressure, 17<br />
Temperature, 17<br />
V<br />
<strong>Valve</strong> Serial Number, 17<br />
<strong>Valve</strong> Style, 28<br />
<strong>Valve</strong>Link software, 3<br />
Variable Out of Range, 49<br />
Variables, Status & Primary Purpose, 47<br />
Velocity Gain, Travel Tuning, 25<br />
Vibration Testing Method, 6<br />
Voltage Available, 9<br />
checking, 65<br />
W<br />
Weight<br />
<strong>DVC6200</strong>, 6<br />
DVC6205, 6<br />
DVC6215, 6<br />
Wiring Practices, 9<br />
Control System Requirements, 9<br />
Compliance Voltage, 11<br />
HART Filter, 9<br />
Voltage Available, 9<br />
Maximum Cable Capacitance, 12<br />
Write Protection, 16<br />
Z<br />
Zero Power Condition, 29<br />
102
Instruction Manual<br />
D103605X012<br />
<strong>DVC6200</strong> <strong>Digital</strong> <strong>Valve</strong> <strong>Controller</strong><br />
July 2012<br />
103
<strong>DVC6200</strong> <strong>Digital</strong> <strong>Valve</strong> <strong>Controller</strong><br />
July 2012<br />
Instruction Manual<br />
D103605X012<br />
Neither Emerson, Emerson Process Management, nor any of their affiliated entities assumes responsibility for the selection, use or maintenance<br />
of any product. Responsibility for proper selection, use, and maintenance of any product remains solely with the purchaser and end user.<br />
Fisher, <strong>FIELDVUE</strong>, <strong>Valve</strong>Link, PlantWeb, PROVOX, Rosemount, Tri-Loop, DeltaV, RS3, and THUM are marks owned by one of the companies in the Emerson<br />
Process Management business unit of Emerson Electric Co. Emerson Process Management, Emerson, and the Emerson logo are trademarks and service<br />
marks of Emerson Electric Co. HART is a mark owned by the HART Communication Foundation. All other marks are the property of their respective owners.<br />
The contents of this publication are presented for informational purposes only, and while every effort has been made to ensure their accuracy, they are not<br />
to be construed as warranties or guarantees, express or implied, regarding the products or services described herein or their use or applicability. All sales are<br />
governed by our terms and conditions, which are available upon request. We reserve the right to modify or improve the designs or specifications of such<br />
products at any time without notice.<br />
Emerson Process Management<br />
Marshalltown, Iowa 50158 USA<br />
Sorocaba, 18087 Brazil<br />
Chatham, Kent ME4 4QZ UK<br />
Dubai, United Arab Emirates<br />
Singapore 128461 Singapore<br />
www.Fisher.com<br />
104 2012 Fisher Controls International LLC. All rights reserved.